When the machine is run all the way up to the front against the stops, then jog the machine back to the rear, the left side has roughly a 1/8inch gap where as the right side is touching. If I bottom out the machine against the rear and run it forward all the way its then the left side has a gap still about an 1/8inch, and the right side is touching. I ran two lines on my spoil board, one toward the front and one toward the rear, with the machine first ran flush up against the front. The two lines are out of parallel by a 1/16th closer on the left edge.
Also, if I have it flush up against the front and Jog it back 30inches, the right side reads on a tape measure it is 30.125 from the front, whereas the left is 30. Seems like a one rail might be further forward than the other, but can’t seem to figure out which one, which way, and how much to move it. And the program to help with that in gsender always seems to read good, the most I’ve seen was 0.73mm, which is less than a 1/32inch.
It almost sounds like your y-beams are not equal in length (left side is longer.)
The one thing you can do, is assign either the back or the front of the machine to be your squaring reference. Run the machine to that side, have it grunt and call it flush. I have mine “flush” on the back, and if I need it “square“ for a new project, I run it against the back, have it grunt and start with a fresh “alignment“. My spoil board has been carved using that alignment and it still measures out perfect after 3 years of using my mk2.
I know it sounds maybe a bit hobbyistic, but.. lets face it, the mk2 (and dare I say the altmill) is a hobby machine and we sometimes have to go with what works. At least, that is how I look at the work arounds I have in place to mitigate some mk2 quirks.
@Joel.S I would say that it doesn’t matter which rail you move, so long as you move it in the correct direction. If you jog to the rear until the right side touches, stop everything and bump the left side rail forward 1/8". If you choose to jog to the front, you’ve said that the right side still touches first. So, stop everything and bump the left rail back 1/8".
I mounted my rails on slats that are bolted to the table with through elongated holes just so I could do this kind of small adjustment.
That’s kinda what I thought, but when I ran it up all the way to the front and made two x- Axis lines in the spoil board, the one in the rear was closer by a 1/16th on the left side then the right, if they where parallel I probably wouldn’t worry about it to much, but sense they aren’t staying parallel I don’t want more issues to contend with.
I’ll give it a try, but I thought if one was further forward then the other when ran up against the front then moved to the back one side should touch first then if I where to run it up against the back and move it to the front the other side should touch first. Like kiddy corner from each other.
Also I would have thought it should stay parallel with what ever edge I run it up against? And why would measuring from corner to corner read good and the xy squaring come out good as well?
@Joel.S I don’t believe you are over thinking this. I believe that I have misunderstood the issue.
If your corner to corner measurements are equal, moving the rails is not the solution.
When you move to the back, the left side is “short”. When you move the front, the left side is still “short” correct?
@gwilki No, worries. I did try and move the left rail 1/8inch both ways and it didn’t work, same issue. I checked it corner to corner and it showed it was a 1/8inch off. So it was definitely square before.
I guess I would consider the right side being “short” since it is always the side that hits first.
Here’s some more info;
It seems like it progressively becomes miss aligned, for example if I start it up against the front then move it to the middle the left is 1/16th closer then the right where as the rear is an 1/8th off. Almost like the left side is slow or the right is fast, even though I switched motors and cables.
I noticed this issue after I setup it up on a new table I made for it so whether or not it is linked I don’t know, this could have been happening since day one and I never noticed or maybe this just started. (The old table was sagging in the middle so I made a new one ).
I’m fast running out of ideas. To recap:
You’ve switched the Y motor and cables, but the issue stays the same.
You are confident that the v-wheels are set properly
So:
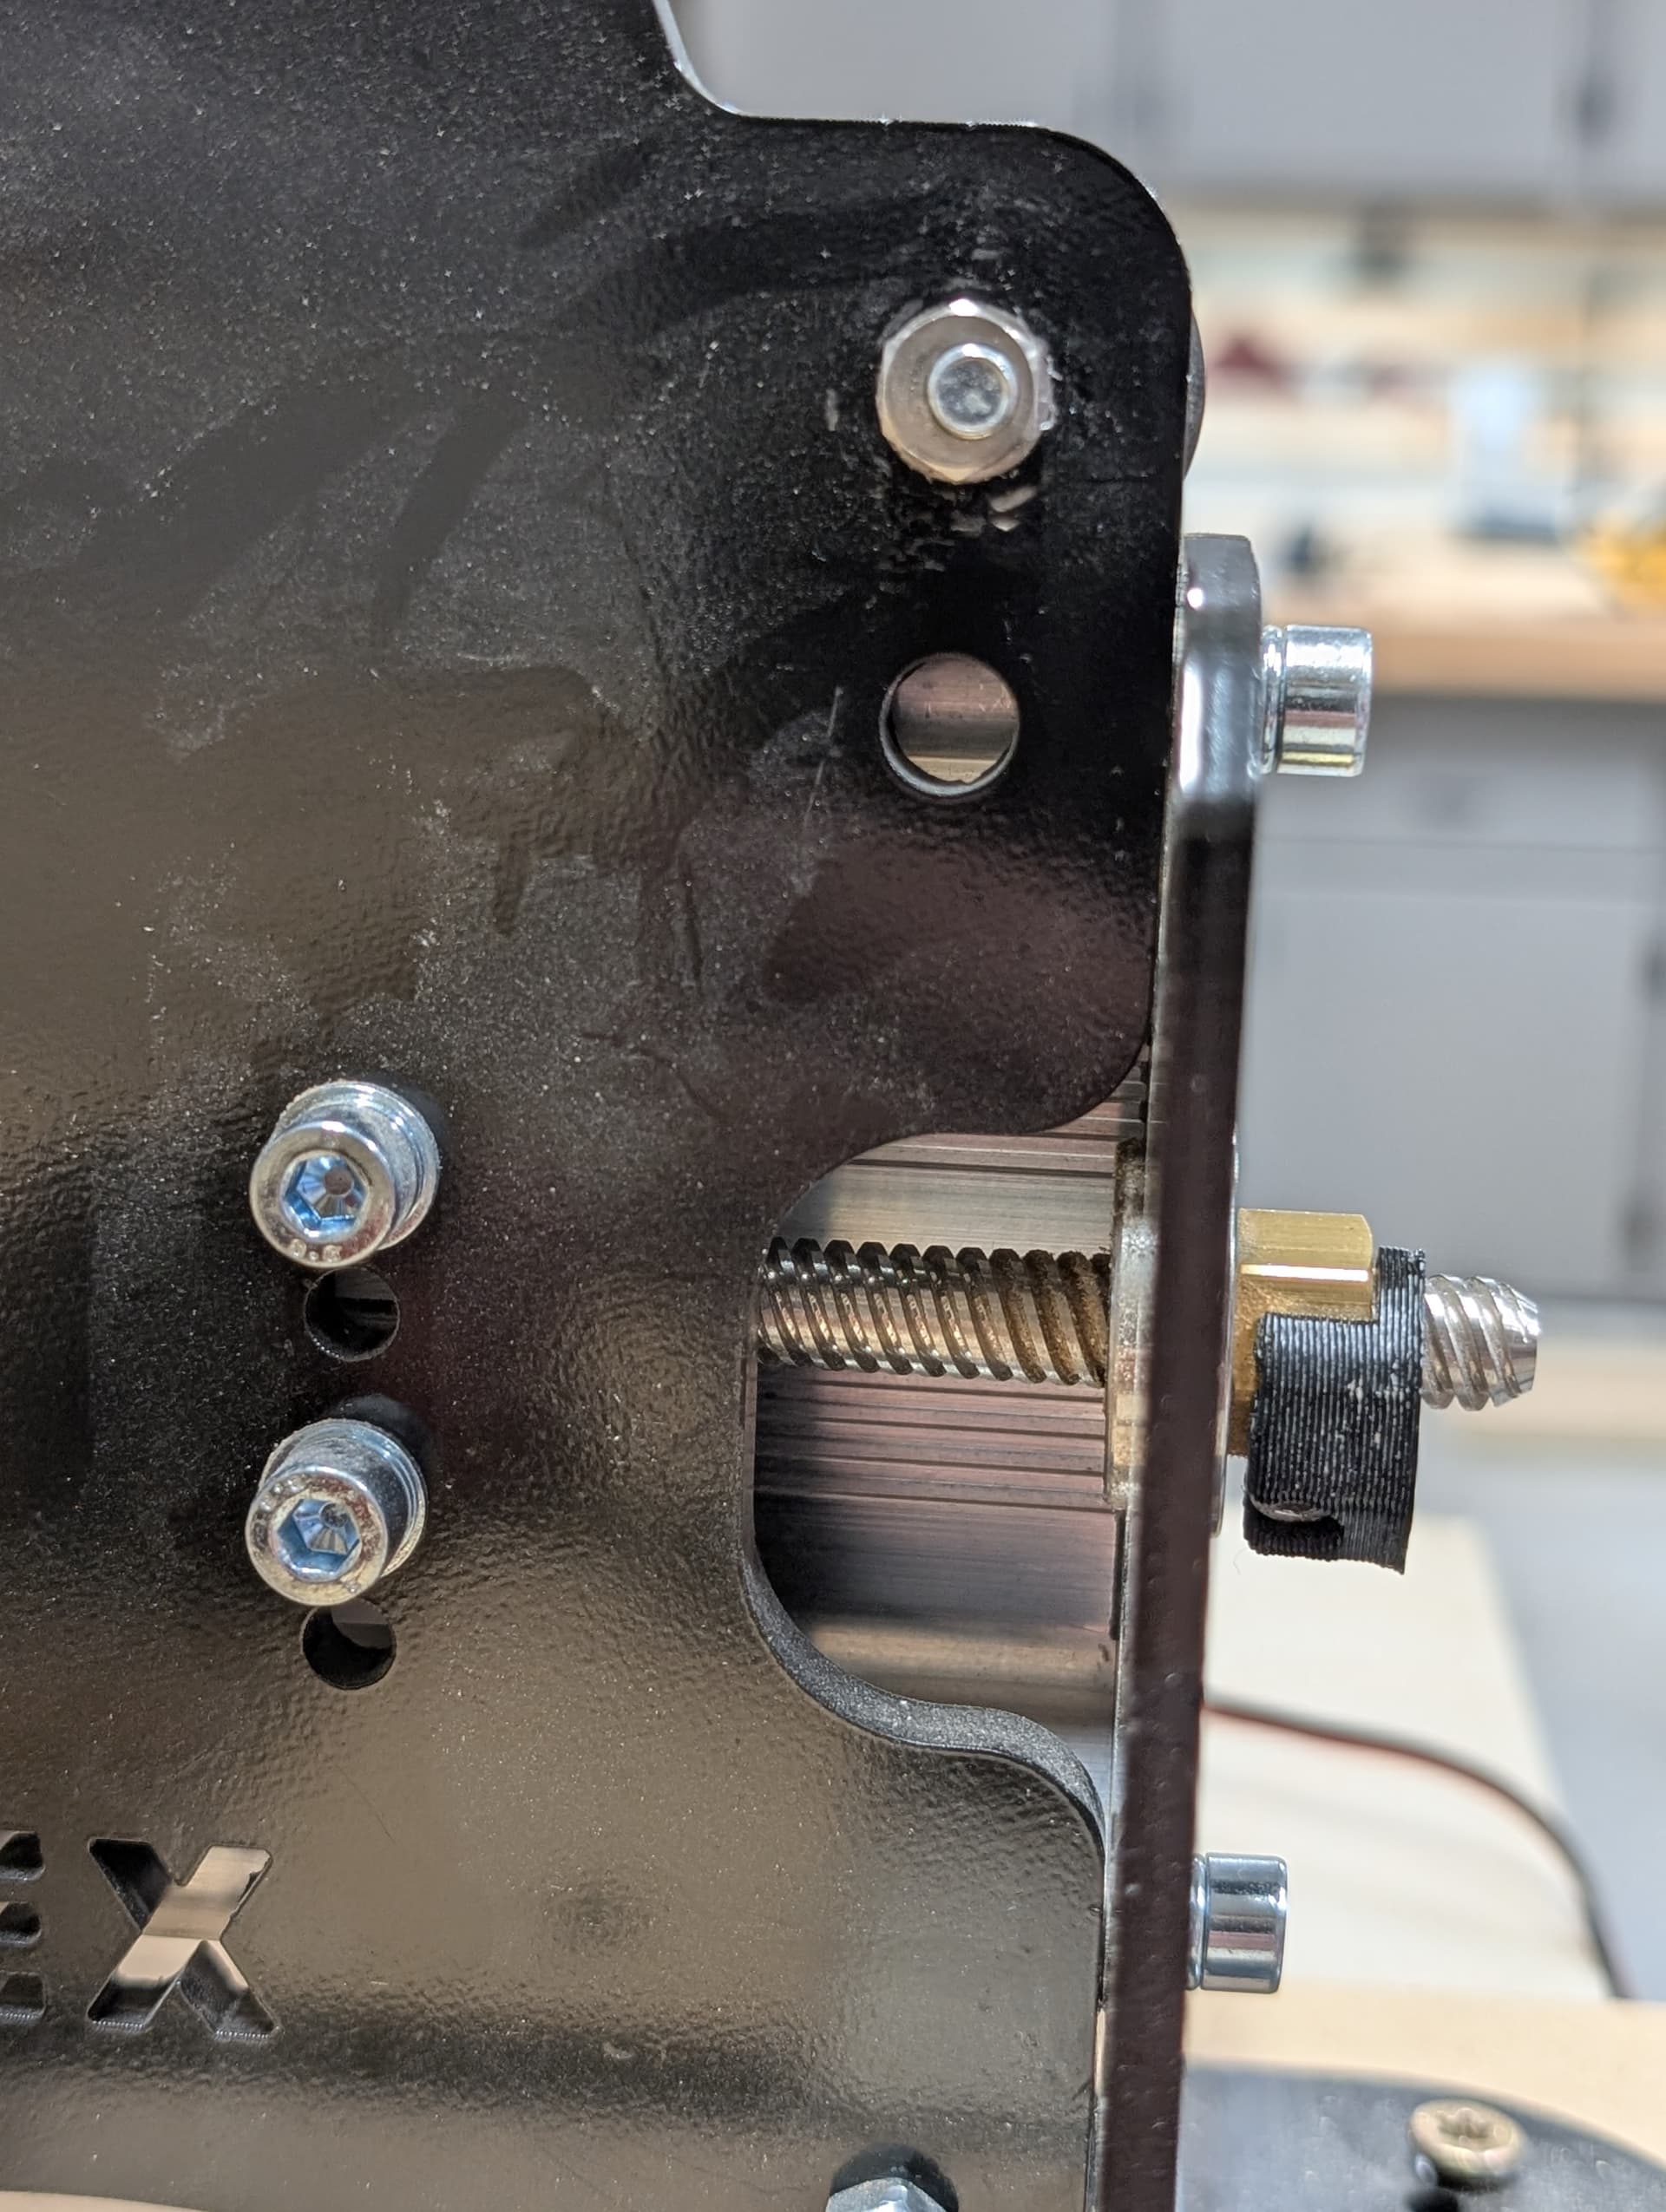
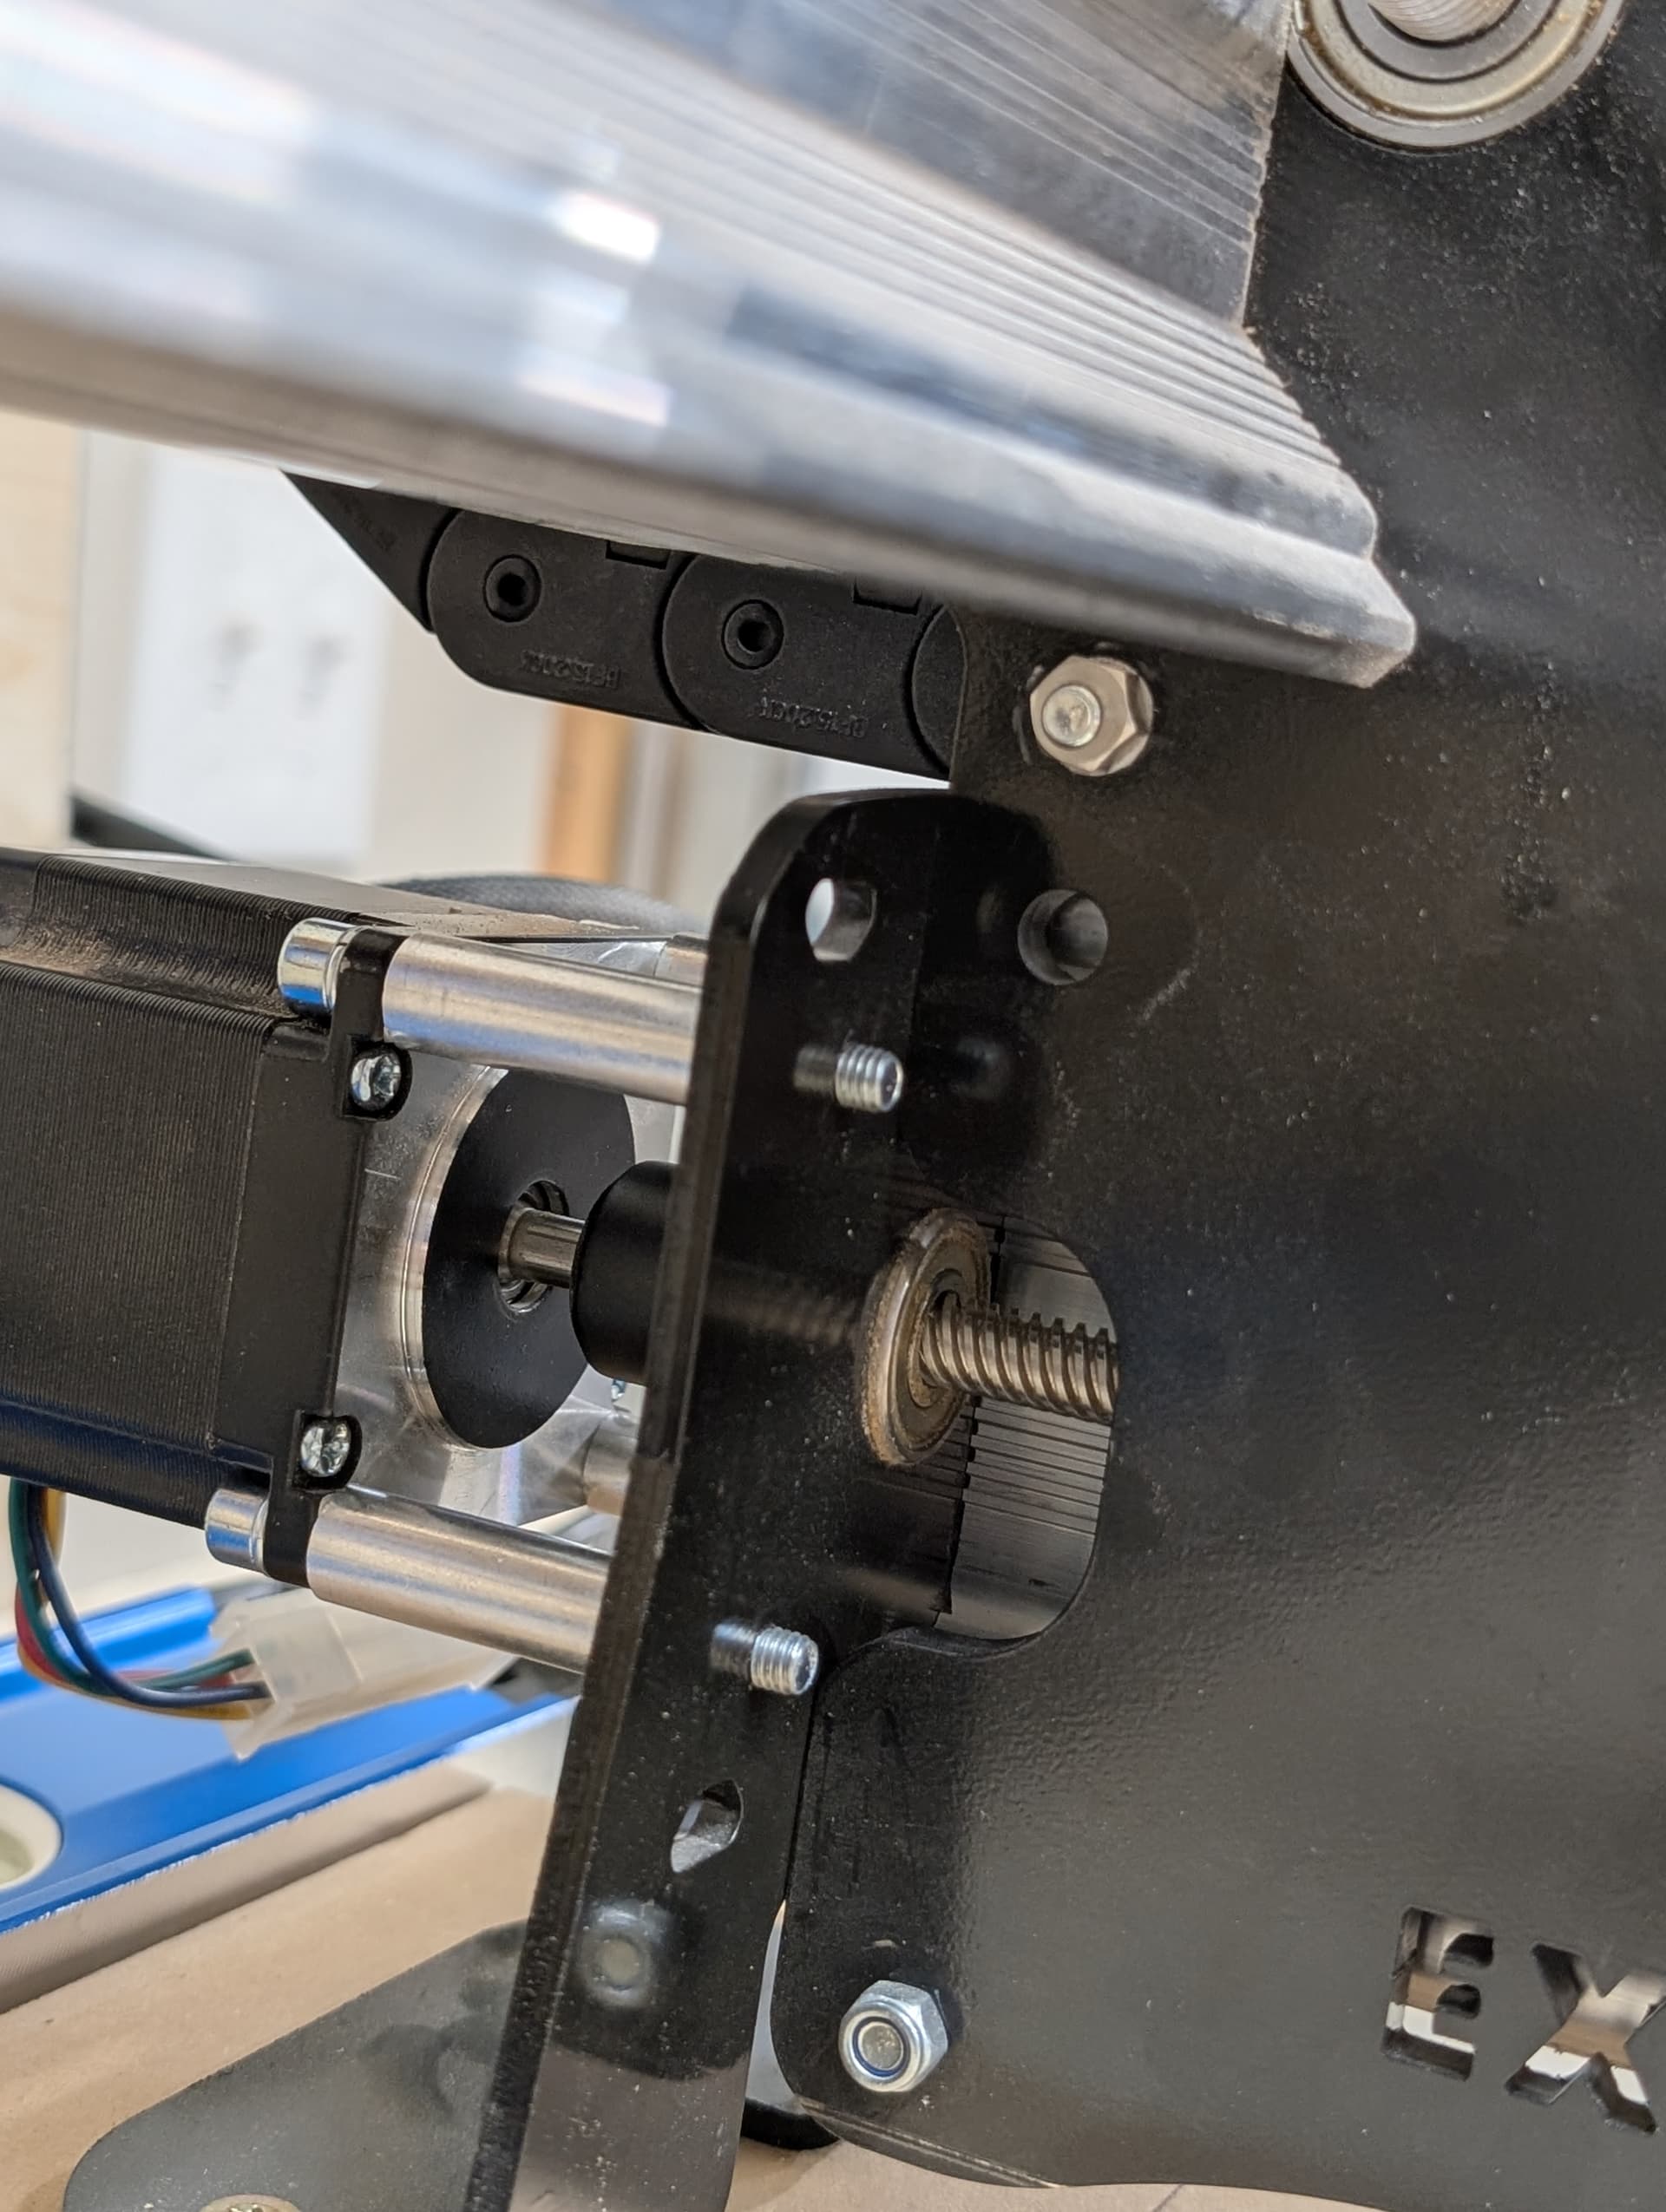
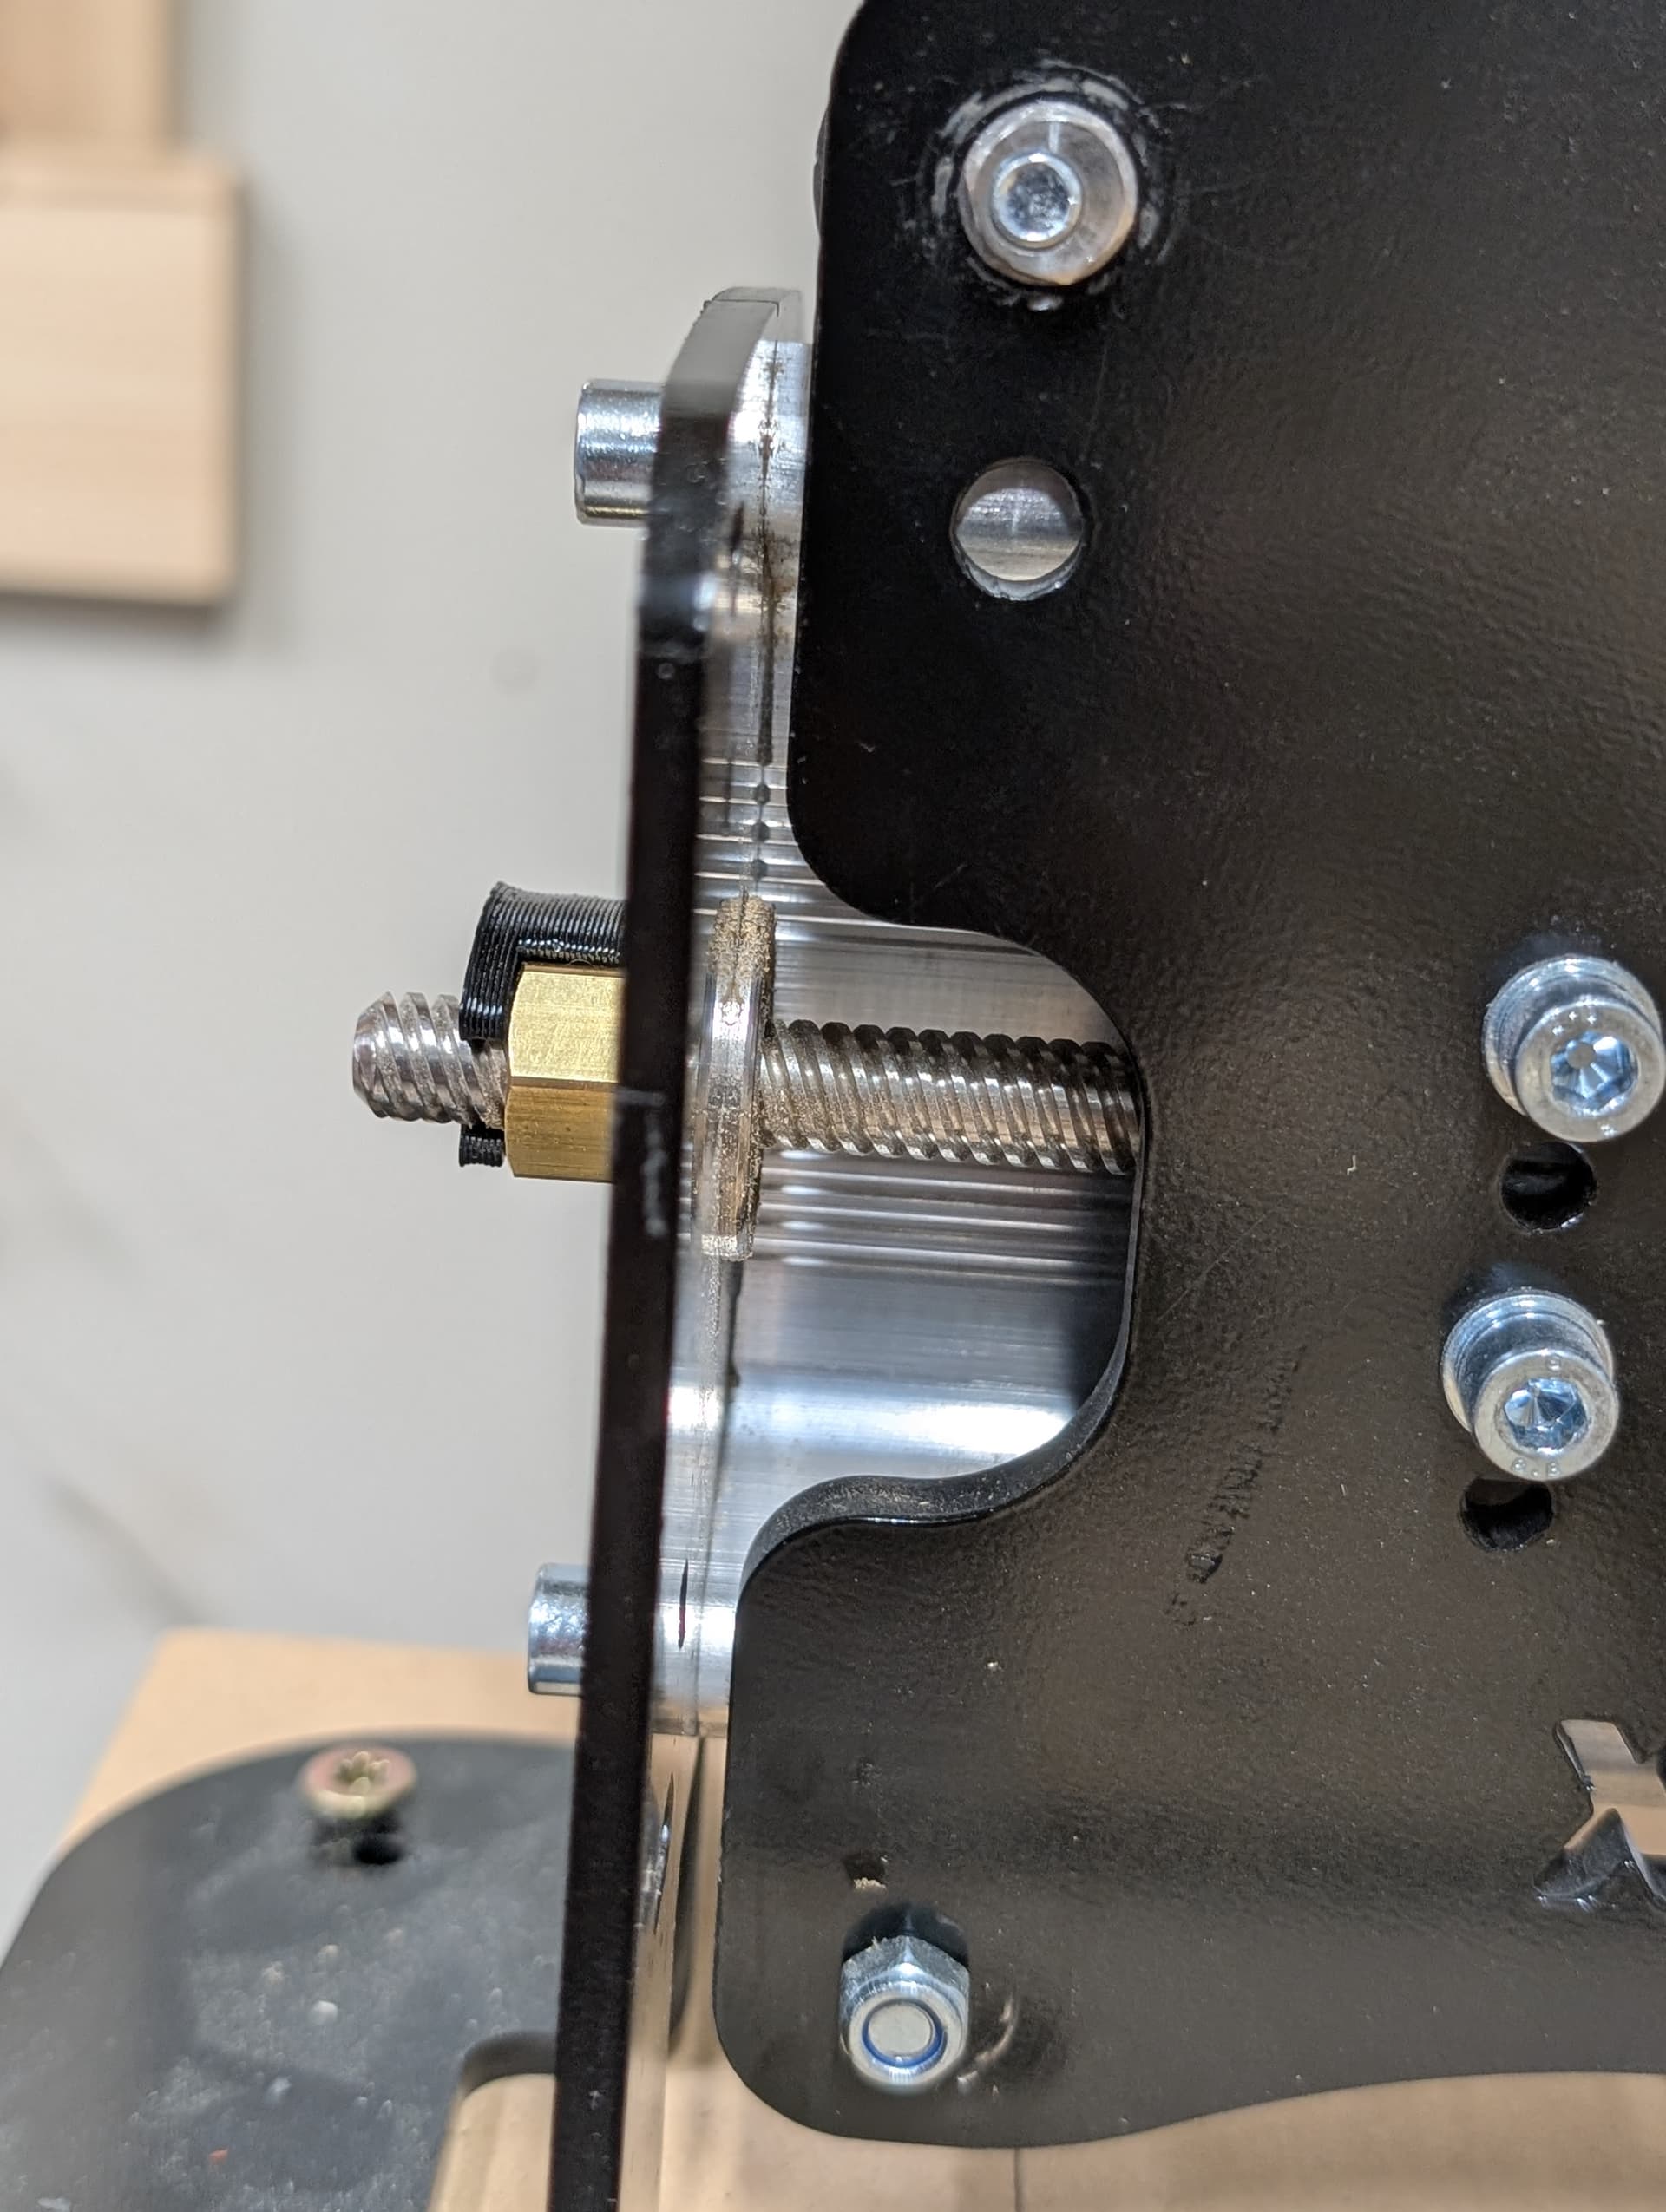
Confirm that the anti-backlash nuts are not the cause. Which do you have, the black or the white. In either case, loosen the bolts holding them to the plates and run the machine back and forward a few times with them loose, then, with the travel in the mid-point, snug them up. Don’t go nuts. If you have the black, back the adjusting bolt off completely, then by small increments, adjust it until there is no play - no more.
Ensure that the collar between the motor shafts and the lead screw are tight.
OH, big question. Which machine are you running? If this is an AltMill, everything that I just said is irrelevant.
You are describing a milder version of something I ran into something not long ago. And I can’t fully explain how or why. My right rail was not traveling at the same small rate as my left. Initially it was very subtle (one having a small gap vs the other butted up against the end), it wasn’t very long before it became very apparent it was binding and running at a severe angle. I checked the v wheels and backlash nuts but didn’t fix anything. What I believe happened is when the machine was getting run to the end stop, the bearing lock nut somehow became over tightened causing the binding on the lead screw. I loosened the set screw, reset the bearings to the appropriate tension and was off to the races again. If you’ve been running up against hard stops it’s possible you are experiencing the beginnings of the same thing?
Yes, Y motor and cables have been switched. Same issue, which makes it seem like a mechanical error, yet everything checks out good. I just rechecked V-wheels, left side is all perfect, right side is all good except for one on the bottom, which, no matter what I do, is always a little loose(been like that since I’ve had the machine). I also loosened up all v-wheels and ran it back and forth, but the problem is still there.
I have the white backlash nuts. I loosened them up and ran it, still 1/8th off on the left side with them both loose. I re-tightened with the short end of the Allen key and just two fingers, so not too tight. Re-checked, and the problem is still there.
Collars are tight.
Seems like a mechanical issue, yet nothing I do changes it, not even a little. It stays very consistent, like a motor reading steps just a hair off or the control board sending a weird signal, or reading it wrong? Is there a way to watch the individual motors count steps? Even though switching motors and wiring seems like it should switch the side of the problem if it’s something like that.
I also reset all my settings to check, problem is still there.
I have a 48x30 MkII.(would like an Altmill, Espescillay if it is more rigid and less screw ups(which might be just me, but whatever))
@Greener Kinda sounds the same, I haven’t run a job yet to see if it gets worse or anything, but will probably start since I’m running out of time and need to start making projects again. Actually, when this first started, the left side lock nut was loose. I noticed it when looking at the rear motor and can watch it suck in a little when butting it up against the front, yet it was not the fix, and why I’m here looking for help. I also usually never run my machine against the stops unless I’m checking alignment, and i don’t have Inductive sensors so im not doing that either.
@Joel.S I’m out of ideas, Joel. If you have not already opened a support ticket with Sienci, I suggest that you do so. One last thing is to make sure that all your cable connections are good.
@gwilki Well darn, but I really do appreciate the help and your time. I do have a ticket w/ Sienci so hopefully we can get it figured out with them.
All the cable connections seem good to me and tight. I just switched the long cable that goes to the left side with a brand new cable in hopes that it would help, but still no success.
@Joel.S I just watched the installation video for the white nuts. Be sure that the springs are facing the motor on both. Finally (and really this is “finally”) be sure to break them in . Sienci recommends spraying the lead screws with WD40 and running the machine back and forth several times at normal jog speeds. Then, repeat at rapid speed. Finally, dry off the lead screws.
@gwilki So the white anti-Backlash nuts are facing the correct way, springs towards the motors. I‘ve had these nuts installed for some time and have been using the machine without noticeable problems, yet the current problem still could’ve been there, just never noticed.
I can definitely find some WD-40 and give it a try, though.
I just ran a couple of small jobs today, and it seems to run well. That being said, though, it was jobs with very little y-travel and runtime, so wouldn’t show much sign of being skewed.
@Joel.S With any kind of luck, Sienci tech support will have a solution. Clearly, I do not. I have the original LM Mk1, with all the original parts, except for the SLB. I’ve been luck to have had very few issue, and those that I did have were resolved by the SLB.
Please report back when your issue is resolved.