A new kind of articulating dust shoe

In my quest to get back my lost X-axis travel from the original stock dust shoe, I have looked at far too many dust shoe write-ups and videos.

I found one that was innovative and decided to do a version for my Longmill. The video is here:

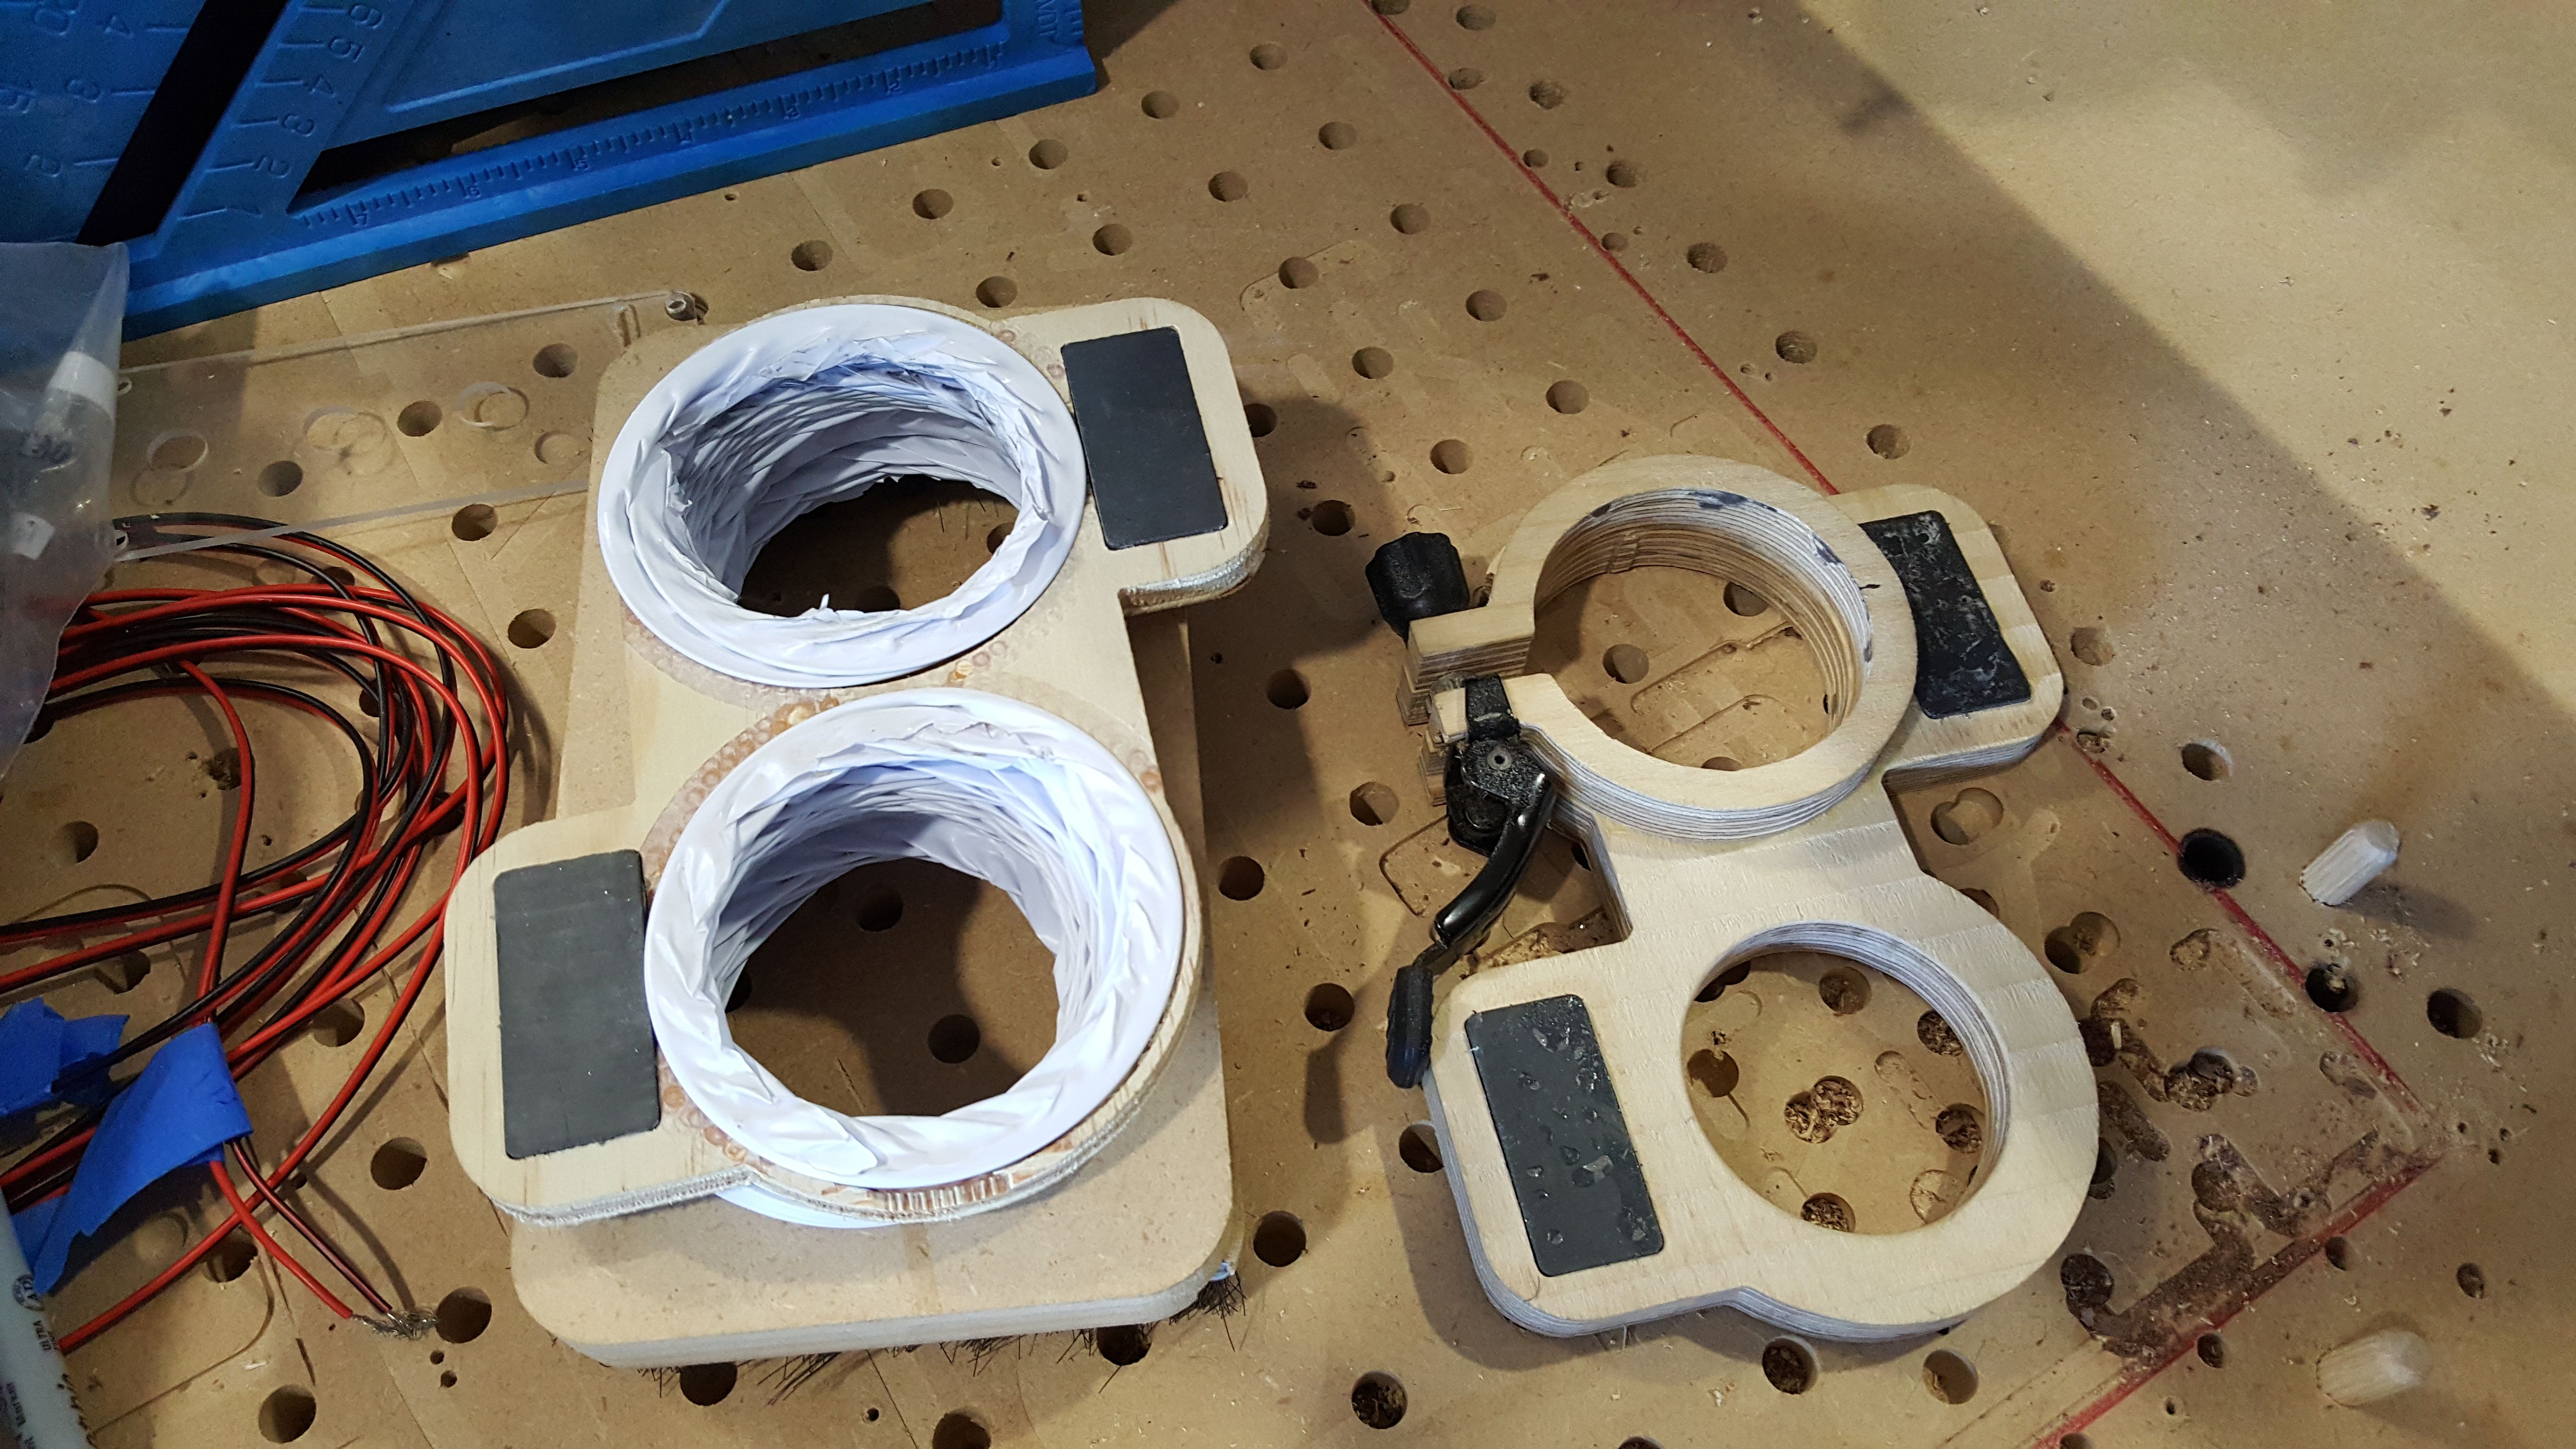
The show is unique in that it has an upper and lower portion and they are connected with a steering rack boot or other flexible ribber material and the distance between the lower foot/bristles and the upper piece can expand and contract (thus allowing the router to descend down in to cuts without jamming the shoe in to the stock).

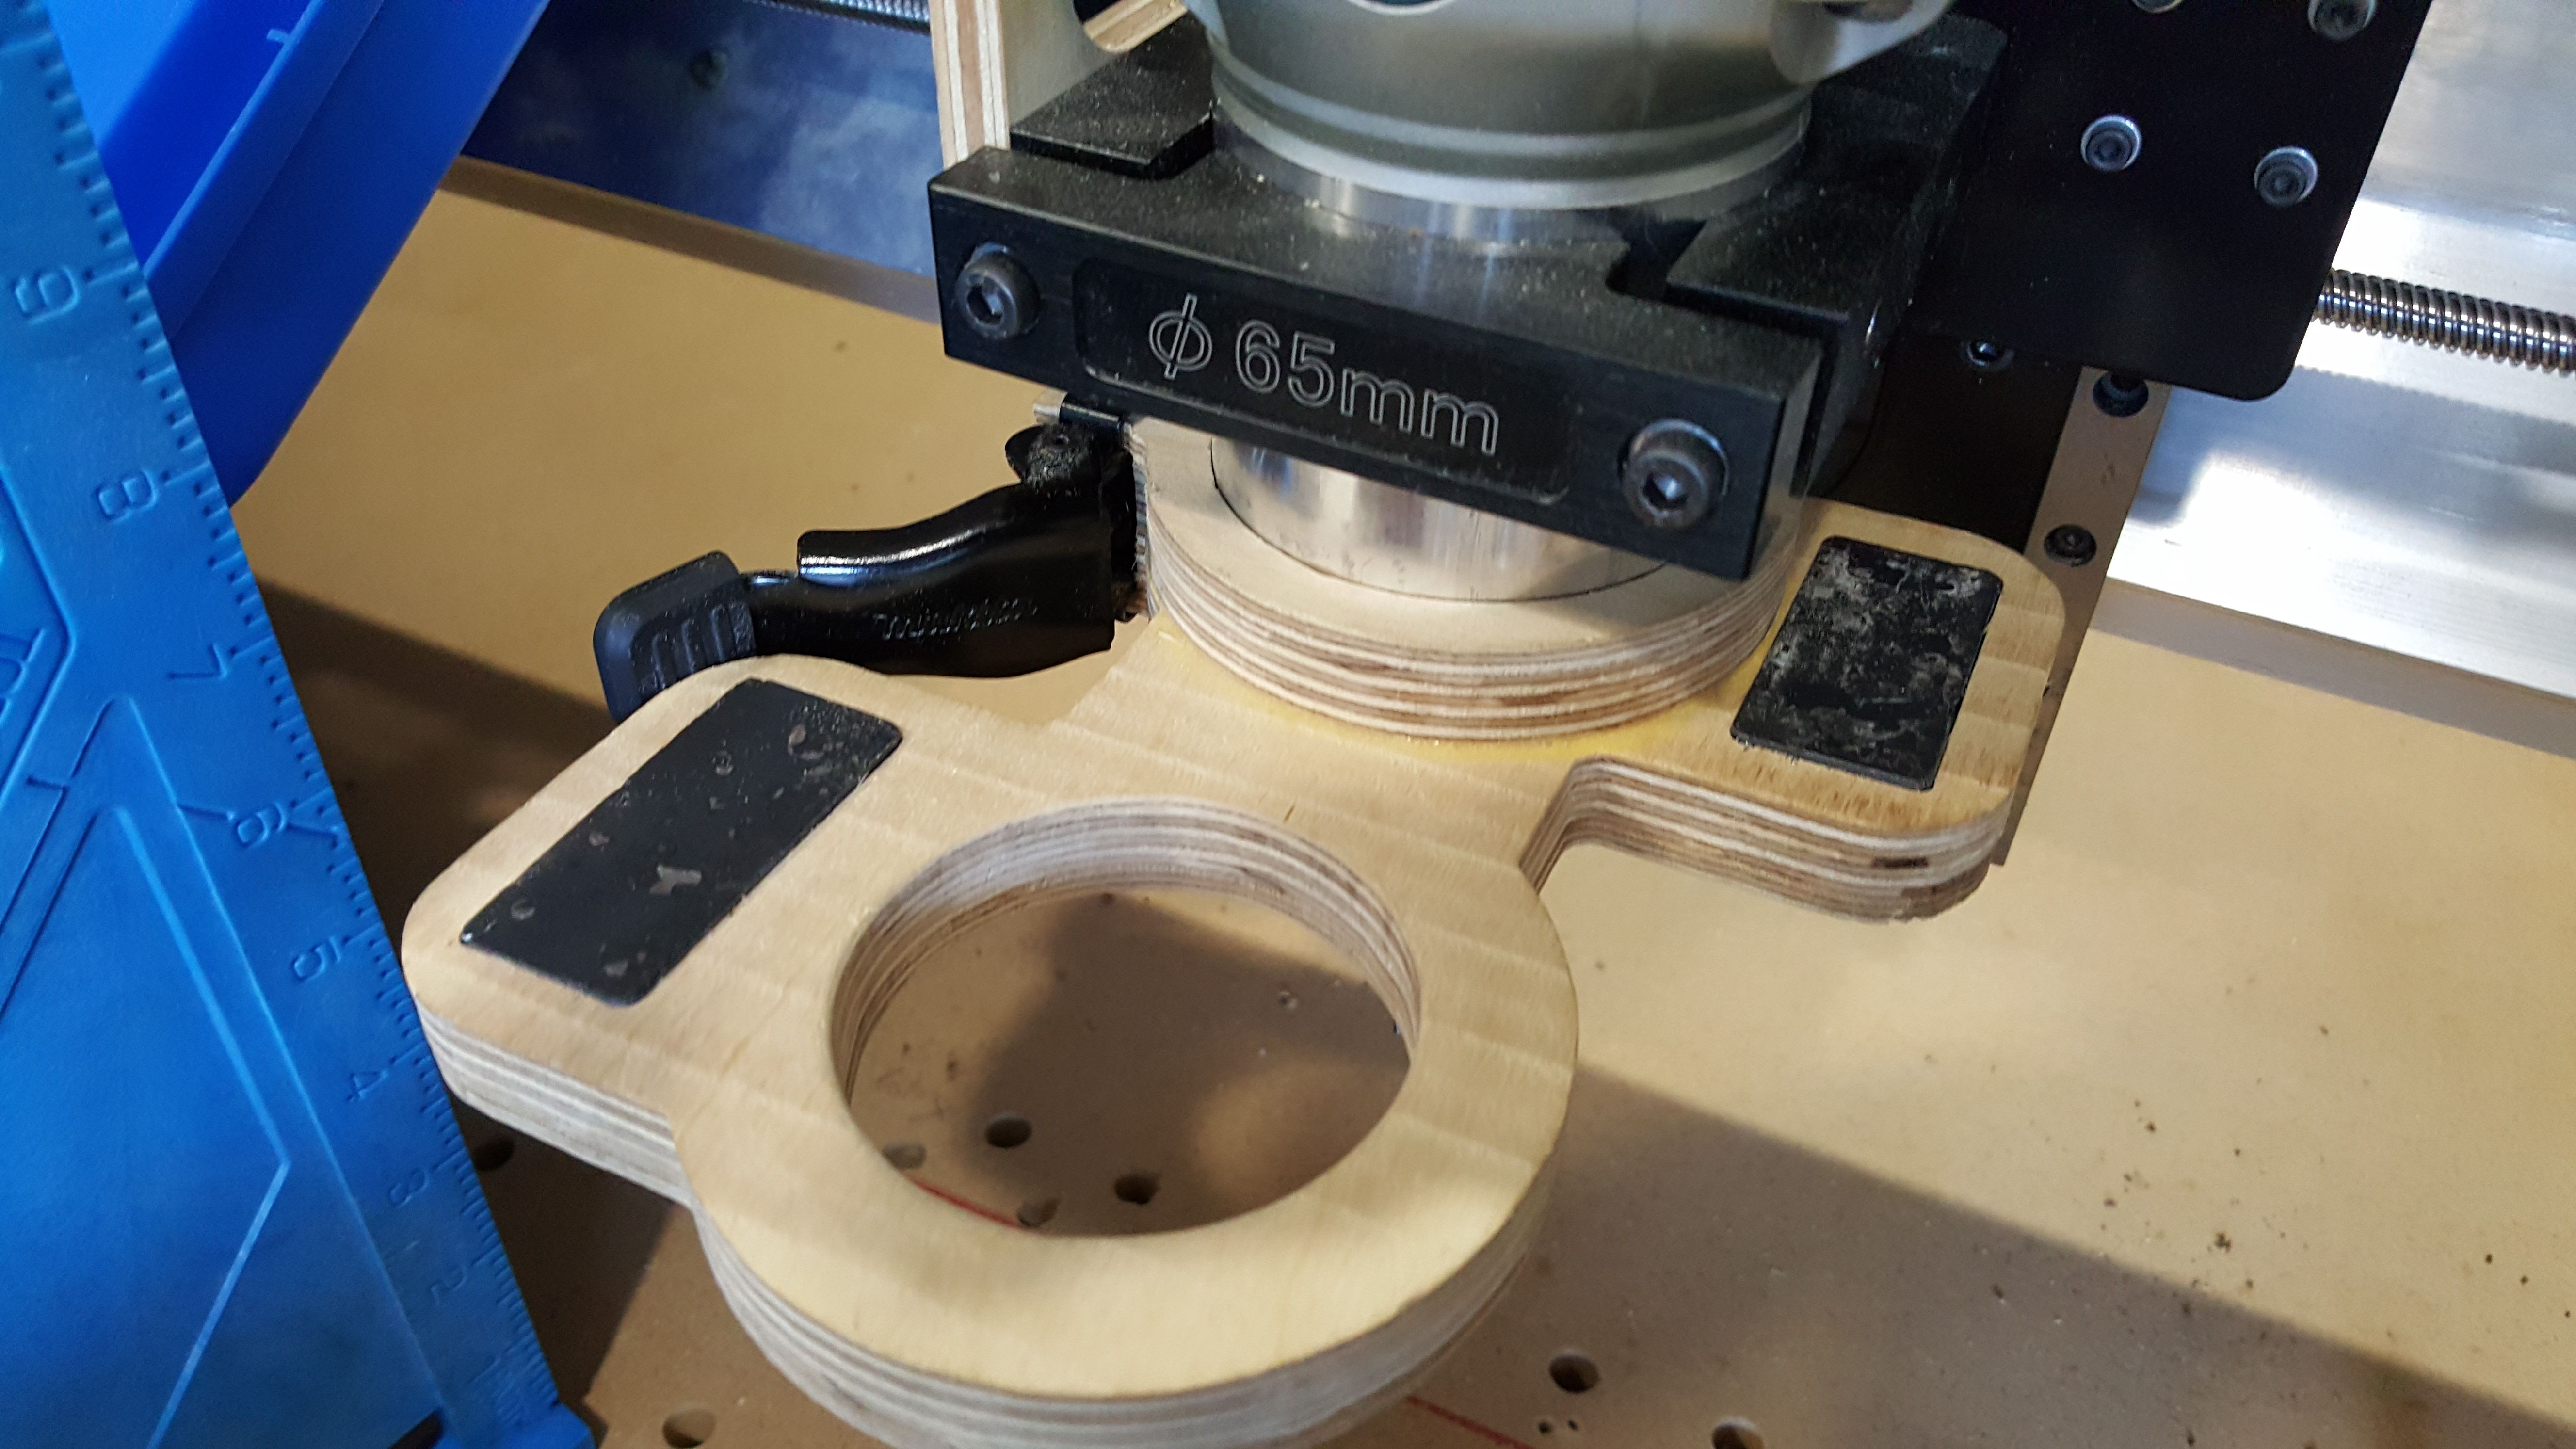
I wasn’t able to find a suitable rubber boot that would accomodate the 65mm router body so I ended up using a $5 3" bathroom vent line I picked up at Home Depot: https://www.homedepot.ca/product/dundas-jafine-flexible-vinyl-ducting-3-inch-x-8-foot/1000142209

On my design I moved the vaccum connection out in front of the router and I attached to the sides of the router mount using the existing M8 holes. This hasn’t worked out especially well as they seem particularly susceptible to loosening to vibration so I’m rethinking that part. The lack of any accessory holes or railes on the ZX gantry is unfortunate, it would really help here.

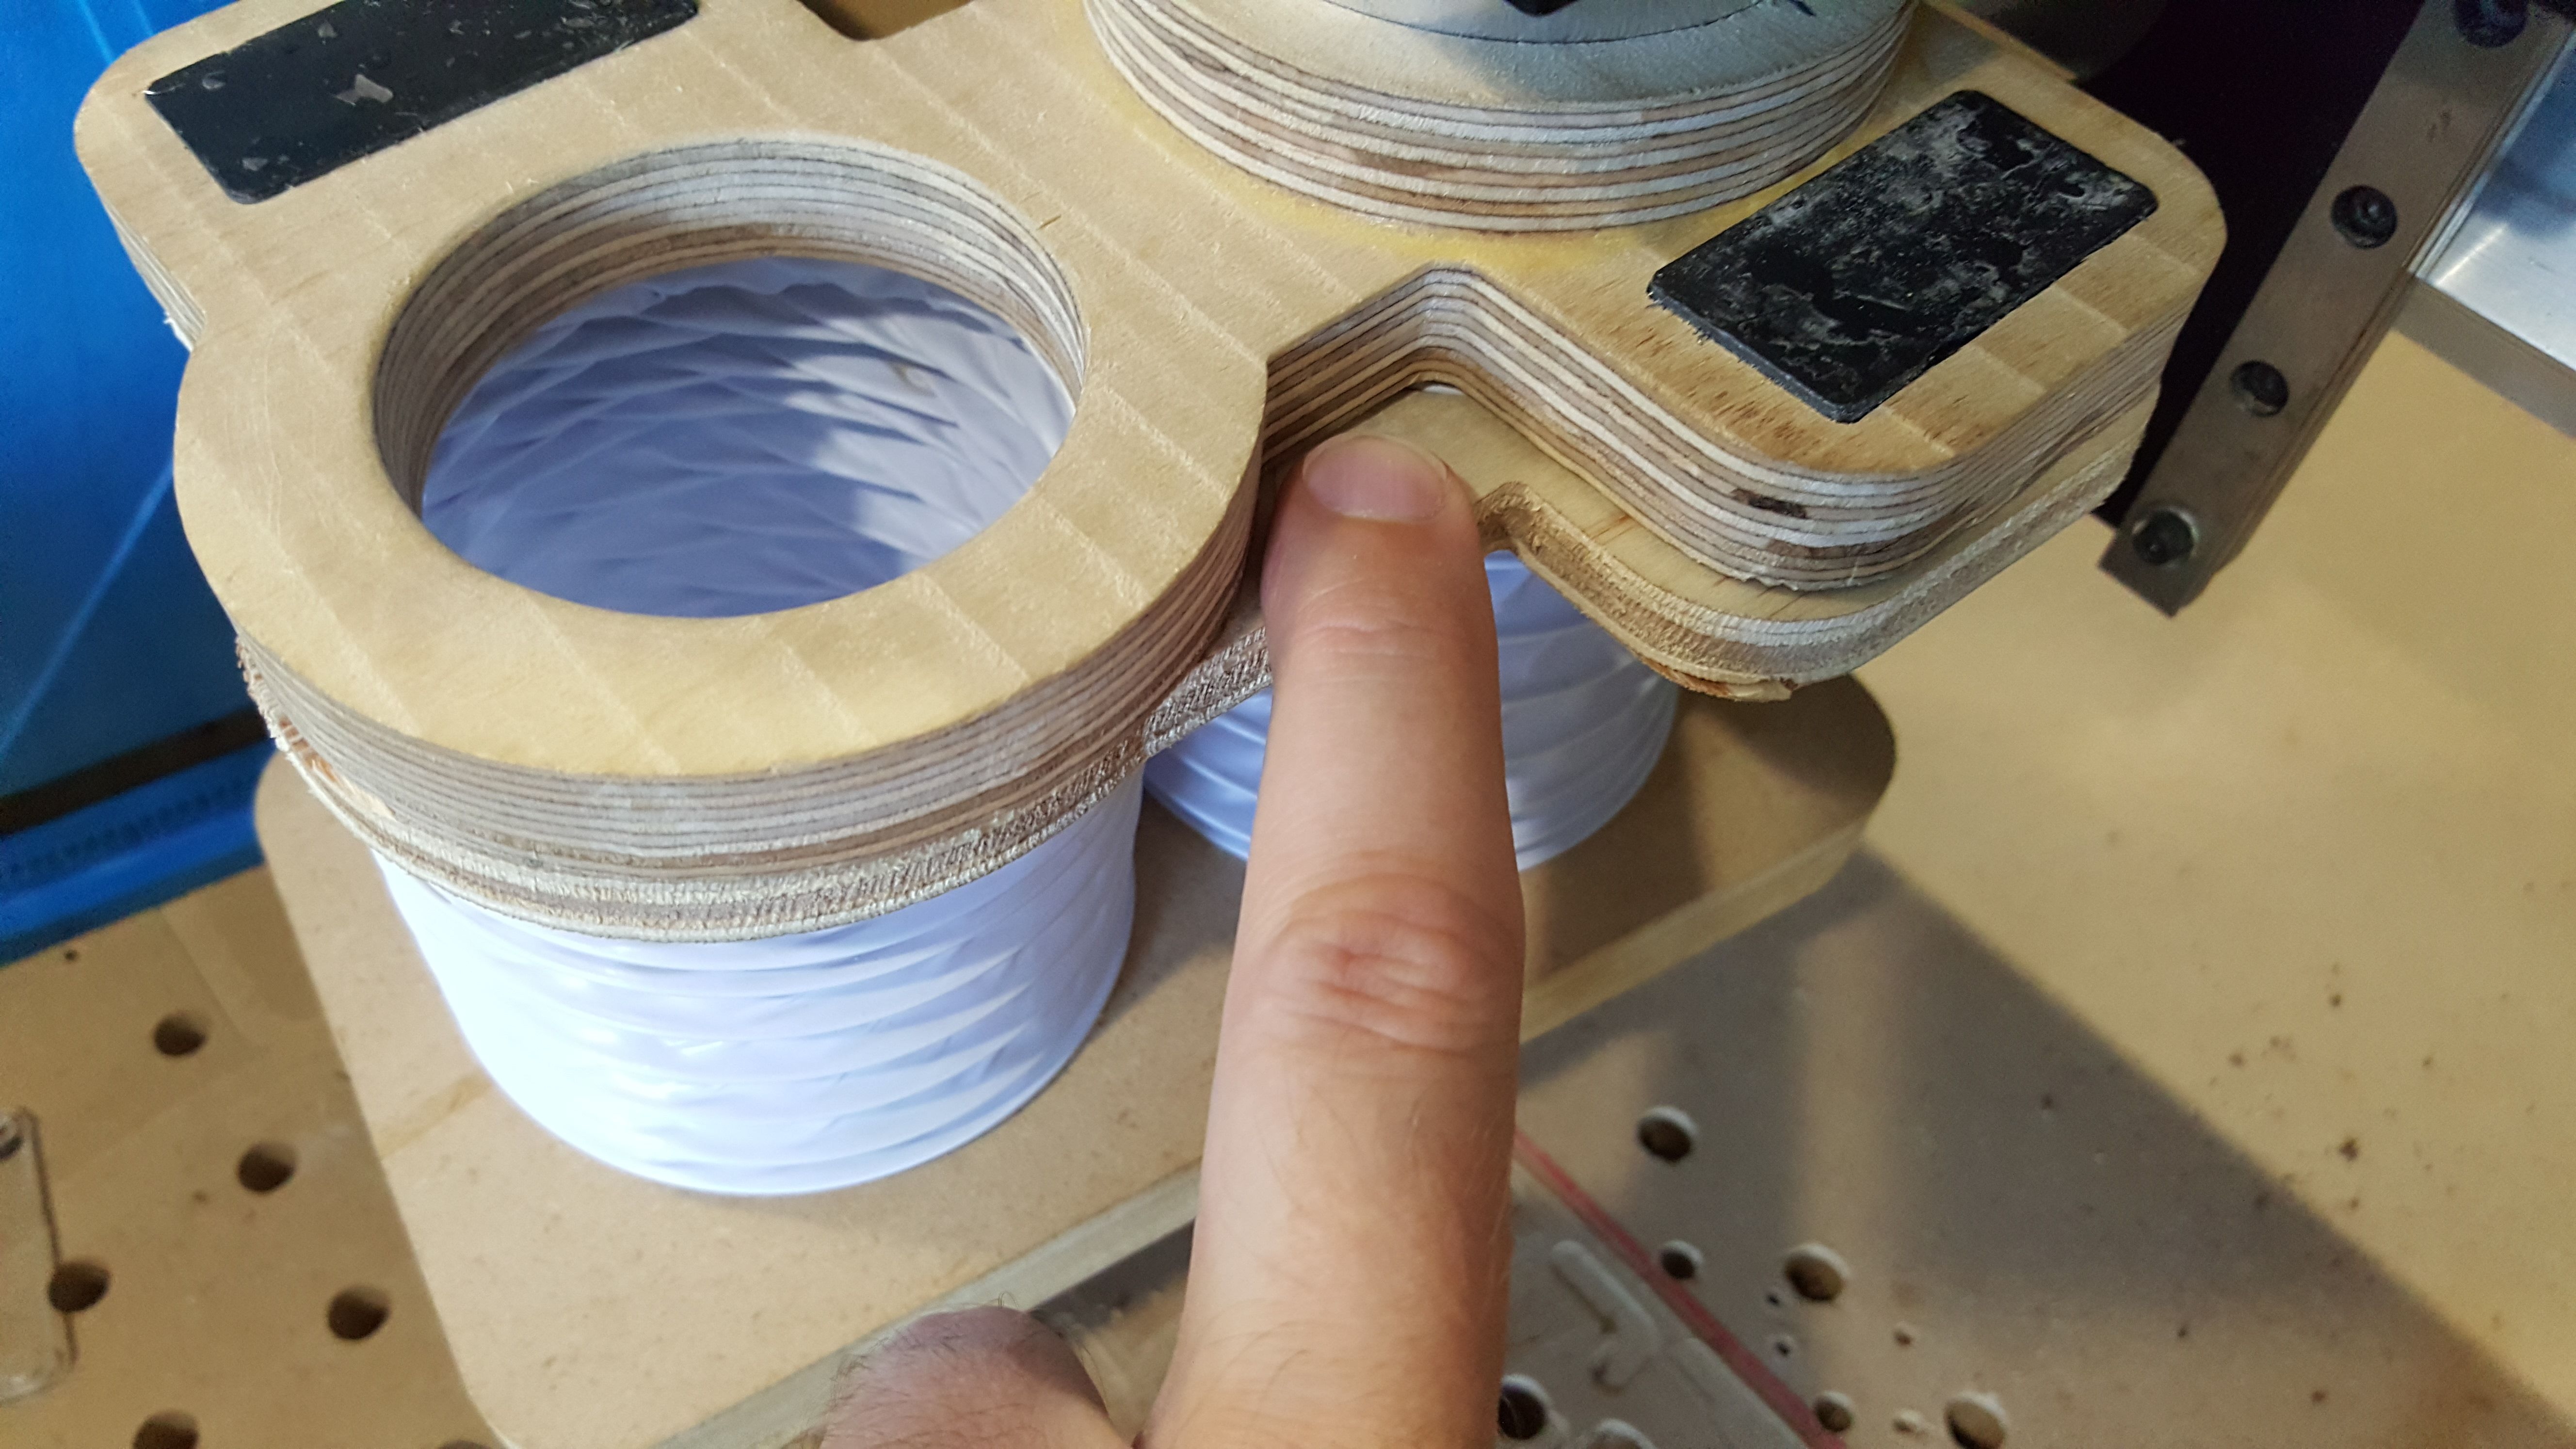
I made my shoe out of 1/2" plywood as that was the thinnest thing I had that was of decent quality. I would like to use 3/8" baltic birch or even some plastics to reduce weight on my next attempt. The design needs refinement but works quite well otherwise.

The middle piece is connected to the top piece with some extremely strong ceramic magnets I picked up at Canadian Tire: (not exact but similar to these) https://www.canadiantire.ca/en/pdp/ook-magnetic-ceramic-block-7-8-x-1-7-8-in-1611862p.html#srp

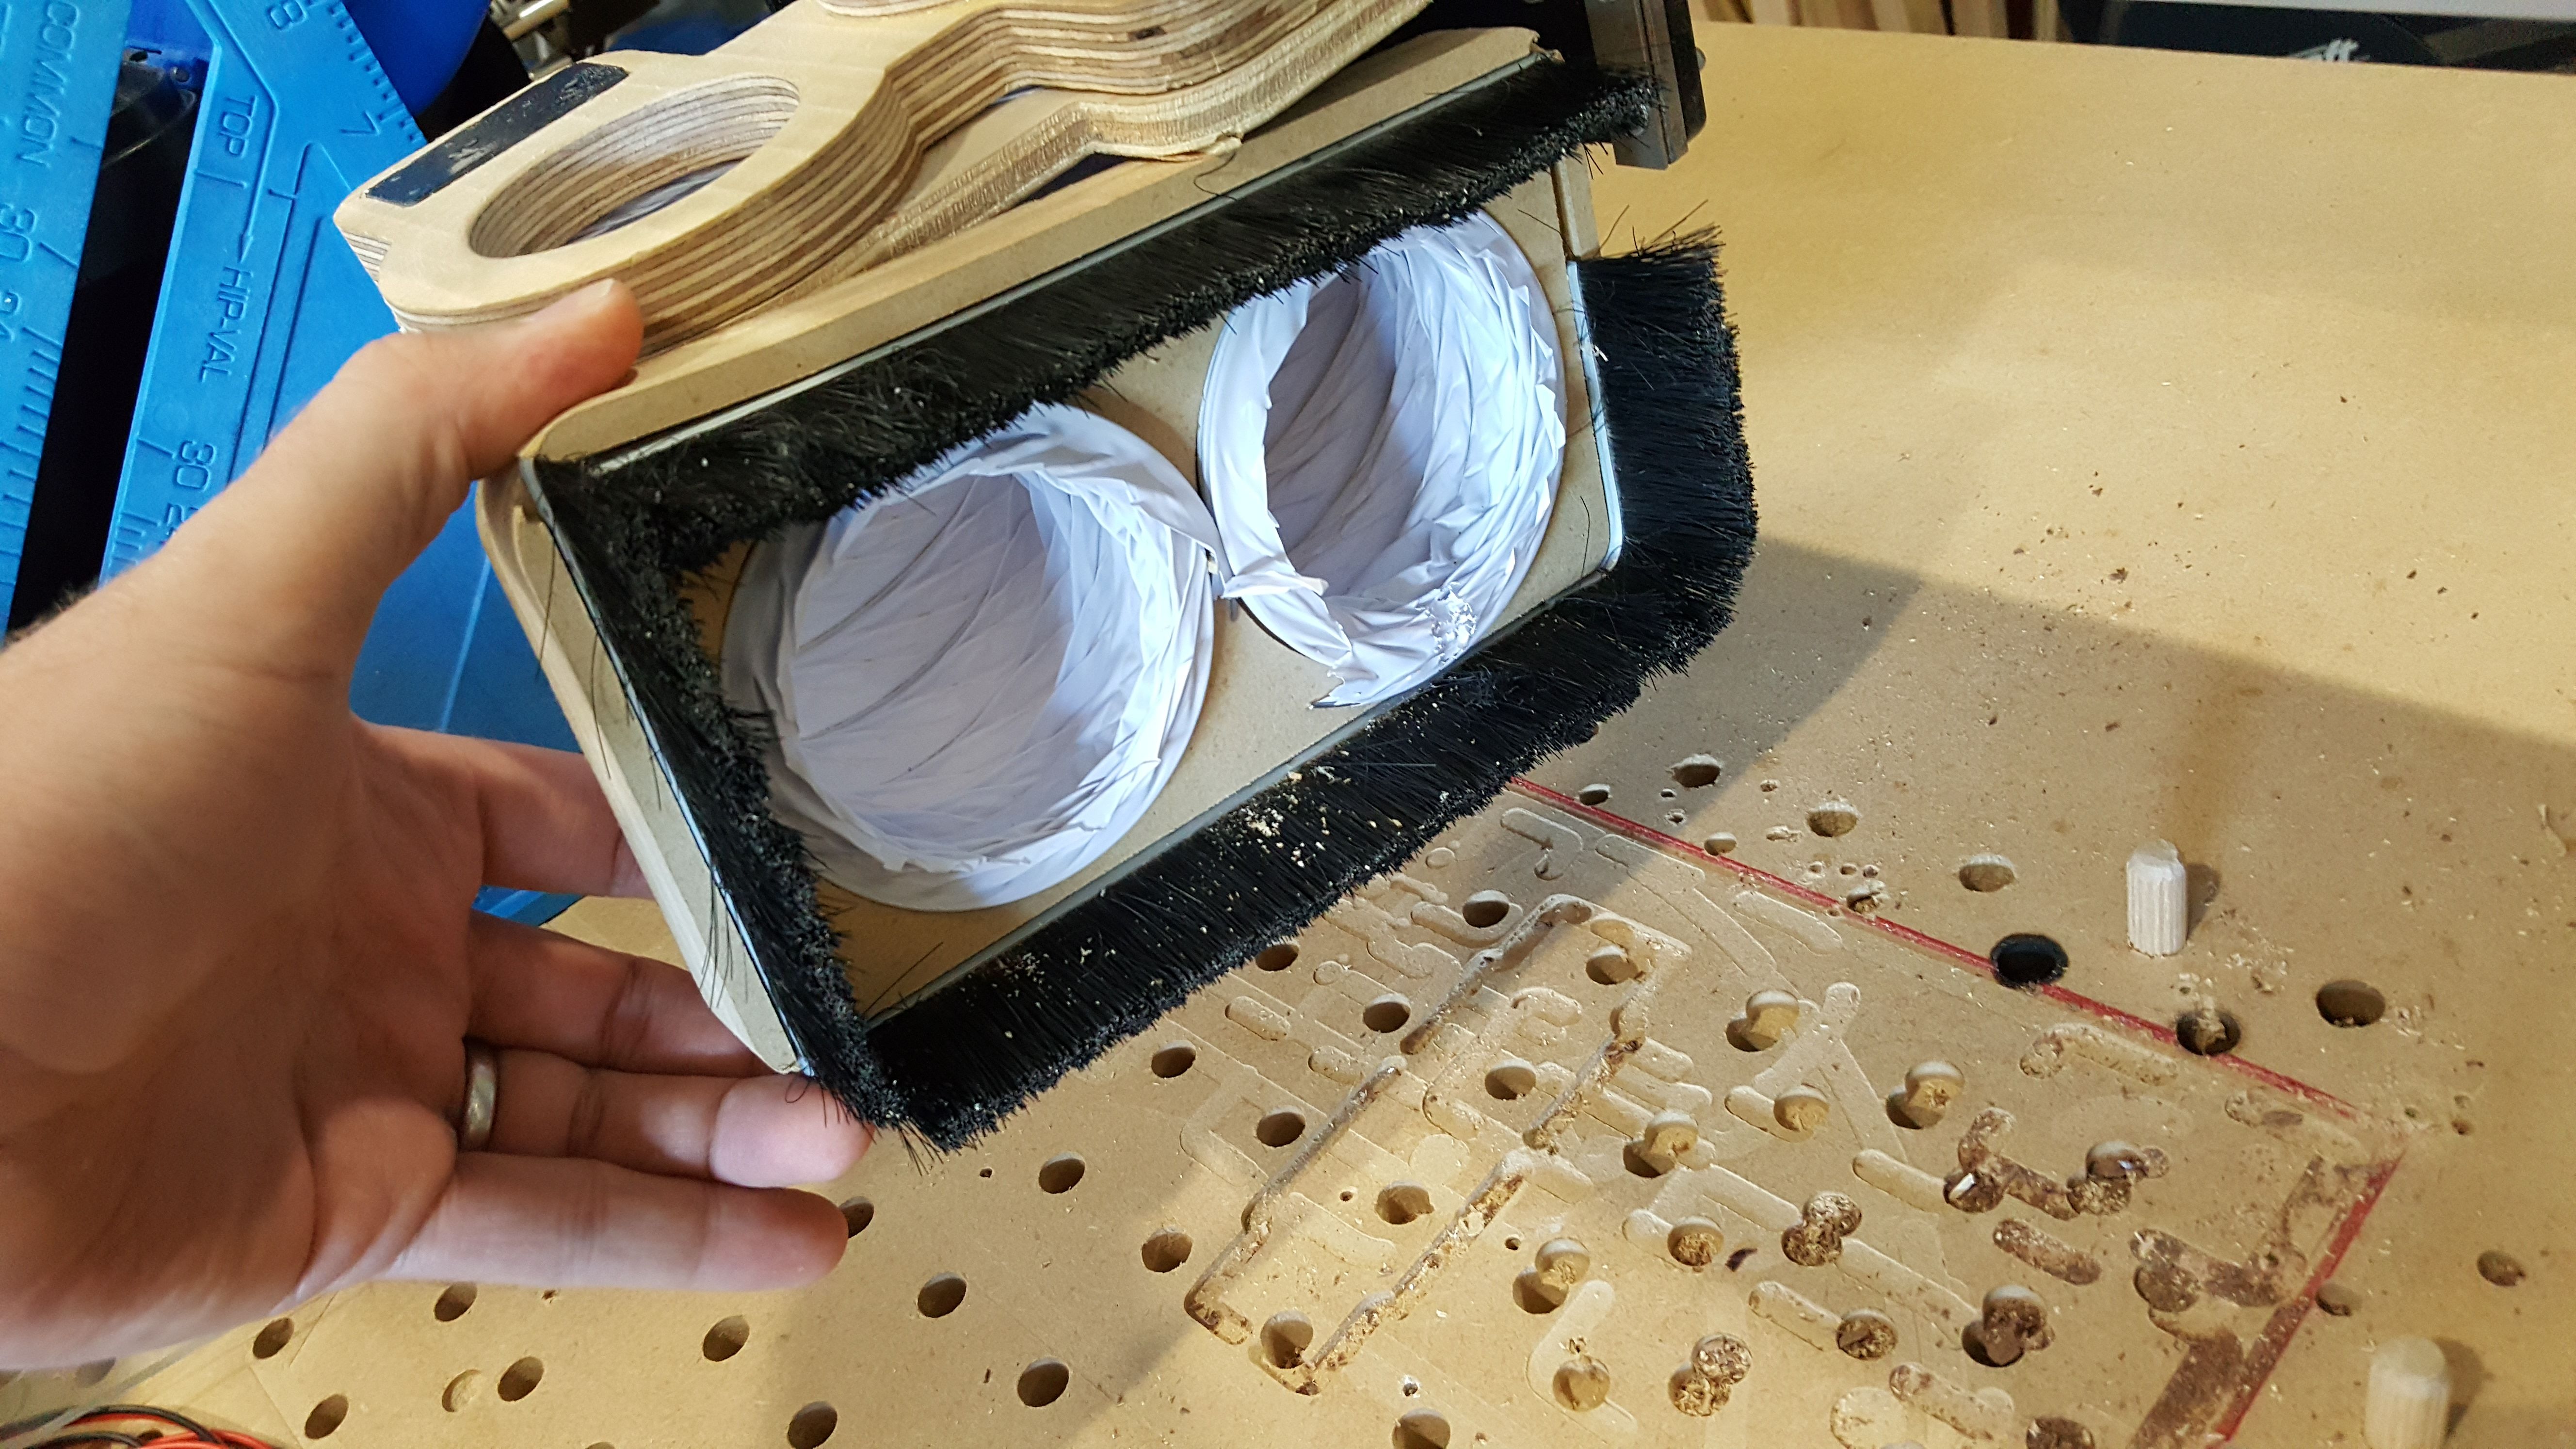
The middle piece has the openings for the two hoses (the one that the router descends through) and the vaccum line. I just cut the top side of the vac one to fit my vac hose outside diameter. The two compressible vinyl duct lines hang from the top piece for about 4 rings (the metal spirals in the duct) and the bottom piece has bristles from a metal door sweet in a groove.

So it looks and works similarly to the one in the video. It does angle nicely over edges and it provides excellent suction. The vinyl duct is a bit stiff and I should probably weight it down and let it stretch out. It tends to recoil itself and draw back up whereas I would prefer it’s default position be fully extended.

Removing the shoe in my design is a treat as the two magnets hold it very firmly but allow it to be removed in 1s for bit changes etc. and it just snaps back on and the locating holes put it in the exact position.

I don’t have a photo of mine handy but will take one and post it when I get a chance. But I wanted to float the idea out there to the bright minds on the forum as I think this is a very interesting direction to go with a dust shoe design. Making it lighter than my concept and improving the attachment method are the principle issues at the moment. I could use a compression ring around the router like the CNC Swede example but I was hoping to avoid that complexity of that (having to drill through end grain for the fitting) and make the entire thing on my machine.

I’ve also considered getting the steel plate the router mount is installed in to re-made with accessory holes or slots as an option to improve mounting possibilities, but that’s a larger project I would need to send out…

Curious what others think of this innovative design.

-Jeff
Th

2 Likes

@jwoody18 I had seen that video when I was playing with designs, Jeff. Clearly, it does a good job of chip/dust collection.
When I saw it, I was concerned with how much weight and leverage it was putting onto the Z gantry. I have absolutely no number to substantiate that concern. It just seemed to be a bit much. Like you, if I had built it, I would have had the hose input in front of the router, not beside it. Otherwise, the X travel loss would have been more than I was happy with. However, putting the hose input that far out front adds to the lever effect on the Z gantry.
I like the idea of a Z axis independent shoe for all the reasons that Chris sets out on the web site, so my designs stuck with that idea.
Now that I have the laser, I’m glad that I went the way that I did. I can simply pull off my magnet-held shoe and there is nothing on the Mill to block the installation of the laser.
All that said, I will be interested to hear of your experience with the design. It does have a lot going for it.

2 Likes

Jeff, I don’t know why it took me so long to stumble upon your thread here but this is quite the interesting concept and endeavour you’ve set out on. I’m curious if you’d still have some pictures handy of your setup and perhaps be able to offer any additional insights now that you’ve been running this shoe for nearly a year :smiley:

Hi Chris,

Sorry for the long delay.

The dust shoe is brilliant. I get exceptional dust collection, especially at the edges of the workpiece which it automatically tilts to capture debris.

Since I first posted, I made my bottom layer our of MDF as the 3" vinyl bathroom fan tubing has “memory” and kept lifting the bottom foot up. Now it hangs the way that was intended.

The vaccum force draws it down to the workpiece before the bit gets there and holds it until well after the bit lifts, which also aids in dust collection.

Right now I have a lot of stuff piled on my table but I will clear some space and get a static shot of the shoe so you can see it. Not sure if I mentioned it above, but I designed it to re-use the clamp from the Makita base for the router that comes with the basic Makita kit. I cut the upper pieces out of baltic birch

Photos coming shortly…

-Jeff

2 Likes

Ok here are some photos:

Here it is installed on the Longmill:

You can see the Makita clamp on this one:

There are finger tabs on each side to quickly remove the middle and lower pieces for tool changes:

Here are the three components, assembled:

And this is the underside of the shoe. I just have the bristles pressure fit. They should really be glued, but I need to get better bristles first:

The one consideration is that it is technically possible for the hose to swing in to the bit if you make the length too long. I can’t remember the exact number of rings I used, I want to say 8-9 or so, basically means it will never swing in to the bit. I can say that if you make it longer, it can and will happen and it is ugly. I’d be happier if the tubing was rubber and didn’t have wire rings it but I’ve not found bellows that have 3" diameter yet. If someone finds some, please let me know.

-Jeff

2 Likes

At least in the automotive area, there are stiffer hoses with bigger diameter, e.g. the air hose of a super charger, but… I think you need a really flexible one which easily streches down to the work piece.
Maybe you can somehow attach a flexible pin or rod to additionally guide the hose instead of replacing the hose.