This is a follow up to another post I started on the subject. This one I’m happy with so I’m posting the final results.
Looking at gSender and the Insignia touchpad referred to in the other post a bit more, I came to the conclusion that it might not be the best choice for a pendant. Using the numbers and the period is likely not a good idea. And perhaps the same for some of the symbols you might possibly use in one of the gSender fields (e.g. “del” and “backspace”). I suspect that if you type a number/symbol in one of the fields, you would also invoke the shortcut using that number/symbol. With that in mind, I could probably get away with using the keypad for 11 to 17 shortcuts.
After researching programmable keypads, I decided to get the Max Keyboard Falcon-20 keypad. It is a 20-button keypad with 5 actions possible for each key. Keeping at least one button to toggle between the levels, that means a possible total of 95 shortcuts. And each button has its own RGB diodes, so a colour can be set for each button and each layer. The keypad can also be made to work vertically or horizontally.
In reality, having 5 actions for each button is not practical. Unless you can memorise every action, it’s unlikely you’d be able to fit 5 descriptions on every key. You’d probably need to use an overlay or keymap as a reference.
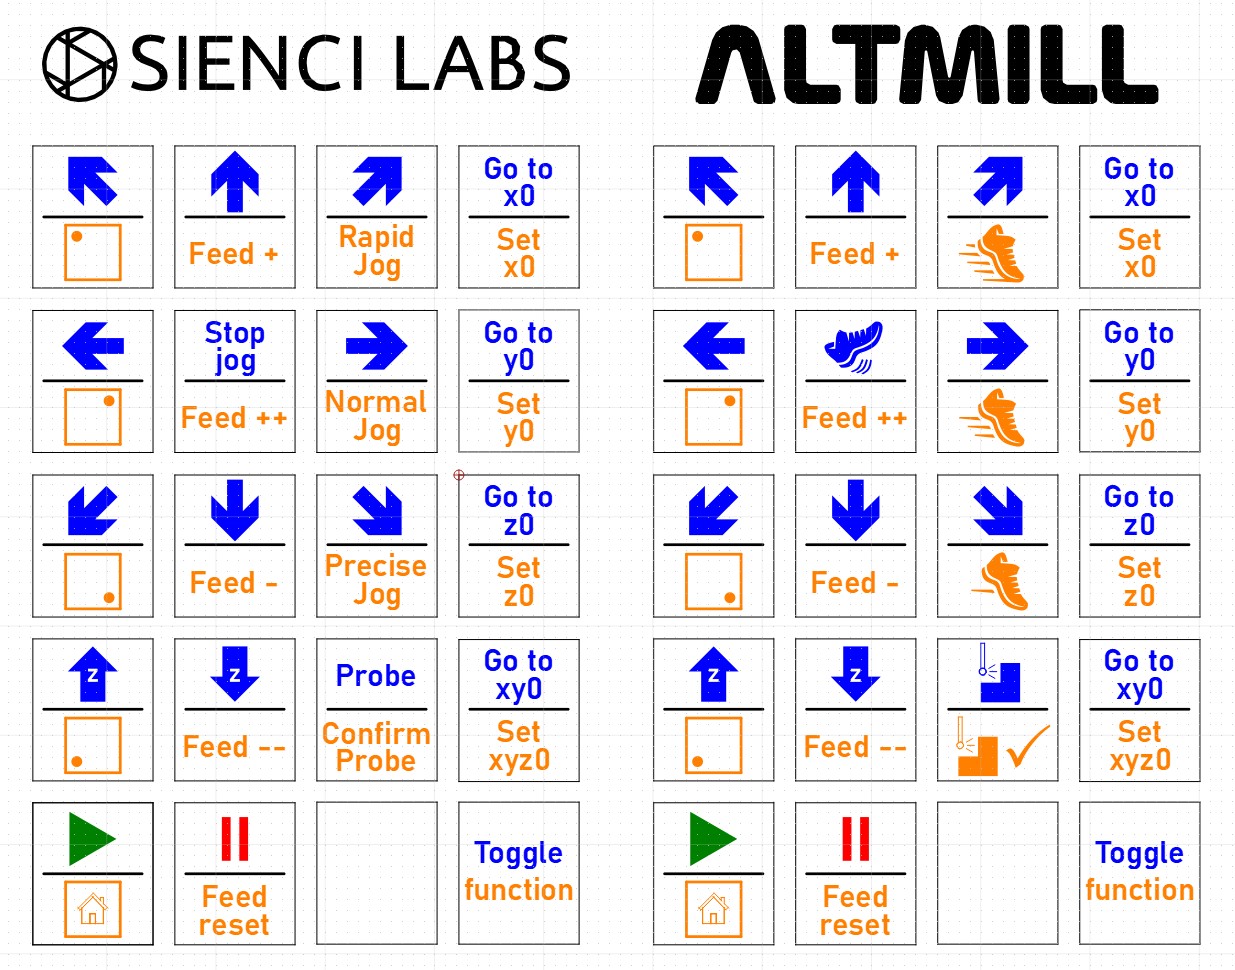
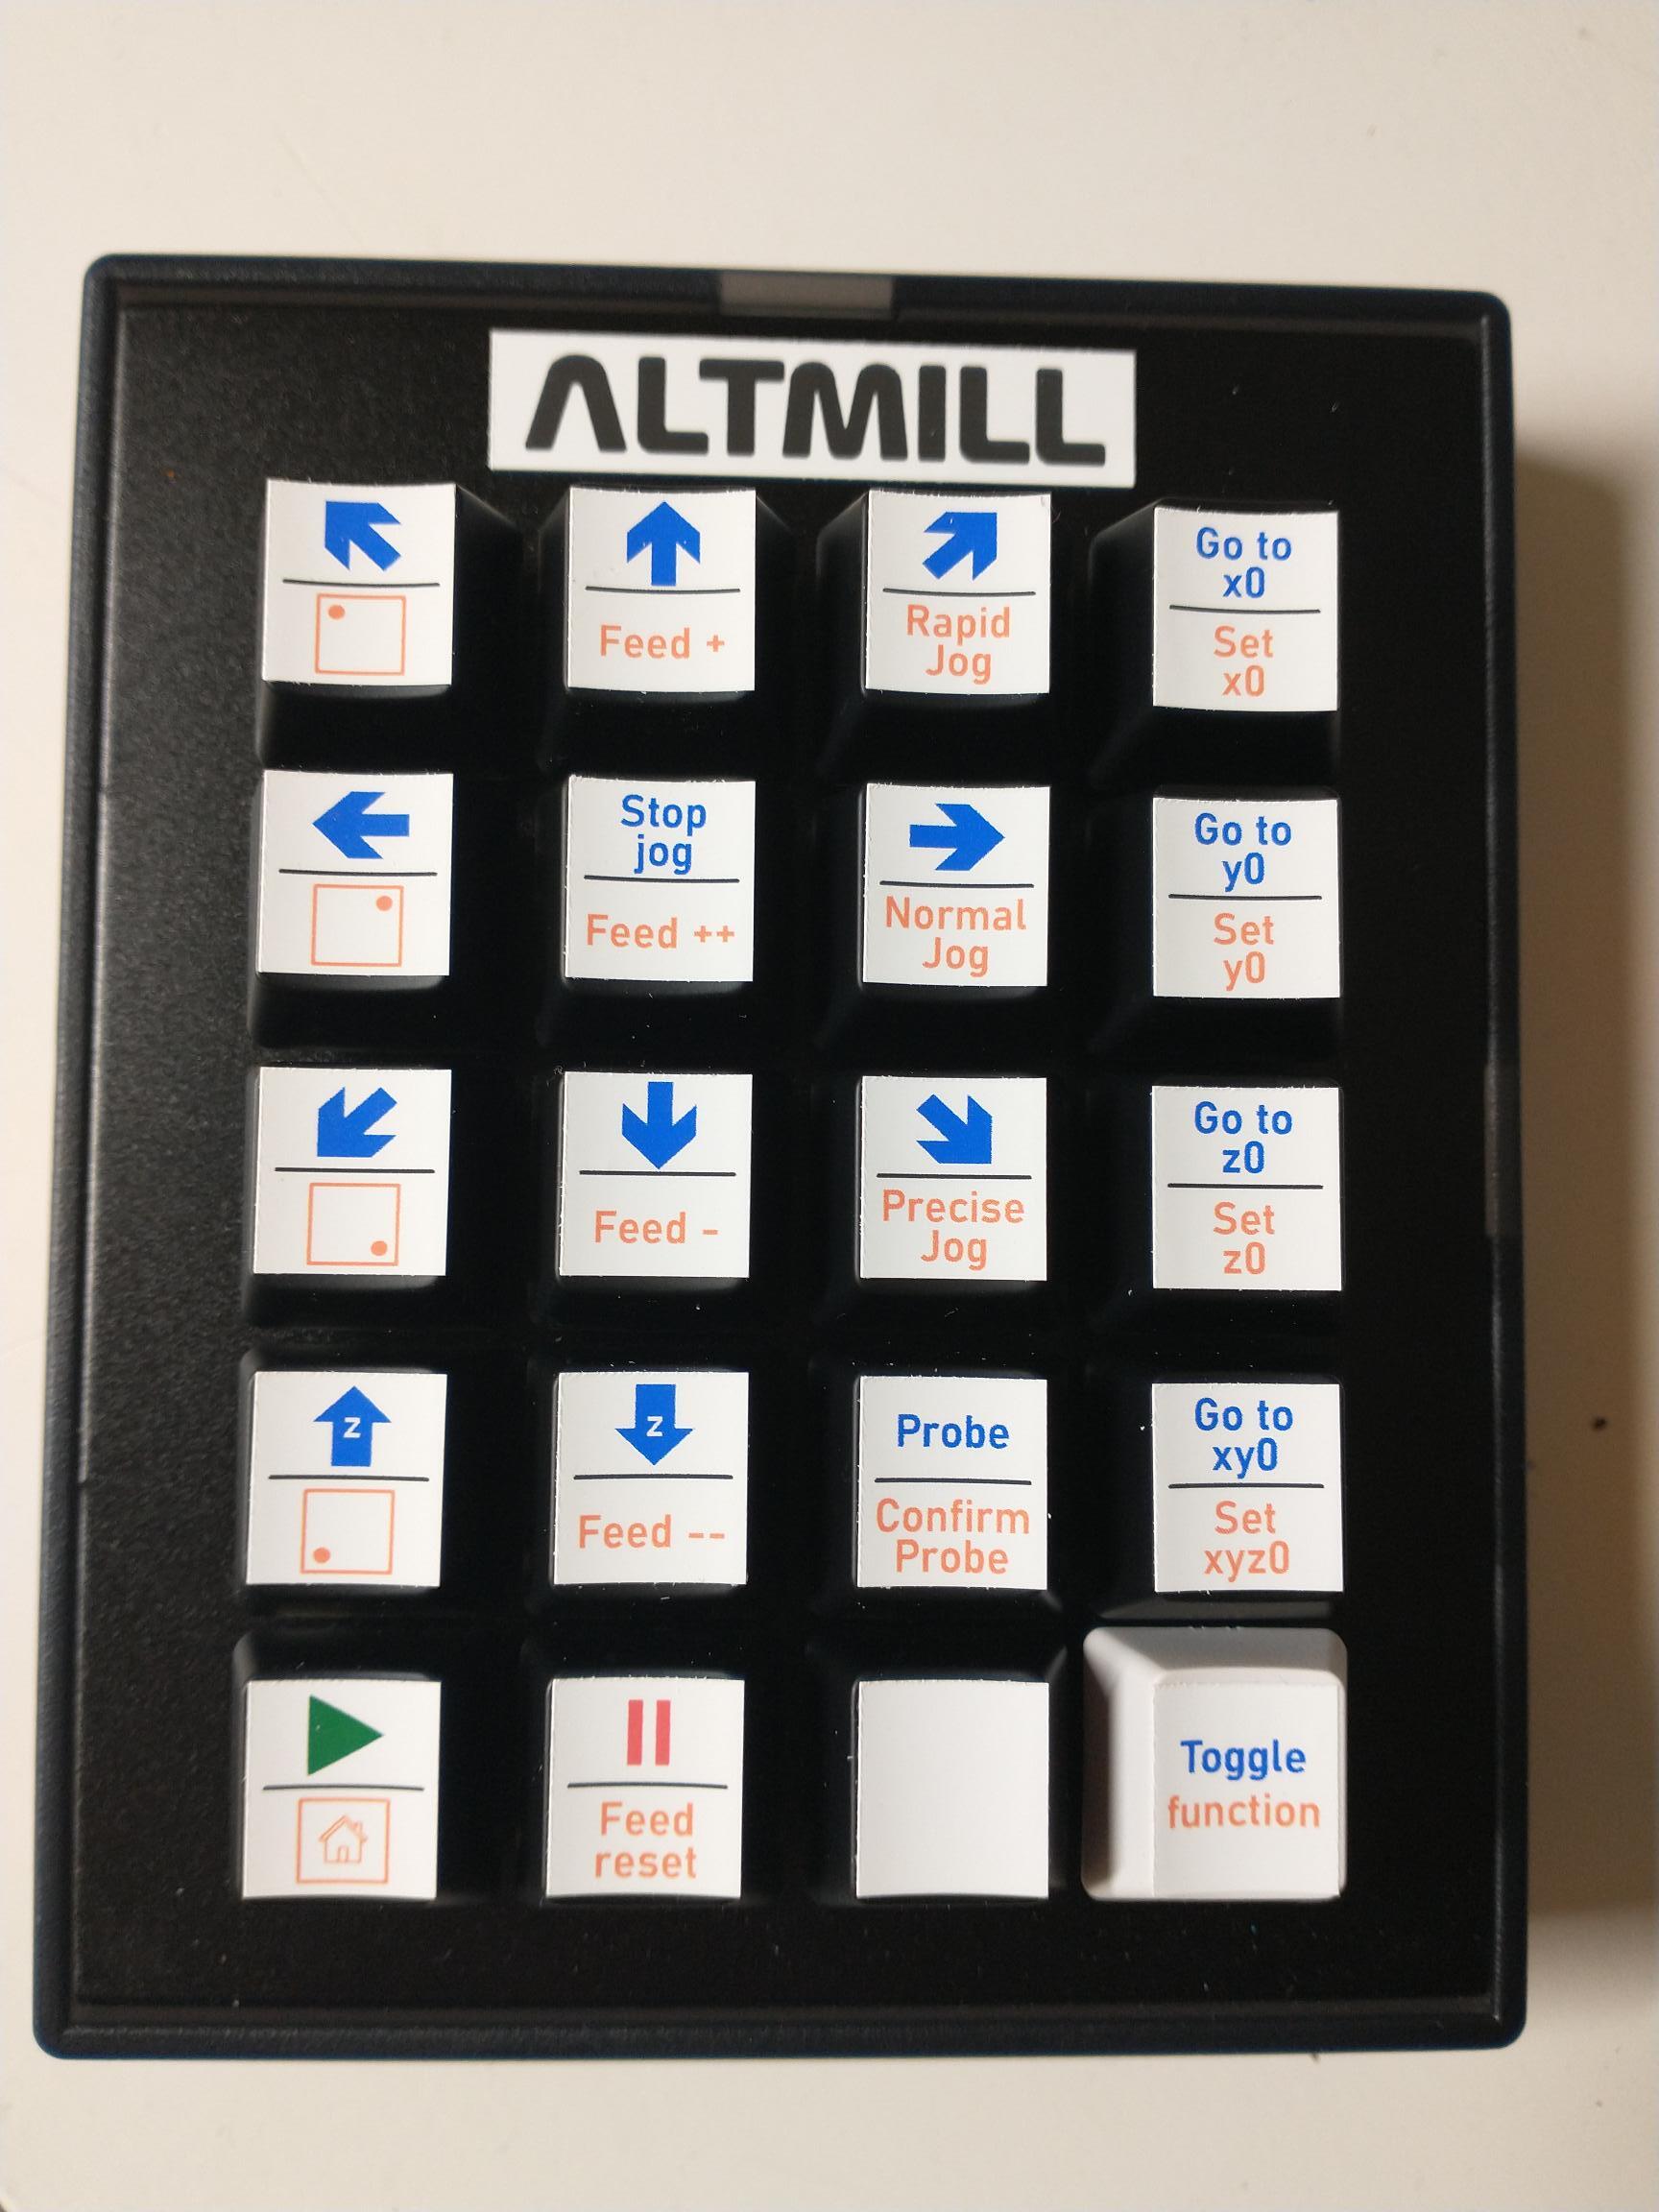
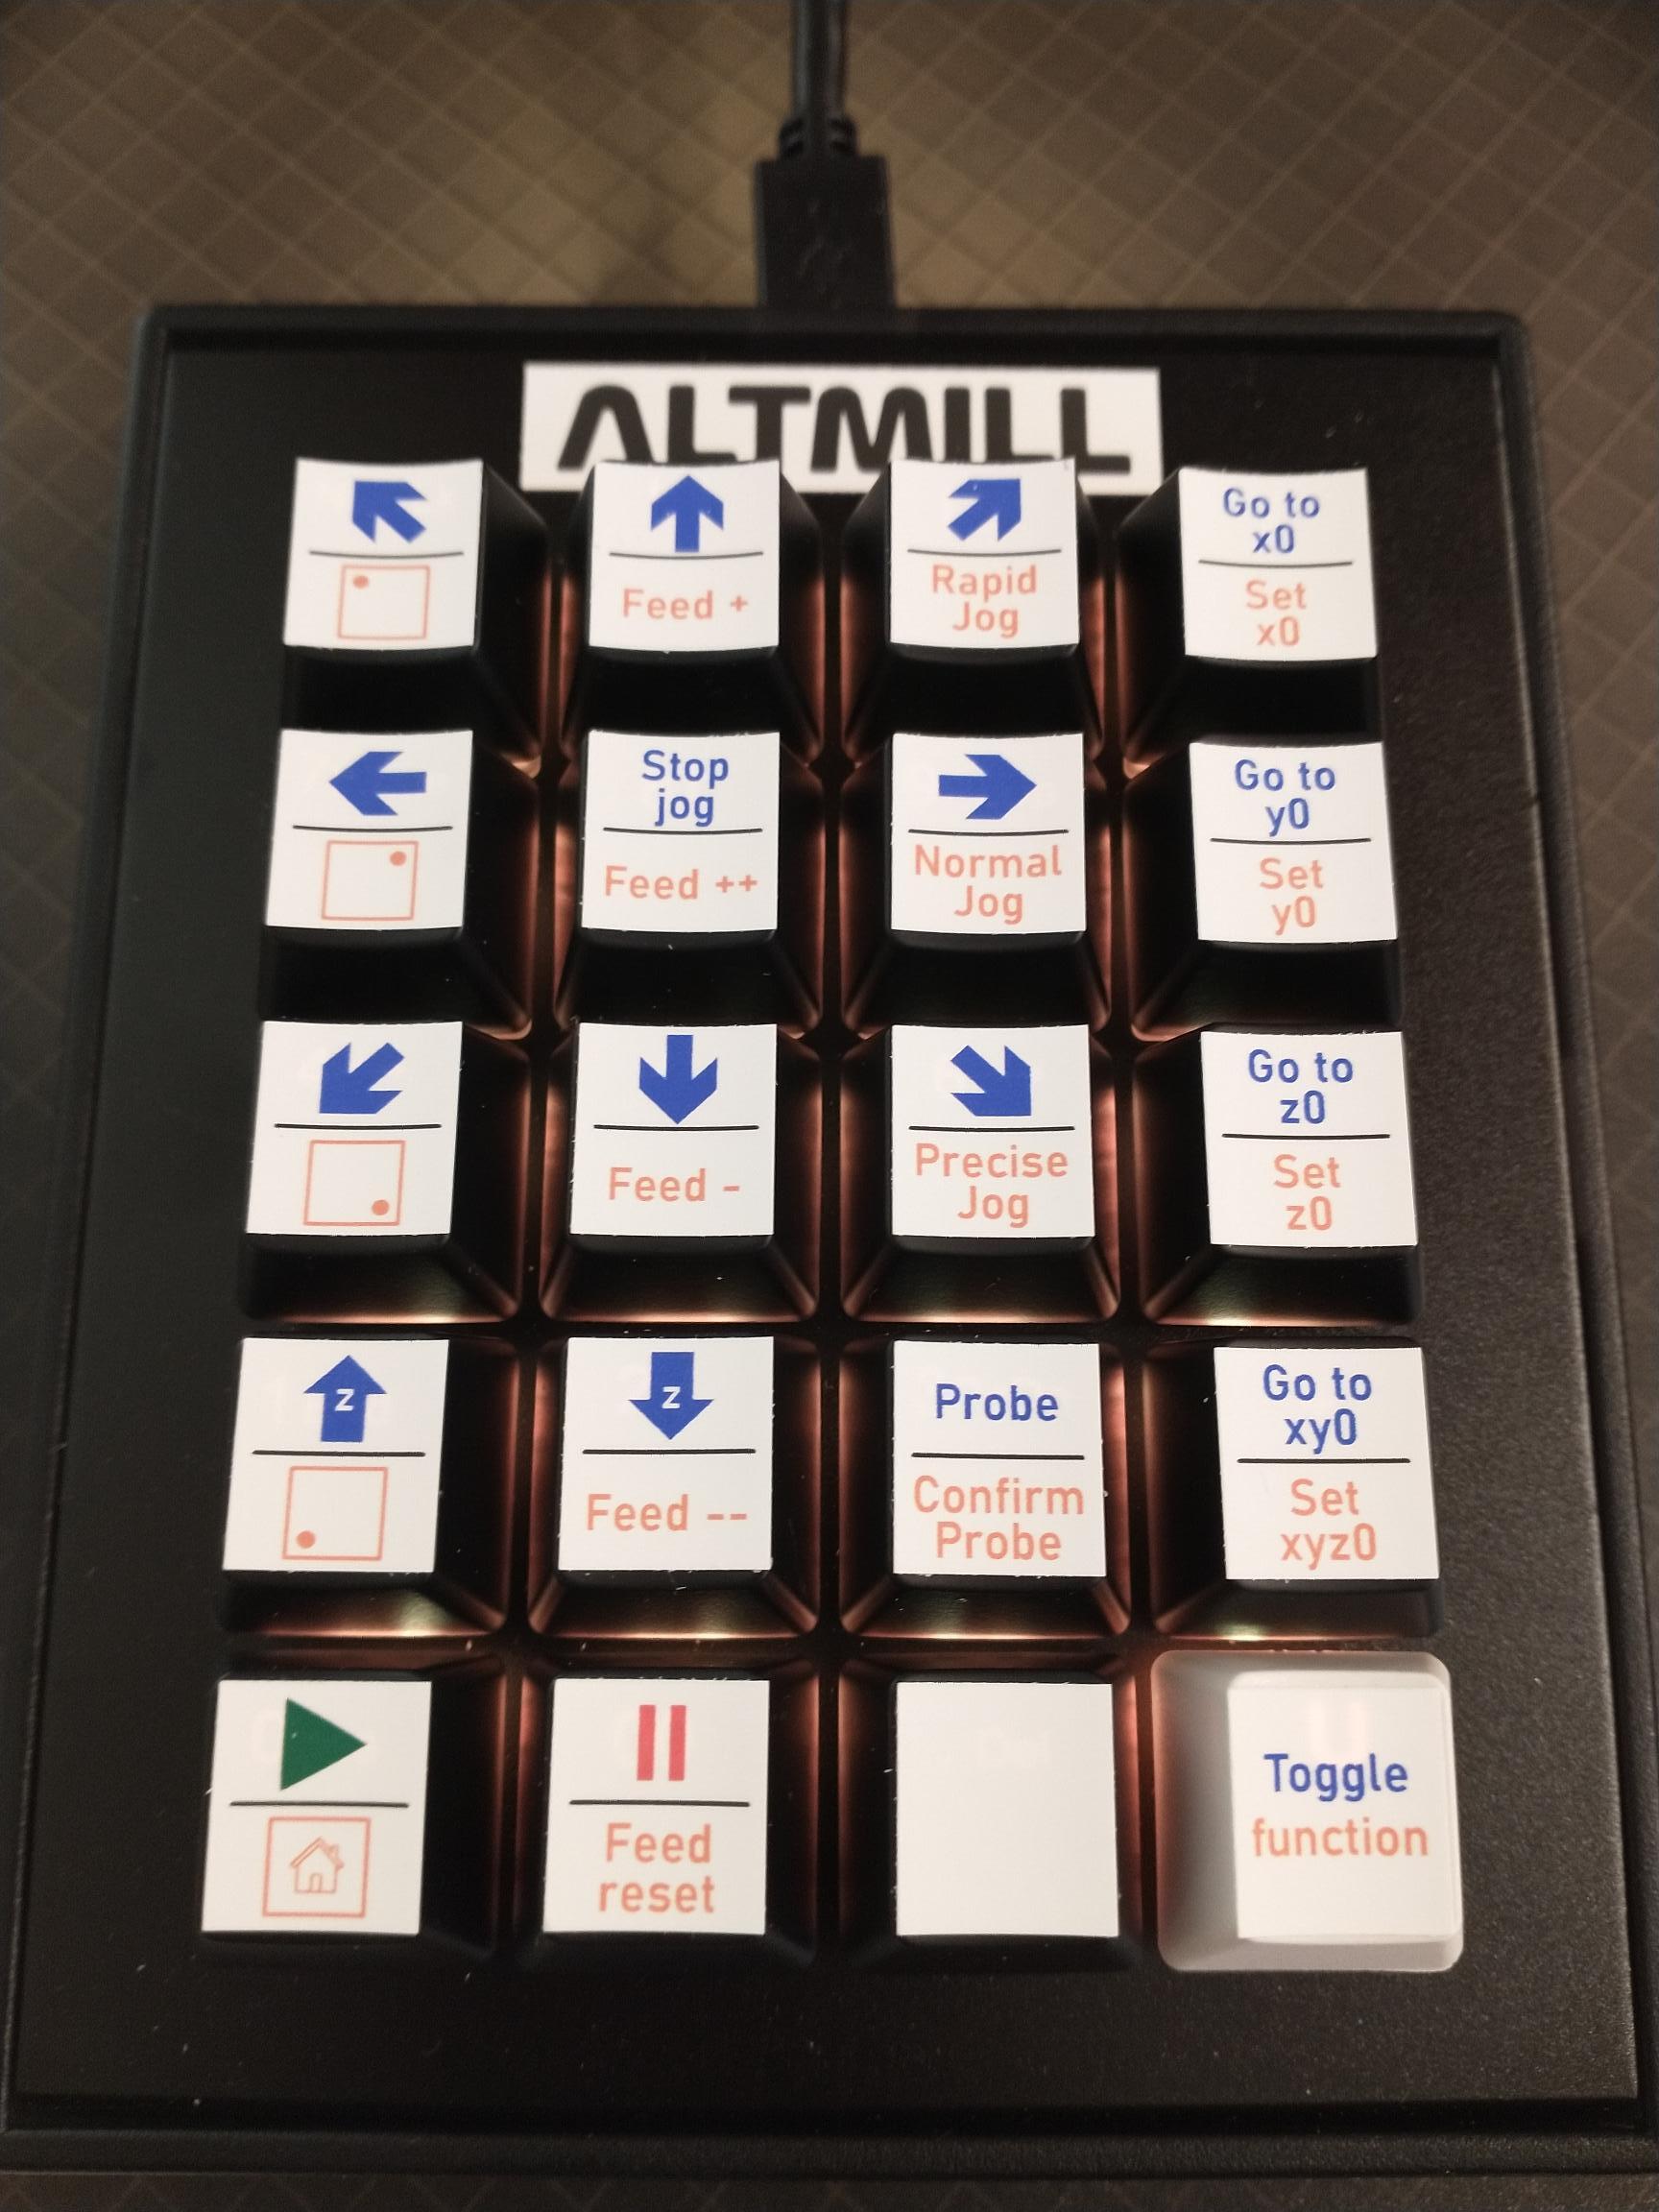
After a few design iterations, I was able to configure the keypad to have every action I wanted on a single layer. That gave me a total of 32 shortcuts using the 20 buttons. After sleeping on it more, I came up with a better layout using two actions per button for a total of 38 shortcuts.
I have two versions for the key labels. One with pictograms, one with text. I’m not sure which I prefer. Pictograms can be cute but sometimes text is better if you can fit it on the key.
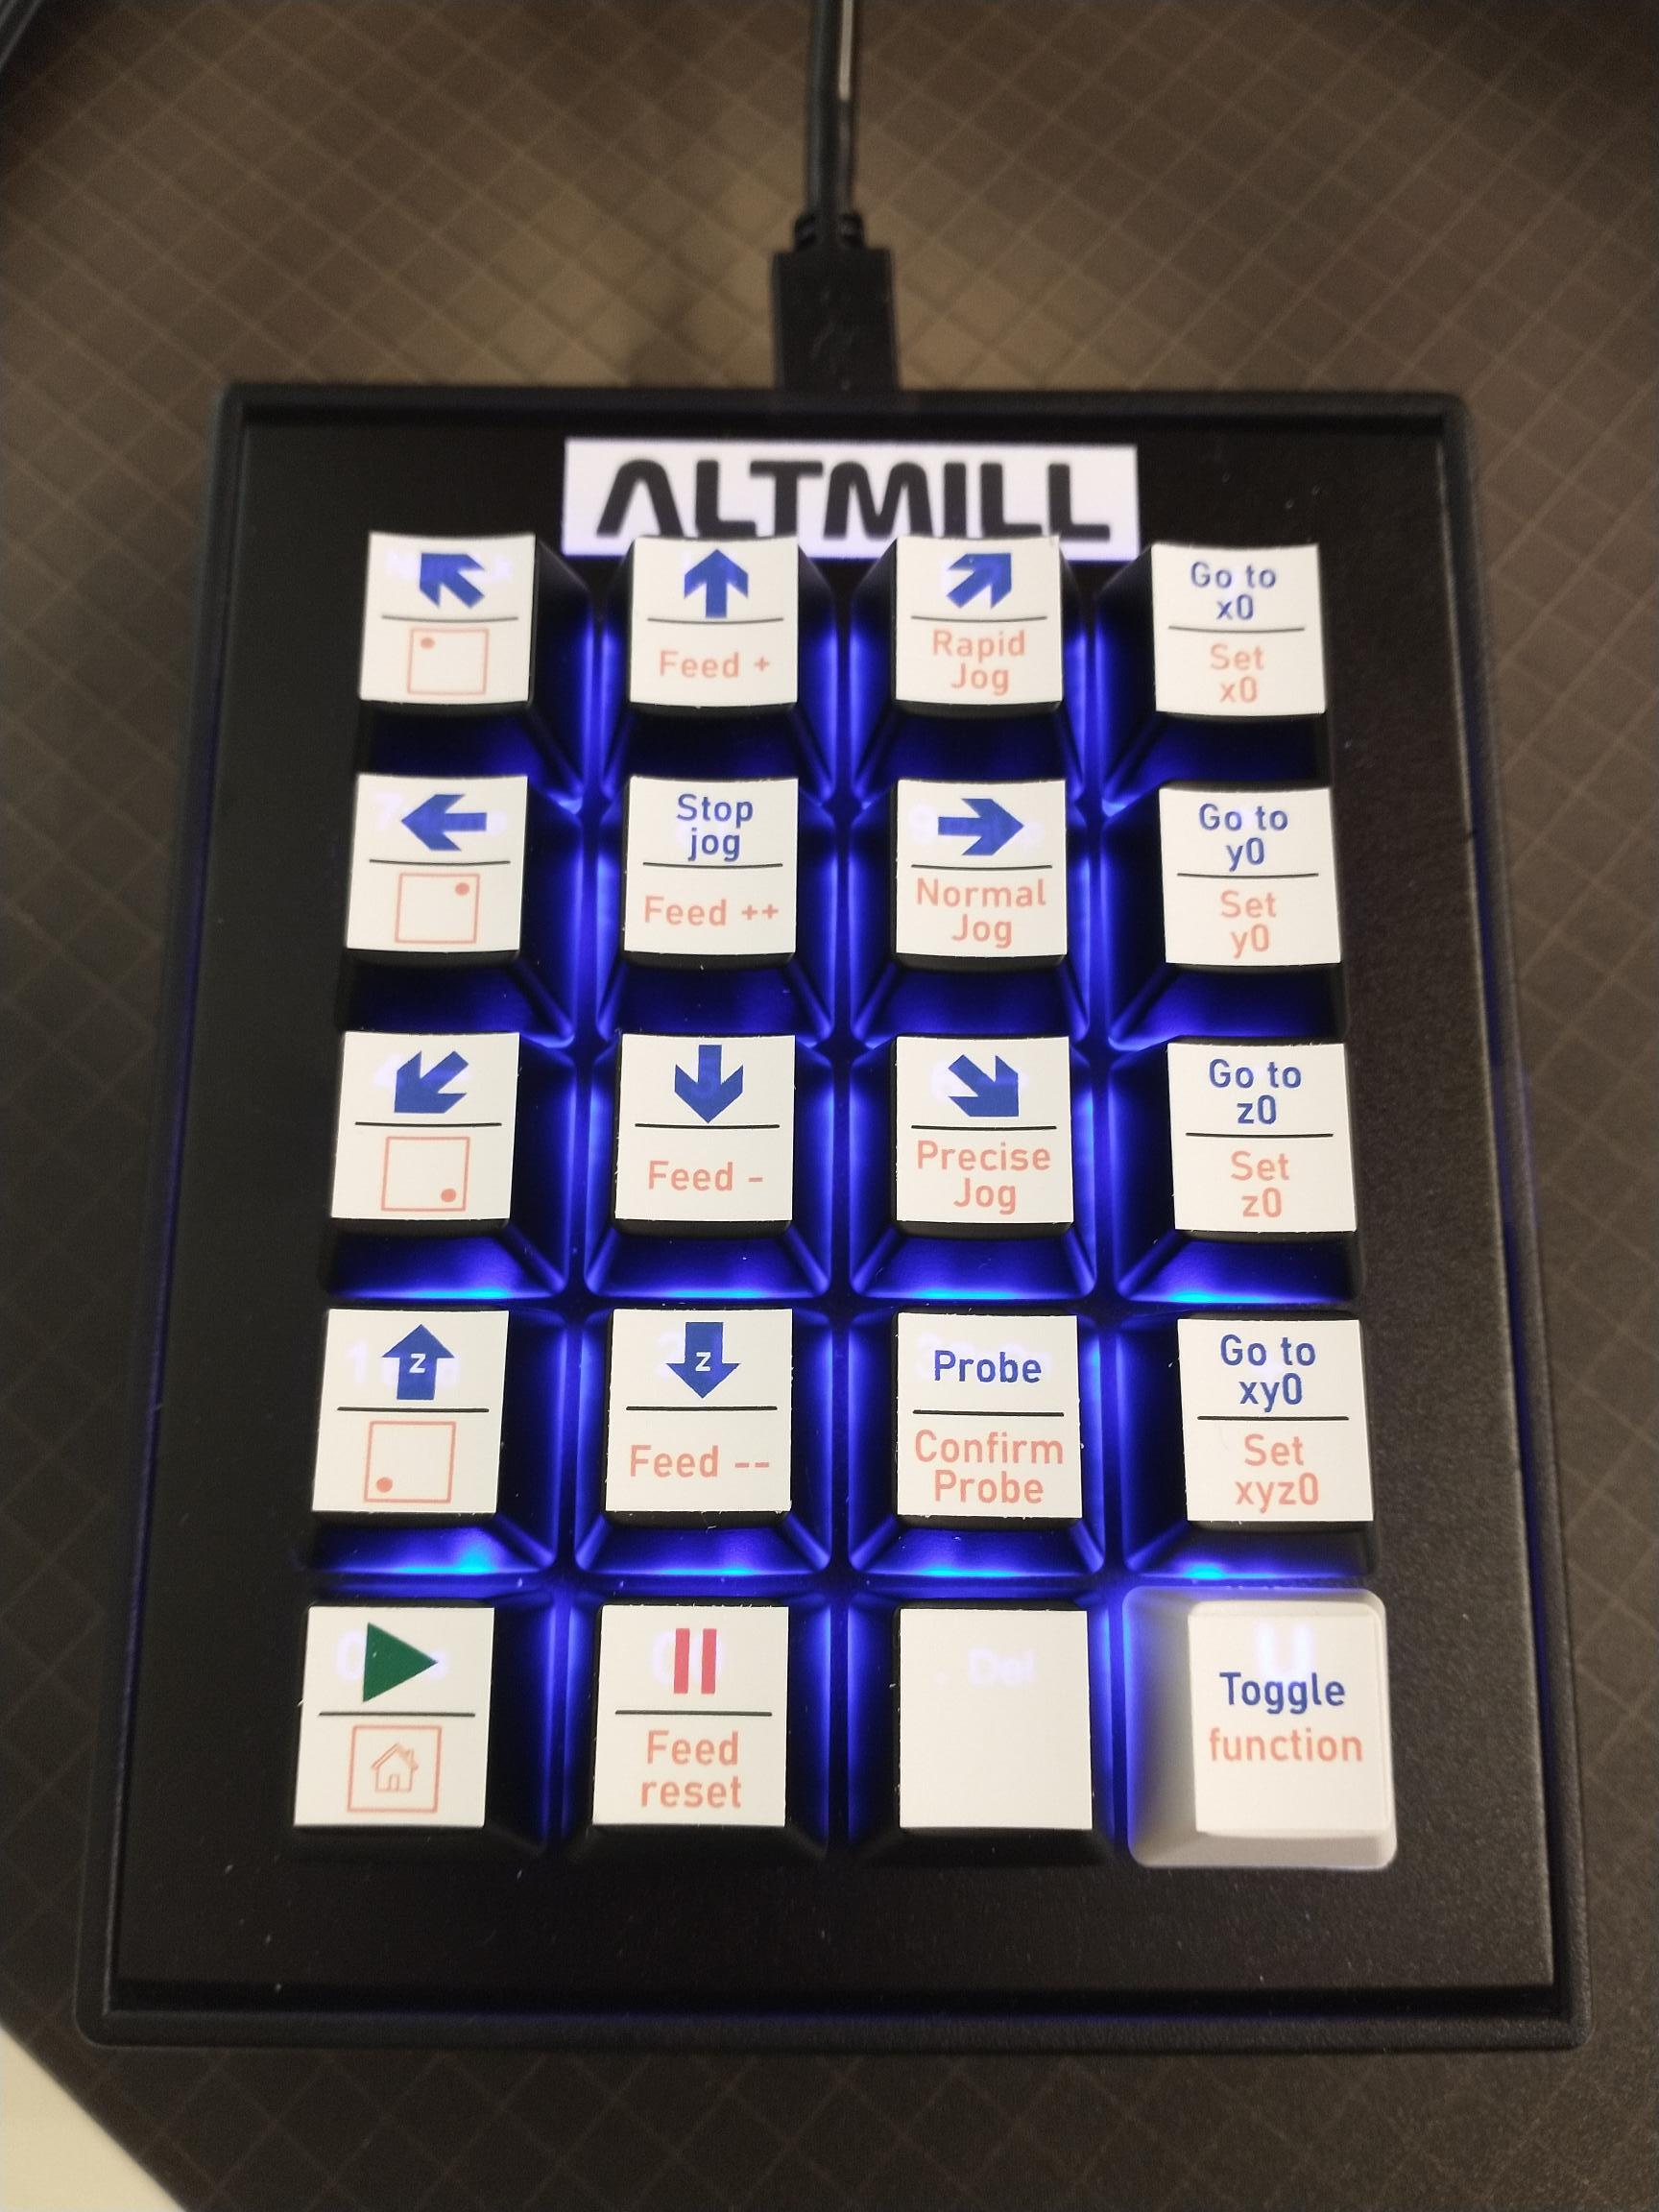
I programmed the keypad and then used it to enter the shortcuts in gSender. Seems to work but the real test will come when I actually have my Altmill, at which point I’ll figure out any additions or deletions to make. I have an unassigned button so I can get two more shortcuts.
Each button has two possible shortcuts. Simply use the toggle button to switch. The LED diodes change colour so you know if you’re on the blue or orange layer.
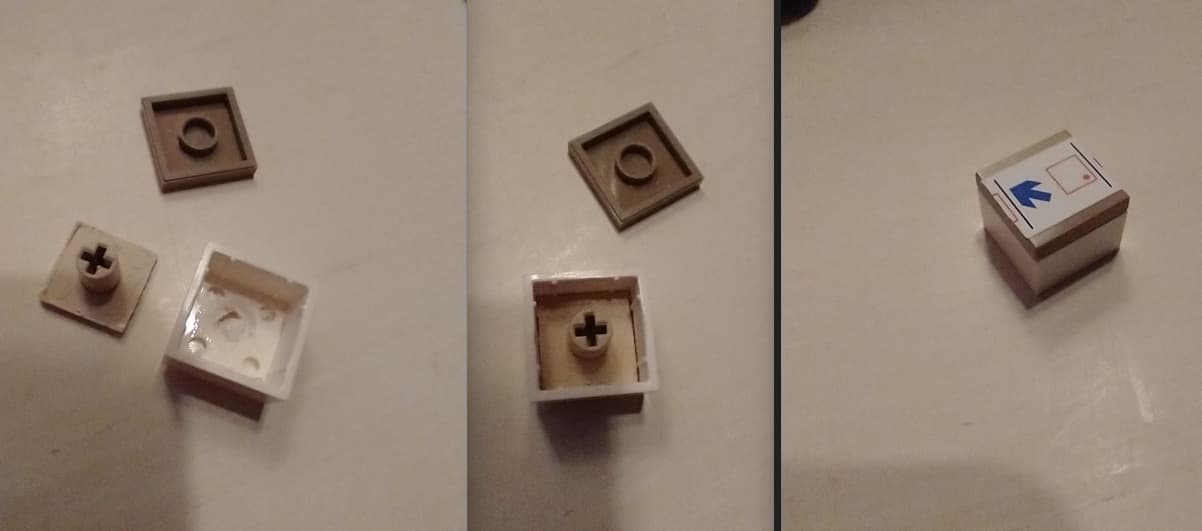
I had a few white keycaps so I used one for the toggle key. But it’s not the same shape as the others and it’s going to bother me to no end. So I’ll put the original back ![]()