@GregM Here are three pics, Greg.
There is not a lot to it.
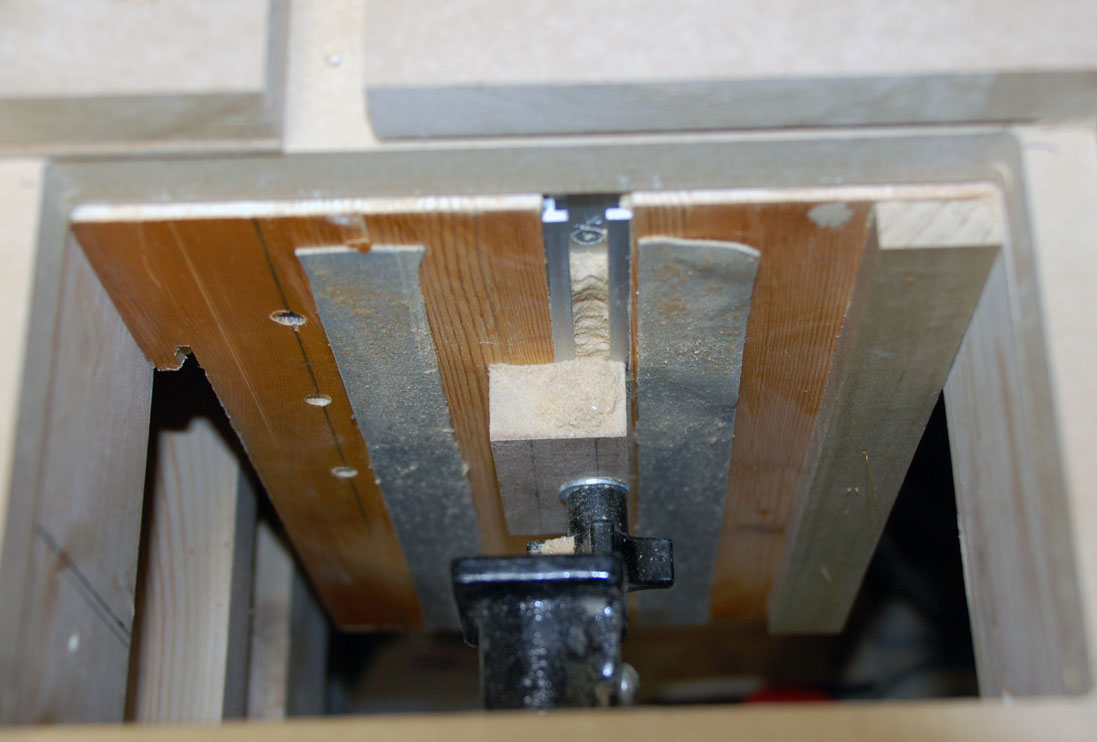
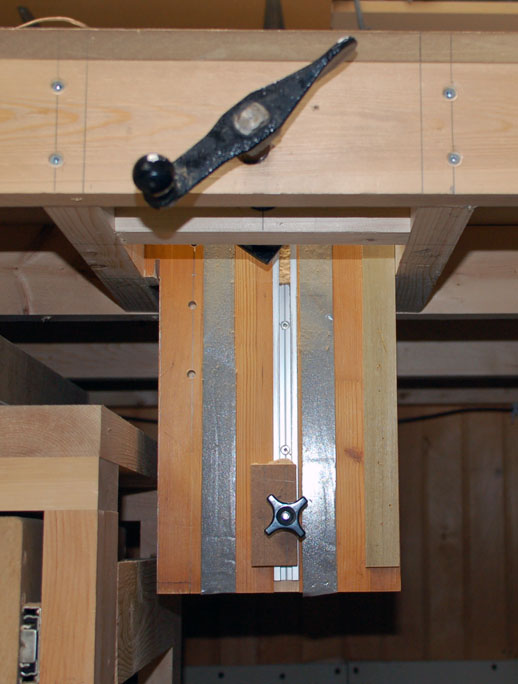
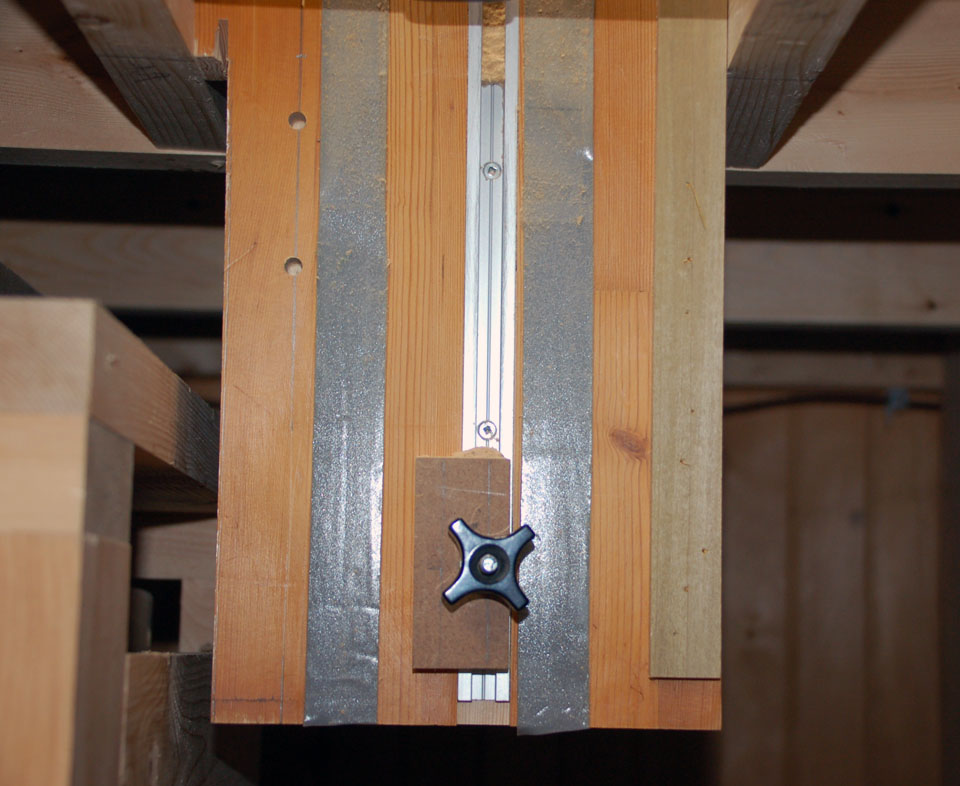
I chose to do this when I was replacing the slats of my spoil board. I first cut an opening in the table top using the Long Mill. That way, I was sure that it was square and parallel to the X and Y axes. Then made a 2 x 4 frame to frame the opening, screwing them to the front table member and the cross member already in place. I added a length of scrap pine that I had from an old table. Into that, I routed a dado and inserted a T track. Finally, I attached a vertical cleat to the right side of the pine. The cleat is perpendicular to the spoil board surface. I already had a small block with a knob on it that slides up and down the T track. Finally, I drilled the front table frame member and the 2 x 4 framing the opening and mounted a screw clamp that I had kicking around.
In use, I lower the sliding block so that the project material stands proud of the spoil board by a bit more than the depth of the cut. Gravity is not your friend so this keeps the project material from dropping while I clamp it in place. I position the project piece against the vertical cleat and tighten the clamp.
That’s it. It’s a pretty crude and simple set up, but it seems to work well. The only limitation is the depth of my table when it comes to the length of the project I can handle. The opening in the table is about 9" wide, so that is the max width that I can fit. That was an arbitrary width. If I ever start projects that are wider, I can simply cut the opening bigger.
One of the pics shows the setup from the top of the spoil board looking down. The other two are just different views of it from the front of the table.
I hope this helps.