Creating a topic to document my progress in building the AutoDustBoot for the Altmill, similar to what I did with my Onefinity. You can check it out here:
The main reason I created this dust boot is to achieve full automation with an ATC, such as the RapidChangeATC. Additionally, I’m not a fan of spindle-mounted dust boots because they create more pressure as the spindle cuts deeper.
Key Features:
Automatic retract and expand during job runs, which is crucial for avoiding collisions with the ATC.
Quick removal without requiring any tools.
Ability to save material height.
Swappable brushes with different length accommodate varying wasteboard heights.
@siganberg My comment was not a criticism. Quite the contrary. That said, I’m a hobbyist with a 30 x 30 Long Mill. (I’ve used a 4 x 8 Biesse with a tool changer, too.) A tool changer on my LM would be an unnecessary complication with my work context.
Like you, I hate dust. My shop is in my basement so dust collection is a must. I’ve designed a Z-independent dust hood that works for me and does not take away as much X travel as the Sienci models. It is crude, ugly and does the job. If I had your design and engineering skills, I’m sure that I could do better. Since I have neither, I’ll just live with what I have.
I know you didn’t mean anything bad, and thank you for the compliment!
For me, having an ATC was always a dream, but I never considered it seriously because of the complications with the hardware (compressor, pneumatic lines, ATC spindle, etc.) for a hobby-grade CNC. However, when I saw the implementation of the RapidChangeATC, it was so simple that all I needed was to find a place for the magazine—everything else is handled through the software configuration, with no need for extra hardware.
. Not sure how far away grbl-Hal or the Slb-ext control board are from configuring rapid change full ATC , seems from the videos I’ve seen it semi works through prompt command.
None the less , it’s better than wrenches as they say .
And the auto dust boot is missing across the board .
Interested in watching your progress .
It’s actually a fully functional ATC. In the prompt, I’m issuing M6 commands, which is the standard way of changing tools and the same command most CAM software generates in the G-code. The firmware (grblHAL with an NGC expression macro stored on the SD card) handles everything automatically. The the macro in gSender and the macro in the firmware used by RapidChangeATC are different.
In the video, I demonstrate a G-code program generated from Fusion 360 that runs a job using two tools.
Good Lord willing and the creek don’t rise, I’ll get an Altmill in December. I’ve been watching this RapidChange ATC since its inception. I’ll be following your lead on implementation; thanks for leading the way.
Incredible work Francis. Thanks for pushing these operations forward. Do you have any plans to sell or open source your auto dust boot? It looks great!
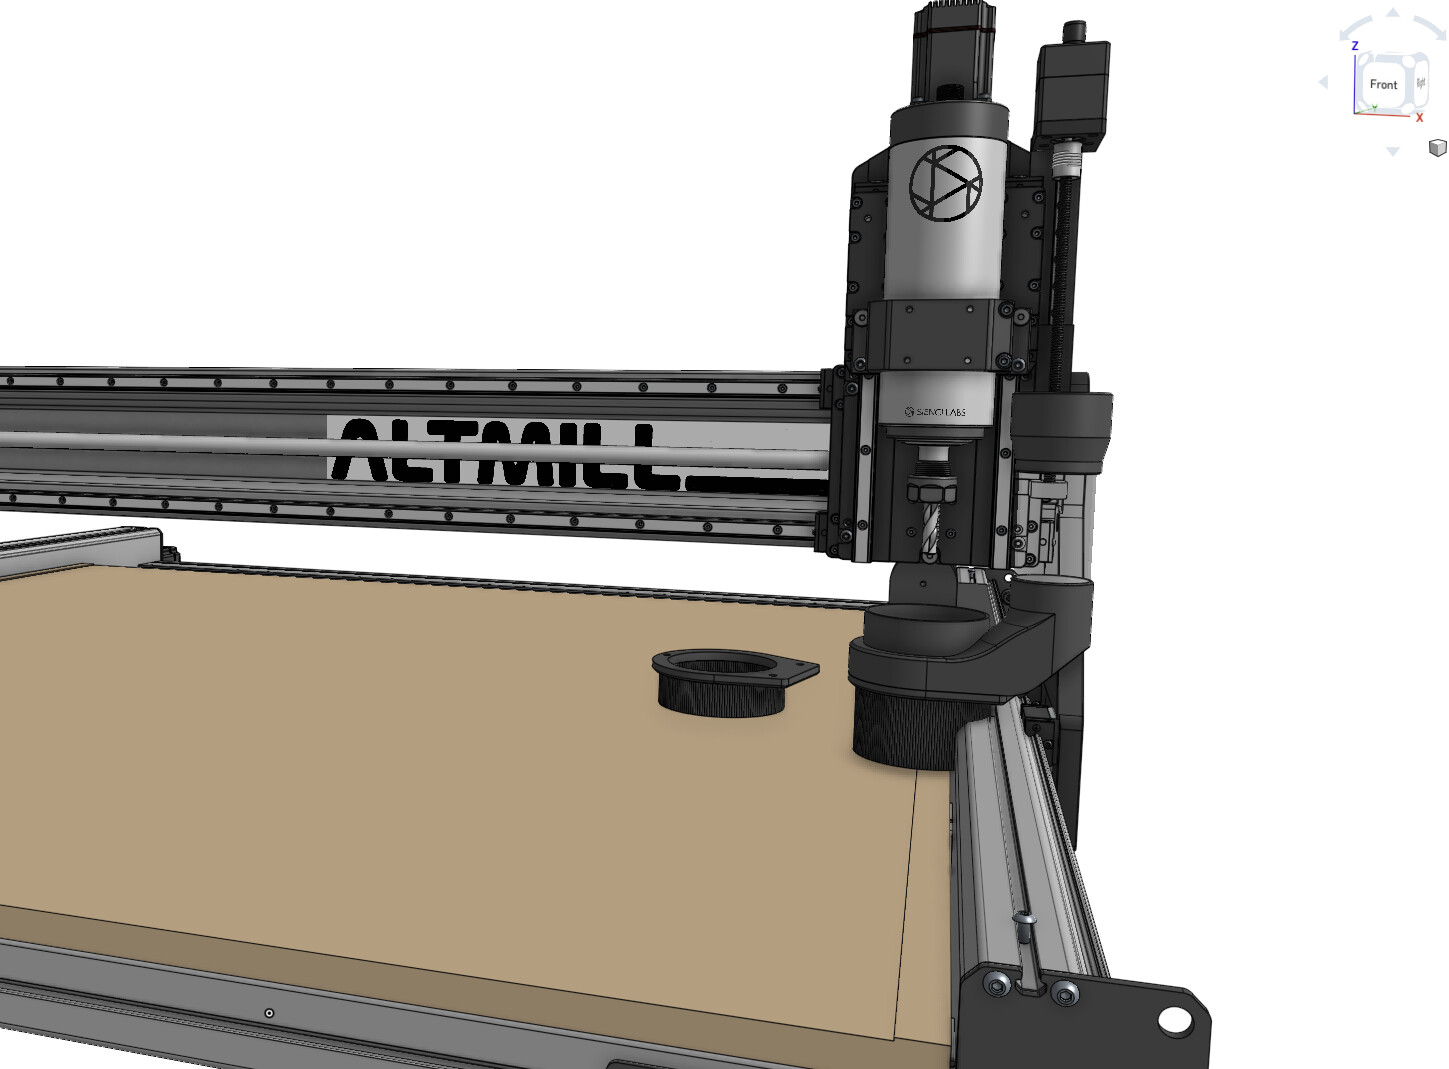
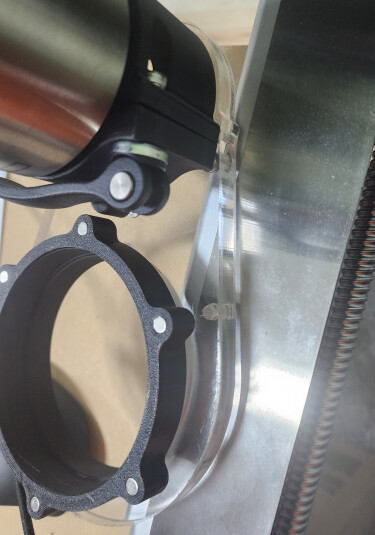
Although the acrylic tube looks cool, it will be hard to align it during assembly so I simplify the dust leg. Still can be remove without using any tools.
Francis, I see you mentioned a likely partnership with RTC Atc . At this time they have stated a partnership with Onefinity and that their ATC unit is only available through them. Perhaps I’m mistaken on this , it’s just what I’ve read . Assuming this is the case , I’m wondering how your dust boot will be marketed to the Altmill community if your plans are to partner with Rapid change . Perhaps I’m wrong on that as well ?
Also , do you have an idea of where abouts consumer pricing will fall ?
Love the unit by the way , great to have followed your progress with it .
My understanding of the partnership between 1F and RC ATC is that it specifically involves a model created for 1F, called the Easy ATC. It has a different form factor compared to the regular RC ATC. I actually have one to test with the AutoDustBoot I designed for 1F. Compared to the regular magazine, it is quite large. I believe the reason for the different form factor is that Onefinity has its own dust boot that attaches to the spindle. Personally, I’m not a fan of spindle-mounted dust boots.
The regular magazine, on the other hand, is available for anyone to purchase and use with their CNC, regardless of the brand or model. In my opinion, I prefer the regular magazine because it is more compact and has a cleaner design.
My involvement in the partnership with RC ATC is limited because I don’t have the time or resources to set up a store or provide support. Additionally, my product only makes sense when used with their ATC.
It’s too early to say for the pricing, sorry. Once I have final design and break down of part price. I will post it here.
Instead of directly driving the dust boot, would it be possible to design this in such a way that the dust boot is spring-biased downwards against a hardstop, which itself is driven up and down by the motor?
The goal would be for accidental Z-plunges to just compress the spring and cause the boot to slide upwards instead of breaking something.
I think it will add more complexity. I tried to make it as simple as possible to ensure it’s easy to produce. I did consider making it completely foolproof, but there’s only so much I can do.
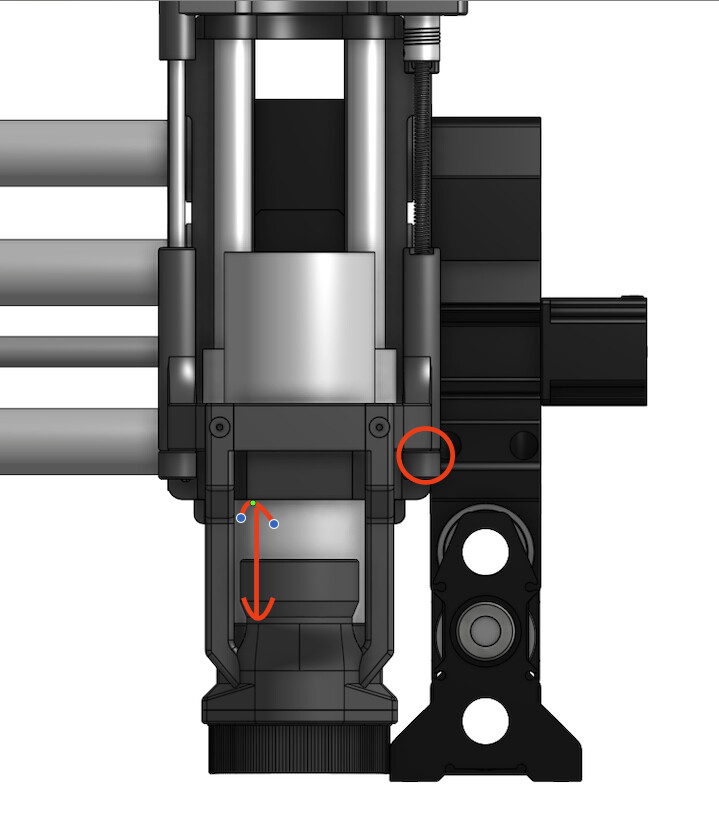
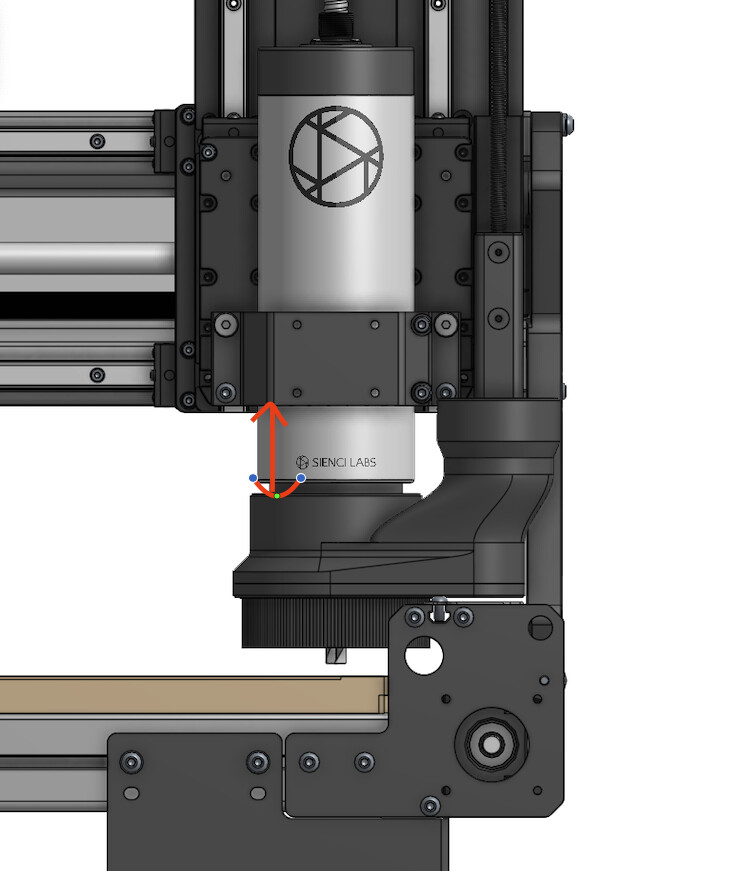
An alternative solution, which might be easier, is to cut the idle power to the stepper motor when it’s not moving. In this case, if the user forgets to add the M8 command in their g-code to expand the dust boot and allow the Z-gantry to plunge, the stepper will simply give way and follow the Z-axis until it reaches the travel limit.
By the way, I designed the bottom travel limit to be much lower than your Z-gantry should ever travel. If this happens, you’ll face more serious damage to the CNC bed rather than the dust boot— which is much easier and quicker to replace.
Very impressive. I have the AltMill with the water cooled 2.2 from PwnCNC. Will this work with it as well? I’m very new to the CNC world and finding it a bit of a LONG uphill learning curve. I ordered the boot kit from PwnCNC and just discovered it hits the Y axis
Yes. Once I tested it on my own Alt Mill and adjusted the final design, I will start selling it on my site and probably create a tutorial video for both ATC and the AutoDustBoot.