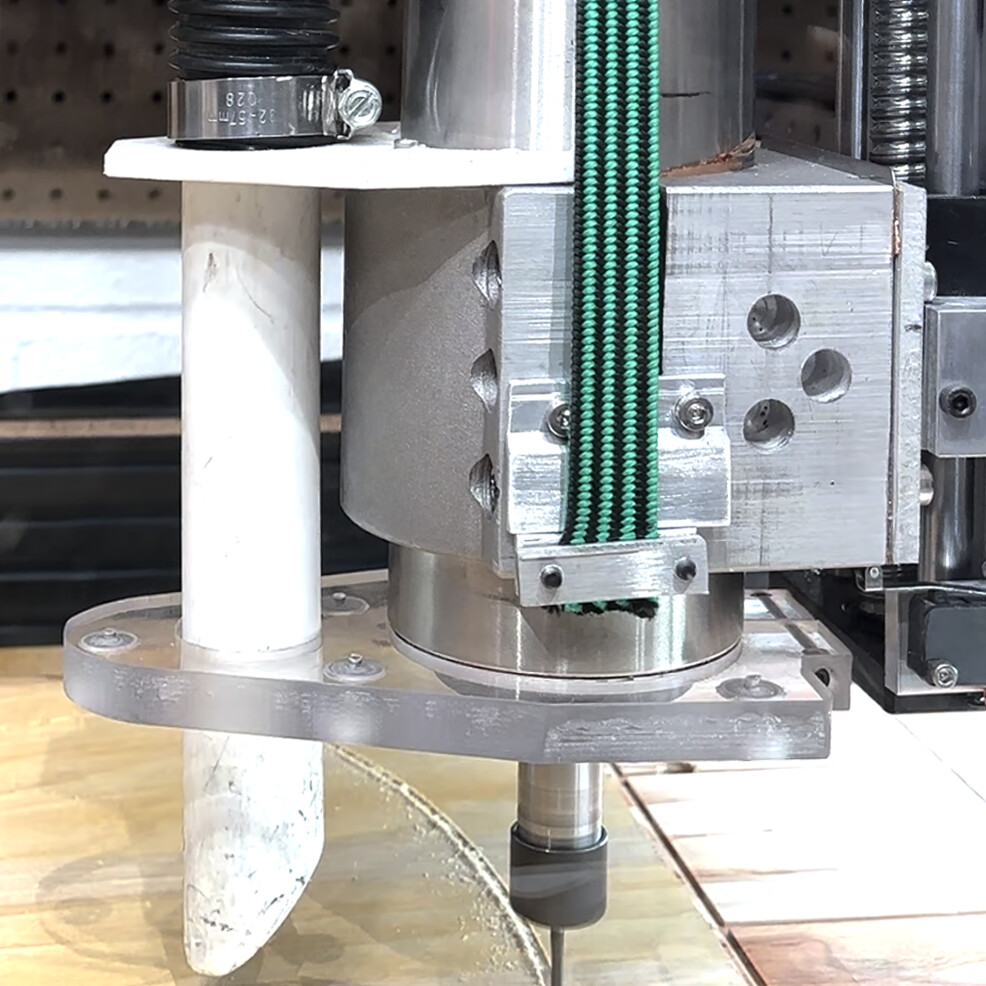
A few months ago I installed a 2.2kw water cooled spindle on my EXT 30x48 MK1. At the same time I also upgraded to the new SLB. Everything is working fine except when I am doing large 3D carves. The z-axis drops ever so slightly, I am assuming because of the additional weight. On a small carve it is not noticeable but on a 25" x 12" carve I lose 1/4" to 3/8" in height by the end. Someone suggested in the Sienci Labs Facebook group to add spring on the z-axis to solve the problem. That helped but still have drops in z-height.
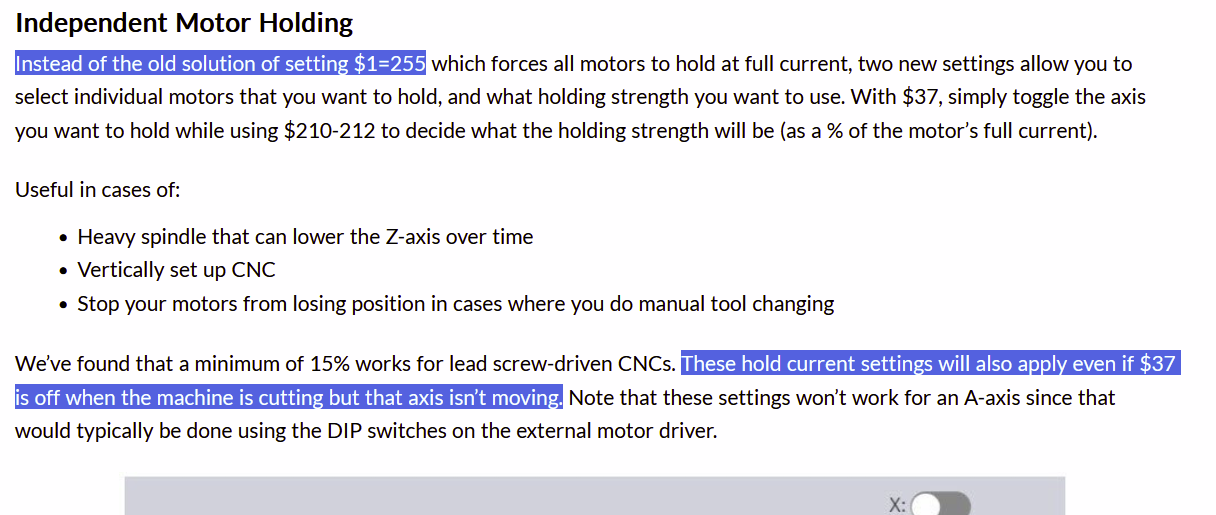
As suggested in other threads I have set $1=255 in the gSender Firmware. I am running the latest version of gSender, 1.4.9.
Can the SLB drive a stronger stepper motor like the links below? The first link seems to have almost identical specs but the Holding Torque is ~30% larger than the steppers supplied by Sienci Labs. The second link has more than twice the Holding Torque but seems to require more currant. Can the TMC2660C drivers provide enough currant for these larger stepper motors without affecting anything else?
Thank you for the suggestion @Spamming_Eddie, but based on the description in $210 - $212 these settings do not apply when $1 is set to 255 since it applies the torque to all motors
These settings are instead of the old solution.
They might prevent axis movement when the axis does not move but the machine is working.
Atleast thats what I get from the explanation in the document. I have no big beast spindel on my mill but if I had, I would play with them improved settings that are specific for, gasp, heavy spindles that can lower the z-axis over time, before grabbing a wrench.
Yes. Currently I’m running a larger NEMA 23 on my X axis 2.8Nm, 3.0A and a NEMA 23 on my Z axis 3.0Nm, 4.0A. The color of the wires will not likely match the wire colors of the NEMA 23 motors that come standard with the Sienci CNC. So, be sure to match up and connect your A+ A-, B+ B- correctly.
@aarseneault I’m not a stepper motor expert, but my understanding is that if the motor is better set up with its windings or coil pairings it’s possible to get more torque out of the same amount of current/voltage that the drivers can output. I can’t make any guarantees with the links you’ve listed, but it should be possible. There have been others asking the question of what range motors the SLB can support and that’s also a difficult question to be able to fully answer so I’m still working to see if I can give more insight there too.
In your particular case though, I’d agree with @Spamming_Eddie in checking out $37 and $212 for trying to keep your Z-axis in place. If that works, then you don’t have to bother getting new hardware and doing more assembly/disassembly but totally your call
Should I expect something different when applying $37 (z-axis) and $212 (100%) compared to $1 (255) other than the max force being applied to all motors rather than just the z-axis?
My understanding is that it has the same effect but offers more granular control to apply different settings for each motor rather than the same for all motors. If that is true, setting $37 and $212 will not change anything since I already have $1=255 and am still getting a drop in z-height on 3D carves.
I will try it out when I have some downtime to see if it makes a difference.
You’re correct that it has a similar effect, though I actually haven’t tried seeing what the holding current is of $1=255 compared to the current set by $212 through $37 so it’s still possible that if it’s dependant then increasing $212 and activating it through $37 might still be stronger
I am no expert. I built my own CNC, and am using the SLB as my current controller. I began with a pretty weighty 1.5KW water cooled spindle. I had also built the machine with 4.2A Nema 23 steppers with a 36v power supply with an Arduino-based controller using external Stepper drivers. So, there should have been plenty of torque to hold the Z axis up. This wasn’t the case though. I tried several things to combat gravity, but ultimately, I added a mechanical fix. It’s not elegant. It’s basically a bungee support on both sides of the Z carriage. It’s not perfect, but it keeps things within a tolerable range – for me. It assists the stepper when lifting the spindle. I was concerned switching to the SLB because the onboard drivers are not a high current as the external drivers I have been using – so probably not as much torque. A good thing about the bungee system is I can retention it if I find steps are missing. I know some industrial machines have electromagnetic, and spring systems. This is my cheap “cowboy” engineering solution.
UPDATE: After testing the suggested options in the firmware with no noticeable results, I changed my stepper motor to a higher torque Nema23 motor (425oz-in / 2.8N.m). Well that had no noticeable effect either. I was still losing steps on the Z axis at a very slow rate. Note that this is only noticeable on larger 3D carves.
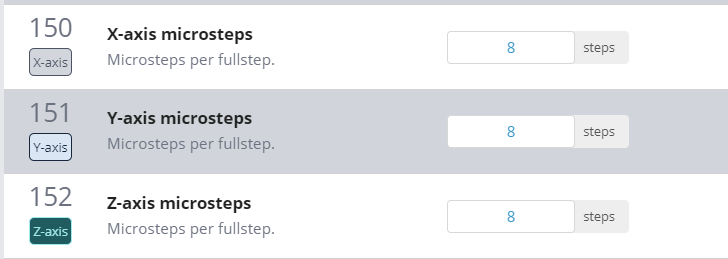
I read an article on the Community Form where @chrismakesstuff mentioned that with the launch of the SLB they moved from 8 micro steps to 32 micro steps and that there should be no effect on performance. In a last ditch effort I changed my micro stepping back to 8 and tested the same 3D carve as before. Guess what? No more lost steps. The carve remained level to the end (well i stopped at 65% - it was getting late for this old man ).
I went back to higher noise like I had on the original Longboard but I can live with that. The accuracy seems to be the same as before, although this was a simple carve so will have to eventually try a more intricate model.
For now I am leaving as is. I may eventually try micro stepping at 16 but that will be a future experiment.
Huh, very odd and interesting to know. I’ve been doing some other motor testing recently and this makes me want to add in some other testing around the microstepping. That must’ve been a journey for you @aarseneault but I hope that this is now permanent good news that will get you wrking better with your setup. Hopefully once I’ve completed more motor testing I’ll have a new firmware install to share to help boost performance
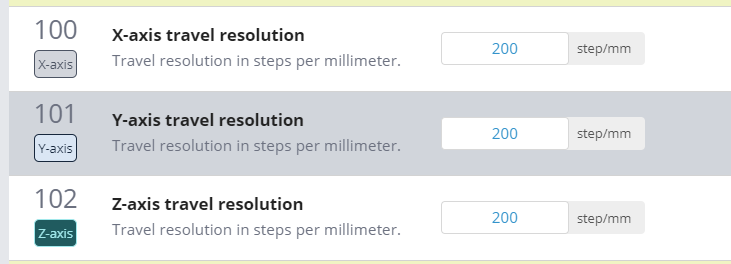
Regarding theoretical accuracy, it should come out to:
Smallest movement = mm/step
= (microstepping x gearing ratio from motor to lead screw  x  lead screw pitch  x  # of starts) / steps/rev
= (1/32 x 1 x 2 x 4) / 200
= 0.00125mm (for 32nd microstepping)
= 0.005mm (for 8th microstepping)
As expected, the accuracy is increased by x4 when using 32nd microstepping because it’s x4 more steps than 8th. All this being said though, typical Hobby CNCs will have deflection of at least around ±0.01mm so a positional accuracy of 0.005mm shouldn’t hurt the overall accuracy of the machine too much. As you also noted, 16th microstepping could be tried to double up from 8th