Glad to hear that you have gotten comfortable with using the machine itself. Yes optimizing your process and feed rates/cut times is a challenge that every CNC user goes through, experienced or newbie.
Good to see youâve asked the community for their suggestions as well! I also earned so much just through reading what others have suggested here.
I have an unlimited supply of rigid insulation in varying thicknesses through work so at some point Iâm going to have to try it out. Free product is always a good thing lol
This one was for a couple who dress up like Mr. and Mrs. Clause every year. I cut this out of a piece of spalted maple and the inlay was walnut. I finished it up with mineral oil. I forgot to take a picture of the back but it has their family monogram burned on the back. I used a 1/2 90degree v-bit to do the inlay and 1/4" end mill to do the cut out. The design came off of Etsy.
I have been doing a multitude of LED lights using a 90 degree diamond drag bit. The bases come from Amazon. Most files come from Etsy and then I modify them as needed. These have been fun to make for friends and family. These are just a few I have done this month.
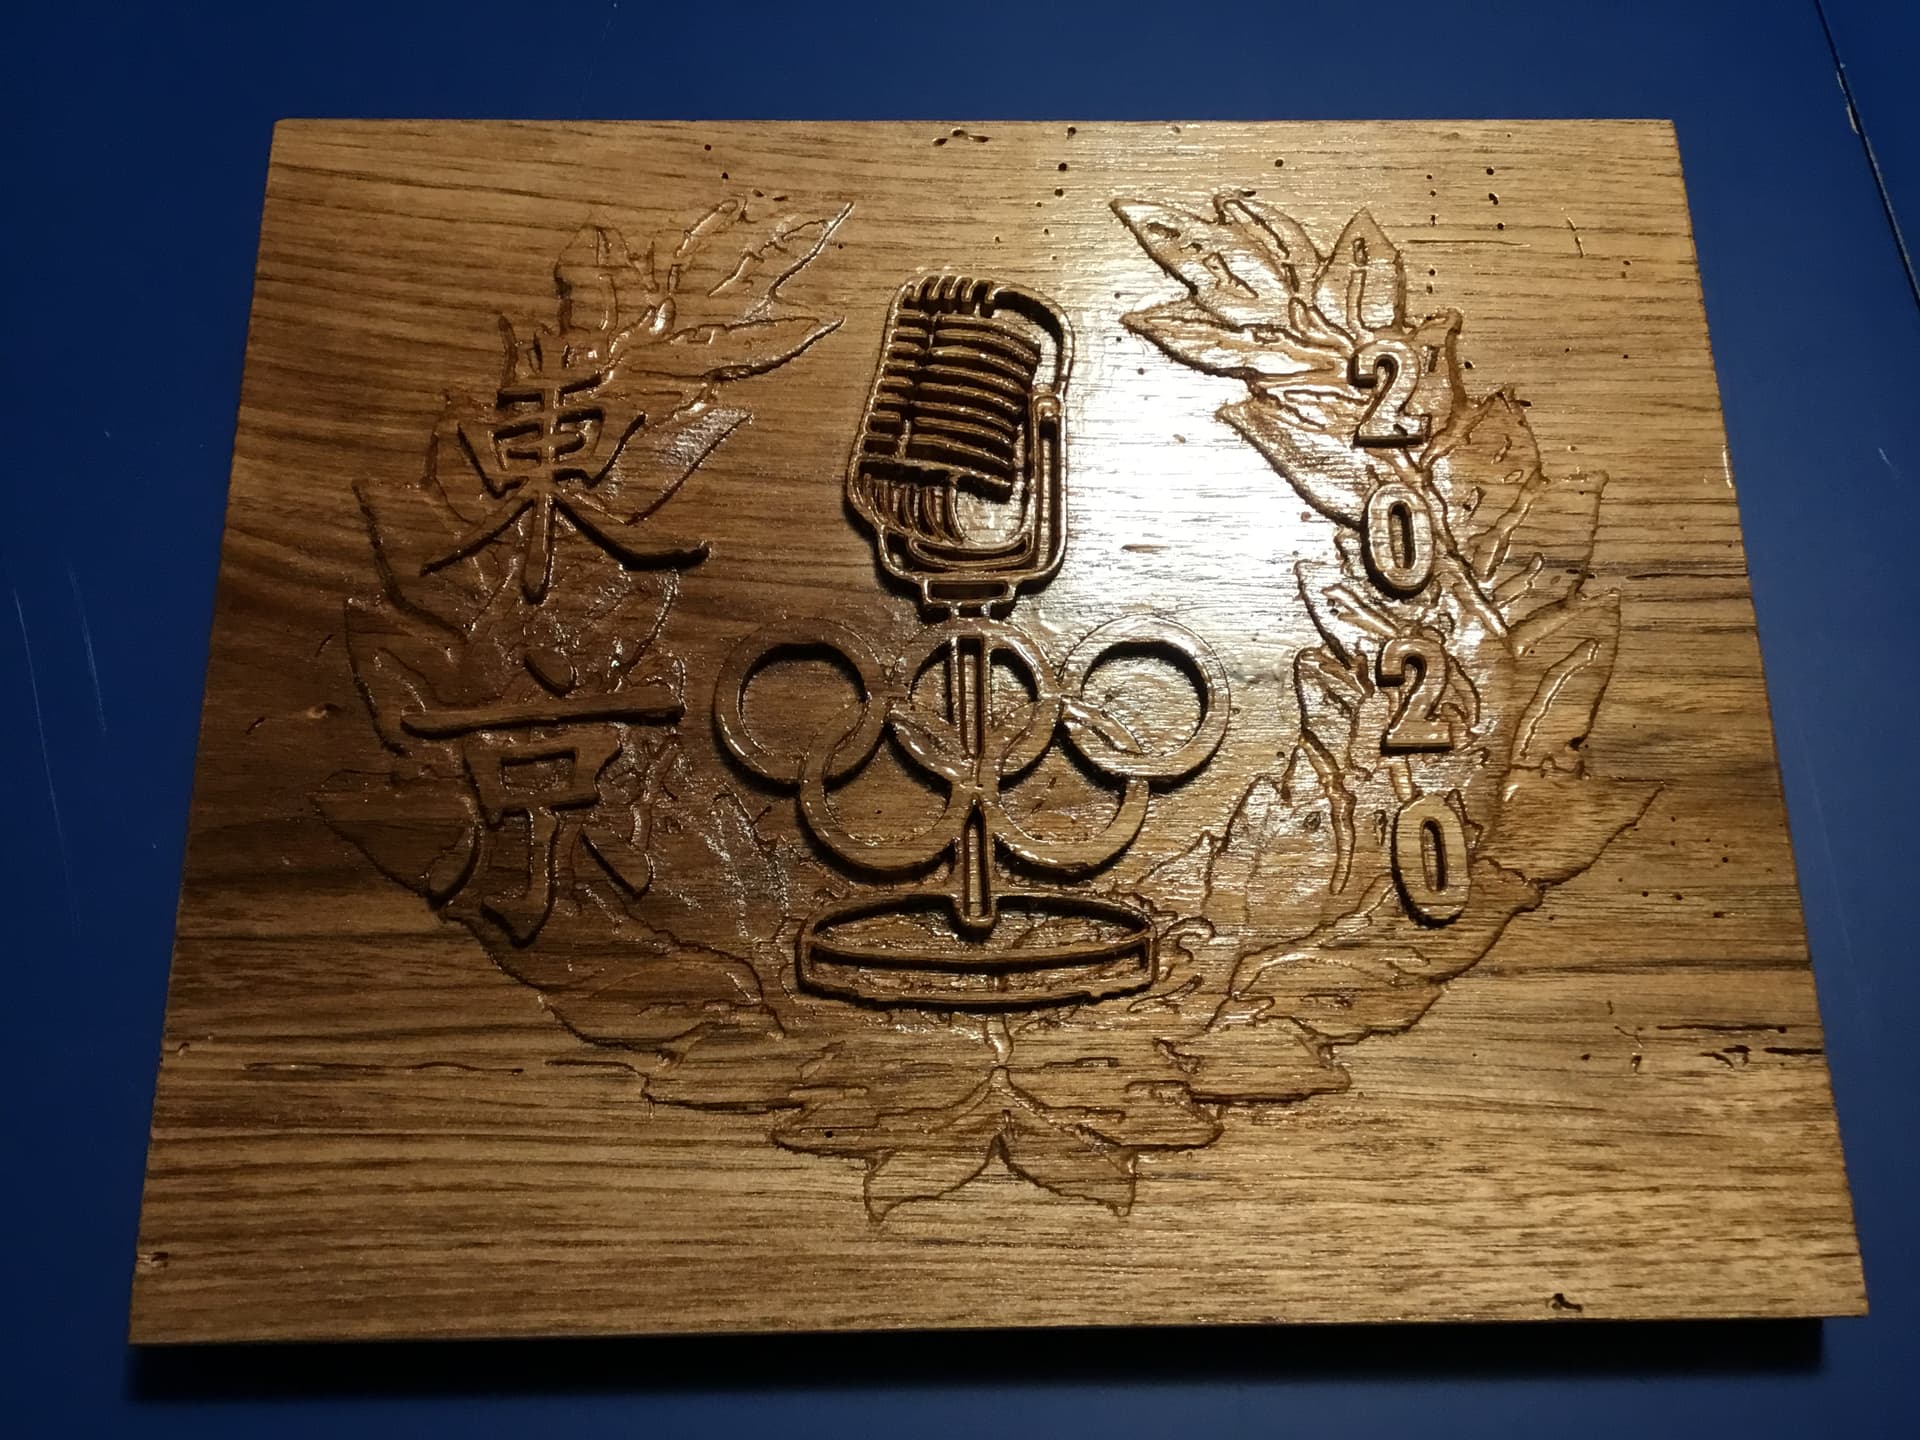
Christmas gift for my niece. She was asked to be an announcer at the Tokyo Olympics this summer.
Carved in an old weathered piece of butternut with my 30 x 30 Longmill.
Used Vcarve Pro software.
Tools included 1/4 and 1/8 inch EM and 1/4 inch TBN (all from Sienci).
2 coats of clear coat.
Process and Lessons Learned:
Created a .stl file using a few .svg files in Blender. I used an old microphone, Olympic circles, 2020 and the Japanese letters for Tokyo to create a file which I brought into Vcarve and combined with a wreath from the software. I had one small challenge as I used a few end mills which needed to be zero based but after my roughing toolpass I lost the top of my workpiece and had to calculate each tool change using the high point of the model.
SVG I created to make .stl file
Sometimes it is advisable to use the bottom of the workpiece, i.e. the spoilboard, as reference for z-height. As side effect, this guarantees that the carved object results with the right thickness and wont depend on the measurement of the uncarved workpiece.
@JHahn@leafs4ever Jannikâs advice is good. Another idea is, that when you mill the material for your project, keep an offcut. Place that on your spoilboard separate from the project piece and use it for your Z0 location. As an aside, and from failed experience, I would remind you to make sure that, if you are going to set Z0 in gSender on the spoilboard, you set it on the spoilboard or the bottom of the material in your CAM software.
Some more candle holders⊠a great Christmas gift! These were cut using the LM in two passes - one to rough and then a finishing pass. Two of the holders in the image show the output from the finishing pass from the LM⊠youâll note that there is still quite a bit of sanding that needs to happen. All of these are still âunfinishedâ but will get a coat of Rubio. The ones in the image are in White Oak and Ambrosia (Wormy) Maple⊠I have some Black Walnut and Ash that I will also be using.
Thanks. Yes, its my design. This is the final version I landed on after 3D printing a few that didnât quite have the proportions I was looking for. I did the 3D model in SketchUp and used CAMLab to generate the g-code.
One of our members Dany (@djomphe) shared his submission to me through my inbox, as he seemed to have trouble submitting it here, so I am reposting it on his behalf:
Hello everybody,
i am from magdalen Island, quebec and i love my longmillâŠ
Here is a gift souvenir for my mom. My dad died in 2019 and i decided to engrave him for a lifetime souvenir. i took a picture and i convert it in vector file in gimp and inkscape to make the path in aspire. it took me about 2 hours to engrave but after having spent 4-5 hours to details the path. If i would not have done that, it would have taken more than 8 hours, i used a 15 degres v bit 1/8 to have all the details. i stained the engraving and i sanded the plate to be able to see the wood grain. You will understand that i can not share the file for that. Hope you will appreciate. Thanks for sharing all your nice work.