Christmas Contest 2021

Christmas gift for my niece. She was asked to be an announcer at the Tokyo Olympics this summer.

Carved in an old weathered piece of butternut with my 30 x 30 Longmill.
Used Vcarve Pro software.
Tools included 1/4 and 1/8 inch EM and 1/4 inch TBN (all from Sienci).
2 coats of clear coat.

Process and Lessons Learned:
Created a .stl file using a few .svg files in Blender. I used an old microphone, Olympic circles, 2020 and the Japanese letters for Tokyo to create a file which I brought into Vcarve and combined with a wreath from the software. I had one small challenge as I used a few end mills which needed to be zero based but after my roughing toolpass I lost the top of my workpiece and had to calculate each tool change using the high point of the model.
SVG I created to make .stl file
Olympic Mic 2020

4 Likes

@leafs4ever Welcome back, Jim. Iā€™m sure that your niece will love it. :grinning:

Sometimes it is advisable to use the bottom of the workpiece, i.e. the spoilboard, as reference for z-height. As side effect, this guarantees that the carved object results with the right thickness and wont depend on the measurement of the uncarved workpiece.

2 Likes

Thanks, that is a great idea. I will definitely do that next time.

2 Likes

Thank you, I have been on the fb forum but I do like this one. I find it more personable. Have a great day.

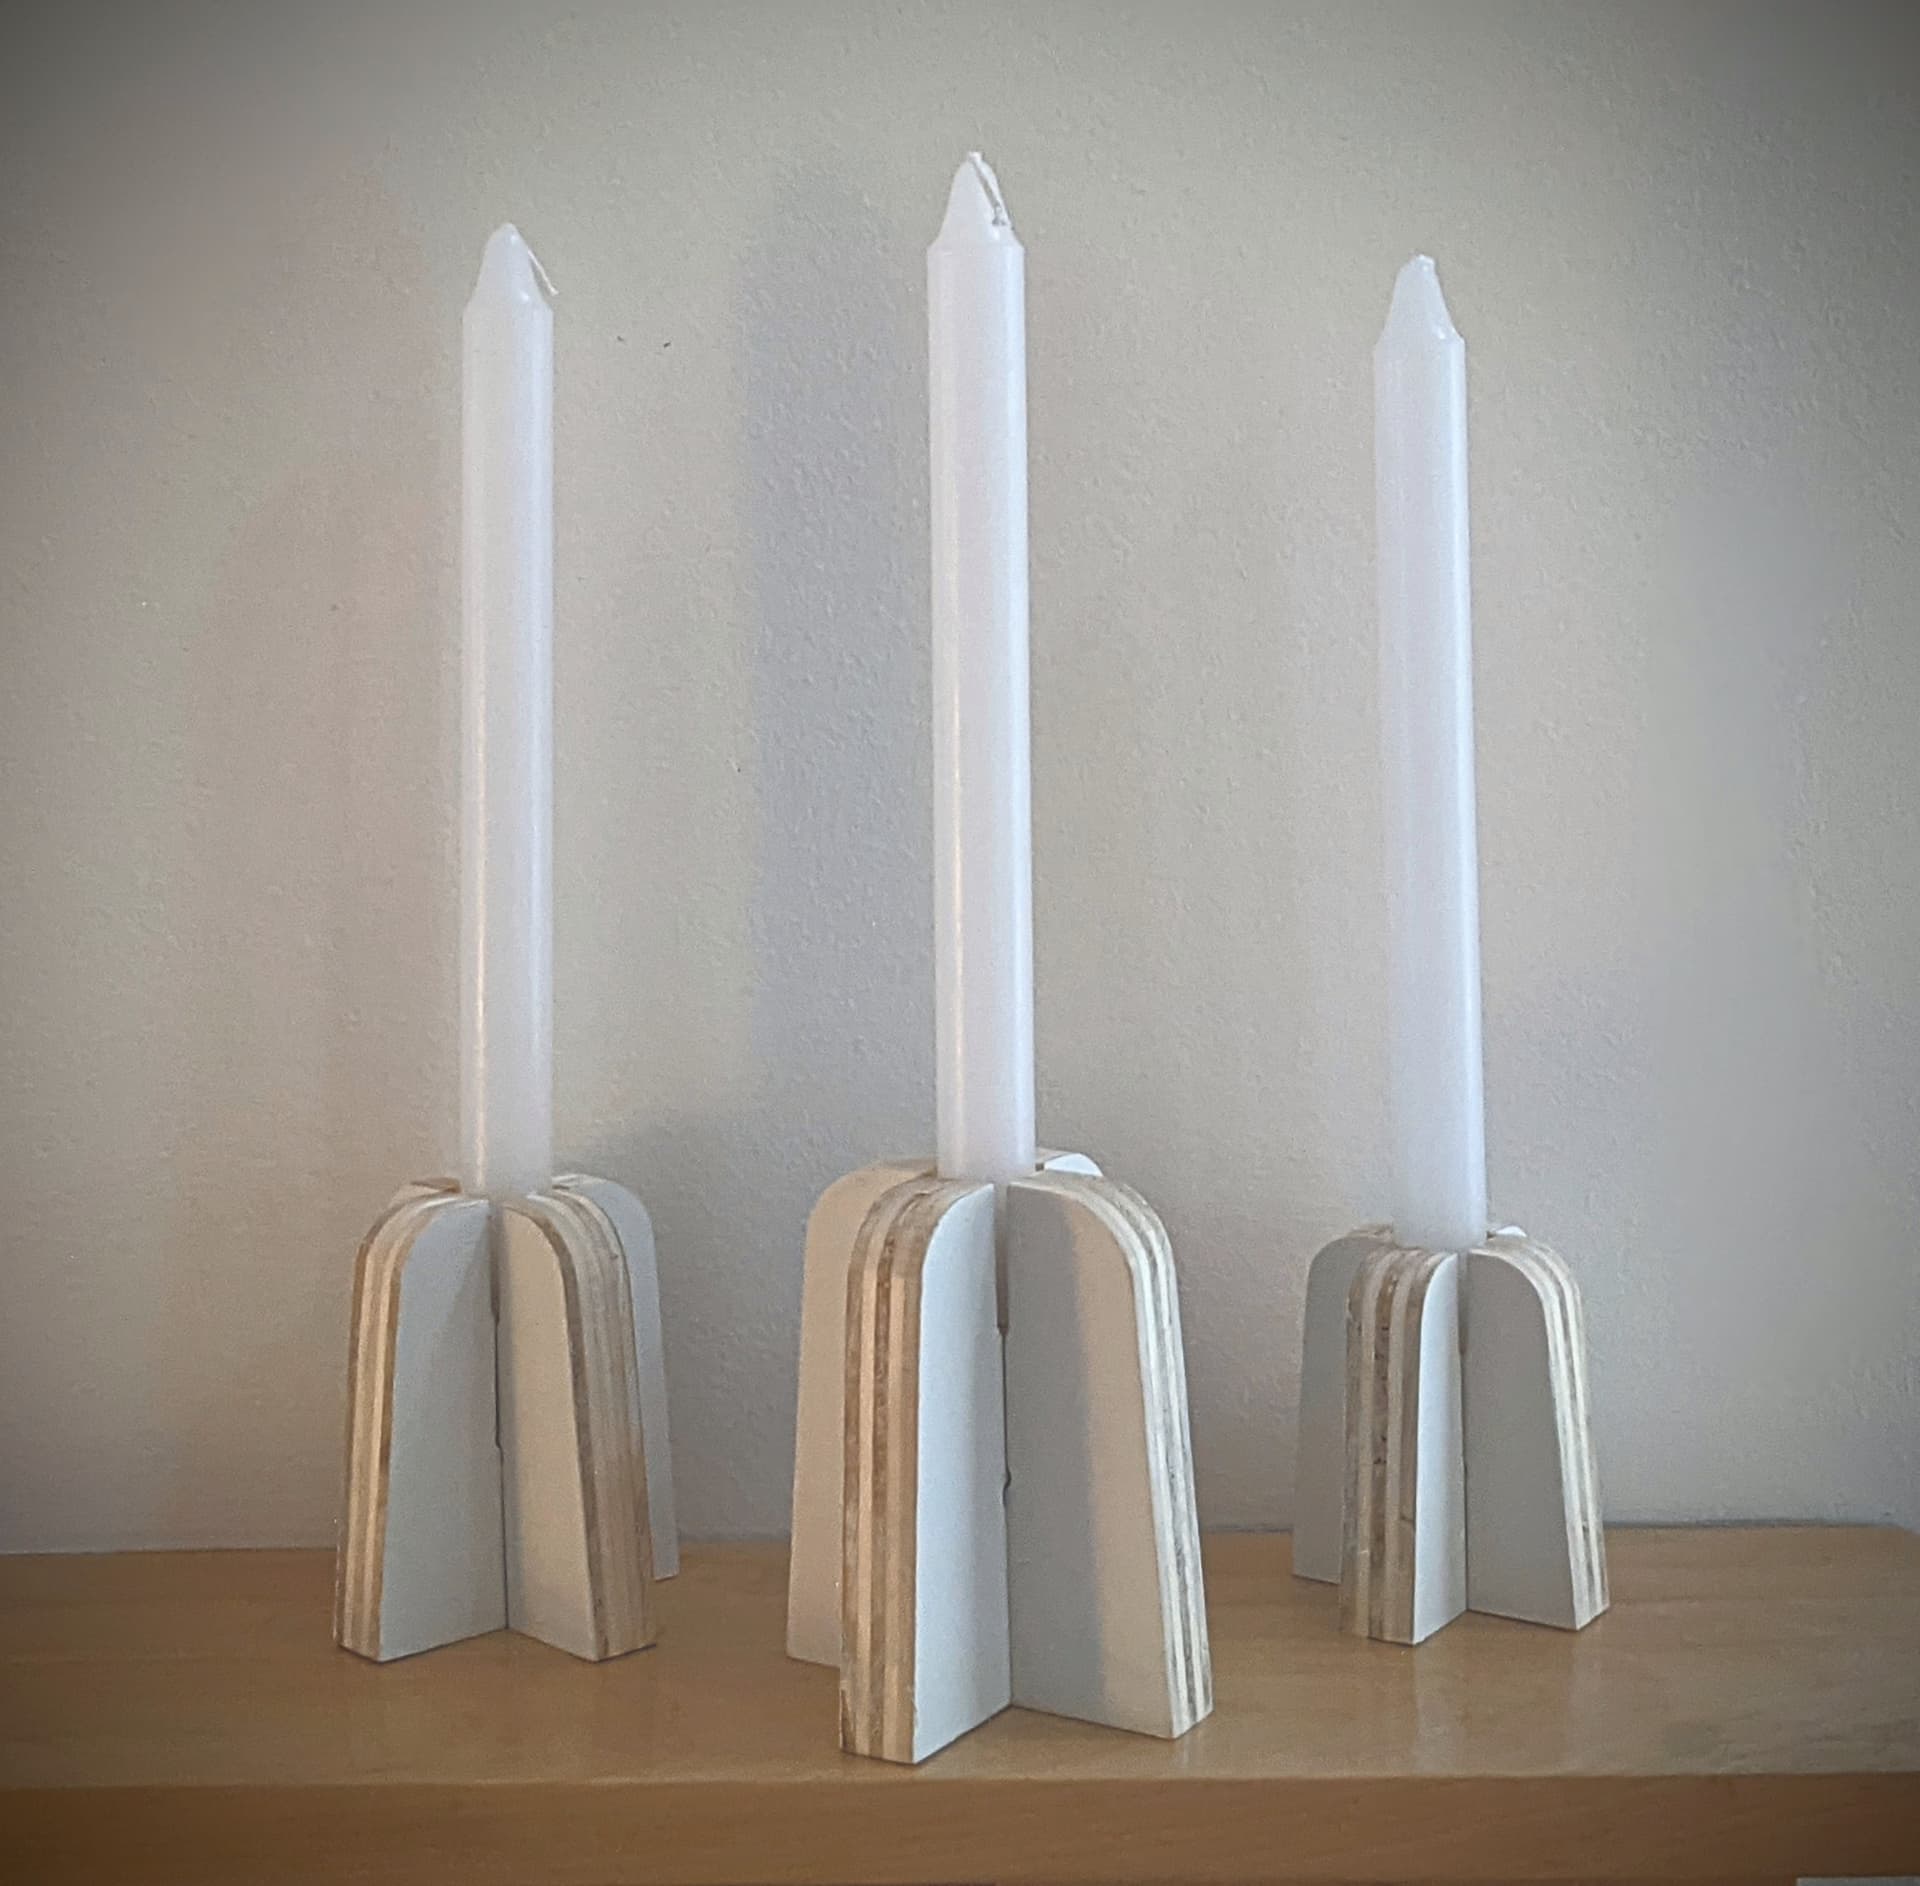
I made these 3 candle holders on my longmill. They use 3/4" plywood and are a flat pack design. The design comes from here. I made 3 different sizes:

3 Likes

@JHahn @leafs4ever Jannikā€™s advice is good. Another idea is, that when you mill the material for your project, keep an offcut. Place that on your spoilboard separate from the project piece and use it for your Z0 location. As an aside, and from failed experience, I would remind you to make sure that, if you are going to set Z0 in gSender on the spoilboard, you set it on the spoilboard or the bottom of the material in your CAM software. :grinning:

1 Like

Thanks. That was my first thought but I ended up planing my board after I cut it. Another lesson learned.

Some more candle holdersā€¦ a great Christmas gift! These were cut using the LM in two passes - one to rough and then a finishing pass. Two of the holders in the image show the output from the finishing pass from the LMā€¦ youā€™ll note that there is still quite a bit of sanding that needs to happen. All of these are still ā€˜unfinishedā€™ but will get a coat of Rubio. The ones in the image are in White Oak and Ambrosia (Wormy) Mapleā€¦ I have some Black Walnut and Ash that I will also be using.

2 Likes

I second the flocking idea. I use it on my custom gun boxes. I grabbed my kit off of Amazon.

1 Like

@rabult I really like the design, Robert. Is it yours?

Thanks, bought a kit from Lee Valley. Will give it a try.
Russ

Thanks. Yes, its my design. This is the final version I landed on after 3D printing a few that didnā€™t quite have the proportions I was looking for. I did the 3D model in SketchUp and used CAMLab to generate the g-code.

1 Like

One of our members Dany (@djomphe) shared his submission to me through my inbox, as he seemed to have trouble submitting it here, so I am reposting it on his behalf:

Continuing the discussion from Christmas Contest 2021 :

Hello everybody,
i am from magdalen Island, quebec and i love my longmillā€¦
Here is a gift souvenir for my mom. My dad died in 2019 and i decided to engrave him for a lifetime souvenir. i took a picture and i convert it in vector file in gimp and inkscape to make the path in aspire. it took me about 2 hours to engrave but after having spent 4-5 hours to details the path. If i would not have done that, it would have taken more than 8 hours, i used a 15 degres v bit 1/8 to have all the details. i stained the engraving and i sanded the plate to be able to see the wood grain. You will understand that i can not share the file for that. Hope you will appreciate. Thanks for sharing all your nice work.

2 Likes

Hi everyone!

Submissions are closed now, however you can keep talking here if youā€™d like :slight_smile:

Thanks everyone for participating - now letā€™s move onto VOTING!

2 Likes

Missed the deadline but sharing anyway! Some wall art for the kids.

  • 1/4" endmill for the roughing pass
  • 1/16" tapered endmill for the finishing pass
  • Cedar (black one was first attempt, pine with black stain)
  • Carveco Maker, gSender

Cheers!

2 Likes

Bonjour, Dany,
tres bien fait! Je suis certain que ta mere va etre tres content de recevoir cette cadeaux incroyable!

de Marty

1 Like

2 Likes

That is a beautiful frame! Very nicely done!
Jake- CNC Woodworker Wanta Be