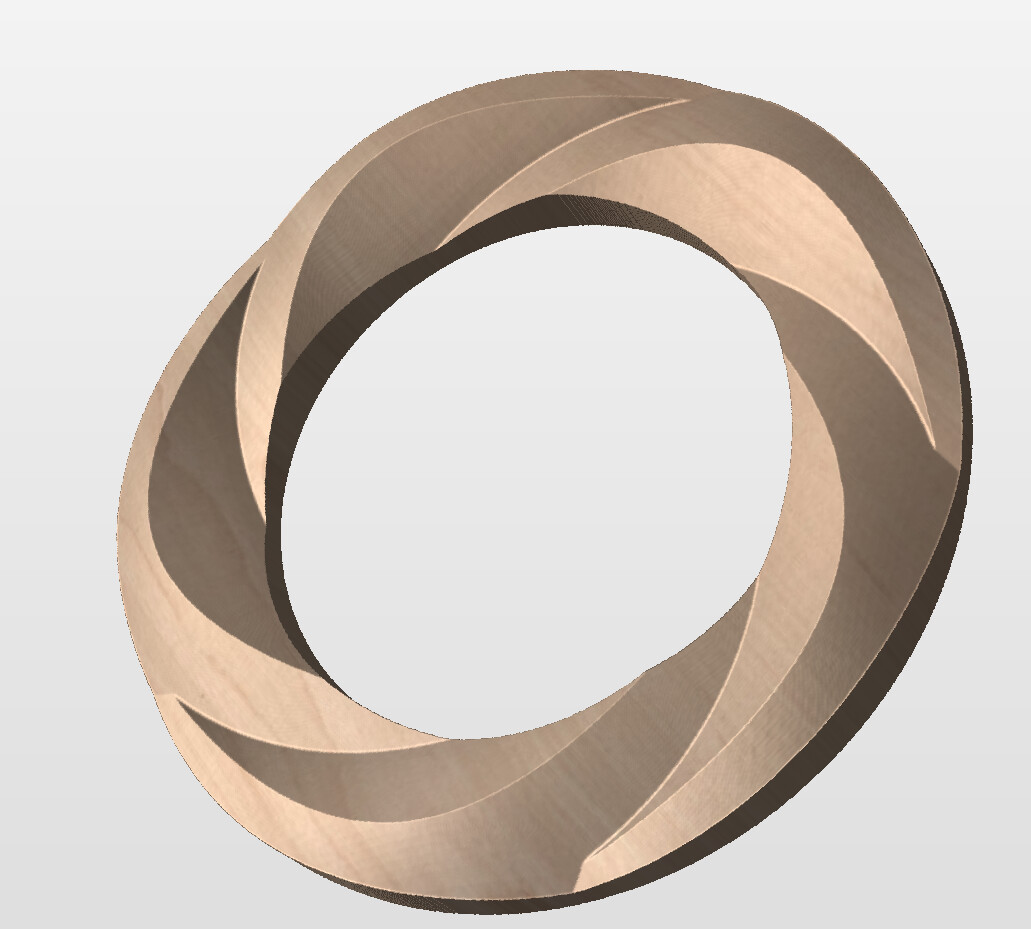
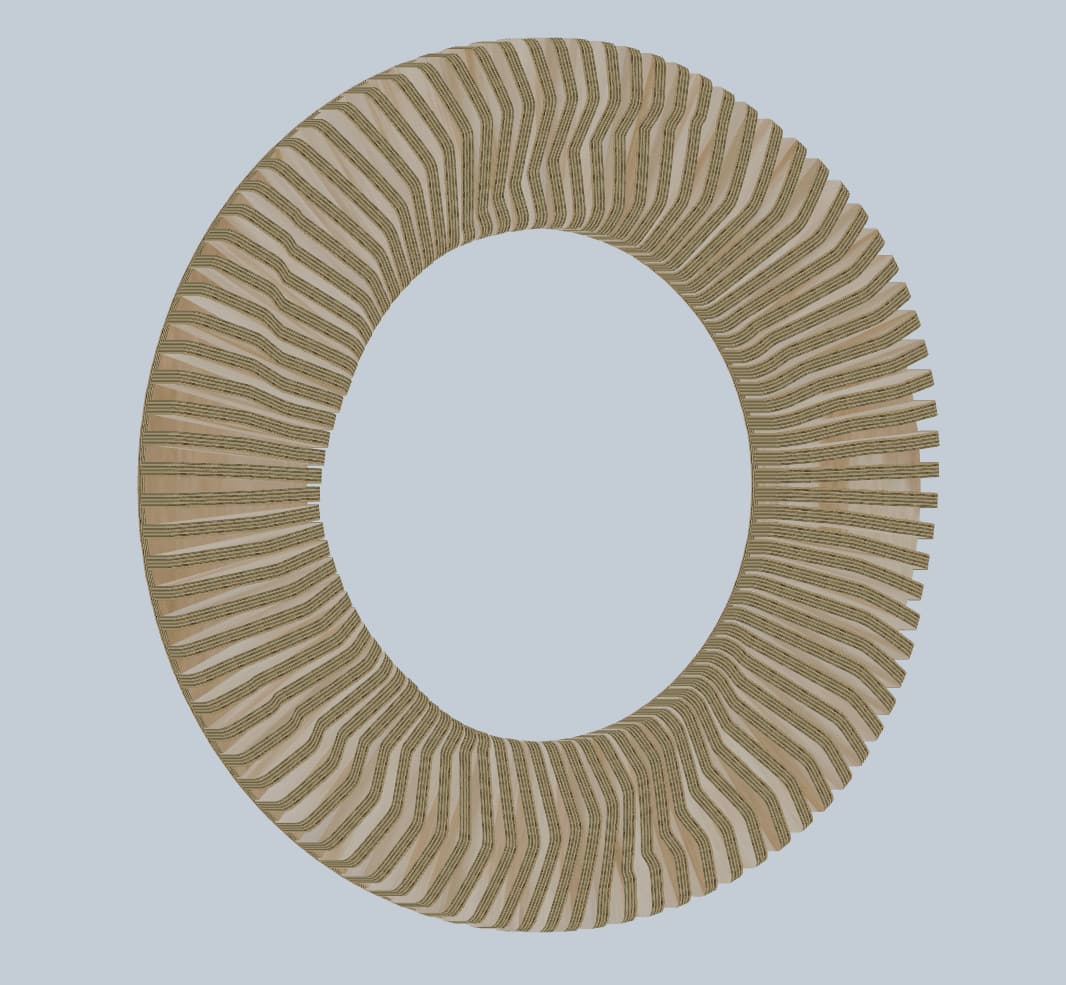
I decided to make a projects page for some of the stuff I will be doing. Now that winter is approaching, I will start using my Altmill a lot more. My second project is a mirror frame. Last winter, while waiting for my Altmill to arrive, I was playing with Fusion to see what interesting things I could do. I am not a modeler by any means but I figured that interesting shapes can be made fairly easily just by trying things out. One of the first designs I came up with can be used as a picture frame or wall art. With the Autodesk Slicer program. it’s possible to take a solid model and make radial slices out of plywood, which can then be assembled. Slicing is not part of this project. I’m just adding the info for reference.
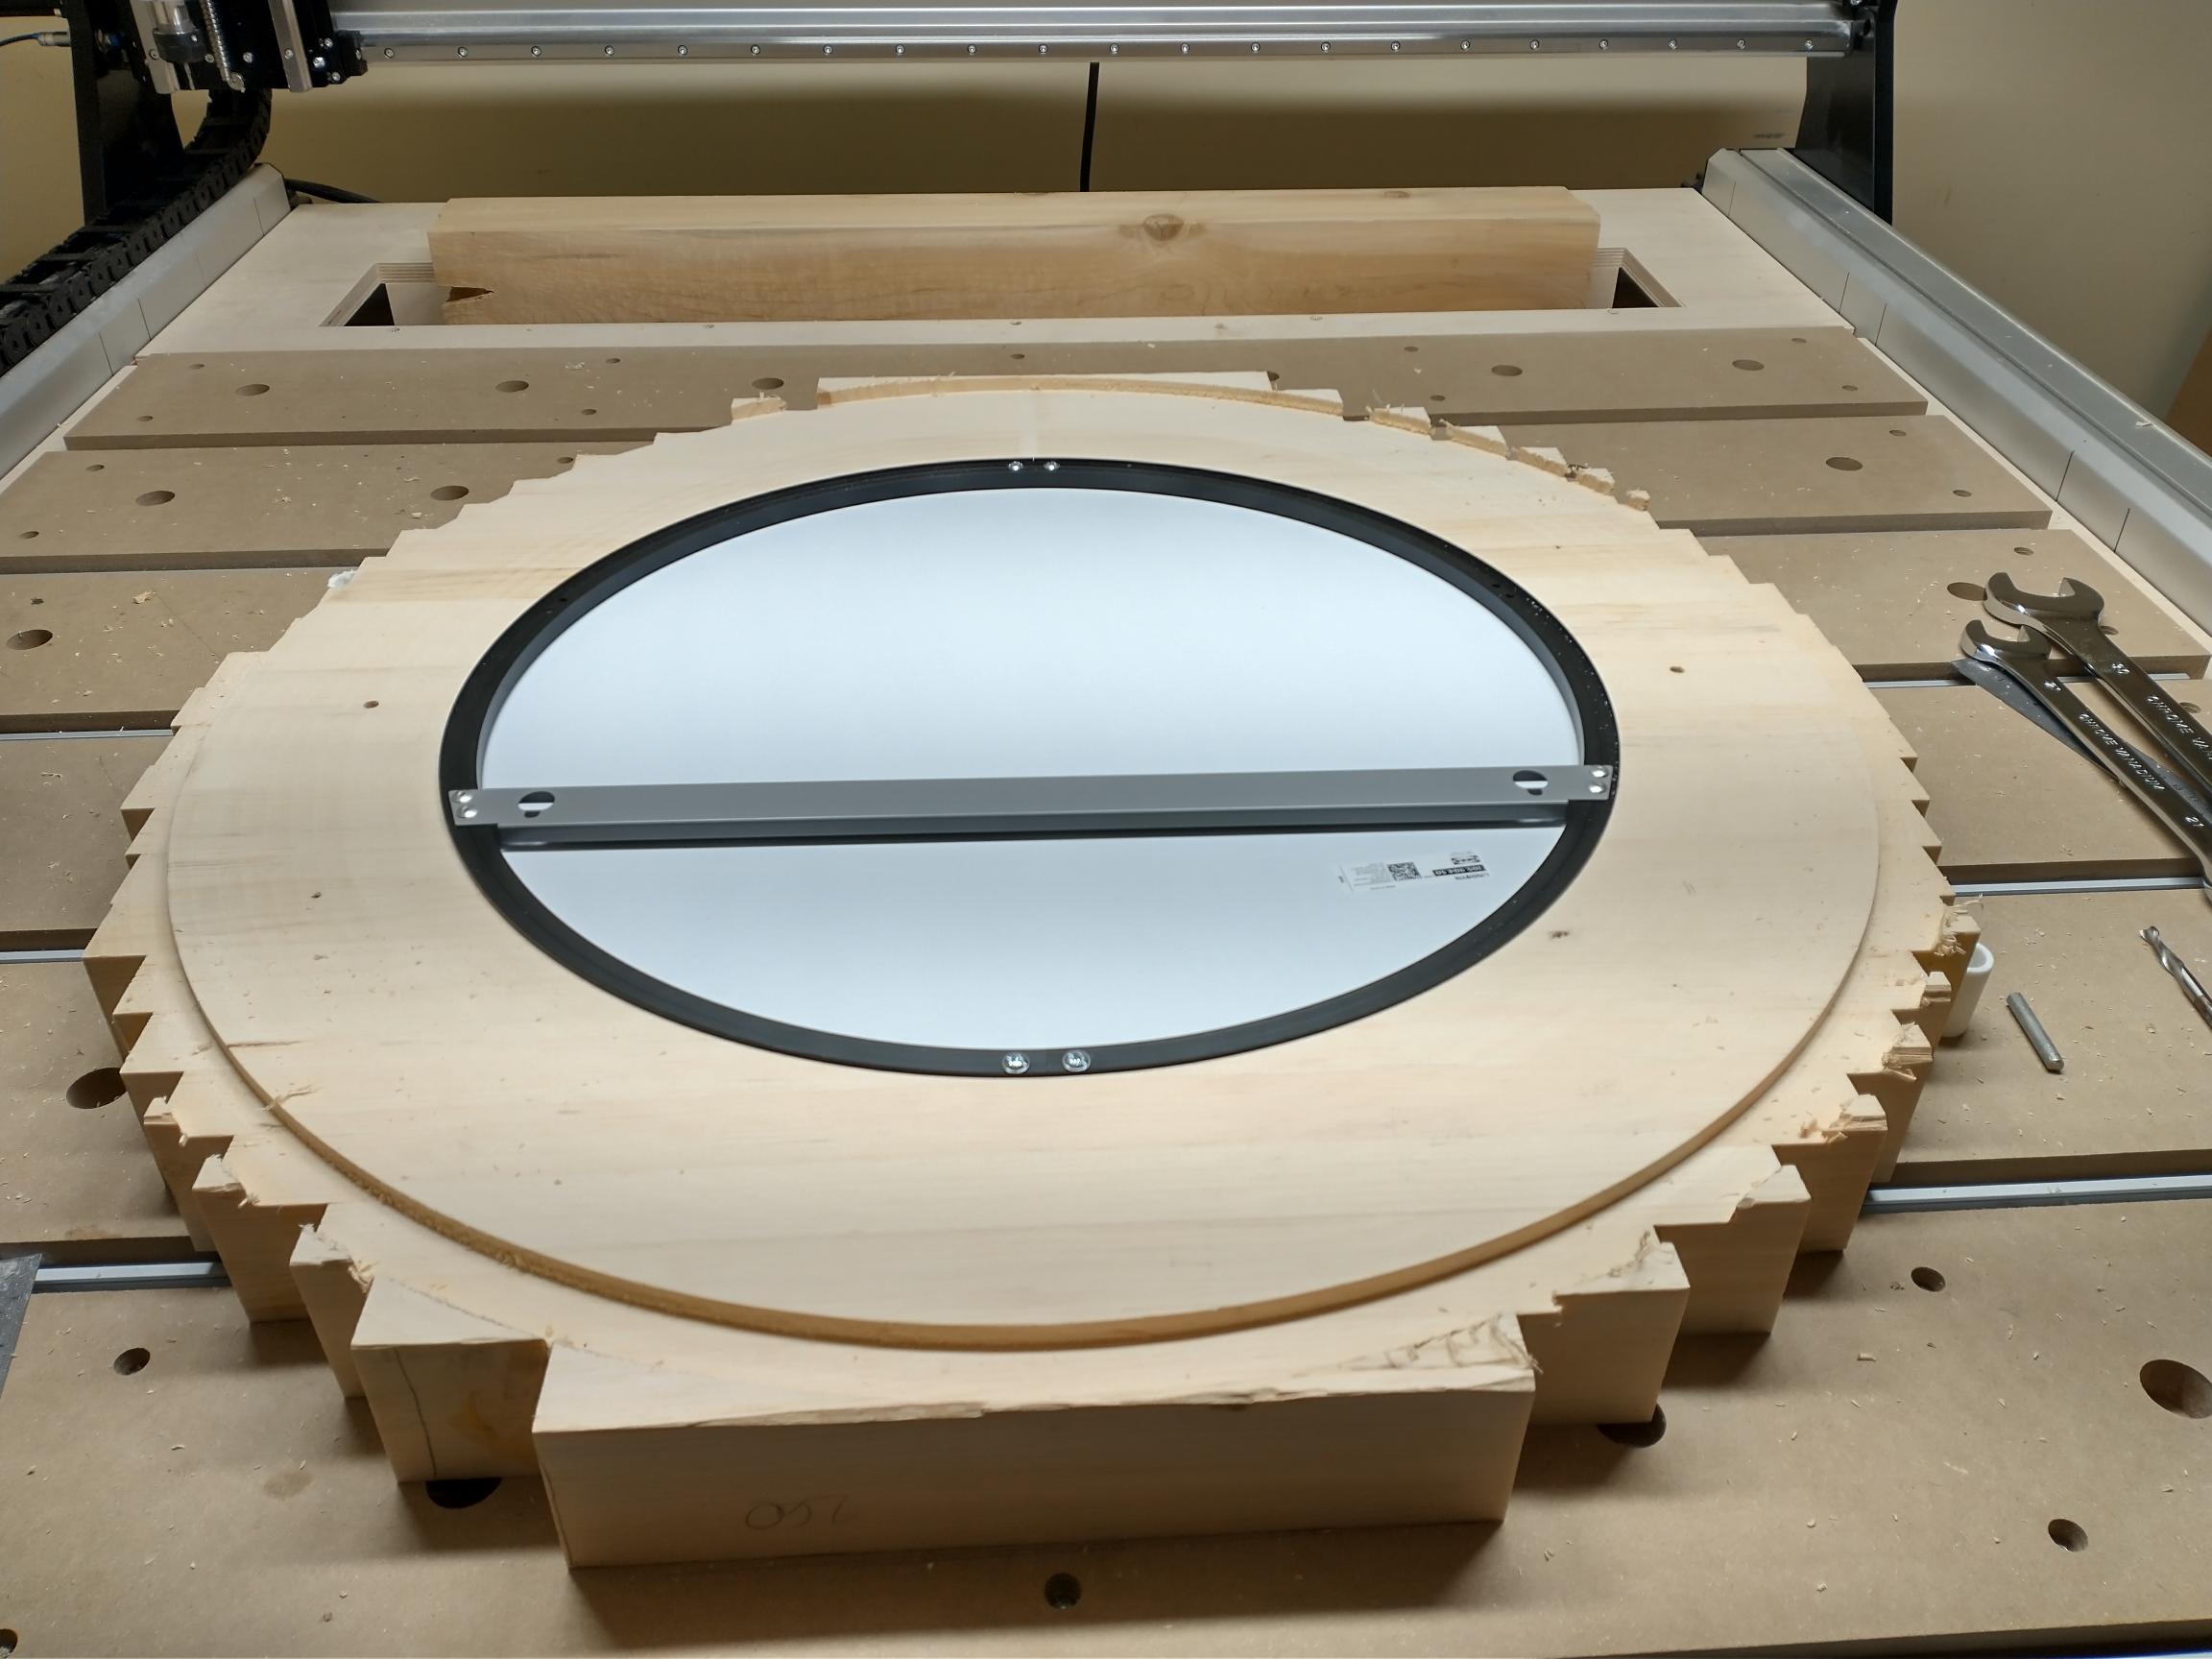
I will be making a frame for a round mirror. Specifically, I will get a 500mm round mirror from Ikea, which will be inserted at the back.
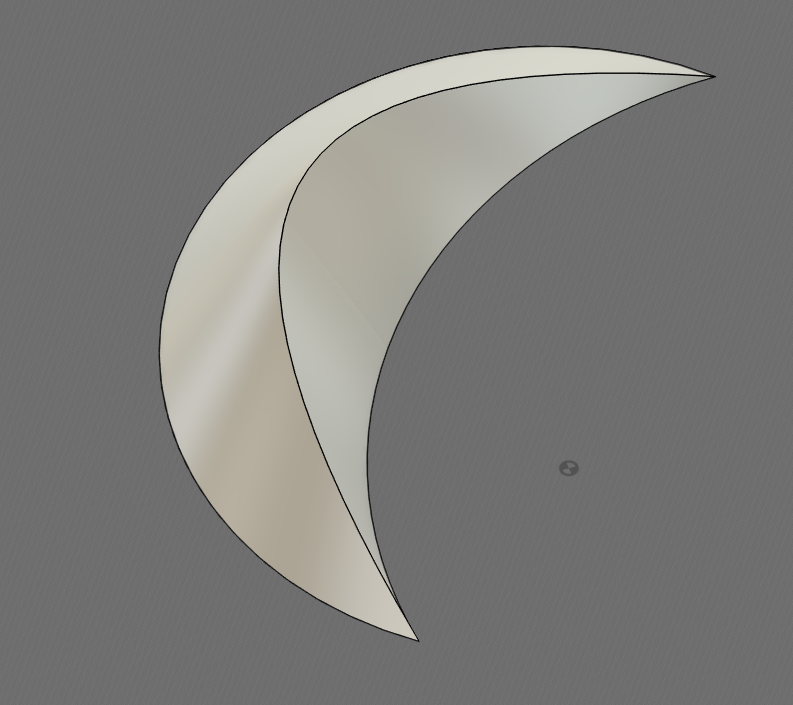
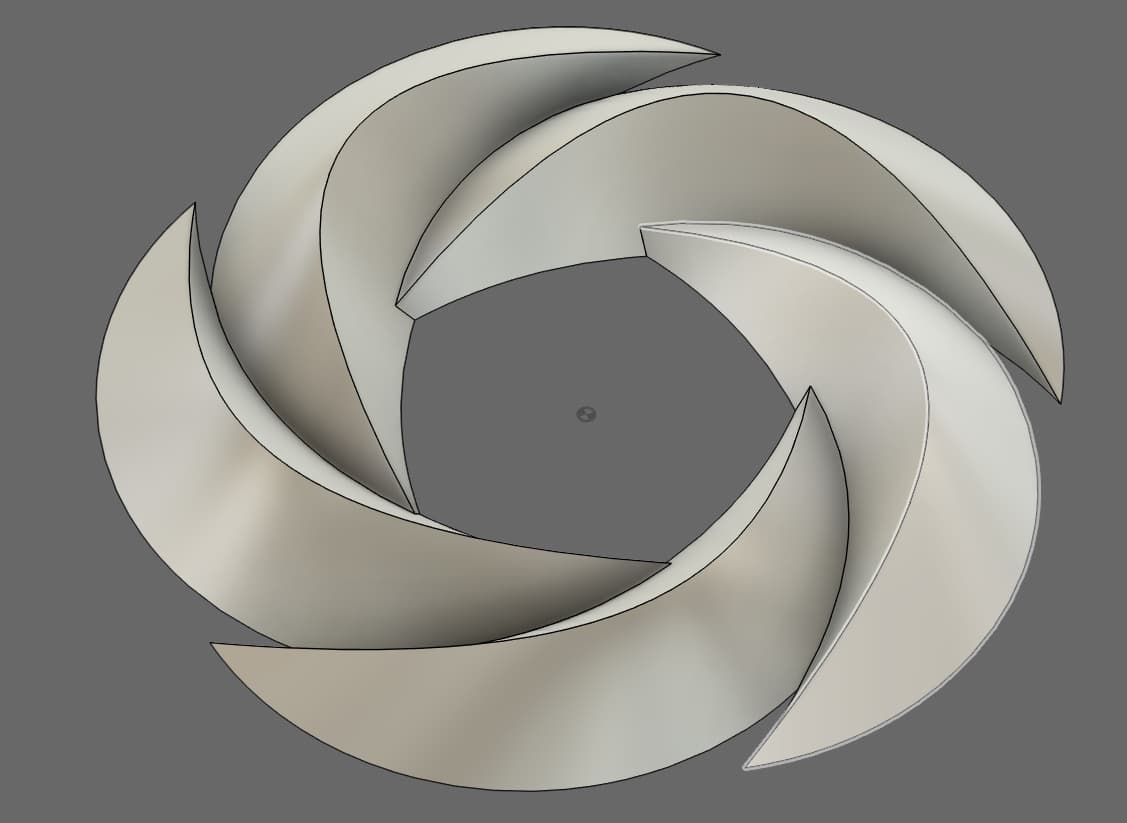
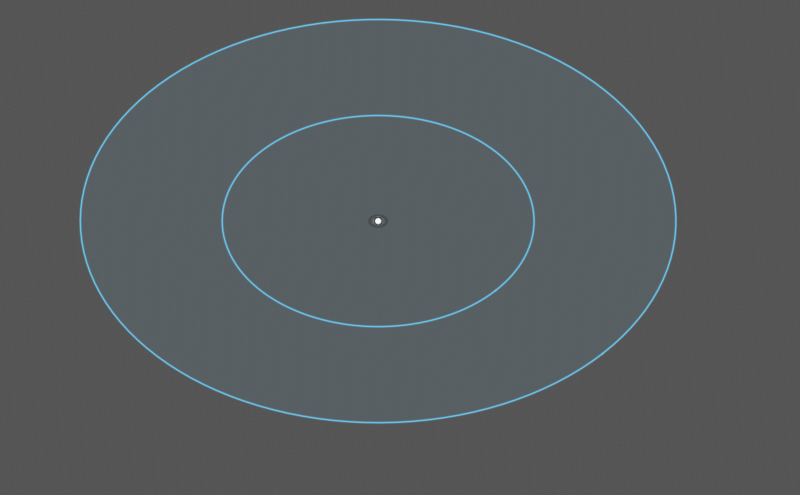
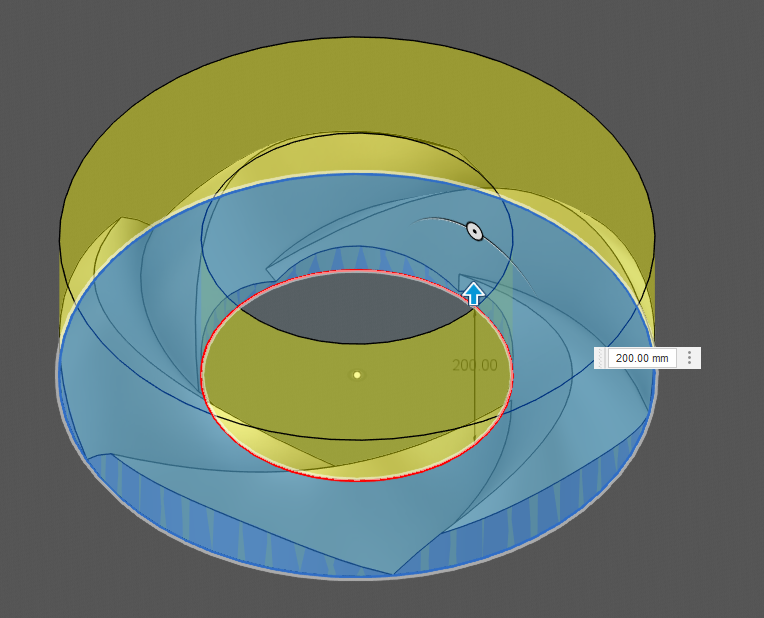
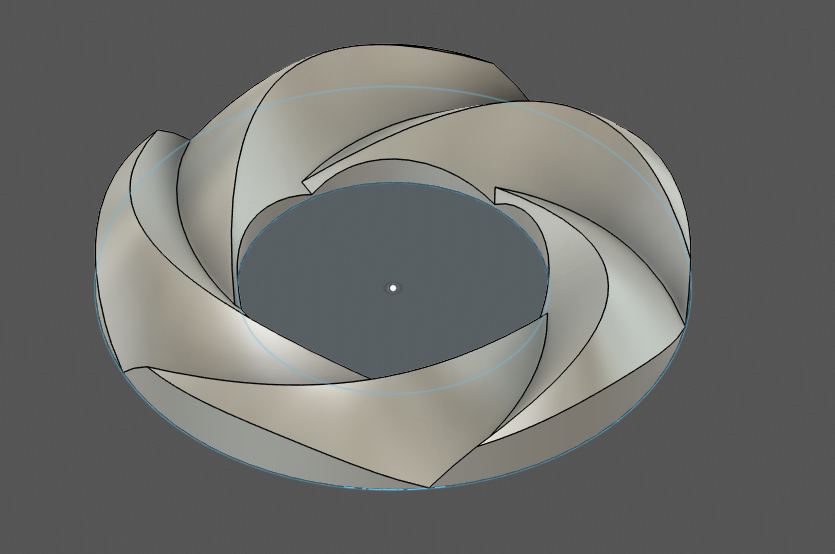
The object starts off as a crescent shape that is copied around a centre point. You then make a donut the size you want and extrude it using the intersect option to remove the part you don’t want. That gives you the basic shape to work with.
The beauty of parametric design, when done properly, is that modifying previous parts automatically changes every subsequent object. So if I went back to the crescent and changed its shape a bit, the final object would be changed as well. Ditto with the size and placement of the donut. Once you get the hang of it, it’s very easy and fast to do an object.
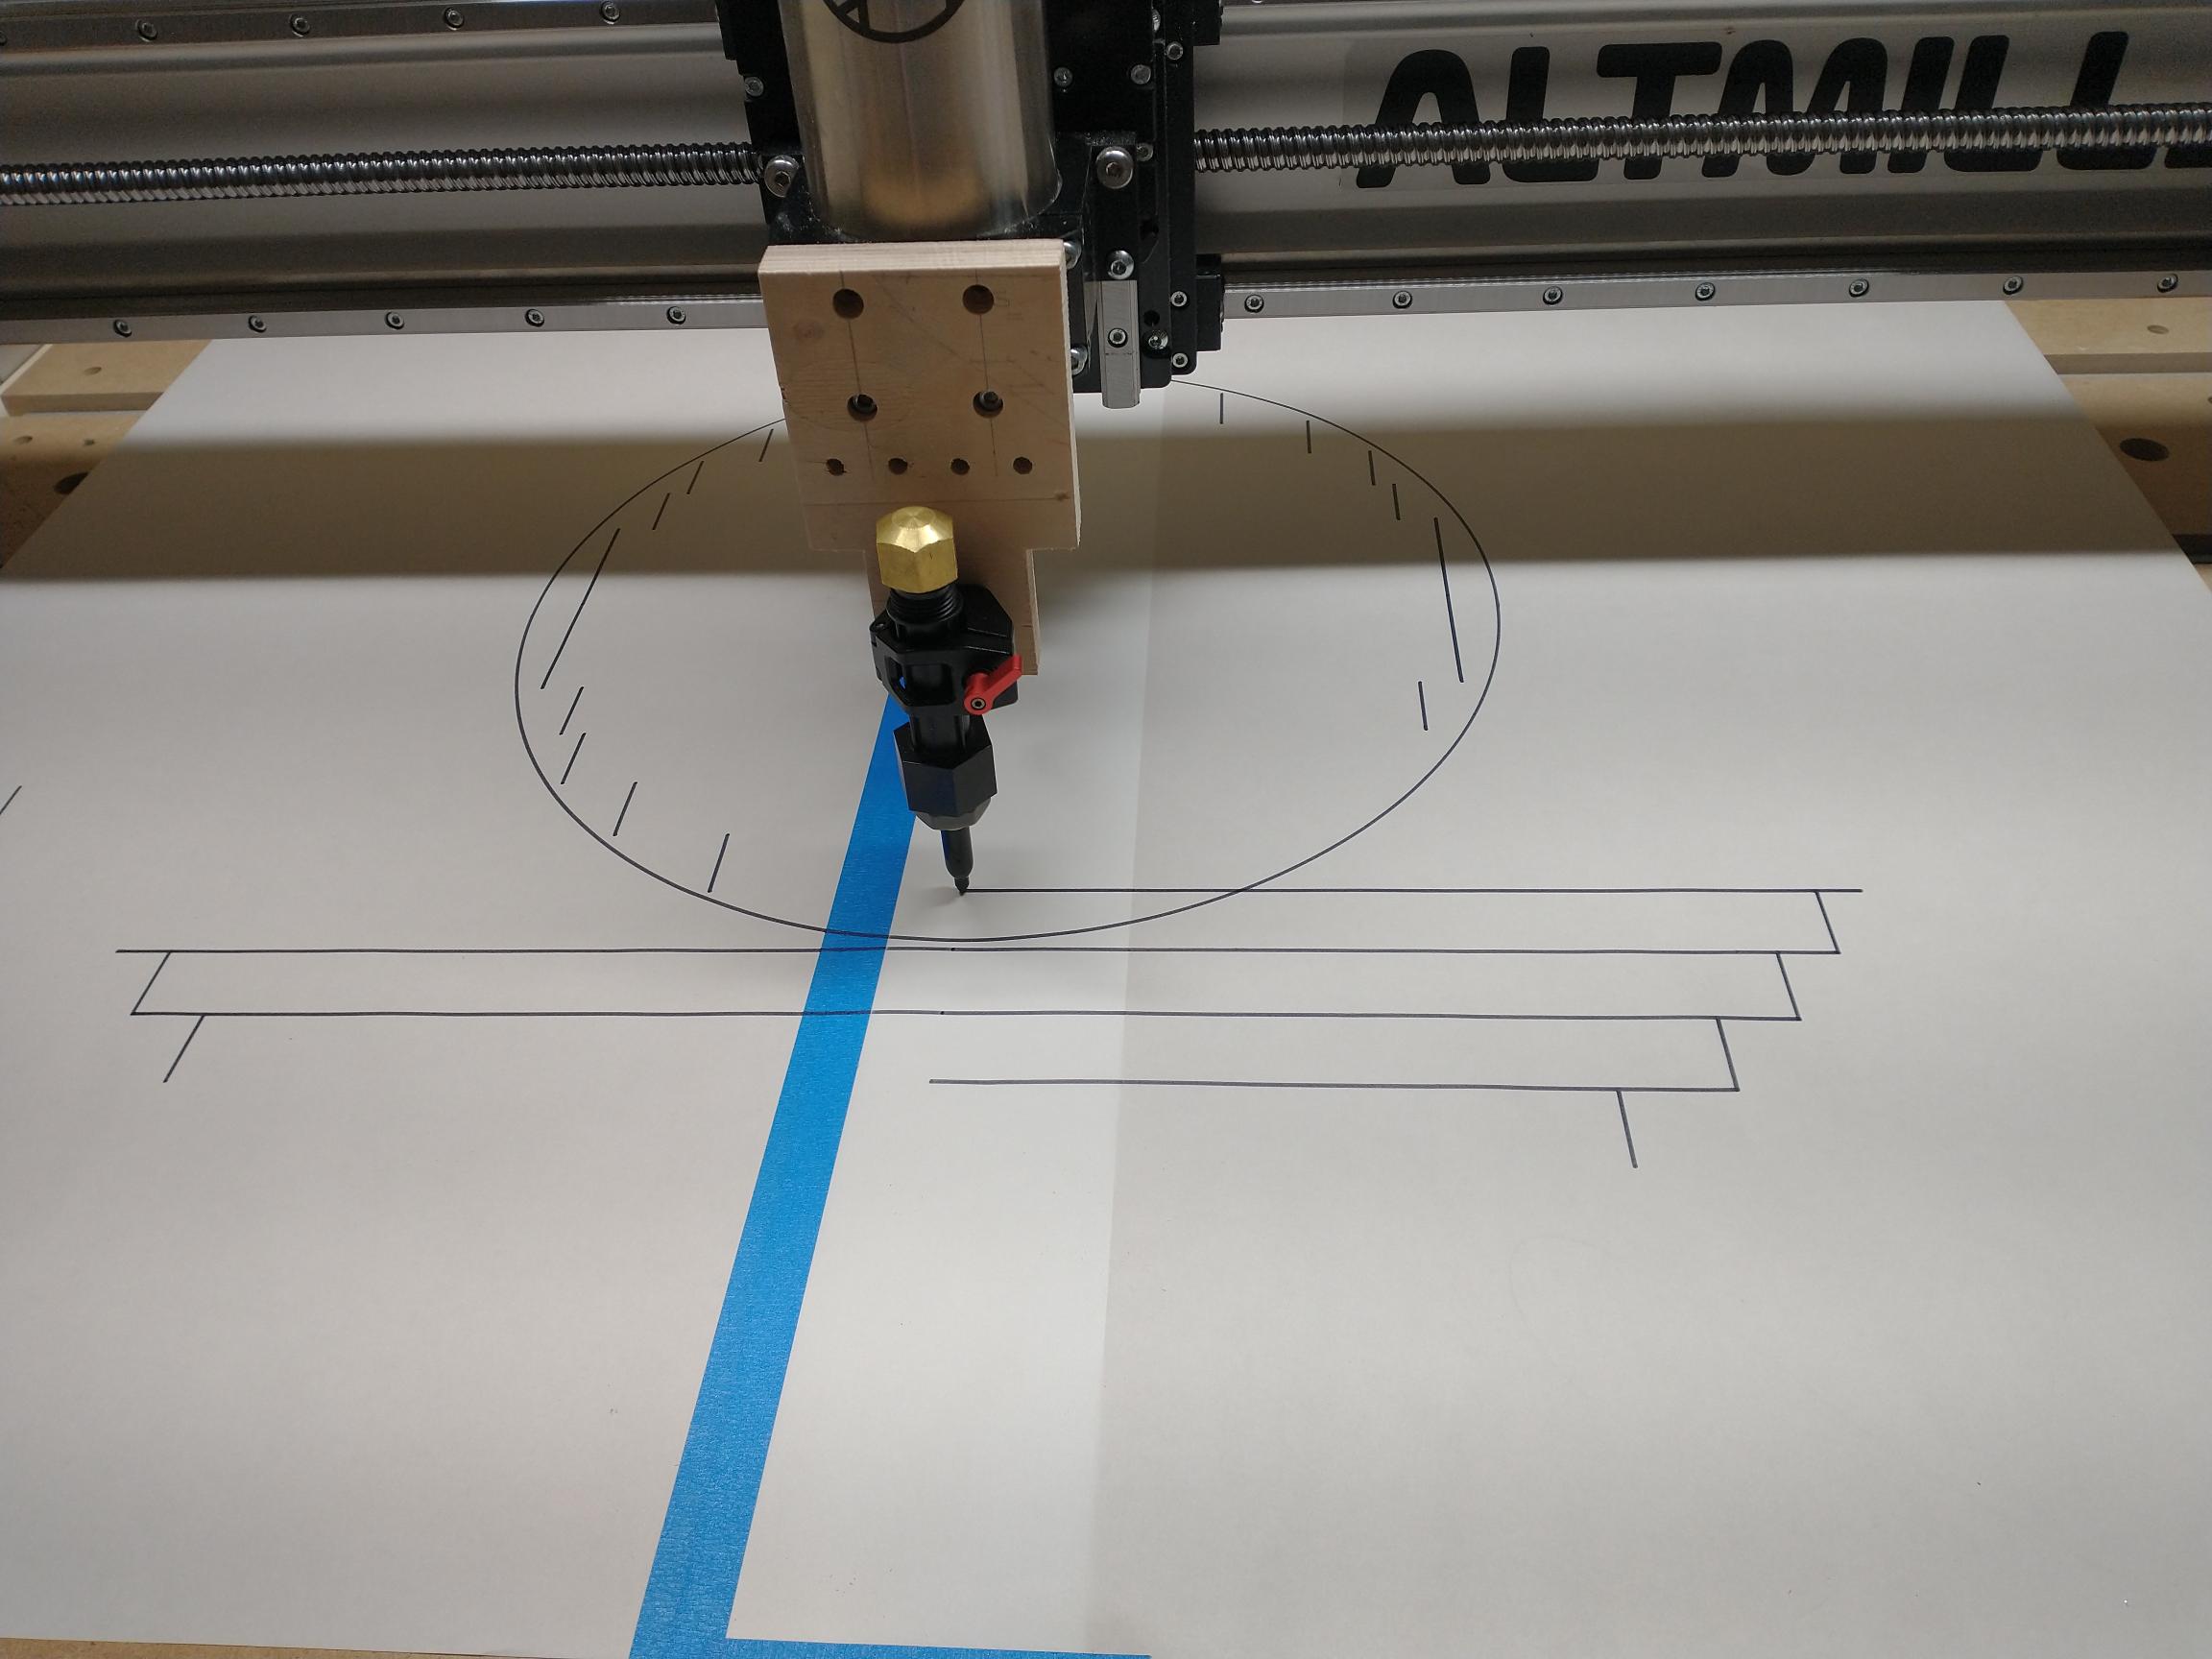
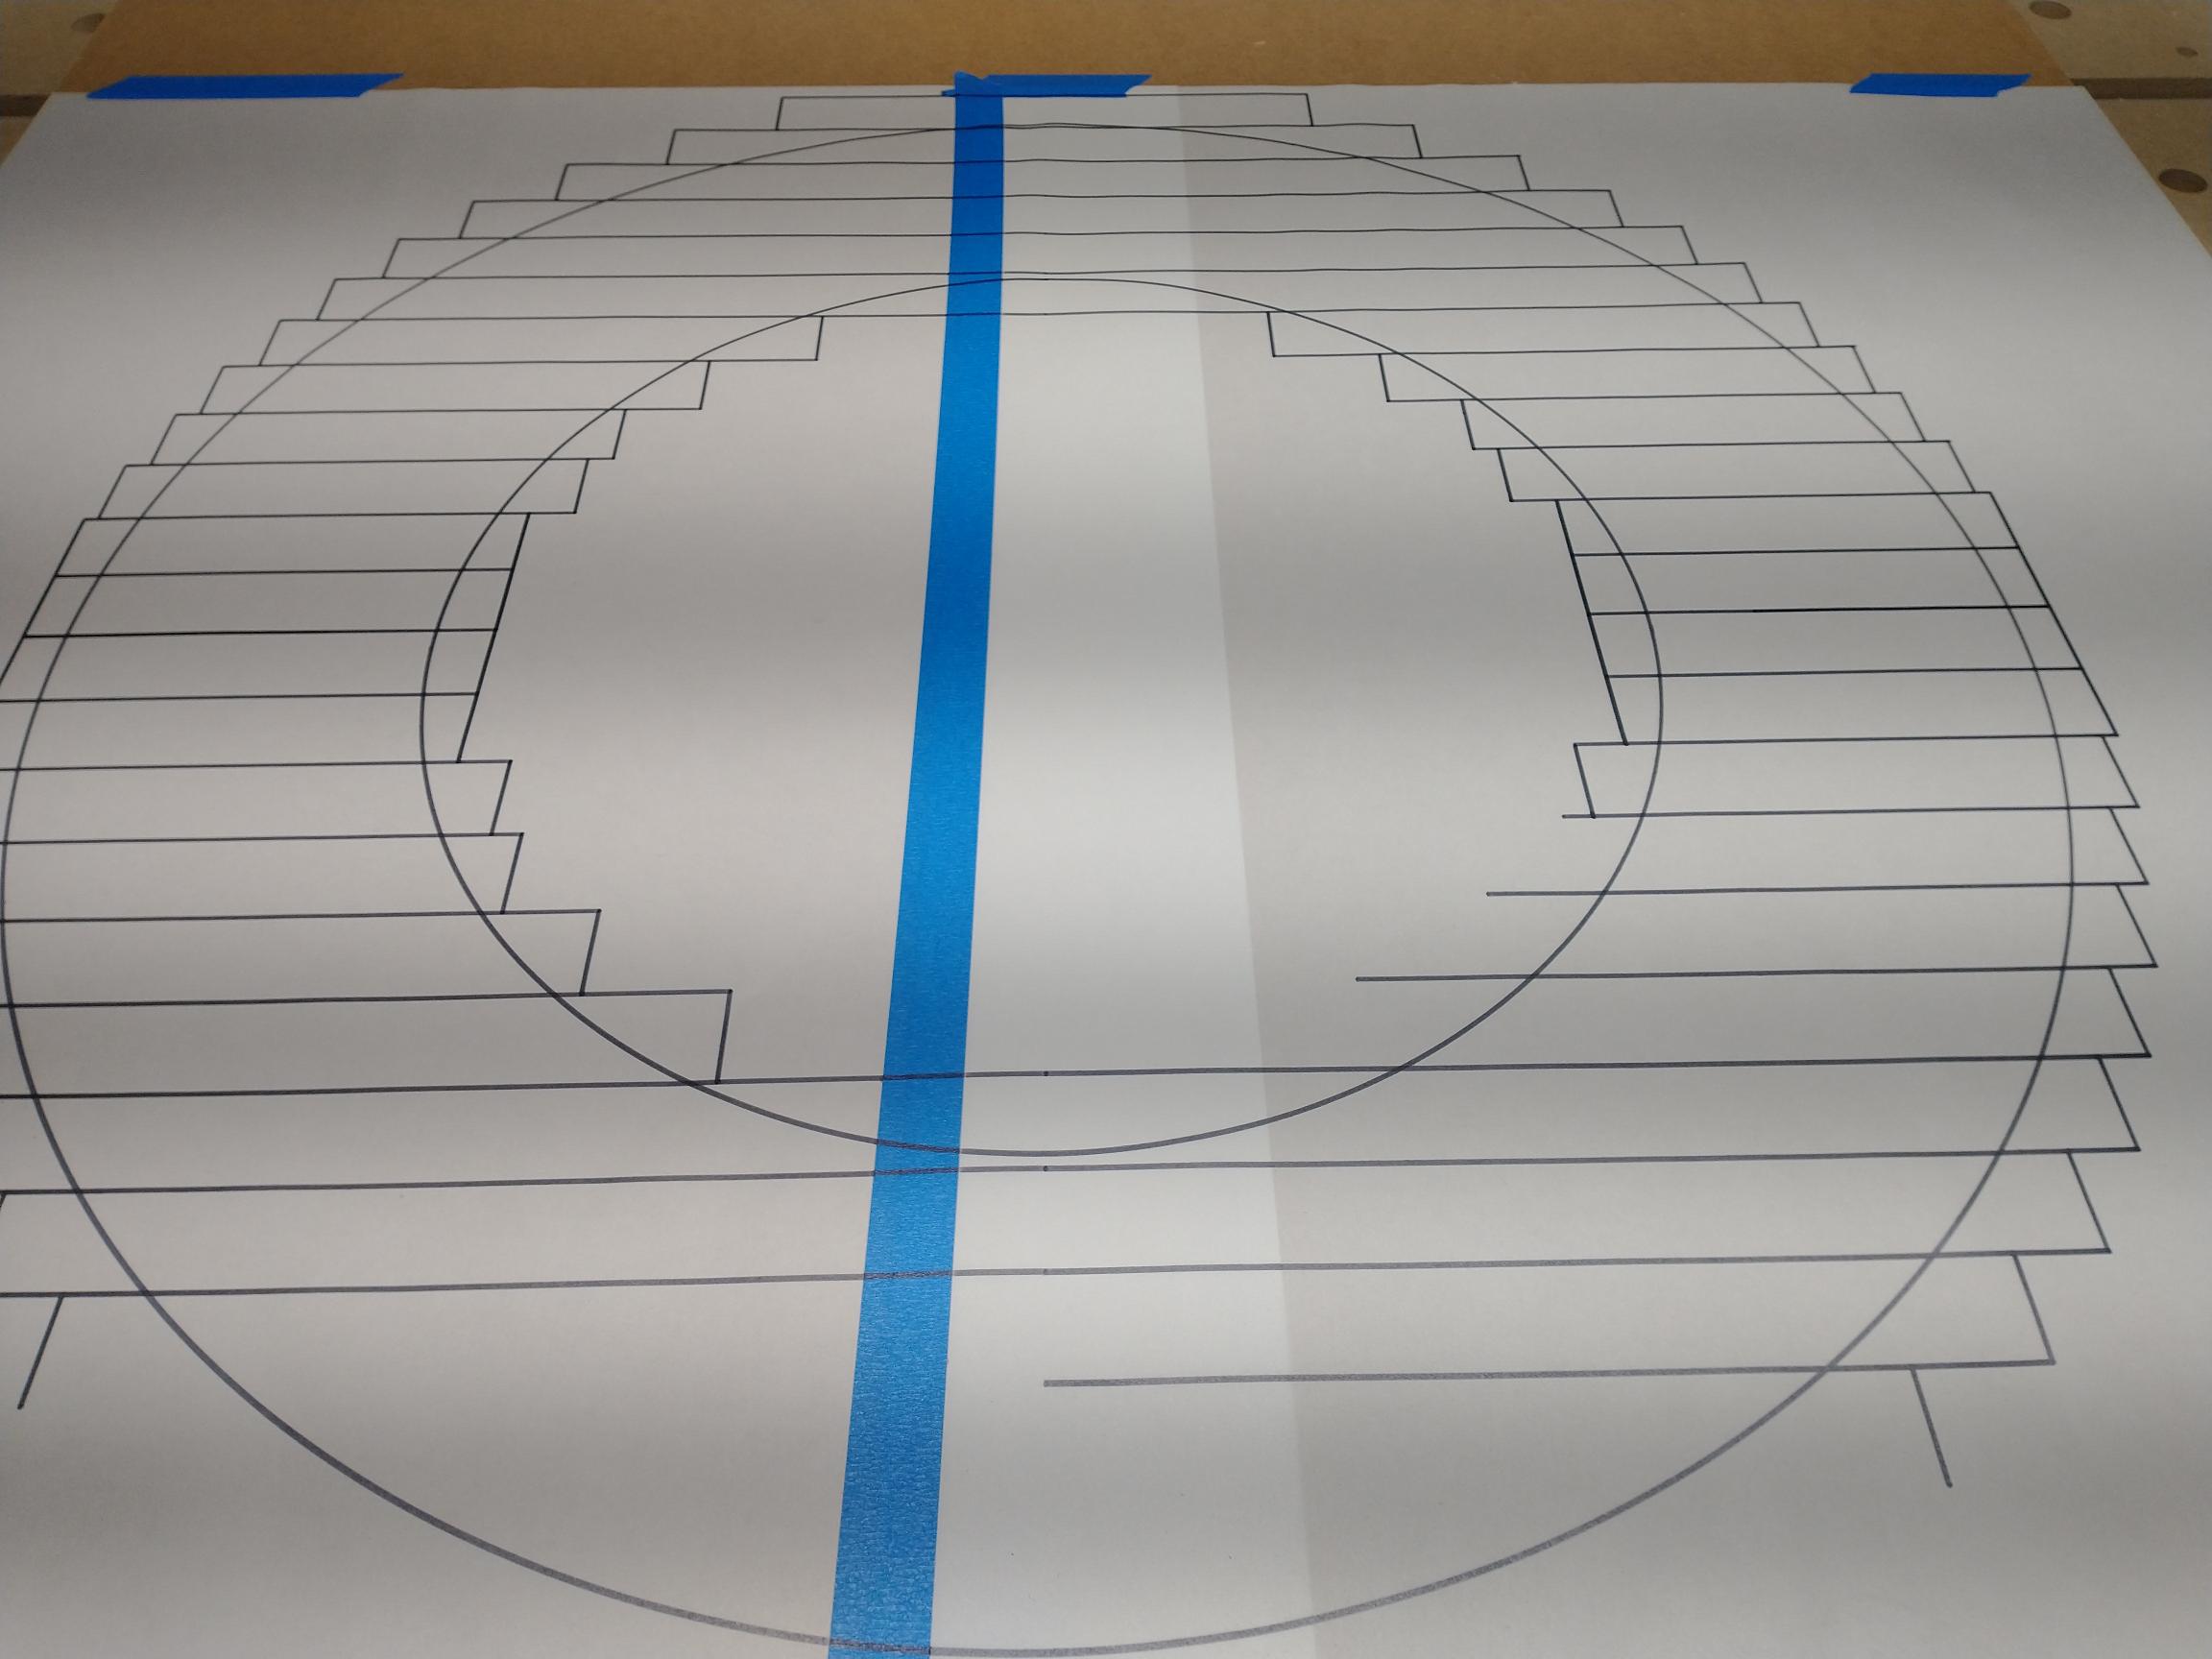
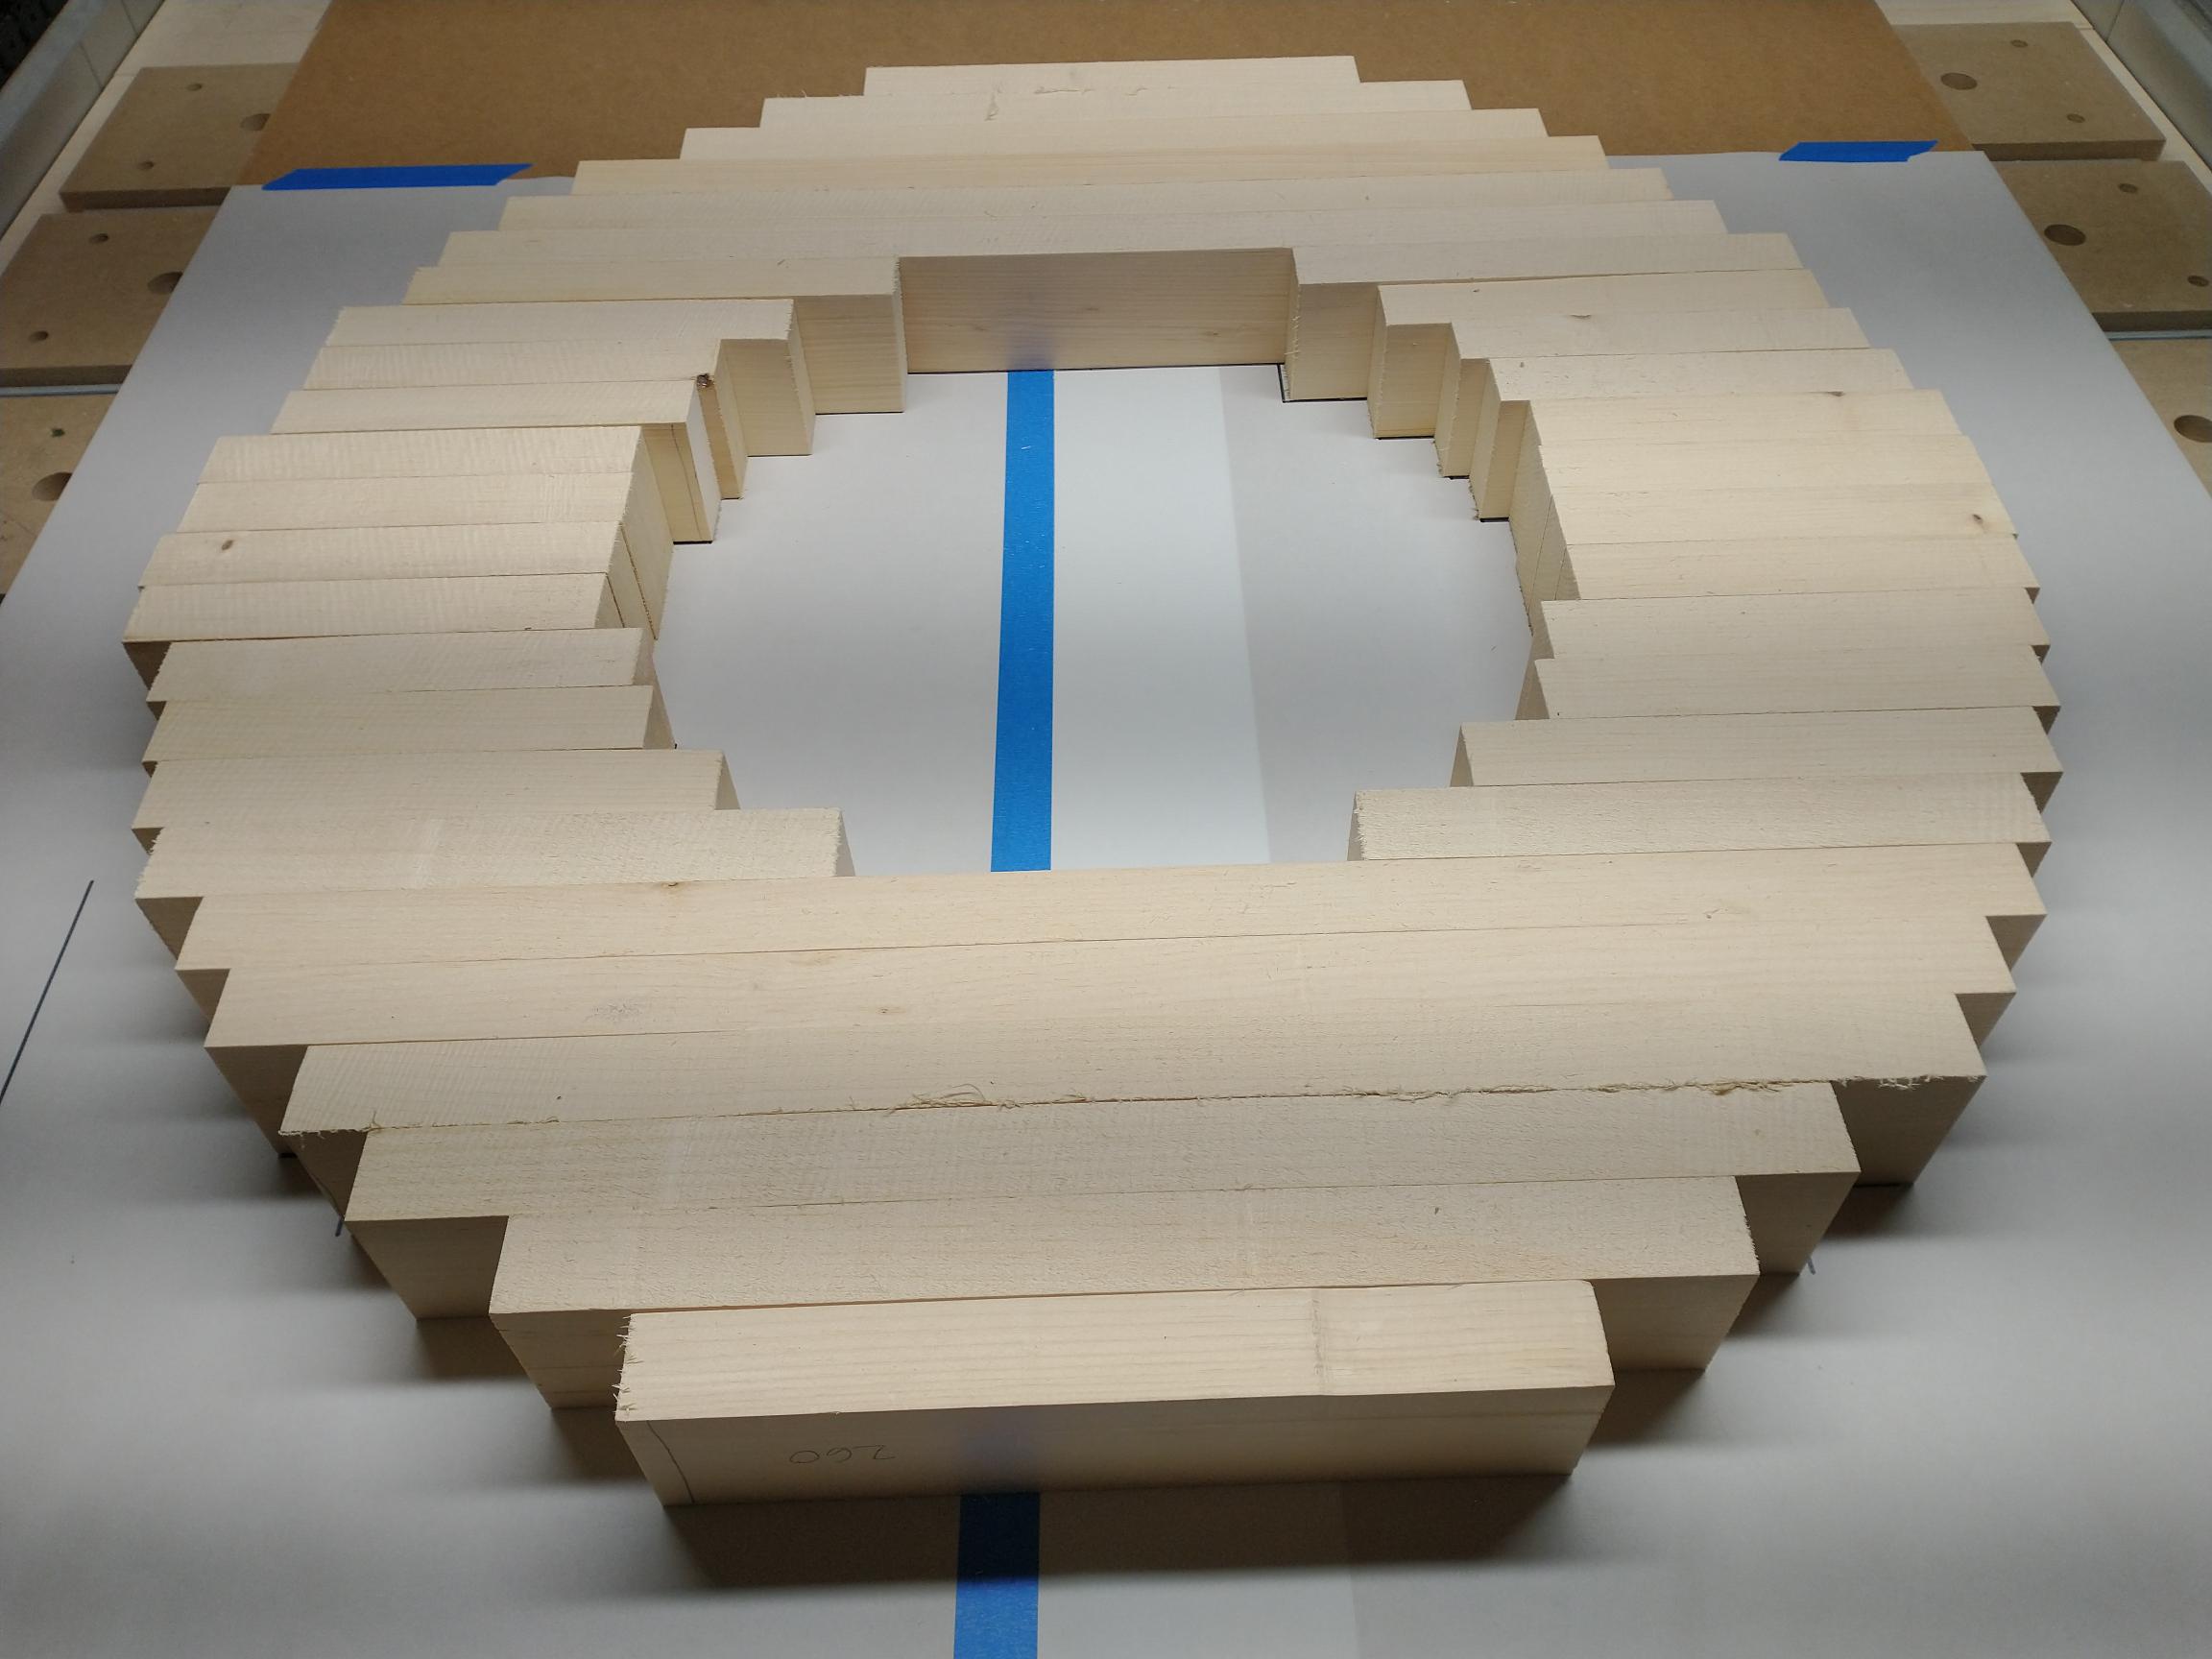
First thing I did is trace the outline on a piece of paper. That ensures that the wood pieces will be positioned properly during glue up. I then used 30mm by 65mm clear pine I had on hand. My initial plan was to use maple, birch, or other hardwood but I want to make a prototype first. Since I had the pine, I’ll use that as a prototype and if the results are good, maybe just use that as the final frame.
I thought I understood what was going on but then you decided to throw a wrench in my understanding with the slicing bit. Can you explain what is going on here?
@Jens I think you understood quite well. The slicing bit has nothing to do with this particular project. I just added the information to give another example of what can be done with the model other than just a carve. I edited the original post to clarify that.
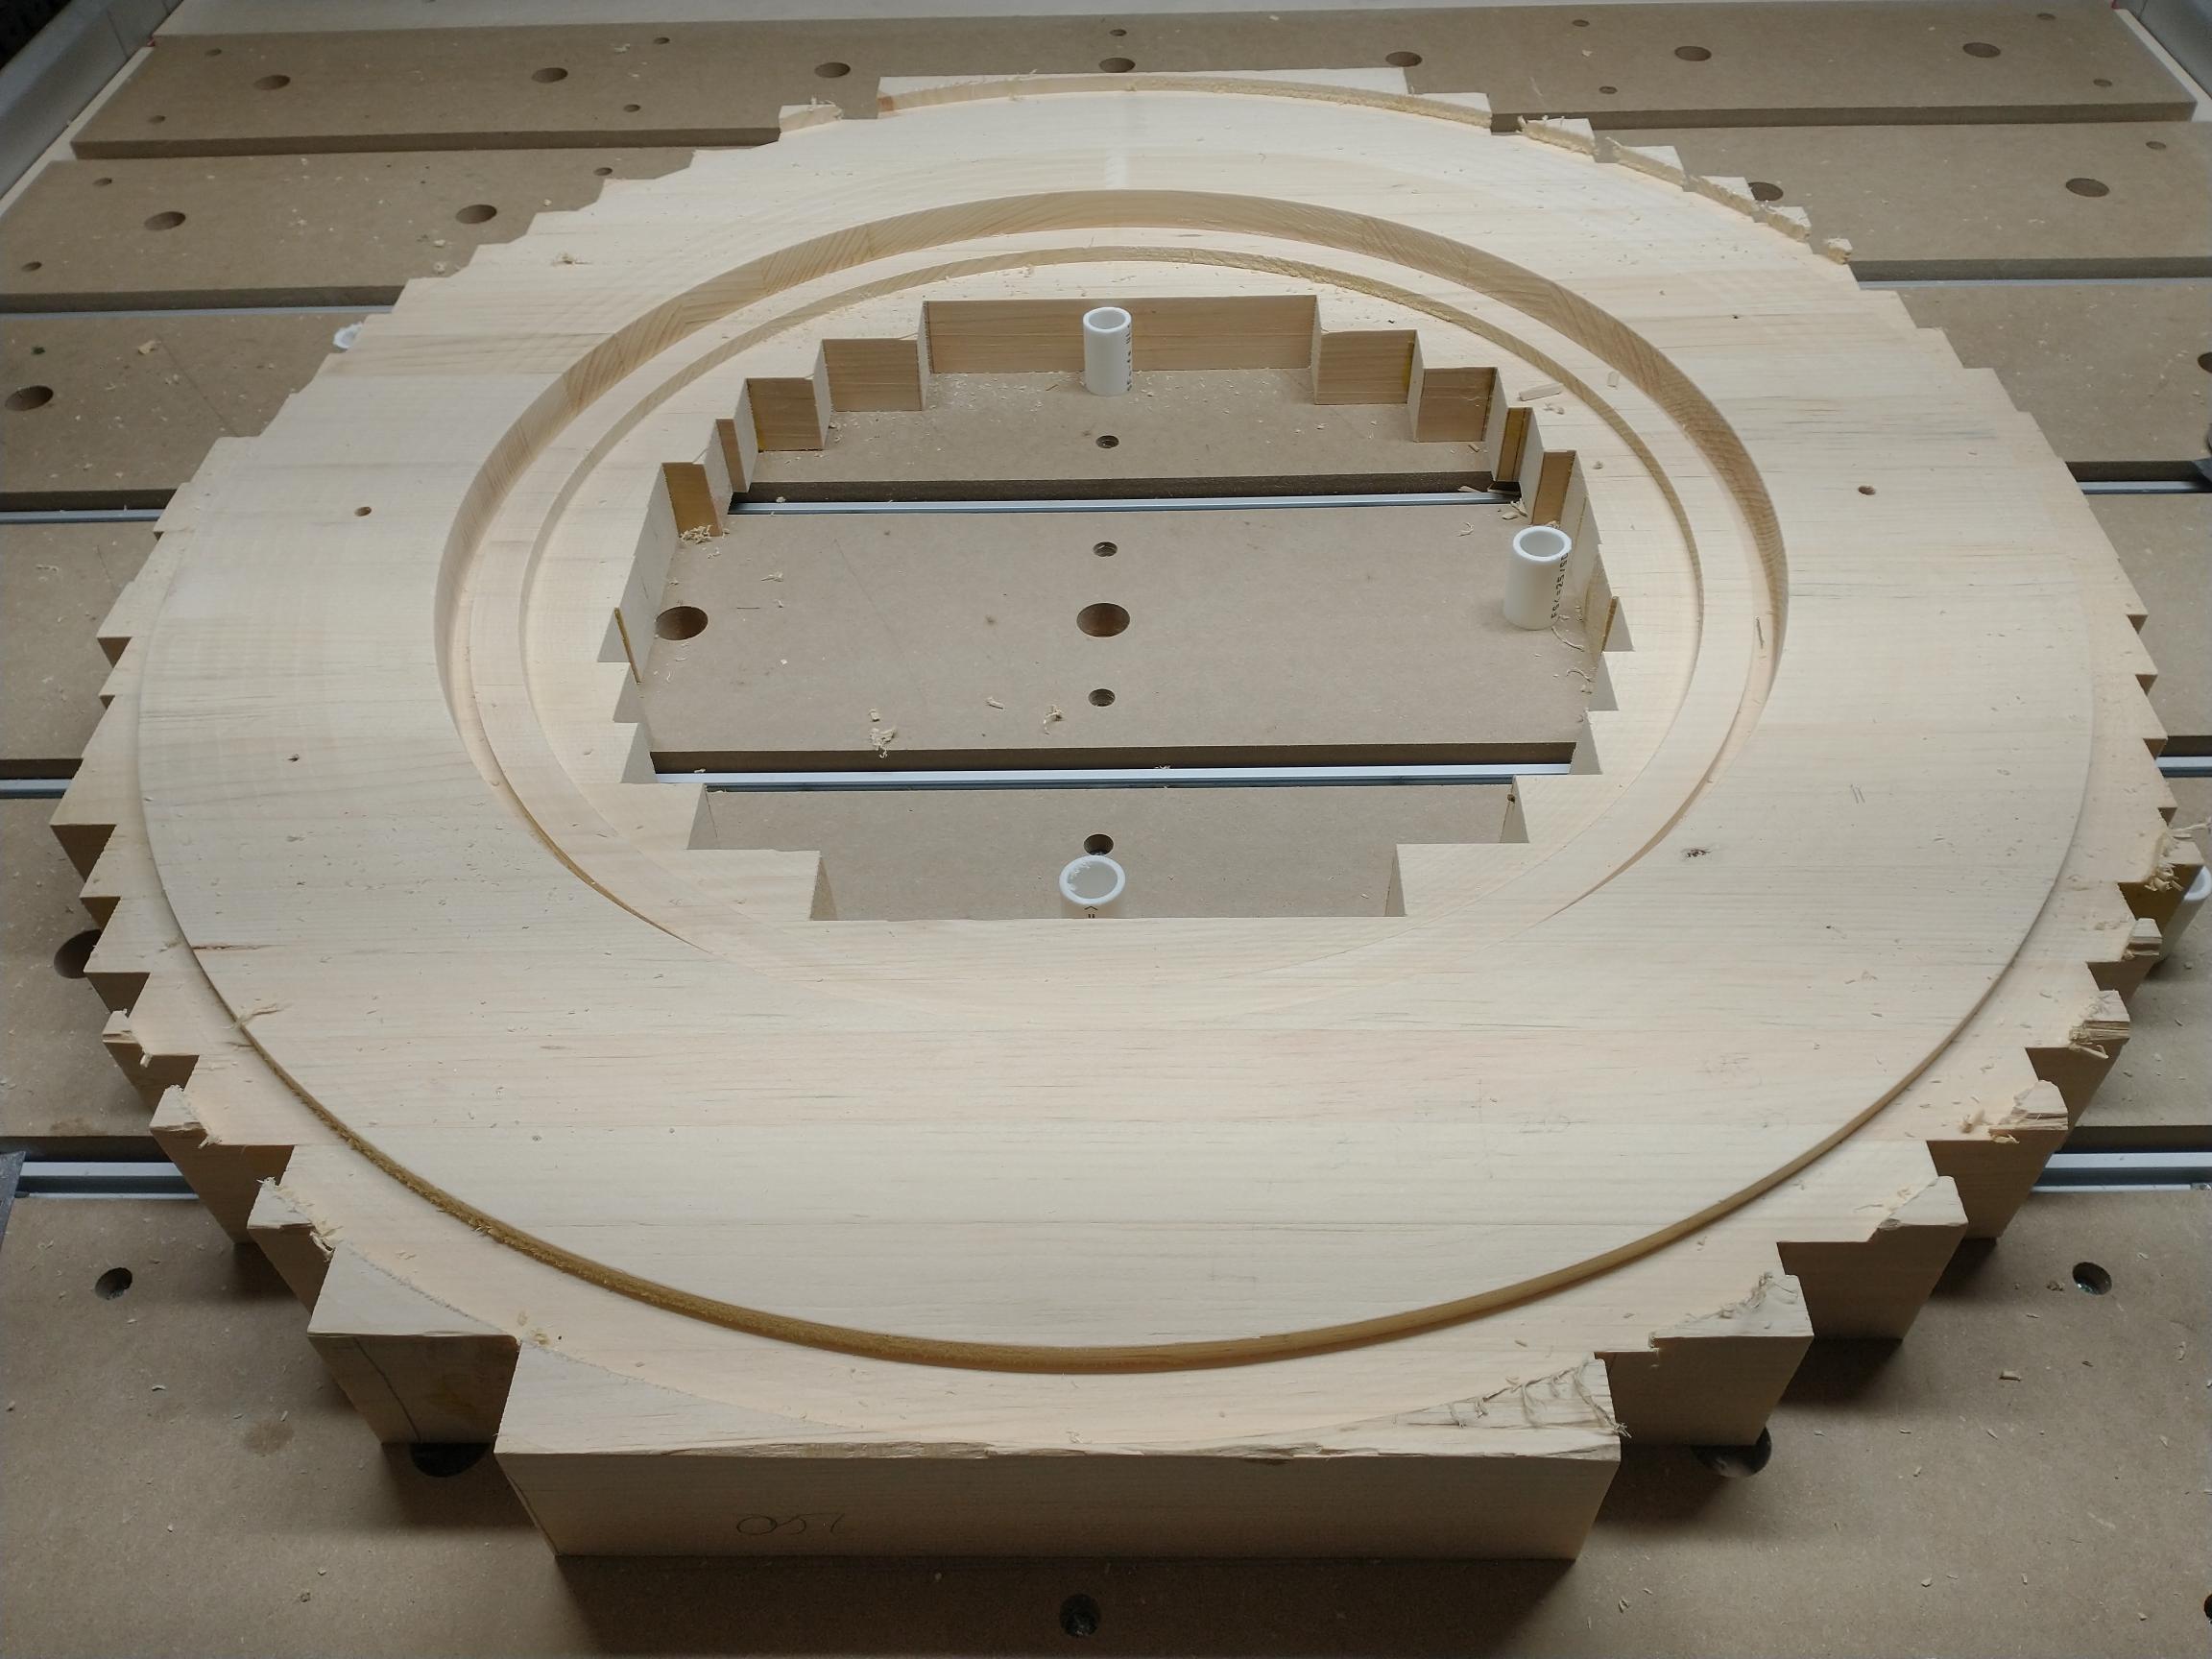
I just finished making my cuts on the back. It’s sized for the IKEA 500mm LINDBYN mirror. It will be inset complete with the frame it came with. I could have removed the frame but decided to keep it.
Compared to the surfacing bit used yesterday, my 1/4" flat end mill is way noisier. I’m guessing its length may factor into that. I needed ear protection.
This is my first big project and I must say it is a bit nerve wracking. A lot of things to think about while you’re setting up the toolpaths and again while the Altmill is making the cuts. Especially on a 2.5" deep carve like this, you need to make sure there’s always enough clearance. I’m using the default feeds and speeds that are published for the Longmill. I hope to increase them as I gain more experience.
I’m not sure how I’ll cut the inside and outside edges once the other face is done. I might use the Altmill if there’s enough clearance to cut the entire 2.5" depth. If not, I cut out a recess to use as an edge for a flush cut bit on my router table.
Wouldn’t that just be a matter of cutting 1.25” off when you are working on each side?
In theory, if your registration is correct, there should be no discontinuity where the cuts from either side meet. If there is a little bit of an issue, sanding should take care of it.
In the pictures, you can see two 1/4" holes on each side of the frame. Those are registration holes for a plywood base that will be screwed into the frame to hold it down. The plywood has the frame’s centre point drilled in to set my XY zeros.
Since you have registration holes, why did you decide to involve the plywood board when you could have just put registration holes into your spoilboard and flipped the model? (assuming you have double sided milling sorted in your mind).
I guess that would still involve double sided tape since you can’t use clamps.
The plywood is screwed into the frame and held down via the t-tracks. Not sure how much I can trust double sided tape yet. I’ve used it to hold down plywood and know it’s strong in shear but you need good contact and this is a 700mm diameter piece which may warp a bit. I didn’t want to chance it.
Ah, keeping it simple and challenging at the same time. Reminds me of a clock I made once. You have your backside, needing to house the mechanic, and your clock face side, needing the clock side. It was about the same thicknes. A teak plaque that kept its natural outline. It needed to fit a glass dome with a plastic ring friction fitting the dome in place and keeping it there no matter what. (Clock was ment to hang outdoors.) No screws, no glue (it was a finnish test base that I needed to be able to disassemble and rework.)
Anyway, all that wasn’t the biggest mind bender, it was how to do the centre hole with a bit without the reach. It took me waywayway to long to mentally step away from the cnc and include the rest of my shops machinery back into my tool box.
The cnc is so versatile that you can use it as a replacement tool for a lot of simpeler tools. That’s fine, if you do not own those tools. Like I don’t own a planer, so any planing I need done is done by the mill. But.. if I would have a planer and the material would fit it, the planer will always be the better tool to use.
I needed a hole smack middle of my clock to have as a reference to work on the backside and ended up milling a 6.5mm hole half past clock and finish up using a 6.5mm drillbit in my trusted accu drill.
I can hear yall duhhhh, but it’s not taking that step back to dismiss the cnc as the best tool in your shop, that is one of the biggest pitfalls of owning a cnc. Because it is effing blindingly awesome! Look at that thing. I am gonna use it no matter what!
Reading your story, I see you stepping away, right there when your eyes brush the router table.
I typically use Lee Valley’s double sided turning tape (Double-Sided Turning Tape - Lee Valley Tools). It really sticks and is thicker than normal tape, so it handles imperfections quite well.
Agreed. I’m lazy (or efficient), so would use the CNC as much as possible. But other tools at your disposal can make quicker work of a particular task. As an example, this is pine, easy to sand. So do I bother using a 1/4 BN end mill with 5% stepover that will take 5 hours or use a coarser toolpath and then spend a few minutes with the sandpaper? I’ll figure that out when I get to it.
I have a roll of that stuff I am trying to use up. It could be the other tape they offer as well, not sure. It drives me nuts because it is very difficult to get the protective tape off the second side of the tape. VERY annoying but I have some other tape (Amazon) that I am hoping will be easier to use once the Lee Valley stuff is used up.
It does stick really well though once you managed to get the backing off and used plenty of force to make the wood stick.
Funny that you mention that. I have an older roll with a backing that is easy to remove. My newer roll is a real pain in the ass. So much so that I don’t want to use it.