I’ll be posting here with pics very shortly.
I have a bunch of crosshair lasers lying around somewhere. I was hoping to make a quick fix for lining up the mill and laser but couldn’t get it to be dead on accurate so I left it be.
Do you have a post on your laser setup? I still like to implement them lasers to see if I can ease up the proces or get rid of the need for a dimple somewhere. a push in the right direction would be much appreciated.
@Spamming_Eddie I have started a new category and moved your post here SE. My set up has come up before, but I’ve not posted pics or any real info. I’ll get to that today and post in this category. Stay tuned.
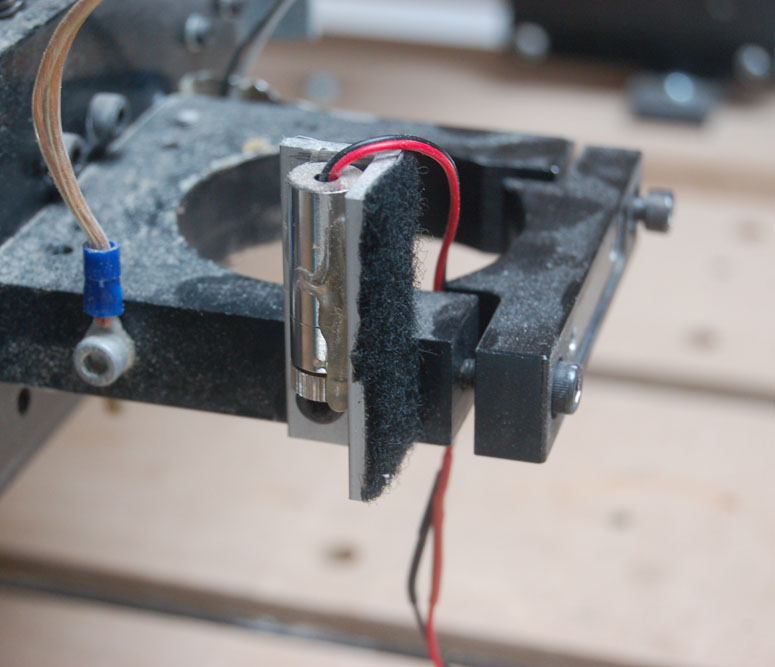
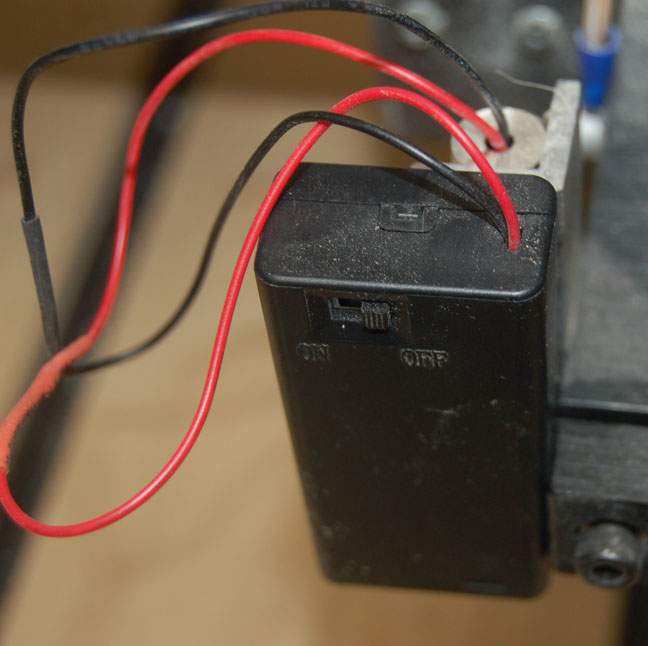
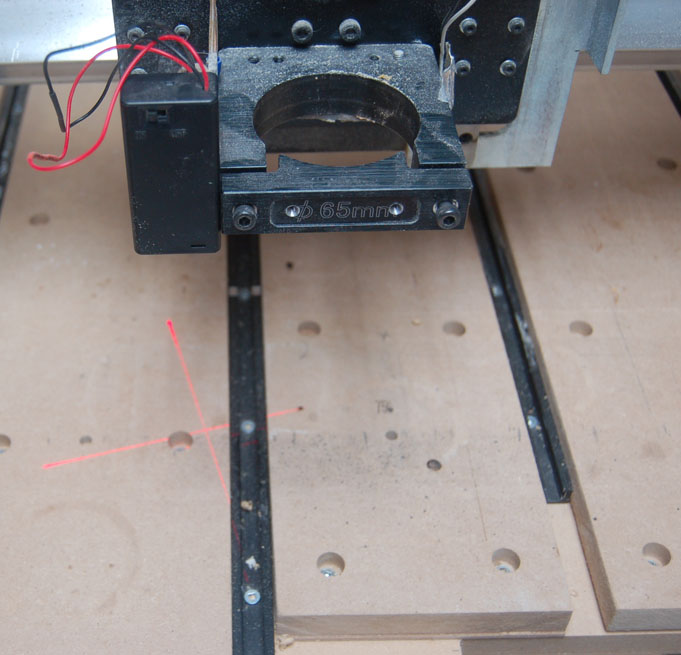
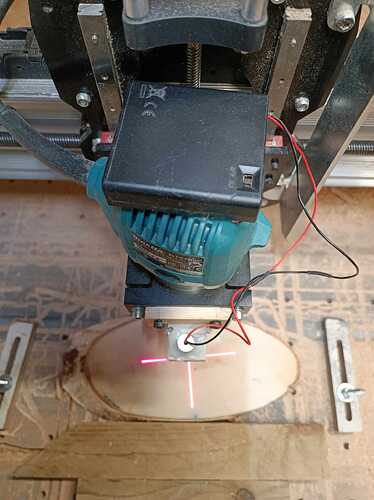
@Spamming_Eddie My apologies for the delay S_E. Here are 3 pics of my installation. You can plainly see that I went for function over looks. ![]()
Pic 1 shows the crosshair module attached to its bracket and the router bracket. I epoxied the module to a piece of aluminum angle. The angle is held onto the router bracket by one screw in the tapped hole that was already there.
Pic 2 shows the unit from the top, including the battery holder. The holder is held onto the angle with velcro.
Pic 3 shows the crosshair it produces.
The key to making this work is to ensure that the laser is perfectly parallel to the Z gantry movement in both X and Y. If it’s out, the offset between the crosshair and the router bit will vary with the height of the Z gantry.
I determined the offset by putting a v bit in the router and making a very small dimple on my spoilboard with that bit. I set XY0 at that spot. Then I jogged the laser crosshair until it shone precisely in the centre of that dimple. I made a note of the X and Y offsets. Then, I wrote a very short macro that moved the router in the opposite X and Y directions to those coordinates. The macro then resets X and Y to zero at the spot. (I didn’t do that at first and kept forgetting to zero X and Y.)
It is a pretty crude installation and simple process, but it works for me every time. I have set a keyboard shortcut to run the macro to keep things simple.
Hey Grant,
It seems we think alike. I too have made a crude battery-powered laser crosshair, but when I installed it, I felt it was more trouble than it was worth and left it be. I didn’t even know something like macros existed, so it would be all handywork.
I now see that my initial setup on the laser spot didn’t help either. Your idea is better. I think if I install it directly on the back of the laser module, I have a way better startpoint than if I first put on the cross and later mount the laser.
Learning to do macro is another hurdle to tackle, but not one I am afraid of. It’s just learning a few words in another language to be able to order a beer and say, Thank you. (And a whole bunch of swear words.)
Thanks for the inspiration. I at least know that my hardware idea isn’t that weird, and I might revisit the idea one day when I am thirsty.
@Spamming_Eddie FWIW, here is the macro that I used for the offset. I forgot to include it previously.
G91
G21
G1 Y-21.5 x76.5 F2000
G90
G20
G10 L20 P1 X0 Y0
Your X and Y values will be different, of course. I set an F value because I found that when running this as a G0 full speed run, it would be out a bit. I assumed that it had something to do with acceleration and the short distances, but I really don’t know. I do know that this slower speed works.
like the idea, which battery powered laser did you use?
@Rusty_golfer I just bought on Amazon. If you seach on “crosshair laser”, you’ll get tons of them. Mine came a 2-pack for somewhere around $15. I’ve had them for some years, so I don’t recall exactly. The same was true for the AAA battery pack. I got a switchable one to keep the wiring simple.
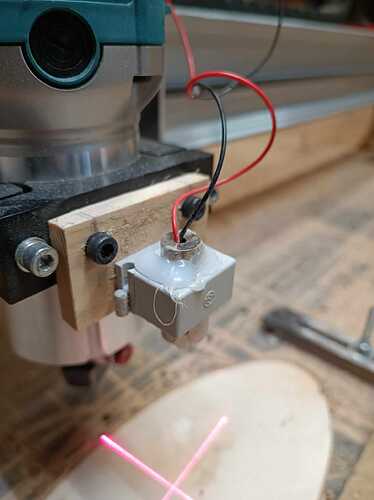
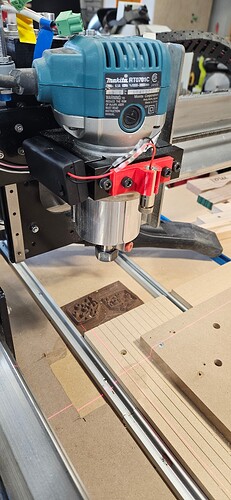
Thanks for the idea. No tapped holes on the side & didn’t feel like pulling it apart to drill/tap one so used the laser set. Easy to swap out. Just have to write the macro & good to go. Have a 3D printer so that helps also…
@Rusty_golfer That looks a lot prettier than mine. ![]()
