Cutting a detailed 1600mm+ long top, using tiling on the Longmill

I figured it was time I shared a project. This is a new “gantry” (or at least most of the top piece) to sit perpindicularly over the top of my workbench, on its own legs (to allow me to work with sheets on the bench without banging in to my tools and accessories…

I’m about 2.5h in to a two-day, two part tile-job of the top which is almost 5’ in length. This cut will get about 80% of it done then, due to being cheap and not having a ready supplier of baltic birch, I will cut the end piece out of what is left of this stock and biscuit it together.

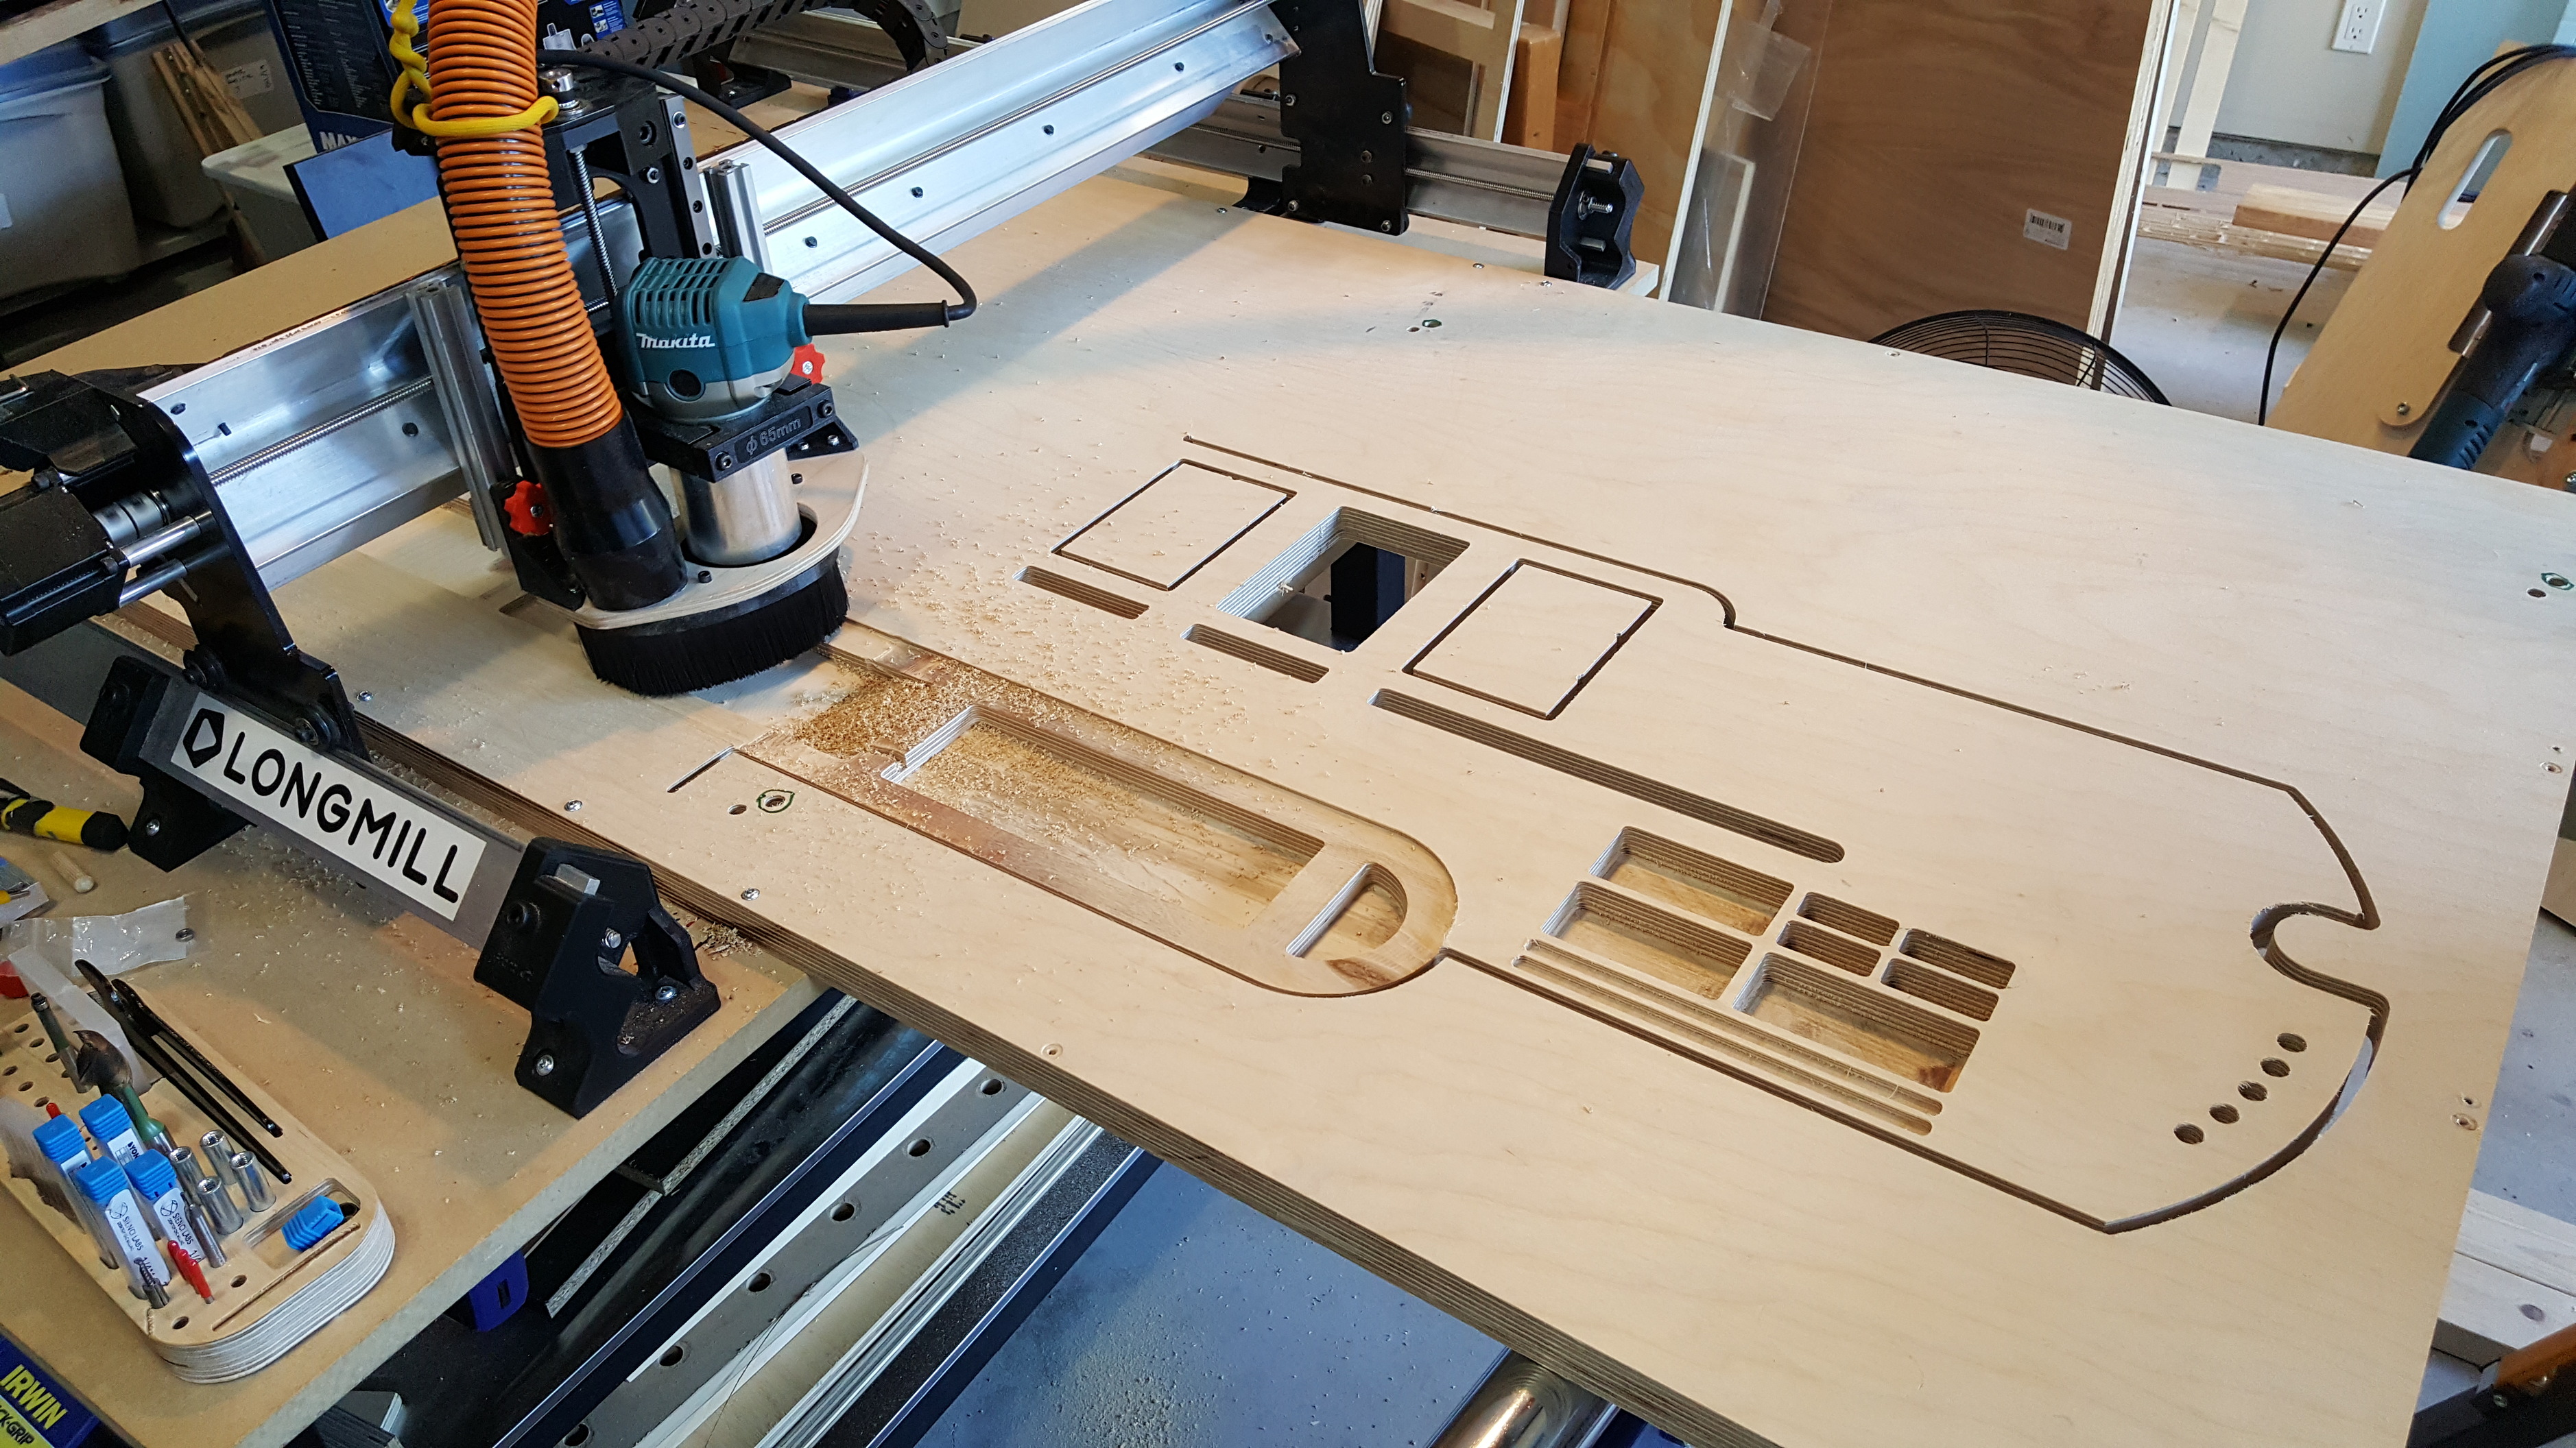
Here is a photo of the Longmill doing part two of a 1600mm deep job. I was sure I messed up either the pin alignment of the 3/8" dowels I used (over cut the holes) or that I caused an issue with messing up XYZ as I had a bit of a machine crash during the first cutting run. But I managed to salvage it and damned if the joining areas aren’t perfect! The nicks that are present aren’t caused by the two joins meeting but by some of the shenanigans when a bit slipped last night during a tool path that was initiallly too deep. So far I’d say the match up is damn near perfect.

I used Sketchup for the concept drawings and initial measurements and then recreated the 2D drawings in Fusion 360 and using the Fusion 360 stock contours feature to prepare the various parts of the job. I kept notes and will try and write it up if anyone is interested. It was daunting at first but as the concepts sunk in it became quite logical, with just a few gotchas to watch for.

Love my Longmill. So much potential in such an accessible machine. I never thought I’d be doing 100 inches per minute (2540 mm/s) cuts in baltic birch in my garage. You guys rock!

-Jeff

4 Likes

Wow Jeff, that’s an extra smooth tiling job :exploding_head:

Thanks for sharing! Are you gonna leave us hanging on the end result :stuck_out_tongue:

Patience, young Jedi. There is much work to be done on the path to completion. :slight_smile:
-Jeff

1 Like

I like your bit holder.
I made one as my second project but it really wants to be redesigned now that I have a better understanding as to what I need it for.
Well done. Looking forward to the updates.

Thanks Robby. It looks decent (except where my Z went bonkers and reamed out the center of it), but I would give it only a B on usability. I was a bit too aggressive on spacing and I knick my fingers quite easily. Next time I’ll make it bigger (although I wanted it easily carried in one hand) and I’ll put many more spots for the square bit holder/covers like the Sienci bits came in. Nice to keep them covered up, reduces the finger knicks. :slight_smile:

I will say the thing the two slots for the collet wrenchs are my absolute favorite. I tend to be a bit messy on the bench but I’ve quickly gotten used to diligently putting them back and I never wonder where they are - and stood up vertically they take up almost no space.

I’m a bit off track on the main project (although I did complete the whole top cut, both the large and piece and the small final piece) before my power switch went out. I’ve been down the proximity switch/homing/limit rabbit hole the last few days as I wait for my new controller. I need to get out of it ASAP, it’s depressing me, I prefer making things. Hopefully I can mostly wrap up the electronics tonight and make some mounts tomorrow and then be back in business, god and Canada Post willing.

-Jeff

2 Likes