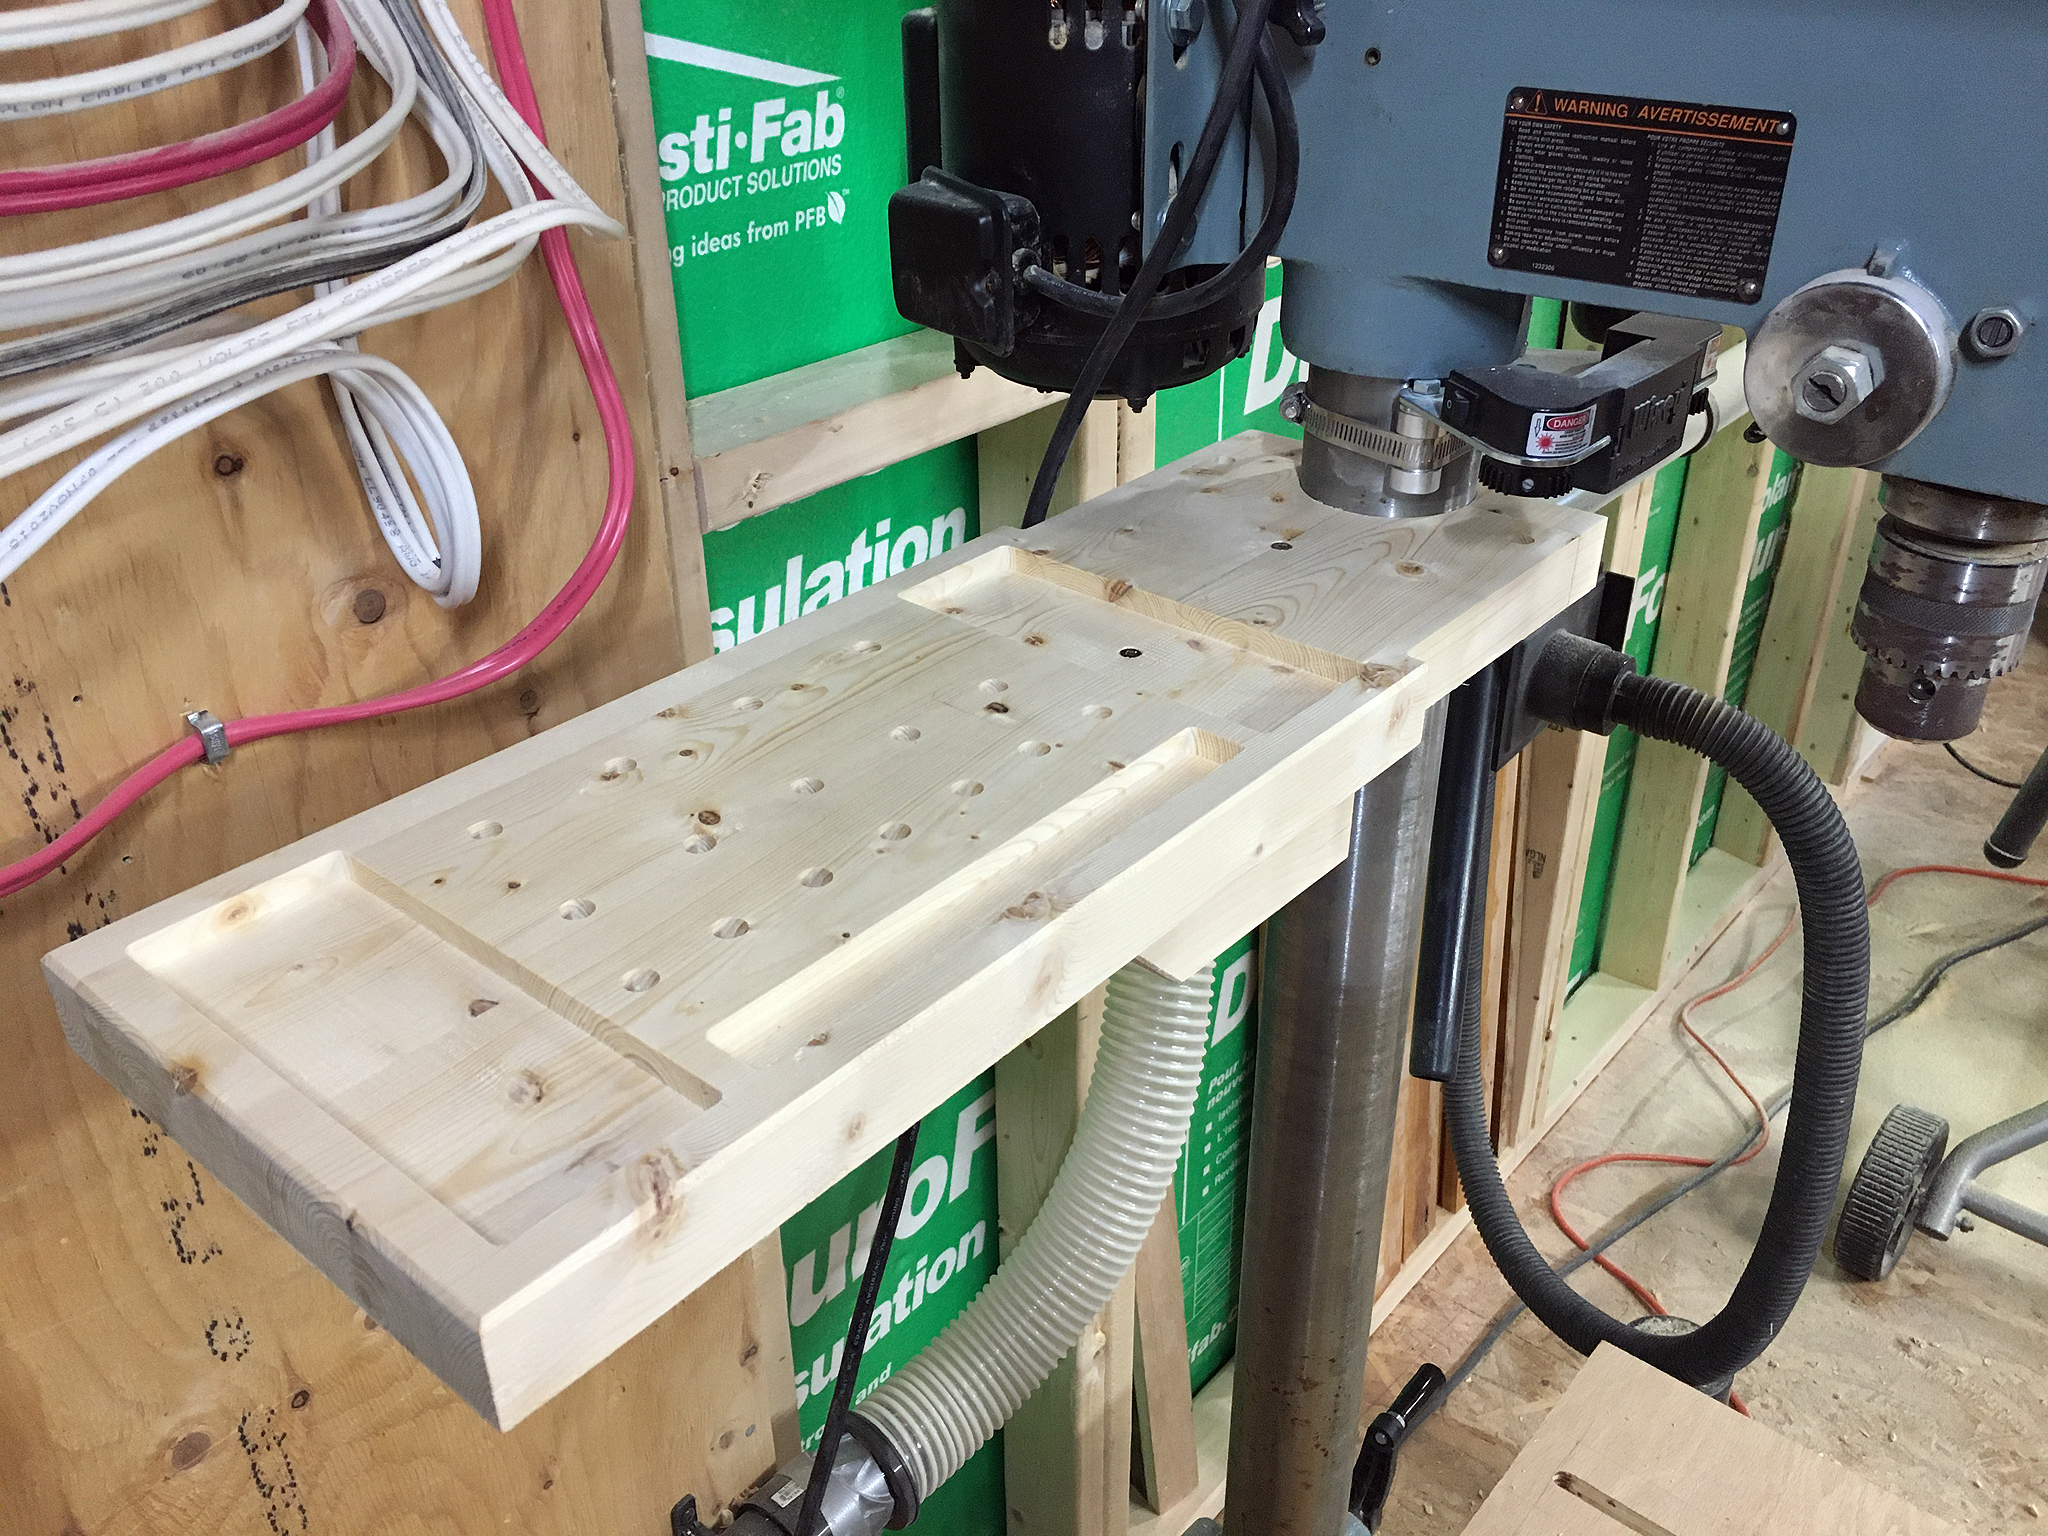
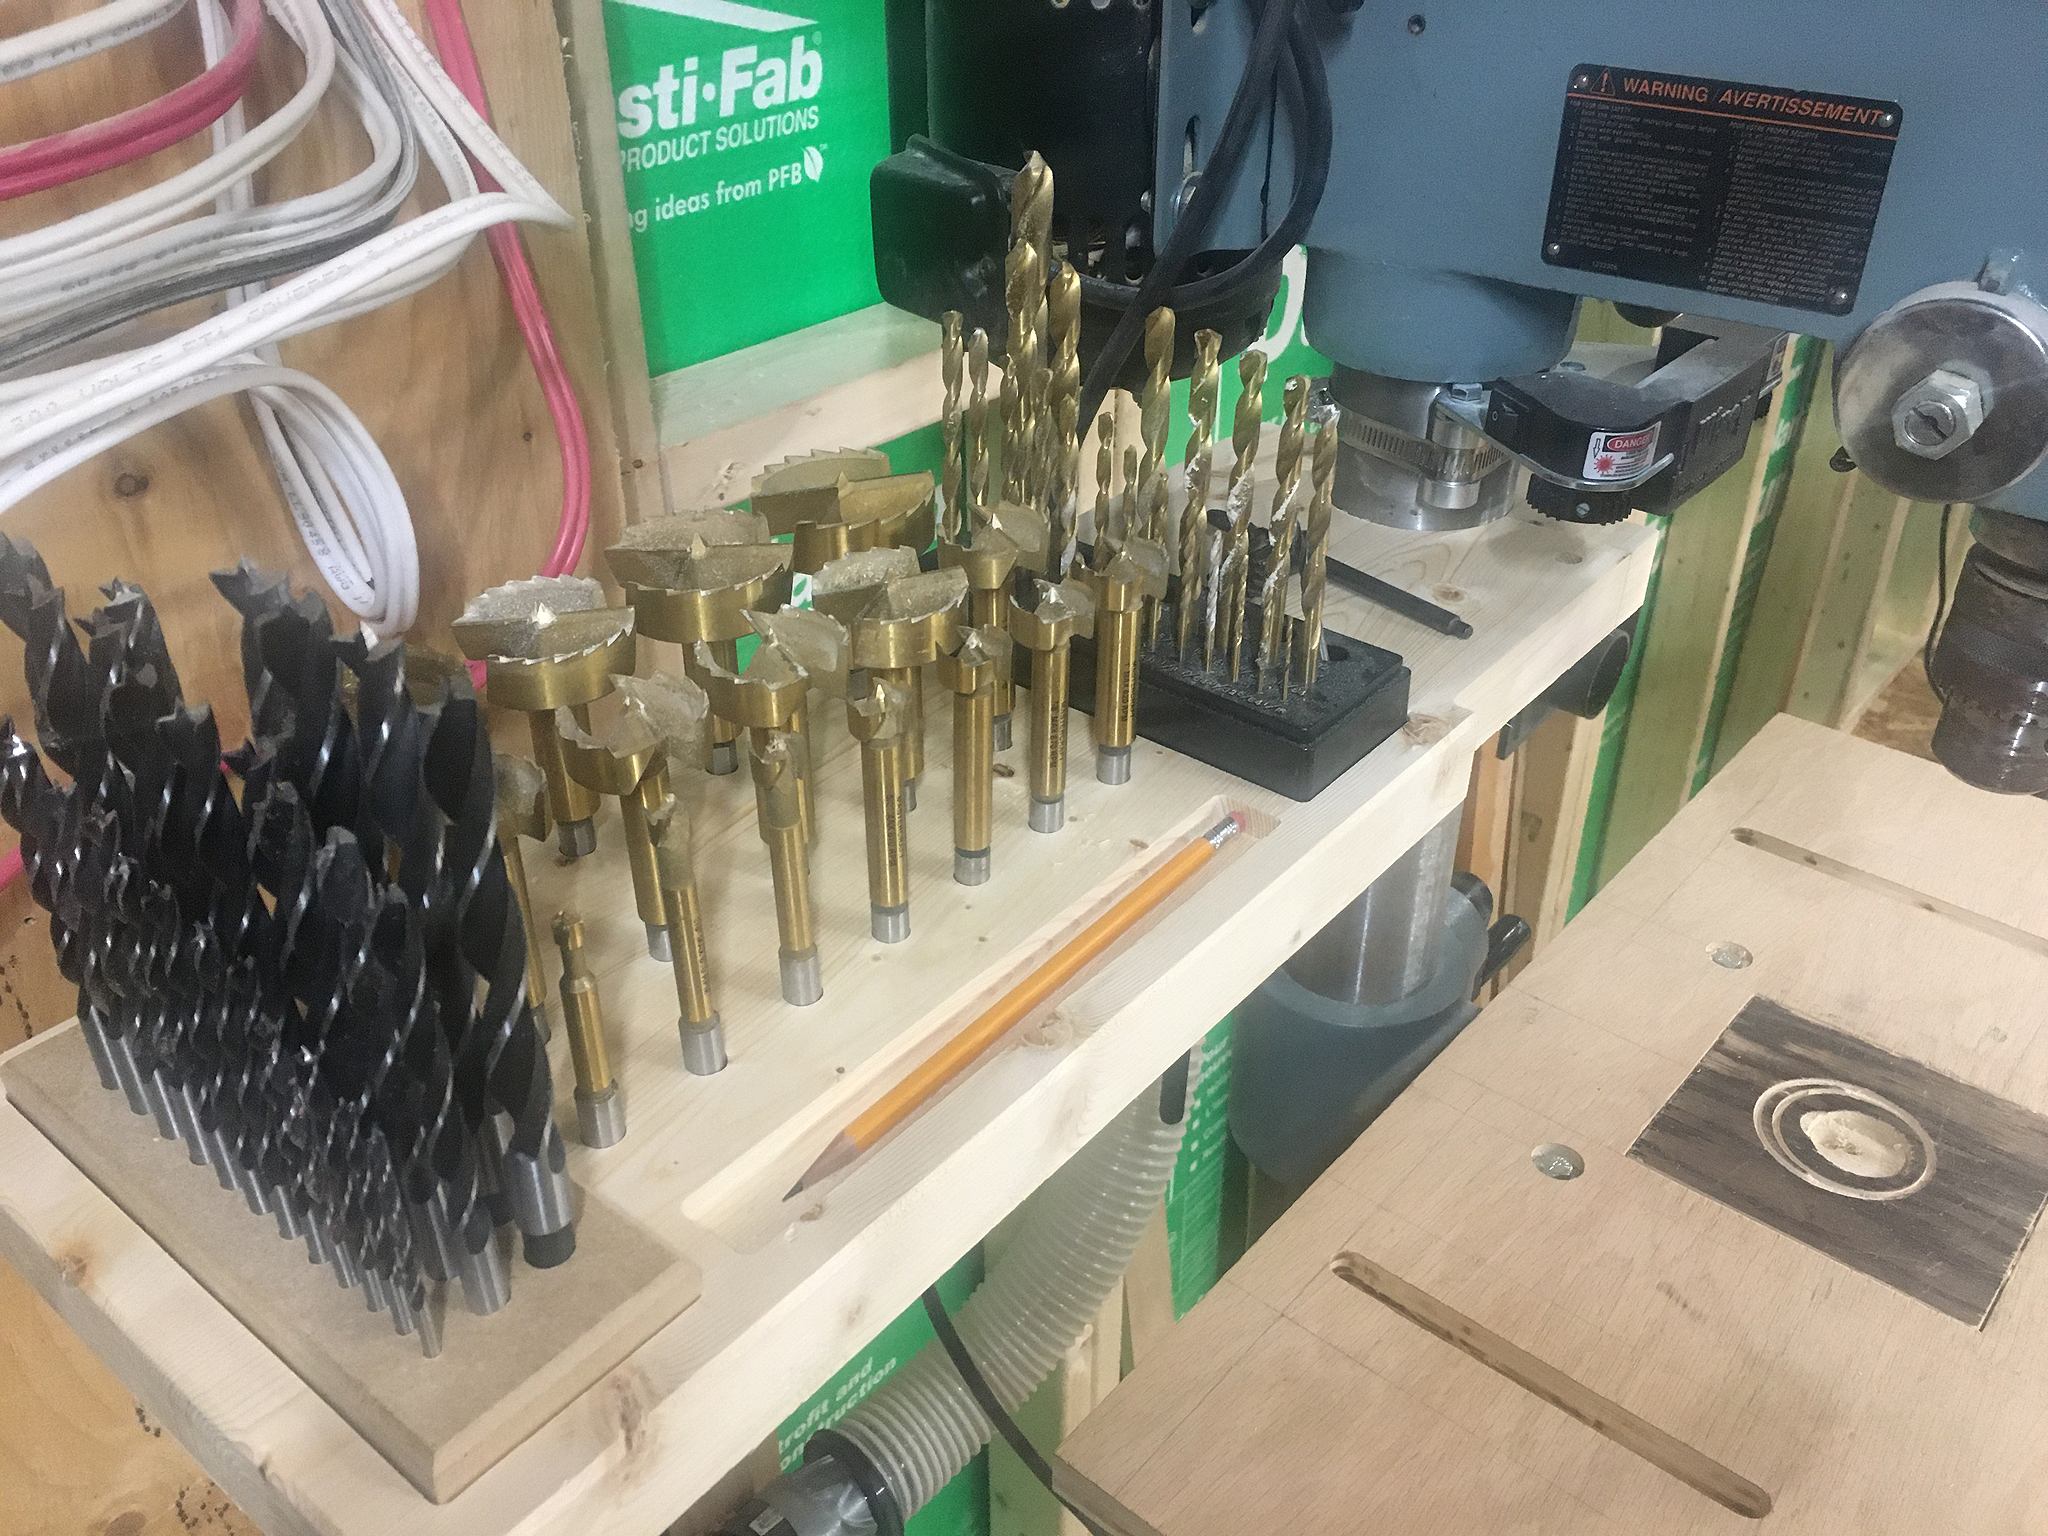
Made up this dress press accessory table for various bits. It was made from 2x4 rough lumber ($3) that has been jointed, planed and glued together. Also made up the brad point bit holder. As a person new to CNC machining, it was a fun exercise in simple design that required some experimentation with precision measurements and smooth fitments while maintaining symmetry in design. All design work and gcode files were done in Easel.
4 Likes
Awesome - That looks very nice. What is the size of that table? is your drill press bolted to the floor?
Ahh, the drill press is not bolted to the floor and appreciate the question; these beasts are top heavy, take no chances for sure.
Here is a link to the Easel project and a screen shot of it with dimensions. If you have an Easel account, it will permit copying of the design. The design does not include the support piece under the accessory tray. It is screwed into the table bottom and rests against the drill press pedestal to take the majority of the weight.
http://easel.inventables.com/projects/Cf6sbMqRvhJRz4M7hwMw7Q

1 Like
Thank you for sharing, I have an account I will check that out. I also realized after asking that your table was an accessory table, when I first looked at it I thought it was the table you used to drill on. Then I looked again, used my brain and realized it was for your bits, so prolly not a lot of weight.
Those things are heavy though, I put mine on a mobile base to wheel it around. The base is a touch wider but it’s not much more stable
I love how you designed that to wrap around the pillar. What size stock did you use?
1 Like
Heya Mike, thanks, appreciate the feedback  The whole thing was cut from pine wood that started off as a single construction grade 2x4 (< 3 bucks), cut to length, jointed, planed and then glued together to make a single, thick/wide board. The resulting board is about 1.5" thick.
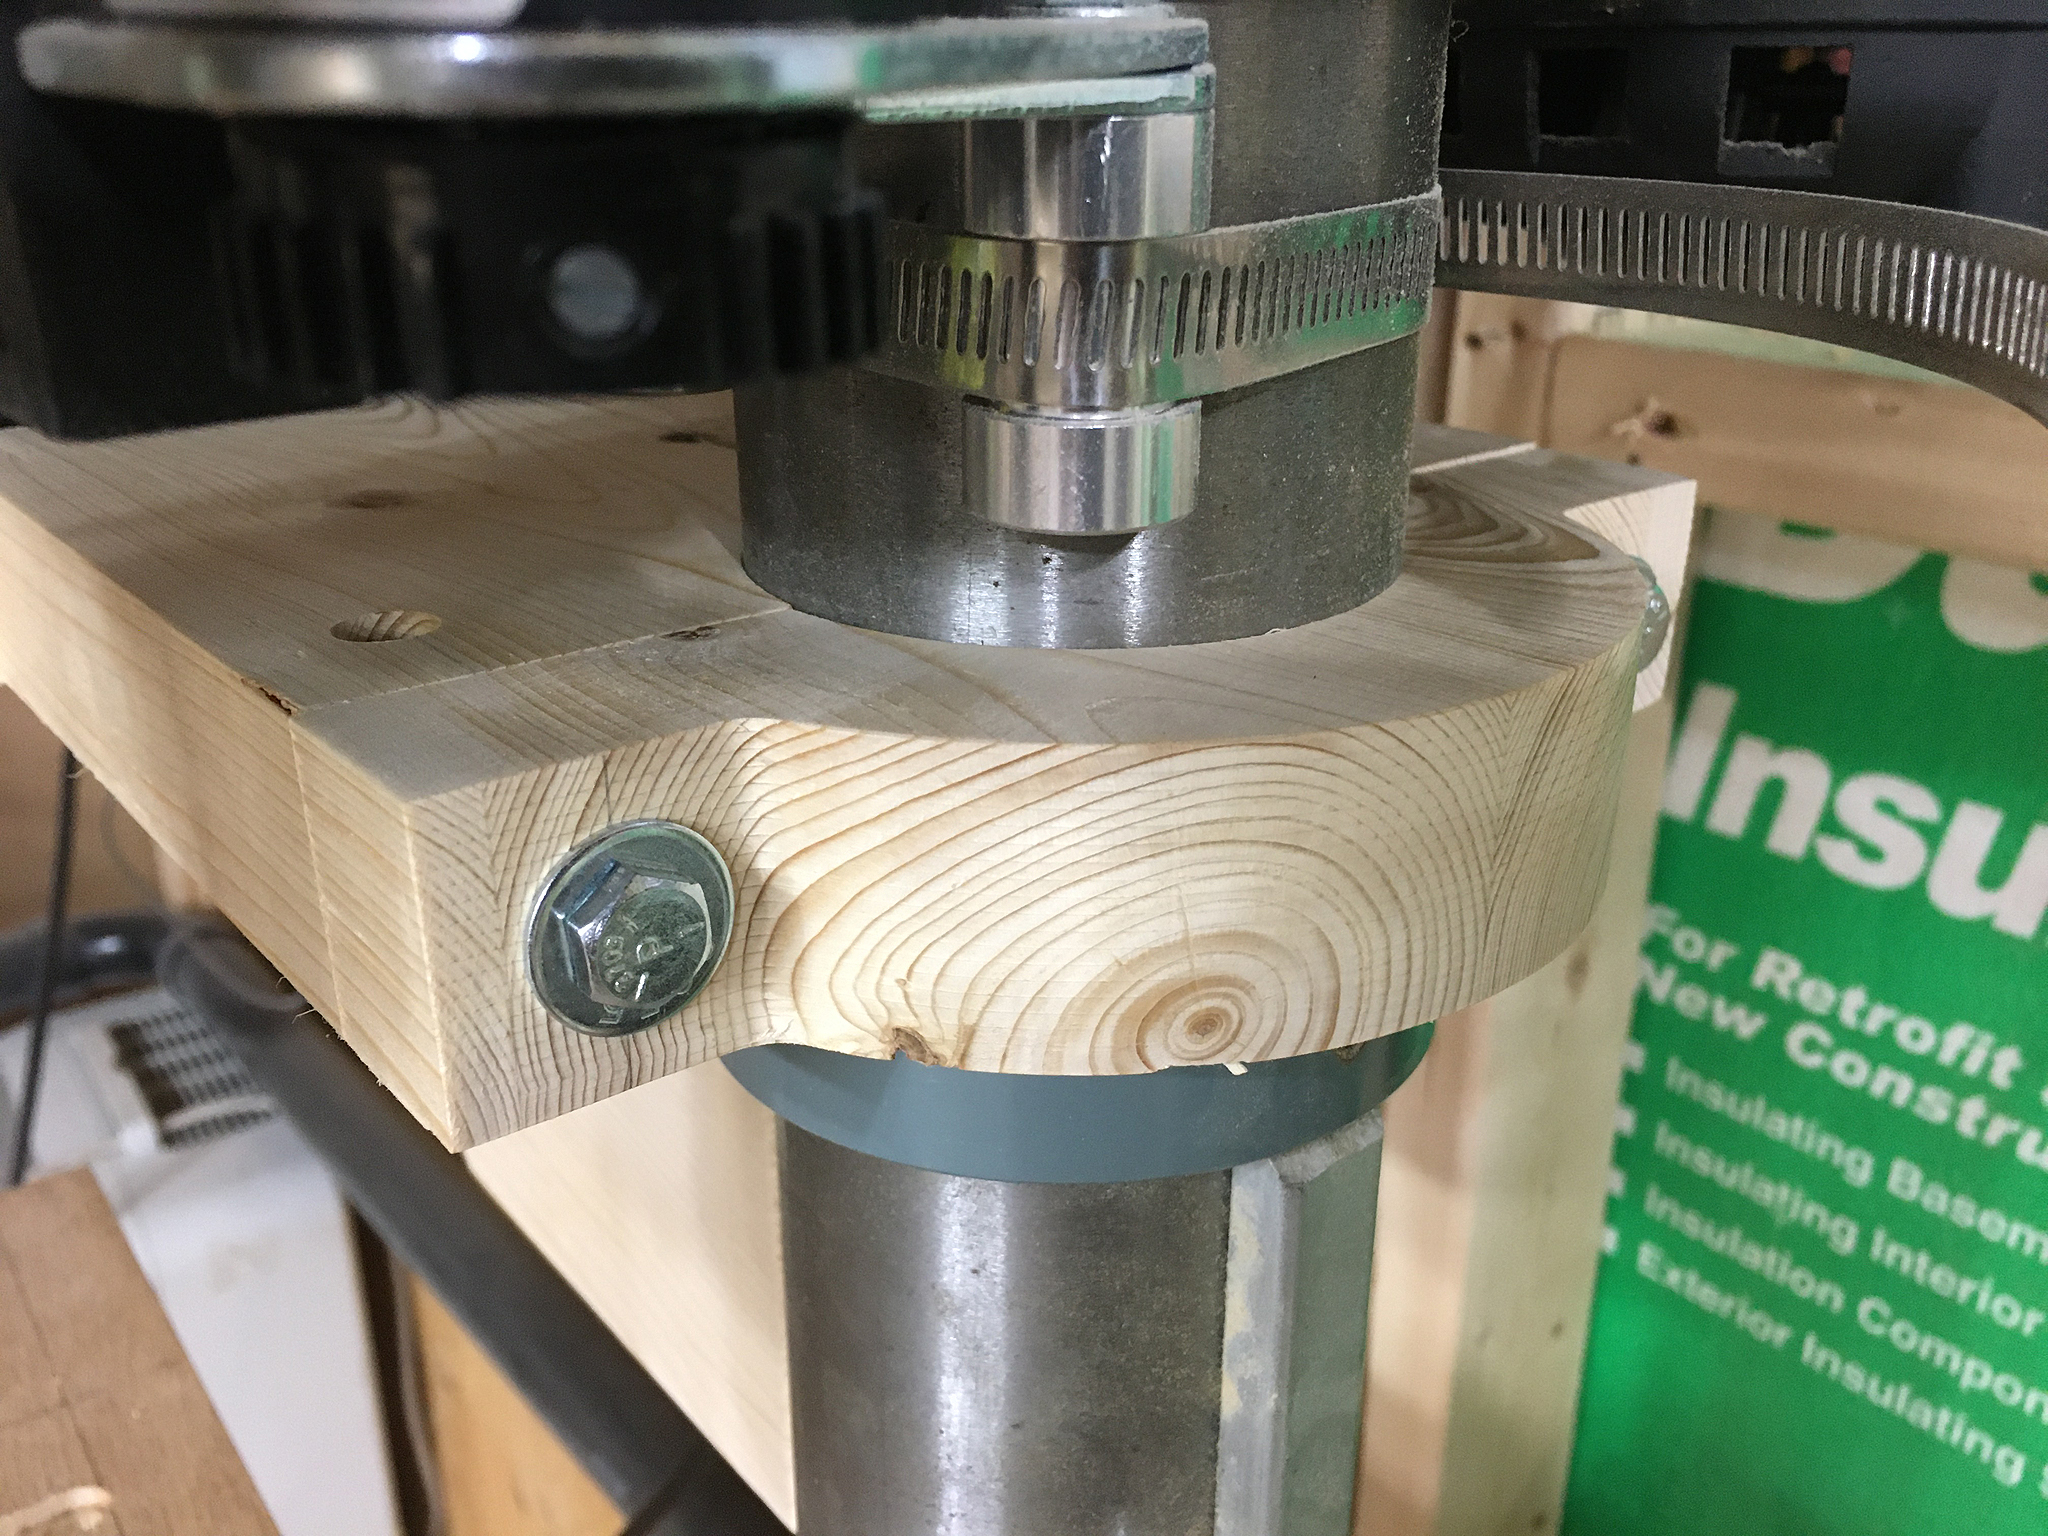
The bracket is from the same wood piece, and is attached to the main accessory tray by round insert nuts into the two holes on the far right in the design. Holes were drilled manually/horizontally into the bracket and accessory table to accept the bolts.
Design of the pillar attachment was done using the Boolean functions in Easel (several steps). In this case, the diameter of the bracket precisely matches that of the pillar and was an “outside” cut.
1 Like