I wanted to modify the dust shoe to make it a easier to get at the collet nut and the bits.
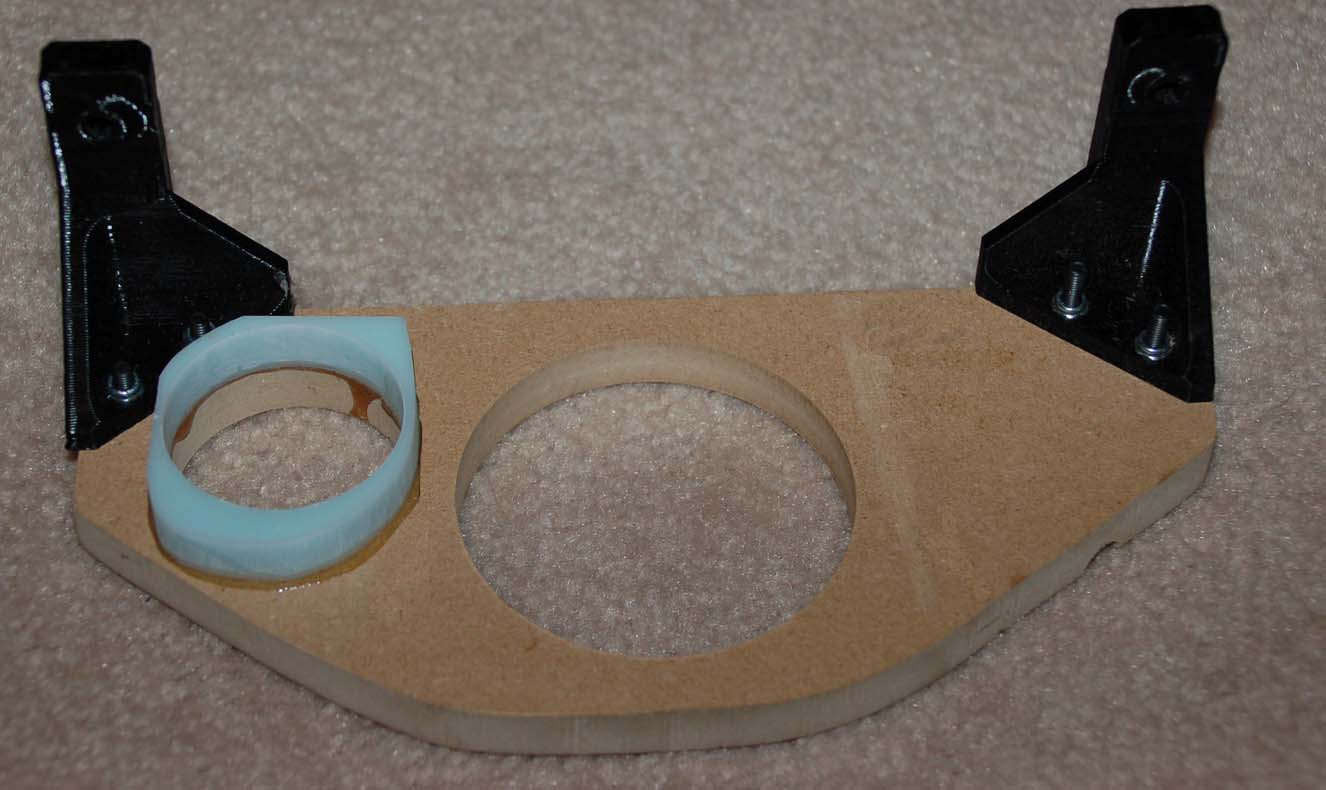
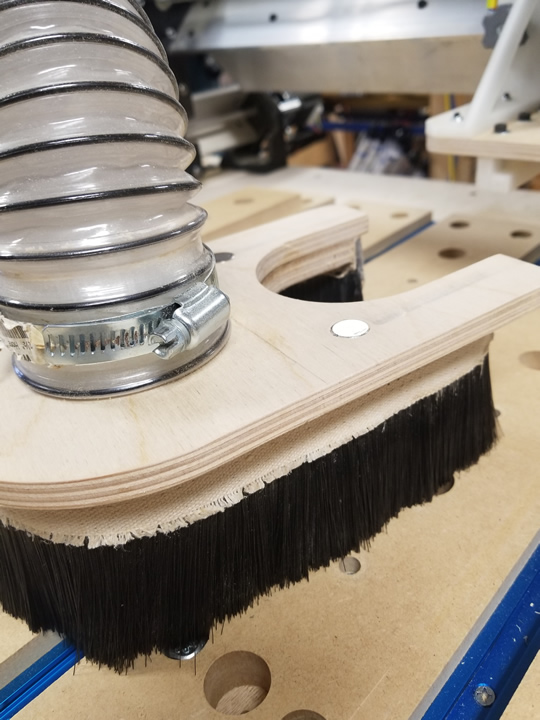
I made two copies of the plywood part out of 1/2" mdf, since I wanted something a bit thicker to hold magnets. Then, I attached the upright supports to one of the new pieces and the brush to the other. I mounted disc magnets into both the part holding the supports and the part holding the brush.
Now, to remove the brush, I just unclip it from the top piece, which stays on the machine.
Thats a great idea! I would maybe suggest adding a couple tabs/ dowels so that the show staying aligned when lateral force it applied - for example, on my machine I often have some taller clamp knobs that will hit the bristles but not the plastic or wood of the shoe. that force might be enough to dislodge the magnets, which could push the shoe into the path of the router.
I’m going to have to do that modification though, great idea!
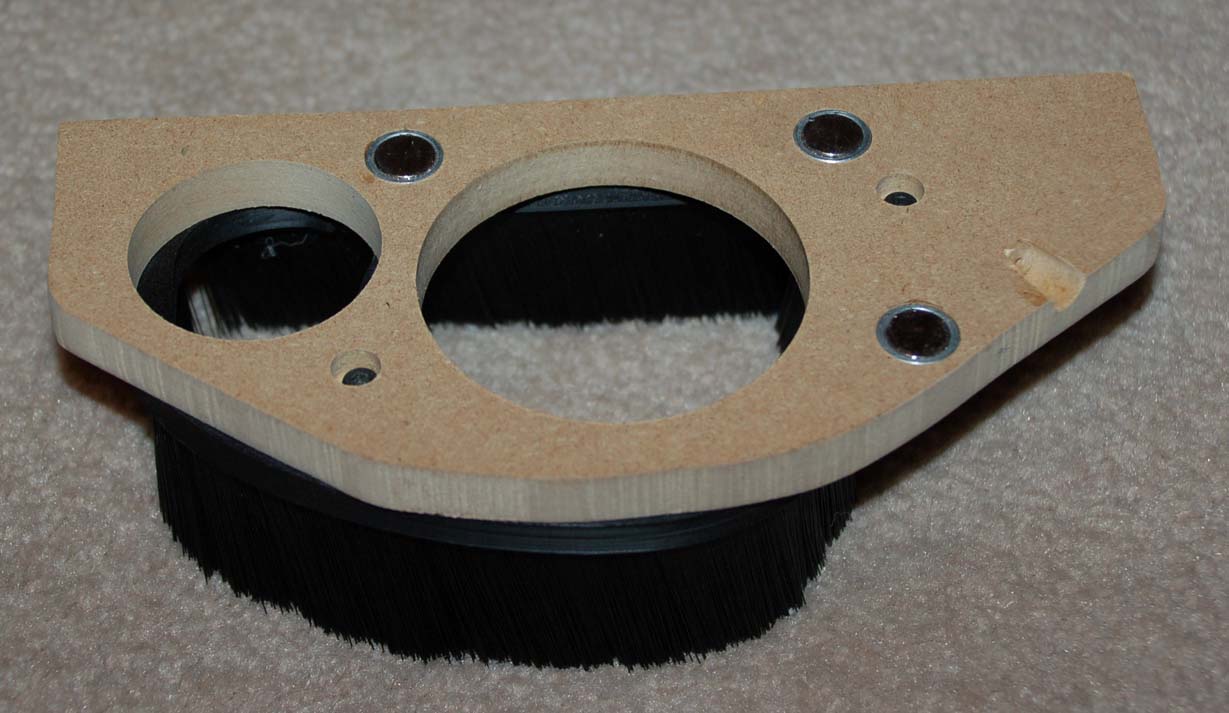
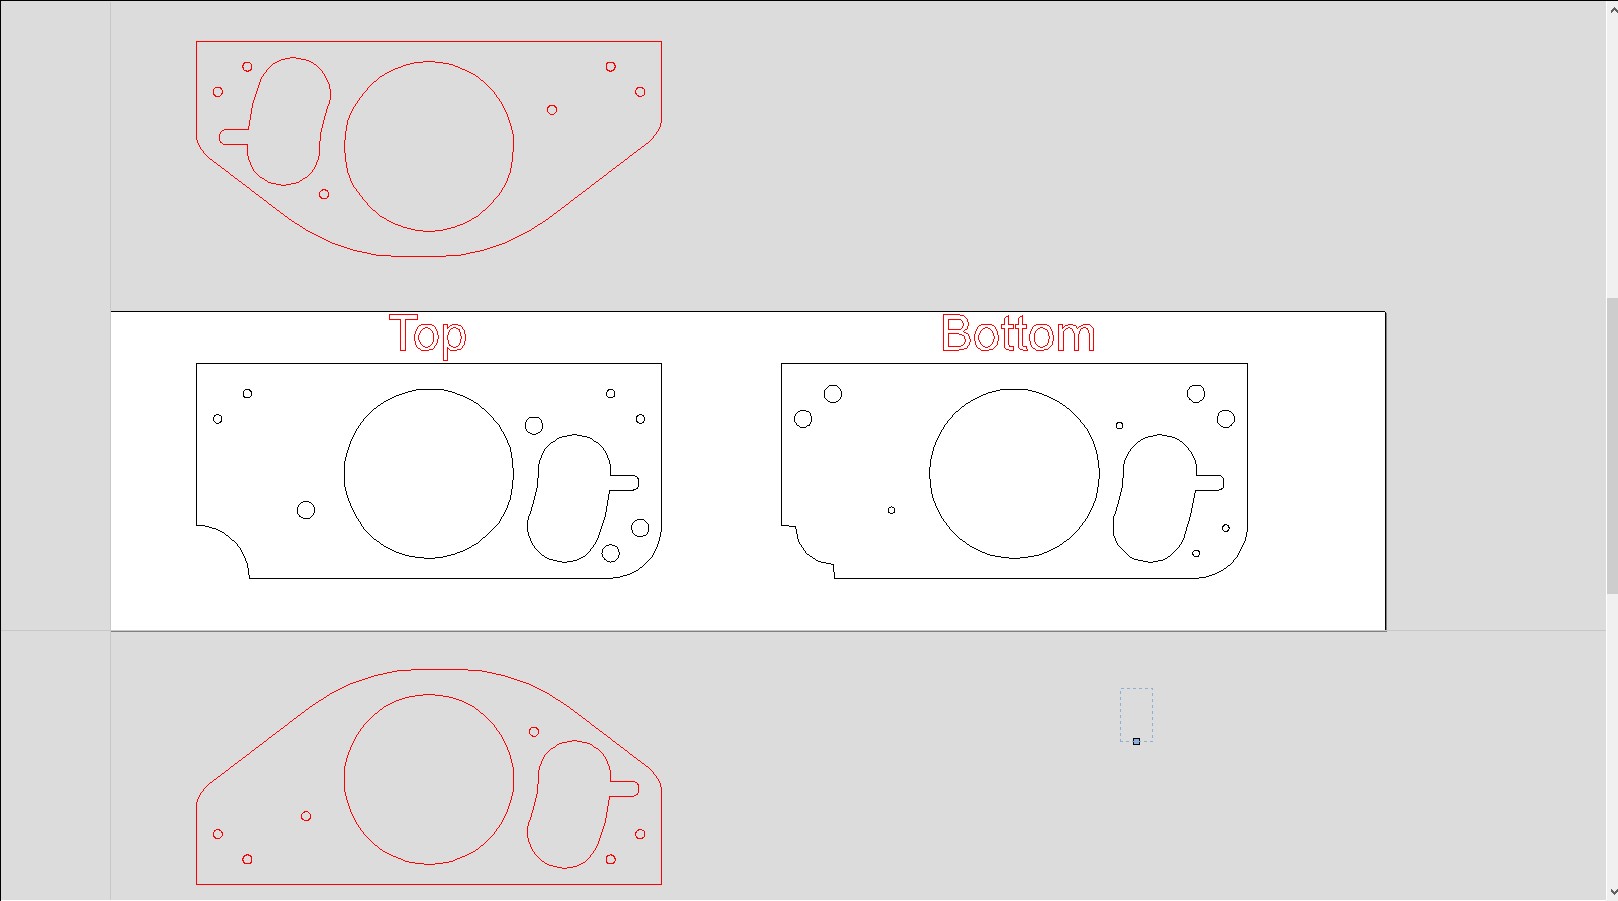
Attached are pics of the dust shoe mod.There is not a lot to see, I guess.
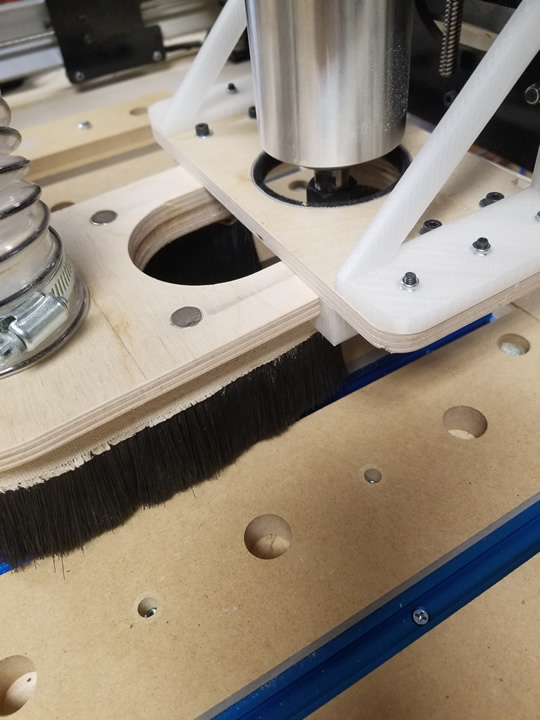
I traced the plywood “top” that came with my LongMill onto 1/2" MDF. I cut out two copies on my bandsaw. (I suppose that I should have used the LongMill, but my skills with a bandsaw and drill press far exceed those on the LongMill.)
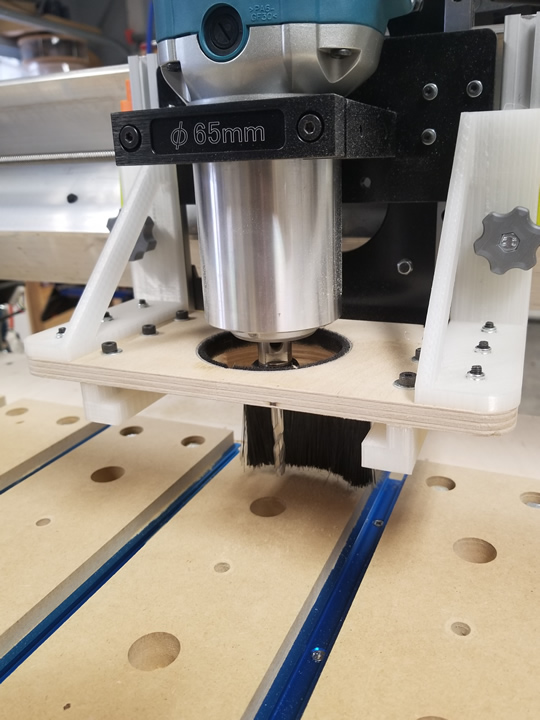
I have a 2 3/4" forstner bit, so I used that to drill out the hole for the router. Likewise, I have a 1 3/4" forstner bit that I used to drill out for the dust collector hose.
On the top piece, I drilled out for the screws holding the brackets. On the underside, I counter bored for the heads of the bolts so that they are sunk below the surface of the MDF. I used a scrap piece of Corian (the mint coloured piece in the pic) give a bit more thickness to plug the dust hose into. I expoxied that to the MDF. It won’t wear from inserting the removing the hose like MDF would.
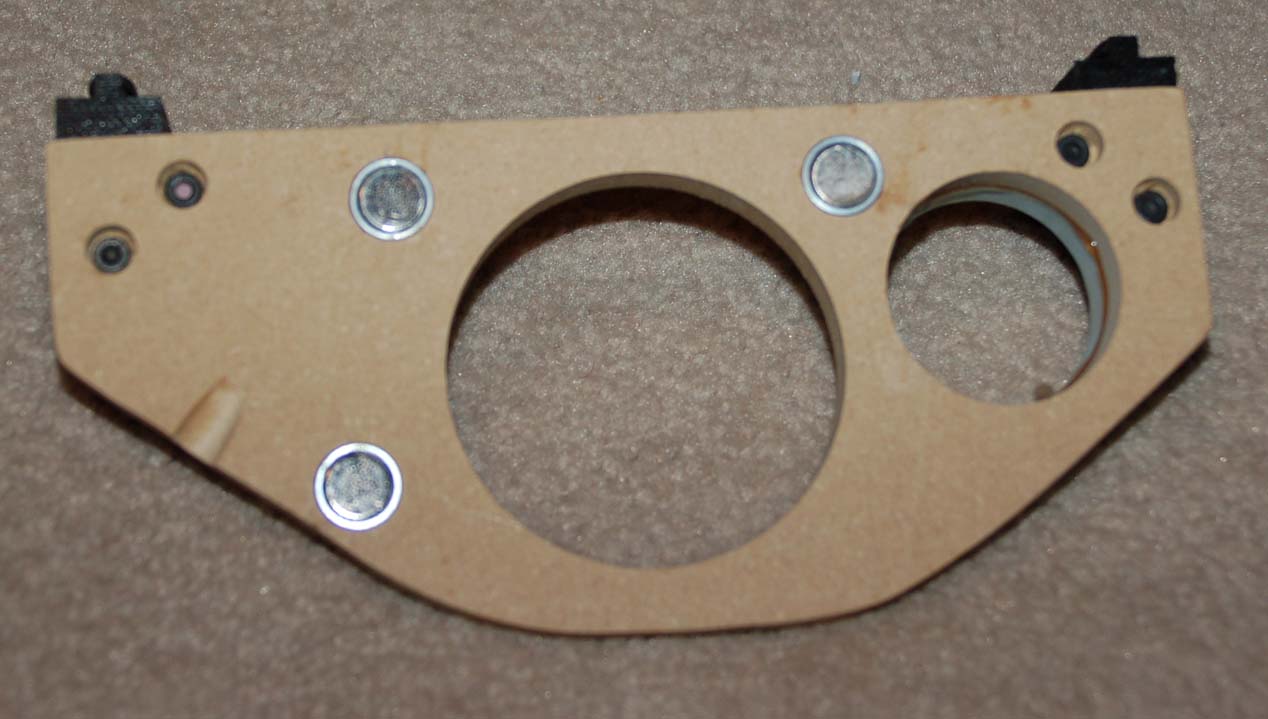
On the piece holding the brush, I drilled the two holes holding the brush to the MDF. Again, I counterbored them so that they heads of the bolts sit below the MDF surface.
I had on hand 1/2" rare earth magnets. I get them locally from Lee Valley. I also had the cups they fit into. I went with three magnets in each piece of MDF. The holes for the cups are 5/8 and are drilled about 3/8" deep. The cups are epoxied and screwed in place.
My original plan was to simply make a top plate from MDF and put magnets in it and in the brush itself. But, there is not enough meat in the brush frame to hold magnets. It may well have been strong enough to simply put magnets in the top MDF and wrap steel wire around the brush frame, but I wanted more surface and went with the second piece of MDF. That could well prove to be overkill.
I drilled a notch in the two pieces of MDF that will allow me to put a screw driver in between to pry the pieces open, in case it’s too tough to simply pull it off.
That’s it. Long winded, I know. If you have any questions, feel free.
Mike: That’s not a bad idea. I’ve not run a job with this yet, but I can say that the magnets are too strong to simply pull the two piece apart. I need to use something in the lateral notch that I drilled to pull them apart.
That said, they are not as strong in shear as in direct pull, so hitting something could move it. Time will tell, I guess.
I like it, I’m thinking I would make it pretty close to the original, but bring in the router hole diameter closer to the body of the router to stop chips coming out that hole. Can pull in the part from on shape and convert to a dxf or something to cut with, I would imagine - that is where I sometimes get goofed up with the cnc. if it was a 3d printed part I could just take the STL and print it on my 3d printer but getting the files to the CNC sometimes confuses me yet.
Really like that idea though, looks great and solves a problem I have as well!
Mike: The router hole in mine is smaller than the stock one. I happen to have a 2 3/4" forstner bit, so I used it. The hole could still be a bit smaller, but not much, really. Maybe when I am a bit more competent in the CNC, I’ll route a new one with a more precise fit.
Likewise with the hole for the dust hose. The stock one never worked for me. The adapter was not close to fitting in the odd-shaped hole. Initially, I glued and siliconed it in place. Then, it was just easier to make something with just a round hole that my vac hose would friction fit into. Again, I happen to have a 1 3/4" forstner bit. With that and a bit of sanding, my vac hose fits snugly. I used corian as it won’t wear from removing the hose often. I need that hose for my vacuum.
I don’t mean any of this as a criticism of Andy and Chris’ design. They needed to design for a range of routers and vac hose sizes. I can design just for my equipment.
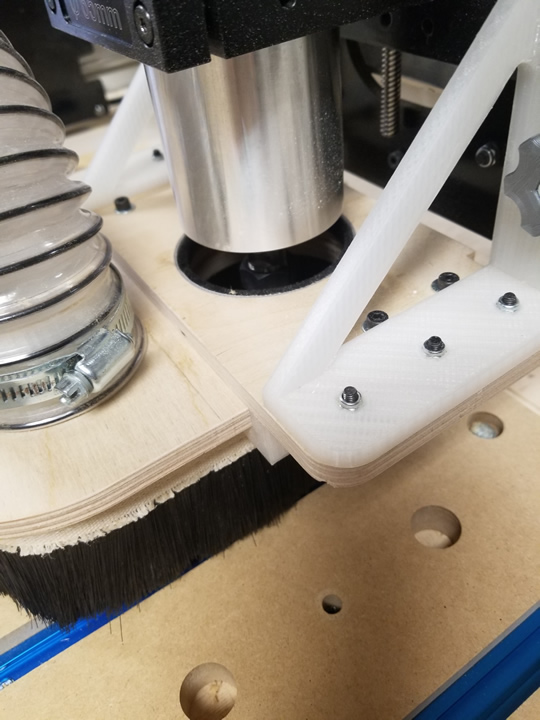
I wasn’t satisfied with the dust shoe design and looked around on the internet for ideas. I decided on a 2 part shoe so that it would be easier to access the collet for cutter changes and zeroing the cutter. I used a combination of 3D printed parts and CNC cut parts with a brush that I found on Amazon. The removable part slides into the stationary part and is held in with rare earth magnets. It accommodates a 2.5 inch hose. Here are some pics.
I like it Philip. I did something similar, but I am using the Mill-supplied printed side brackets. I don’t have a 3D printer to make others and the stock ones seem to be doing the job so far. Yours are more robust for sure and I may end up having to do something owing to the cantilever effect of the new shoe.
I would think that you could make the brackets out of wood or acrylic easily enough or even better just get a 3D printer. You can also order them printed on Thingiverse but I think it is a little pricey. When I first saw how much dust the CNC generated I was afraid that I would need some sort of enclosure, but this new dust shoe works great. I have it connected to an old Fein vacuum with a dust separator. I am very satisfied with the performance as I get very little dust in the shop. I plug the router into the auto start on the vac so it is very convenient to use.
I’m still struggling with the total outlay for the Mill, the table, mills and all the peripheries. The last thing that I will do will be to buy yet another toy.
As you say, I can always make something out of wood. So far, though, the stock supports seem to be doing a fine job.
I have my shoe connected to my 2HP dust collector. I hook the collector up to a 4" pvc pipe, which I then reduce to 2 1/2" at the Mill. With this setup, there is virtually no dust on the table or the piece.
Does anyone else experience significant binding trying to adjust the dust shoe up and down to be the right height for your workpiece? I realize that this probably means the aluminum tracks aren’t parallel, but for what it’s worth they did glide decently as directed during setup. I think I may sand down the 3d printed portion that rides in the aluminum t-track. I don’t see it as super important for the shoe to be perfectly square to the workpiece surface.
Sorry if this is a side-track from the purpose of this thread. I was looking for magnetic dust shoe mounting ideas and reading this thread reminded me of my binding issues. ¯\_(ツ)_/¯
Adam: I had that problem at first, too. I just loosened the bolts holding the tracks and ran the shoe up and down to pull them into alignment. I tightened the shoe about half way in the travel, then snugged up the bolts. That fixed the problem for me.
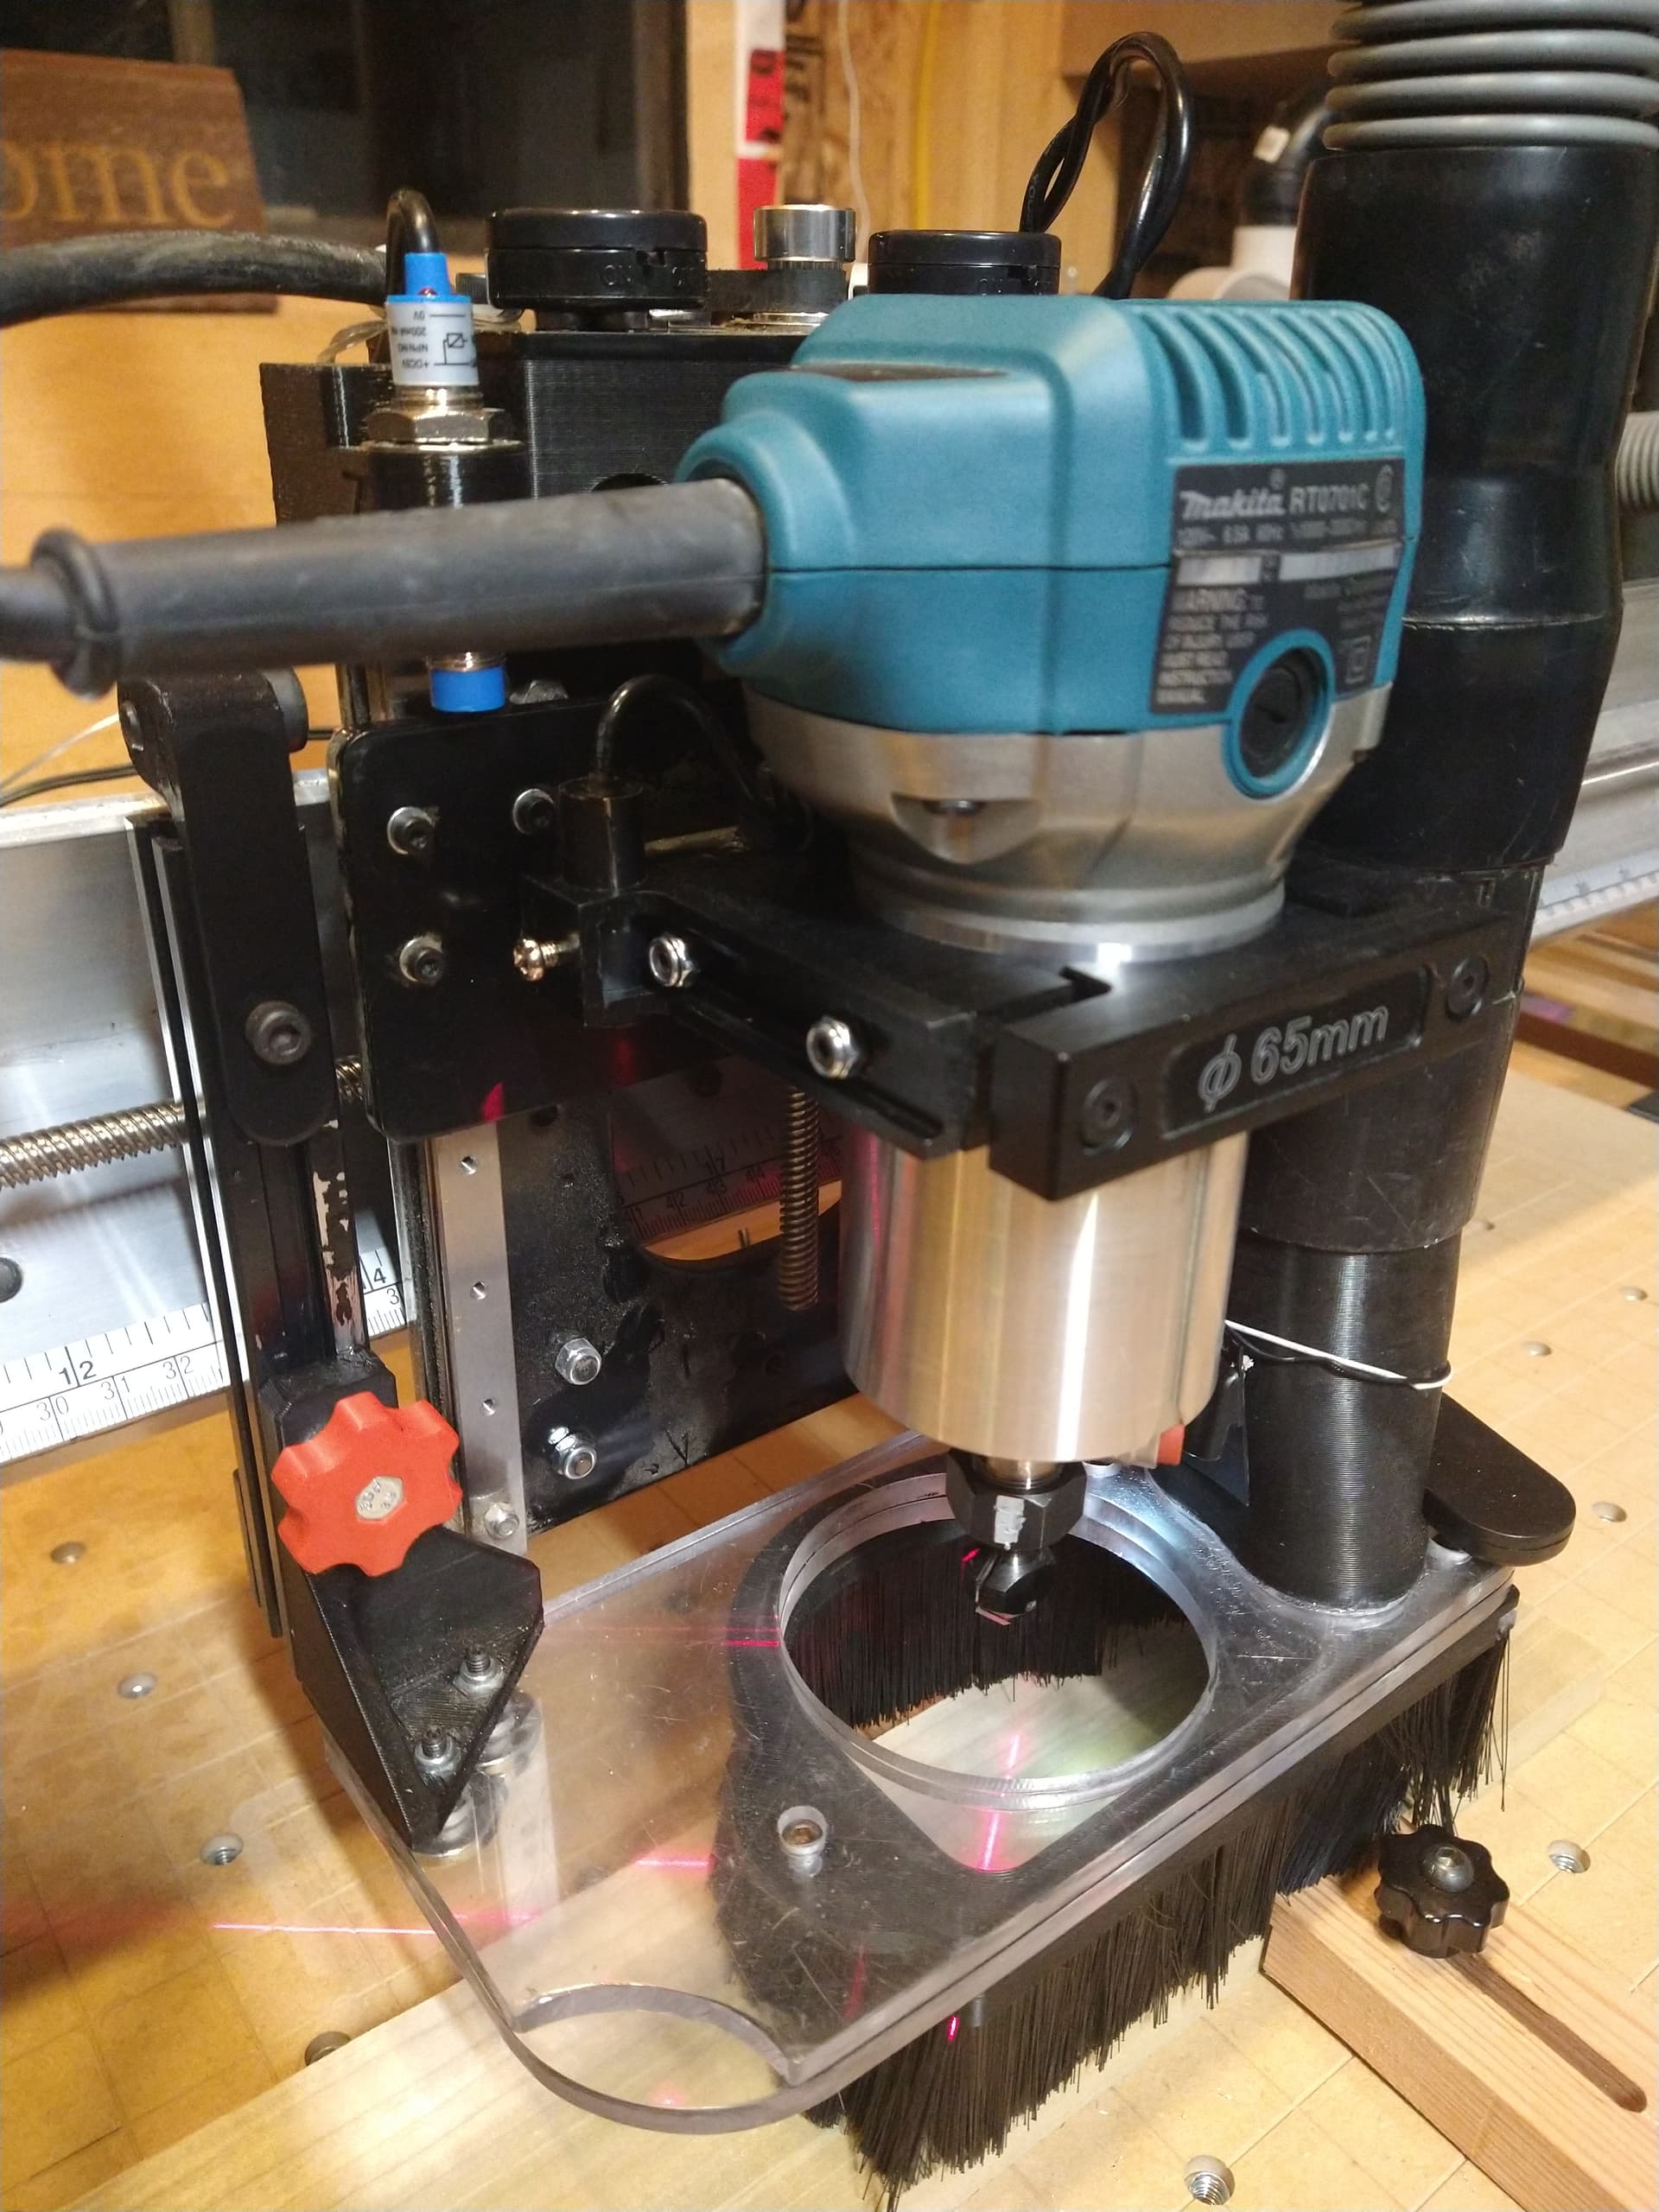
I wanted the brush part of the original dust shoe design to be removable, however it shares mounting screws that hold the base to the arm. My solution was to reverse the brush part. This allows the base to be mounted to the brackets independently from the brush. I cut two bases in this reversed orientation and drilled larger clearance holes in each where needed to allow the bases to mate together flush. The bottom can now be magnetically attached. The clear acrylic allows for easier zeroing in on the work piece and clear viewing of the carve in progress.
@BrianN NIcely done, Brian. My last post to this thread was a few years ago. Since then, I’ve played with a few designs and for now at least I’ve settled on the one that I posted earlier this week.
There are as many ways to approach this as there are users, I think. Yours is another good solution.