I decided to try my hand at deep inlays in end grain cutting boards. Since I’m guaranteed to mess this up a few times, I made some mockups with scraps. And sure enough, I’ve messed up a bunch of times. I’ve learned to double check bit geometry instead of relying on importing manufacturer files and to make sure the piece is sufficiently clamped down, for sure. Along with a bunch of other lessons in flattening and keeping things flat. Finally got to and end product, and its so messed up I’m not sure what to do.
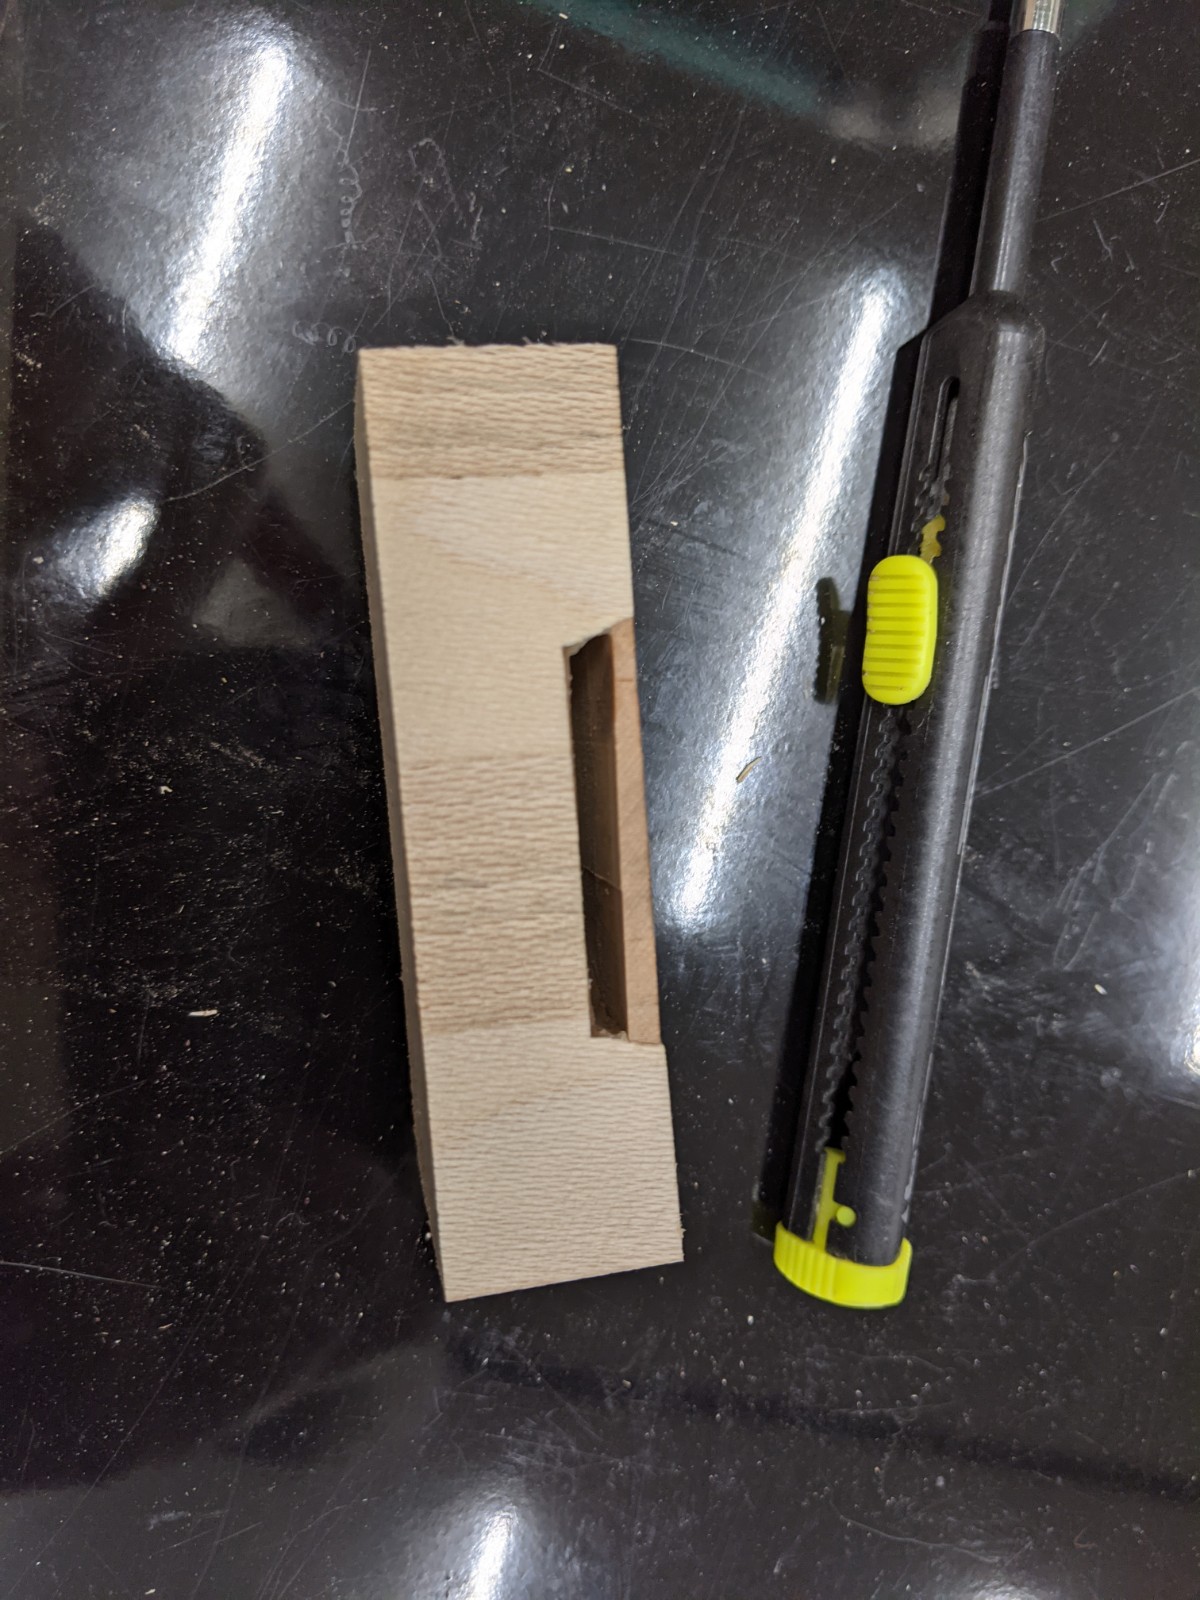
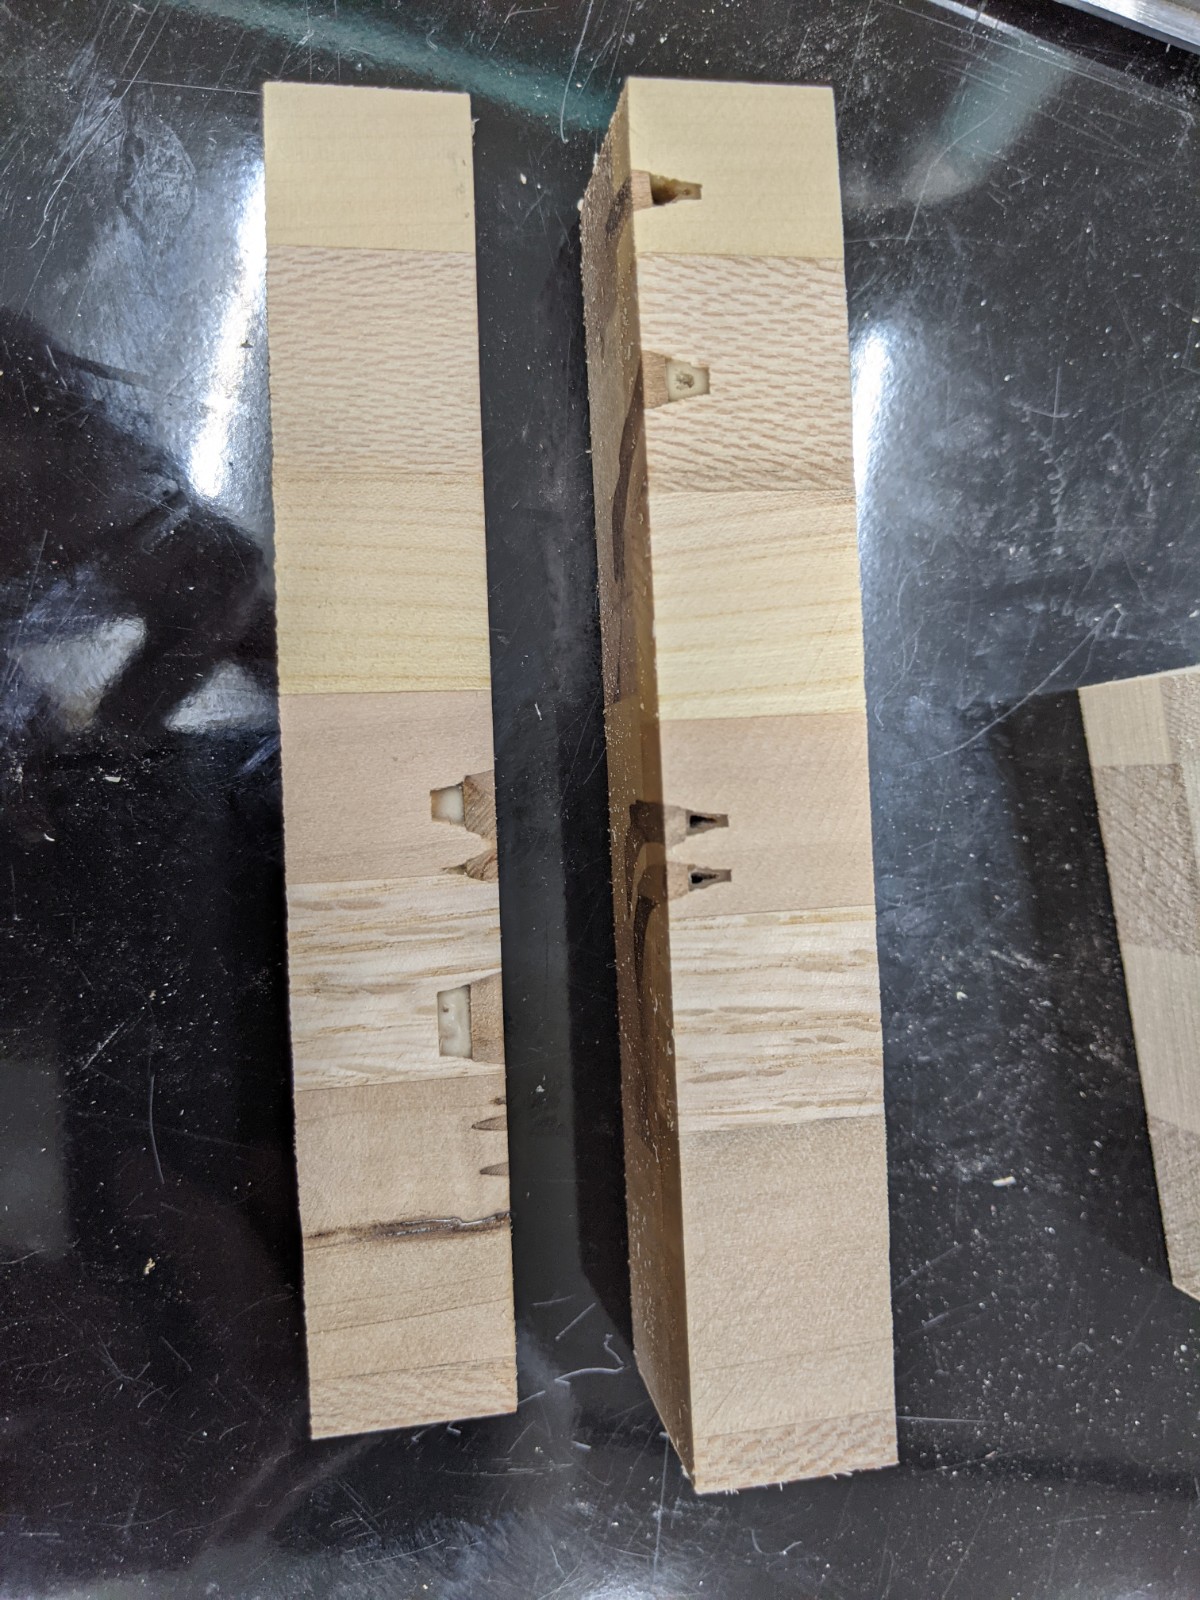
The problem is, when I went to glue up the plug barely fit. Nowhere near enough clearance to slide in, let alone allow any glue squeeze out. Resulting in these:
I can see clearly that the plug is just oversized… the only way I made it fit at all is using 4 bessey parallel clamps and giving it hell. The piece is only 6" across… that was a lot of force.
Anyways, I followed the tutorial more or less exactly and I’m not sure what to change for a better result. You guys got any pointers?
Issues with the size of the plug always comes down to the Start Depth settings. I don’t have vectric’s so can’t see your file. How deep is your pocket? What’s your start depth on the first and then the final plug passes?
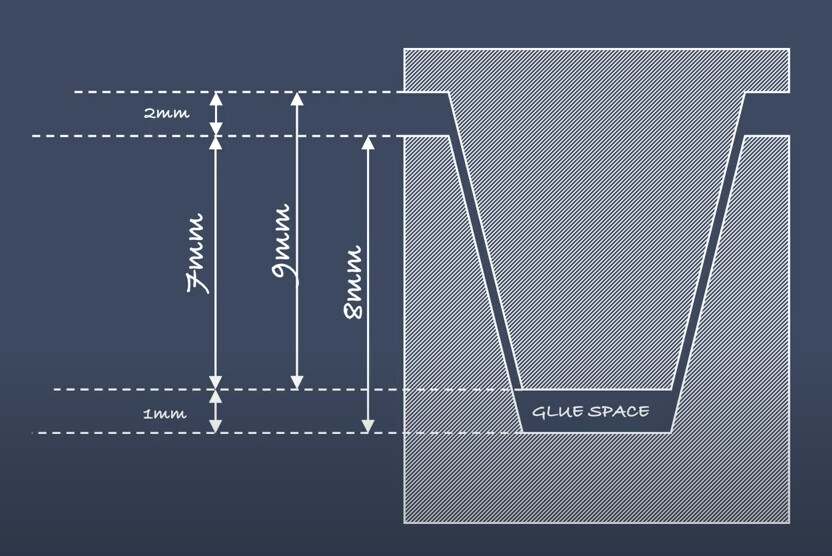
Using the tutorial you included the first would have a start depth or 2mm and a bottom of 9mm. The last one would have a start depth of 7mm and a bottom of 9mm. I’m skipping the middle pass in my example.
I even copied all the intermediary toolpath depths for the plug.
I’m no rocket surgeon, but the video was laid out with clear explanations that made sense so I figured I would stick to the examples and remove my own failing from the mix… the only material difference that I can think of is I used a 20* bit instead of 15*, because thats what I have. I can’t see why that would make a difference though.
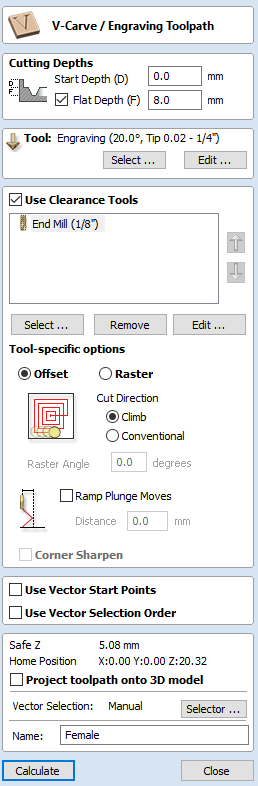
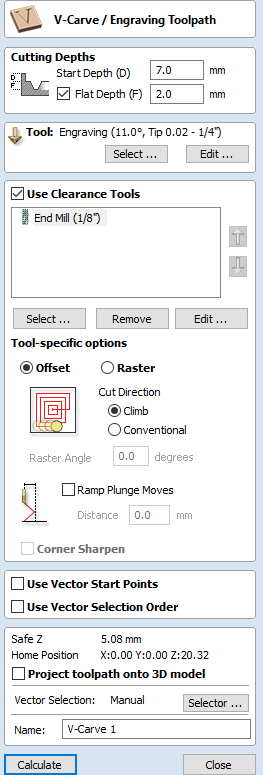
In the example given in the video, the female start depth is 0mm with a flat depth of 8mm. The male has a start depth of 7mm and a flat depth of 2mm. This is supposed to give 1mm gap in the fit for glue space and 2mm sticking out the top.
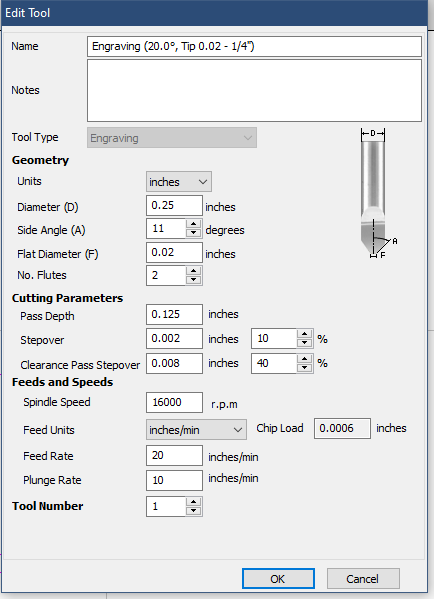
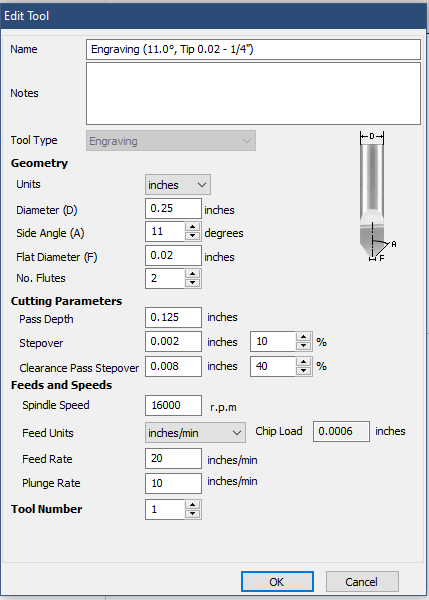
@David I think that Jammer has seen the problem. You need to use the same bits for both the male and female. As Jammer said, Vectric has you using a 20° bit for the female and an 11° bit for the male.
I imported the tool from whiteside’s tool library and it imported as a 20* bit, but had 20* as the side angle, when its actually a 22* inclusive angle bit with a 11* side angle. when I edited the tool info in individual toolpaths, it changed the title in some and not in others I guess.
The tool settings could very well be the issue. I’m not sure how to accurately check the actual geometry of the bit vs. what the whiteside sc50 specs say.
Failing any other observations, I may try all the same settings but with the 15* bit used in the video. The two I ordered finally arrived.
@David As I’m sure that you know, we can call a bit anything we like. In VCarve, the key is to make sure that the actual specs of the bit are accurate.
It would be difficult to measure a bit that acute. There are tests online for 60° and 90° bits, but I’ve never seen on for sharp bits like 15’s and 20’s. It’s doable, of course using simple math but getting the measurements is tough.
I have a protractor that I use to measure the bevel angle of my turning gouges. You might try something like that.
I had tried doing some inlays this winter and found that (for whatever reason) using an 11 degree bit didn’t work out. The female cut out was too big for the male piece. If I used a 30 degree bit everything worked perfectly. I had tested using the 30 degree bit (which worked as expected) but then decided to change to the 11 degree bit figuring it wouldn’t matter but I didn’t test it with the 11 degree bit and it didn’t fit. Still not sure why the 11 degree bit didn’t work. I still think it shouldn’t matter…