The machine went together really well (with the exception of a few problems of my own causing). It’s now mounted on the MDF wasteboard with T-tracks on a tiltable torsion-box table. I’ve been struggling with design issues, but those are resolving steadily. My only remaining problem is that I can’t seem to keep the bit from cutting into the wasteboard by up to 2mm when I set the stock to the exact thickness of the wood. If anyone has any ideas, I’d appreciate input.
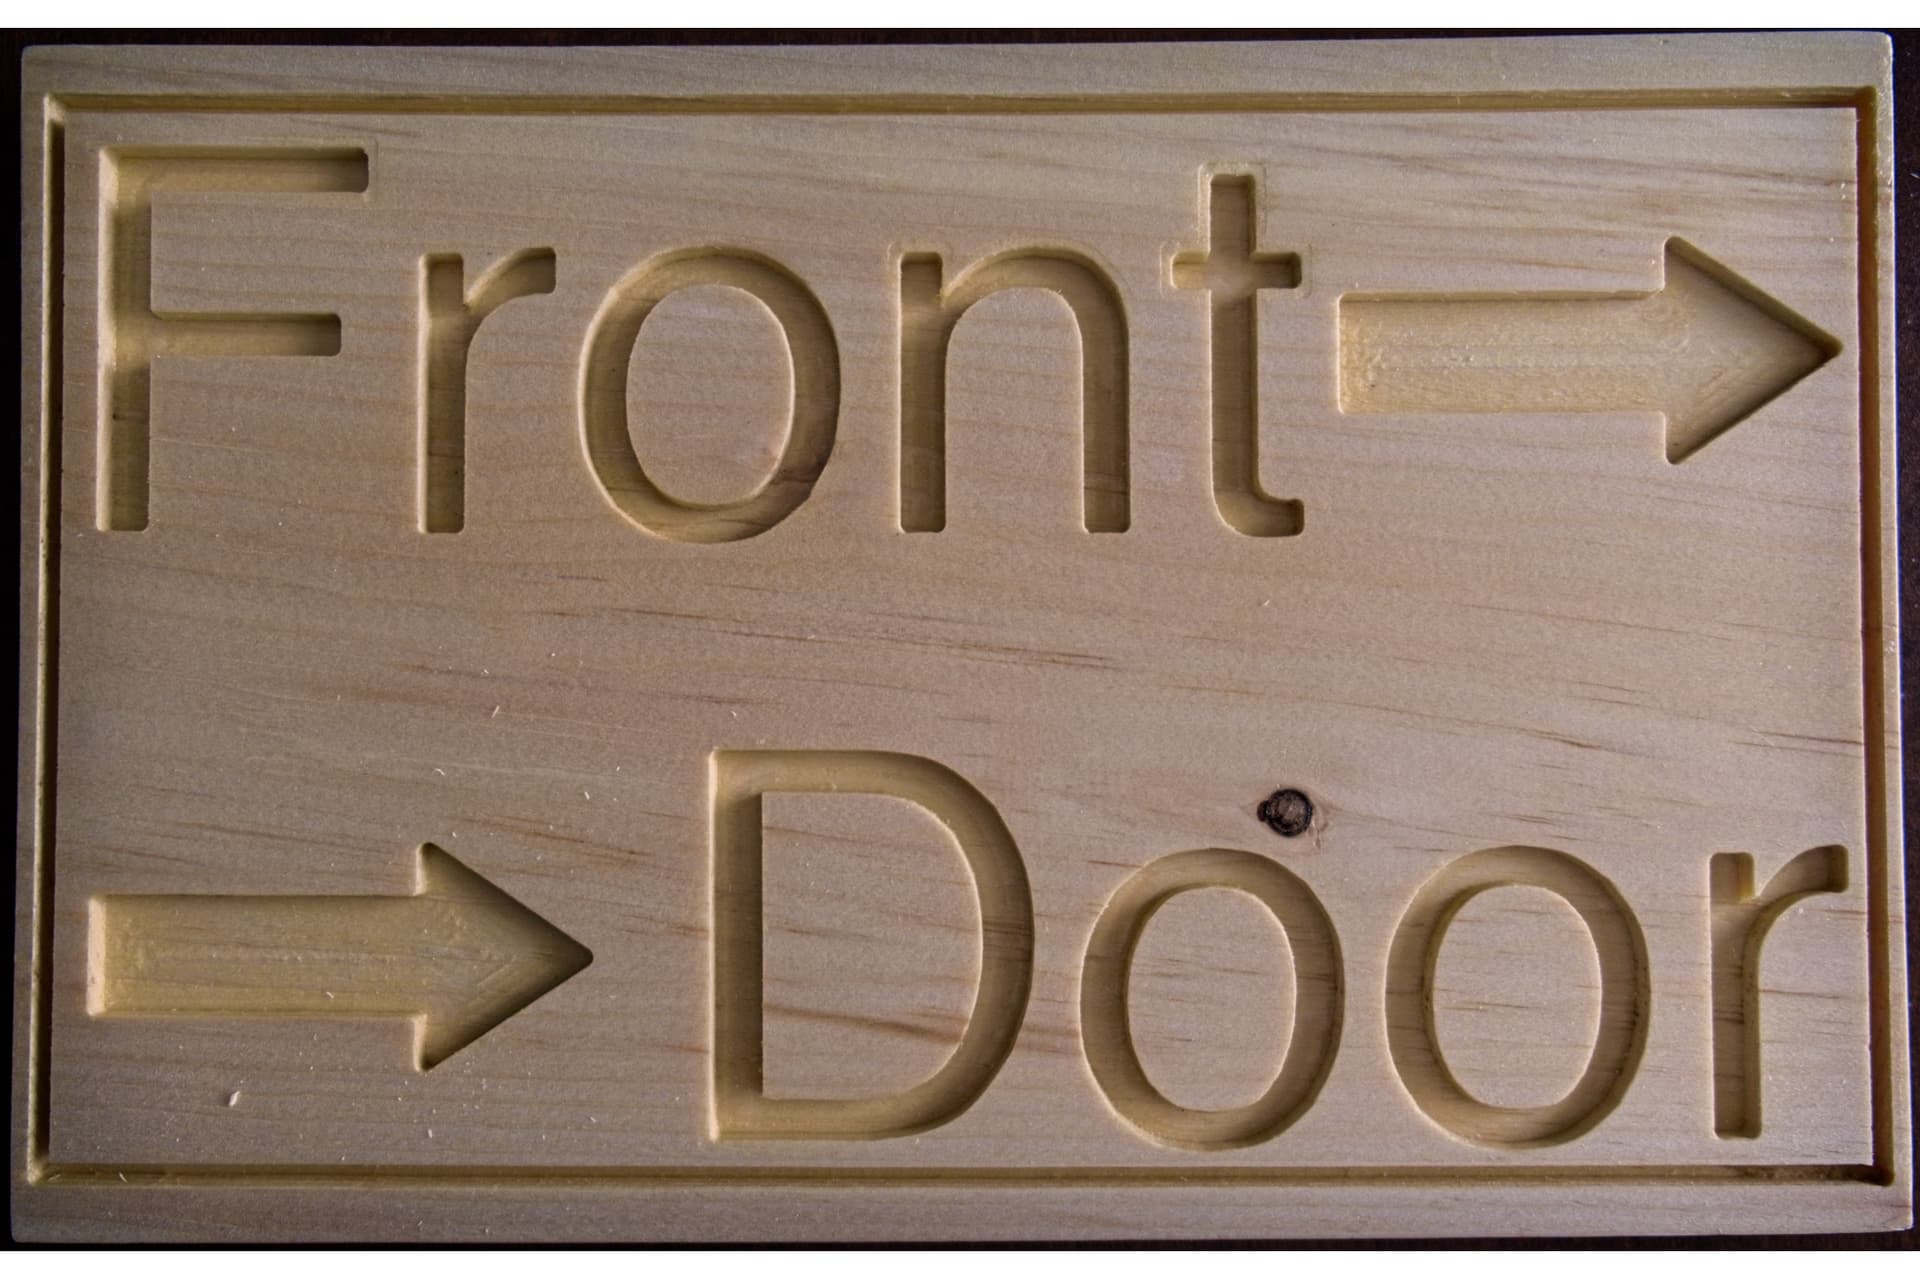
Anyway, here are some images of my first couple of successful carves.
One thing to note is that stock is almost never the thickness it says it is - so the key to not cutting into your wasteboard is to set the zero at the wasteboard, not the top of the material. This is a bit of a different workflow, but once you get used to it it can be really handy.
Hope that helps!
Edited to add - ensure your zero in your model is also at the bottom!
Thanks for the idea. I’ll give it a try. Knowing that wood is rarely the thickness it says, I have been measuring the thickness with calipers. The problem still arises, however. Tips like yours are always welcome.
Another thing to consider - ensure your bit is tight in the collet - you can get some surprising results when the bit “walks” its way out of it. I wrote up some more details in this thread: If you have Z axis "drifting" up or down issues
I always set Z0 at the top of the timber after measuring the timber thickness with calipers as you stated you do. I have no problems with the bit cutting into the waste board, and I always cut 0.1mm deeper than the timber thickness and secure my timber with tape a CA glue. If I clamp down it only leaves a slight mark.
I would design a series of straight line cuts, say 100mm long, with varying depths (say 2mm, 4mm, 5mm, 8mm and 10mm depth) then measure the depths with your calipers.
If the error gets greater, the deeper you cut, then I would check the setting for the Z axis.
Thank you for the suggestion. I’ll give it a try today. I’ve already done something similar, cutting three holes at 3, 5, and 7mm, but you line idea sounds like it might give me a better result. I have already run the calibration tool on gsender and the results were so close I couldn’t see a difference. I shall continue to eliminate as many variables as possible.
I took your suggestion and created a program to cut 9 100mm slots at depths of 3,5,7,9,11,13,15,17, and 18mm ( set the last difference at only 1mm since my stock was only 19mm). I ran it using a 0.25" UC bit in pine and MDF to see if there was a difference attributable to material. Below is a table showing my results.
Are these the results I should expect or is there something else I should be doing?
The driver setting looks OK but the inconsistency in the depth, to me, looks like freeplay in the Z axis or movement in the timber. If it was only timber being machined, then it could be a variation in the timber thickness but MDF thickness is generally consistent.
I can generally rout a groove with constant depth along the groove and that depth is mostly 0.06mm or less of the setting