This guide will walk you through setting up gSender on a Raspberry Pi without the need to connect a keyboard or display (headless setup). You will perform all interactions remotely using SSH.
gSender requires a full desktop environment, so we’ll use the full Raspberry Pi OS with Desktop, not the Lite version.
Prerequisites
- Raspberry Pi 4 or later
- Raspberry Pi OS (64 Bit) installed on an SD card
ssh client- Internet connection
- Basic knowledge of Linux commands
- VNC Client for remote desktop access such as RealVNC (Optional)
Step 1: Install Raspberry Pi OS (64-bit) with Desktop
- Download and install the Raspberry Pi Imager from the official Raspberry Pi website if you haven’t already.
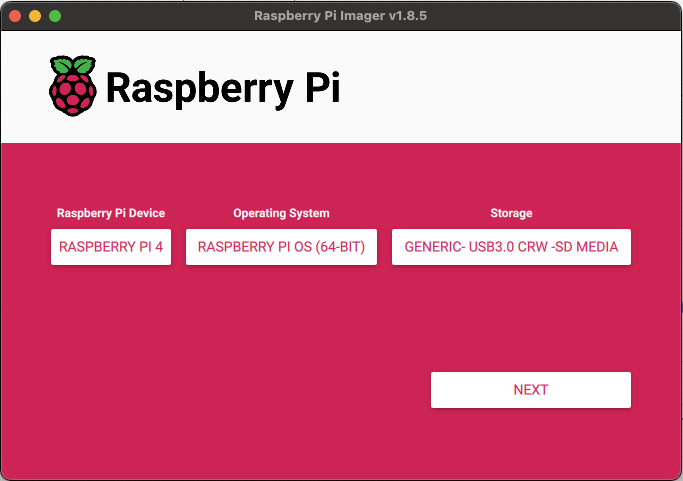
- Open Raspberry Pi Imager, select Raspberry Pi OS (64-bit) as the operating system.
- Choose your SD card as the storage location and click Next.
- After selecting Next, you will be presented with the option to customize settings. Click EDIT SETTINGS.
- On the General tab, make the following changes:
- Hostname: Change the hostname to
altmill (or any name you prefer).
- Username: Set to
pi.
- Password: Set to
gsender (you can change this to any secure password you desire).
- Wireless Network: Enter your Wi-Fi network SSID and password.
- Go to the Services tab:
- Enable SSH: Make sure to check the box to enable SSH, allowing remote access.
- Leave the rest of the options as default and click SAVE.
- Click Yes to apply the custom settings and Yes again proceed with flashing the SD card.
- After the flashing is complete, remove the SD card from your computer, insert it into your Raspberry Pi, and power it on. Give it 2 to 5 minutes to initialize the OS before proceeding to the next step.
Step 2: Install gSender, enable Remote Access and set auto-start.
-
ssh to the Rasberry pi. Password is gsender or the password you enter from Step 1.
ssh pi@altmill.local
-
Execute the following commands.
# Set gSender version to install.
APP_VERSION=1.4.11
REPOSITORY=Sienci-Labs

# Download gSender
cd ~/Downloads
curl -LO https://github.com/Sienci-Labs/gsender/releases/download/v$APP_VERSION/gSender-$APP_VERSION-PI-64Bit.deb

# Install gSender
sudo dpkg -i gSender-$APP_VERSION-PI-64Bit.deb

# Generate autostart, Note: there should be no space before `>` else it will create CRLF issue.
mkdir ~/.config/autostart
echo -e "[Desktop Entry]\nType=Application\nName=gSender\nExec=/opt/gSender/gsender -H 0.0.0.0 -p 8080 --remote true --controller grblHal"> ~/.config/autostart/gSender.desktop

# Turn Rasberry PI AutoLogin
sudo sed -i 's/^#\?\(autologin-user=\).*/\1pi/; s/^#\?\(autologin-user-timeout=\).*/\10/; s/^#\?\(user-session=\).*/\1PIXEL/' /etc/lightdm/lightdm.conf

sudo reboot
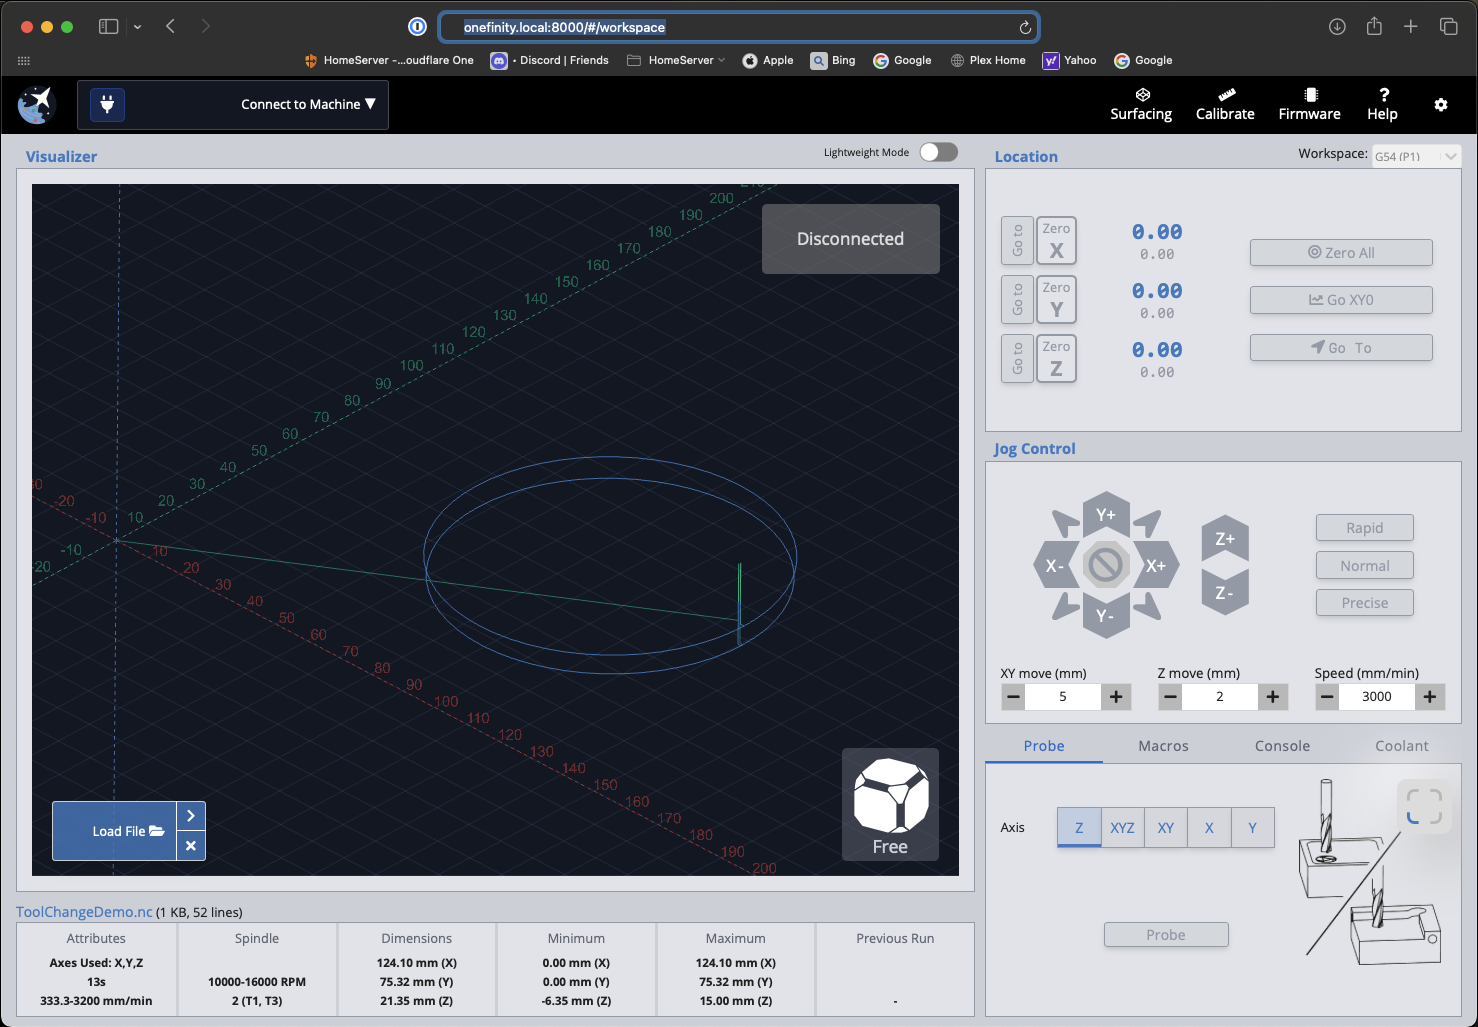
That’s it. From here, you can simply use a browser from any device on your network, such as your laptop or tablet, to access the URL http://altmill.local:8080 .
Step 3: (Optional) Install VNC Server and update all packages
These are optional and not required. I only use this for remote login to Raspberry PI desktop and do some troubleshooting. Also updating packages incase there some security updates.
-
ssh to the Rasberry pi. Password is gsender or the password you enter from Step 1.
ssh pi@altmill.local
-
Then execute the following commands:
# (Optional) Enable VNC Server. Useful for troubleshooting.
sudo systemctl enable wayvnc.service --now
sudo systemctl start wayvnc.service

# (Optional) Update packages
sudo apt update && sudo apt upgrade -y
2 Likes
Some other useful guide that I need to my system.
Installing FileZilla. I use this to remotely update files in the SD-Card installed in the SLB so I don’t need to remove them and put in on my computer. If you ask why I need the SD-Card in SLB, I’m using it with macro for my ATC.
In terminal or ssh execute the following
sudo apt update
sudo apt install snapd

# Reboot after installing snapd package manager
sudo reboot
After reboot, open the terminal again and execute the command to install the Filezilla.
sudo snap install filezilla --beta
Reference: Install FileZilla (UNOFFICIAL) on Raspberry Pi using the Snap Store | Snapcraft
After experimenting with the headless setup, here are my findings:
- Headless is not completely headless. The Raspberry Pi acts only as an API server rather than running the full gSender application. However, it still requires the gSender UI to be running on the server. This means the remote machine is responsible for sending all the G-code during operation instead of just uploading it to the server for execution. This is undesirable because the remote machine can be disconnected at any time due to network issues, low battery (if it’s a laptop), etc. Ideally, the remote machine should upload the complete job to the server, and the server should handle sending the G-code to the controller.
- Remote machines have independent settings. The remote machine uses its own settings instead of the ones already configured on the gSender server. This lack of synchronization can cause inconsistencies and requires settings to be replicated manually.
- Limited functionality on mobile. The mobile remote provides very limited functionality, such as jogging and homing. It cannot modify settings like the network IP address. If you are not using the default IP address setup in the firmware, you’re out of luck because the mobile remote can only connect using the default value.
The ideal solution for a headless setup is similar to what Buildbotics offers. The remote device should only provide a control UI and should not have independent settings. This way, there is no need to replicate server configurations across multiple remote devices. Basically, once I started the job I can turn off any client or remote device without worrying it will be interrupted or no longer sending g-code.
Just tagging @chrismakesstuff @KGN for feedback.
In preparation for Alt Mill, I just got Pi 5 and use the same steps and it works. Pi 5 is a lot faster.
1 Like
After doing more testing using Headless:
- G-code job is actually buffer in the server and closing the remote client will still continue the job which is actually good. But the issue is if the client reconnect, it will halt the job in progress after couple of seconds. This is probably a bug on the gSender.
1 Like
Cool write up and concept overall.
Always wanted to run gSender on a server and upload jobs from my laptop but didn’t think it was possible. Been running gSender on Windows and didn’t realize it can run/be exposed over the network. Gonna do some reading on that as well as the SD slot on the SLB.
Are you still seeing issues with the job stopping if the client disconnects then reconnected?
No I never had problem with disconnect. Although I’m using grblHal firmware (not the stock sienciHal firmware).
We’ve put together a new official guide that covers how to build gSender locally, along with solutions to the most common build and dependency issues on different platforms (Windows, macOS, Linux, Raspberry Pi, etc.).
You can find it here:
Sienci Resources > gSender > Experiment > Compile gSender
This page includes setup instructions, troubleshooting tips, etc. If your question was about building or compiling gSender, you should find everything you need there.
If you still have any errors after following the instructions, do let us know and we can look into your specific issues a little more
Thanks for your patience and for helping us improve the documentation, we are really looking forward to your contributions to gSender as well!
2 Likes
Peter!
I see you are here, I am glad to see you are still working on cnc’s like you did with open builds!
1 Like
Awesome running into you here too! Oh I count my blessings every day, so lucky to be able to continue in the industry I love!