If we only had all the time in the world to work on every cool little thing for the Mill One and LongMill…
Are you working on something cool that you can share with the community to improve the machines or add new features? Is there something that can help us make our machines better for the next iteration? Let us know!
I posted this in one of your other threads. I hope you don’t mind duplication.
While waiting breathlessly for my long mill to arrive, I’m looking into the possibility of hinging the base so that half of it drops down to be vertical. I would like to clamp wooden bowls to the vertical part of the base, then carve into the wall of the bowl. I’ve seen this done on larger CNC routers and I can’t see why it will not work on a Long Mill. Clearly, I will not know for some months yet.
1 Like
@andy Is a rotary axis possible with the Longmill controller? Is it a future possibility?
On the current controller design, no.
Future possibility? Maybe.
Unless you do what @BillKorn mentioned, in which case it wouldn’t be true 4 axis but you could do this with the current setup.
The main thing I am thinking of doing with the setup is around the wasteboard / fence for endstops for XY. Mostly just researching to see what other people are doing. This is to simplify the start of jobs and for easier two sided milling.
The wasteboard thoughts are mostly around setting up a grid of holes with 1/4-20 tnuts below or having 3/4" holes for bench dog style fixtures.
One interesting thing I have seen reasearching this stuff is a probe for the Shapeoko 3, which is similar to the Z probe on the Longmill, but used for X/Y/Z homing - Here is a video where he incorporates it into a fence his fence.
https://shop.carbide3d.com/products/shapeoko-touch-probe?variant=2979437772830 - It doesn’t look that complicated, just closes a circuit with the end mill.
Some interesting joinery I have been looking into is achived by milling a hole in the wasteboard so you can mill the end of the board.
Maybe some interesting boxes this seems like a good way to use the endstops with a milled jig for symmetrical pieces.
Allot of this stuff will wait till I have the machine and start playing with it, but it will be fun when it gets here.
2 Likes
I will be looking to extend the work area on it. My plan is to use it create templates for skis and snowboards. On this subject, does anybody have any ideas on whether it would be better to extend the x or y axis? I’m looking to extend to around 80”. I currently ordered the 30x30. Thanks
When the experts chime in, I’ll likely be embarrassed by this post, but I would think that you can only expand in the y axis direction. The x axis rails have a fixed length, and it seems that it would be big deal to extend them and do whatever you need to do with lead screws, etc. You can extend in the y axis by doing the cut/pattern in multiple pieces. It is referred to as “tiling”. Here is on youtube video that shows it being done
If you search in youtube for “cnc tiling”, you will find many more.
1 Like
That was the initial thought to extended the y. New rails and lead screws and extend the wiring. I like the tiling idea, but ultimately I want it to be as independent as possible without having to continually reposition the material.
1 Like
You would have to rebuild the whole machine to do that. Plus get longer screws for it. Would it be worth it? That is up to you. Personally I would deal with the repositioning for the one job. How may times are you really going to have to do that really? Are you a big production shop that needs a bigger cnc? Or are youa hobbyist that would only have that happen a few times a year? Is the expense really worth it?
Have you thought to try tiling first??
Ya its not that hard. Rebuilding the machine is way way harder LOL
I’m currently using tiling to cut, yes. But I still am running into issues where the cut is not quite as accurate as I’d like. I have had to realign manually on the x on my next cuts even though I have set an alignment hole from the previous cut. I’m sure I am missing something somewhere though. I figure it would just take new lead screws with a slightly larger diameter and couplers, print more feet for longer rails and extend the wiring and should be good to go. Something I may still work towards doing.
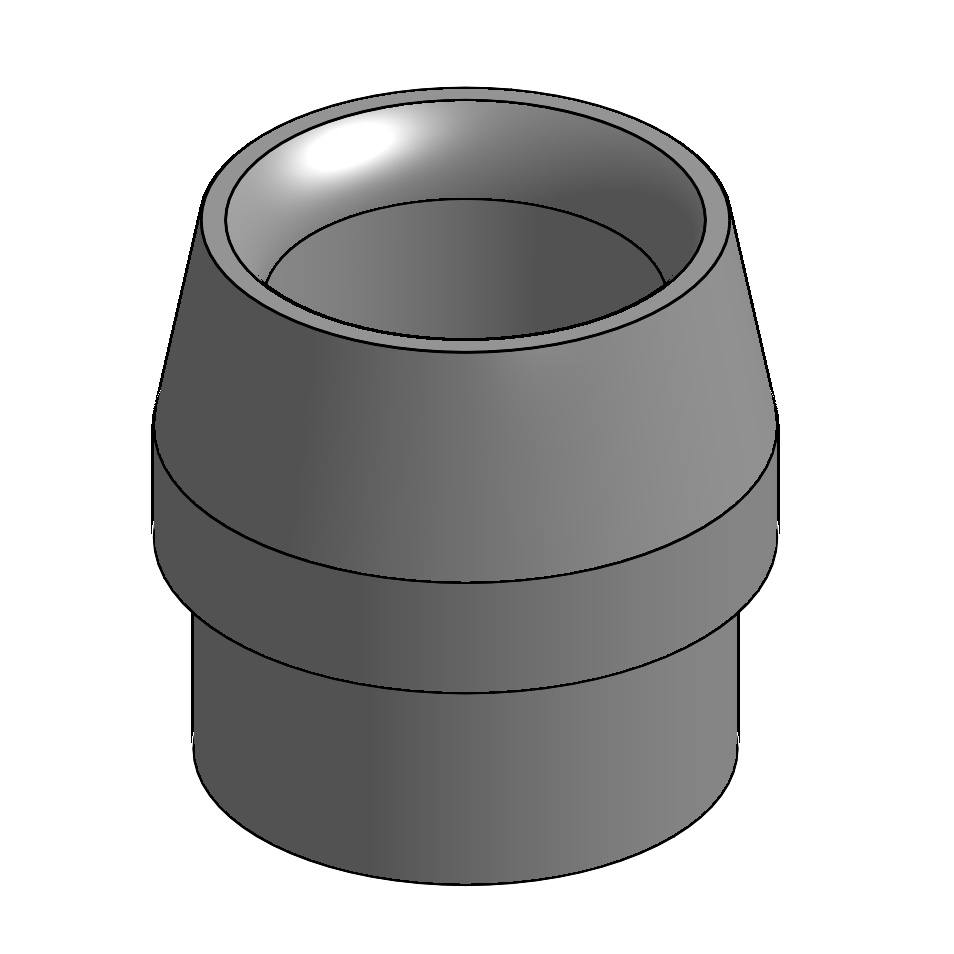
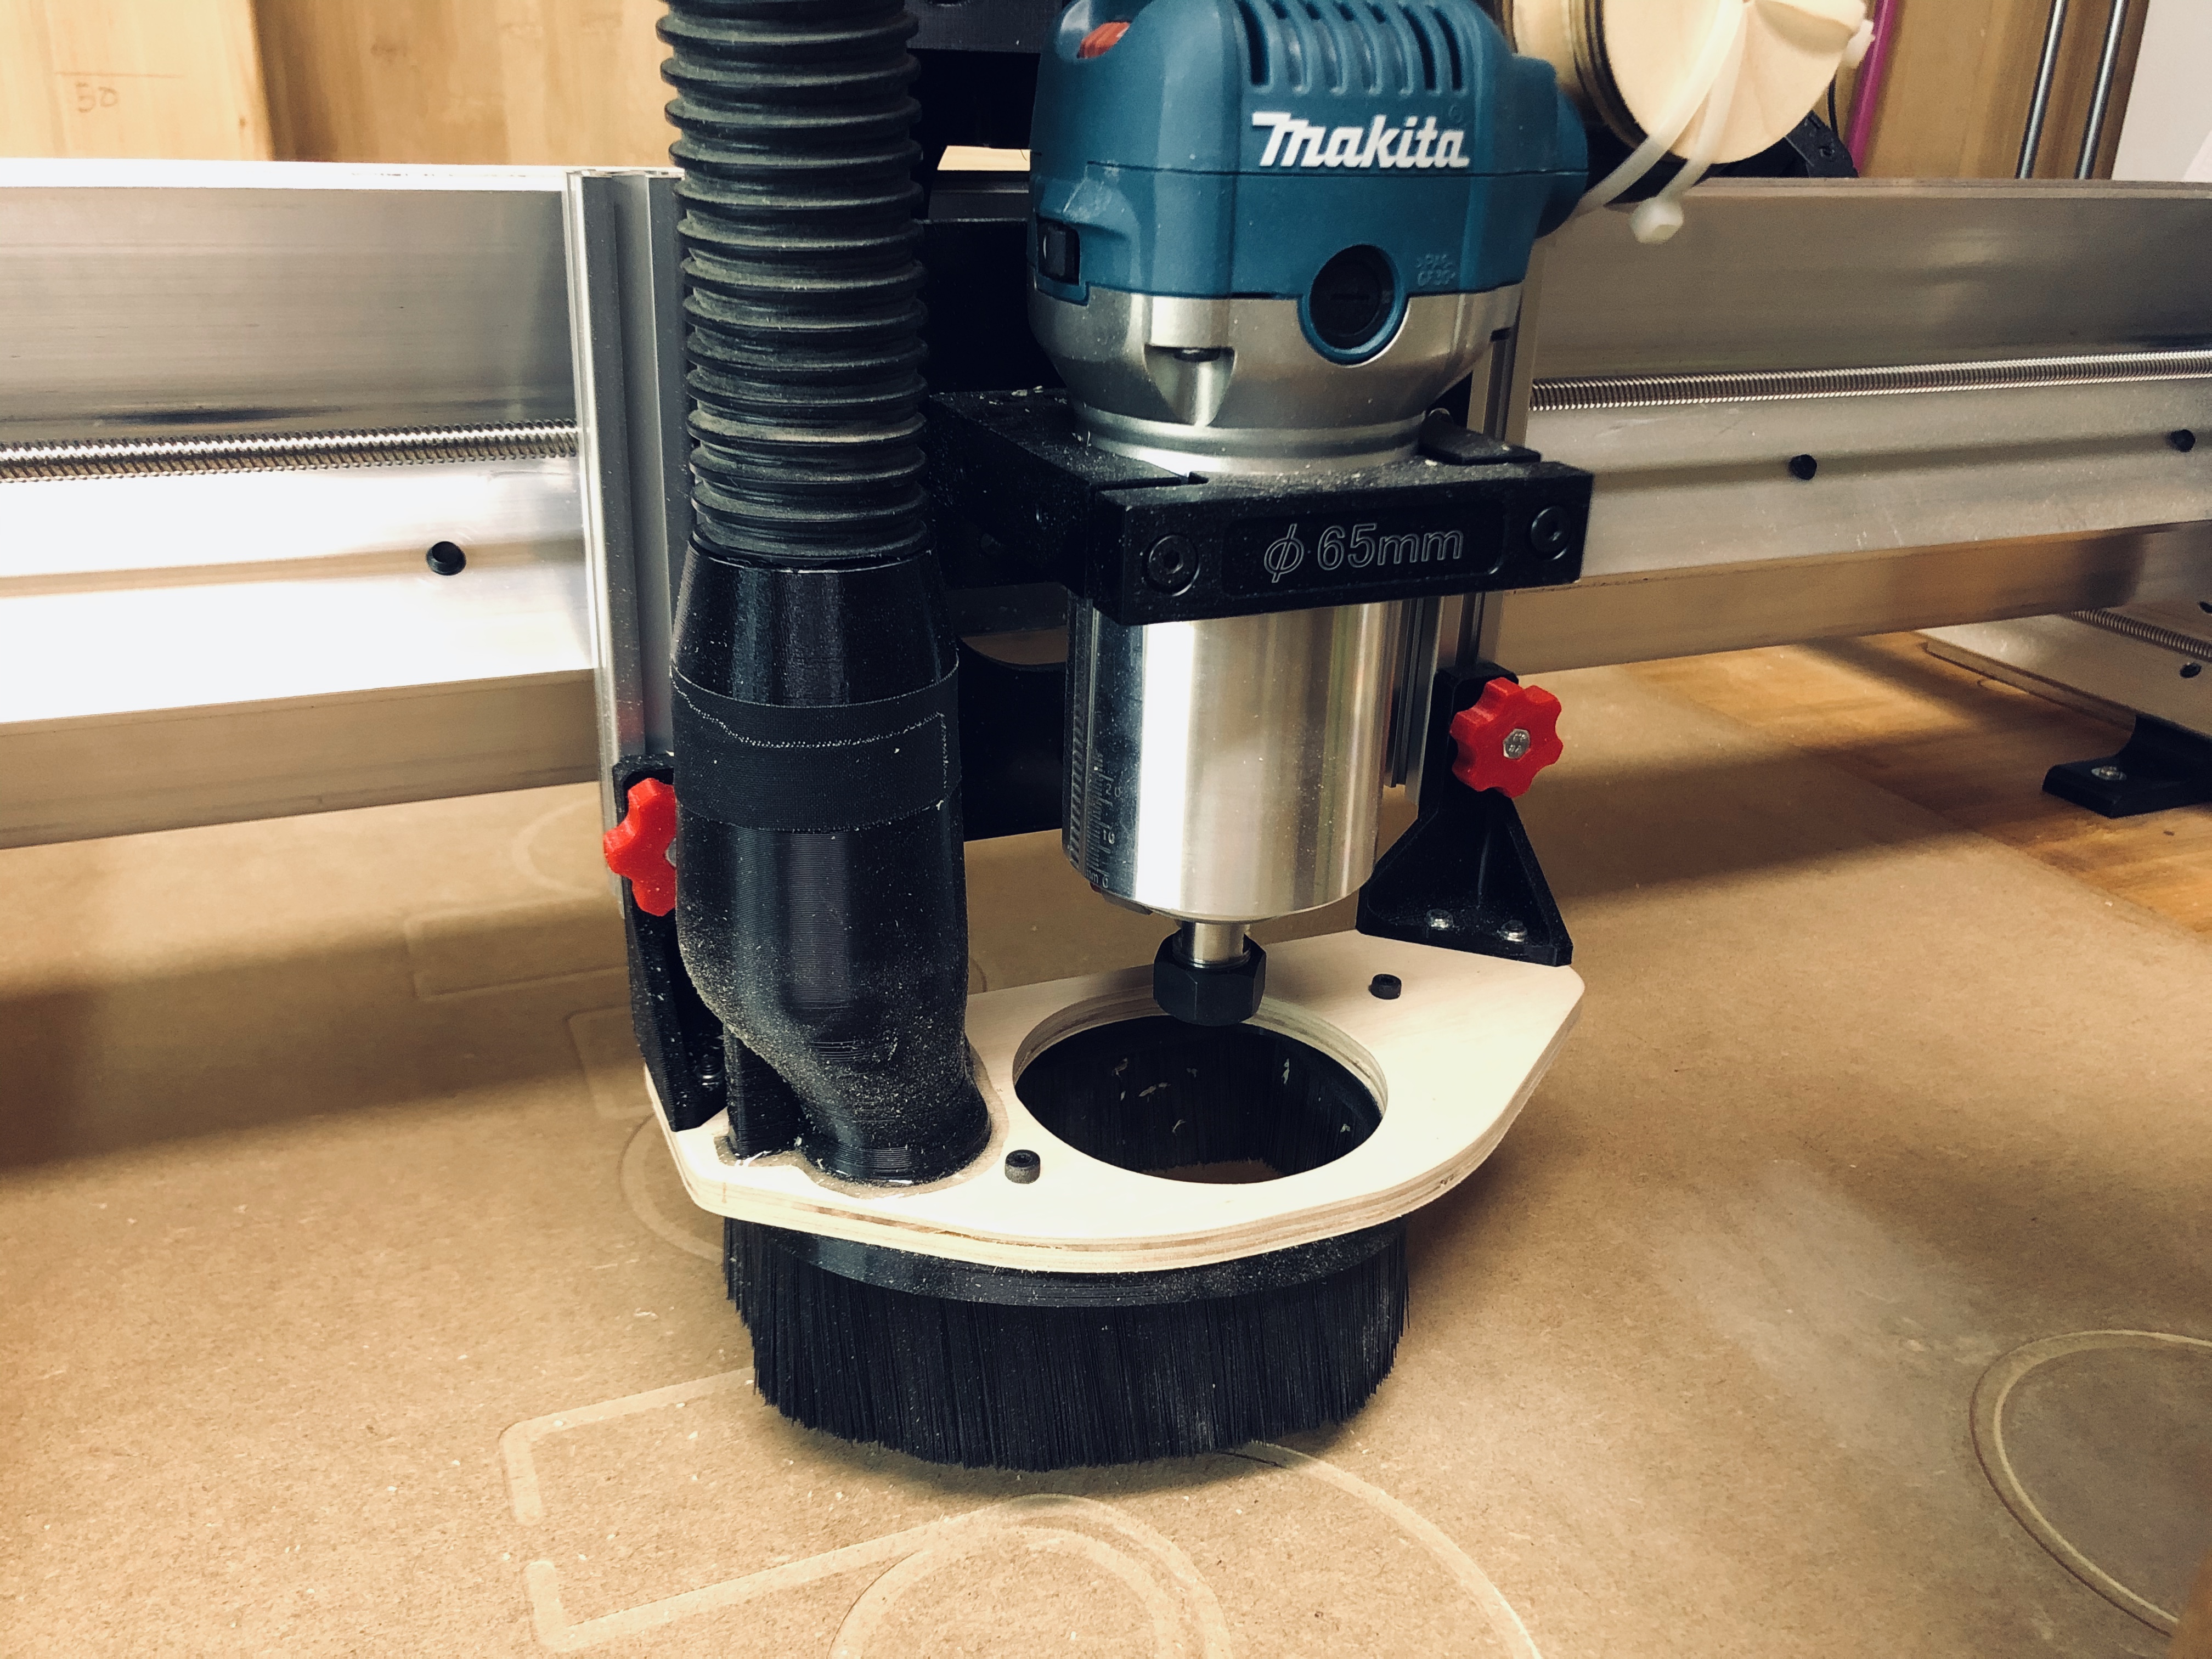
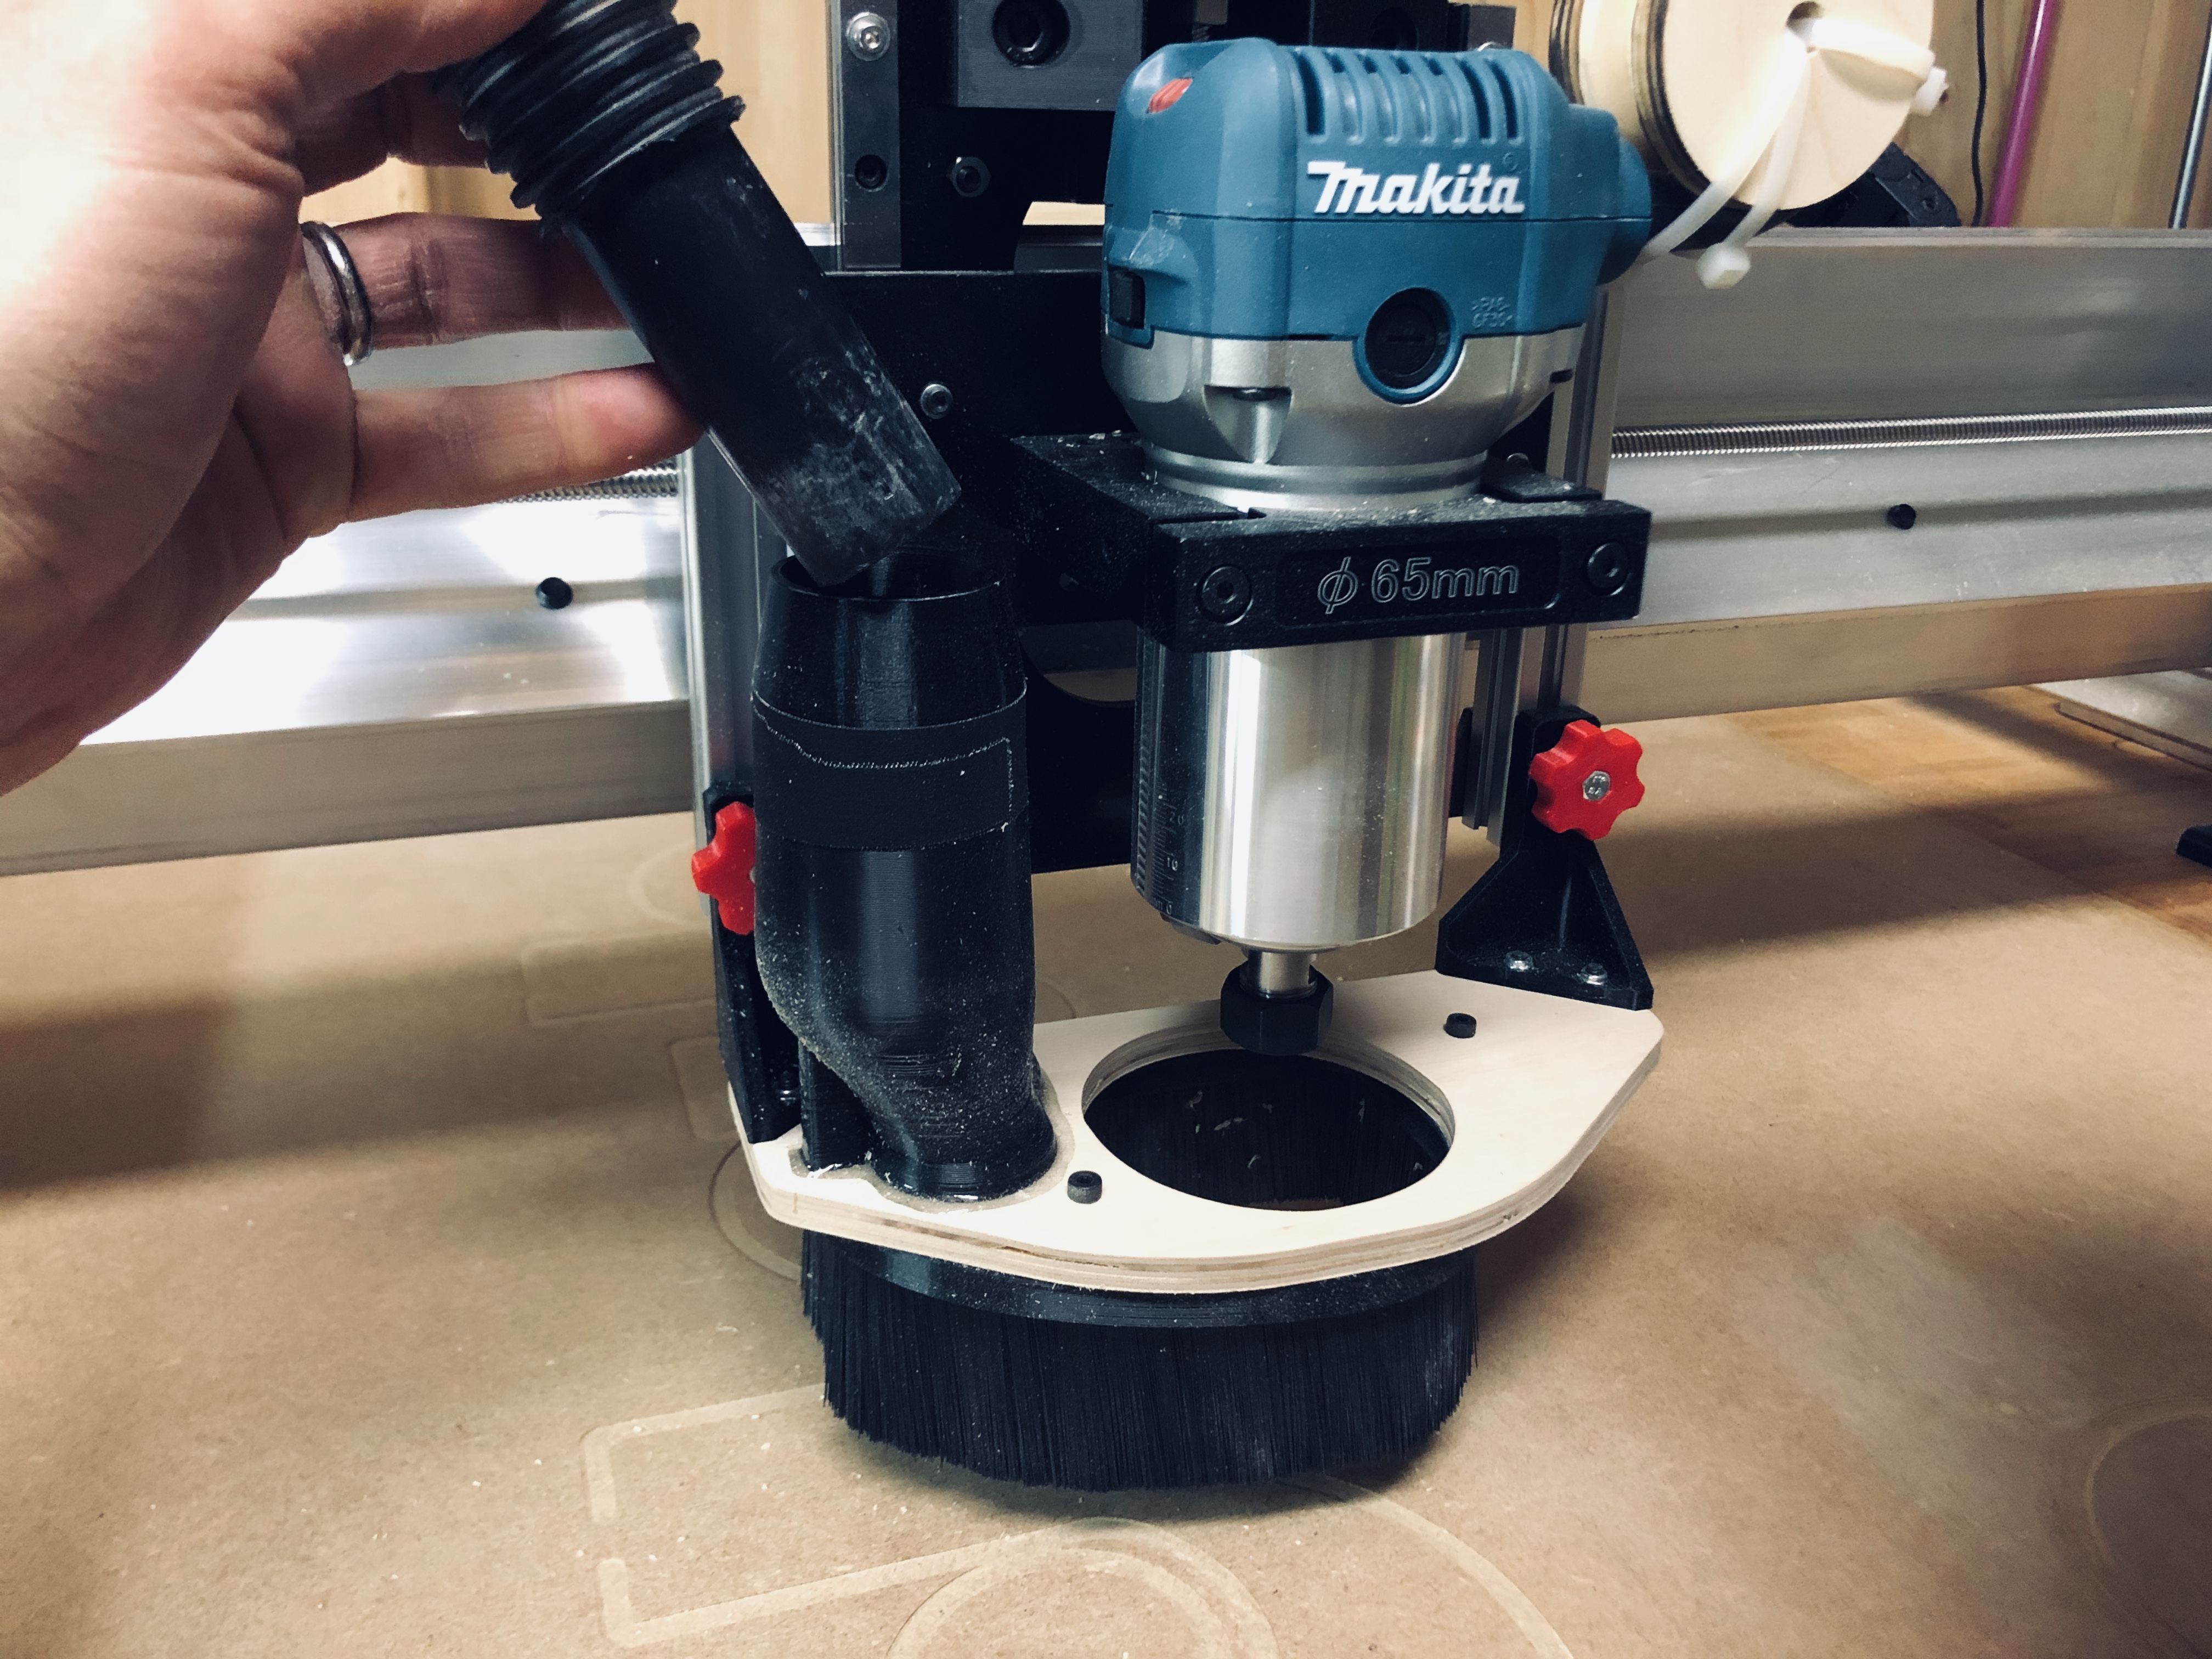
Not sure how useful this will be to others but… I use a shopvac to collect the dust with the dust shoe add-on provided by the sienci people. But the dust shoe vacuum adapter is too large for the shopvac pipe. I can tape it airtight but then I have to untape this assembly to use the vacuum if I want to collect the stray sawdust… that’s super annoying ![]() so I designed this simple adapter (on OnShape) to plug/unplug the vacuum to the dust shoe, comfortably.
so I designed this simple adapter (on OnShape) to plug/unplug the vacuum to the dust shoe, comfortably.
Export the dustshoe2shopvac adapter as STL, then 3D print it. I had to use tiny bit of sanding paper as the fit was a bit tight between the 3D printed adapter and the dust shoe connector (also 3D printed). I also taped the adapter with the dust shoe connector to secure it for good. Now it’s easy to connect/unconnect the shopvac with the Longmill dust shoe.
“dustshoe2shopvac” OnShape model: Onshape

3 Likes
Ah, that’s a well designed adapter @Buebeli!  I’ll add it to the list of machine modifications
1 Like
while you are at it for future dust shoe versions can you make the top of the 3d printed vacuum connector cylindrical? If I’m not mistaken right now it’s funny shaped (i.e. not cylindrical but more conical and closing towards the top) so that only the very top of an adapter (like mine) is in contact with the walls. It still works but saw dust is present between my adapter and your connector and I imagine such a gap feature reduces the airflow… Just make the top 2 cm straight cylindrical if you can, but I’m not sure how this affects other users…
P.S. I started using my Longmill 1 week ago (finally) and must say that I’m a very happy backer of this project. Chris, Andy, and the rest of the SienciLab team you rock! Now I want a Longermill though 
1 Like
you would have to use belts or rack and pinion or some other linear rail system because I do not believe they make lead screws 80" long and even if they did they would whip around like crazy. even 48" lead screw cnc machines require tension to prevent whiplash. it would be much worse at 80" long.