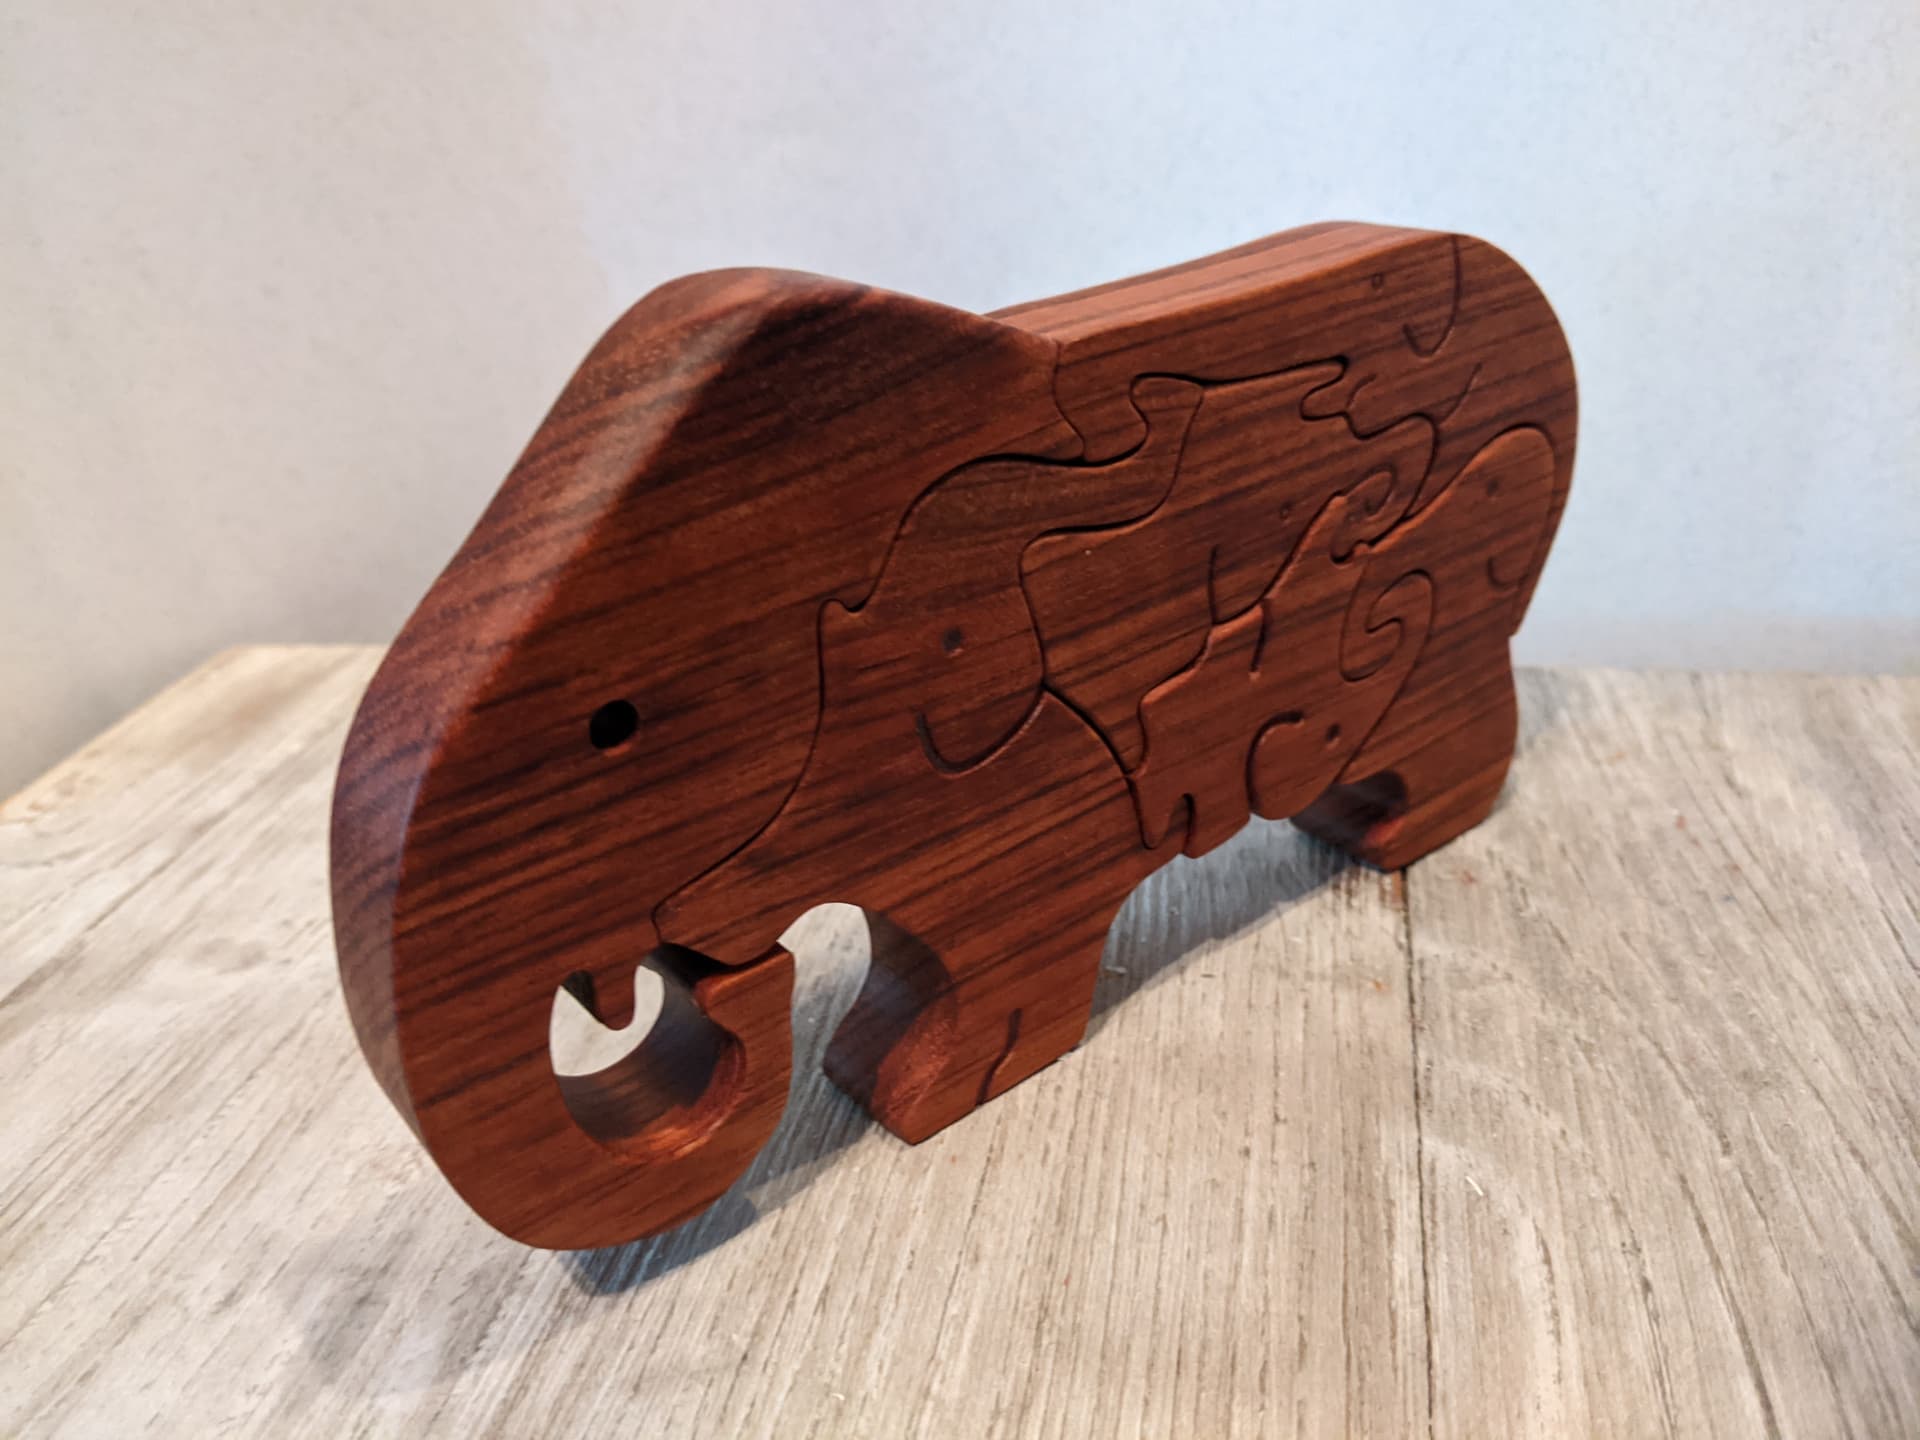
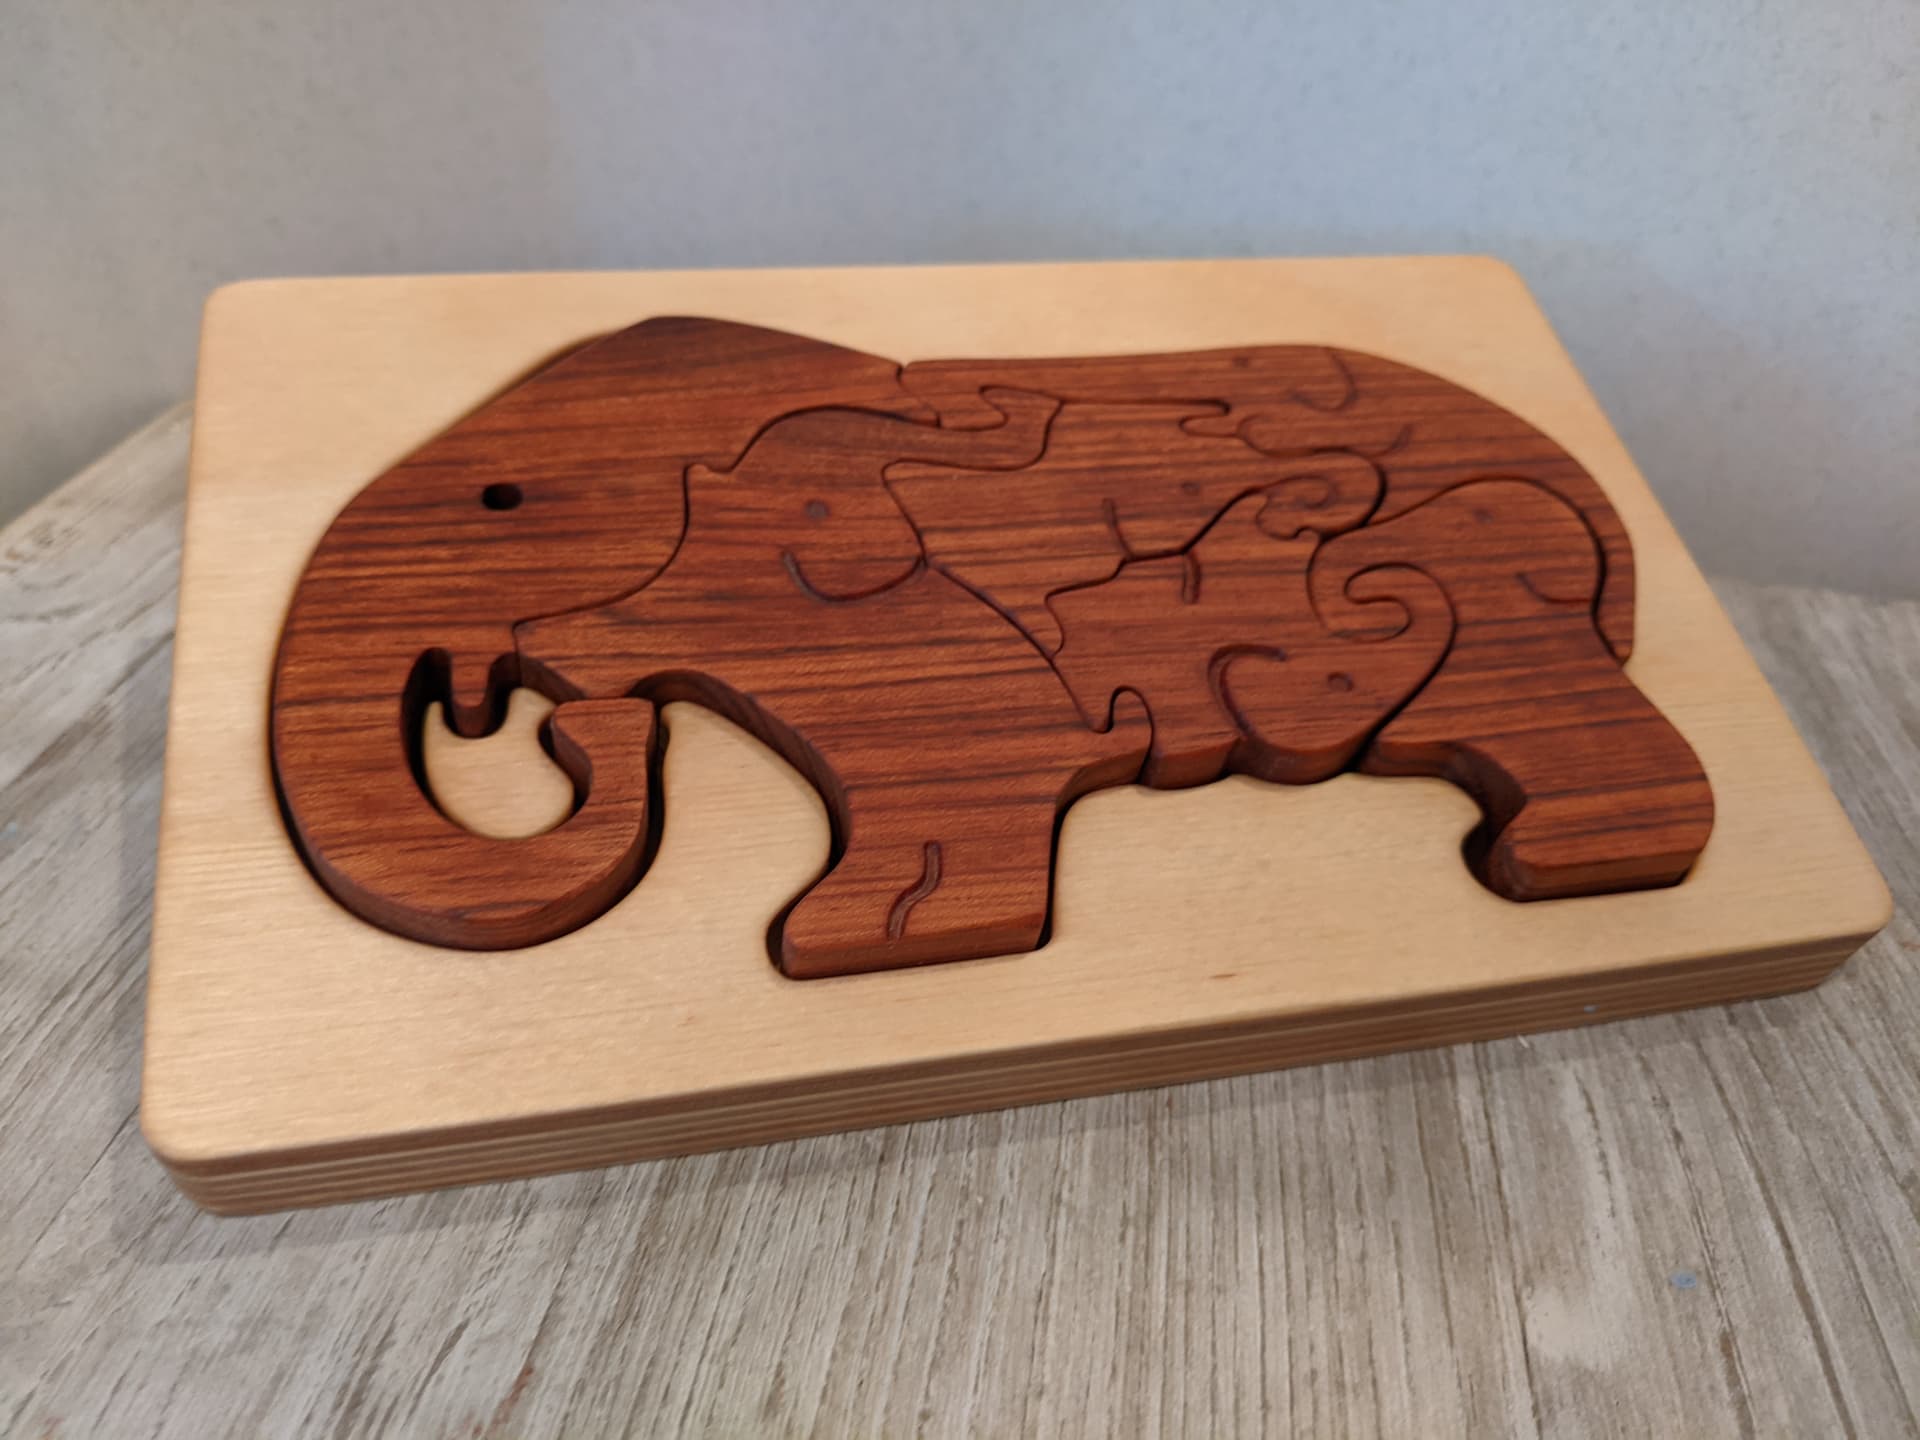
Here is a project I have done with 3/4" Jatoba wood (Brazilian cherry).
It is a design from Etsy for an Elephant Puzzle made out of Elephant pieces.
It was advertised to be a Laser project, had to modify the design a “bit” to be CNC & 1/8" bit friendly.
The details were made with a V60 bit.
I manually sanded for HOURS…
The finish is one coat of “Walrus Cutting Board Oil” followed by a Rub of the “Walrus Cutting Board Wax” it made the wood pop and it was so soft to the touch.
You can have fun with the Pieces, or with the assembled Elephant, or you can let it sleep in its Baltic Birch bed (Finished with the same products).
@Swinly Since you asked “or anyone”, I’ll reply generally. I’m sure that Nicolas will reply specifically to what he did. I’ve done several jigsaw puzzles now and, it they start out as a laser project, you need to modify them to take into account the kerf of your router bit. Otherwise the pieces will be sloppy.
@Swinly I found it to be a bit of trial and error, too. I had to play with offsets in VCP so that the pieces would fit snugly, but not so tight that they broke pounding them together. The amount of offset varies with the thickness of the material, in my experience.
1-When i downloaded the Etsy Files and began to look at how they were created, i realized that the vectors did not follow the pieces.
If you use these vectors on a laser, if you cut everything “in place” it does not matter.
If you use these vectors on a CNC, you will want to “scatter” the pieces on the material. So i had to “Stitch” the vectors for each piece.
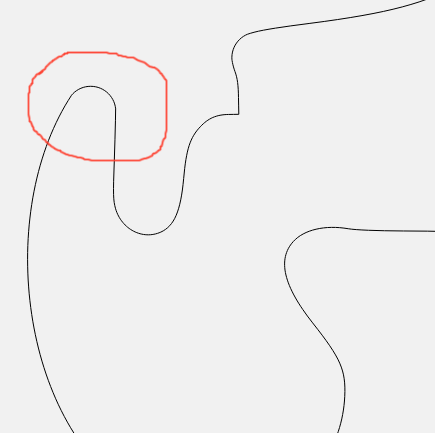
2a-Some of the pieces had vectors that could not be cut with a 1/8" flat end endmill (the tool i wanted to use)
(to the size i wanted)
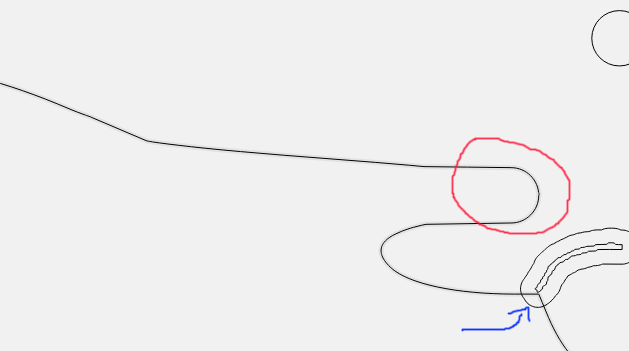
Mostly the interior curves as shown below:
For this second piece it was even more important because of the interlocking piece (exterior curve was able to reproduce the point, but it would not match-up)
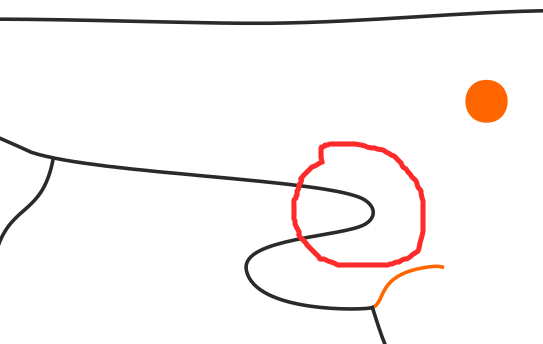
2b-See the blue Arrow? The smaller shape was the one from Etsy. I had to use the Offset tool to create the slightly bigger one, so the V60 Bit would engrave properly to get the depth i wanted.
3-As for the trial and error (as reported by @gwilki ) i wasn’t quite sure i had done it properly, so i did the cut on 1/4" scrap wood to see if it would fit and realized it did (except on piece i had forgotten to fix)
So then i was ready to cut on he real wood. Note that one if the piece (the middle one ) is a bit snug, but manageable (no pounding required )
@webbit_NJ Nicolas: I hope that my question did not come across as criticism. I certainly did not intend it that way. FWIW, when I do puzzles, and being as how I am lazy, I cut down from the top to half the thickness of the wood using a downcut bit. This gives me a crisp cut on the top of the material. Then, I cut from that cut through the bottom of the material using an upcut bit. This gives me a crisp finish on the bottom. (A compression bit would do the same in one pass, but I don’t have one, and in addition to being lazy, I’m cheap.) This process saves a lot of sanding as there are no “fuzzies” on either the top or bottom surface.
Not at all…
I think such a forum is the perfect place to ask questions and share…
In this case, i was not expecting your SANDING question to give the great tip top use a mixed mode of downcut/upcut.
As, also, was not expecting questions on CAD “optimisation” from laser to CNC.
This is great!
Forgot to add… i was SANDING while Watching Netflix so it was not all bad…