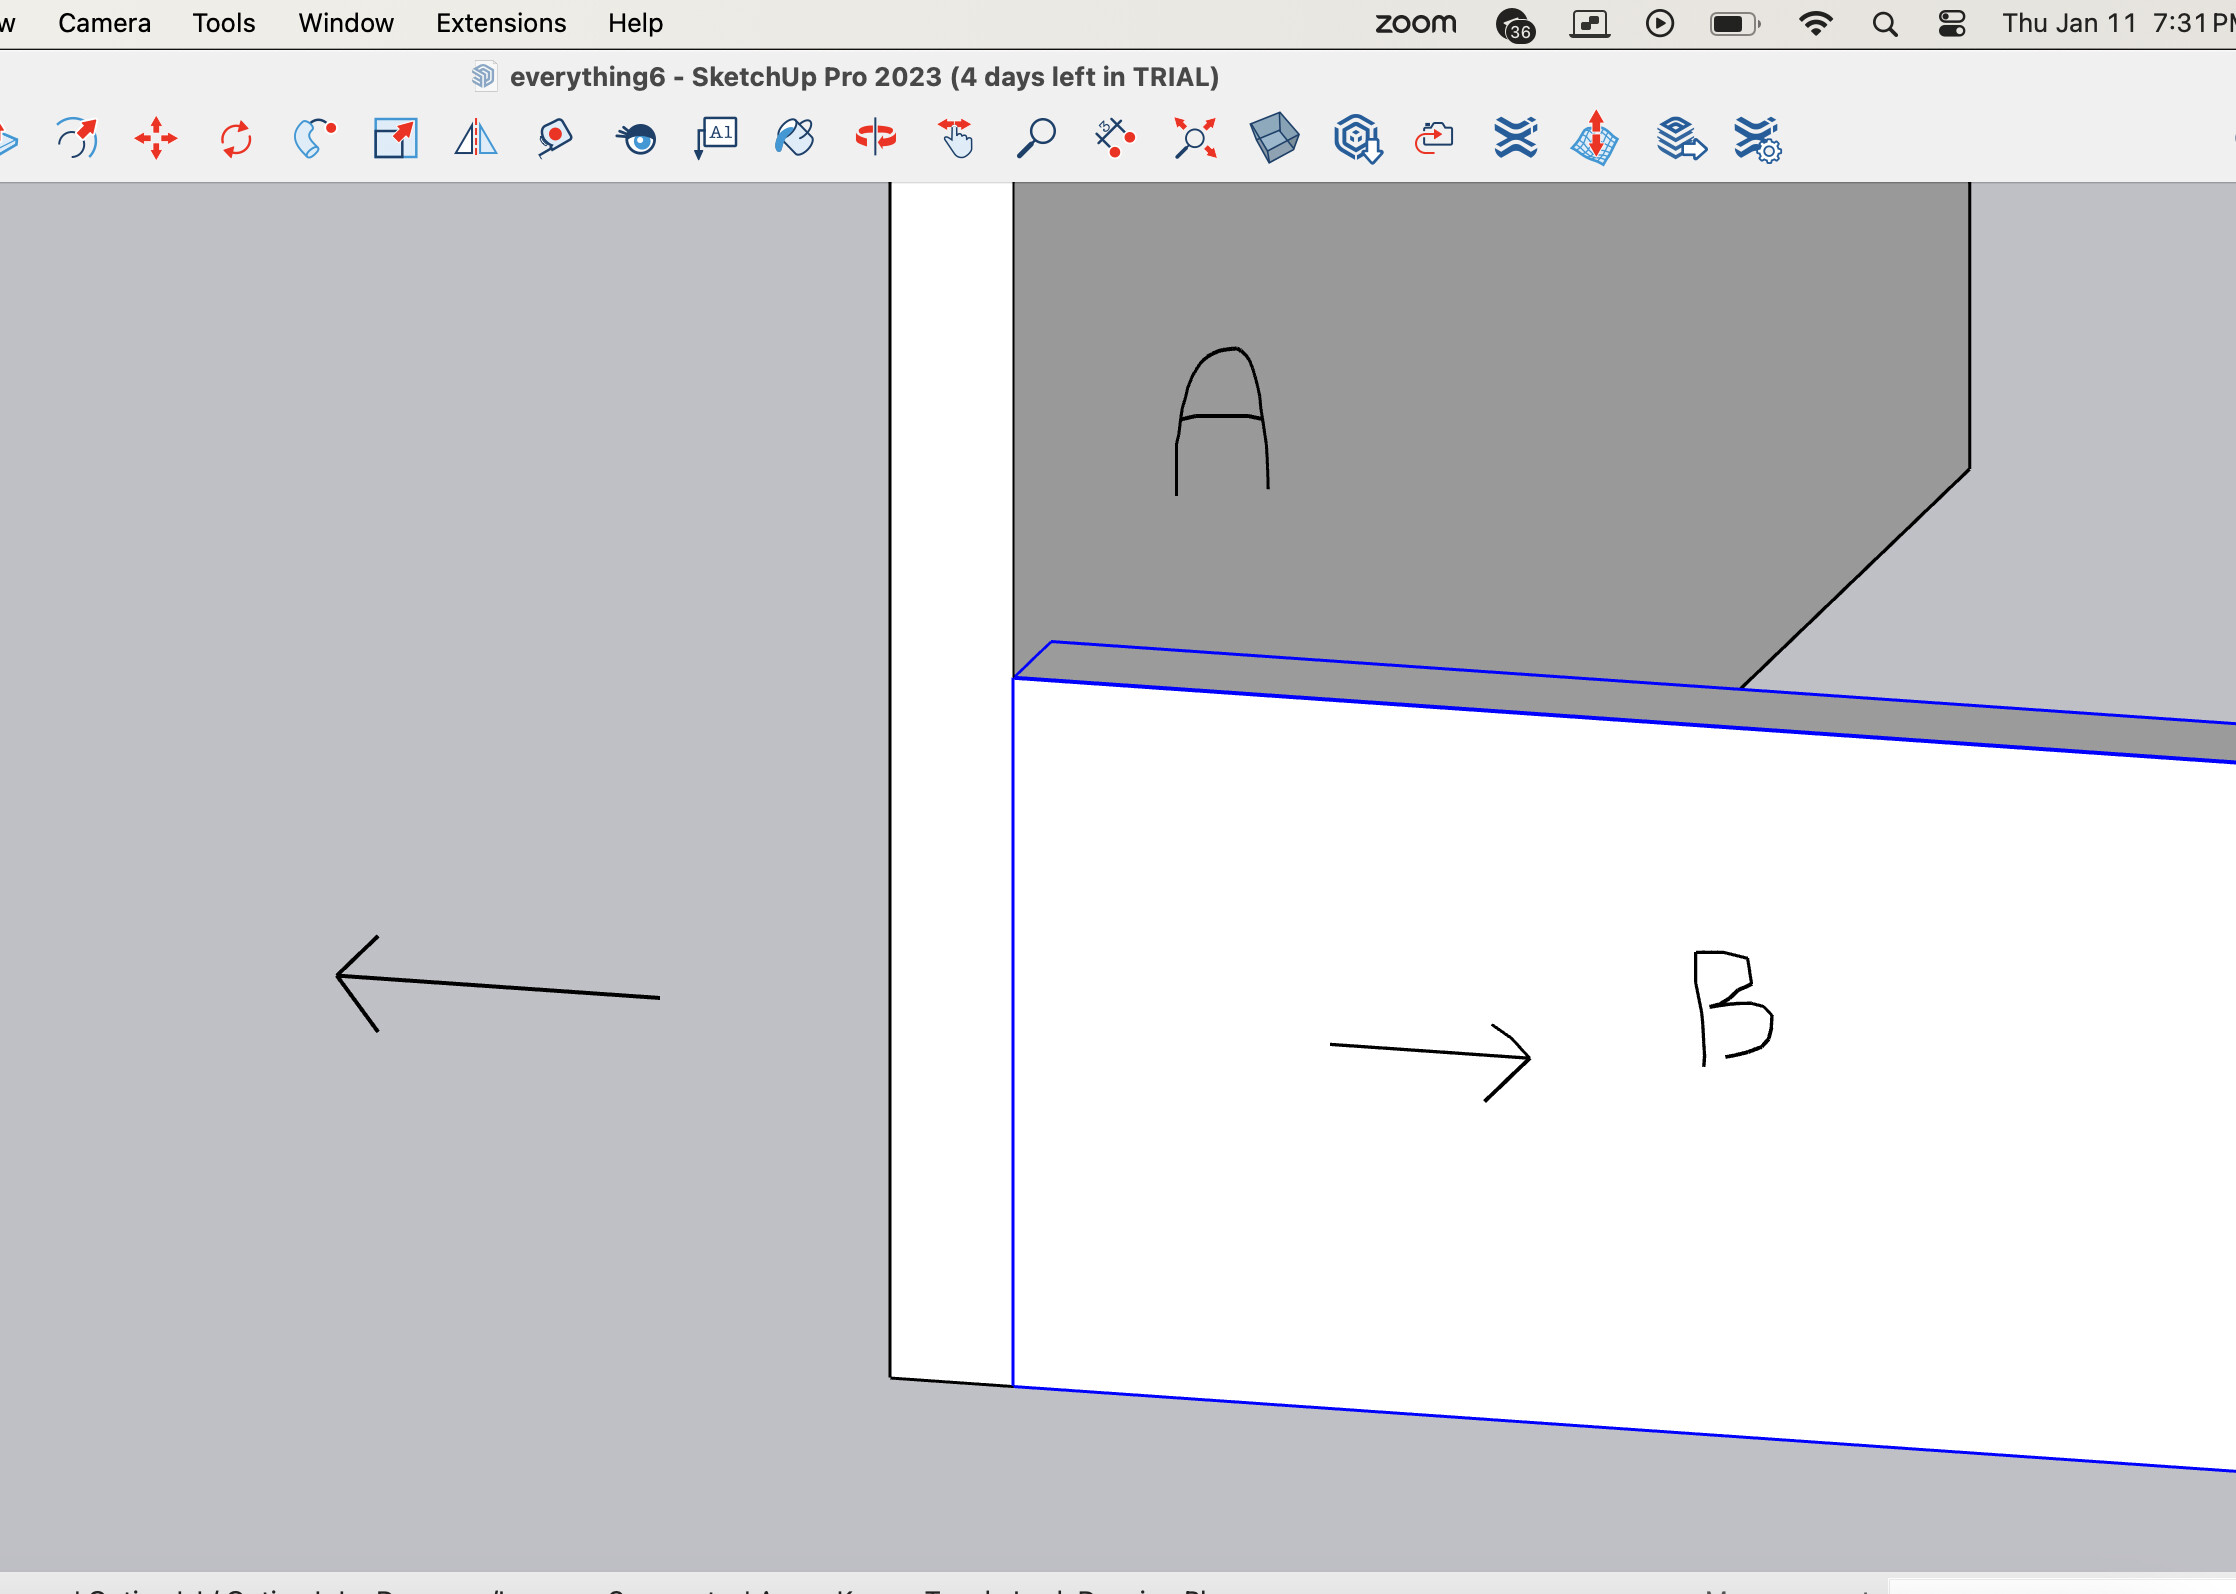
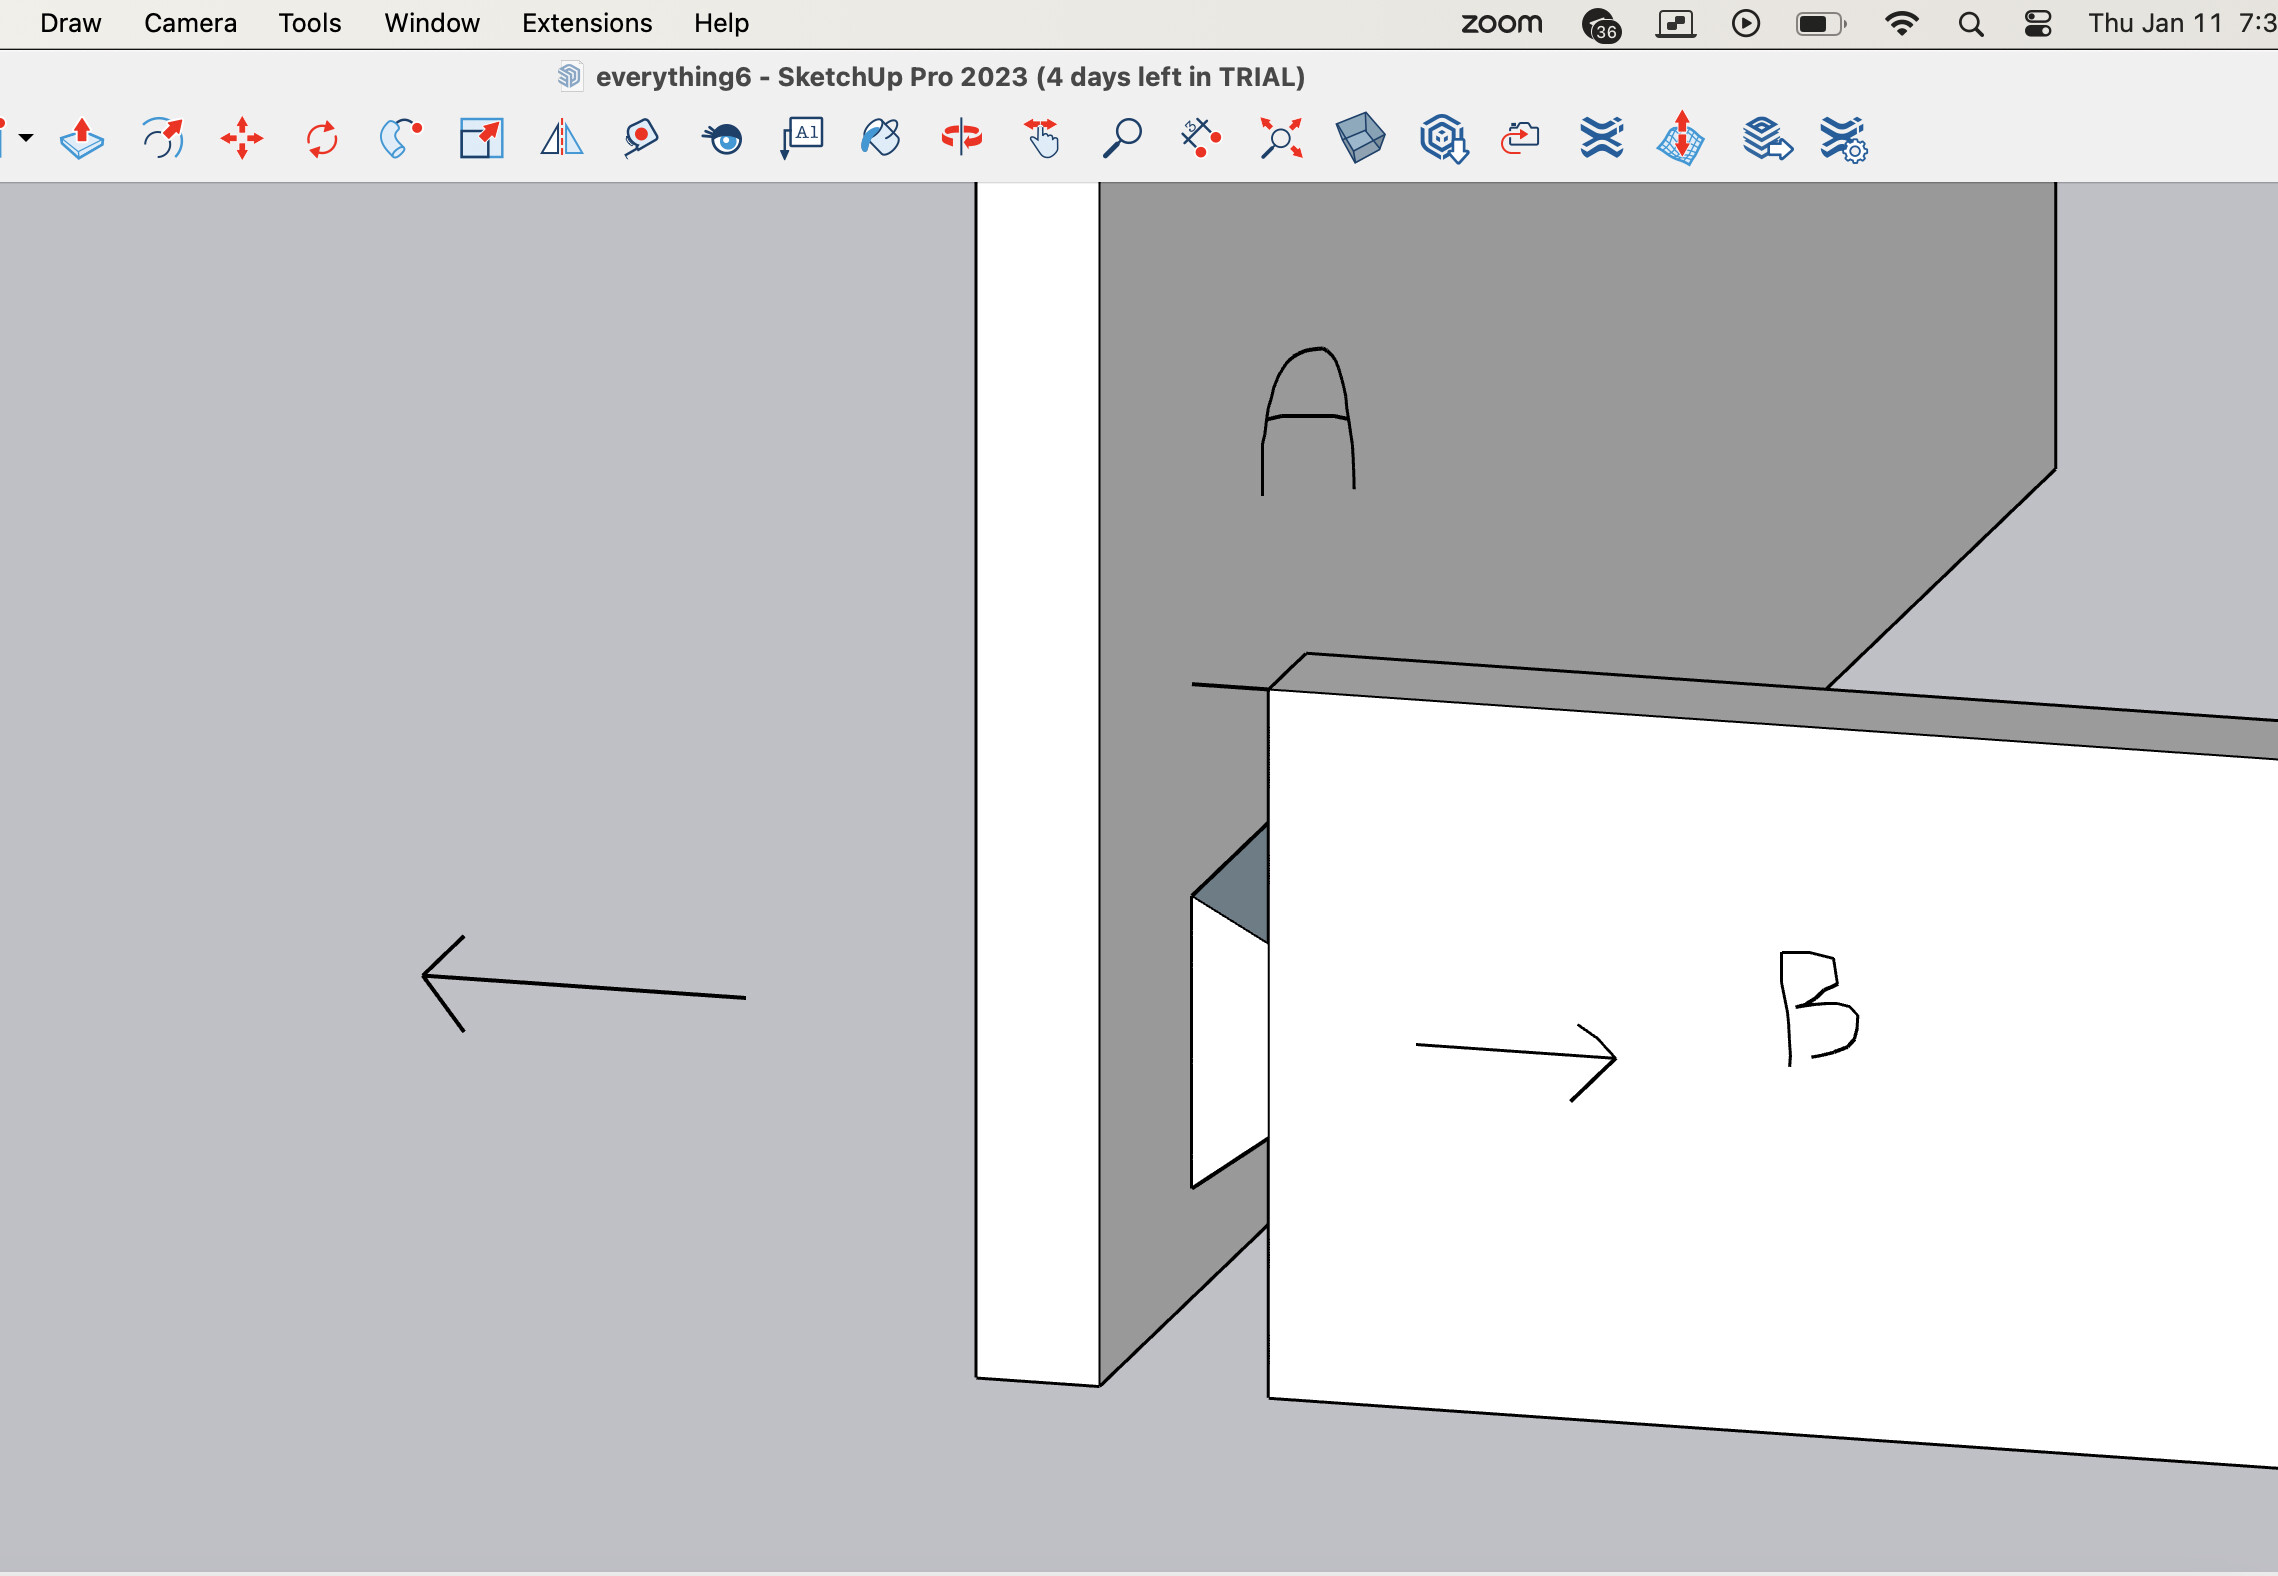
Here is the challenge I have. I need these two pieces joined at 90 degree without them coming apart along the way the arrows are showing (So finger joint doesn’t work).
Normally this would be a dovetail joint but my three requirements are
I want to use the CNC machine to make it happen
I dont want my board B to stick out from the other side of Board A
I only want to have the board horizantally (Dont have a way to do it vertically)
Is there any CNC joint that I can use to accomplish this.
If the only way is a joint that is similar to dovetail, I am fine with making the board B (knowing that the corder would have the small hole , for the bit to make the sharp angle)
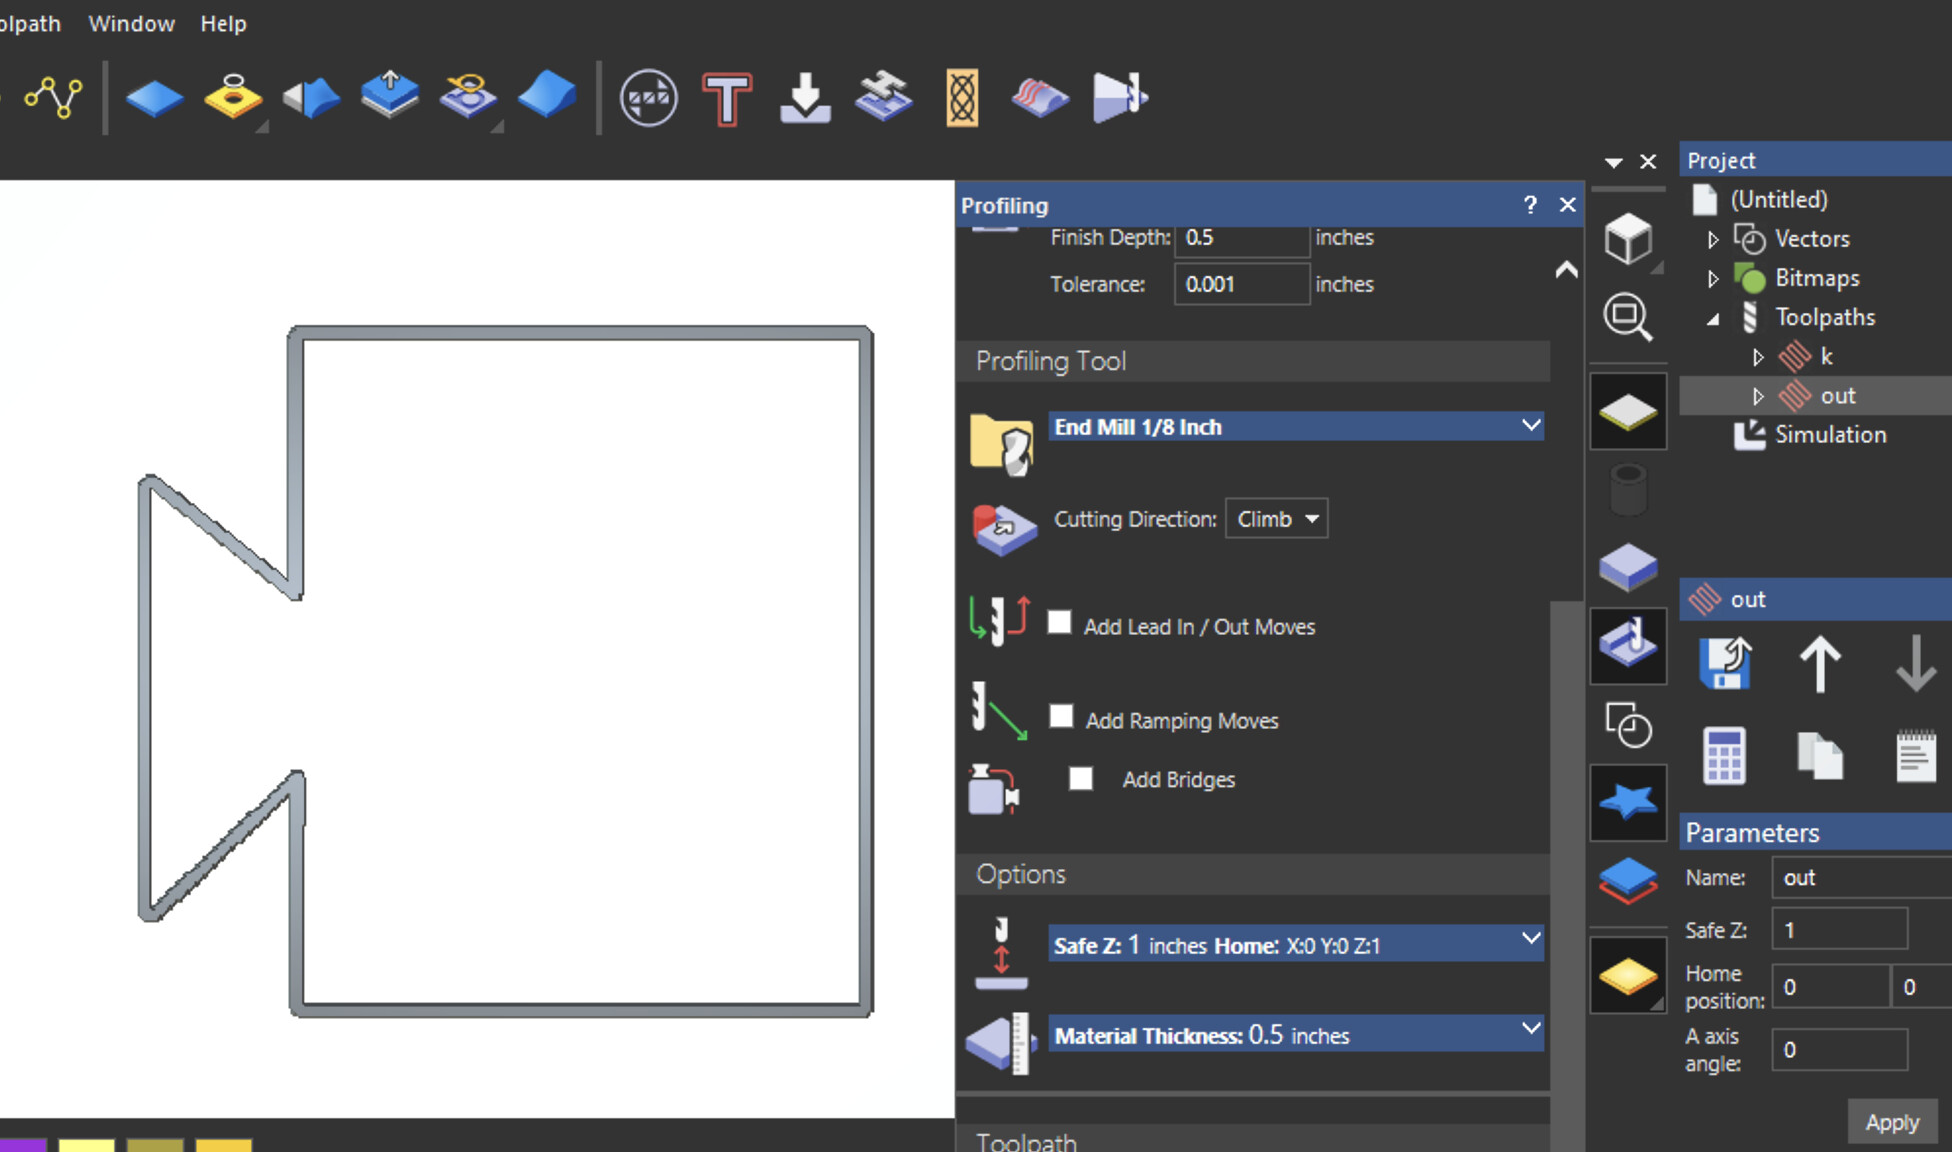
My problem mainly is the board A, I am not sure how to use carvco to make this cut, which toolpath do I need to pick? I guess I could pick the profile, make sure there is no stepping down and my first cut will go all the way to my desire depth. I just dont know if this is a hack (even if it works) , I feel like Im missing something and there must be a better (“Right”) way to do this.
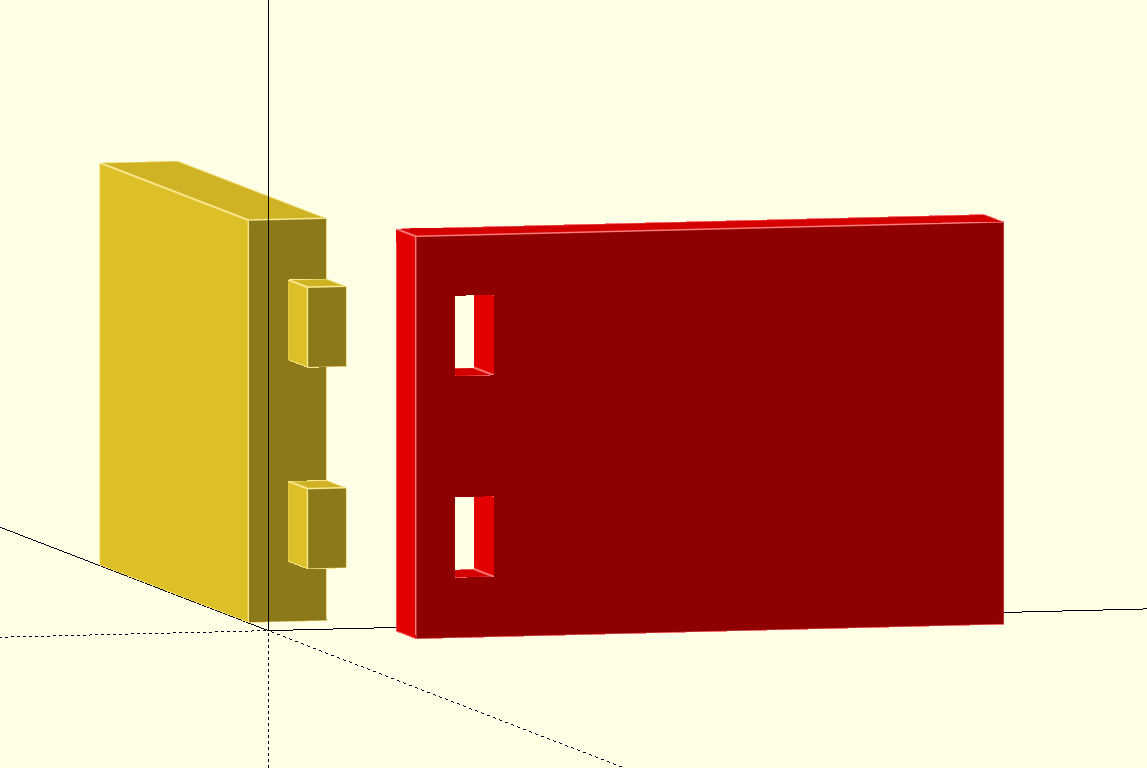
Hello Moosa. There may be other ways to do this but the only way I can think of, without a vertical mount, would be to do a modified finger joint like this.
But of course you would need to add dogbones because you can’t make the square corners.
EDIT: In my pic you would need 12 holes for corner relief, 4 on each of holes in board B, and 2 on each pin on board A. The holes in board A could be done from the right side and only go half way through if you are OK with doing a 2 sided job.
just something that looks like dovetails and profile around it.
I would satisfy my need for the parts not to come apart the way I described.
Am I missing something?
@_Michael you are right, I feel so dumb if I swap the A and B it would accomplish what I wanted. I always had in mind that Board B has the Fingers, you have the Board A with fingers and that does what I wanted. I feel so bad. Still would be good to know how to do dovetail but that solves my problem.
@moosa It’s not necessarily wrong, but you will not get those sharp inside corners as shown in your preview. With the 1/8" end mill, those corners will be rounded.
@moosa I have a Dovetail Guide if you ever decide you want to add a vertical mount to your machine. If that’s even an option, I don’t remember what type of machine you have. Just throwing that out there in case you have not seen it.
@gwilki that makes sense.
Do you know of the “right” way of doing the corresponding Dovetail for my board A (If my board B has the dovetail shown above)
From this response, im guessing Carvco cannot simulate it (But maybe I need to try using a dovetail bit with Profile and make sure to go deep before I reach my board and go all the way in one pass without stepping down? sounds hacky
I saw that @_Michael thank you for putting that together, at first I wrote this question on that thread but then thought it might derail that conversation so created a new thread, but great post!
I will definitely setup a vertical mount someday.
That is what I do in my vertical setup. set the pass depth of the bit to be at least as deep as you want to cut and do it in one pass. I go slow for this, it’s kind of scary!
Also Vectric cannot simulate it either and my dovetails are just entered as end mills.
So if your board B has the dovetail profile, with the addition of inside corner holes, I think you could use the dovetail bit, full depth, to cut a U shaped profile in board A. It won’t be exact because the dovetail is going to bevel the middle section of the U shape which wouldn’t traditionally be beveled. When making the U profile I put the line half the bit diameter away from where I want the cut to be and then cut on the line. It’s easier for me to think in terms of the center of the bit I guess.
@moosa Excuse the delay in replying, Moosa. Just to clarify for my slow thinking, in your original pic, you want the tail on board A and the pin on board B, correct?
Has anyone tried using the box joint gadget in carveco maker…I was wondering if you could import the vectors into carveco maker and scale them to size and create tool paths for them that way? Dos that make sense?…Just a newbie here…