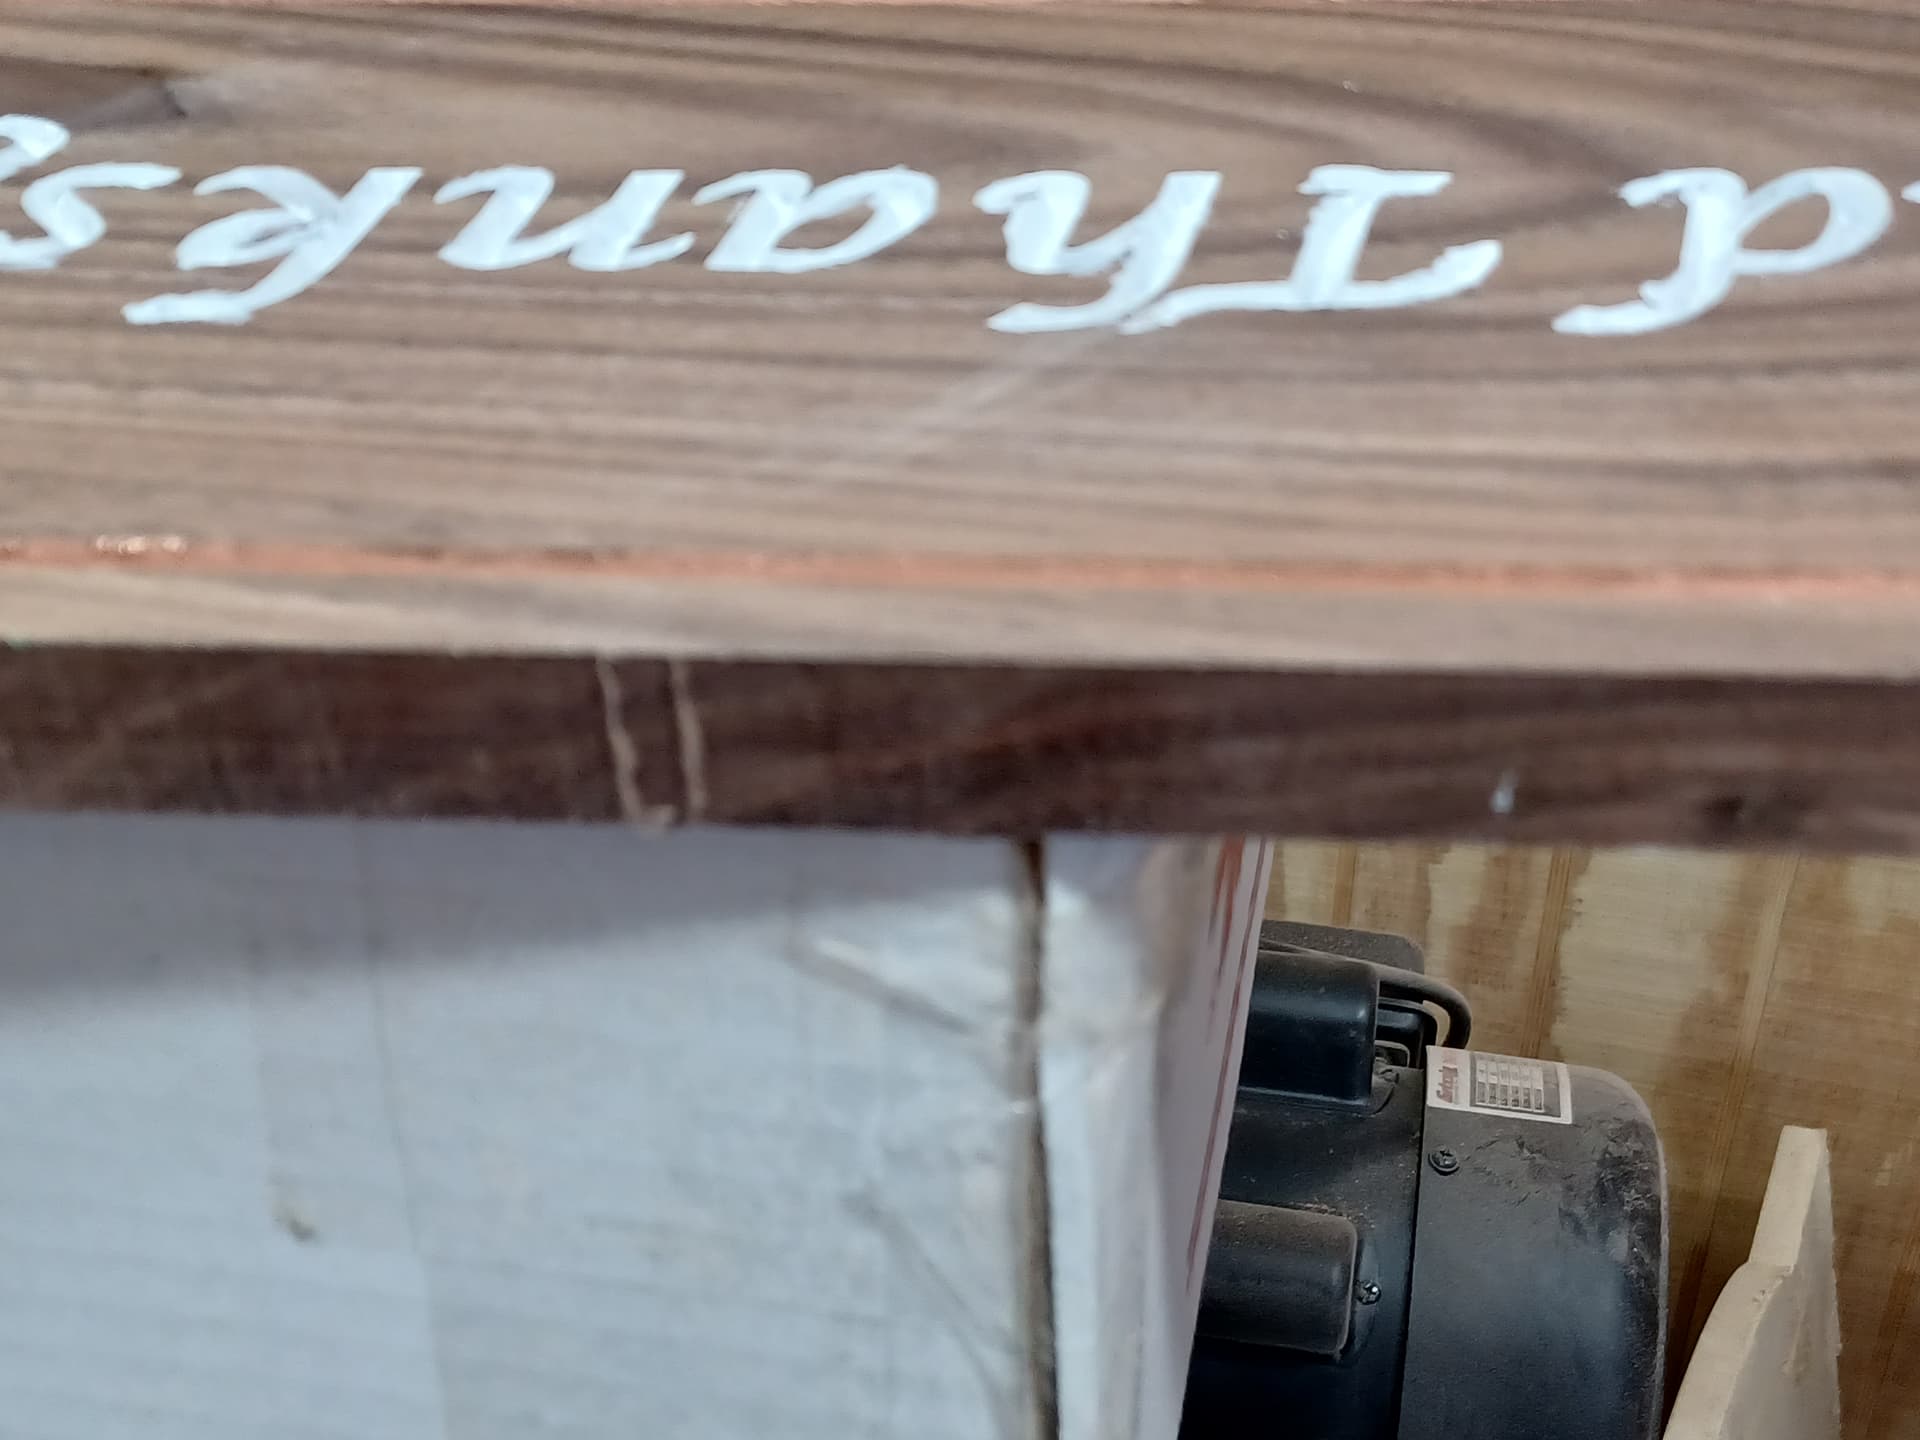
Marks left in tab locations, any suggestions appreciated.
Just noticed this on recent carve
What CAM software are you using? If you are using anything from Vectric, you may have more luck with 3D tabs.
Vetric V Carve pro up to date ver 11.
@Bill In the tabs box, there are 3 choices.One of them is 3D tabs. The benefit of them is that the machine does not stop to go straight up on one side of a tab, then stop again to go straight down. The 3D tabs are ramped on both sides, so not only do they allow the machine to keep moving, but they seem to reduce or eliminate the registration marks that you are getting.
If you try them please report back on your experience.
I agree with @gwilki, use the 3d tab choice.
Anytime your tool-path movement stops/dwells in one spot, then restarts, you will have tool deflection because of the cutting action, which will leave a mark/rat bite.
Please note that 3d tabs should be long enough, and thick enough, to support your project when cut out. A 3d tab does not have the same cross-section as a square tab, so just be aware of that design feature. Don’t go to thin and too short.
The tool deflection can be caused by equipment/part clearances, worn parts, lose running clearances in the router/spindle, tool extended too far out from collet, etc.
Most of these issues, if properly managed thru the tool-paths, will still give you a good finished project.
I also use the lead in function to eliminate/reduce that same issue when starting the cut.
Just keep experimenting.
Thanks to all for suggestion with checking the 3D option, @RustyR could you please provide what settings for leads you typically use?
@Bill, I typically use .125" high X .375-.500" long, depending on tab location access and material type and thickness.
Tips:
@RustyR Good explanation, Rusty. I think that Bill was interested in your leads settings, too. ![]()
OK, lead-in and lead-out settings:
Note: I rarely use the ramp-in/out function, but it also has it’s purpose.
Thanks again for the help and info, very much appreciated
Bill