
My latest project. The drawers aren’t done yet, but you can see where the runners will be mounted. The only screws were used to mount the wheels. I didn’t use the Box Gadget. These were cut flat on the spoiler board though. My vertical mount wasn’t used.
7 Likes
Hey Lewis,
That is pretty nice. I mostly build with standard 4by4’s or something simular. Using the mill and ply is something that still needs to sink in with me. I like the design. It looks almost as if you don;'t need to glue it together. Just hammer it in place and it’s done?
Nice Thor hammer too.
You lit a light in my head. Thanks!
1 Like
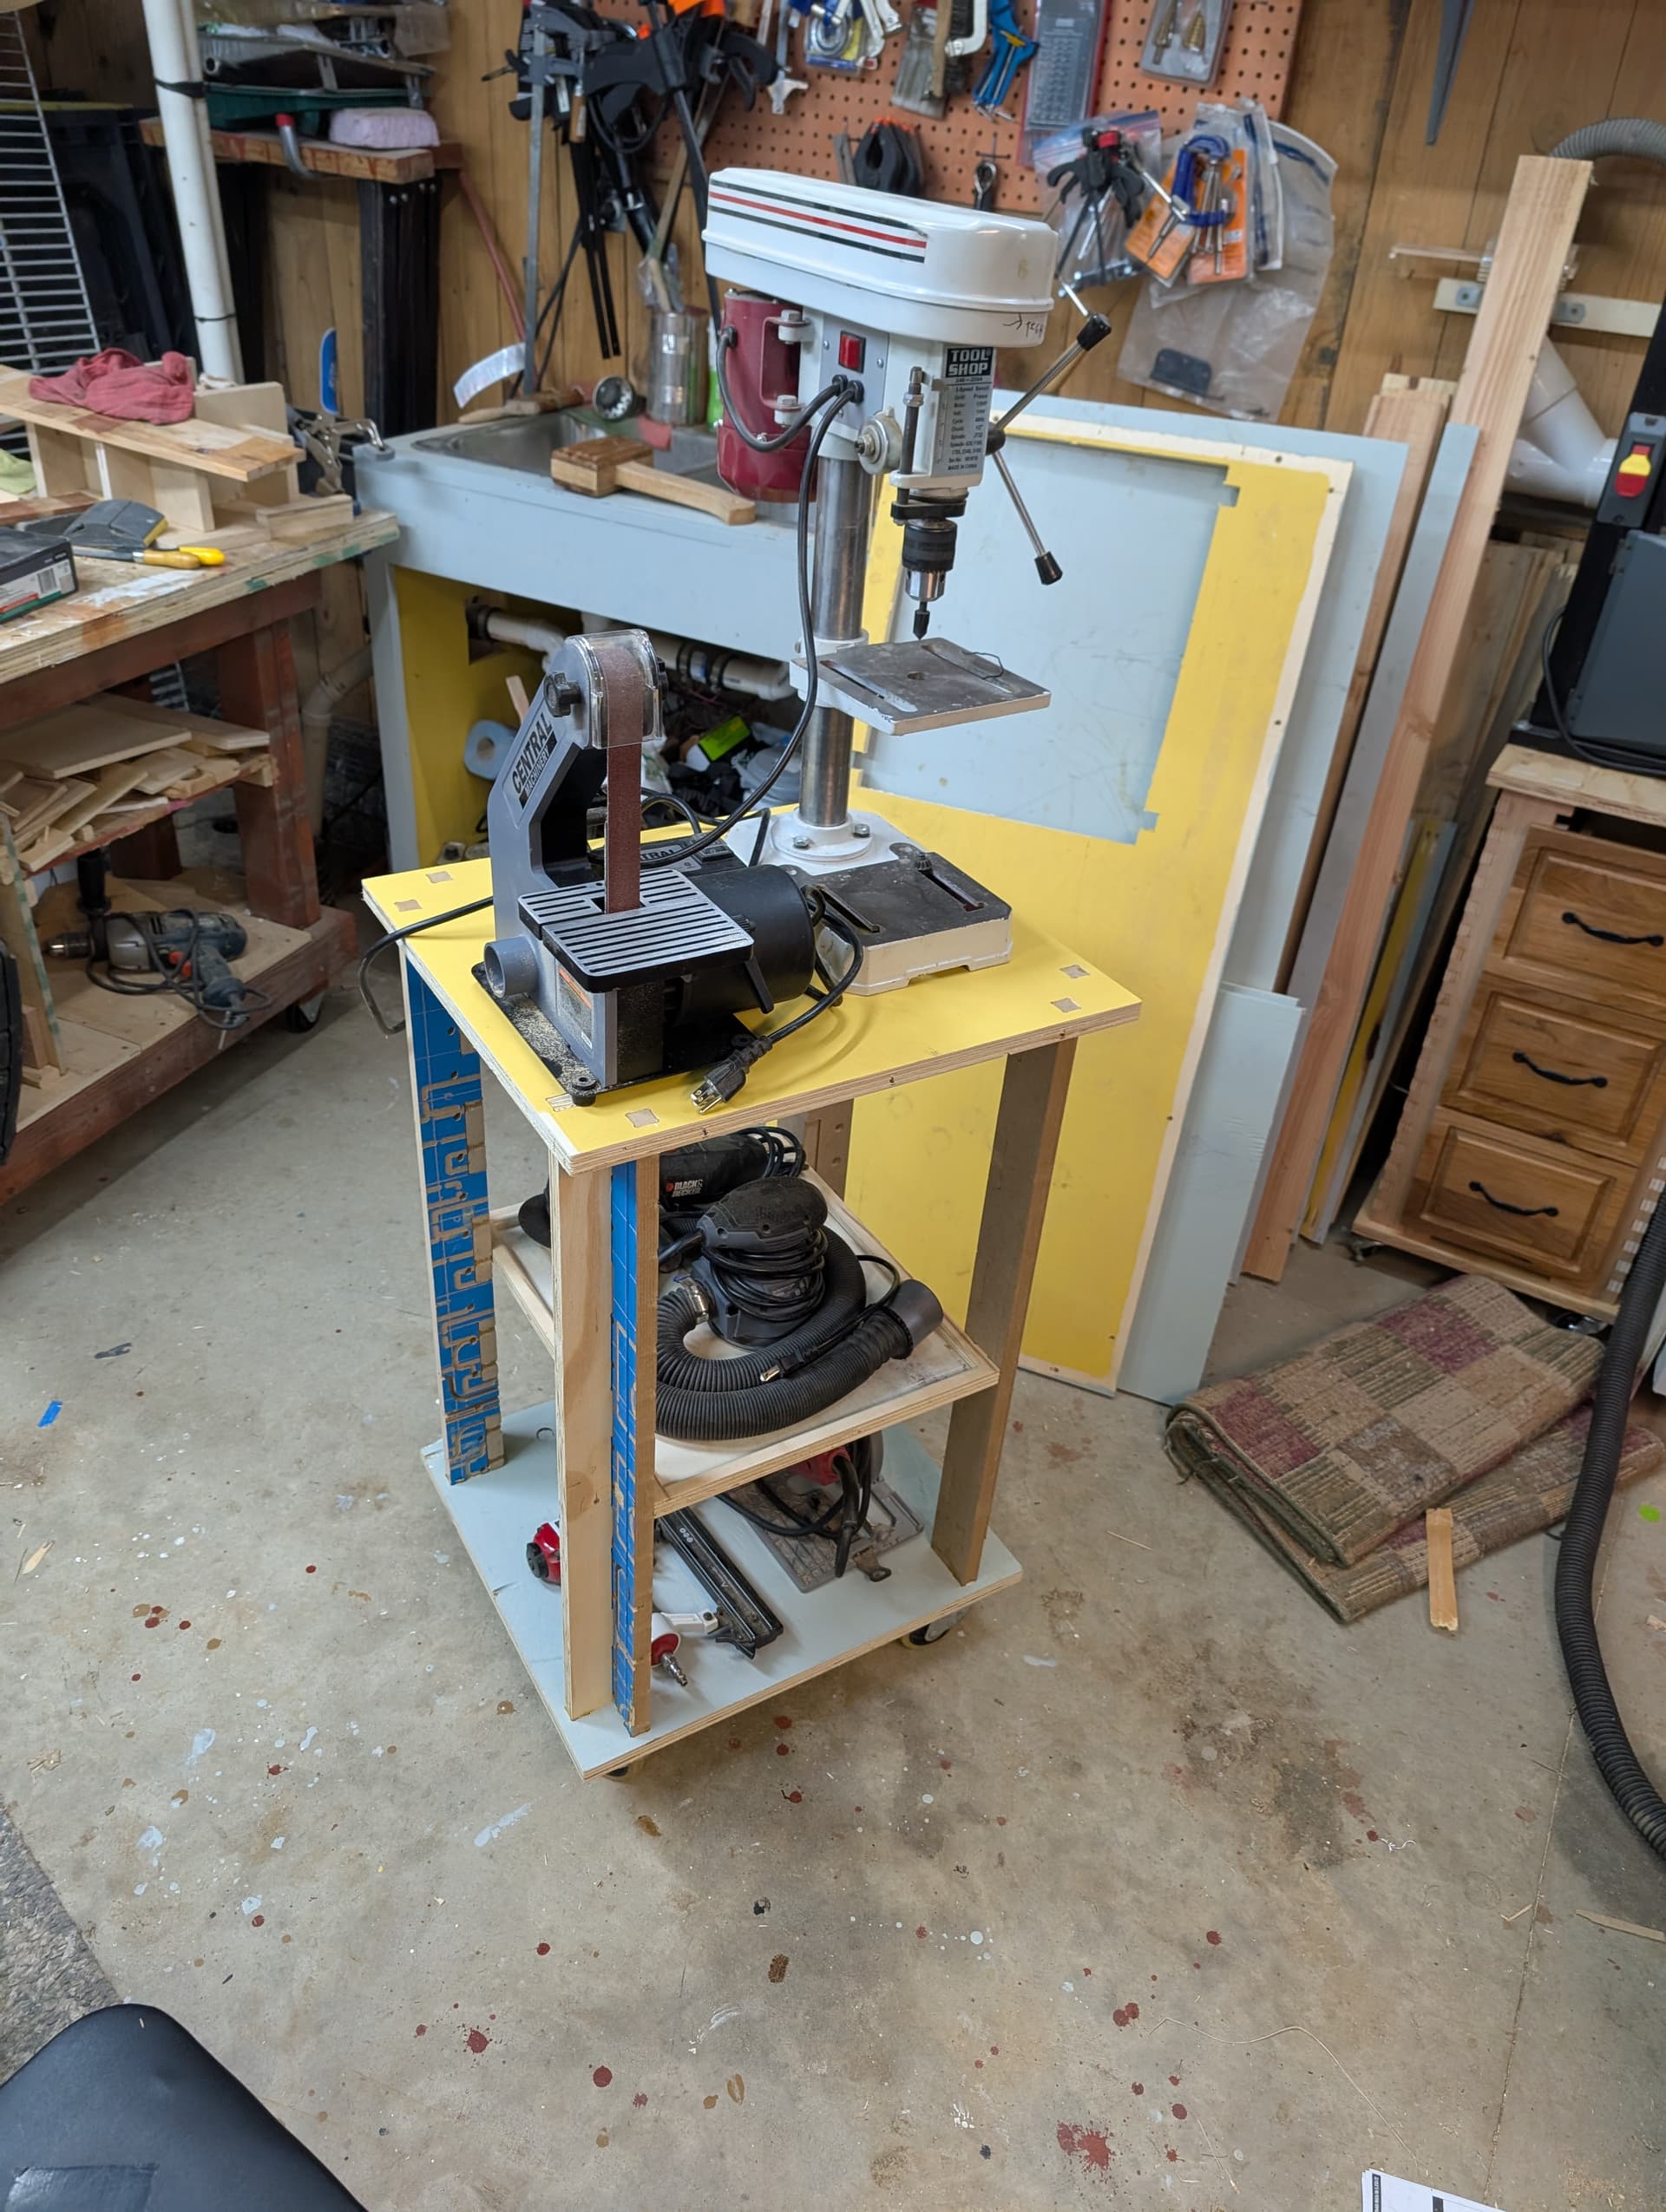
It’s all tight enough not to glue. But considering it has a ‘moving blade of pain’ on the top of it I did add some glue in the joints. My 1st design was with solid sides and it would take a full 4x8 sheet. That seemed way to wasteful so i keep cutting stuff out till I was down to this. I am going to make another stand for my drill press and I will make the legs even more narrow. This stand is much more sturdy than I first thought it would be. This took 1 full ‘handipanel’ 2ftx4ft and a part of another. I want to get the drill press stand down to 1 handipanel.
Lewis, you didn’t show any dimensions, but when I first saw the photo I wondered if that wasn’t easily upset (tip over).
+5 on the hammer… and I like the table too!
about 16"x16"x32"
I do everything CNC in metric 400mm by 400mm by 800mm
It feels stable. If I lock the wheels and push at the very top of the bandsaw it doesn’t get tippy till about 15deg. Once I get the drawers made I got boxes of nail gun ‘nails’ etc that will be sitting on the base. That will help shift the center of gravity down a bit. Being top heavy was definitely a concern while i was building it.
I like this style of construction so much. The box joints give it such rigidity I think I may use my Longmill to build a new table for the Longmill. I can do a better job of incorporating vertical milling at the same time. It gives me a chance to fix 1 design flaw in my original enclosure. I should have made it 1" taller. I’ve lost track the number of times I’ve cracked my head on the top while leaning into it ![]()
1 Like

This should be made illegal, the offence confiscated and shipped directly to my evidence room, to hold the contrabandsaw stored right next to my crooked nasty crimes machine.
Freez! Hands up! Drop the hammer! kick it over here!
1 Like
I love your project! It turned out very well. I may have to try the box joint possibly on drawers that I’m making for under my CNC machine. I was planning on using pocket holes, but using my CNC router is a good thing too.
Keep up the good work!
Jake
1 Like
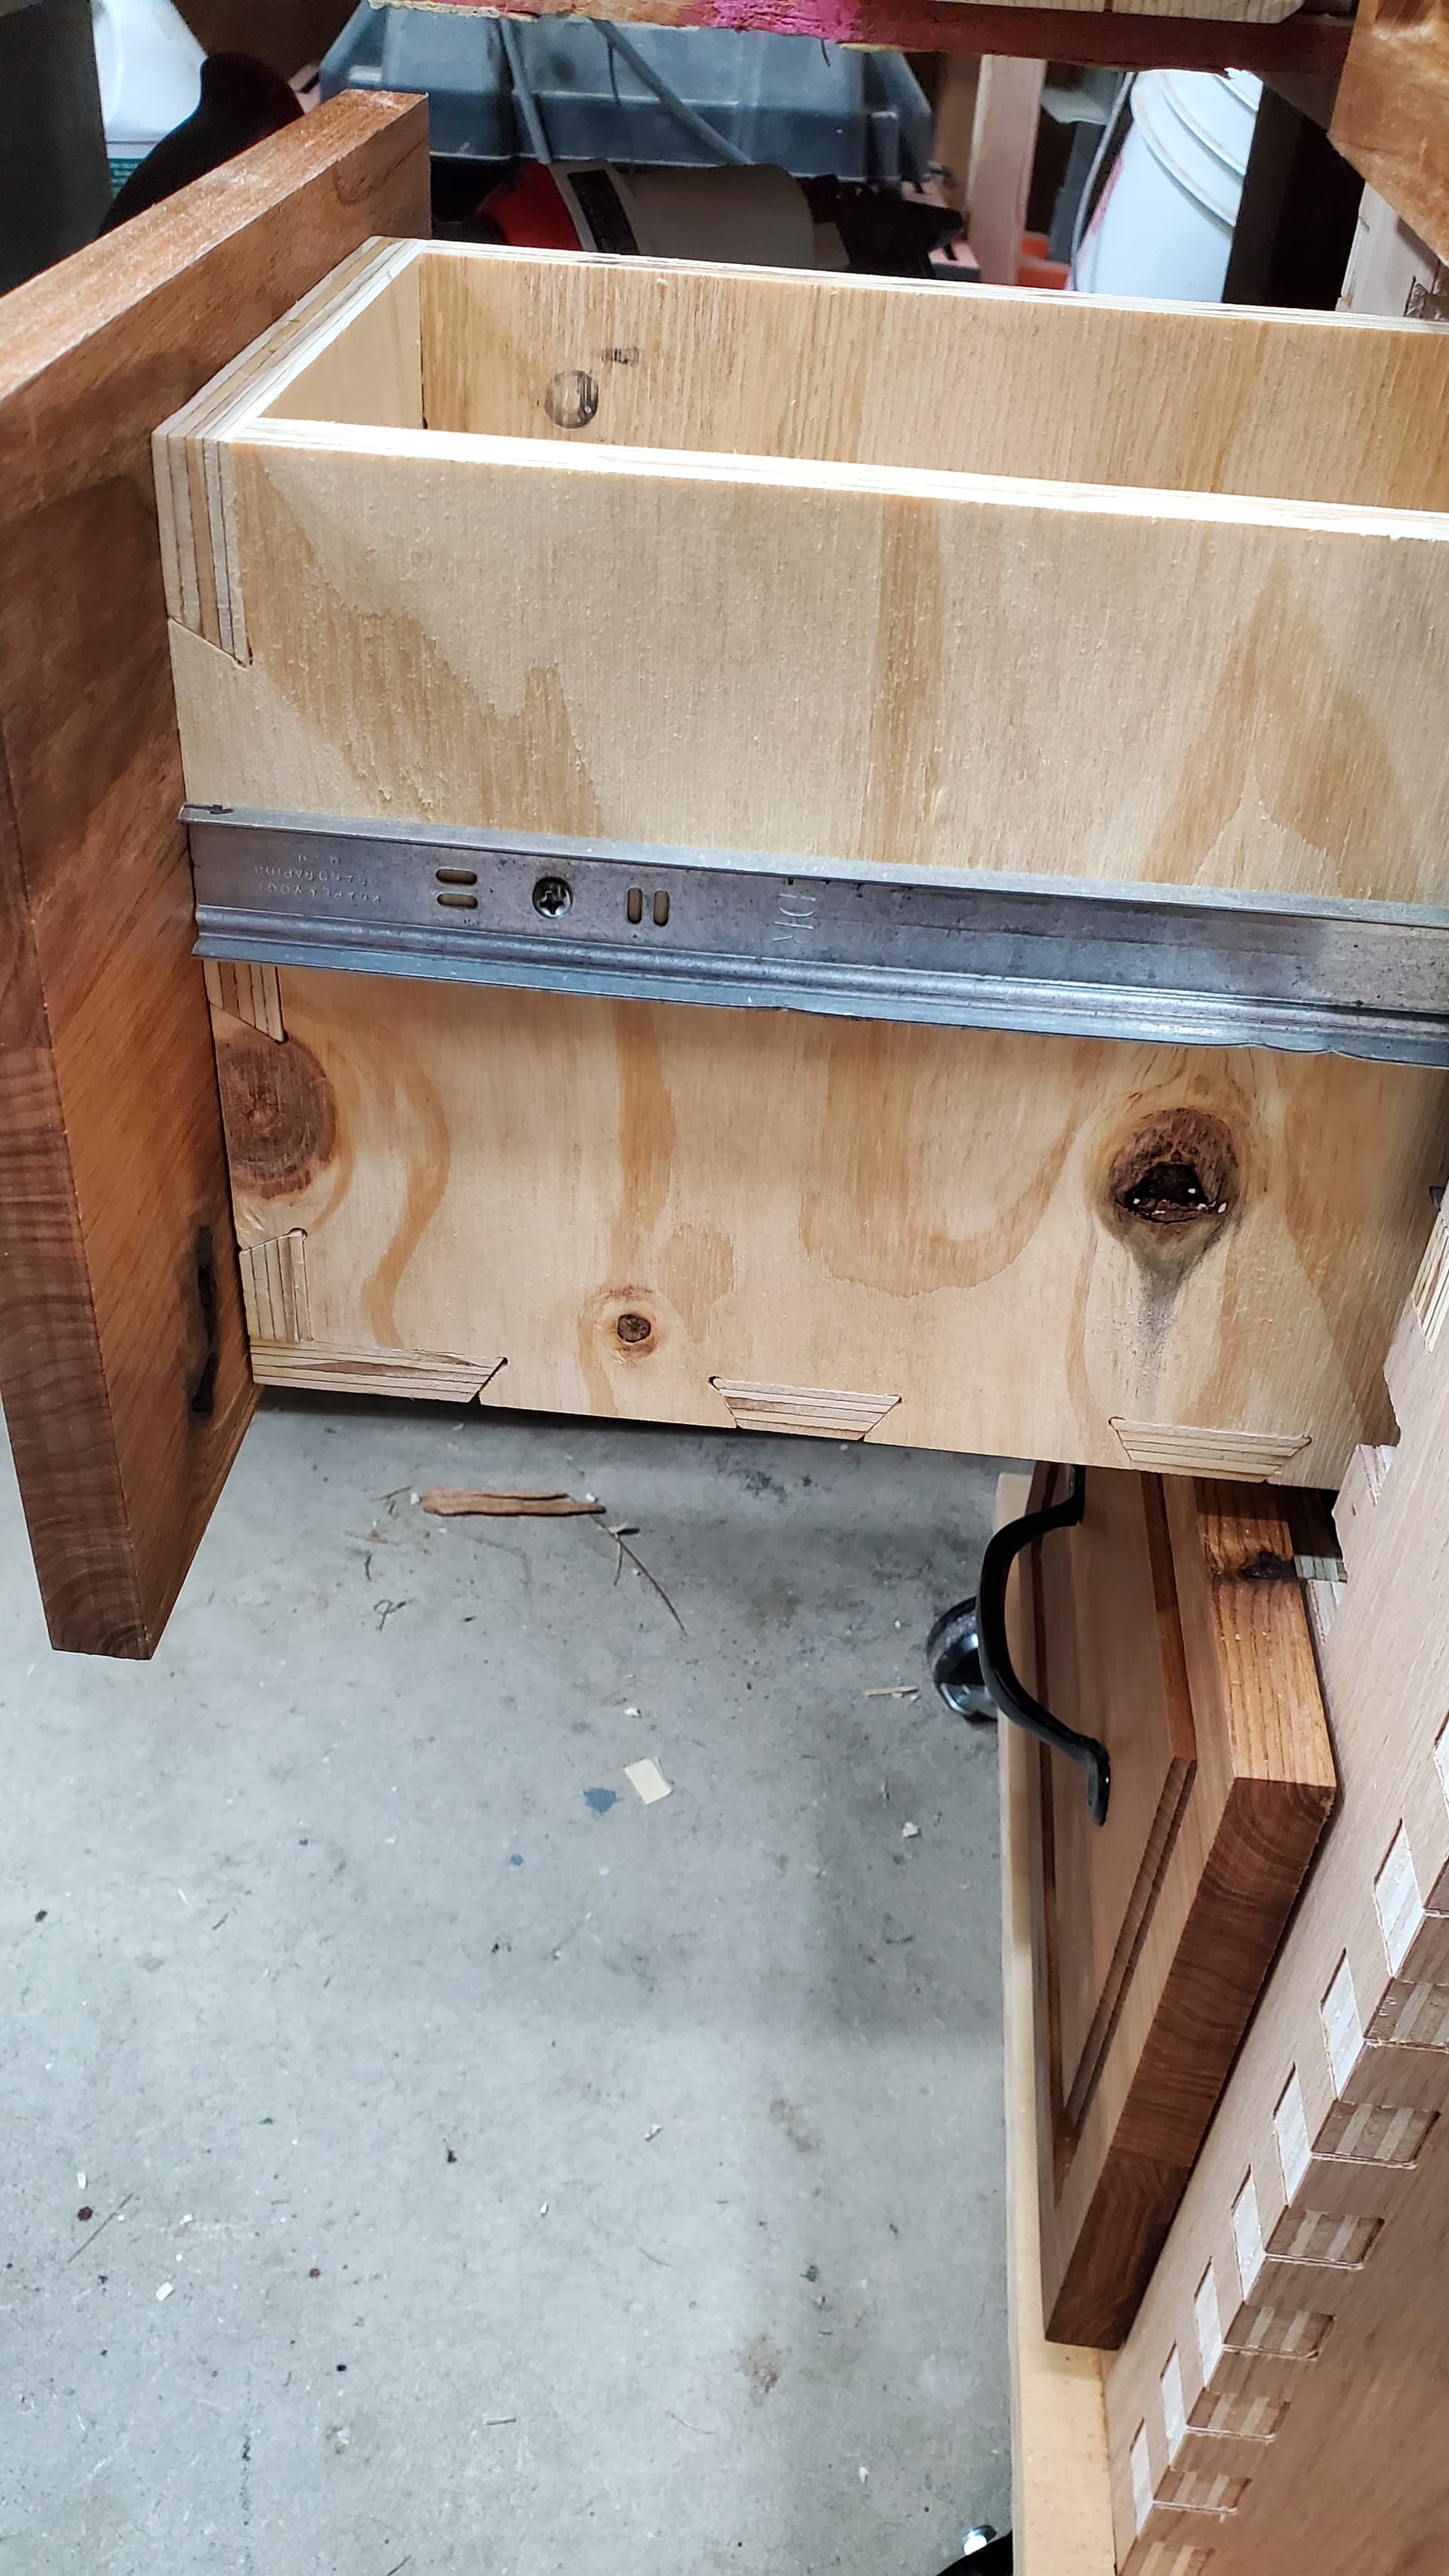
The drawers were done with dovetails.
The top 2 drawers I used the Box Creater gadget, the 3rd one I used the Dovetail Creater Gadget (available with a Google search}
2 Likes
That is outstanding @LewisB314! I’m not sitting in front of my design computer currently, but in my software, I have both box as well as dovetail gadgets. My question is how tight did you go with the joints? If I remember correctly, there is a variable joint tightness choice. Obviously, I want it tight, yet want to use glue too.
Once again, very nice work sir. I appreciate you sharing it with us!
Jake
1 Like
1st drawer 0.0mm Allowance, they had to be hand sanded to get to fit.
2nd +0.10mm and very minor sanding , just enough so all the glue wasn’t squeezed out of the joints
3rd drawer +0.15mm
Keep in mind, a toolpath allowance (+) is tighter and (-) is looser, but it’s the exact opposite with the Gadget, +0.15mm is looser.
The box joints in the legs I didn’t use the gadget, I made the toolpath by hand, so they had a -0.5mm Allowance. Everything was cut with a 1/8" compression end mill.
Nothing was actually loose, I had to use the mallet to tap them all together.
2 Likes
Thank you sir! I am very appreciative of your time and response!
1 Like
This is a great little table I’d like to put next to my Altmill for my laptop and all of my cutters and such. Do you have the files you can share?
Sorry for not getting back sooner. Not in an organized manner. Since it was a trial and error build I don’t have it easy to duplicate.
I should have an updated version in a couple of days that I will share here.
1 Like
SandingStation.crv (3.4 MB)
With the exceptions on the Shelf all cuts are with an 1/8" up cut.
The WorkSheet is ideal sized and doesnt take actual wood depths into accoount
thus the corners don’t have fillets for example.
I consider the WorkSheet for display purposed only.
I made this tool stand using nothing but scrap pieces, this is why I have multiple cutsheets
instead of arranging everything onto one big sheet.
The Shelf I put extra work into mostly as pactice and to add a lip so parts don’t roll off.
The pocketing can be skipped which will save about 90 minutes of cutting.
On the actual cut sheets all corners have fillets for the 1/8" upcut. If you use a bigger
endmill they will need to be adjusted.
The TestSheet can used to check how tight the joints will be before making the larger cuts.
I usually use these type of sheets to adjust for wood thickness.
For my cart I used .76" pockets and had to file them slightly. I have since enlarged all pockets to .77"
1 Like
you may notice the legs are a former spoiler board LOL i have a really hard time throwing
any wood away
1 Like
Hi Lewis,
I just LOOOOOOOOVE the scrappy look on this one. Suuuure the bandsaw cart is amazing in its own right and believe me, if I love that one too, but this! This is what I think shop things should look. Reused scrap molded into something usefull. No care in the world for looks.
And that gives it thát “I am an effin shop cart, not a kitchen appliance your misses uses to arrange flowers on because I am such a cuuuuute cart, you moron” look.
The material Messy, smelly, greacey, old beyond believe, but good enough to be used into this useful thing.
The stories it tells by its scarrs alone! -Yeah I was a cnc spoilboard once-
Daaaaim!
-I like the whole feel your shop gives.- It gives the right fibes I feel a shop should give.. timelesness (?)
1 Like