Just curious if anyone had gotten and setup their Sienci laser yet, and if so, how did it perform? I’m waiting to order one depending on if people have any issues or concerns with the first batch.
1 Like
@gtrboy77 Dean: As a starting point, take a look at all the threads in the “laser” section of the “add ons and mods” category. There are several posts by users who have their Sienci laser up and running.
This is the only YT video I have seen about the new laser:

3 Likes
Got my laser a few weeks ago. Installing was easy except for a couple items.
Issue one: The bracket did not line up with the holes on the spindle mount (left or right side). I ended up re-drilling holes that lined up perfect.
Second Issue: The wires were not long enough to go all the way through the drag chain and leave enough to reach the controller (30x30 longmill). I added 2 feet to each. perfect.
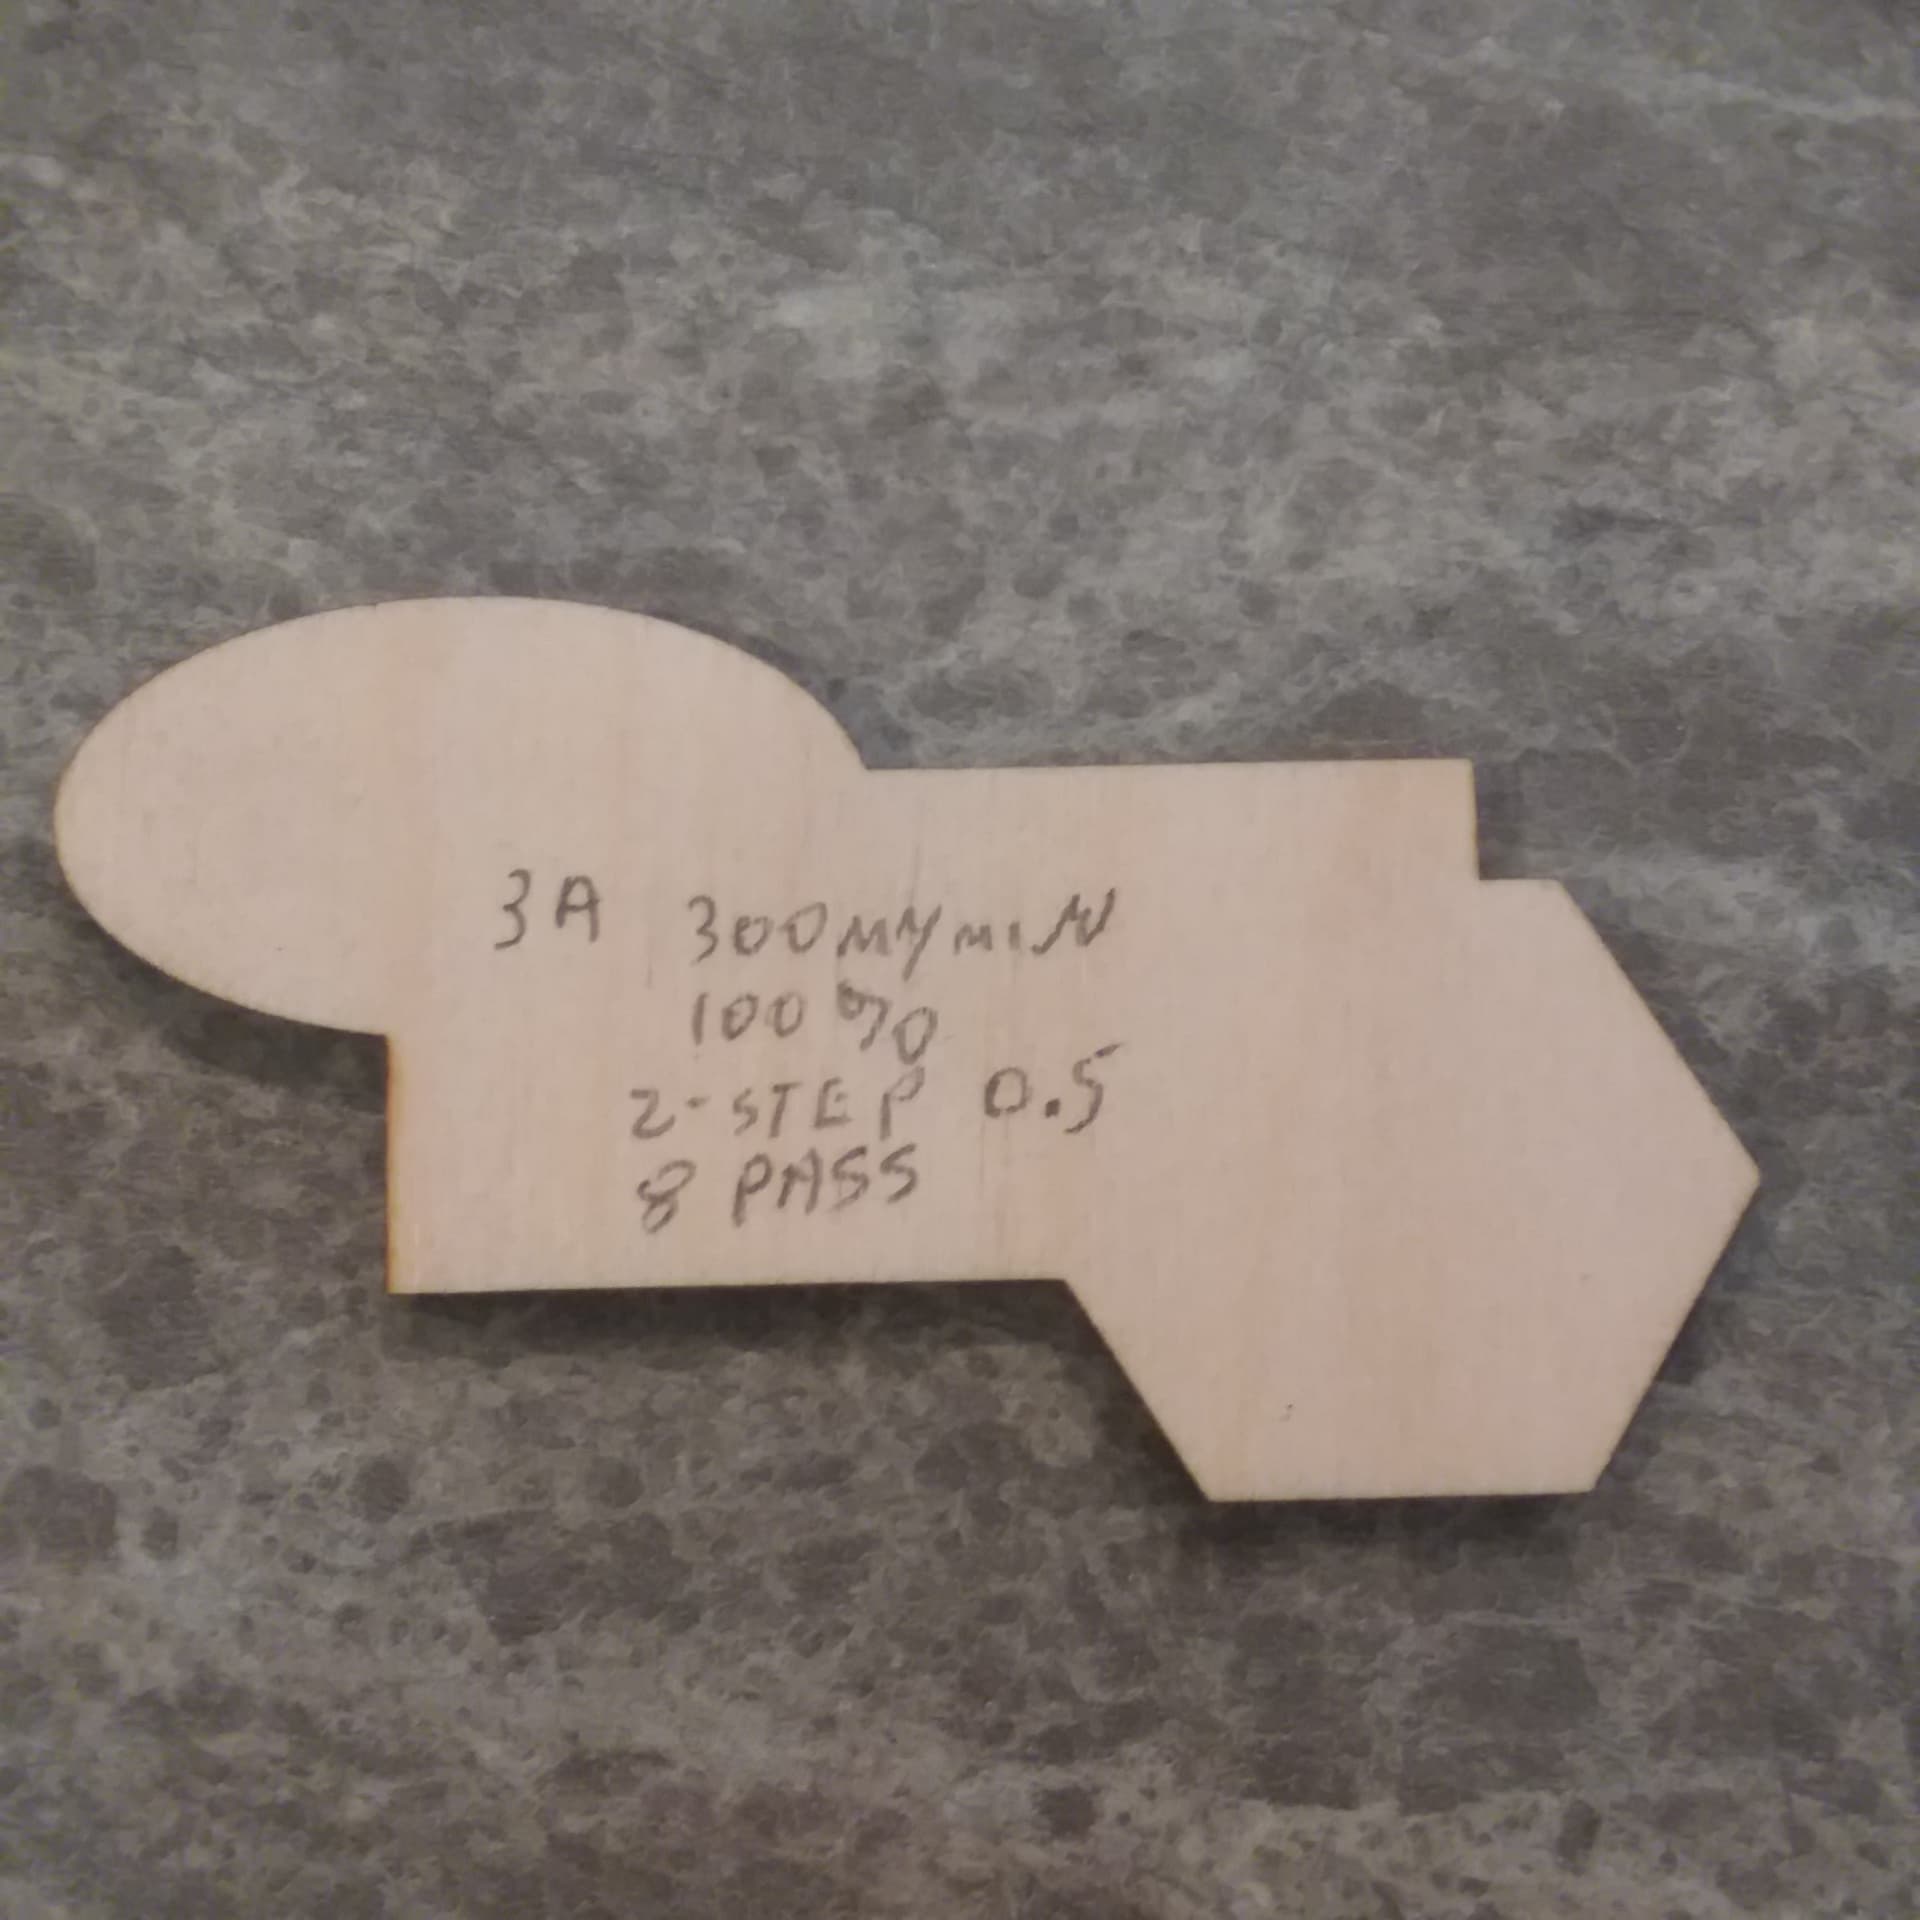
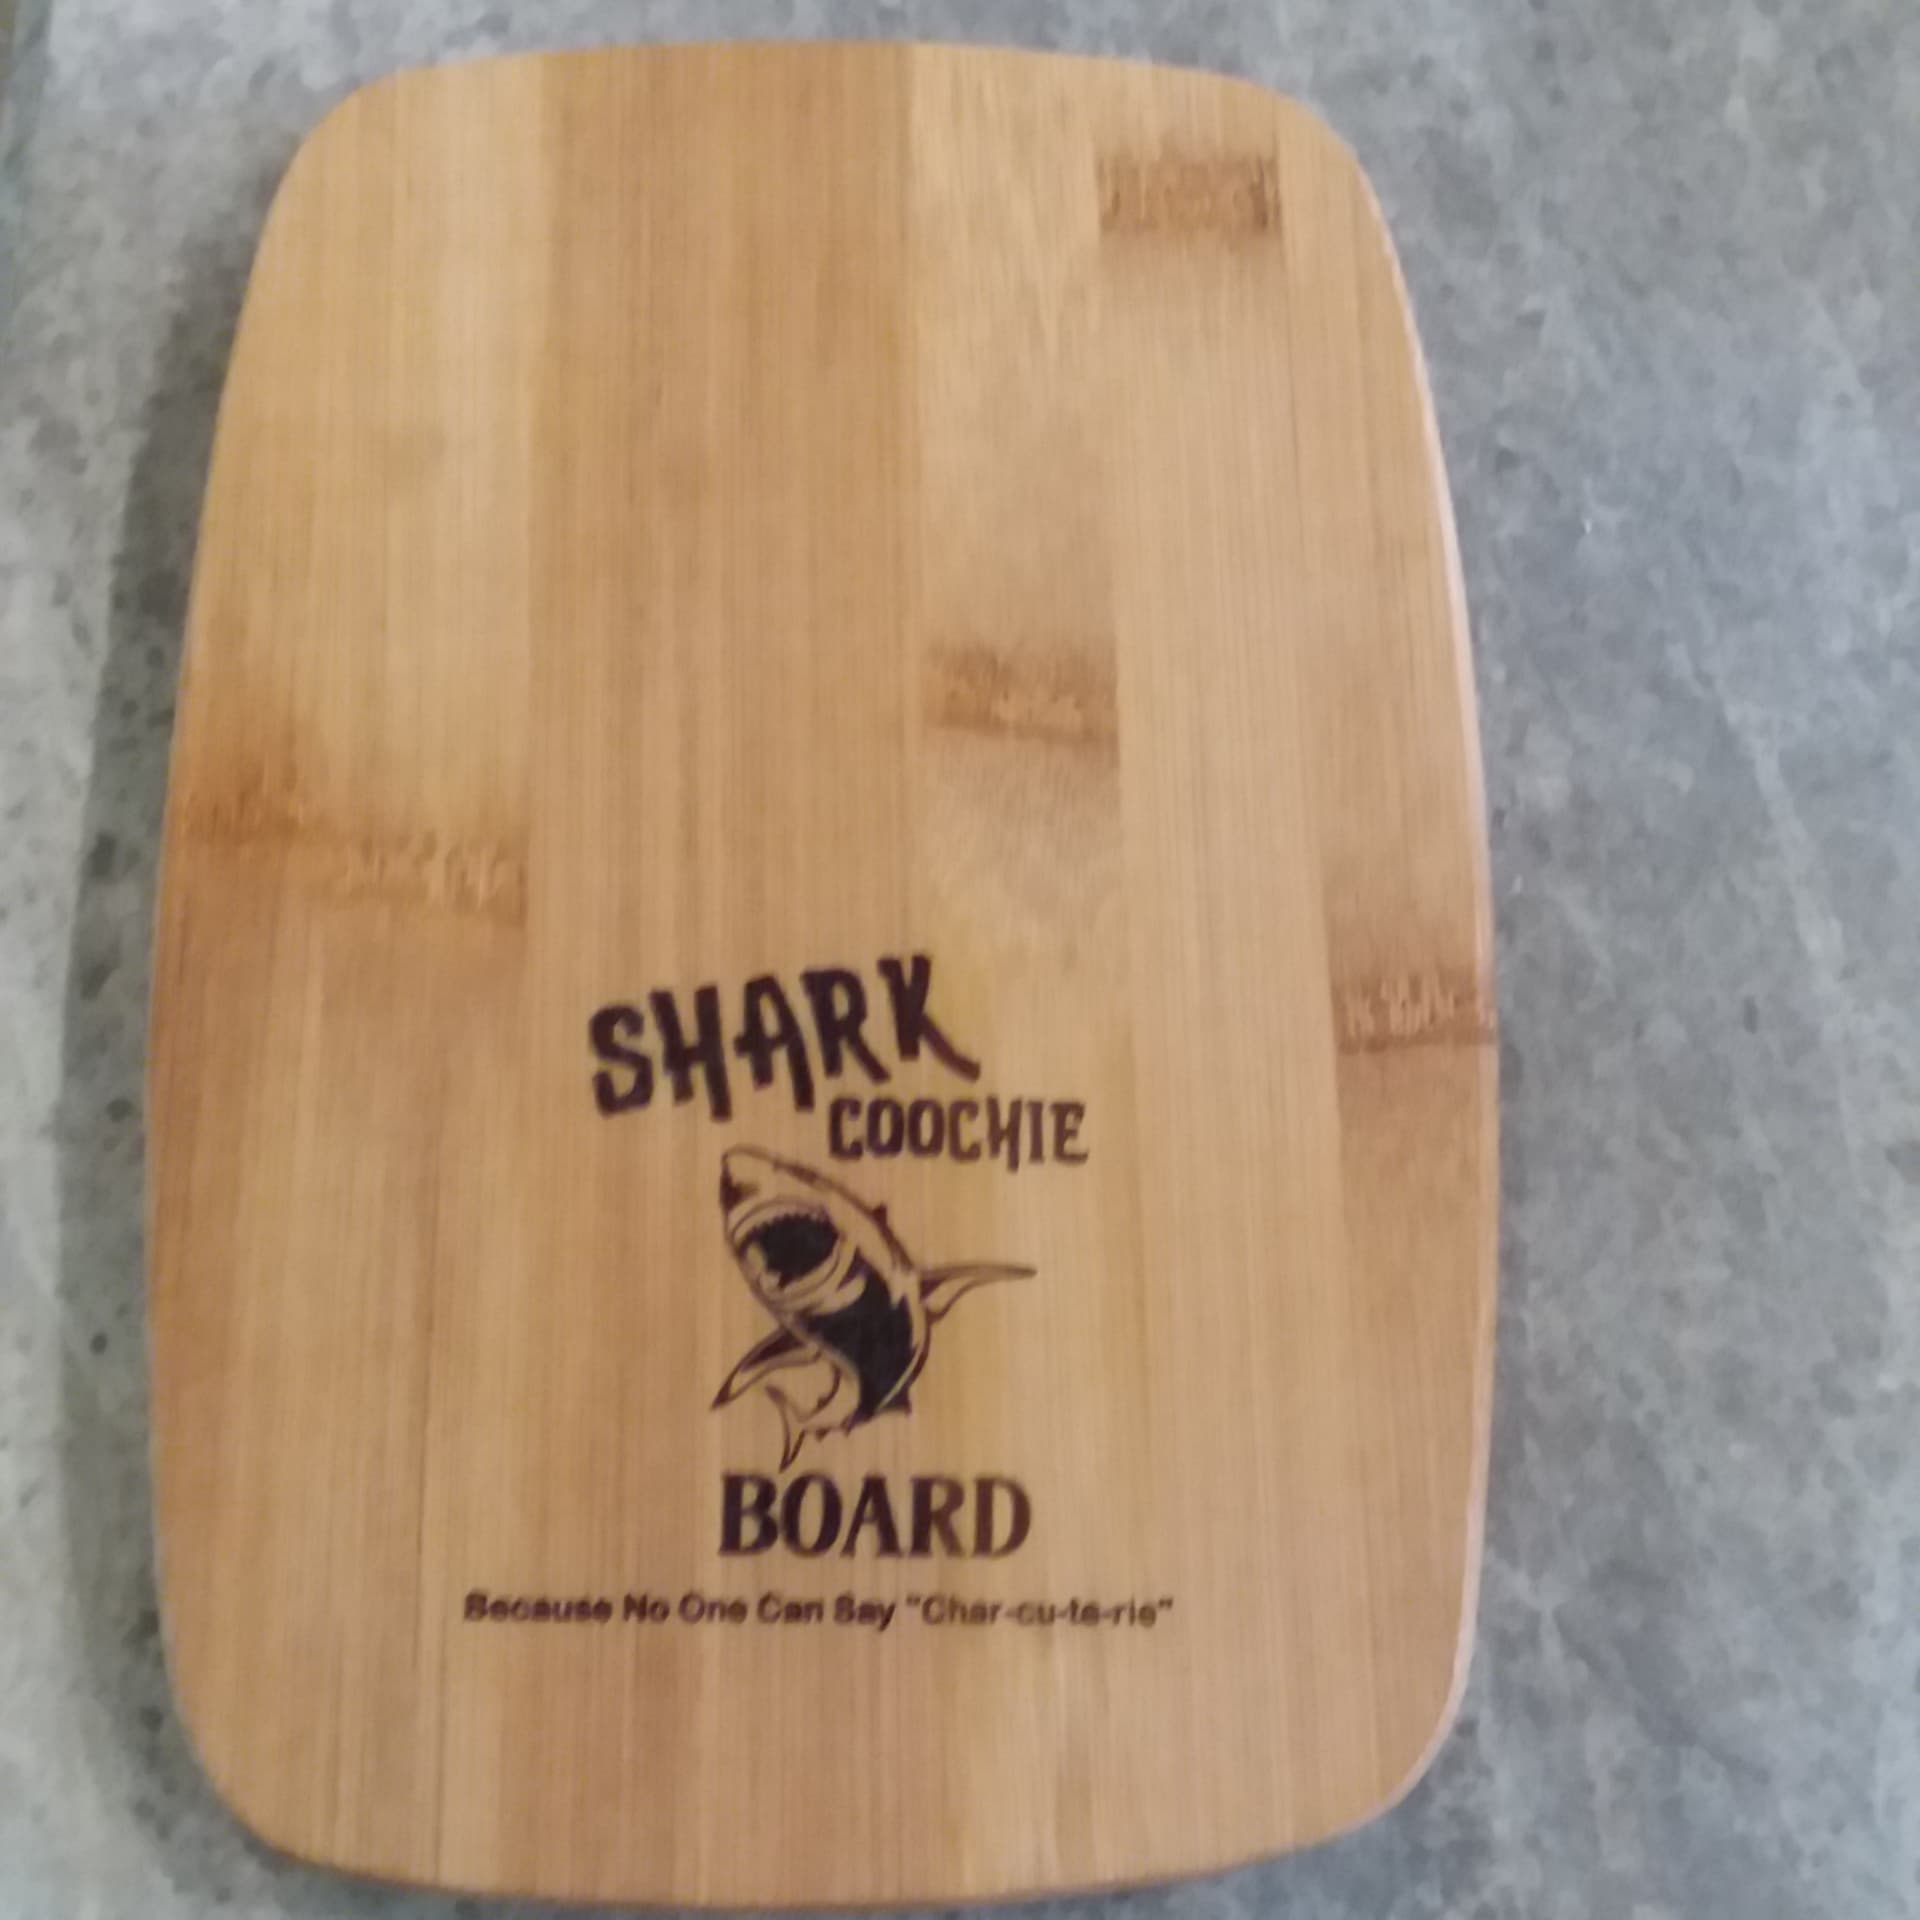
After these were ironed out I proceeded to have fun. I have etched and cut 1/8" birch plywood, etched bamboo cutting boards, etched back of mirror, etched ceramic tile, and etched clear 1/8" acrylic. All tests were done with the power dips set at 3 (3 amp), 2G lens, focused to height with included spacer. I set overscan to 2.5% to reduce burning of design edges. I am using Lightburn software. Below are the setting I used with great success fun.
Birch Plywood: 3mm
Etch Fill: Set speed to 1800 mm/min, 70% power, 1 pass, overscan 2.5%
Cut: Set speed to 300 mm/min, 100% power, Constant power, 8 passes, z-step 0.40
Birch Plywood: 1.63 mm
Cut: Set speed to 300 mm/min, 100% power, Constant power, 4 passes, z-step 0.40
Bamboo cutting board:
Main Design Fill: Set speed to 1800 mm/min, 60%-70% power, 1 pass, overscan 2.5%
Large text Fill: Set speed to 1800 mm/min, 60% power, 1 pass, overscan 2.5%
Smaller Text Fill: 1) Set speed to 1600 mm/min, 60% power, 1 pass, overscan 2.5%
Mirror:
Etch backing off: Set speed to 2000 mm/min, 80%-85% power, 1 pass, overscan 2.5%
Ceramic Tile:
Etch (White tile method): Set design speed to 1400 mm/min, power 70% power, 1 pass, overscan 2.5%
1/8" Clear Acrylic:
Etch (painted metal method): Set design speed to 1550 mm/min, 40% power, 1 pass, overscan 2.5%.
Your mileage may vary! See YouTube for more info. PawPaw’s Workshop and Louisiana Hobby Guy have some good videos on the above. I hope this helps in your adventure.
Just some pictures:

5 Likes
Thanks for the info. How long would you say it took you to cut the plywood?
About 5 minutes. Probably get better at a higher dip setting, but more burning.
For some reason I am having a hard time cutting through 1/8 in birch plywood. I have done a number of tests, and settled on 8 passes at 2.2mm/sec at 100% power, with a z-step of 0.5mm. Those settings barely get through the material and leave significant charring. The dip switch is set to 5. Not sure if it is the material, though. I cut through 1/4 in Baltic Birch with the settings suggested in the manual (I believe 16 passes at 2.2/100) and it didn’t have any problems.
I am new to the laser world. Any suggestions are welcome. (BTW, I am using the G2 lens at the suggested height and cleaned it before the last test which I described above).
@MonkeyBear Welcome back, MonkeyBear.
At the risk of starting a word war, IMHO, diode lasers like the sienci unit are not at all efficient at cutting wood. The router will cuts rings around it. That said, it is possible, obviously. Much will depend on the physical material. Glues burn much differently (and noxiously) than wood.
What CAD/CAM software are you using and how have you set its power levels? What post processor are you using in that software?
With this information, I’m sure that laser users here will have some suggestions.
The settings you are using look ok.
I now cut birch plywood at 150 mm/min at 100% power 5 passes. 0.64 z-step. Most times this is good. (dip switch #4). My material is elevated slightly with a spiked board to allow air underneath, seems to help.
You might want to check the focus on the laser. Set to height then adjust the lens until you get the laser dot as small as possible. Use a piece of black material at 1% power to focus. The darker material will show the dot better.
There are times when the humidity is high (all this summer in Ohio) that I will need to run a few extra passes to cut thru.
Also as gwilki mentioned, with plywood you never know what kind of glue is used to bond the layers together. This could effect the ability to cut thru the material.
The bottom line is to experiment until you find what works.
1 Like
@risenbar That’s very good info, Roger. As additional help for @MonkeyBear and others struggling with this, can you post what software you are using to design and make your cuts? Do you use Lightburn, for example. If so, are you using it to talk to the laser or are you exporting gcode from LB and using gSender to send it to the Mill?
If you are using LB, what have you set $30 and Smax to? I’ll hold off on posting my settings, as I know they do not follow Sienci’s recommendations. ![]()
I have found that the best focusing method is to use the ramp setup recommended by LAHobbyGuy. It is by far the most precise way to get our lasers dialed in. Have you tried it?
Just a though here. If you are using Vectric to make the gcode it seems that VCarve at least assumes a max speed/power setting of s=1000. That means if your using s=255, like I believe it says in the Laser Beam directions, you are only getting about a quarter of the power you set.
I hope this makes sense. I discovered this by making a very short gcode file that cut one line at 100% laser power and the gcode contained a S1000 line. This means that if your max is set at 255 or anything less than 1000 you will not get the power you requested.
Good luck in resolving your problem.
Edit: If there is a setting to change the s=1000 in VCarve desktop I have not found it.
@gwilki Thanks so much for your comments. I’ve been away for a few days, but I am back on the saddle.
I use Lightburn as my CAD/CAM software, and have the $30 set to 255 as recommended. Once done with Lightburn the gcode is exported to gSender (which I think is amazing).
For reference, the laser is set to Dip Switch 5.
@risenbar, also thanks a lot for your comments. I live in Houston where humidity is very high year round. Your comment about glue makes sense. I was able to cut through thicker Baltic Birch with no issue, and I have struggled with thinner “no-name” plywood (not Baltic birch). I will focus the laser using a black piece as you suggest. I will make a spiked board as you suggest as well.
One more question, and this may not be the correct forum to ask it.
My laser module is attached to the spindle carriage of my Mk1. The router is a DeWalt, therefore, the bracket is 71 mm. The laser is attached on the left side of the bracket.
The issue is that I am forced to remove the laser module from the bracket when running the spindle. Otherwise I am unable to attach the dust shoe. Does anyone have a clever solution for this?
@MonkeyBear I believe that some here mount the laser on the front of the router clamp. I simply remove the laser when routing since I don’t want it exposed to the dust and the vibration.
I’m glad to hear that I am not the only one concerned about dust in the laser. For the time being I will continue to remove the laser when routing. Your comments are very useful. Thanks a lot.
2 Likes