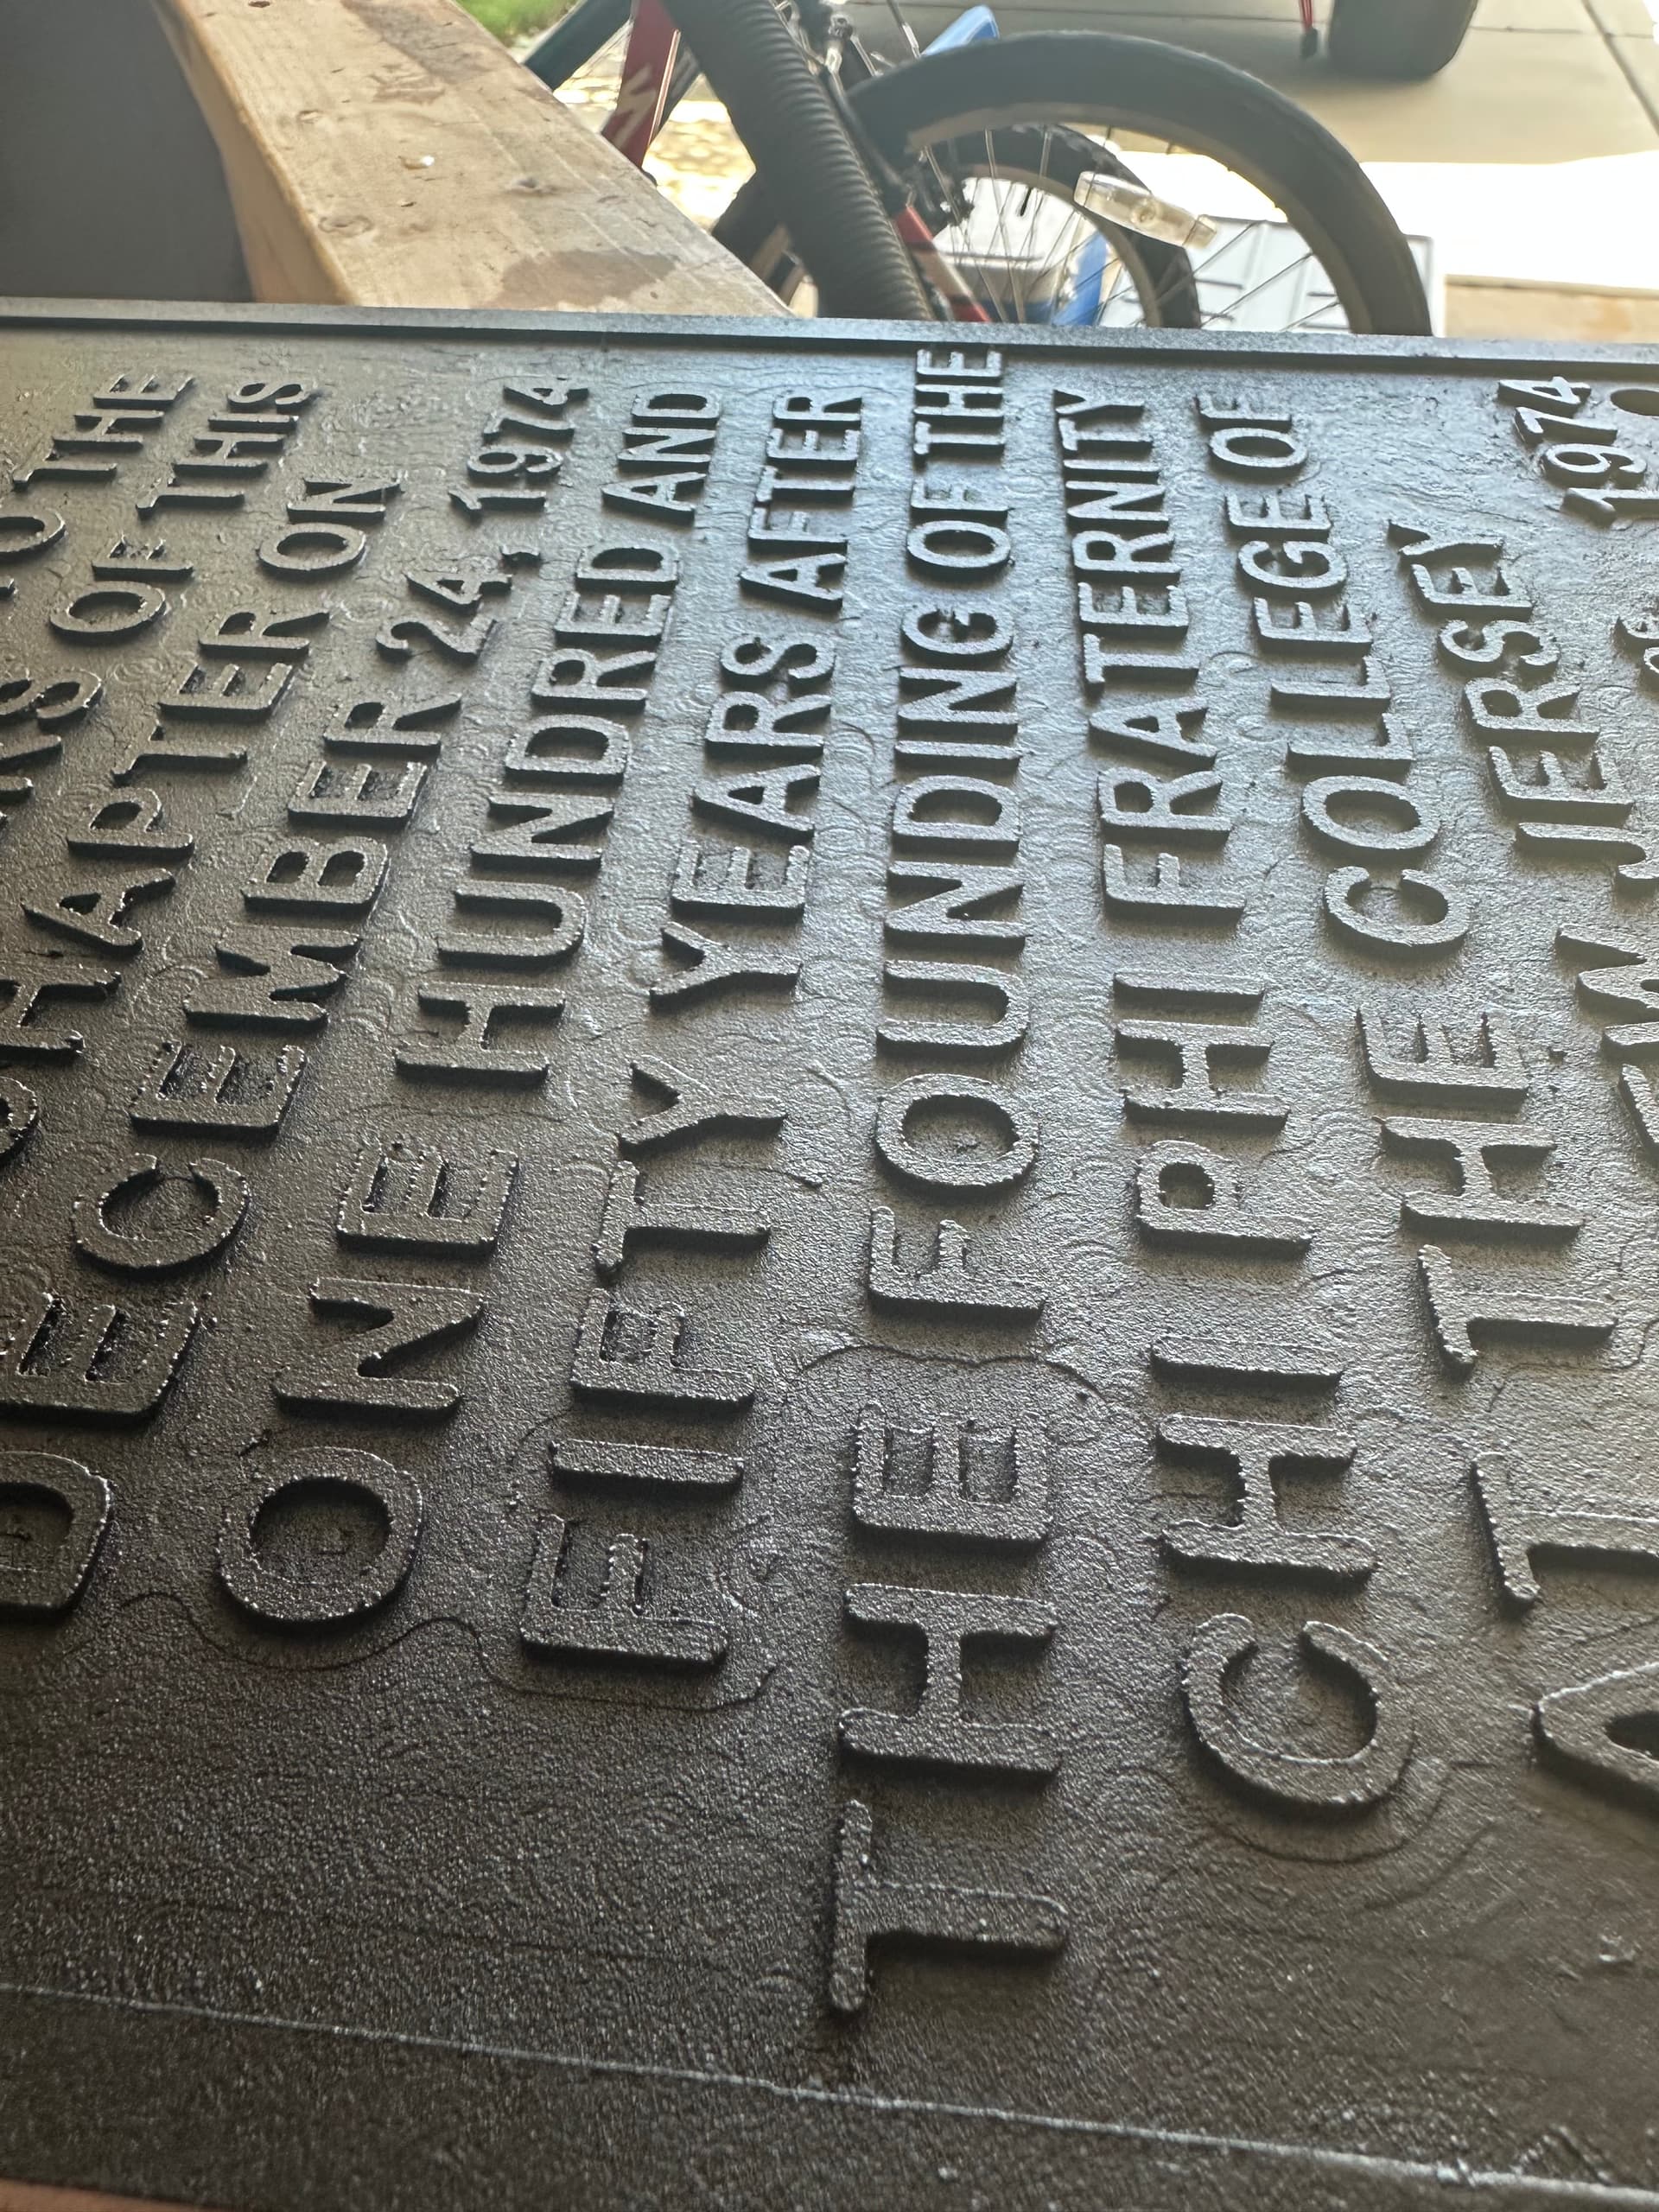
First time using pvc. I can understand my Z zero being off due to bit changes. Any other recommendations on getting this smoother?
I cant imagine this being salvageable? Cant possibly sand all these small spots. I sprayed with a matte black. Noticed how awful it looked and used a textured spray which didnt hide much.
I used 1/16” DC and 1/4” UC. Hold down method was ca glue. My guess is the upcut bit pulled the pvc up some to cause those swirl marks. Maybe I need to slow my feed/speeds down. I used the softwood settings in Carveco. Learned you might need to go slower with pvc?
My router needs some tramming but it isnt too bad.
Why use an up-cut 1/4 bit at all? Why are there multiple different Z levels? Surely you only did a single bit change but you have multiple different Z levels.
The only way I could see this to be salvageable would be if it was still in it’s original location on the mill table in which case you could just cut it a tad deeper. You could try to reposition it back on the table but I wouldn’t think that your chance of success is very high (but you got nothing to loose)
There are a few things that I would look at:
Did you use a new (or very sharp) end mill?
Is there vertical play in the router? Routers do not have the best bearings and I would not at all be surprised, especially on an older router, if there was some play.
Would going to a down cut 1/4” mill produce better results?
I would try a roughing pass and a very shallow finishing pass if your CAM software has the capability.
@Clt49er It might have been salvageable with a deeper finish cut like @Jens suggested, but that was before you painted it. Maybe it will still work but I think the paint might complicate things (e.g. gumming up the end mill).
I think you’ll want to use a speed on the low side as well. Too high a speed might melt the PVC. Not sure about the feed.
It is a .07 pocket in total. Still using two tools, 1/4 and 1/16. Both upcuts to get material out.
.05 first pass in offset
.02 final pass in raster with ramp in
Found better feeds/speed settings. Speeds definitely slower.
Offset path for speed. Raster for straighter lines if they still show up.
Will also take look at my router gantry for tramming and tighten/balance wheels.
Seem better?
Previously did one pass, too fast of speeds, and Z zero between tools wasnt great. Doing 1/4 upcut again. If still is not smooth I will swap out downcuts for another final pass.
Having a longmill dragging a makita smurf around myself, I recognise the markings. I know it is due to deflection in the total system, being slop in the router and gantry. I try and mitigate these using spiraling toolpaths for cutouts and even restarting pocket toolpaths with a small reduction in z0, say 0.1mm to have minimal deflection by only shaving the endmill over the initial pocket surface.
Using hardwoods, the shavings stay visible due to directional cutting and the fibers in the wood orienting to this movement. I think pvc wont have that problem.
Essential to getting rid of the deflection marks is to not have any deflection when doing the final pass. At that stage it does not matter much if you use an up or down cutter. The only thing to look for is that your shaving is equal or slichtly below the deepest deflection marks.
@Clt49er You may want to re-consider going from a 1/4 mill to a 1/16 mill in one step. I don’t know anything about Carveco pocket settings. In VCarve, for example, I can create a pocket operation listing more than one mill. VCarve creates a separate toolpath for each mill. Each successively smaller mill only touches the parts that the immediately previous mill could not reach. That way, the small mill is not doing everything over again. If you can do the same in Carveco, it may help.
@gwilki I noticed that you could have two mills when creating a toolpath in vCarve but didn’t know what it would do. Thanks for that. I guess you want to make sure you only zero Z after the tool change
@Chucky_ott That’s right. You need to reset Z0 for the new tool length. Many VCarve users don’t seem to know about this feature. The beauty of it is that you can put as many tools as you want in the tools window. When you click on calculate, VCarve will create a separate toolpath for each tool. Each smaller one only carves what the preceding bigger one could not. If, however, you put one tool in the window, calculate that, then create another pocket toolpath with a smaller tool, the smaller one will carve everything all over again.
FWIW, it does the same thing for the 3D finishing toolpath. It’s called “rest machining”, but the gist of it is that the smaller bit only cuts what the larger one could not.
You might want to check out “Cutting It Close” you tube channel. He does a lot of work on plastics. My take away from watching a few of them was plastic melts so feeds and speeds more important working with it and it is where an o-flute bit may do better.
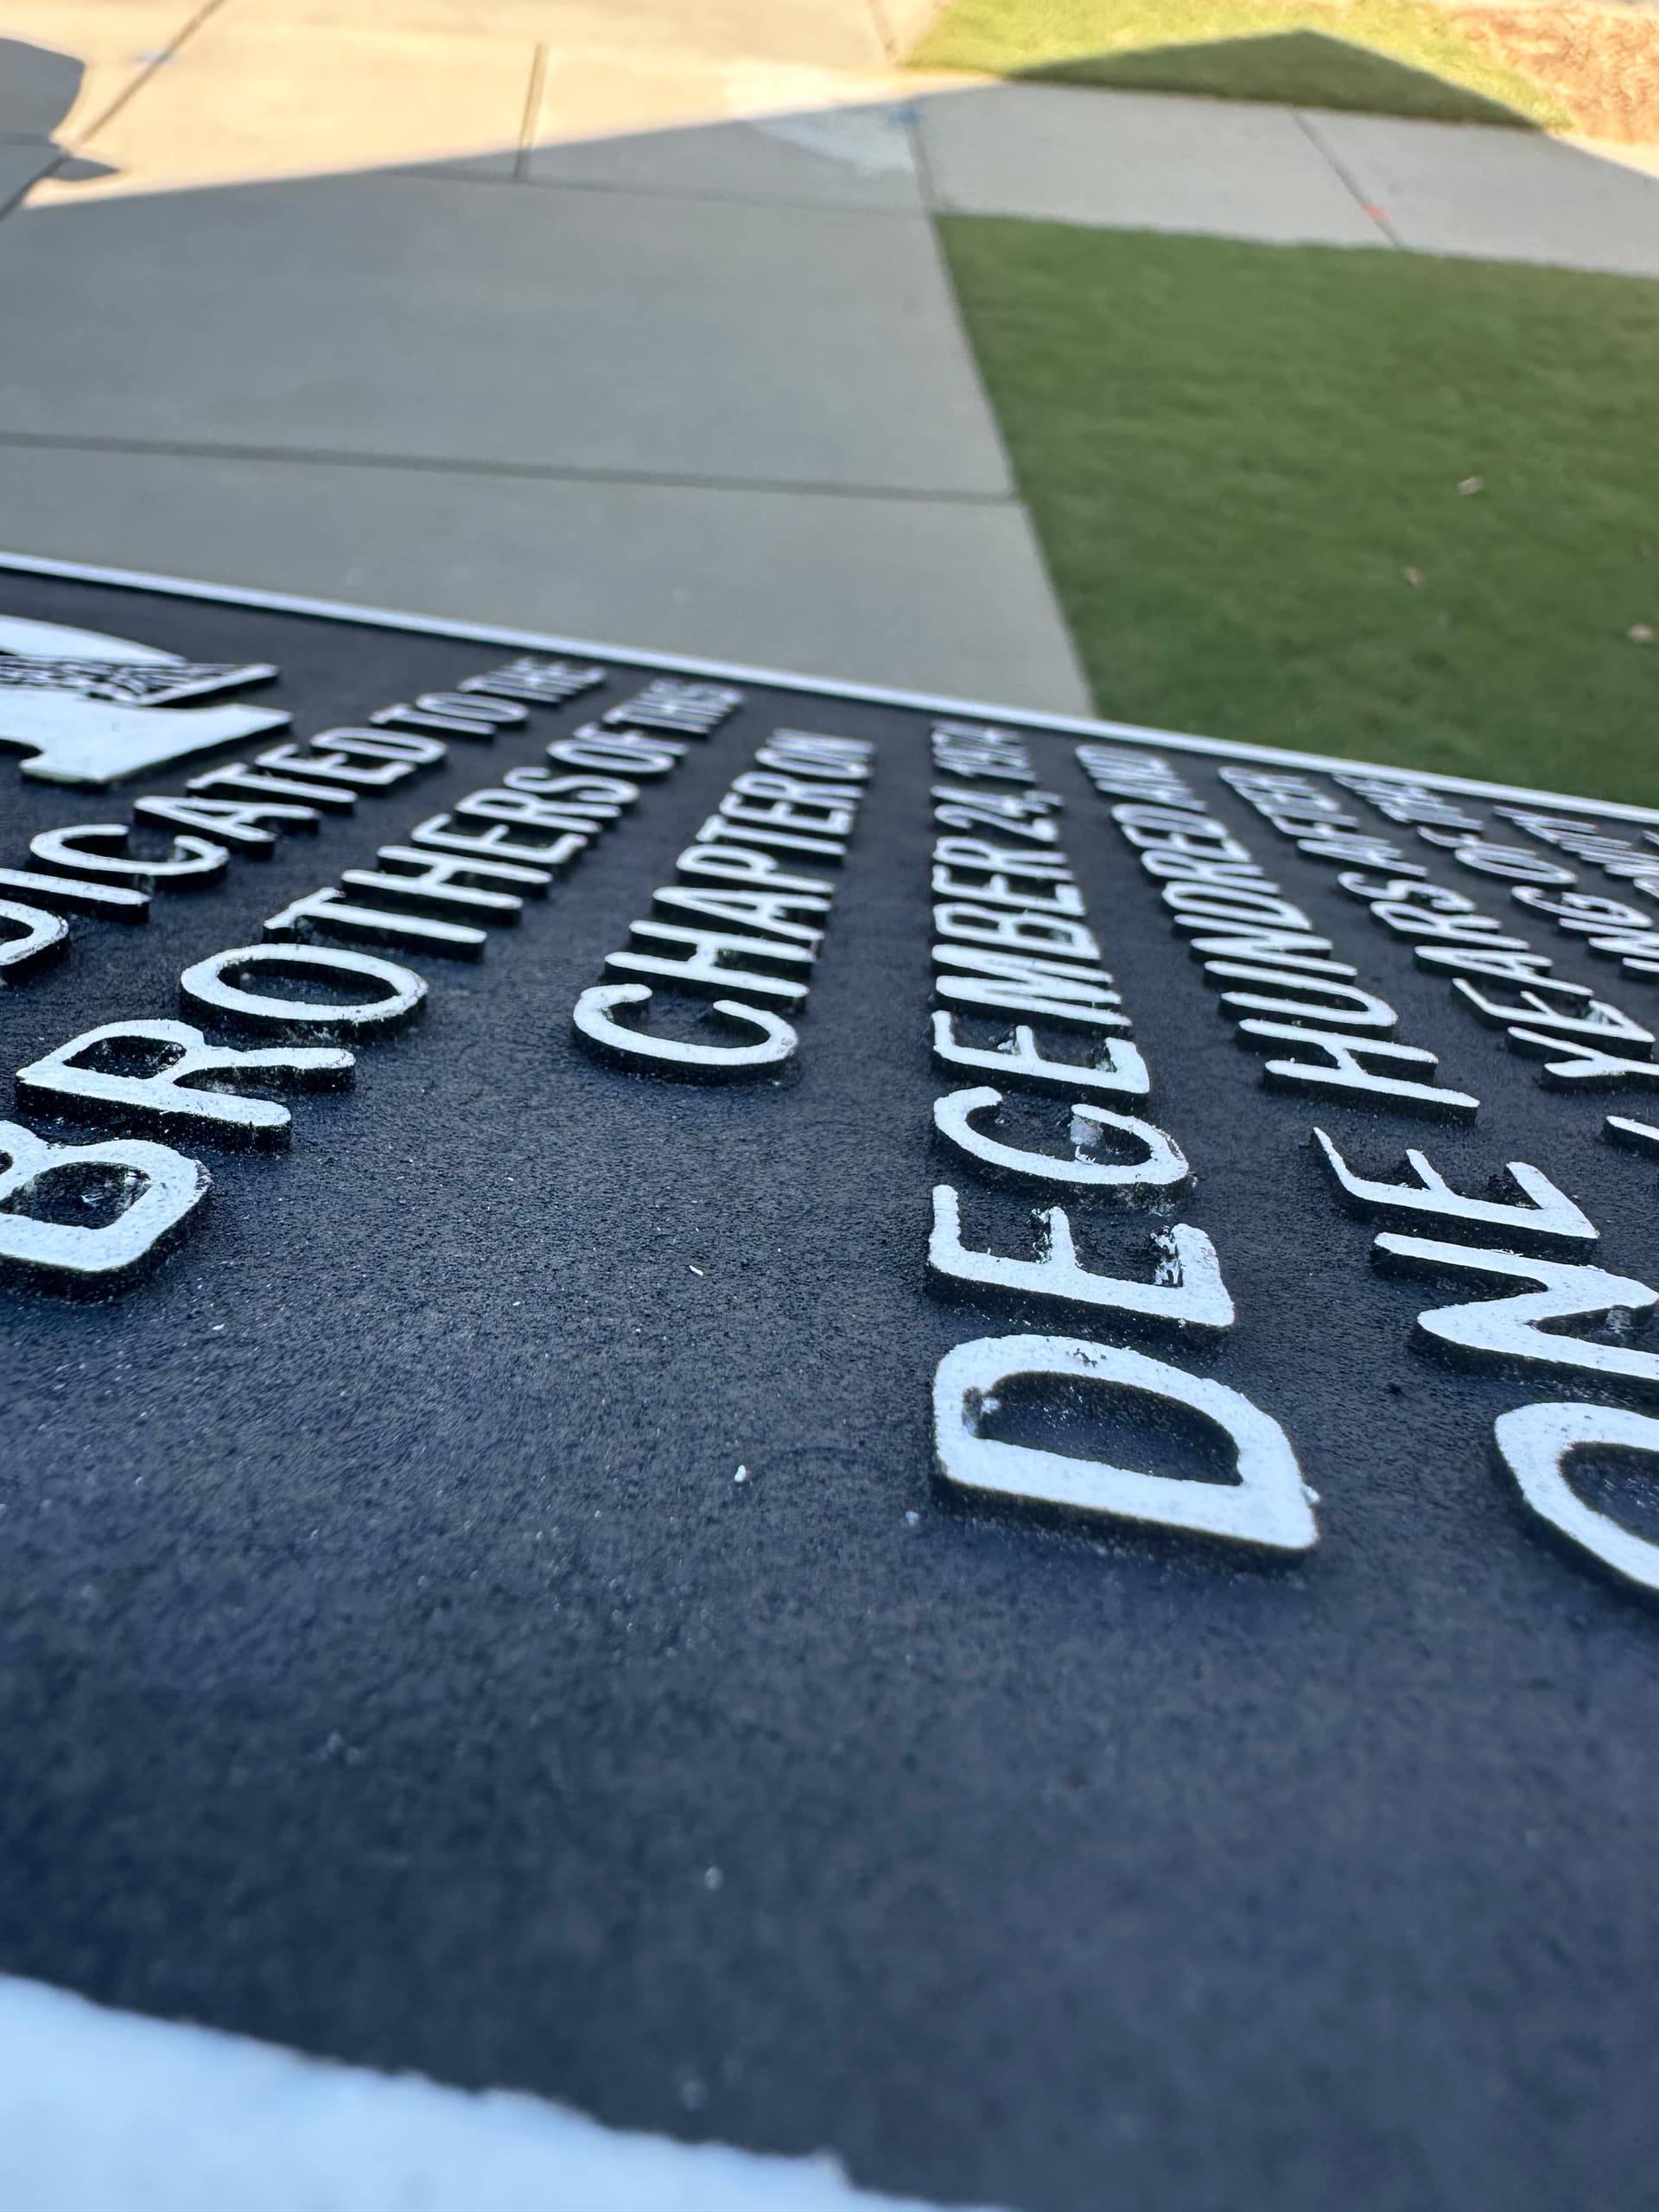
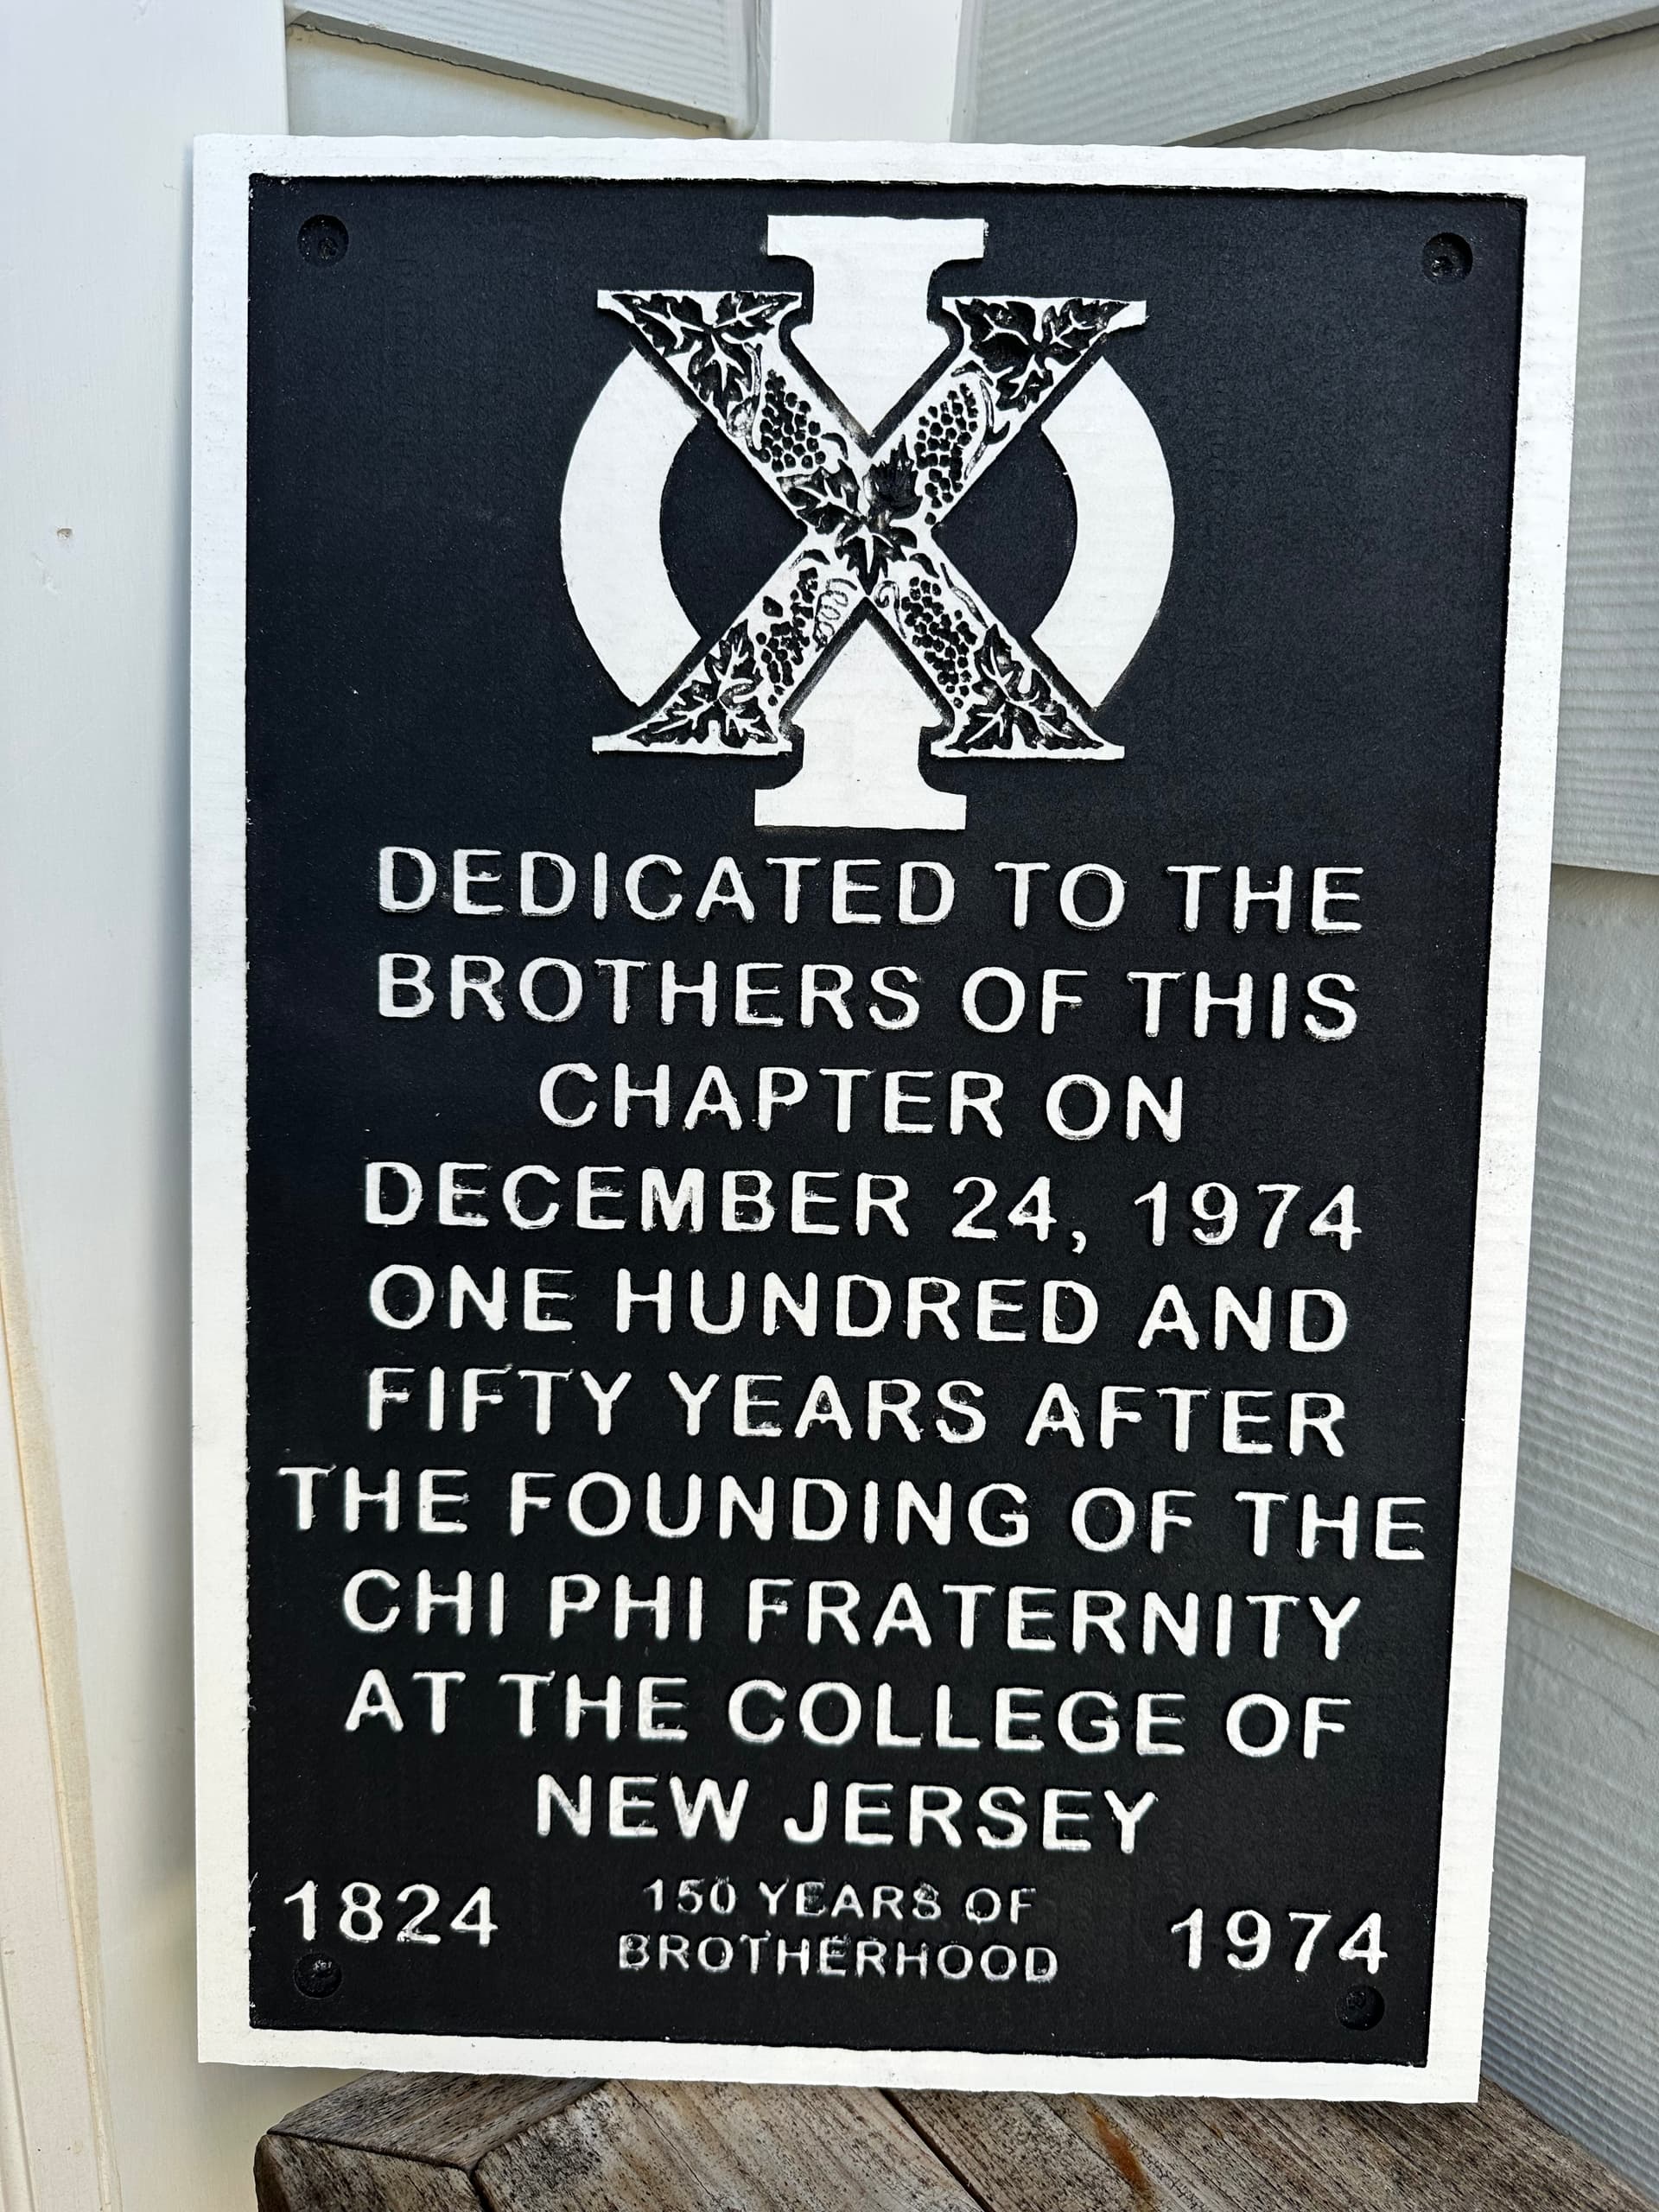
Thank you all for the help on this. My second attempt was soooo much better.
I did the steps mentioned above.
I oramasked before carving. It managed to stay adhered to 80% of these tiny letters. And then sprayed the whole thing matte black. Then tediously removed the oramask. I then did a surface clearance of .03 to reveal the white.
It is not perfect but I learned a lot. I will touch up some spots.
Thank you @gwilki for the logo svg conversion you did for me a year ago! Finally got around to this project again.
This was for my old fraternity house. Hooligans stole the original metal sign.
@Clt49er instead of oramask, I probably would have just spray painted the whole thing and then just shaved off a bit from the top of the letters with a surfacing operation. Oramask is great for letters that are v-carved. Nice job just the same. I have a few projects that will need to be done in PVC. I might get a zero flute bit.
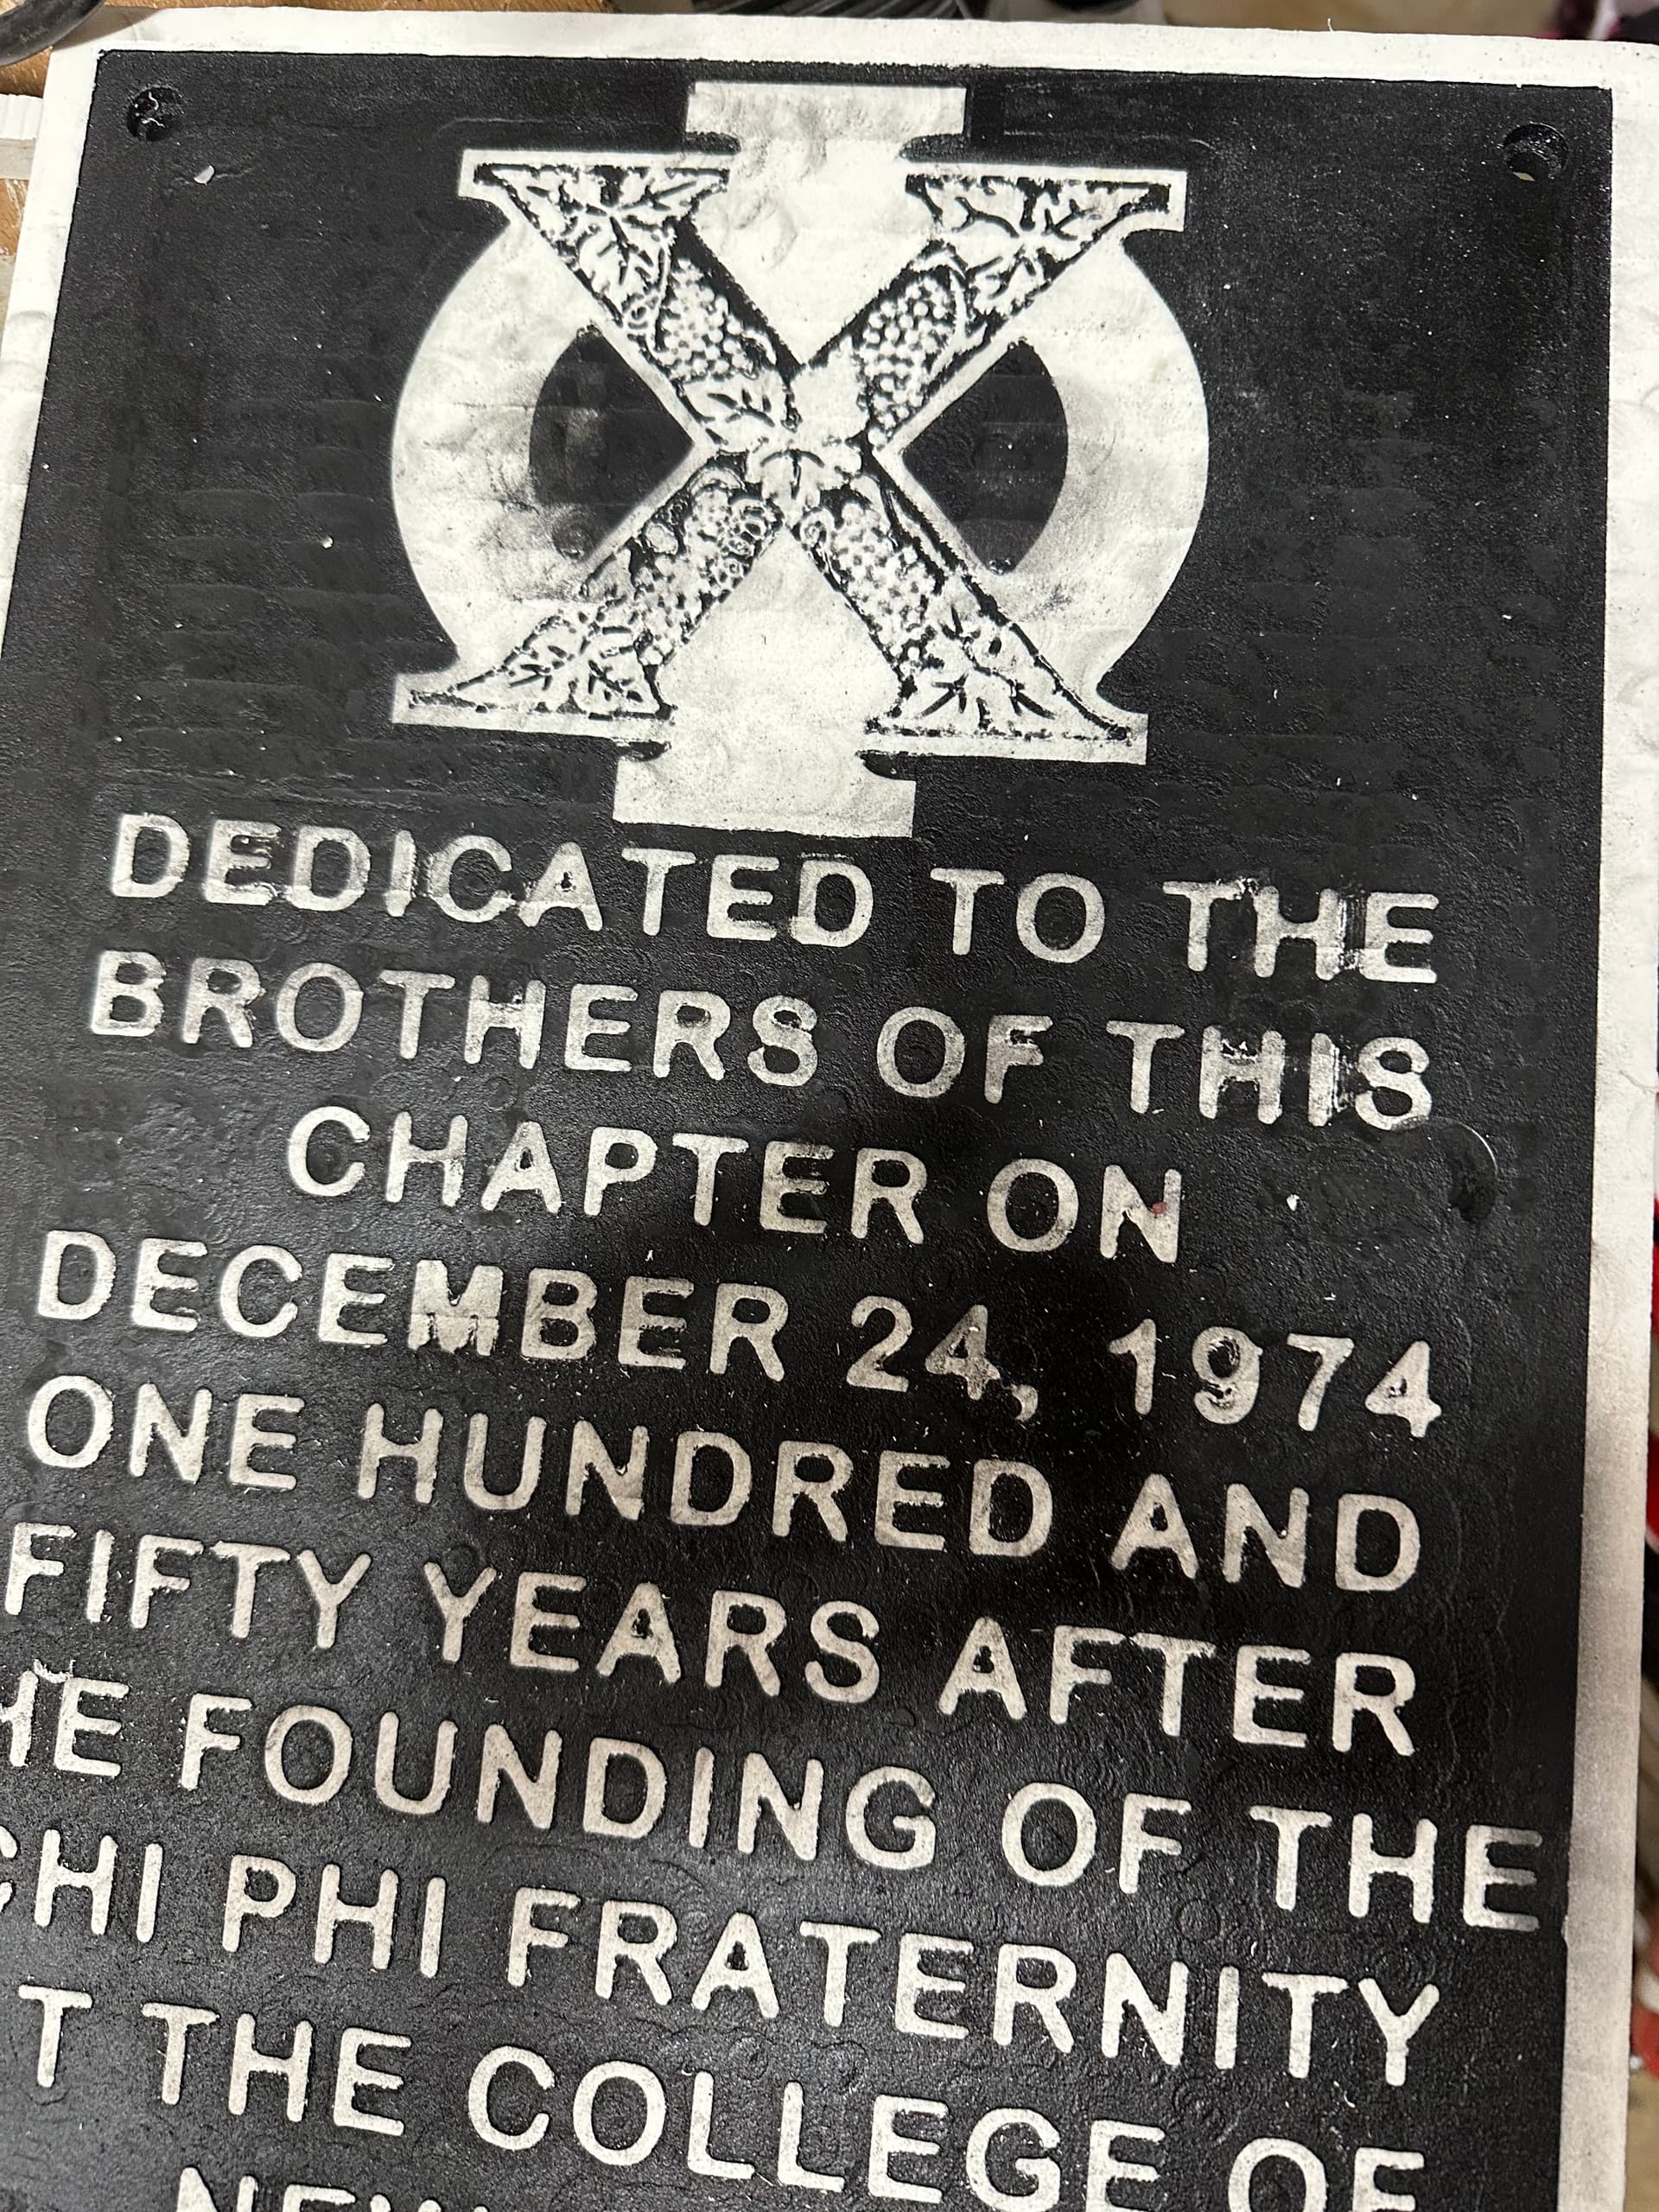
So my first attempt I did not oramask. The black would smear into the white. Had my head scratching. But then saw someone on youtube also experience this. Figured the oramask would reduce it. And it did.
First sign. Kept surfacing multiple times. Dang black wouldnt go away. Even cleaned the bits….
@Clt49er never mind my previous comment. I see that you did do the surfacing operation. Not sure if the oramask was still required. Perhaps the paint would have gummed up your cutter without it.
PVC board, unlike PVC plumbing fittings, is somewhat porous and probably doesn’t cut well for fine details. I just finished working on some trim (not CNC related) and the edges are a bit fragile. I guess I’ll find out how well it carves for fine details when I tackle that project.
@Clt49er If the budget will permit it, a much better solution is color core material. For your project, you would choose white on top and bottom and black in between. You carve away the white and you get a black background and white letters. No painting. No masking. It cuts better than PVC.
@Clt49er Too true I had a rare occasion where I was actually doing a paying job and the customer was up for the cost. Since I was able to exclude from the labour my time to mask, paint, surface and generally clean things up, it reduced the difference to something that she could accept.