I want to create the waste board with t slots but because the t slots are made of metal isnt that a problem. It’s no longer a waste board or is there a way to recess the slots a bit.
1 Like
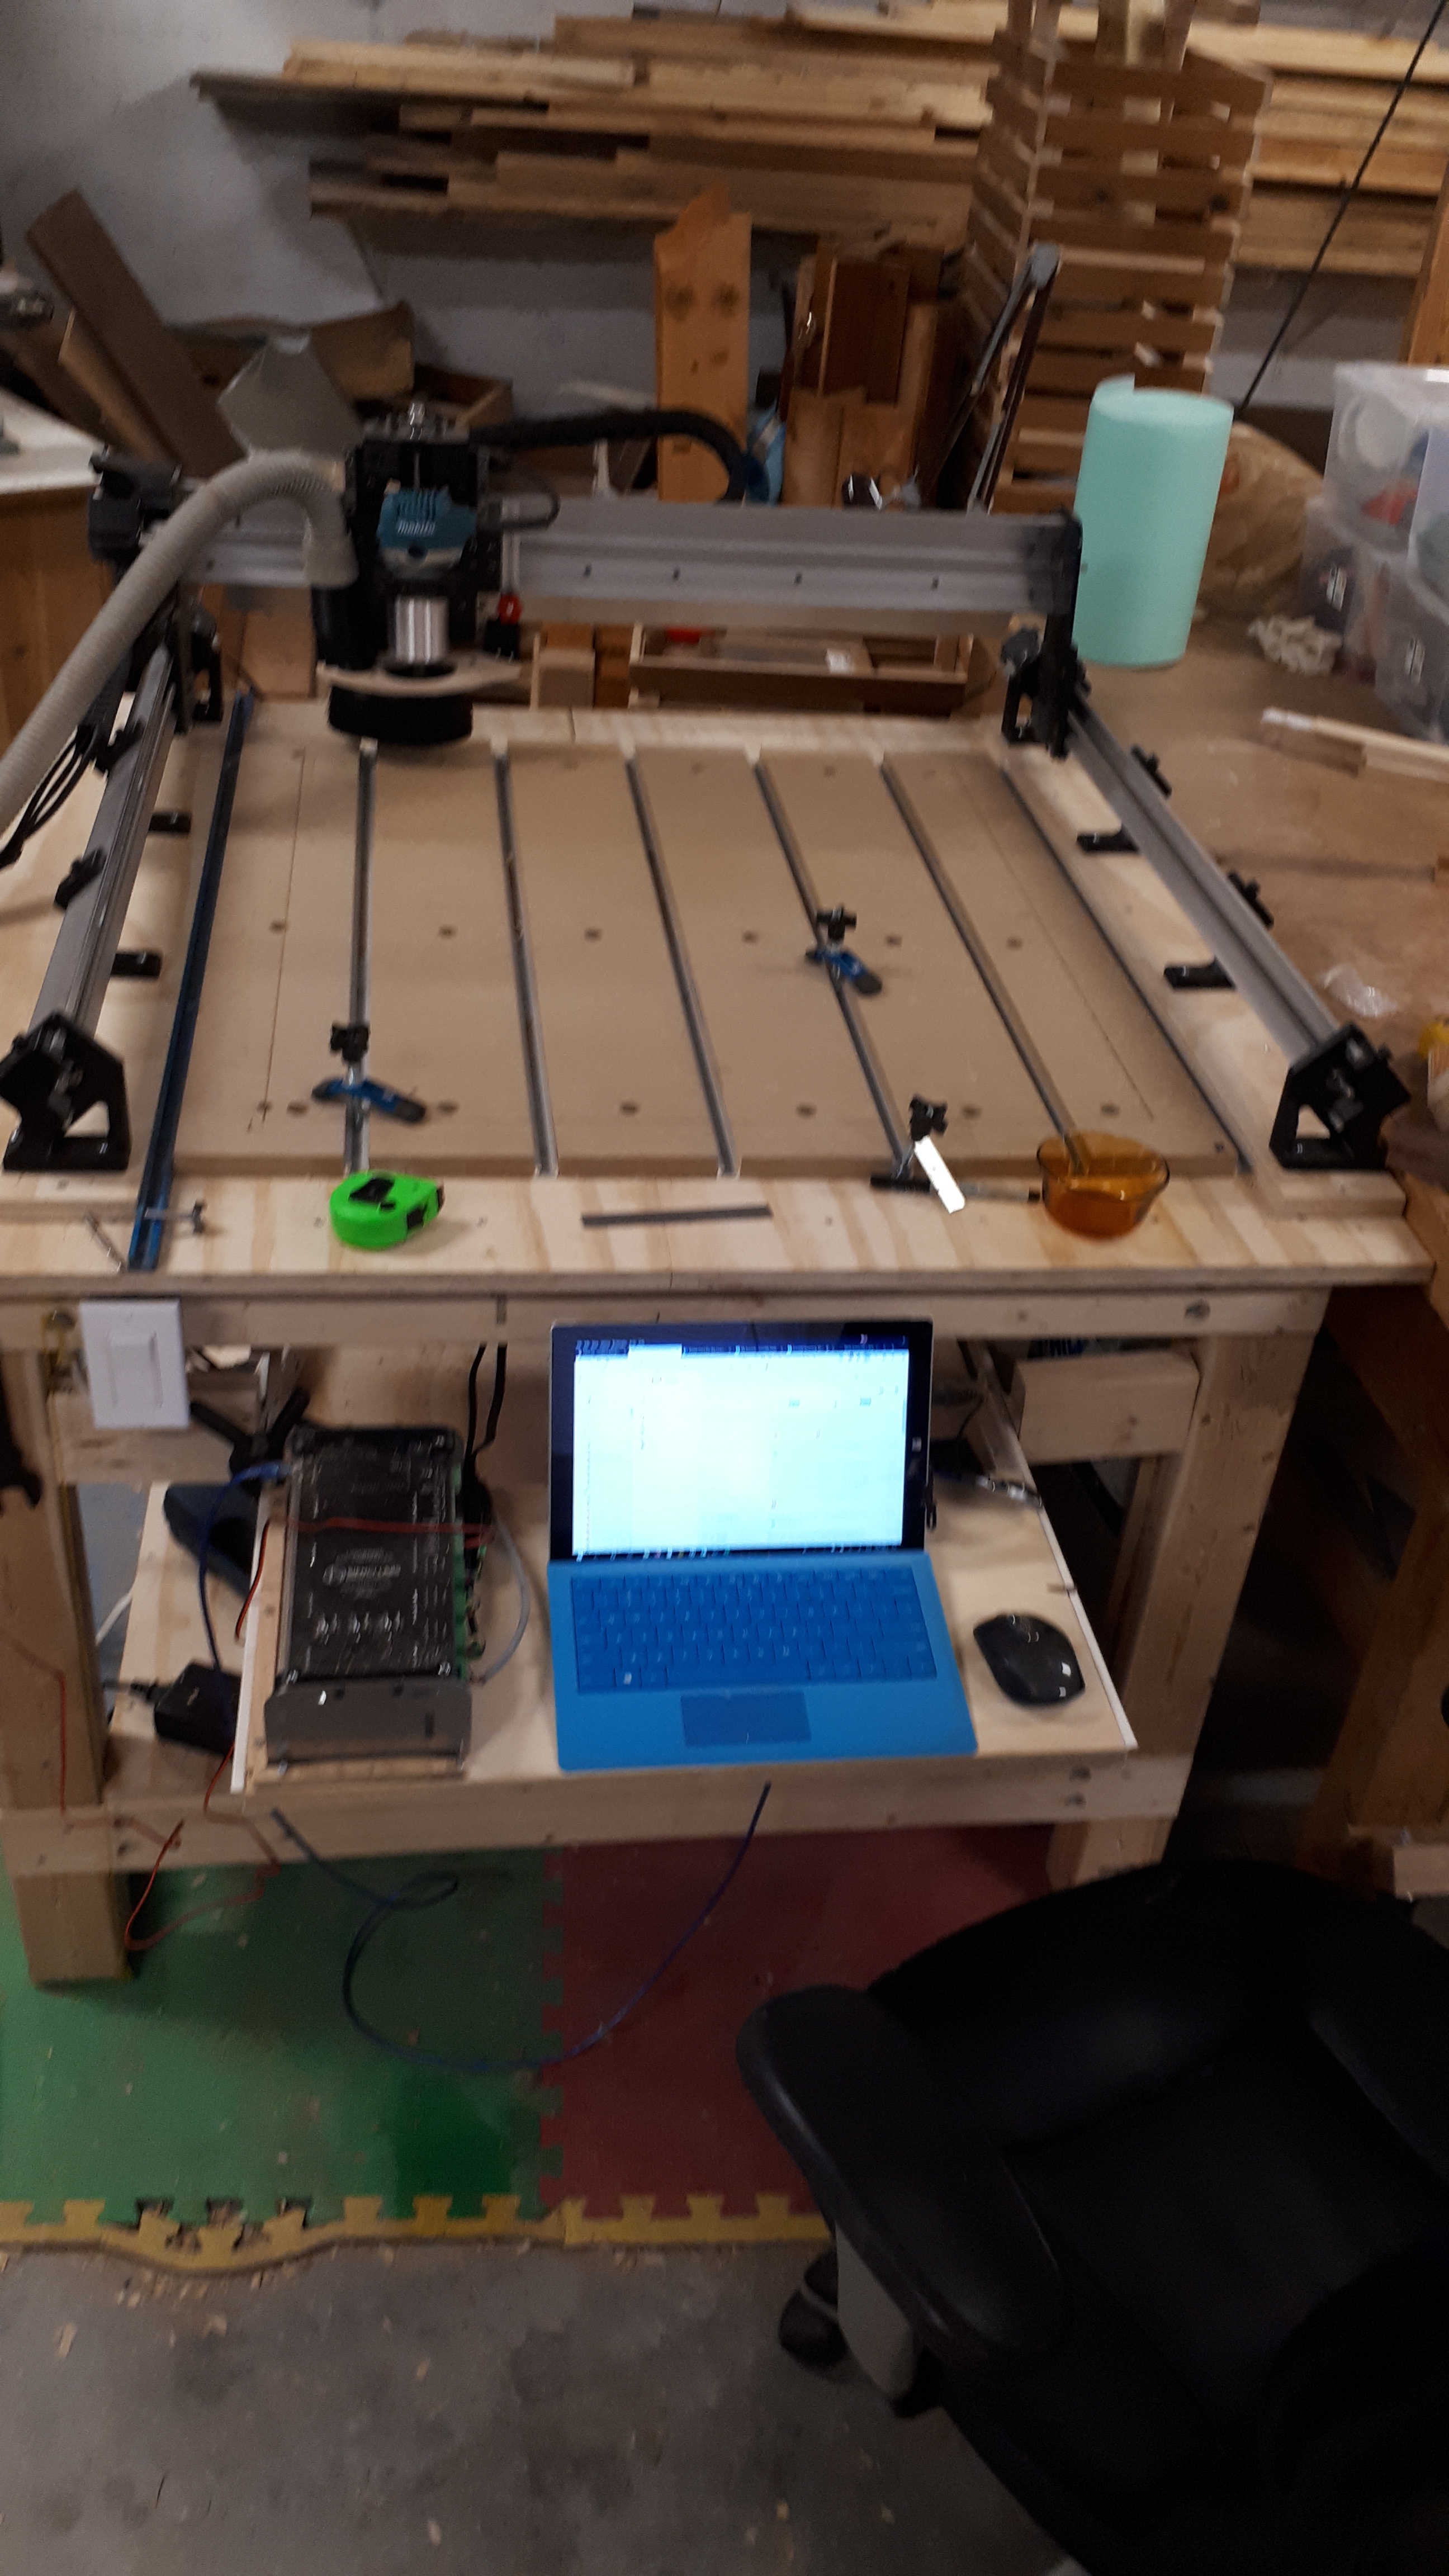
I just finished my setup and have put in a t-track waste board. In a space about 35" wide I have seven tracks and 6 MDF inserts each about 5" wide.
I got my t-tracks from Lee Valley. They are 36" long, 3/4" wide and 3/8 " high.
I filled the spaces with 3/4" MDF that is actually a bit thicker than 3/4". As a result, I have just over 3/8" clearance from the top of the MDF to the t-track.
I connect the boards to the base plywood with 1/4" x 1 3/4" bolts into t-nuts in the bottom of the base. I used a 3/4" Forstner bit on the top to make space for the bold head and washer. I drilled it a bit more than 1/2" into the MDF and when the bolts are tightened I have 3/8" clearance there as well.
I see at least two major benefits to this system (which I stole from “CNCnutz” on Youtube). First, Each of the MDF inserts can be changed out as required without replacing the entire wast board. Second,since the Long Mill is not attached to the waste board I don’t have to detach it to replace/repair the waste board.
The attached picture shows the current setup. Hope this helps.
Now I have to figure out how to program the sucker.![]()
ron
6 Likes
Also most T track is aluminum. Won’t damage the bits.
Exactly what I plan on doing, thanks for the reinforcement of my thinking!
Dave
I was thinking about something similar - Since the longmill is attached to the waste board I don’t want to have to remove it later.
Was thinking in order for it to be repeatable, and in case of replacement, might set up the t-tracks, and then use the machine to drill out the holes for the pieces of MDF for the wasteboard. Then when a piece is bad you could just rip it down the right size and run the program to drill the holes, and they would line up with the holes you had before.
Looks like you must have extended the wiring too, as your control box is on the lower shelf.
Mike
1 Like
Mike,
I thought that to replace the strips I would just drill up from the bottom and then cut the 3/4" holes from the top with a Forstner bit. Still thinking like a woodworker, I guess.
And yes, I did extend the wiring for the Z motor with some 4wire 18 gauge cable.
What do you use to slide into the T slots to fixture your workpiece? Can you use regular 1/4-20 hex head screws to slide into those T slots?
Thanks
Antoine
You can use regular hex head bolts. However, I use 1/4 20 t-nuts. They slide a little better in the slot and don’t catch as easily on any screw heads that might be a little high.
@Streamer I ended going with t tracks based off of what info i on this forum and the top CNC’ers on YouTube. It seems like the most versatile.
@ronboklein I see that you laid mdf outside of the endmills reach, have you encounter issues with material that is longer than the workable area not sitting flat? I am holding off on installing any mdf in the tiny strips on each end as I believe they will cause more problems than good.
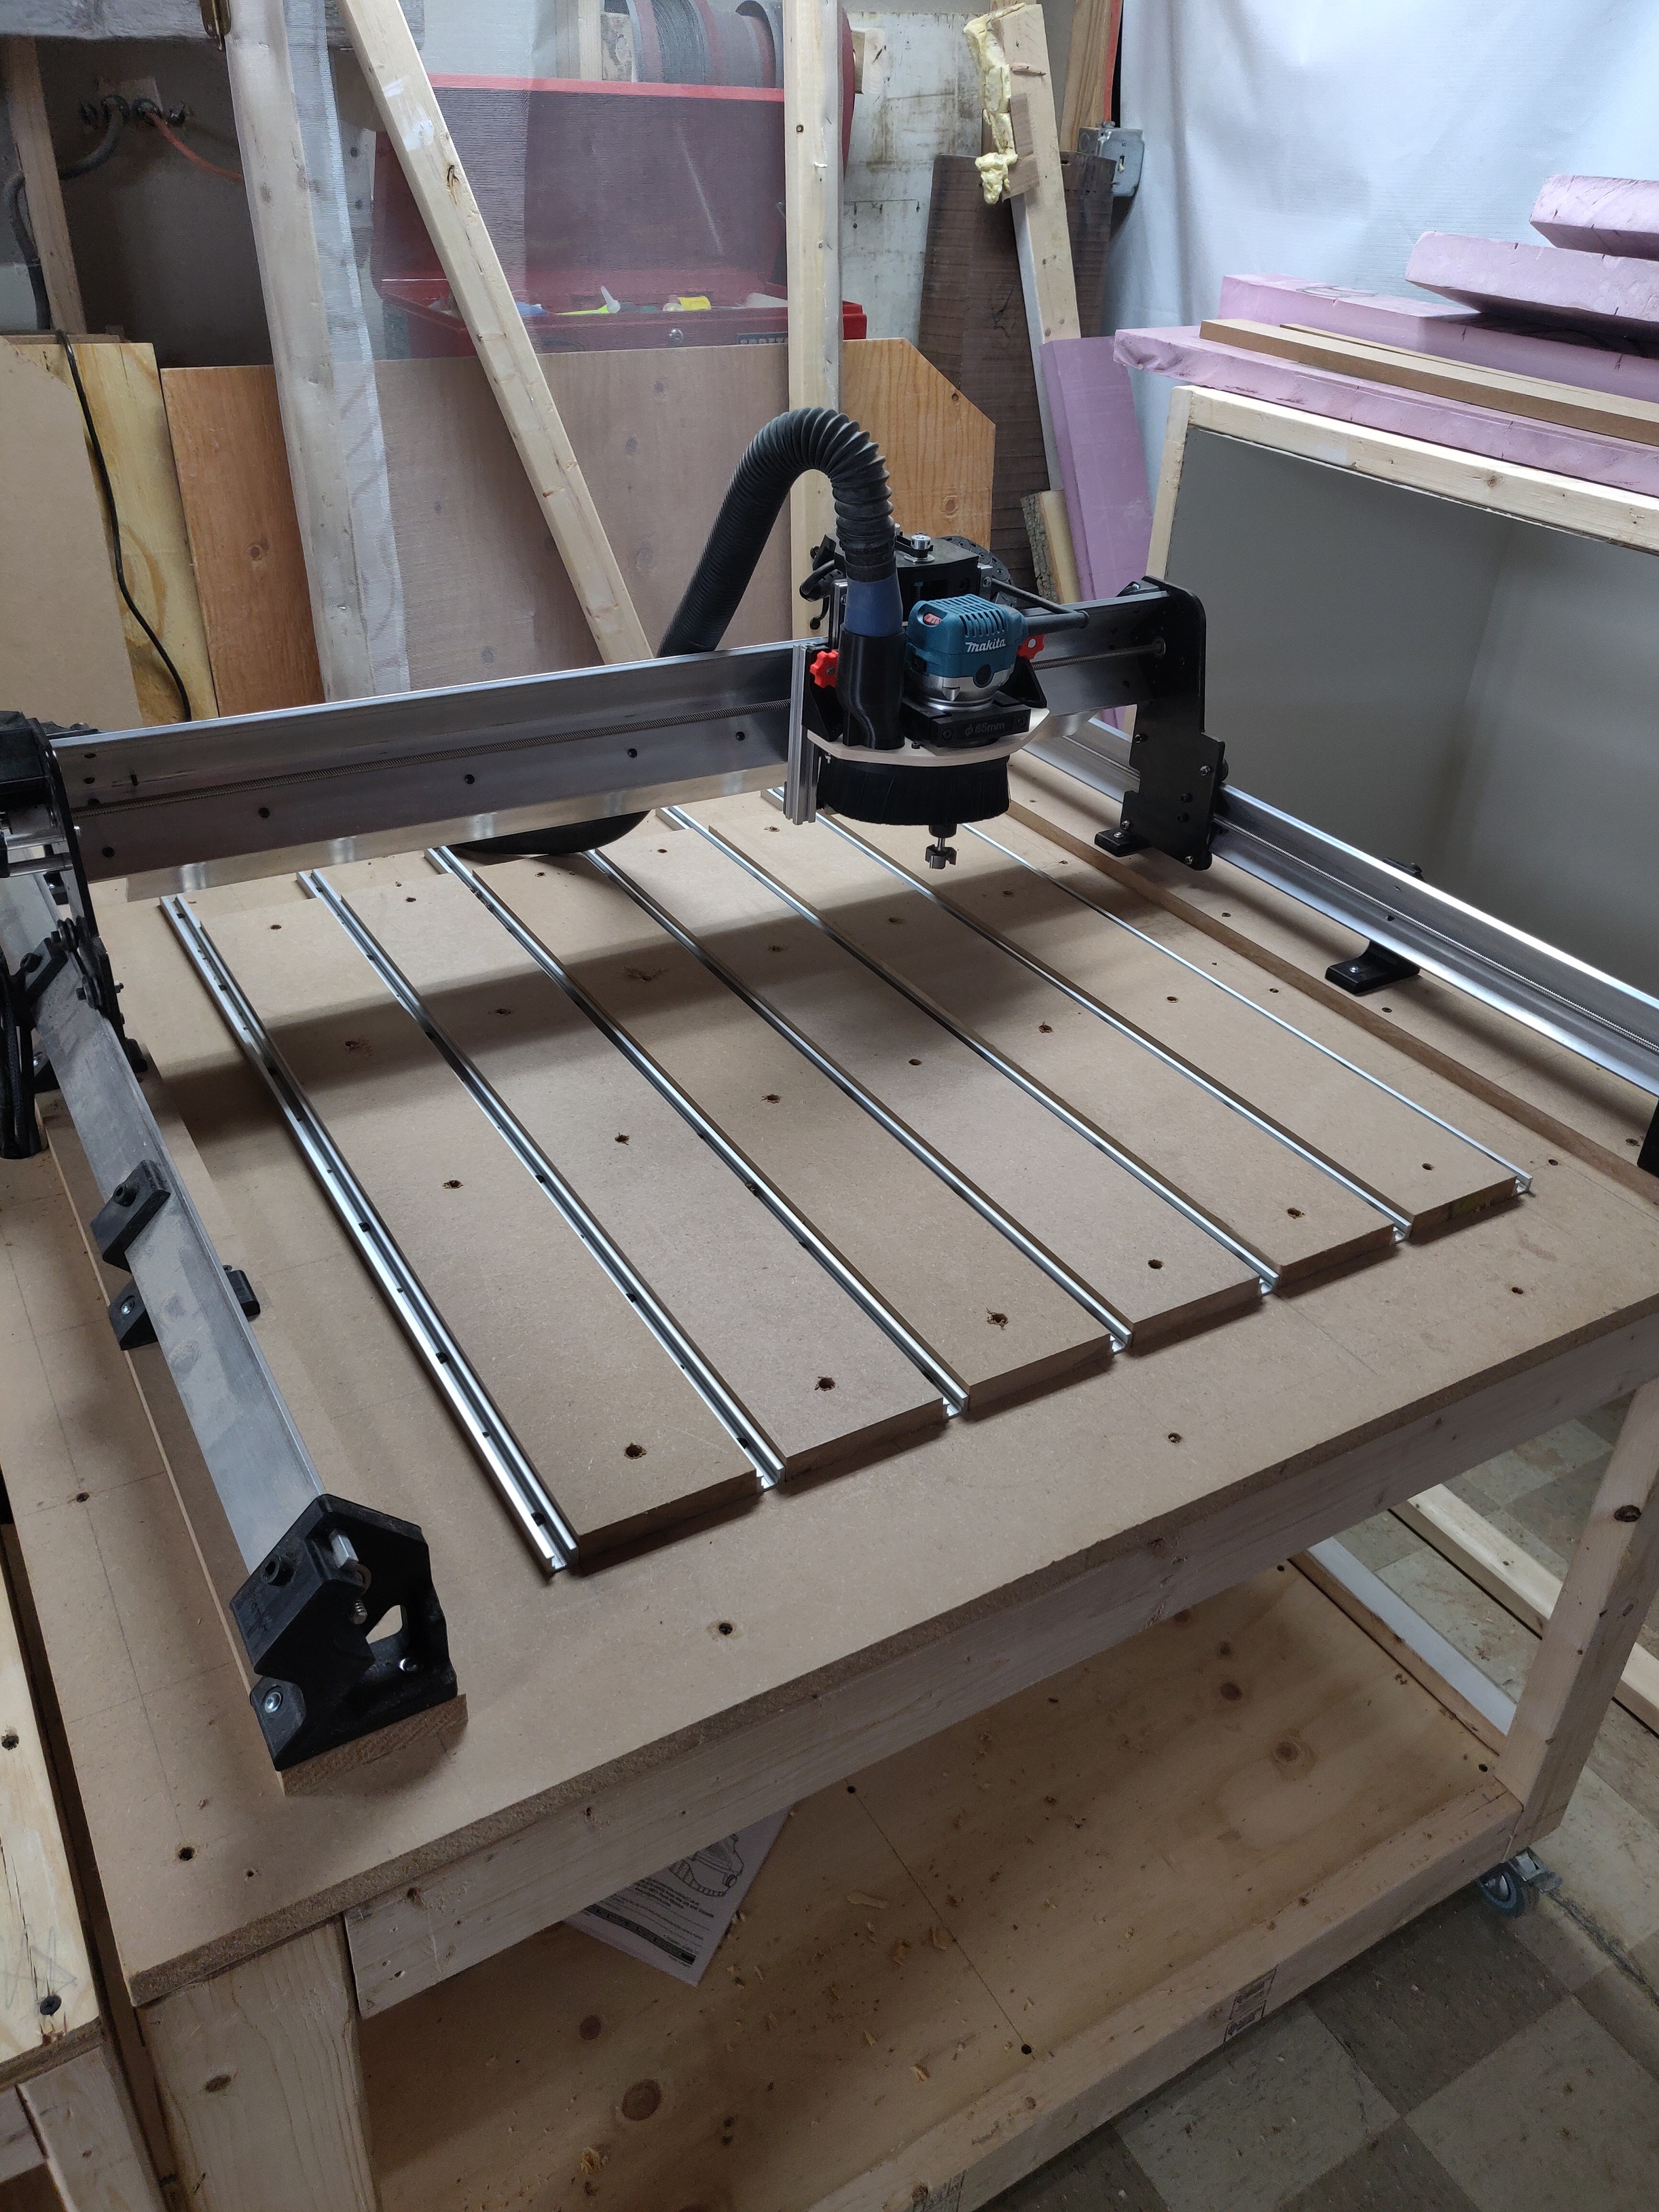
@TightnTapered I had given that some thought and a couple of weeks ago I removed the t-tracks and cut the front and back waste boards at the max y axis then reinstalled the t-tracks. As you know, this will allow me to mill boards that are longer than the actual cutting area of the Longmill. I have purchased Vcarve desktop and it supports tiling. The extra MDF on the sides is not an issue yet as I have not needed to mil a wider piece of stock than the Longmill can handle. If that happens, I’ll deal with it then.
Another advantage of cutting the front end is I can attach a fence to the front and mill the edge so that I have a straight x axis reference to work against.
3 Likes
Guys usually put MDF right up to the legs of the machine to balance the clamping surface. If sure the way you did yours is fine just looks odd. Glad you got it all together.
1 Like