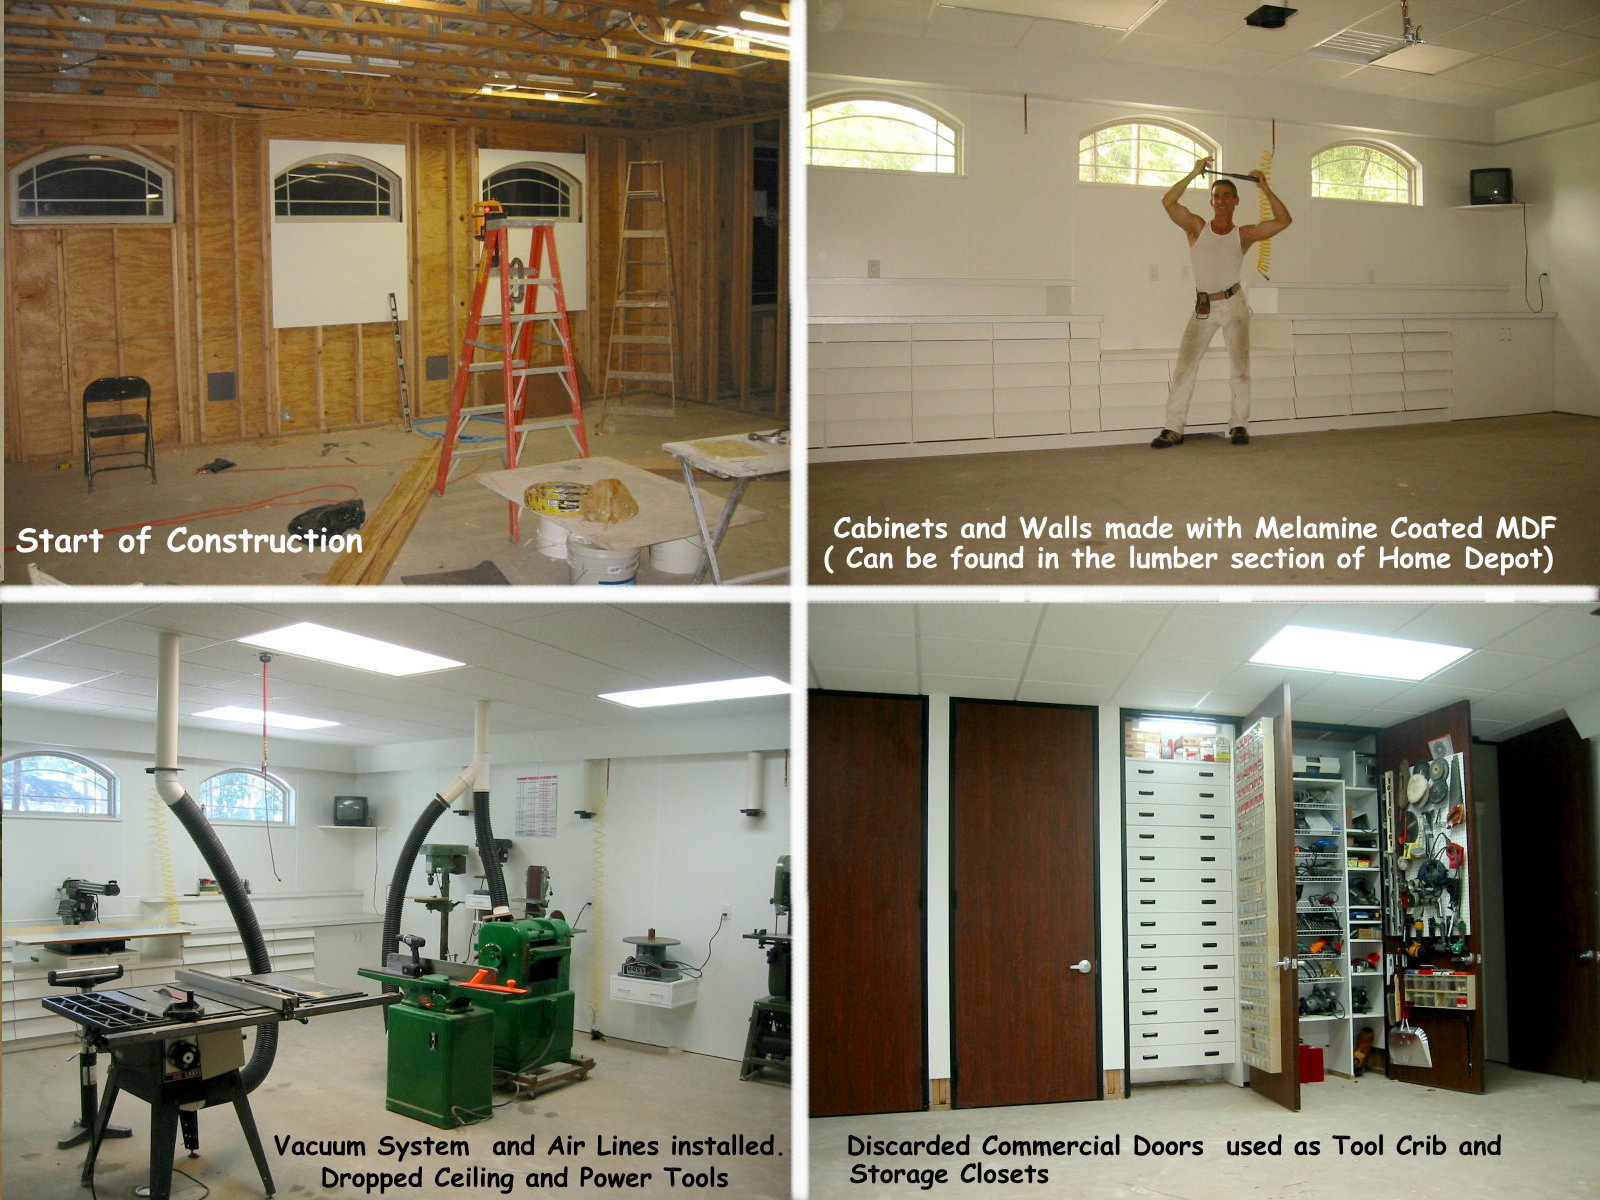
I designed my home and everything in it. My first objective was to have a real workshop (not a repurposed garage) I installed a dust collection system for my stationary tools. The dust collector is isolated from my workshop to decrease the noise.
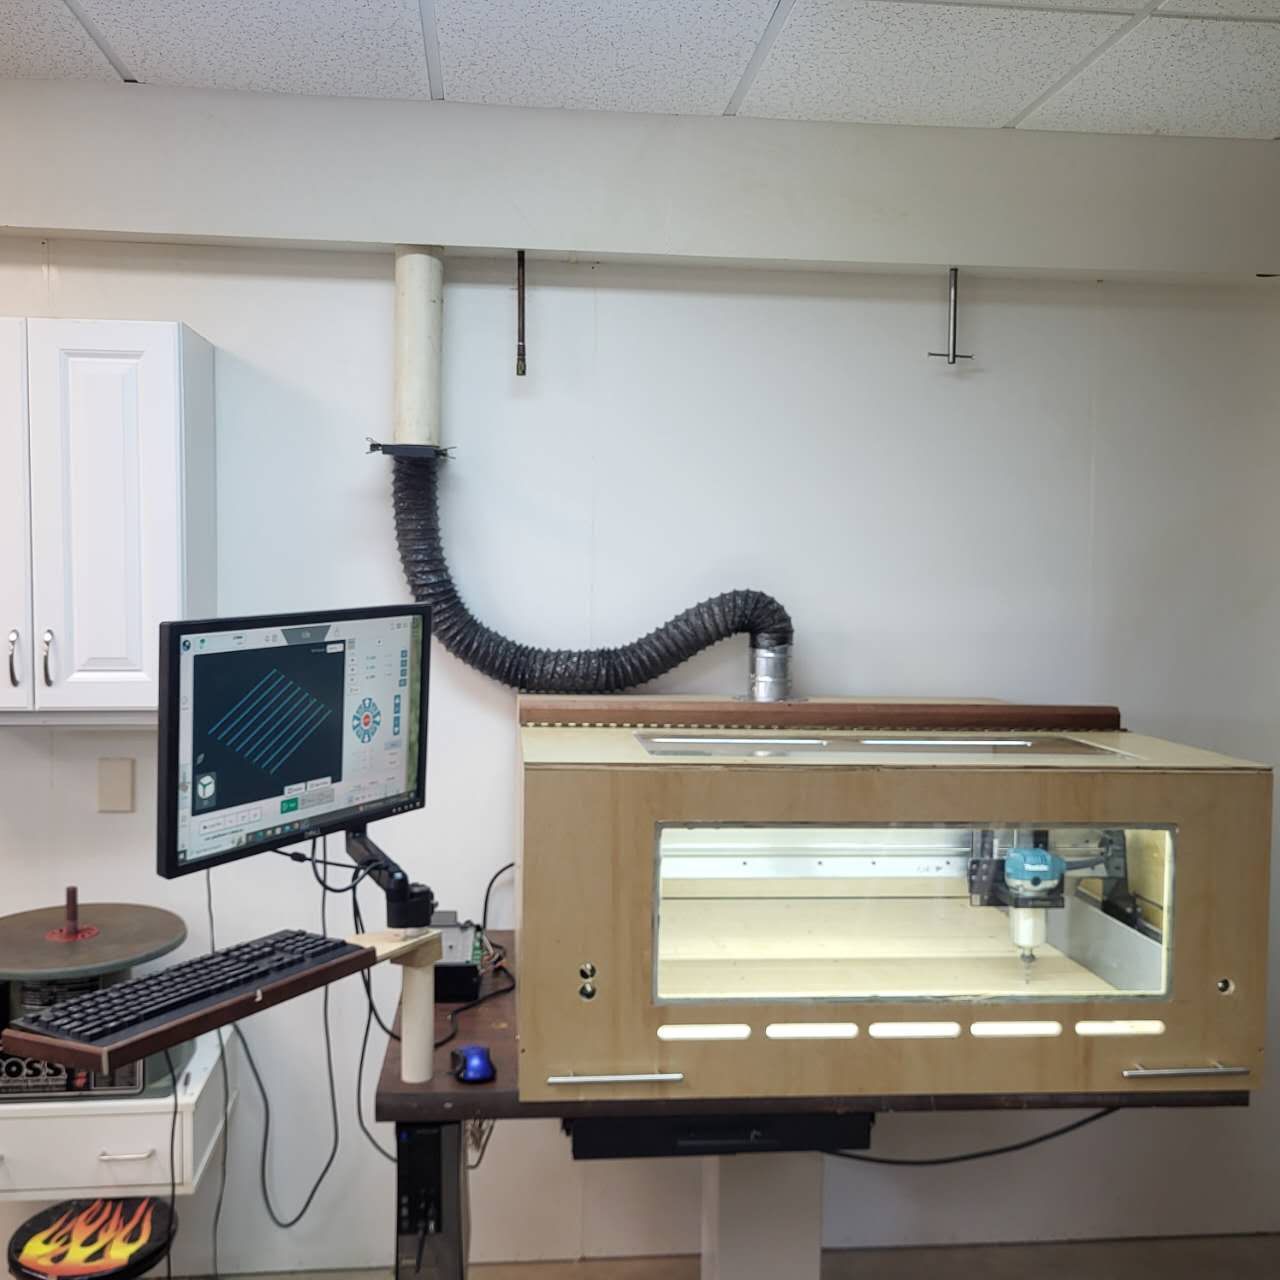
I bought my Longmill off of Facebook MarketPlace for $500. I mounted it to a chunk of a commercial door and attached it to a drafting table mechanism with a power lift capability. I can tilt the table to a vertical position to move it through a standard doorway.
My machine came with a vacuum attachment and cyclone dust collector. While I have 2 shop vacs, they use a “universal motor” which is too noisy. Besides being noisy, the velocity of the cutting debris can easy escape the brush. That system also obstructs the view of the project.
Autocad was used to design an enclosure for my machine. I used the Longmill to cut out the panels with details. I had some old windows which I cut up to bond into the enclosure. The enclosure also mutes the sound of the router , so I can listen to music from my radio while the system is operating
Slots were cut around the enclosure to create airflow across the work area and above the Y rails. This helps to keep the cutting debris from settling on the lead screws and rails. The slots also provide access for an occasional air gun blast to clear any debris into the vacuum system, before opening the hinged door.
I opted to not create a typical “spoilboard” Instead 2” high sleepers were mounted to the 30”x 30” work area. The spoilboard program was used to machine the sleepers and create a “Z” plane parallel to the machine. A piece of birch cabinet plywood was mounted to the sleepers. After it was mounted , a program was executed to cut slots through the plywood for a “T” slot clamping system. Sacrificial 1/8” hardboard strips are used to support pieces which have machining operations which penetrate through the workpiece.
Having a pleasant workshop creates better motivation to pursue new projects. If I had to pull the cars out of the garage first to create a “pseudo workshop” I would procrastinate longer. This feature is rarely in an available home design, so that is why I made all of the design drawings for my home.
I walled my workshop with 3/4” melamine coated particle board. That stuff is nearly indestructible. You can put black sharpie on it and then wipe it off with gasoline and the surface will not be effected.
My radial arm saw is flanked with the counters and drawer systems I built out of the same melamine board
I garbage picked 9’ commercial doors and jambs to make my storage closets and tool crib.
Agreed. If I let my shop get too messed up I’ll procrastinate on making anything because I have to clean up first.
Thanks for sharing some pictures. I work in the ‘basement’ but it’s mostly above ground with a 18 knee wall on one side and ground level on the other. It’s better than a garage but I’m envious of your woodshop.
Just like in your workshop, I often have every surface covered with tools and materials and I end up wasting time trying to find things. When this becomes a burden, I must shut things down and re-organize things to regain some efficiency
I was born in Niagara Falls and miss having a basement after moving to Houston in 1979. Buffalo has a “frost line” of about 48” so even a house, without a basement, should have a 48” deep perimeter footing. If they must excavate to 4ft, they may as well go a bit deeper and create a basement. The frost line in Houston is only 6”, so basements are not as practical.
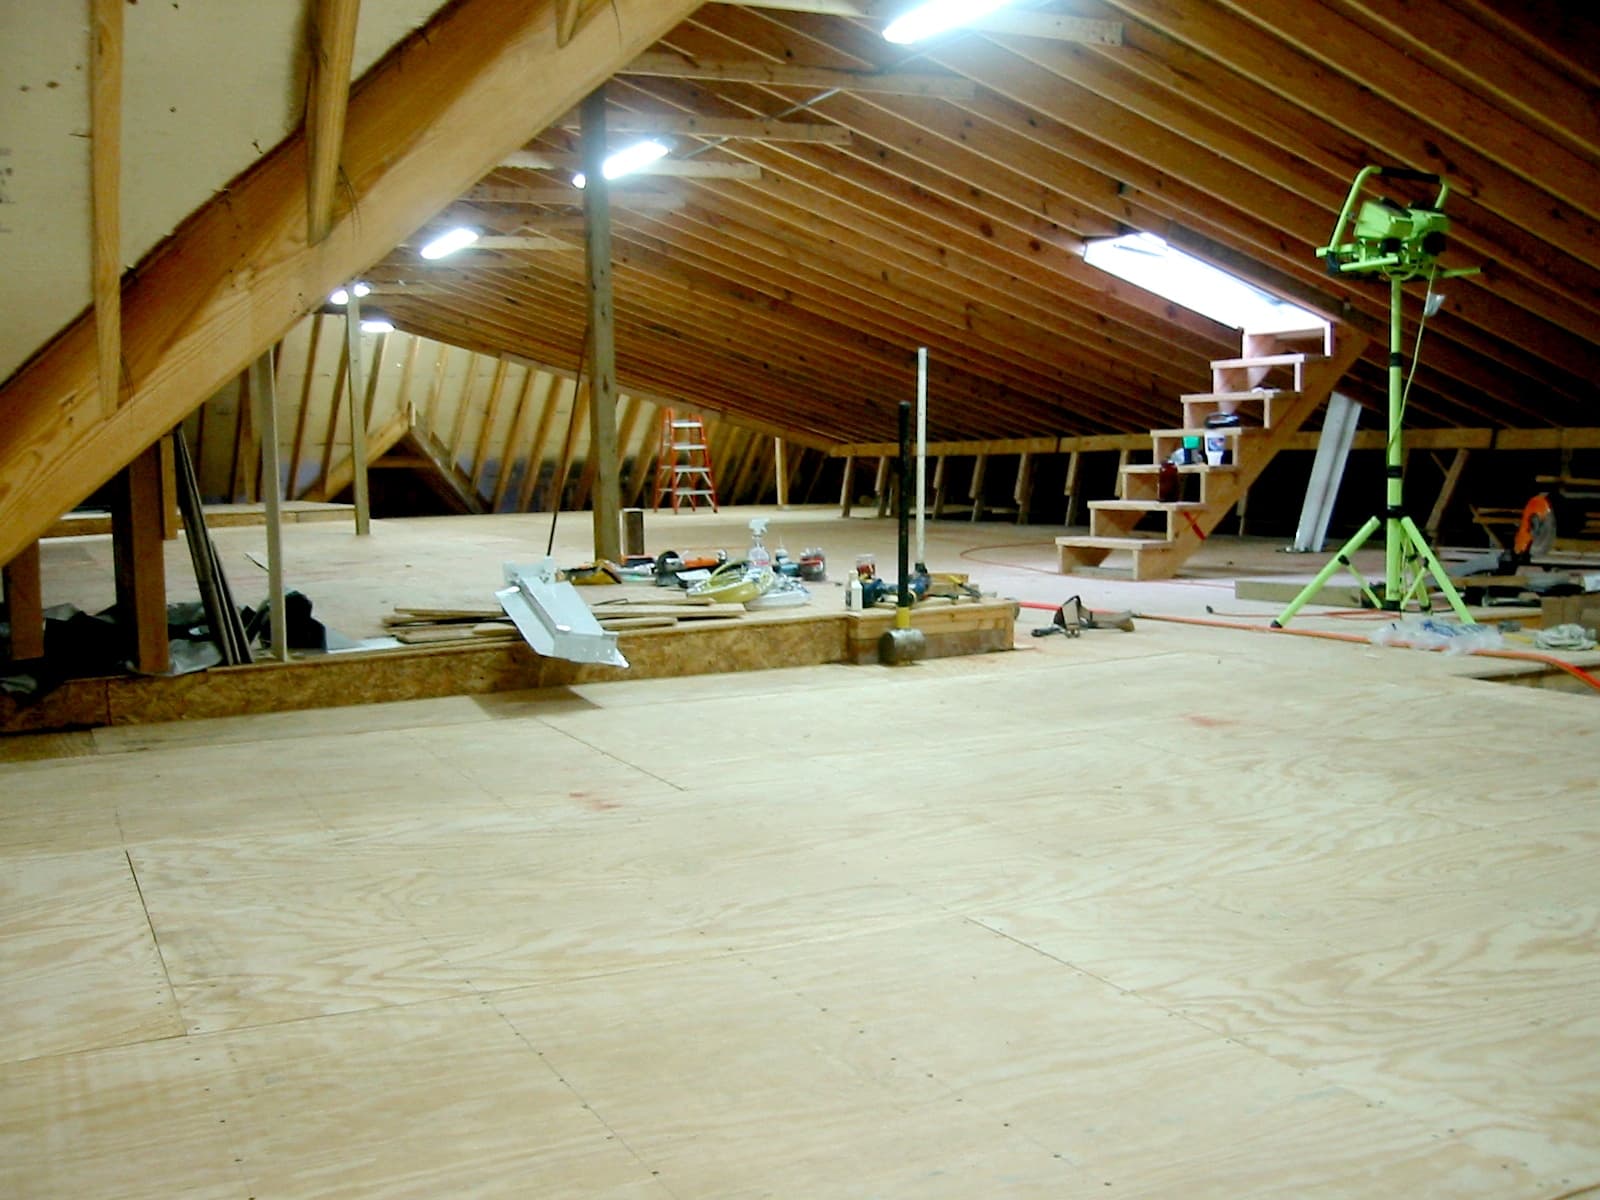
I do have a “Texas Basement” which is an attic. When I designed the roof structure , I used 2x8 rafters to eliminate many braces (except for collar ties). I have a 4’ wide staircase to access the attic from the 2nd floor (not the typical pull down attic stairs found in nearly all Southern homes). I also created a “roof door” from a skylight and a galvanized purlin. I used gas shocks from my old car’s hatchback to keep the roof door open.
My brother helped me install 3200 sq.ft. ol 3/4” tongue and groove plywood.
The attached picture is what the attic looked like when it was initially floored, 20 years ago. It is now filled with dozen of shelving units to store all of my building materials. I am a “pack rat” and generally save anything that may be used in future projects.
I read over your posts and looked at your pics. It all looks very nice. I used a garage as a shop. The trucks live outside. Of course, Im like you, I live way down south in Georgia. My problem is that I ran out of room in the garage and had to build a shop for the rest of the stuff. Also, glad to see that you have a radial arm saw. I do as well. I guess they have gotten a bad rap over the years but I love mine. It is great for dados and half laps. Welcome to the Sienci club!
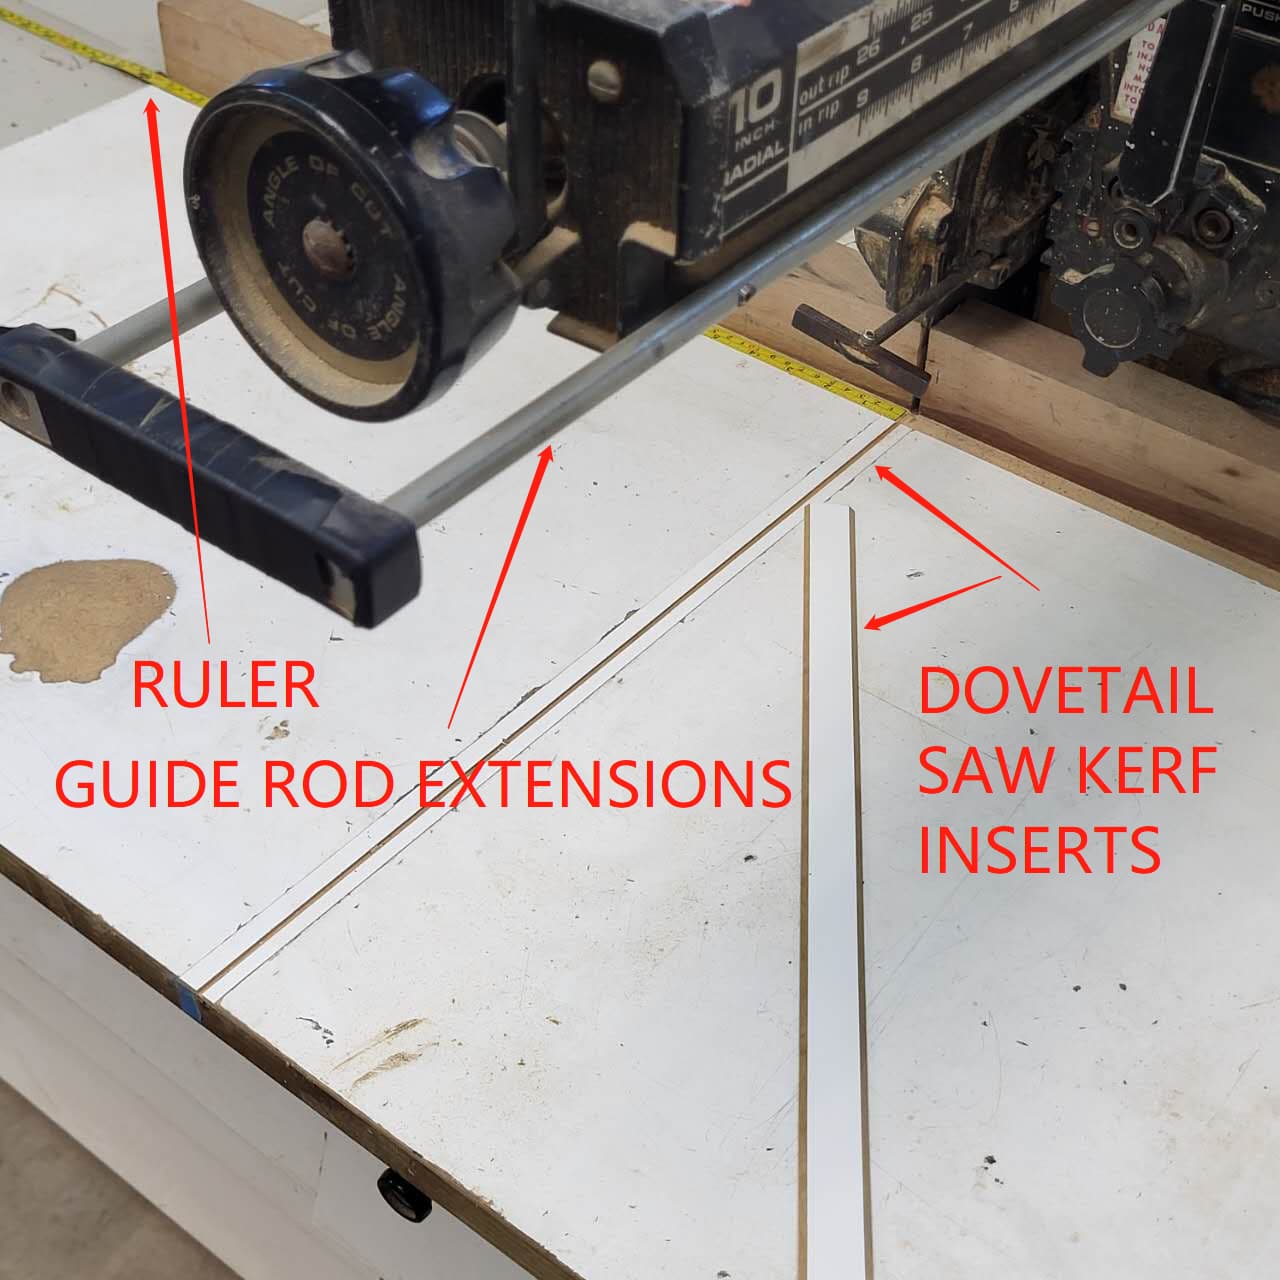
I love my radial arm saw! It was the first stationary power tool I purchased 50 years ago. My Craftsman has a cast iron column. I made changes to make it very convenient to use.
I first modified the saw to allow me the crosscut wider material, without moving the fence. I did this by replacing the gantry guide rods with longer rods. I made from common cold-rolled rods at the hardware store. An aluminum bar was machined to keep the rods from deflecting and the ends.
I also added an 1/8” layer of white hardboard to the surface. I made dovetailed strips, of the same material, which slide into the adjacent 1/8” material. These sacrificial strips can be slid out and replaced so there is always a precise saw kerf which shows where the cut is made. I have a cut piece of aluminum angle-iron, hose-clamped to the column. This allows me to raise the blade for shallow cuts and then drop the blade until it hits that “hard stop” and not cut into the 1/8” strip more than 1/16” .
A 10’ tape ruler is adhered to the left side of the blade and down the left countertop. I can get precise length crosscuts, without the need to mark the wood.
Below is a picture of those mods.
Hope all of your projects bring you continued satisfaction!
Very interested in your enclosure details. Only see one picture but would love more pictures and details if you wouldn’t mind sharing. Materials, Measurements, Etc… Amazing Work.