Not sure if I’m having issues, but I wanted to check as the instructions don’t provide clarification on this.
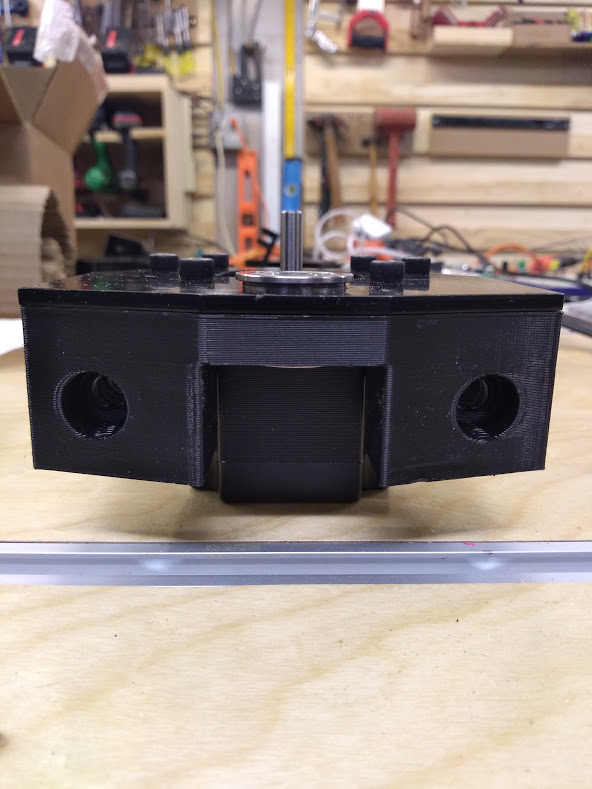
When bolting the Z axis steel motor mount to the 3D printed axis motor mount, the bearing does not sit flush with the steel plate. It looks like there is not enough space for both bearings to sit flush on their respective parts (i.e., if I force the one bearing flush on the steel plate, the one on the 3D printed part will not be flush). Picture is attached. Is this normal? I’m worried about the bearings not be aligned with each other.
Second issue:
It appears one of the plastic pieces for adjusting tension had a hole drilled on the wrong side…maybe. I can’t tell at this stage if it’s supposed to be different or not. Given that the tapped hole runs into one of the nuts, I’m guessing it’s a mistake. Can someone please clarify?
In the first picture, you just need to check that the hole in the plastic bracket and the hole in the steel plate line up with each other, that might be why the bearing isn’t pressing into place. The fit may also be a bit tight, but there will be enough height for both bearings to fit 
In the second picture, that definitely looks like the nut has been mis-manufactured and somehow slipped through our QA. I’ll make sure a new one gets shipped out to you by tomorrow. What’s your backer number?
I’ve got your backer number here, I’ll get it shipped out to you tomorrow. I’d recommend moving on with the assembly for now and put the block which doesn’t have the tapped hole on the Z-axis since that’s the easiest one to take the block off of once it’s fully assembled. I can explain further if you need @zymurgy_cat
1 Like
Thanks. Got it. Just took some creative clamping to make a press fit. And I see what you mean about where to put the block. I’m working intermittently on this, so I can just wait for the part.
1 Like
I had the same issue with the flange bearings. Not sure if I remember exactly what I had to do. But I think it was to make sure the motor is loose enough to slide back and forth so the printed piece is also able to move a little. Hope that makes sense. I could get both bearings in but when I tightened the motor down one of the bearings would pop out. Took some finaggling to get it right.
1 Like
Hi. I experienced the same issue when assembling. I found two things worked for me. 1. A little spit lubricant around the bearing. 2. Use a “BFBPH” - actually, not a Big Friggin Ball Pean Hammer, but a little gentle persuasion from the suggested rubber mallen, or in my case a trim hammer. There is just a little builup of paint coating that you need to work through before they will sit properly.