3D Printed Longmill Part - Middle Rail Support

Hey All,

I was bored tonight at work and had a printer free up. So I downloaded
a part for the Longmill from their open source link

It’s great to have access to these files just in case of breakage.

I printed off the Middle Rail Support file. CR-10 0.2LH 20% Infill 3hrs

I now have something to hang onto until my machine arrives… lol

3 Likes

LOL A souvenir of what will be ha ha

The online files aren’t just great for replacements, but allow you the freedom to customize your machine.

I decided to re-print all the parts in fire engine red…just because.

Prusa MK3
PLA+
50% infill, 5 perimeter layers
0.2 LH

2 Likes

Looks good!

@chrismakesstuff would you be able to share the infill rates etc with us for the stock parts?

-Jeff

@andy runs the slicing for the farm, he can certainly comment on the settings we use

Andy put up a post that goes over the settings now: https://sienci.com/2019/11/11/3d-printing-settings-for-longmill-parts/

2 Likes

After going through the article I have a question:

  • 3-4mm Top & Bottom thickness, means that wall thicknesses are also 3-4mm?

Thanks
Hansi

3-4mm Top & Bottom thickness

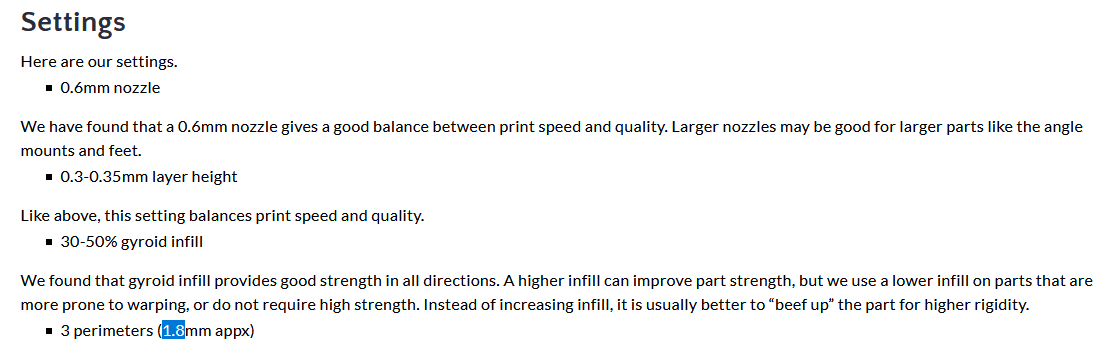
I think Andy meant 3-4 solid layers top and bottom to give the parts necessary strength along their face. For perimeters, since we use a 0.6mm diameter nozzle then 3 perimeters means the walls are about 1.8mm thick; but if your nozzle diameter is smaller then you’d want to consider increasing the number of perimeters.

Ahh, great! That’s making sense now. So the feet would be printed in this orientation, right?

1 Like

Yes exactly @Hansi :+1:

Great! Thanks so much
Hansi

Hi atgood:
How many hours did it take you to reprint, with the Prusa?

Hi Hansi:
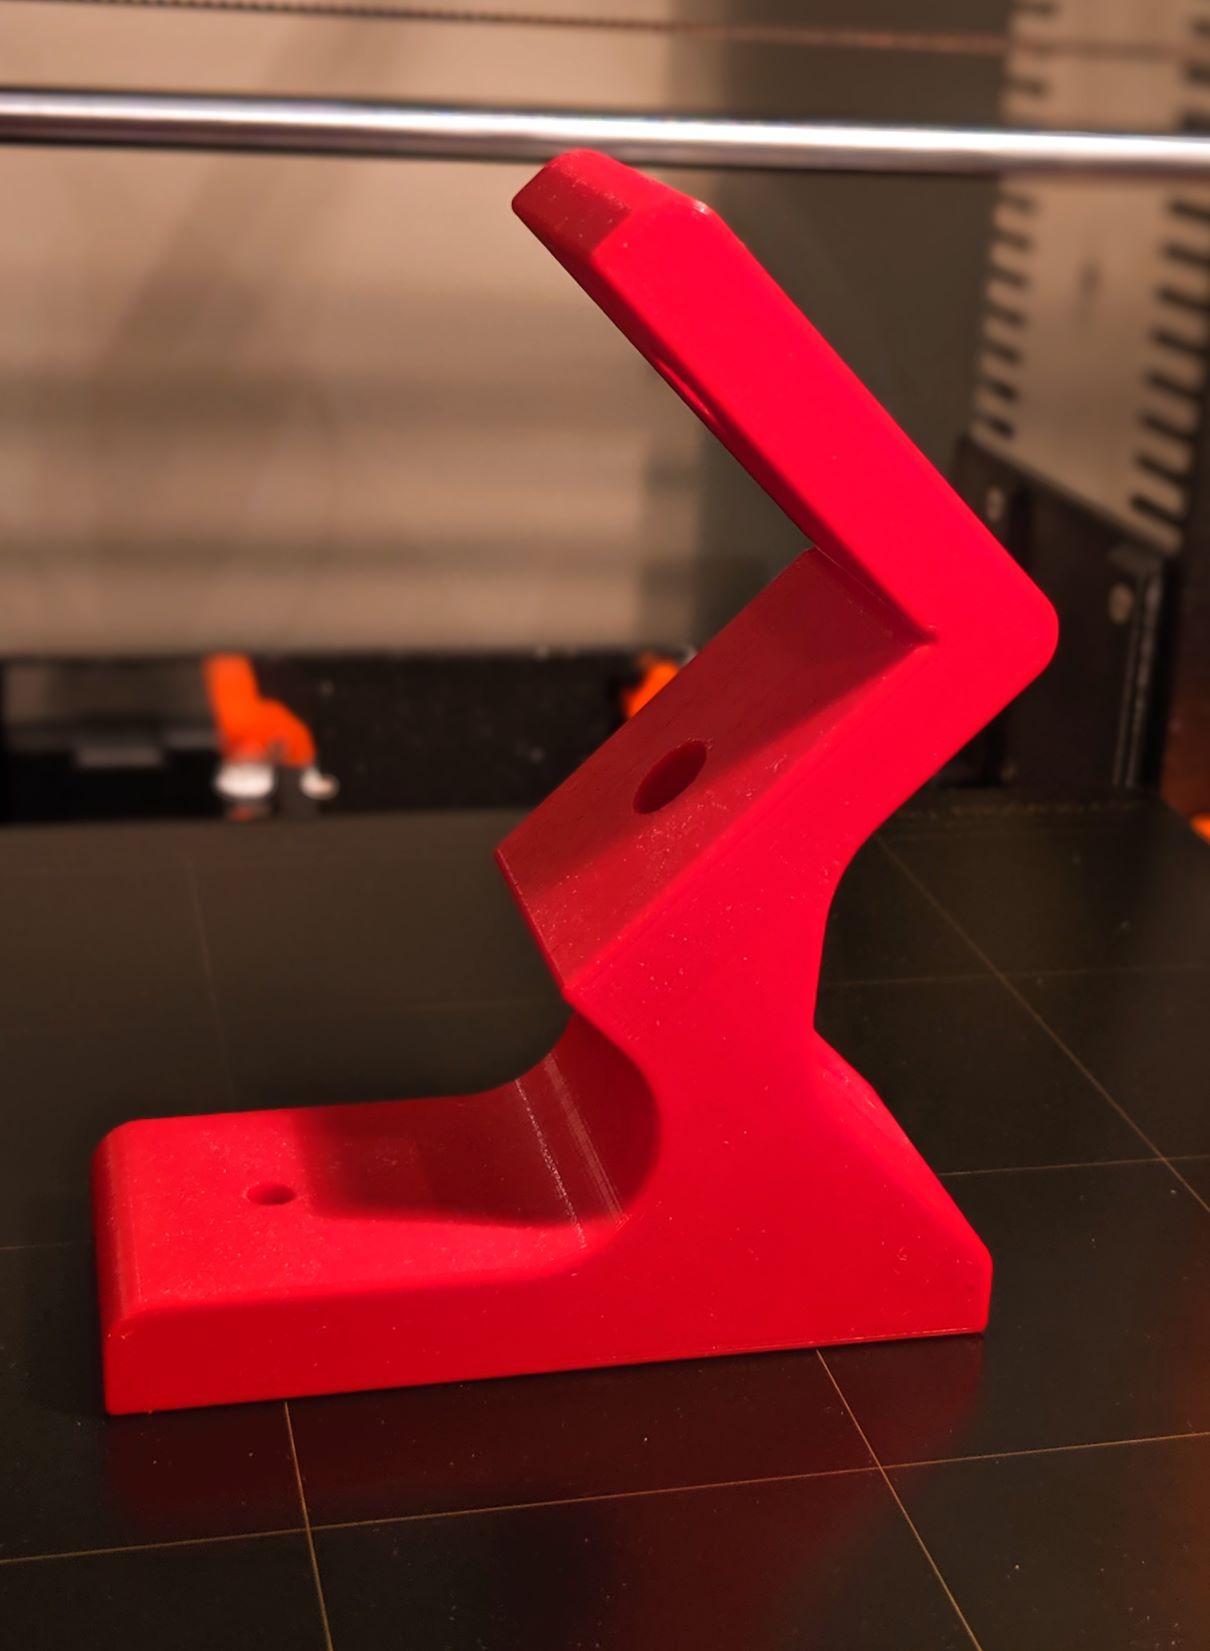
I didn’t have a 0.6 nozzle so used my 0.4 with 0.2 layer height, 50% gyroid infill and 5 perimeter layers to ensure part strength. All in, about 48hrs to print all Longmill 3d printable parts. Likely around 36hrs if you have a 0.6 nozzle and use Andy’s settings above. I also bumped speed to 130% after first layers. Filament: esun PLA+, Fire Engine Red

1 Like

Hi Atgood: What did you have your top and bottom layers set at?
I’m also using eSun PLA+… What was your bed temp and how did you get it to stick?

@Hansi - top and bottom layers set to 4, nozzle temp 210 and bed temp 60. If your bed is cleaned well with isopropyl alcohol before print there should be no troubles with the print adhering as the parts have quite a large surface area.

Great! Thanks so much!
I was printing hotter and also had my top/bottom too thick.
Did you mean top/bottom 4mm or 4 layers?

Top/bottom is set to 4 layers which equals 0.8mm if using 0.2mm layer height.
Cheers!

All clear, :+1::+1:
Thanks for your help,