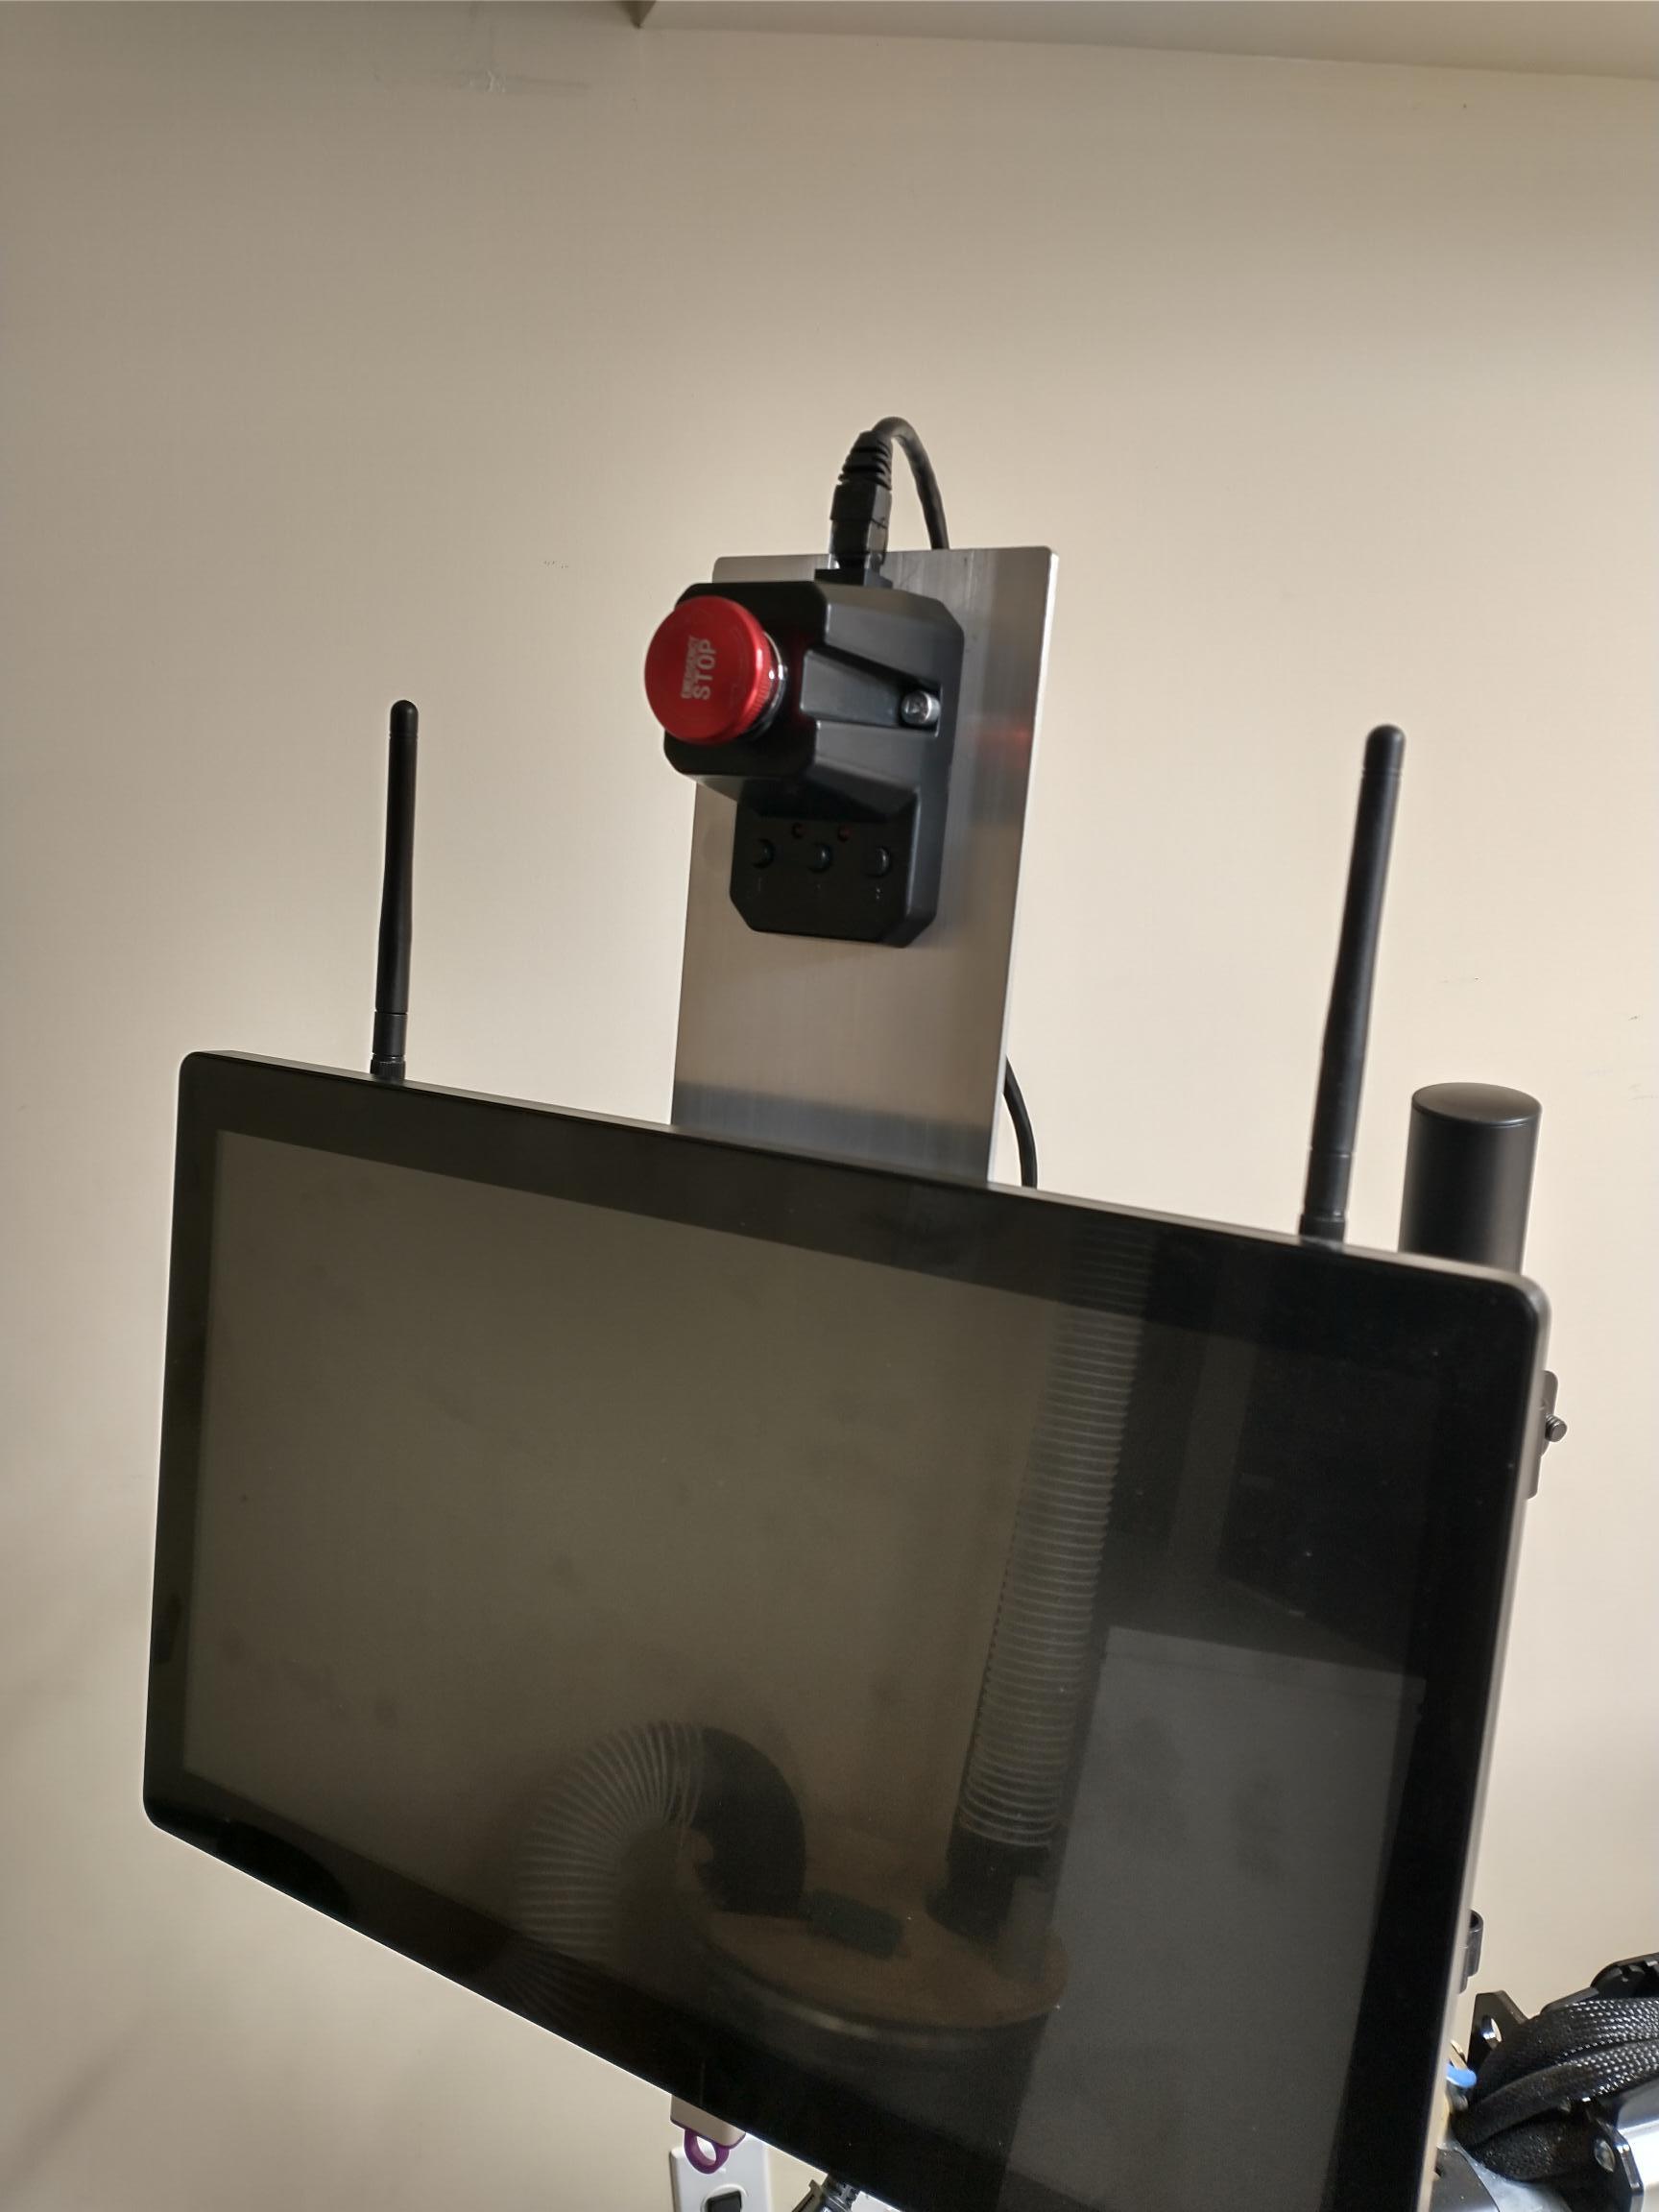
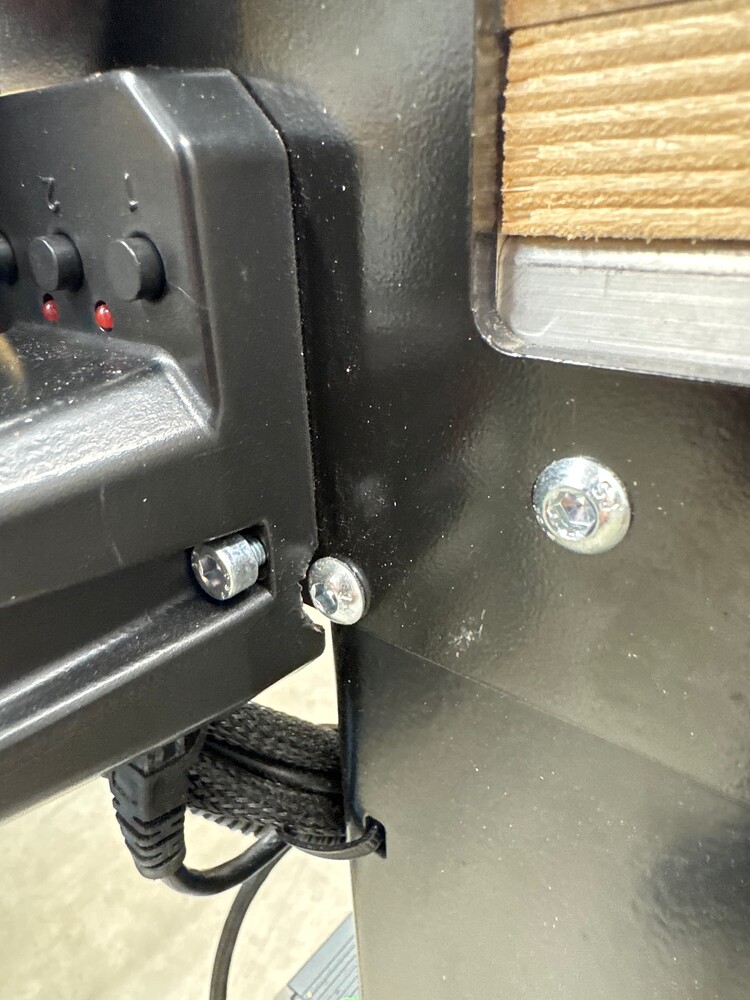
I didn’t like the default location of the e-stop. It was hard to reach in the event of an emergency stop. At first, I was going to put it at the front of the Altmill but figured it might get hit accidentally. Final location was on top of my gControl.
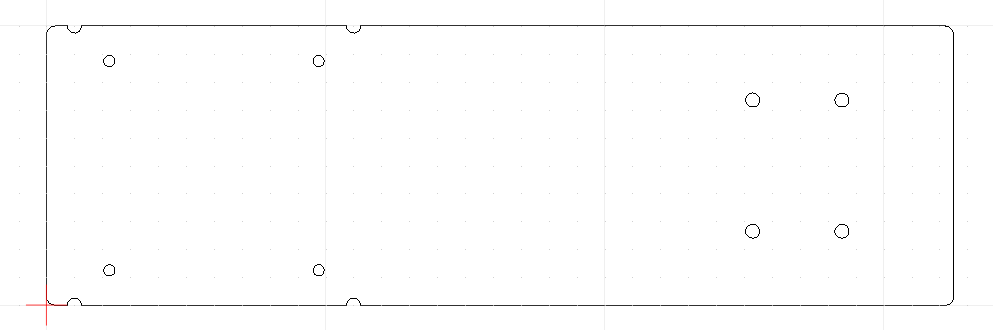
I had some 1/8" x 4" aluminum flat bar which I milled to fit between the Vesa plate and the gControl. The semi-circle cutouts are for the 100mm mounting screws. The 4 holes on the right of the diagram are to mount the e-stop. Only two holes are required but I drilled all four to allow me to mount the e-stop with the cable facing up or the cable facing down. Now it’s easy to reach and I can see the 3 buttons as well.
Yeah, I had considered that location (didn’t know about the foot though) and other spots around the post. I tried to mimic reaching for it during an emergency and it was too hard to reach considering my monitor height and the antennas.
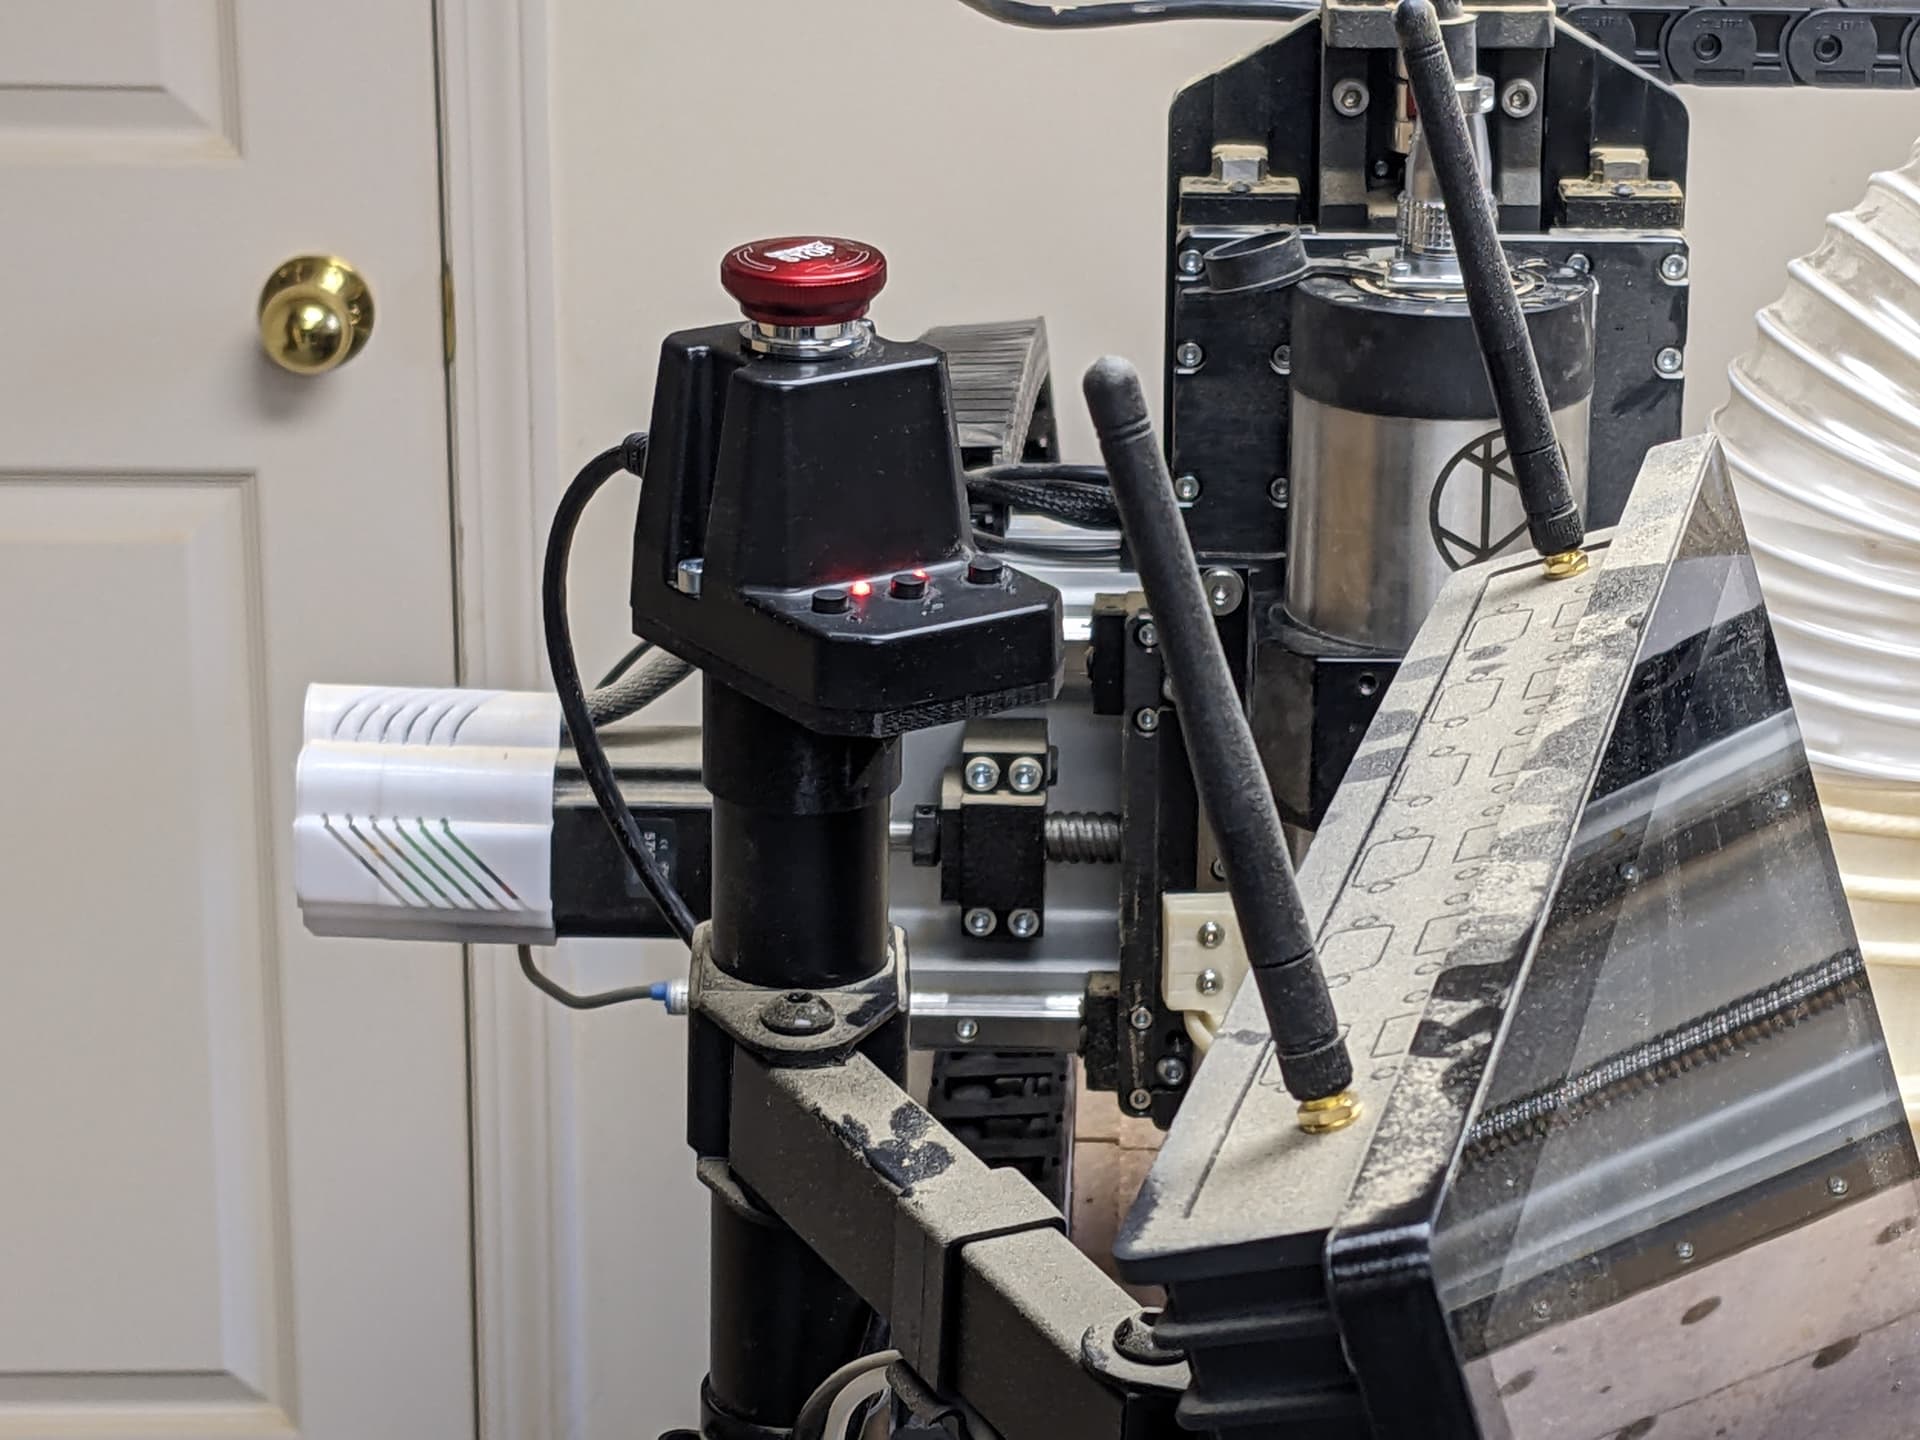
The bolts are tight enough that you really need to push hard on the monitor to turn the arm. Pushing the e-stop just moves the monitor by the amount of play in the swivel between the VESA mount and the arm.
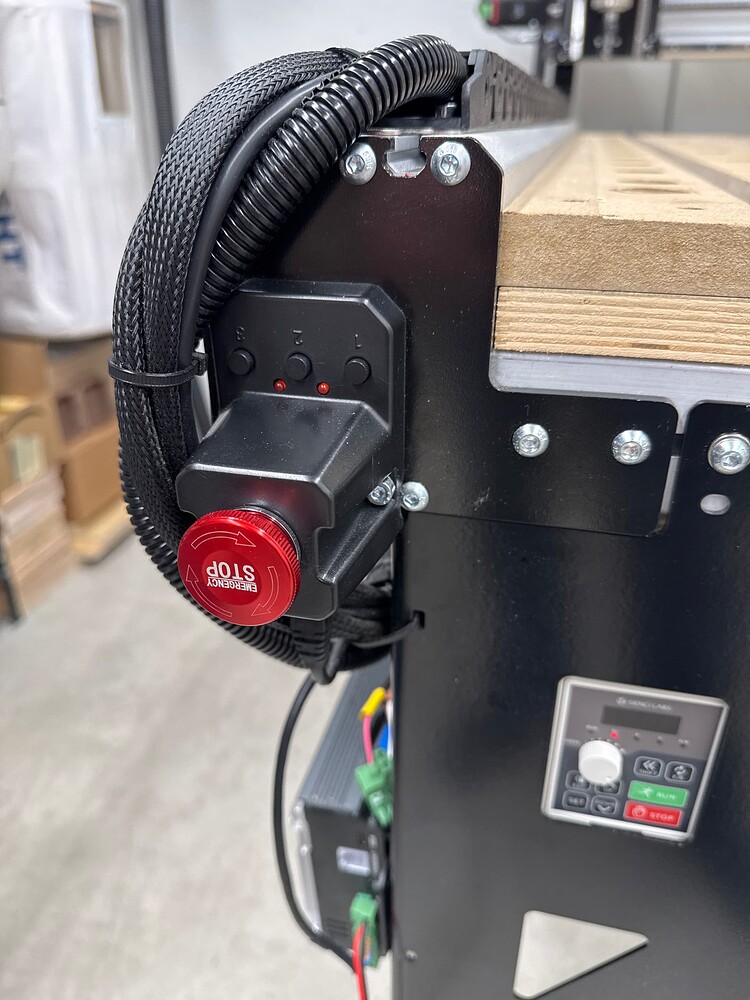
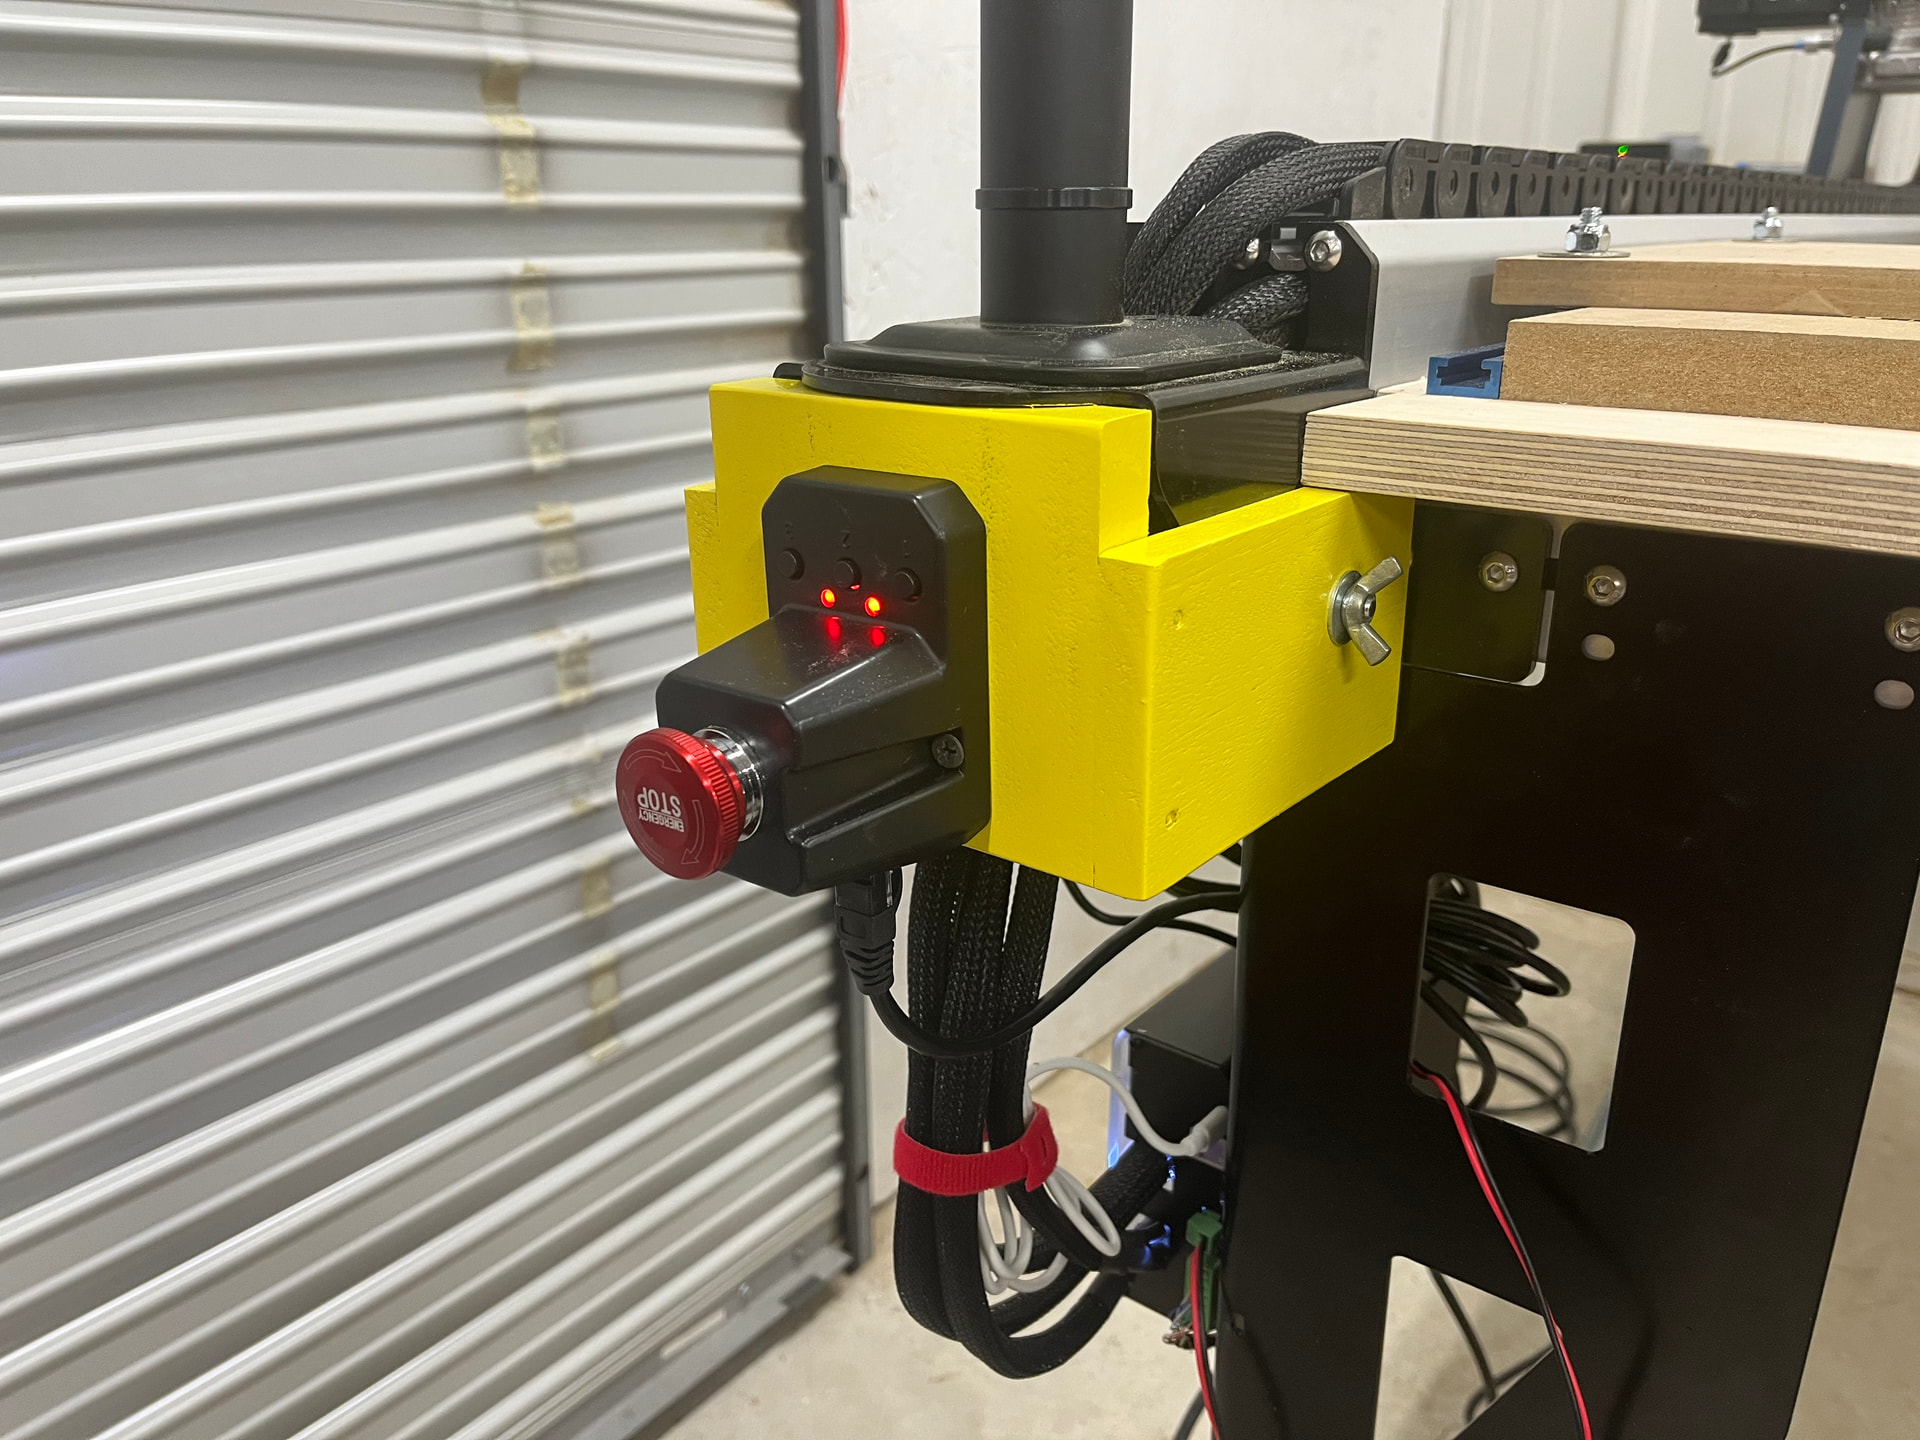
I made a simple wood back-plate to hold it in place on the right leg. As pointed out, one must be careful to not bump it by mistake, but it is very easy to reach and I programed the buttons to move the Spindle out of the way and back again.
That’s exactly why I mounted mine up front. In an emergency situation, I wanted it readily accessable without reaching or having to look around the corner to find it. I’m digging the yellow mount. Super high visibility.
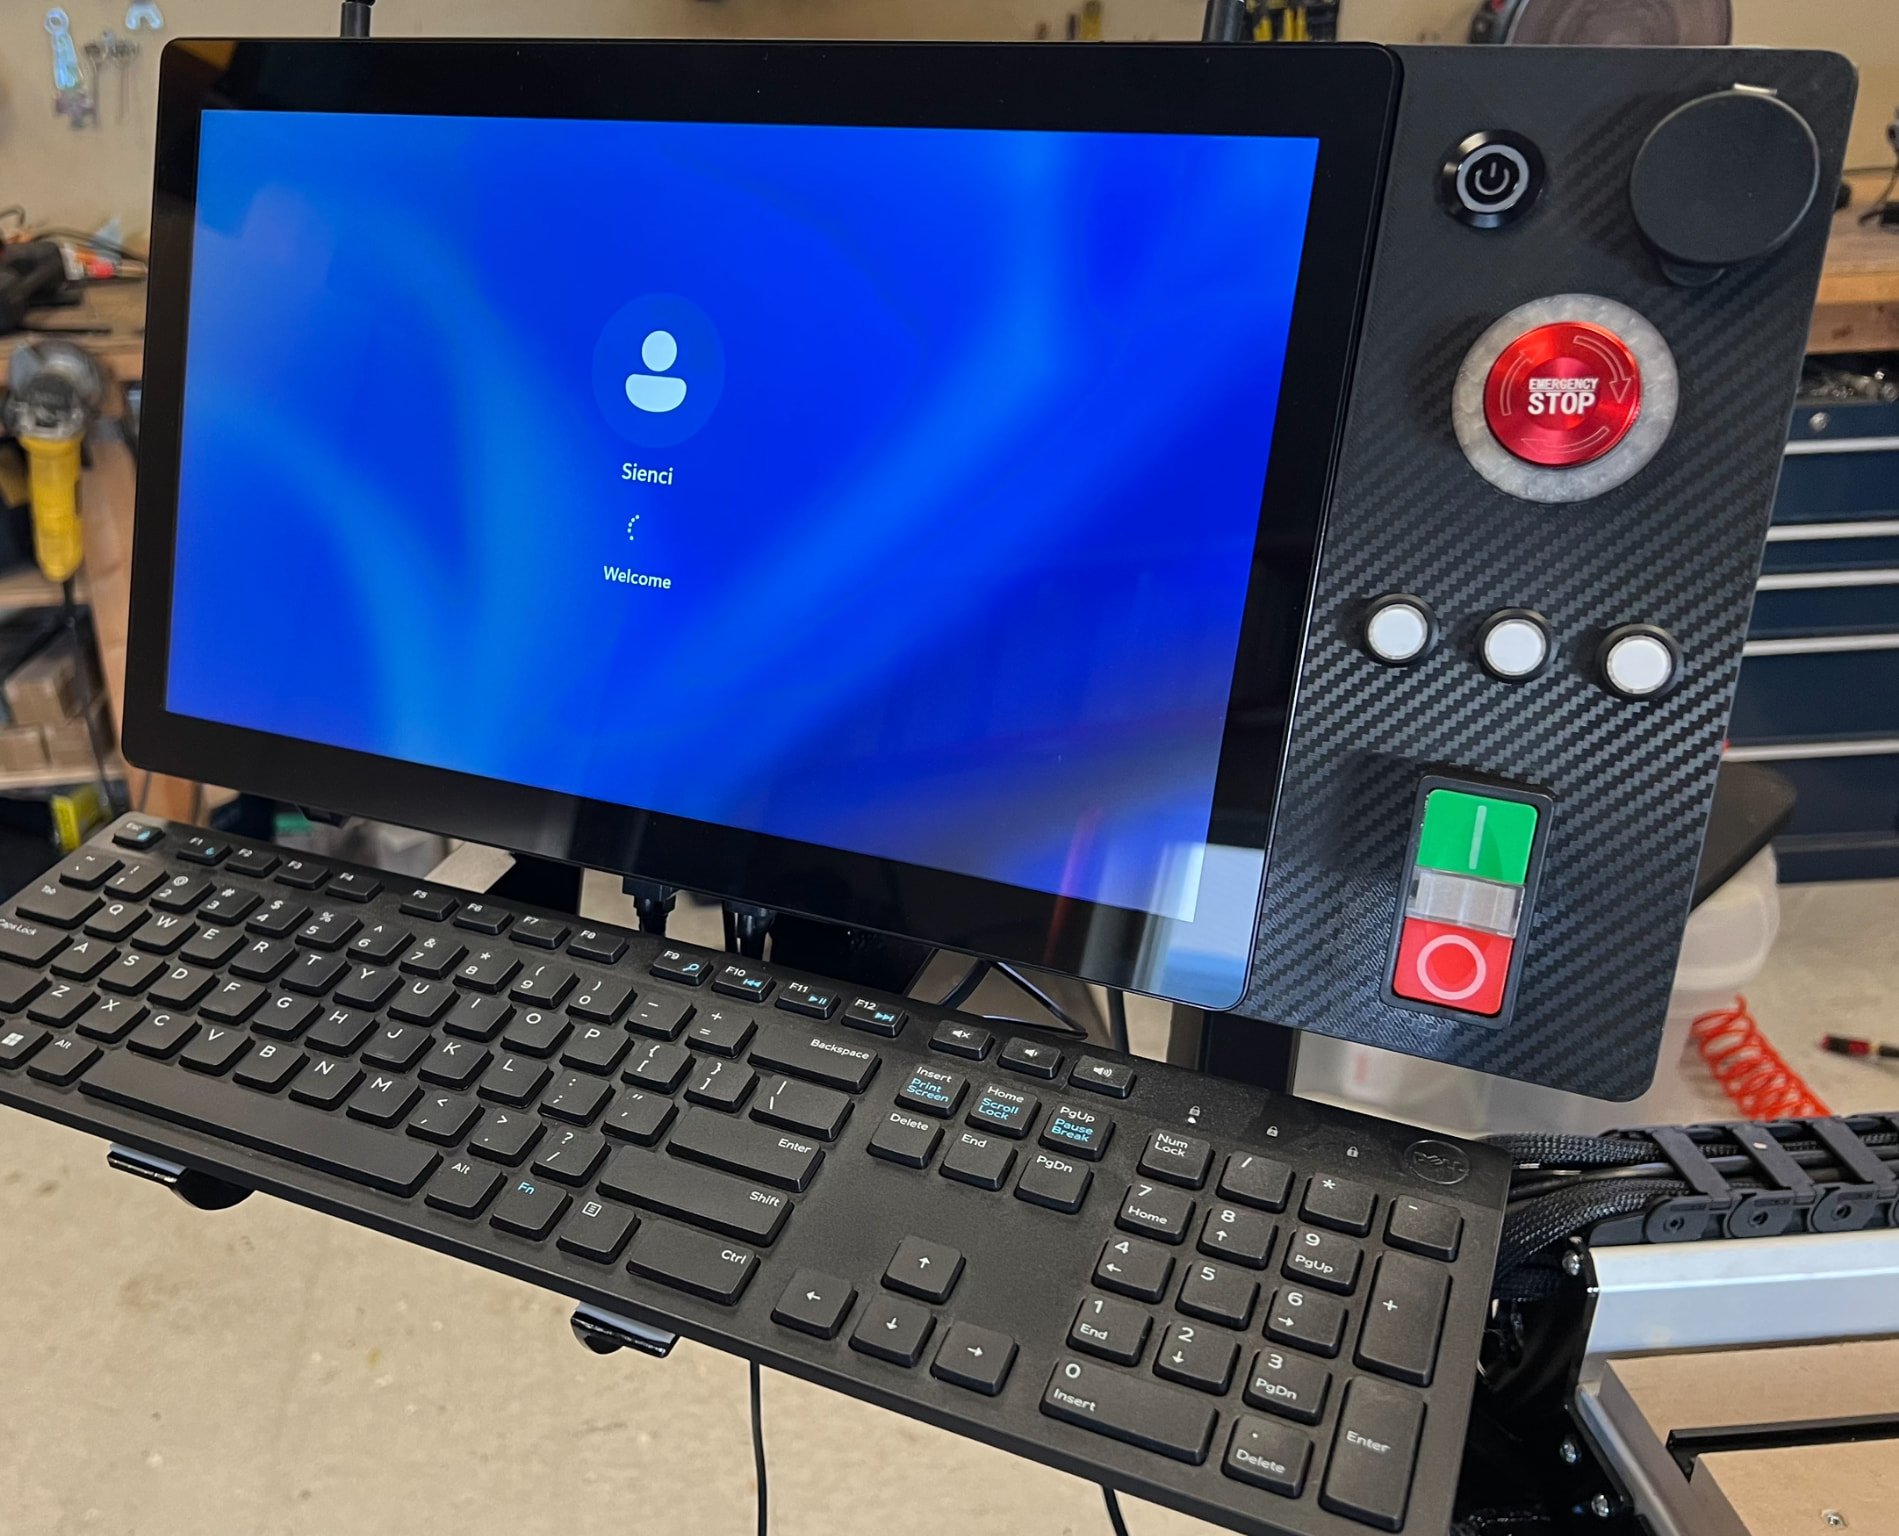
That looks awesome! What are the other buttons/knobs do? I assume the 3 buttons below the stop button are the three buttons on the original emergency unit but what about the big button in the upper right? What about the button that looks like a power button and the red/green monstrosity ?
@marcoose That’s slick. It’s things like this that is pushing me closer to getting a 3D printer. I just have to find a way to get it in the house without my wife ever seeing it.
Yep, the black power button in top left is gControl PC power, the top right is a USB extension dust cover, the middle is the original e-stop with neopixel ring around it, then 3 buttons that replicate the stock ones, and the monstrosity at the bottom is for a contactor that turns on the machine power (the Sienci 48v and 220v for my spindle)
A lot of people just download and print endless trinkets, but I continue to be amazed by how useful it actually is. I am constantly printing little brackets and holders and enclosures etc. If you want to convince yourself search for “gridfinity” You can tell your wife you have ordered a small indoor garden kit to grow bamboo shoots, and it will come in a box labelled “Bambu Labs”