Aluminum Sign Engraving

This is similar to another thread here, but I didn’t want to hijack that thread so I’m creating another one. Maybe the answers here will help both of us.

I’m getting ready to attempt my first Aluminum carve. Some details.

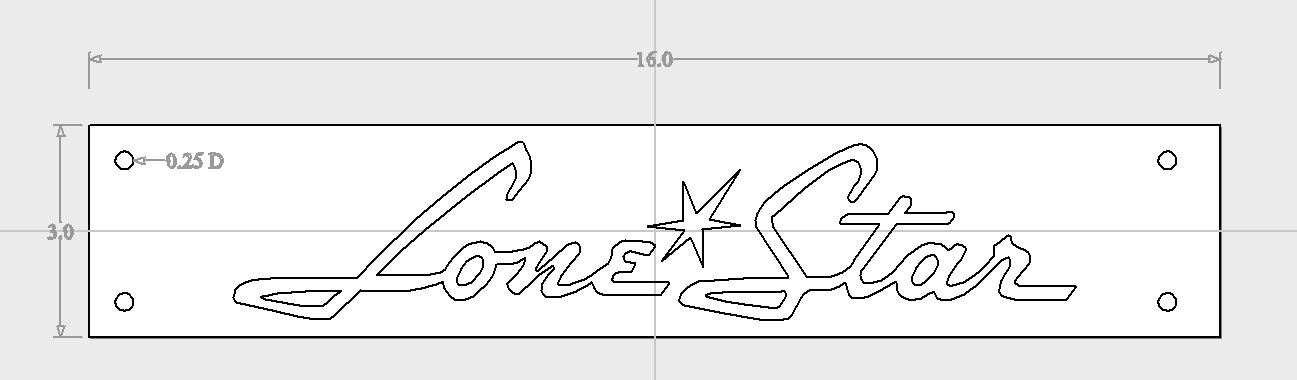
  • Software - Using Vcarve Pro
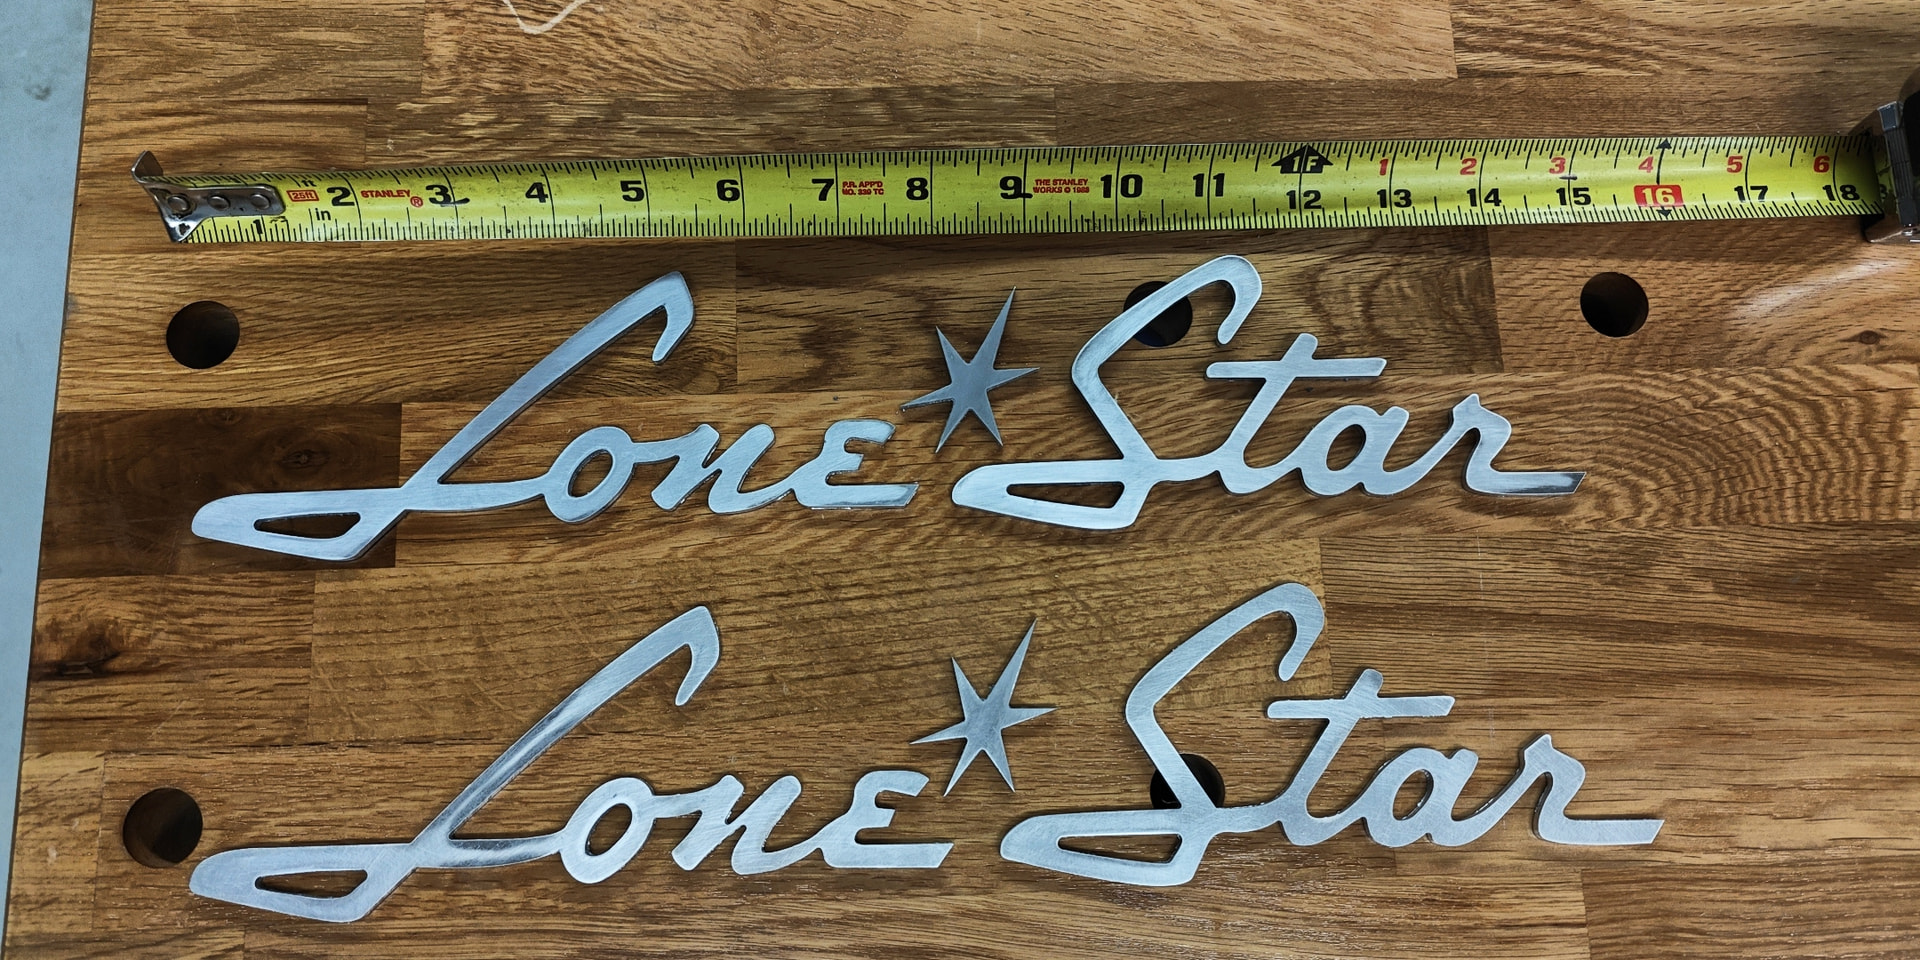
  • Material - 1/8” 5052 Aluminum
  • Size - 16” x 3” sign
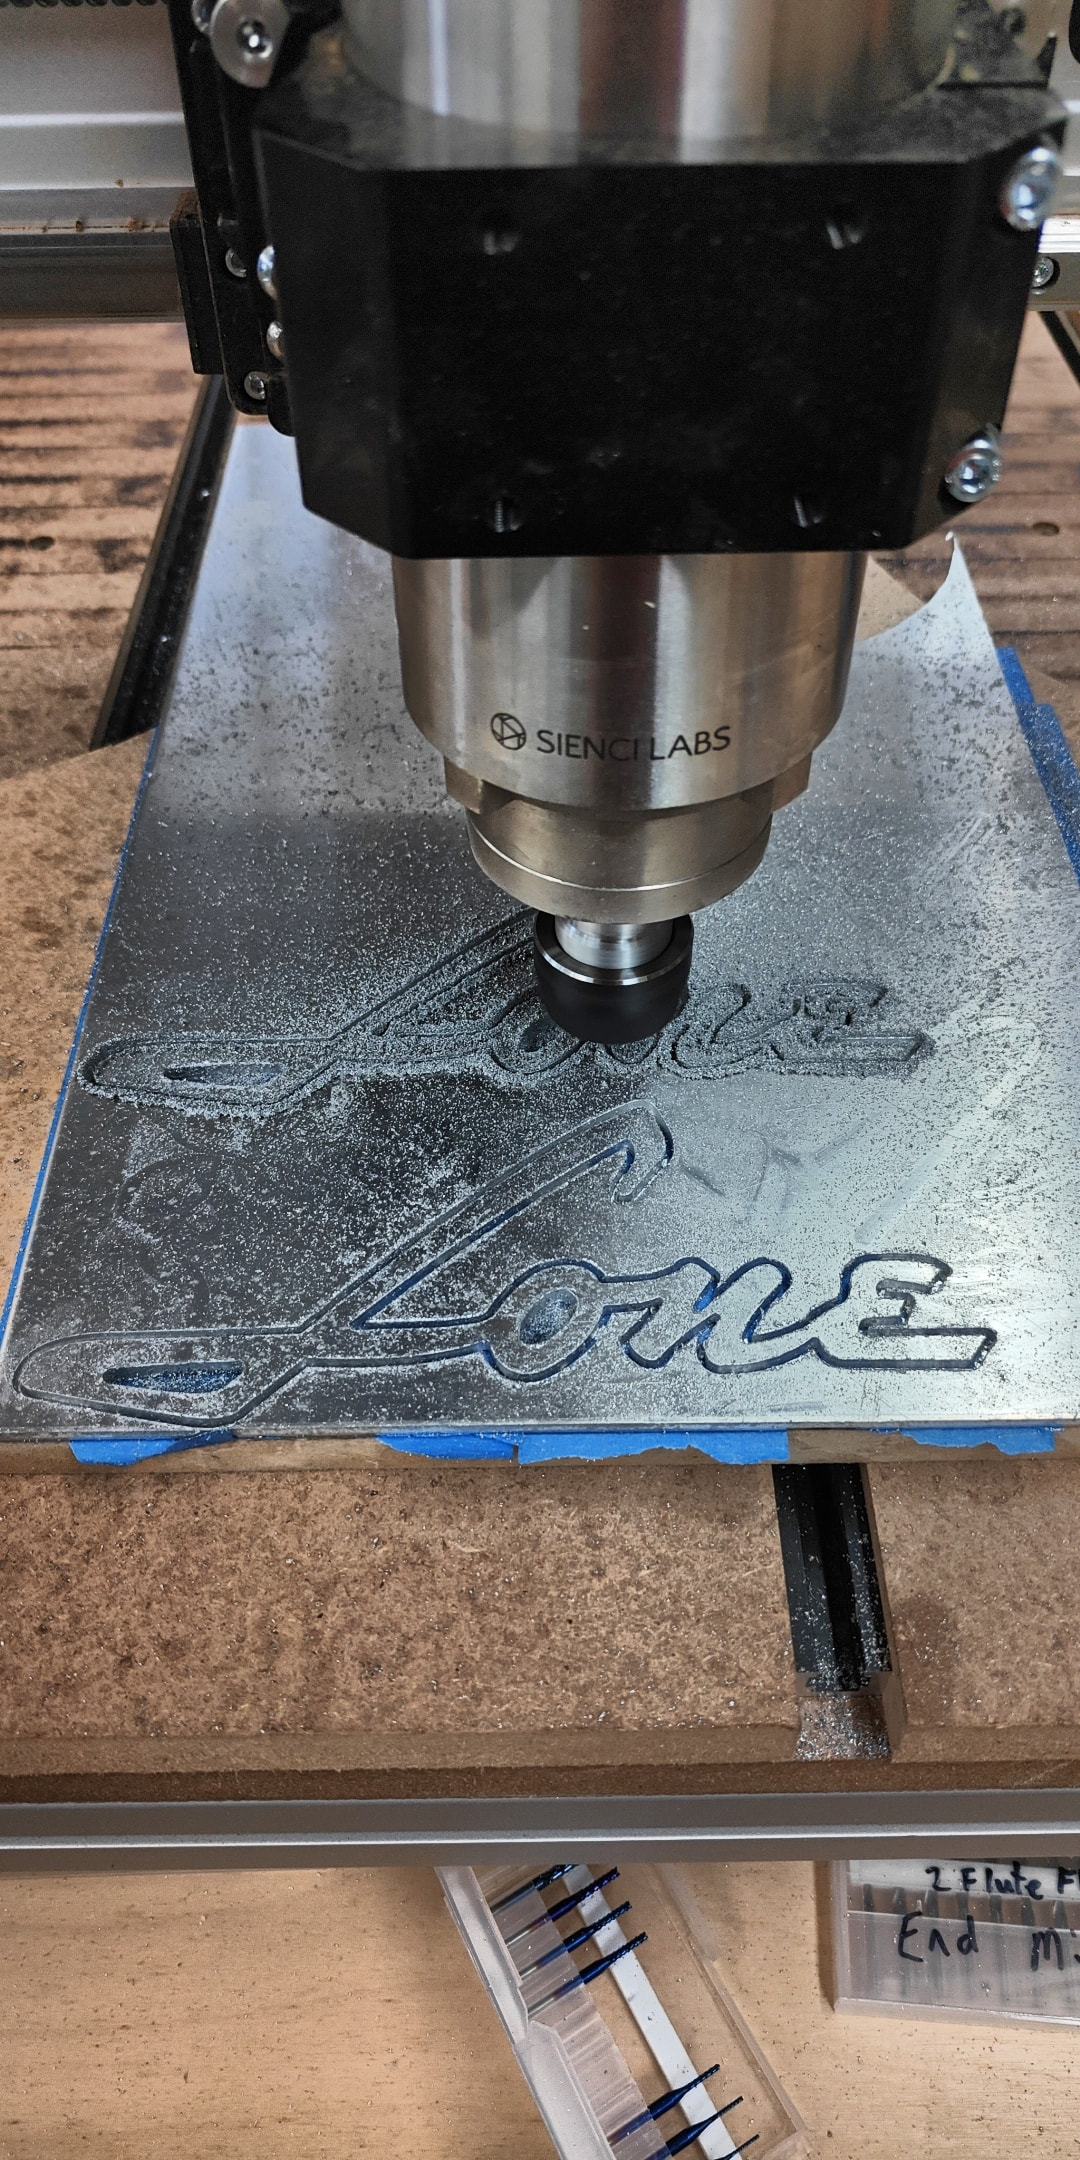
  • 4x4 Altmill

I’m looking for advice on everything.

  • I’m currently using the “Quick Engrave” toolpath, but I’m unsure if this is best
  • Is this best with Outline carve or Fill carve?
  • Depth of cut? I have no idea what’s best for this.
  • Spindle speed? What’s best for small engraving on 5052 Alum?
  • Bit selection? I have small end mills ball nose (down to 1 mm), I have tapered ball nose bits, vbits, etc. pics below are using a 1.5mm end mill. This choice might also impact the speeds and feeds.

Basically just looking for advice on how to cut this on 1/8” 5052 Aluminum as I have yet to do anything on Aluminum.

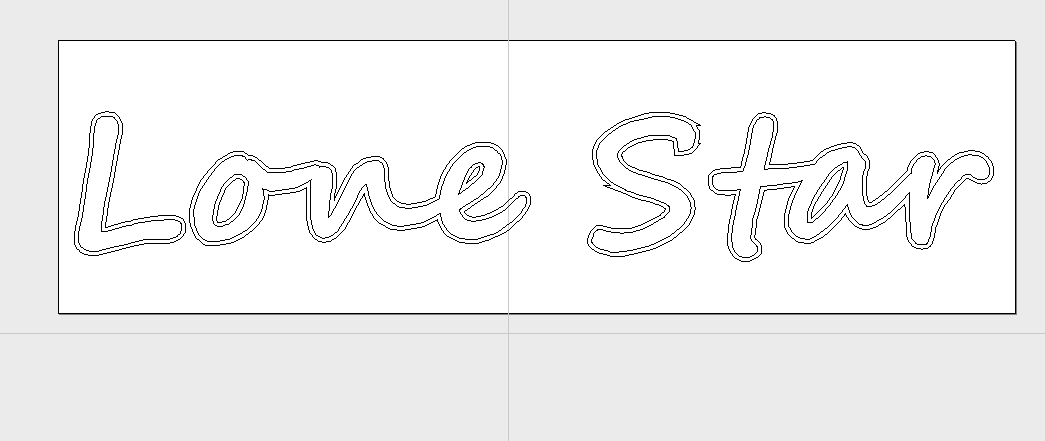
Here’s what it looks like in Vcarve Pro at the moment.

Thanks in advance.

@gabo Did you want to cut it out completely or just a recess ?

Just recess. I currently have it set for 0.03” depth and to “outline” carve. But it can be whatever looks best.

I’ll probably use some type of black fill for it. I’ve looked at laquer stik. Whatever it is needs to be waterproof and UV resistant as it’s going on a boat.

Thanks.

@gabo I can’t really help you for the endmill choice since I don’t have enough experience. A single flute flat endill and a pocket toolpath is what I would use for the clearing pass. Not sure what to use for the finish pass.

I’m partial to epoxy so would have suggested that for the black fill. But a lacquer like car paint would work equally well I guess.

Oh, didn’t even think about epoxy!! Thanks for that as that’s probably a good idea. Epoxy would probably be more durable if I can find the right one.

I might trim it down to just one letter or maybe the little star in the center to engrave that a few times on some scrap. I can probably get it down where I only waste a few inches of material. That would allow me to figure out bits and depths.

I just figured this was a really common thing to do, so maybe someone who has done it many times might have some advice. Thanks.

Well, after some back and forth with my friend. He decided he wanted it cut out. Which makes it into 3 pieces, each word and the little star.

After breaking three bits and adjusting, I finally got it cut.

These were cut out of 1/8” 5052 Aluminum, with a 1.8mm end mill, the blue ones in this Amazon kit, Genmitsu 40pcs End Mills CNC Router Bits, 1/8" Shank CNC Cutter Milling Carving Bit Set Including 2-Flute Flat Nose & Ball Nose, Nano Blue Coat & Titanium Coat, MC40A: Amazon.com: Industrial & Scientific

In the tool database, I configured it with a pass depth of 0.05 mm, stepover 0.432 mm, 18000 rpm, feed rate of 550 mm/min, plunge rate of 150 mm/min for a chip load of 0.0153.

My file in Vcarve was in “inches” not “mm” so the pass depth wound up being 0.002 and took 67 or so passes. After the initial plunge cut, I could increase the feed rate in Gsender and eventually got to 200%. So that doubles the feed rate. I sprayed WD40 a few times during the cut.

I have no idea if this is optimum for these bits. But they didn’t get hot and they didn’t break and it got me through the project.

Prior to getting the info set, I broke two 1.6mm and one 1.4 mm bits. Not a big deal, I at least learned some starting points. Bummed I couldn’t get info like that from here, so I’m posting to help some other newbie :slight_smile:

Also, for holding down the aluminum, I used the painters tape and super glue method. Put painters tape on the spoil board and painters tape on the aluminum piece, then super glue them together. I was surprised how well it holds. Even the little star completely cut out wouldn’t budge without applying a heat gun.

NOTE: My friend is refurbishing a 1960s Lone Star boat. These will go on each side of the hull.

2 Likes

@gabo Nice job. Maybe you got lucky with your hold down method but I don’t think I’d use it along with WD40. It may dissolve the adhesive in the tape. It did when I used it with rubber-based double sided tape.

@gabo The Sienci tools database has feeds and speeds for aluminium. That’s what I used for the cut I did.

@Chucky_ott I agree and thought the same. I tried to keep the spray on top of the aluminum and for the most part was pretty successful at that. I cut out all the pieces using that method and had no problems at all. They were stuck so well that after removing the outside part I decided to sand them while they were stuck and they never came loose.

But yes, I would still be very careful not to get much of the WD on the tape. With the little straw attached to the WD, it was pretty easy to just ease out a little at a time in the cut without it getting all over everything.

Also, I bought some double sided tape. A brand that was recommended on a YT video of doing some CNC work. But that didn’t hold at all. I have one “star” that has a gouge in it from coming loose when it went through. I was completely surprised how much better the “blue tape” and “super glue” method held. It was totally rock solid.

@gabo Next time I cut aluminum, I’ll try just blowing air with my compressor. It will have the added benefit or blowing the cuttings away.

I might try that too, or just use my dust collector. It creates quite a bit of air flow and sucks the cutting right up. With the settings I had, the bits never got hot at all and there were times when it ran pretty dry. Especially at the beginning because I wanted to wait until there was a groove to put in the WD. I was just being extra careful after breaking a couple of bits.

That kit still has some tiny bits, the smallest is 0.8mm. I’m not sure what I can do with that bit without breaking it, it’s tiny.

I looked at that, but the bits were so small I had to reduce some things. That chart shows a 1/8” end mill (smallest they list) with a pass depth of 0.2mm. That broke these little bits right and left!! Notice my pass depth was 0.05mm.

@gabo I wonder how well it would work using two end mills. 1/8" for roughing and a smaller mill for the inside sharp corners.

Unfortunately, a profile toolpath in vCarve only allows you to use one end mill. So you’d need to create one tool path for the 1/8" mill and another for the smaller mill. And accept the fact that you’ll be air cutting a lot with the smaller mill.

An alternative would be for you to use a pocket toolpath. That allows you to specify multiple mills. The smaller mills will only cut what the large mills can’t. To do this, you’d need to create an 1/8" offset of your vector to create a “pocket” that you then carve out.

Interesting thoughts. Would be a lot more work to set it up, but would decrease time. I don’t have enough experience to know whether it would improve tool life. Does a larger tool last longer than a small one? If both are set up properly I’m not sure.

But any tips and advice on doing things in Aluminum, Copper, or other metals would be great. I also found out that 5052 might not be as good as 6061 for CNC work. I read that 5052 is more “gummy” and doesn’t work as well, but I didn’t have any problems with that.

So much to learn…

Dunno, but it is less likely to break. Another option would be to use a tapered ball nose. But that will mean your edges will have a 5° angle (or whatever your TBN has). Sometimes it comes down to the tools you have.

1 Like

That’s for sure. I thought about using a tapered ball nose. The only reason I didn’t was my tapered ball nose was a lot more expensive than the cheap Amazon ones I bought, so I wanted to learn on those! haha

1 Like

Unfortunately, a profile toolpath in vCarve only allows you to use one end mill. So you’d need to create one tool path for the 1/8" mill and another for the smaller mill. And accept the fact that you’ll be air cutting a lot with the smaller mill.

Maybe create a small (0.125mm ) offset (inside and outside) of the original and use it to create a vcarve toolpath that will create a chanpfered edge with sharp corners where sharp is needed. This will give the illusion of a sharp cut while not needing small bits to cut air andor break. Due to the offset being equaly inside as to the outside, the deepest part of the vcarve will be at the cutout line.

Allowing the vbit to not go deeper than say 0.05mm will prevent it from digging to deep. It will create a wee striped champfer but that may well be more a feature shattering sunlight all over the place, than something that needs to be sanded off.

?

2 Likes

@Spamming_Eddie That’s a good idea!