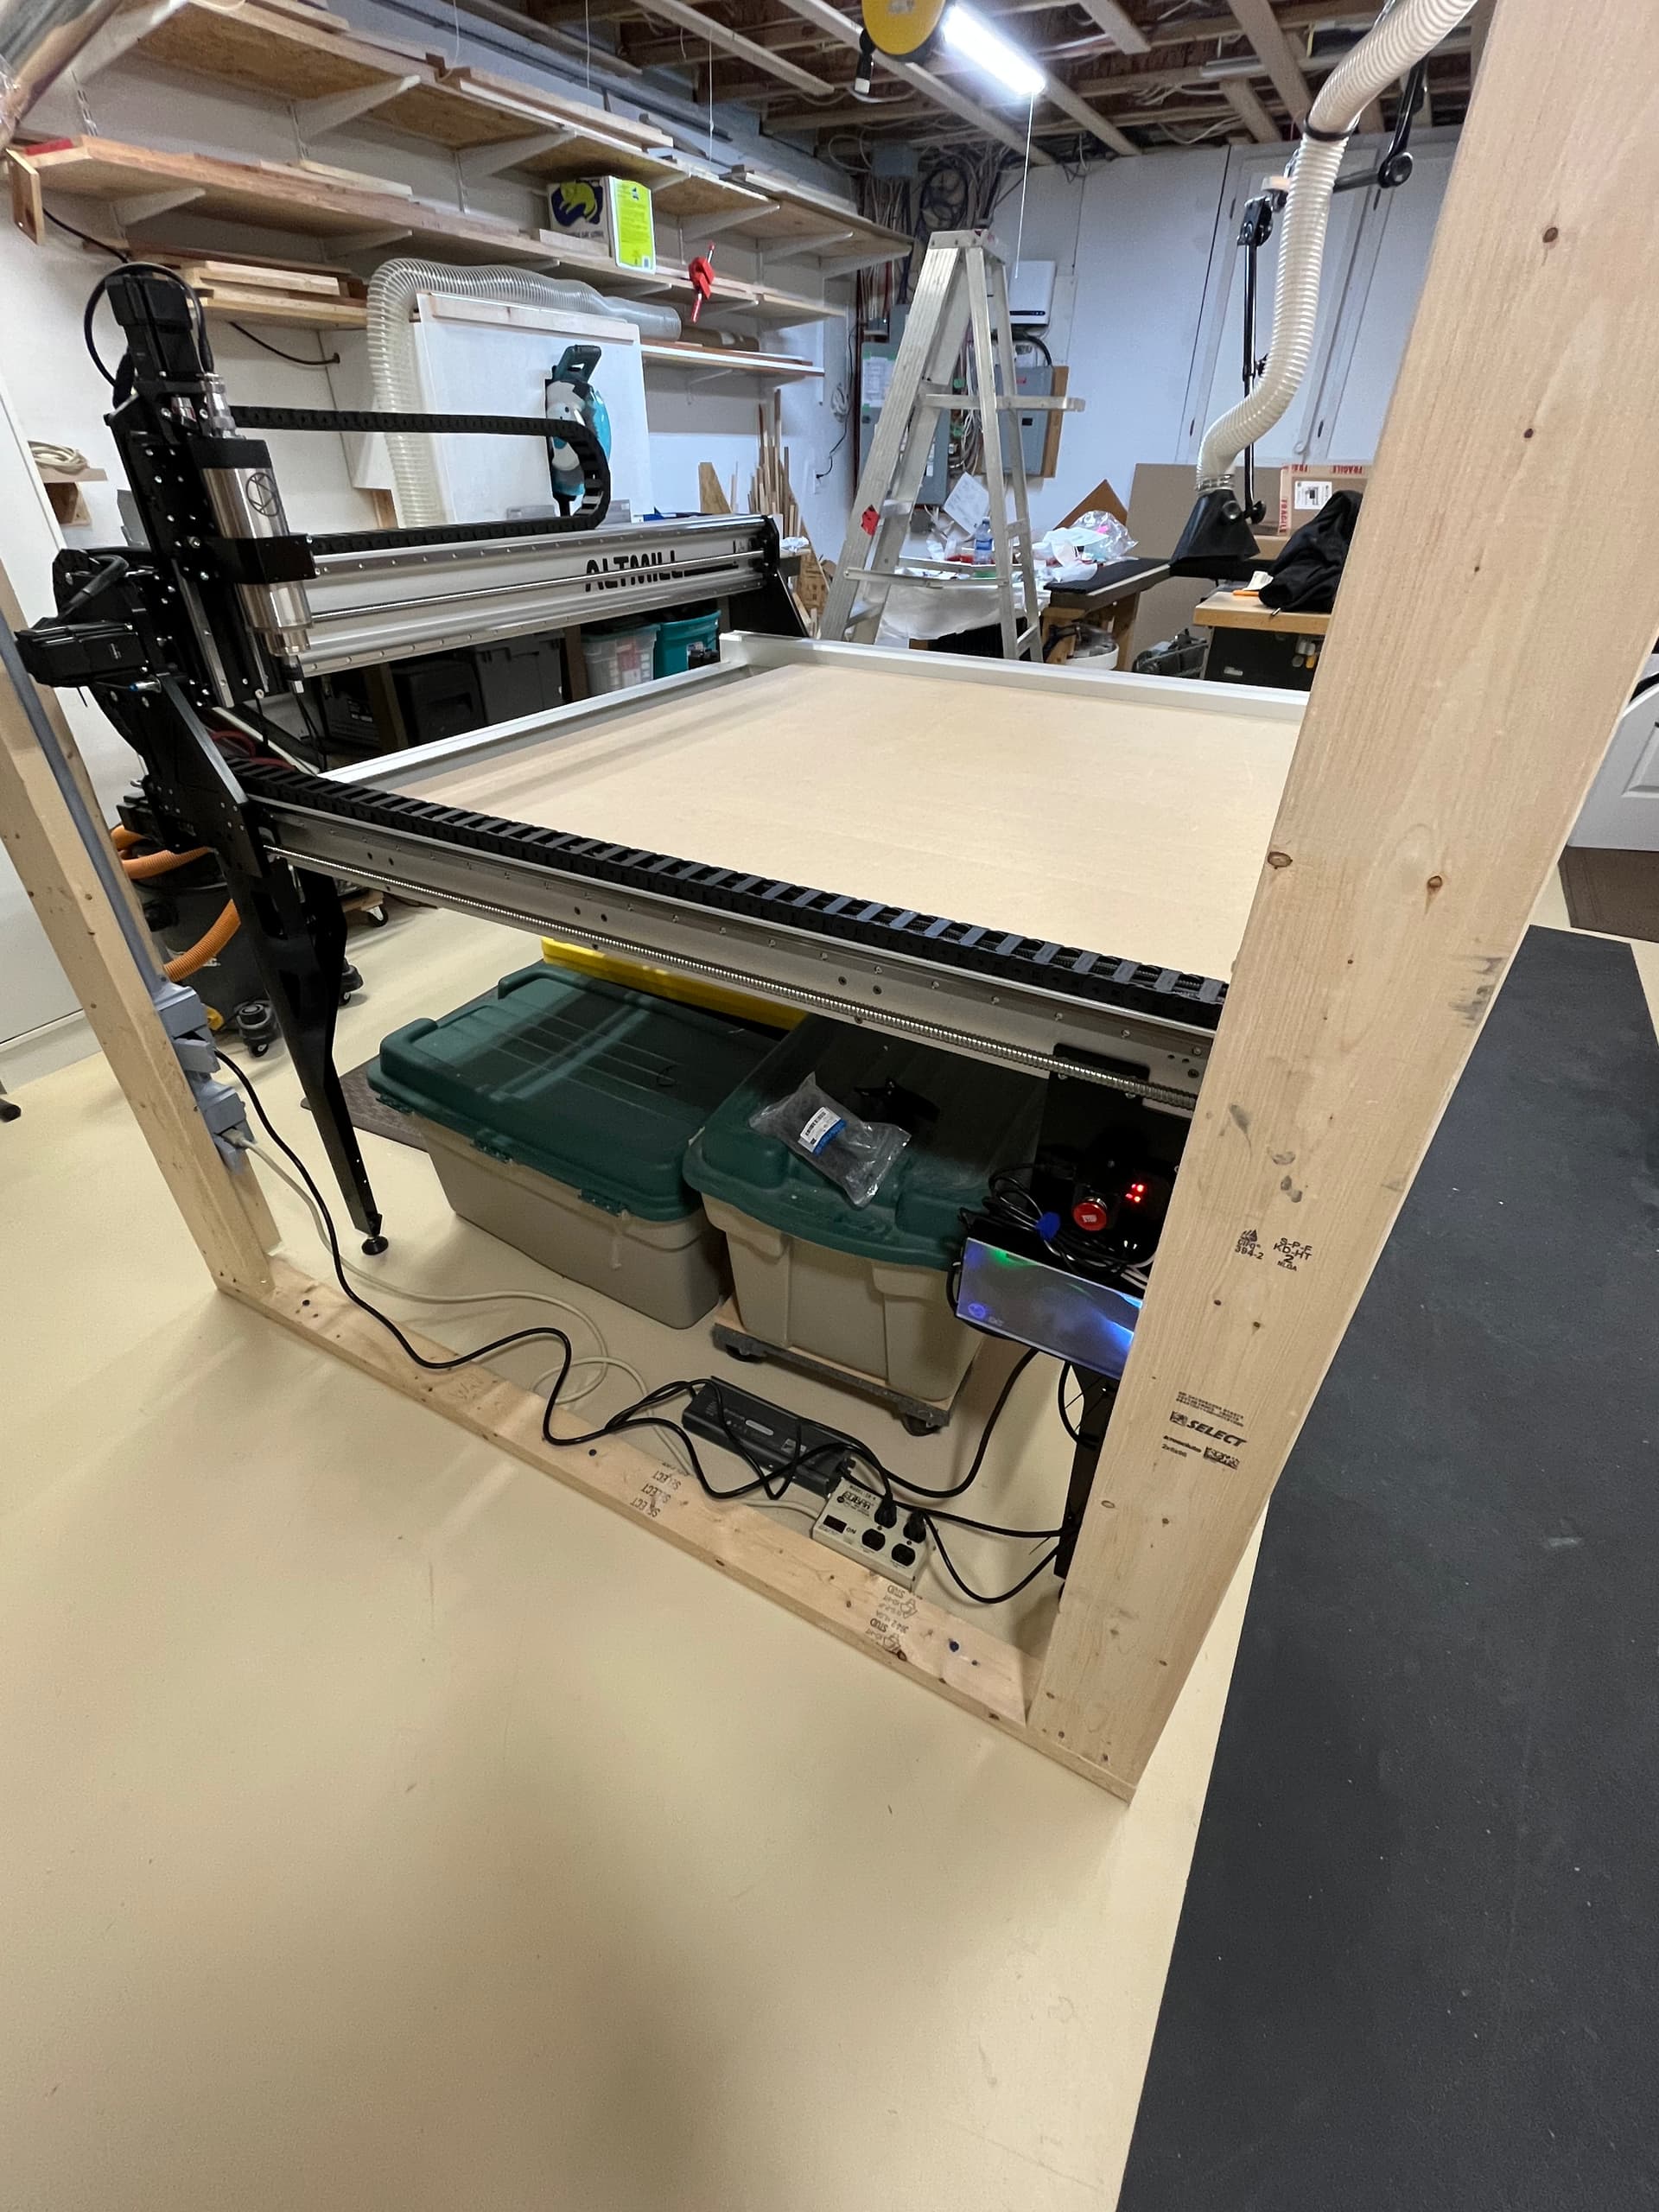
Hi Folks. My Altmill arrived over a week ago but I was too busy to get it completed until today. Today I finished installing power for the Altmill. Mounted the G Control to the Altmill, and got the controller and spindle configured after downloading G Sender 15.3 . Right now it is running the Spindle break in program. No issues so far, all seems good. One thing I di notice was a low level noise coming from all the stepper motors when the controller is on but the machine is not moving. I assume this is normal but please let me know if it is not! Since my Altmill is more or less in the centre of one end of the room I built some wall framing on the left side which allowed me to run the 2 power circuits in conduit down the framing and attached the outlets there out of harms way. My other reason for doing this was to eventually provide protection from the moving x axis assembly and its motor which stick out 4-5 inches into what is essentially a hallway now in the workshop. The good folks at Home Depot cut the 3/4 mdf to size for the baseboard on their panel saw. Half a sheet of MDF is not hard for 1 person to handle but the entire sheet would have been a bear to maneuver into the basement. Screwing that down will be the first job tomorrow. Have the t rail kit to install after that. It shouldn’t be too long before I can actually put it to work.
That’s the truth! I had no experience with MDF until I bought my LongMill. I grabbed a full sheet thinking it would be similar to plywood. Surprise! OMG this weighs a ton!
My first thought when I saw the first picture was “Is this going to be a giant enclosure?”. ![]()
Congratulations on getting your AltMill together.
WOO HOO! hope to bring mine to life soon as well!
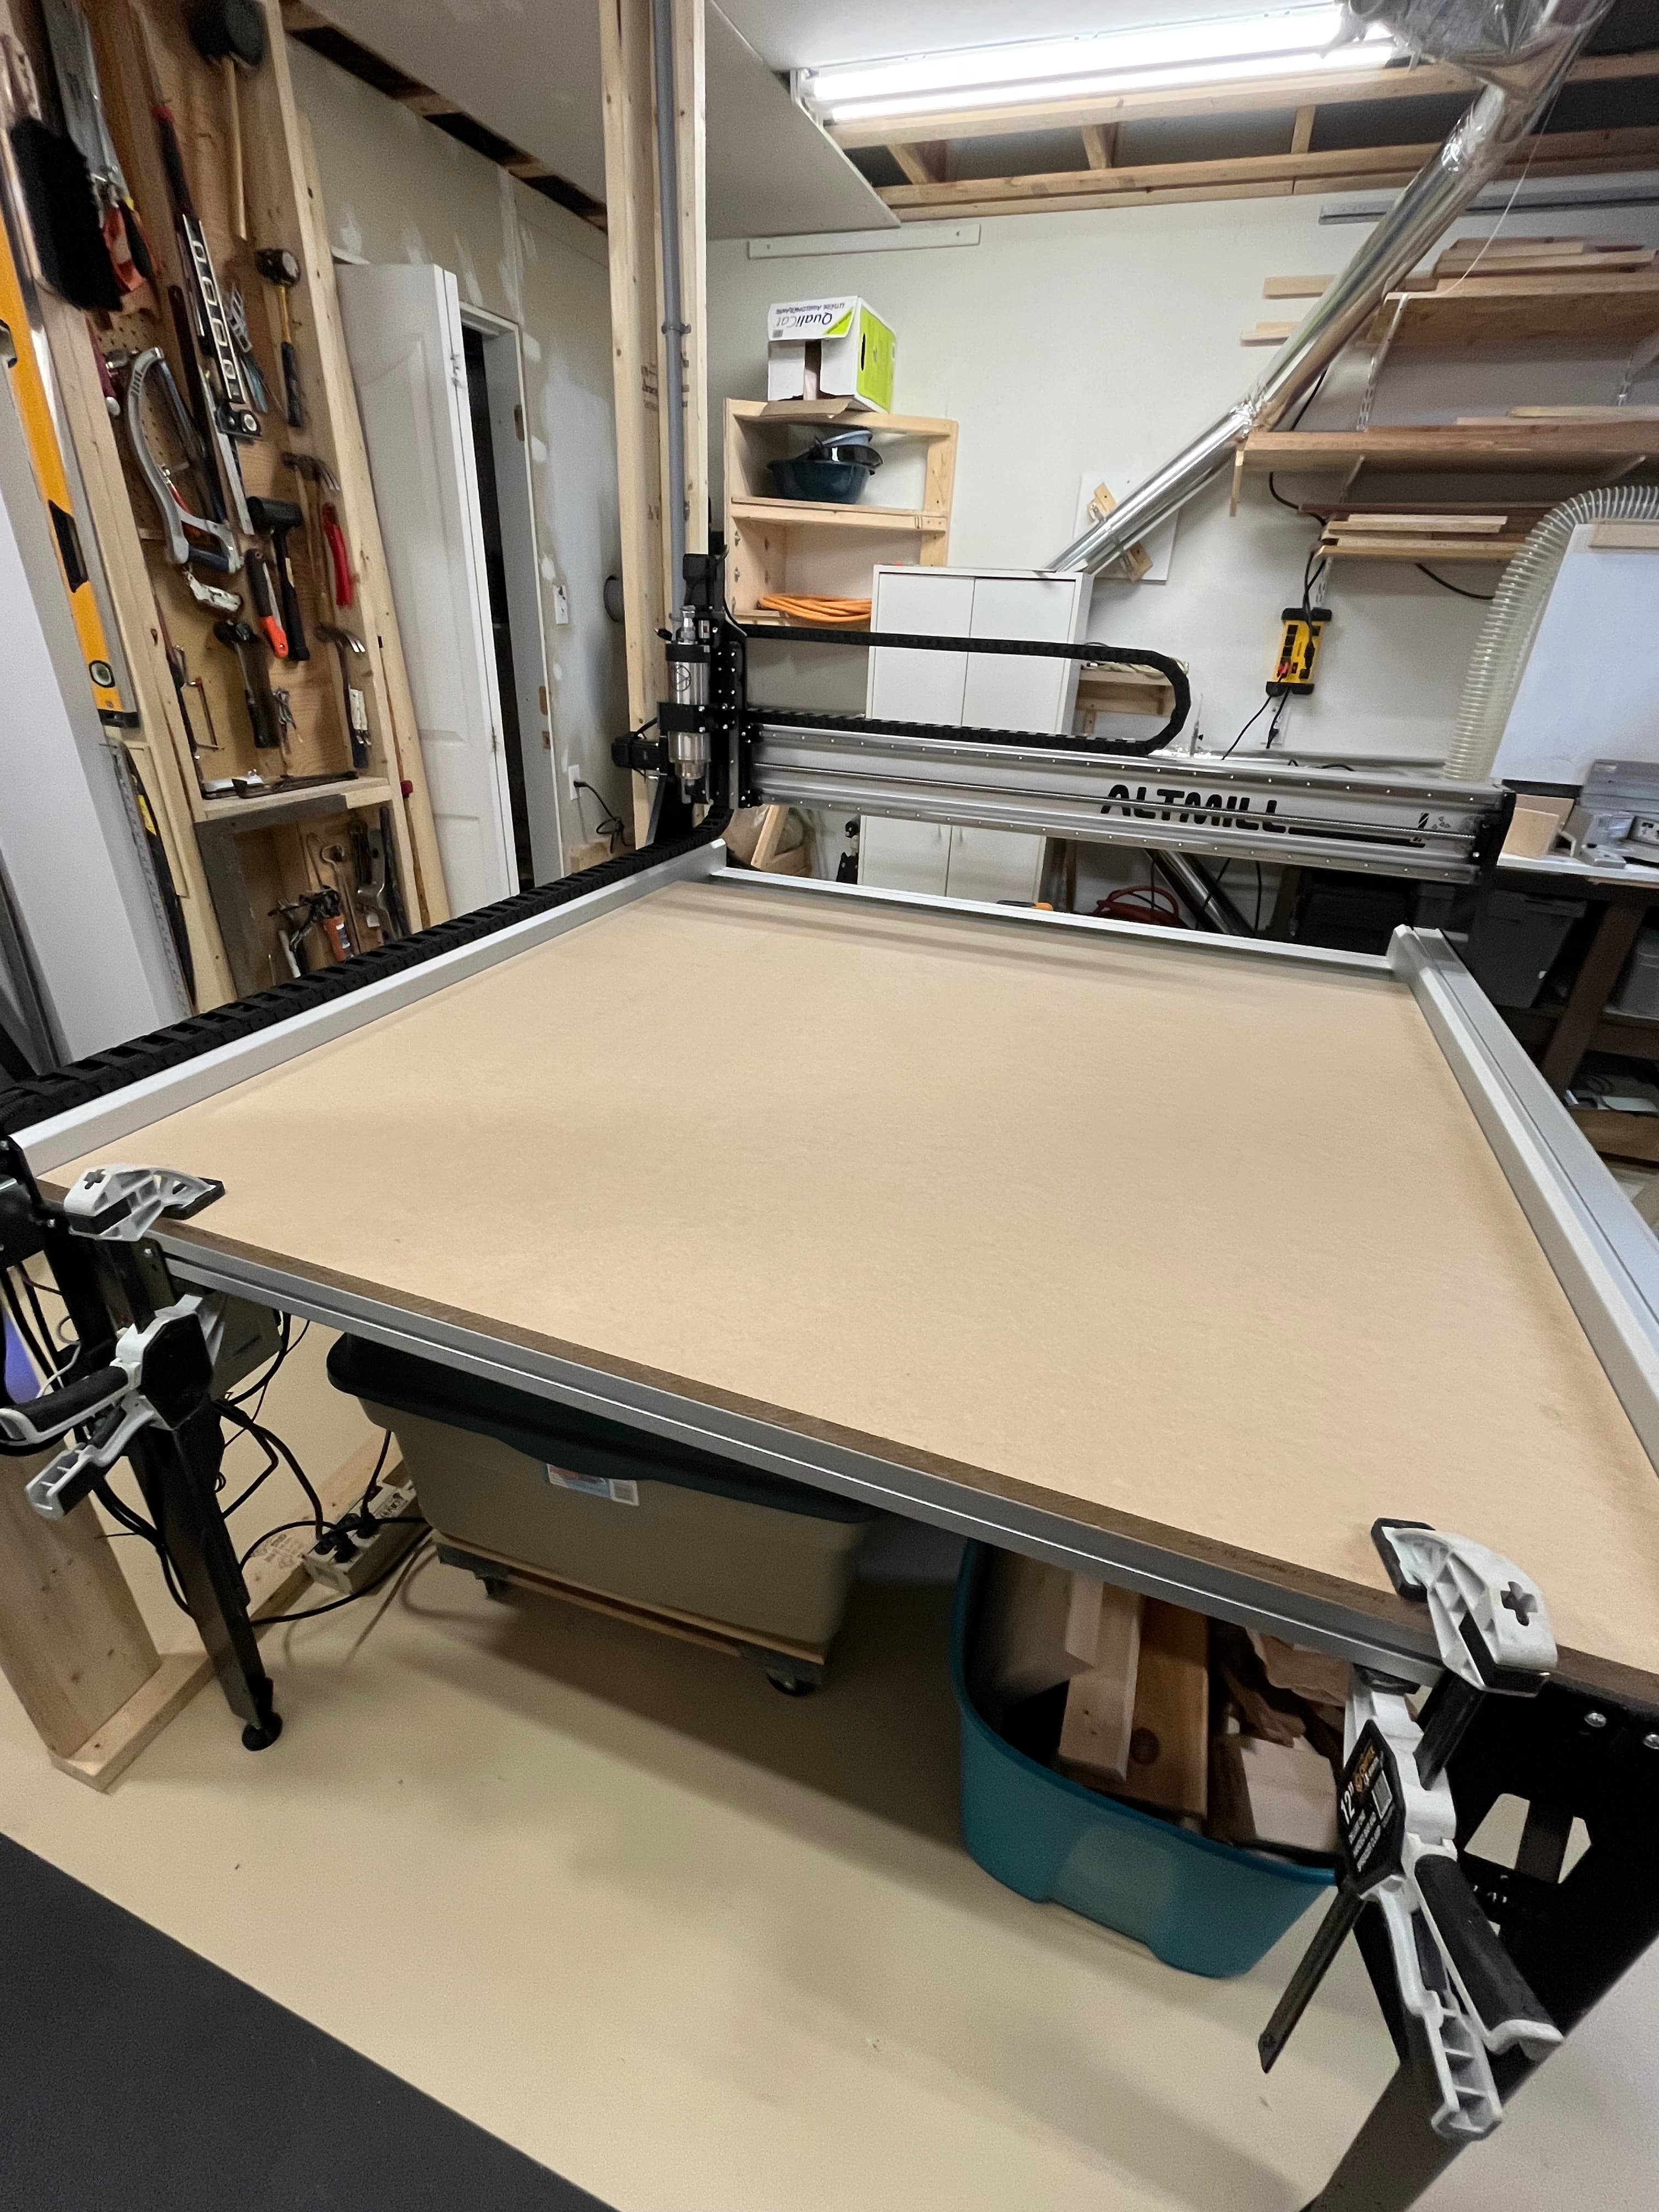
Giant enclosure— Good guess Michael! I have it set up so I can do just that. More of a stall, as in horse stall. I’m not sure how much noise and dust will be a problem. The initial wall on the left side is for safety and to give me a way to get power to the middle of the room without cords going across the floor. I put 2 sheets of drywall on the ceiling and I can then make it into an enclosed area if needed. Dust collection is roughed in on the ceiling to the centre rear of the machine. I have a pretty strong collection system so I am hoping dust won’t be a big issue. Noise is another matter. I did the spindle break in and it runs quiet compared to a conventional router. When cutting things are much louder of course and more high frequency content in the noise which makes it more annoying. Got the T tracks and MDF slats installed this morning. I guess surfacing is next!
Cheers
Brian
Good news Headshop! My advice is to lay out all your parts and hardware first then with the instructions from the website to guide you take your time and it will be a good time. One trap I fell into was using the wrong length of bolts on the gantry side panels. I used longer bolts that would not tighten properly. I didn’t know that because you leave them loose initially until the point where all fasteners get tightened. I read the text but then visually selected the bolts based on what I thought they should look like. The correct set of bolts was only a few mm shorter. No big deal as it only took a few minutes to swap them but I should have been paying attention to the label on the parts bag. Overall it really was a fun project. One reason was the well thought out assembly instructions. I also was not in a hurry and used the assembly process to study and learn about the machine structure and the design choices made.
Cheers, Brian
Wow. I tried to get here through the link in my email but Malwarebytes blocked the link as being suspicious then Bit defender blocked it then finally windows security blocked it! Think Sienci Labs need to update their security certificate! Anyway, Brian, Thanks for all the advice on the build out! it was most appreciated. I think its time for Brian and Sienci Labs to do another MK2 build video as there are enough changes with the machines shipping from July forward to warrant a new video. Maybe call it MK2A? I don’t know how long it took me to figure out the bump stop changes. But I eventually got there. Luckily I did use the correct size socket head bolts on the rail block. I learned not to trust the MK2 video after spending so much time on the bump stops. I watch the video then verify in the assembly manual and if there is a discrepancy I always go with the manual!
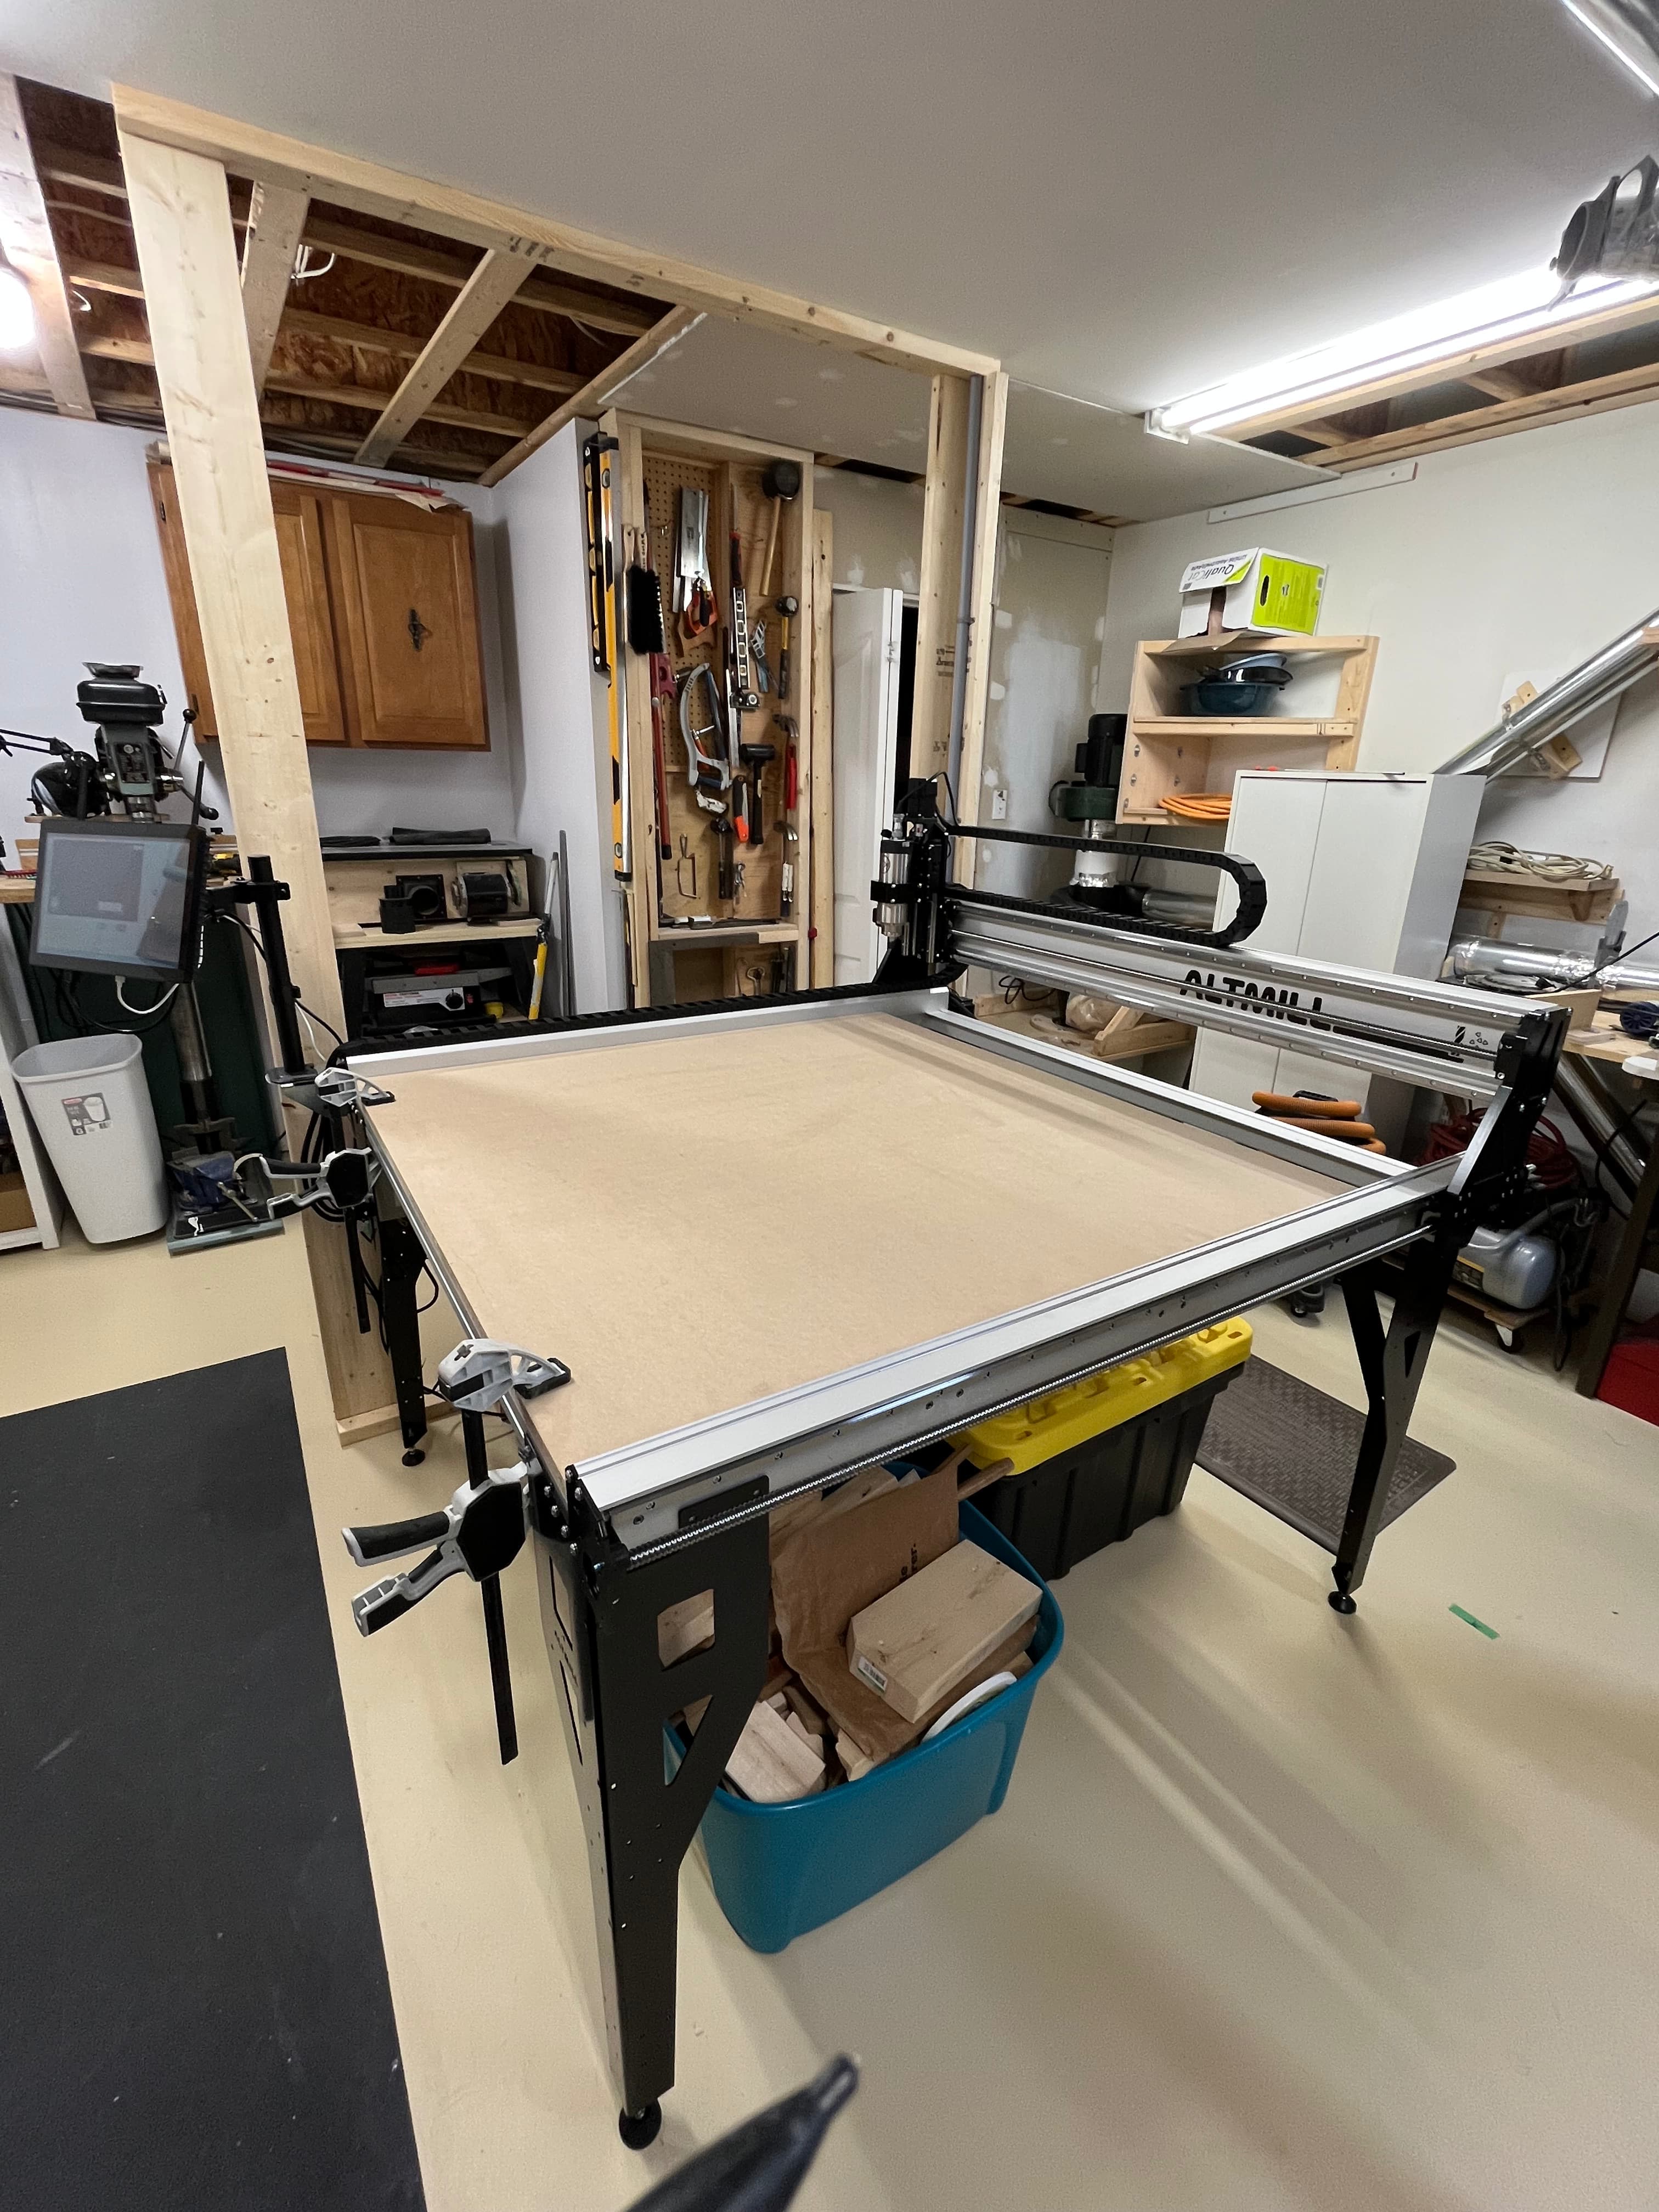
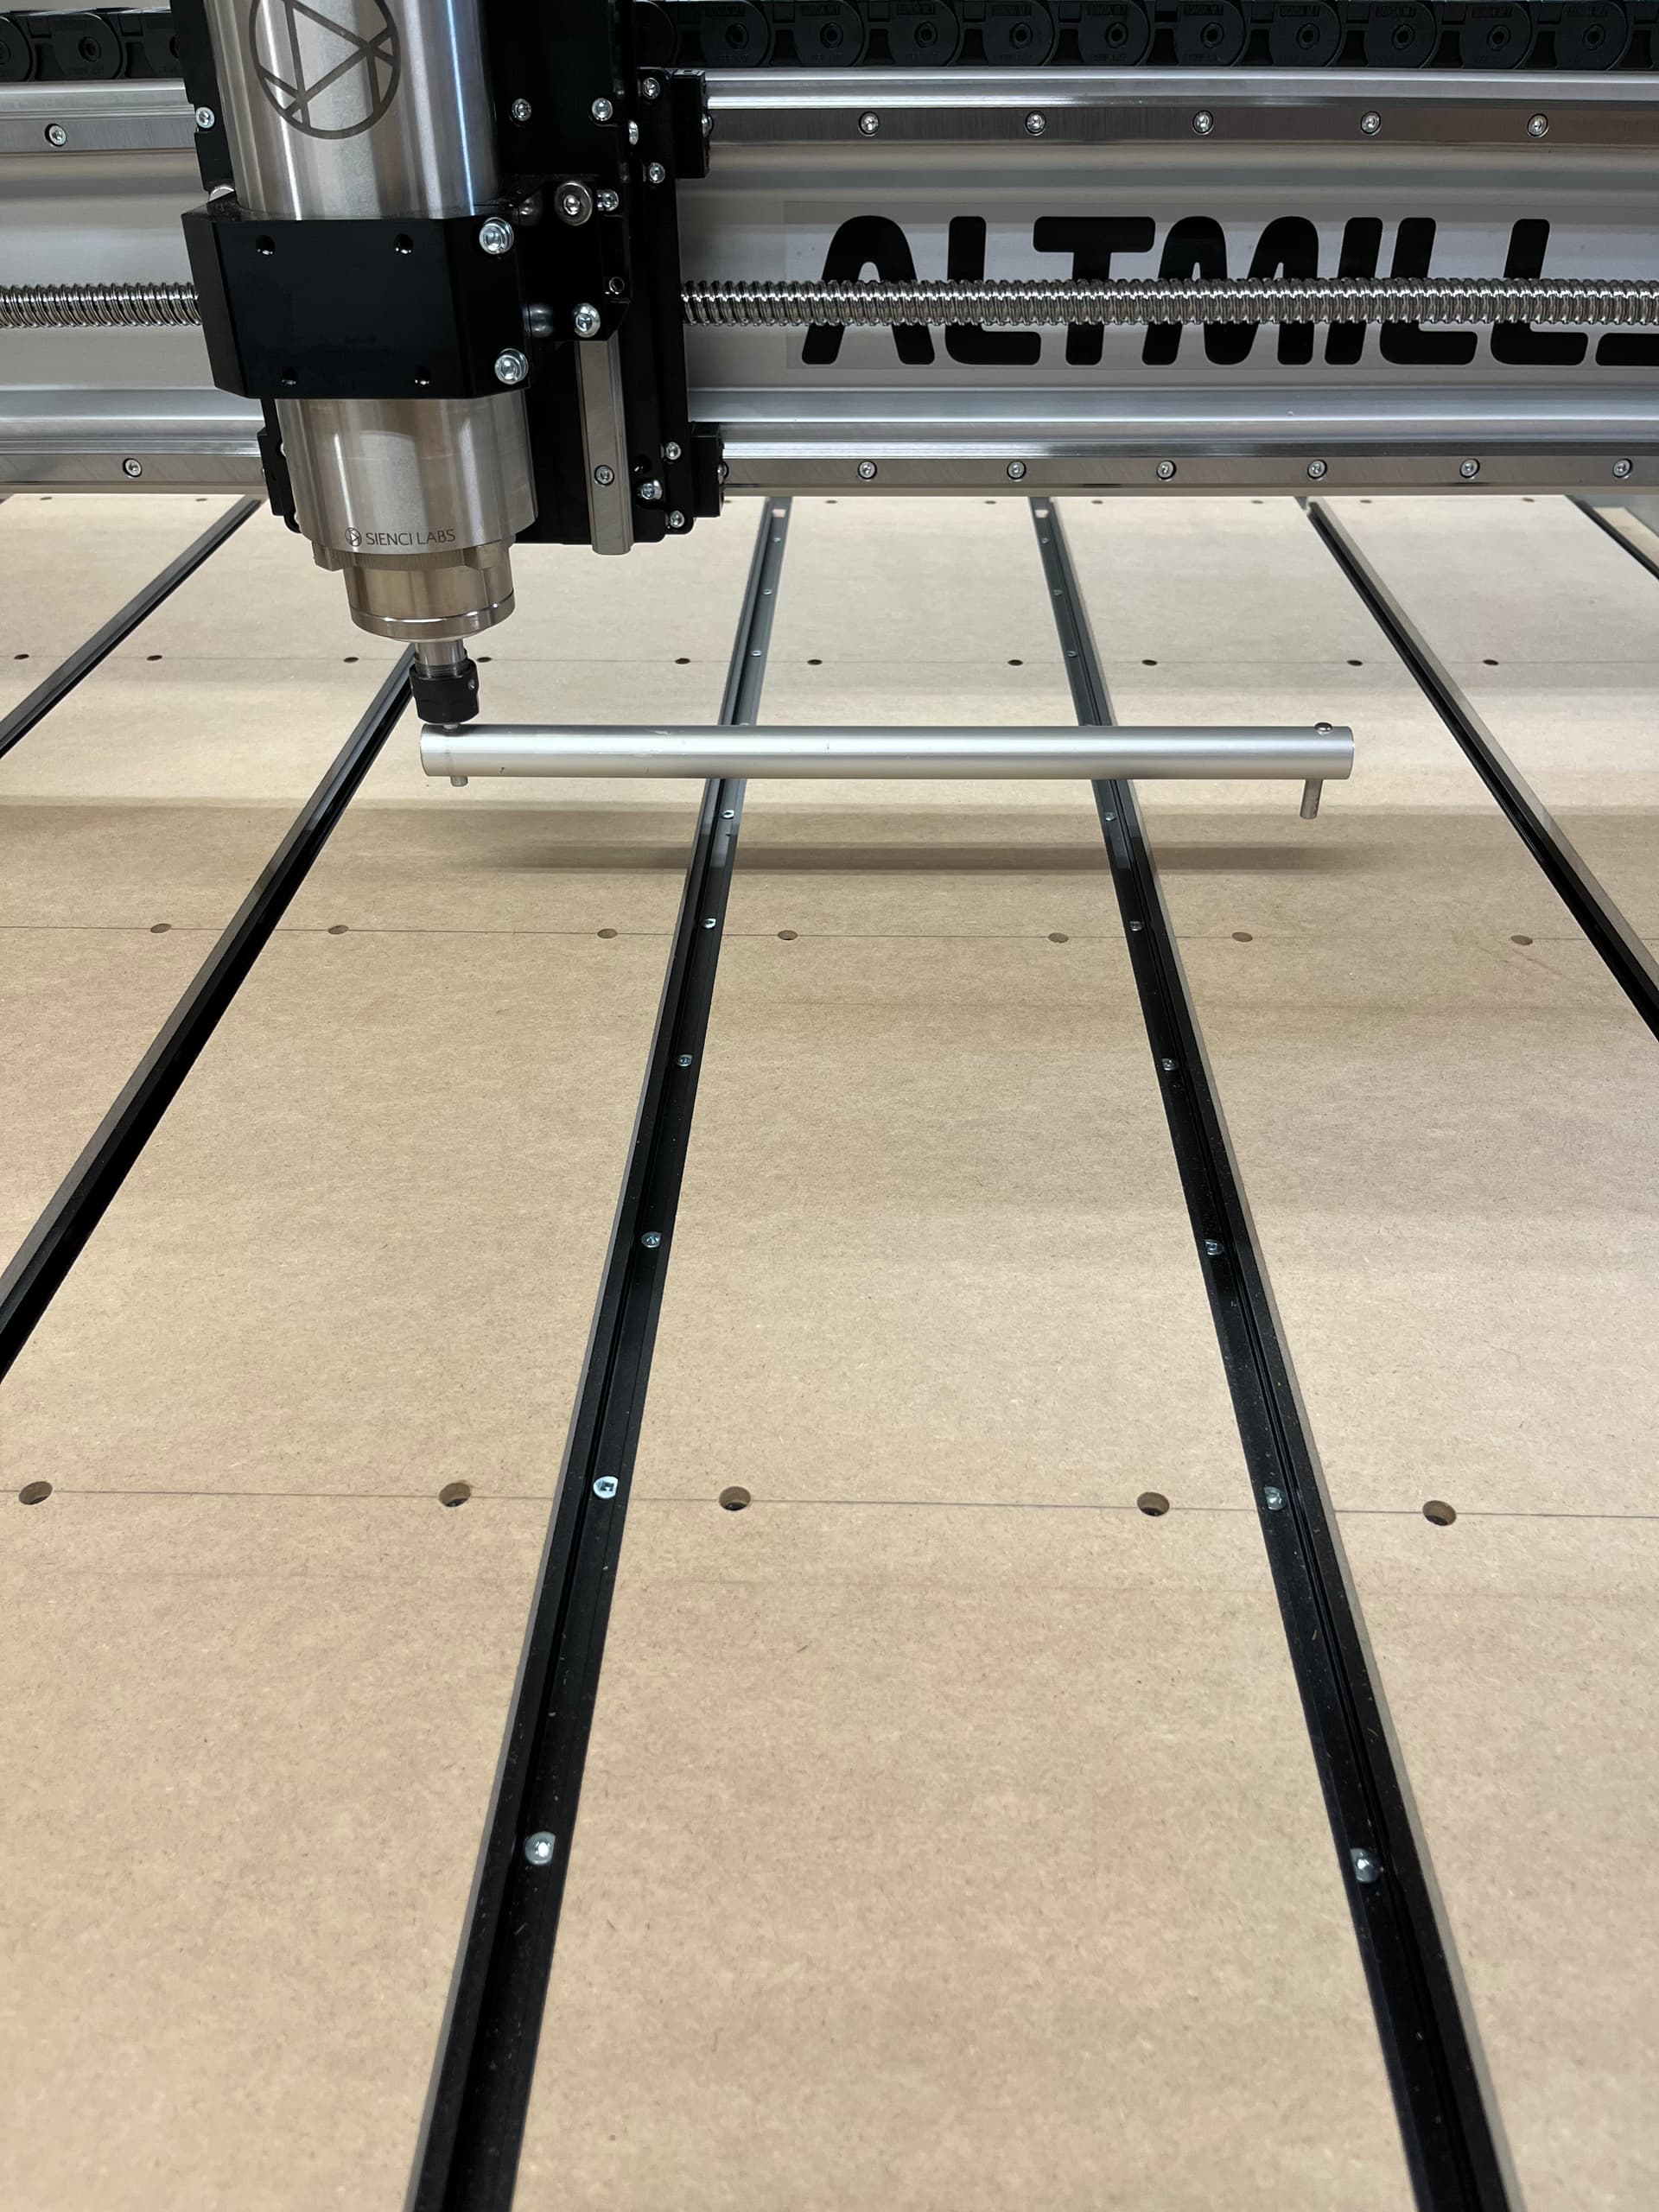
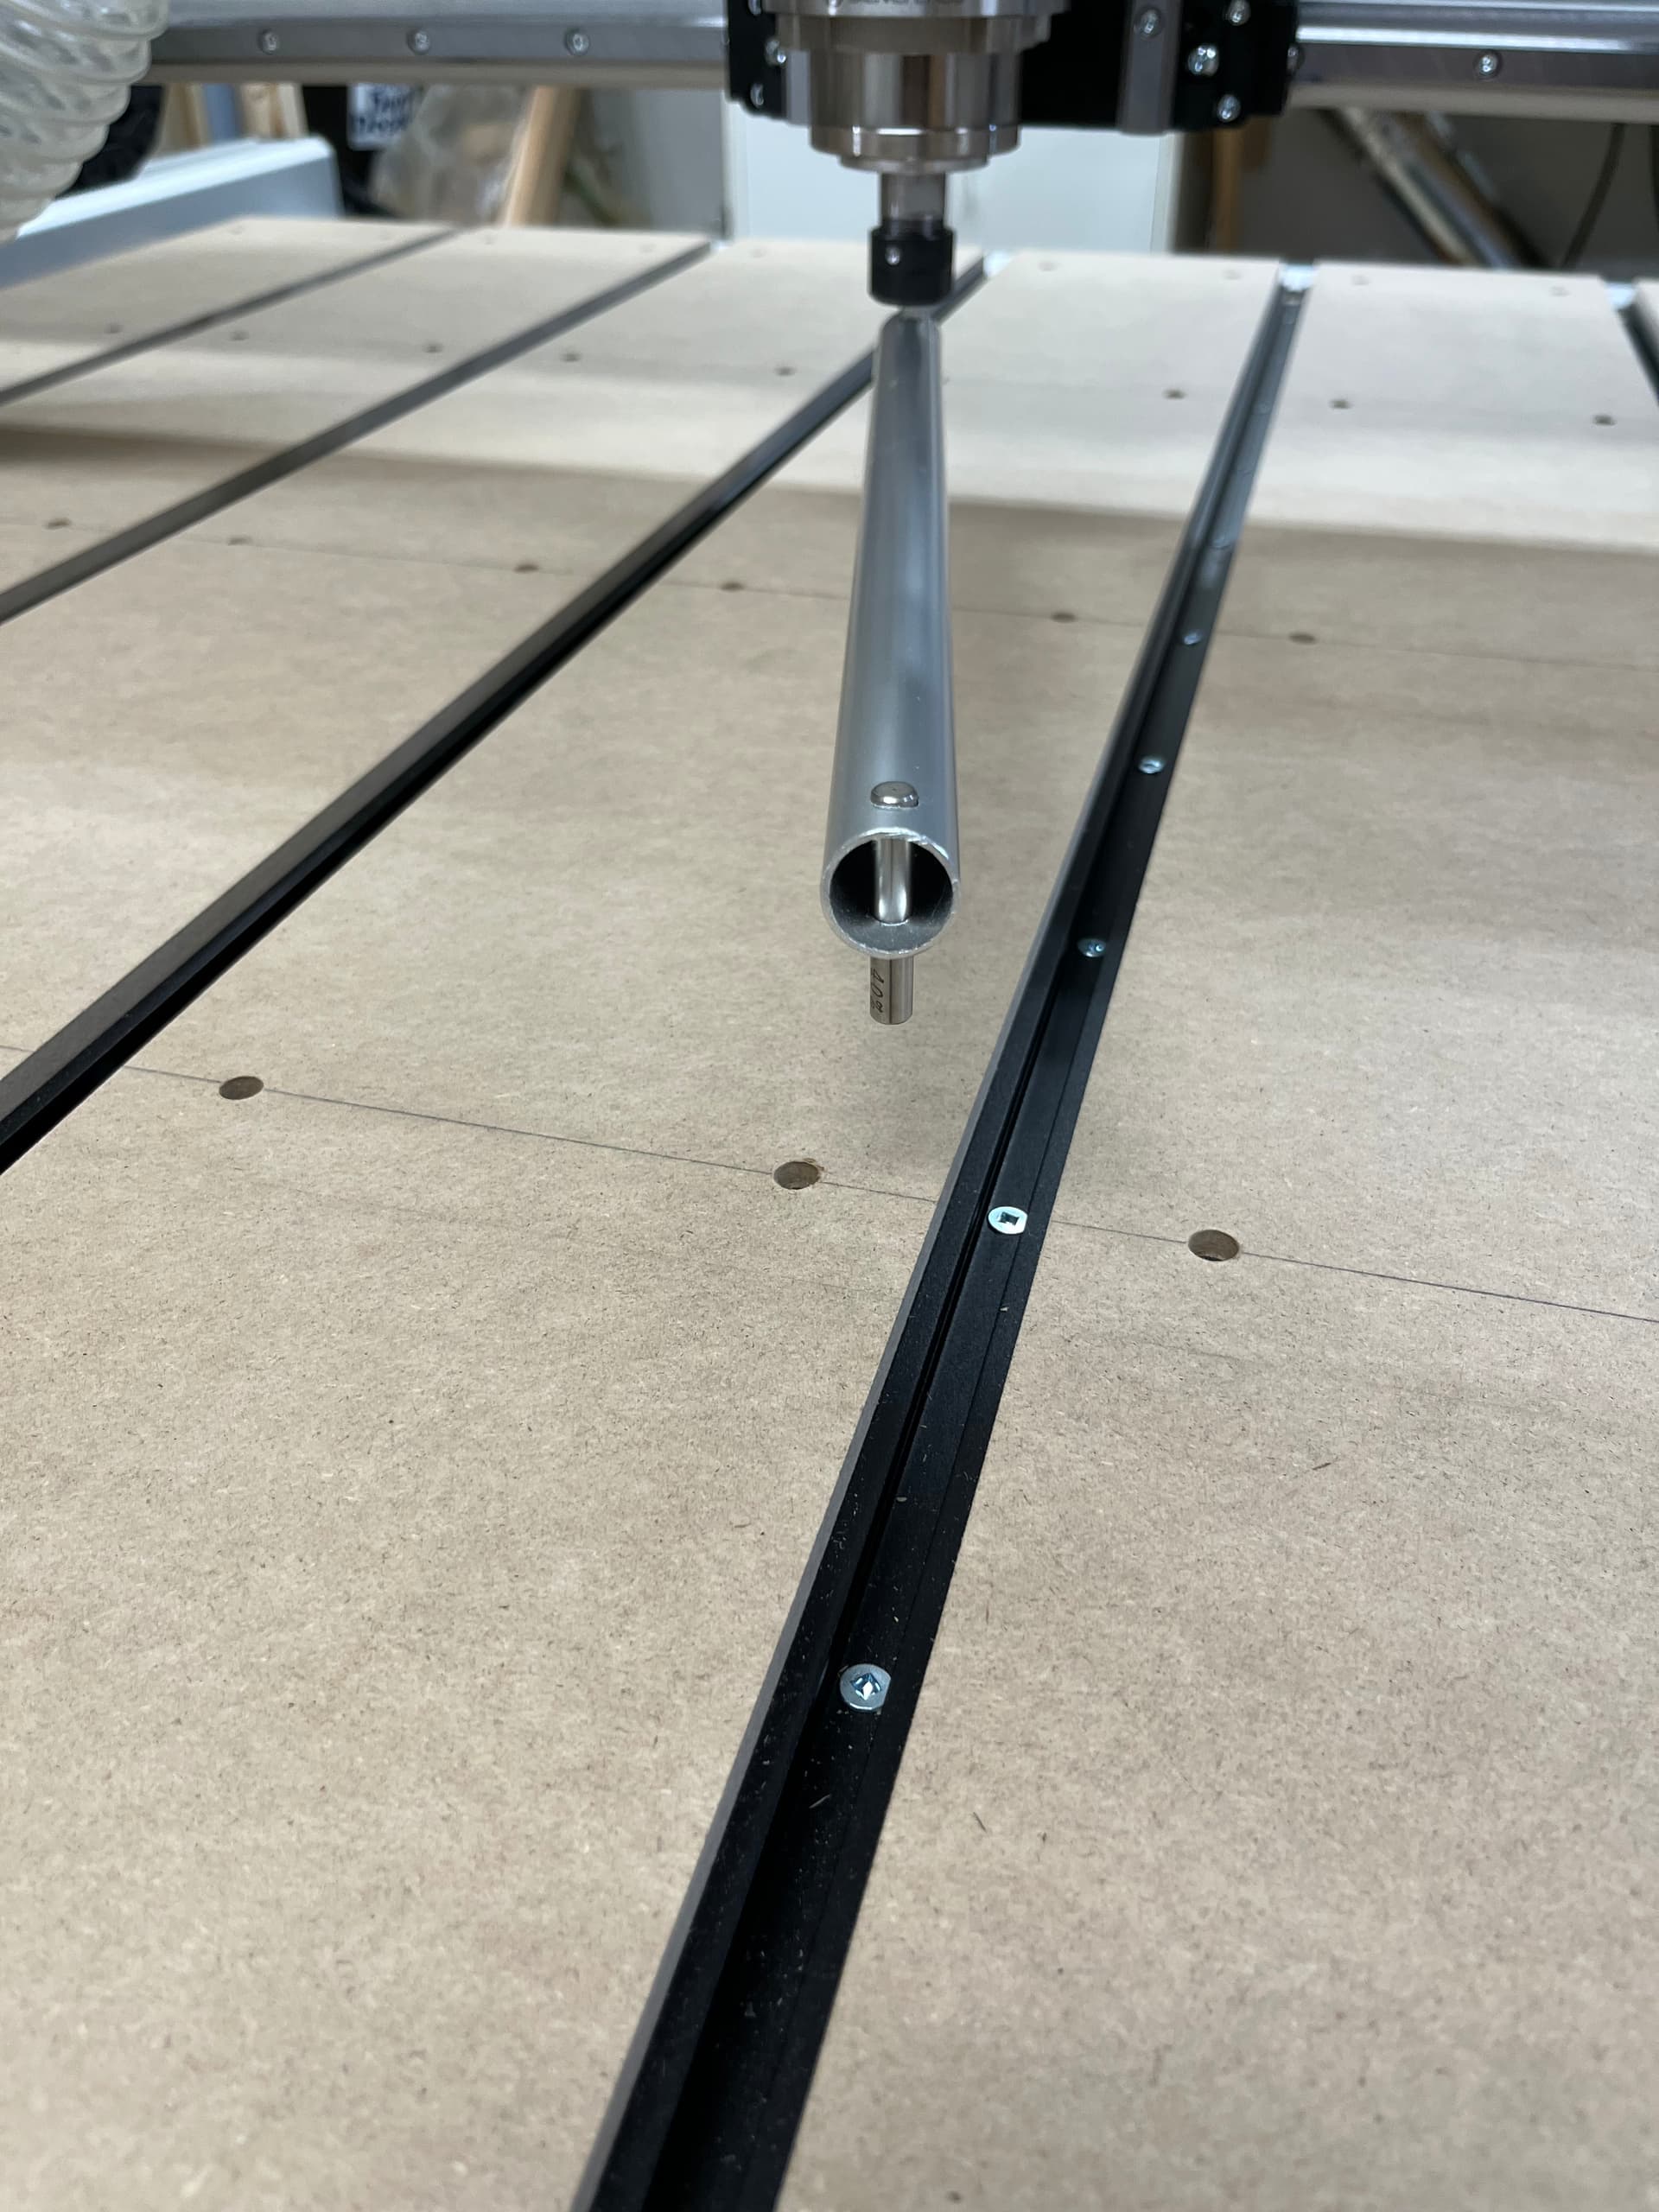
I got the T ttrack and 6.125”W mdf pieces screwed down. Adjusted the tram pretty close using the video from IDC woodcraft and then went to get the surfacing done. I had some strange codes appearing on the VFD. The code F125 came up and I couldn’t get rid of it. The manual says it is an entry field for overcurrent error response time. I wasn’t sure what was up so I backed up sand loaded the spindle break in program and it ran fine but F283 or maybe it was 238 was coming up on the display when running. Those codes didn’t seem to exist in the manual. I reloaded the surfacing program set to .5mm and 40% step over and set the limits for x and y so the dust boot would not be rubbing and hit start. Surfacing wnt without a hitch. No alarms, nothing got hot including the x motor which gets pretty much a continuous workout. You could see slight marks in the flattened surface but you can’t really feel any ridges. I know the tram is not perfect in the Y axis so I will revisit that and see if I can get it closer. I made a DIY tram bar using a piece of 3/4” ID aluminum pipe and 2 pieces of 1/4” steel shaft. Used a 1,2,3 block as a reference on top of the spoil board to make it easier. So far so good. I need to re configure my dust collection hose as it was catching on the z axis motor cover. All part of the setup process.
Which Spindle and VFD are you running?
Hey Bfpca,
You are getting somewhere now. I think if you cant feel the lines in your spoilboard, your tramming has been a succes. The visual lines wont go away. It’s a result of milling a line in one direction and the otner one in the other direction. Trying to tram that away will be like chaging a ghost.
Time to make that beast throw chips around. Oh man it’s going to be epic!
Dean, I am running the old H100 VFD setup with the 1.5kw 120v ER16 spindle.
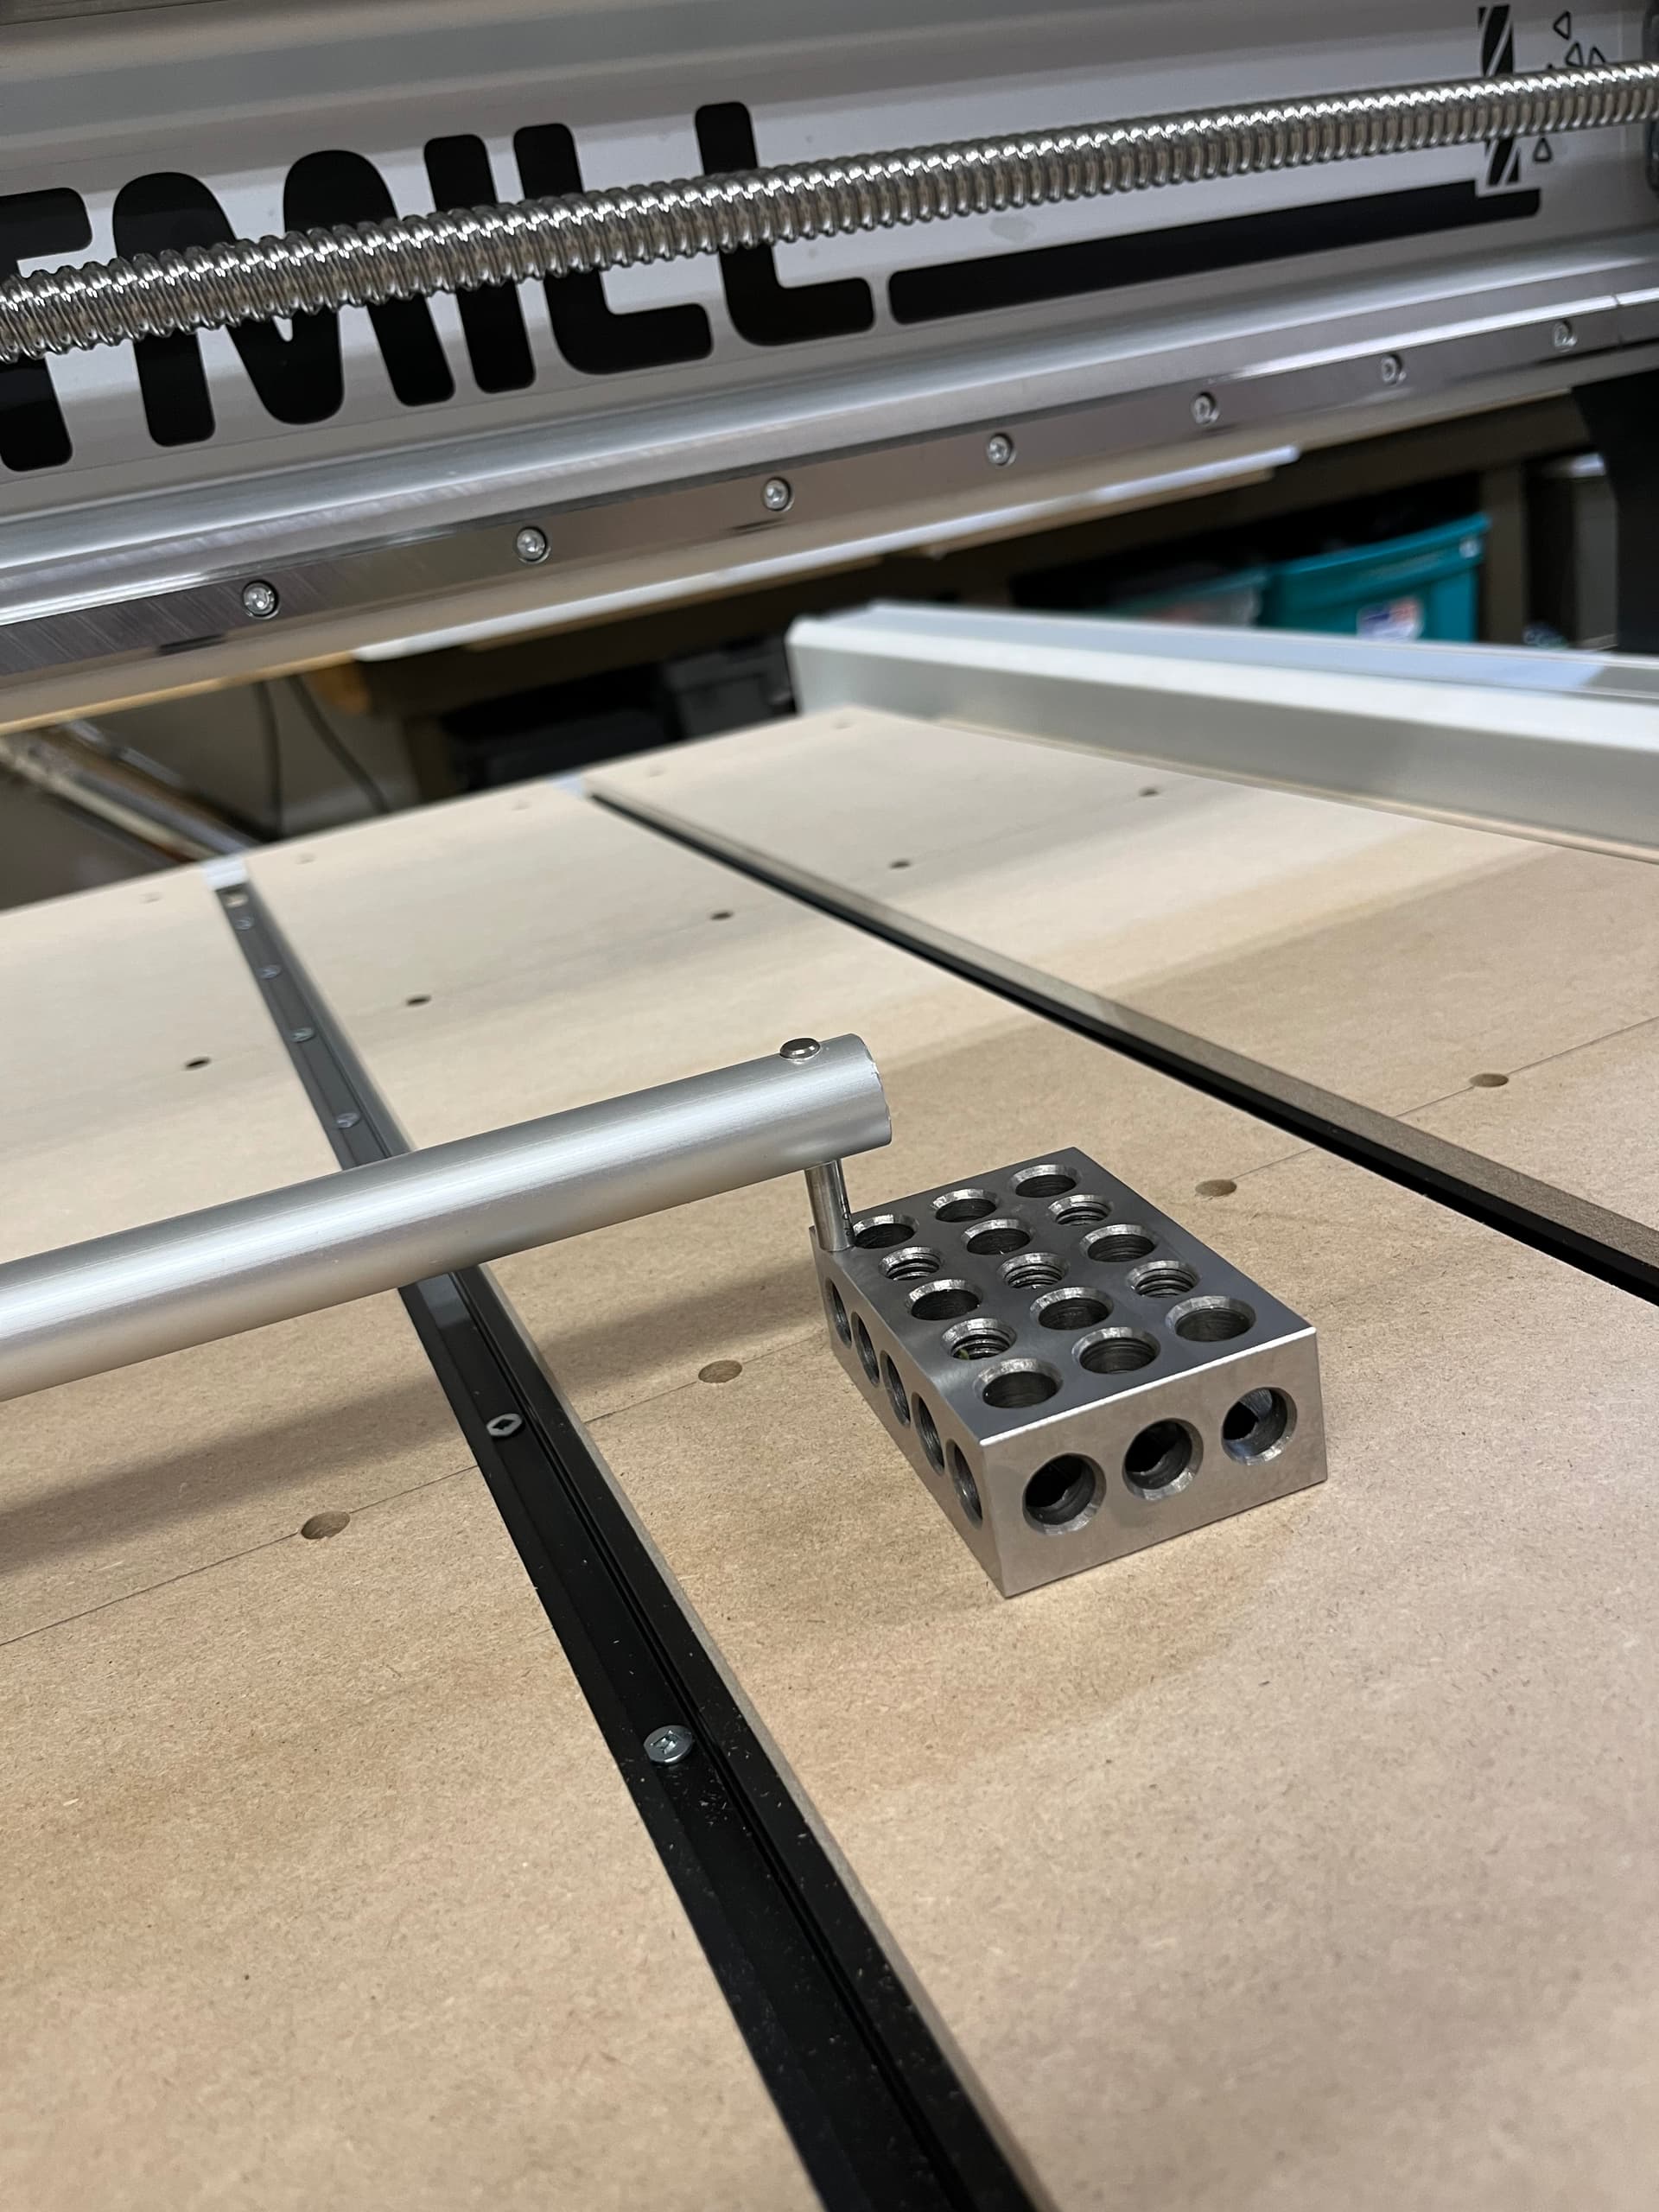
Thanks Eddie, I suspected that may be the case. It looked like my tolerance on the Yaxis was somewhere between 5 and 10 thousandths over the 12.5 “ tram bar length. Which works out to maximum of .0004 at the edge of the 1” diameter bit. The post it notes I use for shimming are .004 so 1/10th of that which should be close enough. I’m new to CNC but have done a fair bit of fabrication and also precision mechanical alignment work when I was maintaining laboratory equipment. For a first project I am thinking the plywood clamp set that were done by Sienci would be a good project. I have some cutoffs of 1/2 birch ply from a recent project that are just right to turn out a batch. I like the idea of wooden clamps rather than the metal ones that come with the T track set. A lot easier on the bits when I make mistakes which is going to happen. MY DIY trimming bar in action below.
I think it’s a wise decision to go with wooden clamps. I use wooden ones and they have been hit on multiple occasions so I’m glad I went with wood.
I posted some free clamp files for Vectric a couple years back. Even if you don’t have Vectric the design isn’t complicated if you wanted to create them in another software package.
Enjoy!
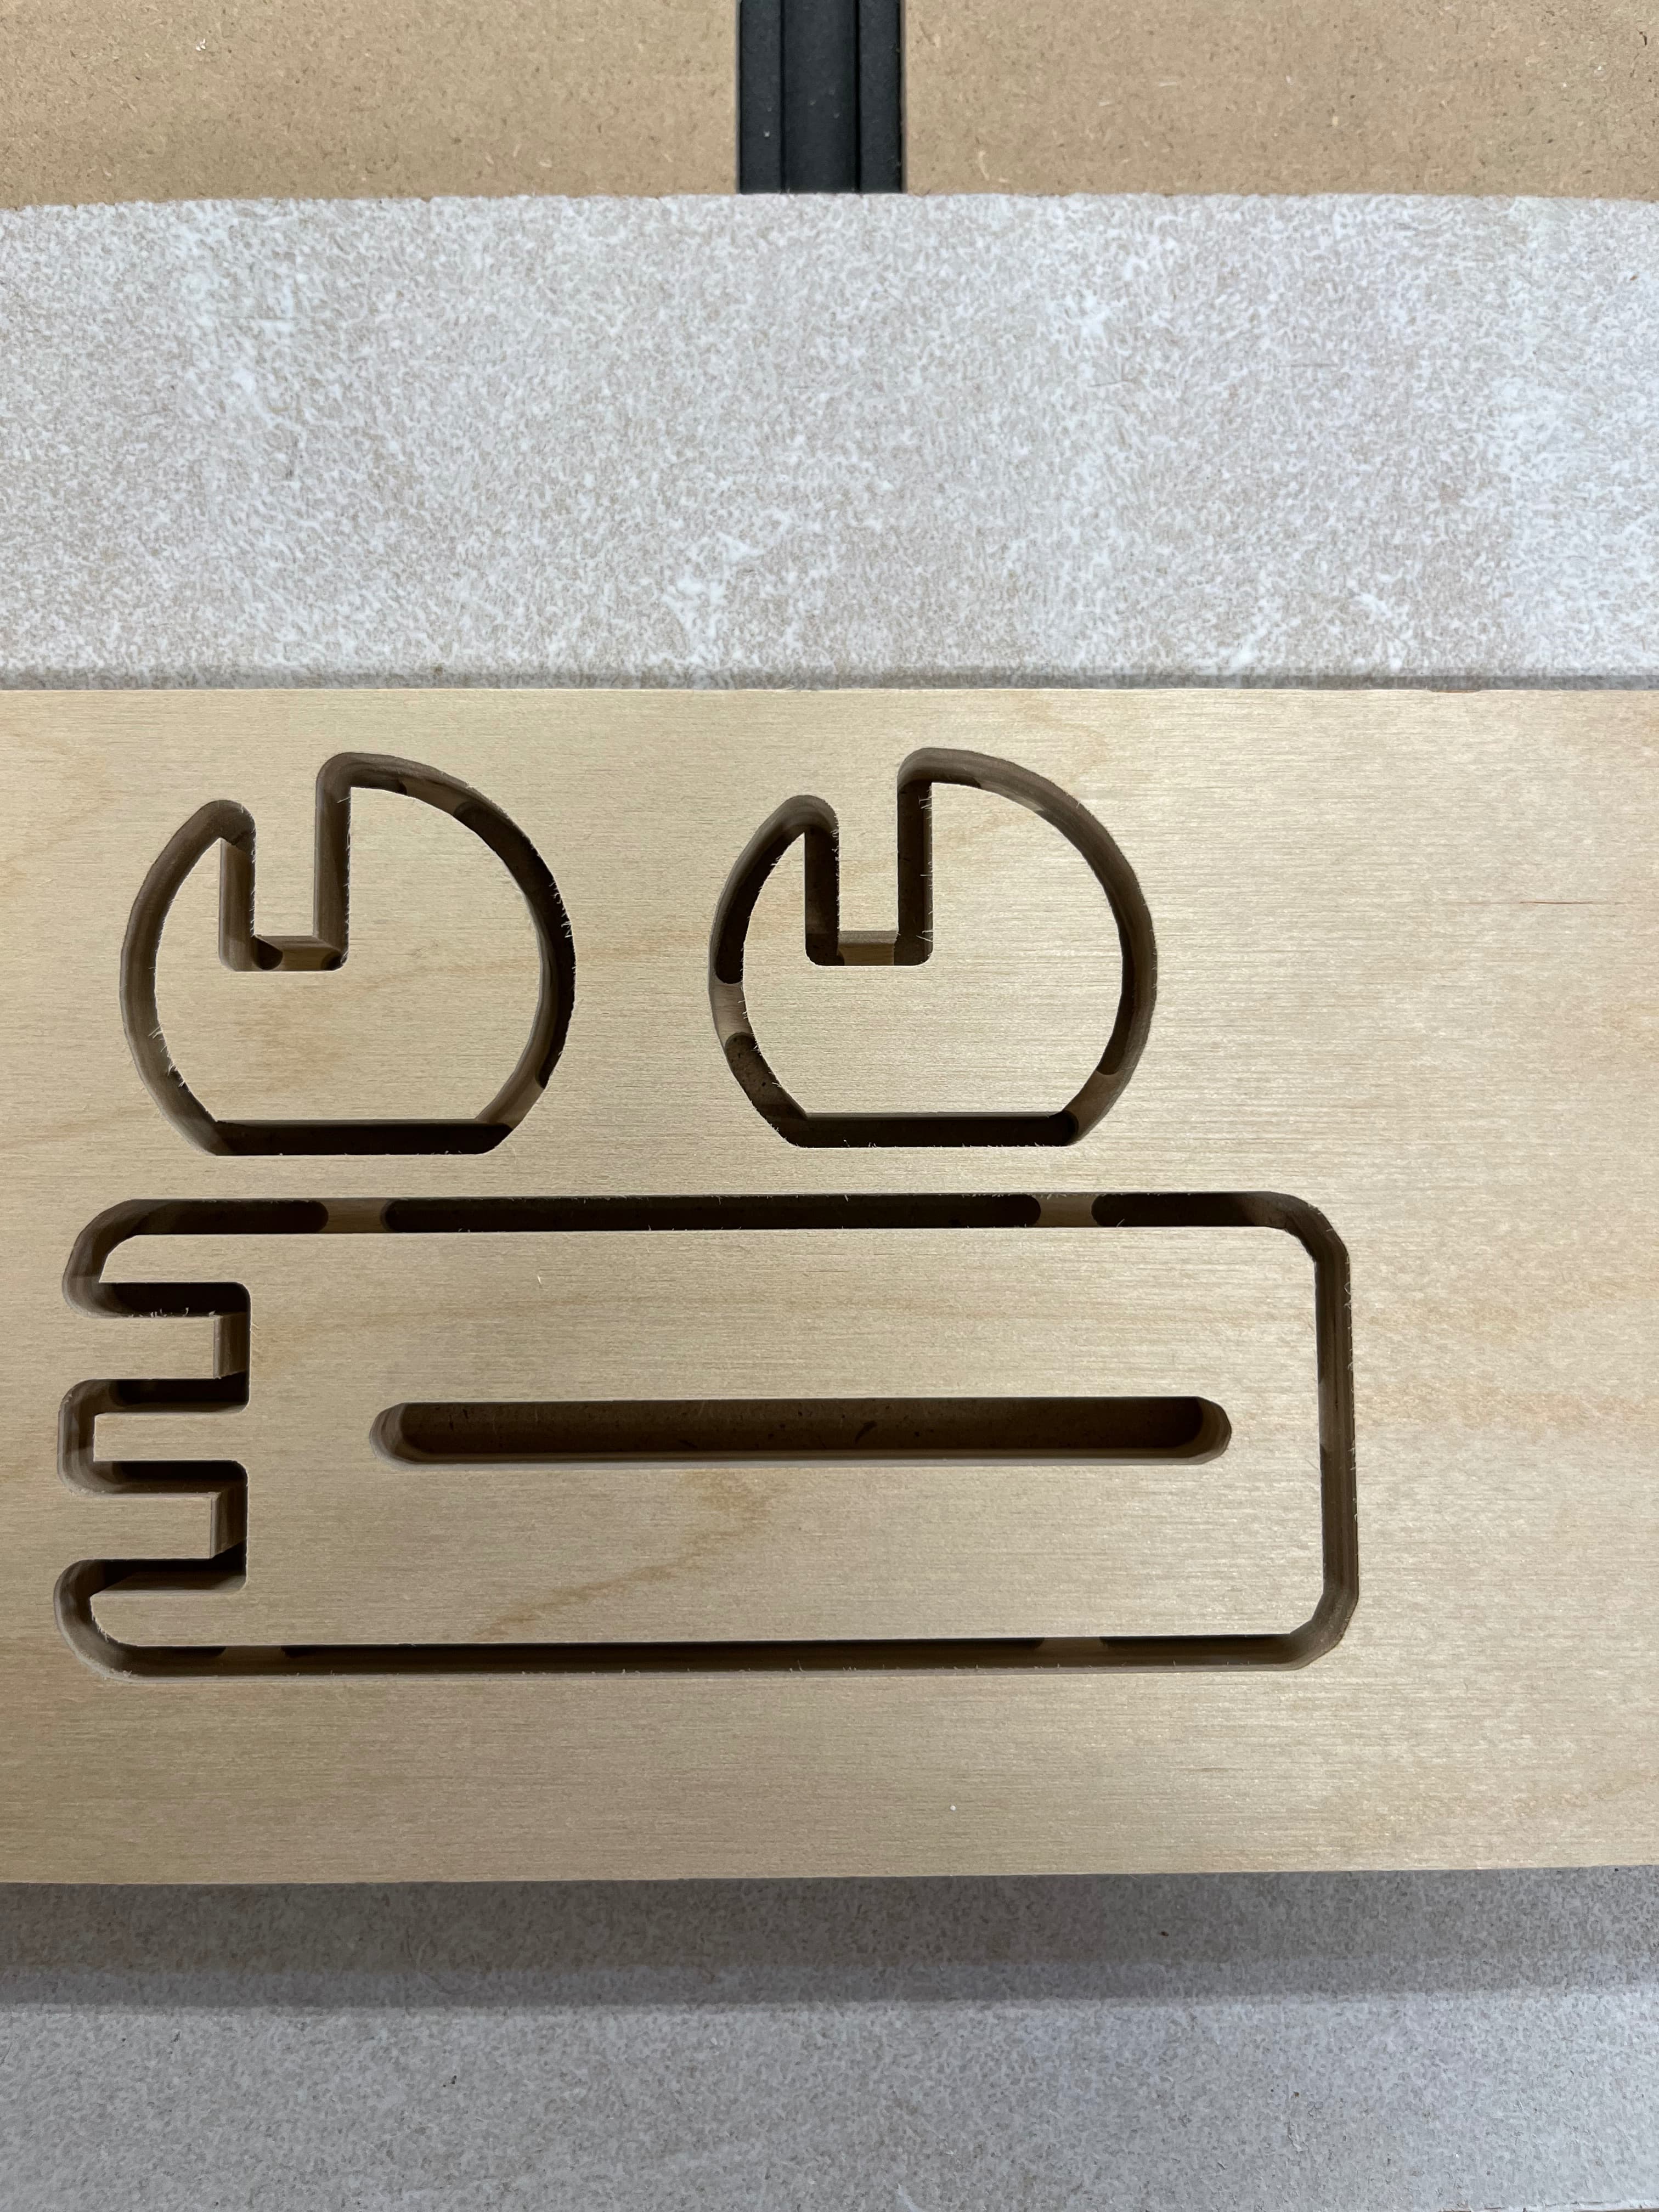
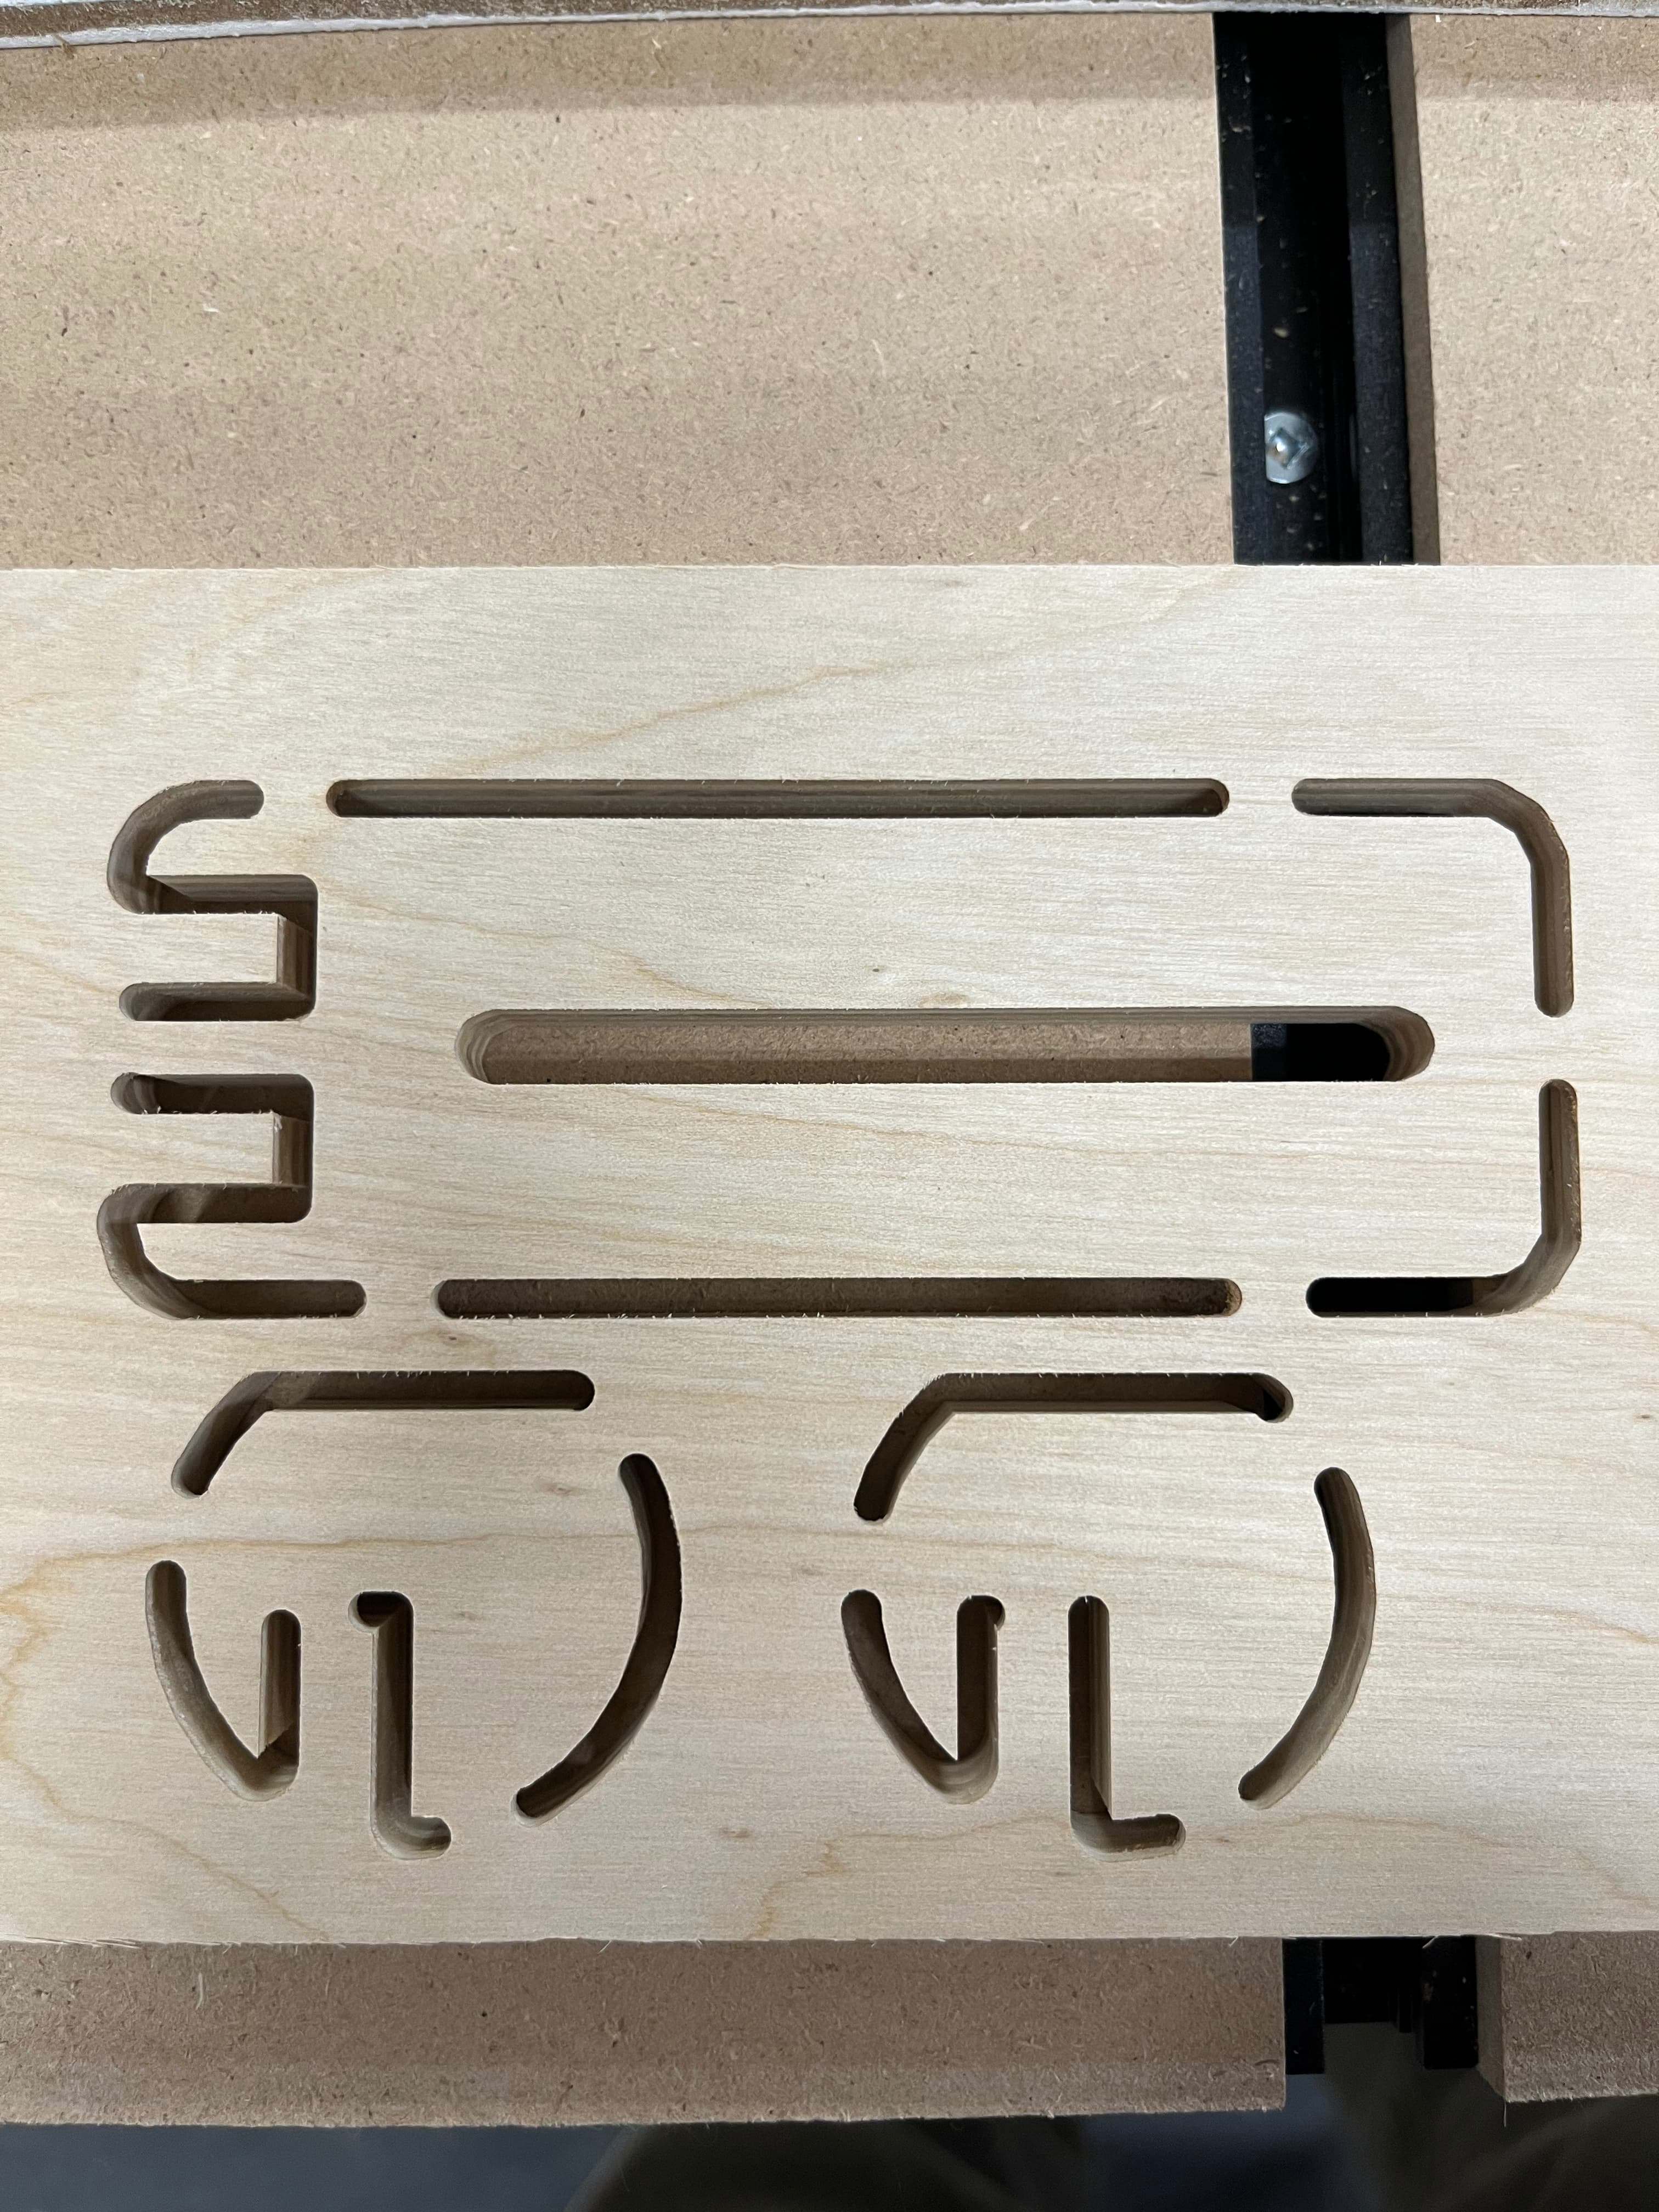
Thanks Michael for the clamp files! I just finished my first cut using Carbide Create Pro to modify one of the clamps that Scott had made for the Sienci video. I started out trying to make 7 of them on my piece of scrap plywood but got bogged down trying to deal with groupings etc. Just a little too much for a first project. I backed up and got a single clamp set up in CC Pro and it was a slow process figuring out how to save the design to a gcode file and then exporting it to the G control computer and then setting up the bit and dust shoe etc, etc. In the end I ran it and all I can say is Bravo Sienci!! The first time I have experienced the Altmill doing some actual cutting work other than surfacing the spoil board. The speed and feed selected by CC seemed low compared to a similar 1/8” spiral down cut bit in the Sienci database but I was OK with that. The file executed perfectly and the end result was an extremely good finish on the cuts. The G Control/ g Sender combo was a revelation to me. I was able to see exactly what the bit was up to and using the 3 different views you can see your progress in real time. With the dust boot installed and connected to my 2hp collection system I had no dust at all on or around the workpiece. A slow cut with a small bit for sure but a good result on the dust recovery. It was a great feeling watching all this go down without any glitches or broken bits, flying work pieces etc. Once again I say Bravo and Thank You to Sienci for producing the Altmill and the very synergistic G control /Gsender setup. Having such a great experience on my first project is a big boost to this older beginner in CNC. I am posting a few pics below.

I am sorry that you didn’t have more excitement …. you don’t know what you are missing ![]() On the bright side, it’s only a matter of time.
On the bright side, it’s only a matter of time.
Not sure what the story is on your third picture with the interrupted cuts. The second picture has proper tabs from what I can tell and looks perfect.
Welcome to the world of CNC!
I believe it’s the bottom side of the second photo.
@Bfpca They are really clean cuts. I think it depends a lot on the wood though. I’ve cut some wood that had 3" strings hanging on by a thread and others that cut super clean. I guess it could also depend on how dry the wood is.
I’m glad your up and running and having fun!
Ahh, that would explain things … and yes, damn clean cuts
I forgot to mention that I was working with a scrap of 1/2” Birch plywood. It’s the stuff that HD sells, at least here in Canada. And Yes, the 3rd photo is showing the bottom. I was expecting a rougher cut there when using a down cut bit. I did use a scrap piece of 1/4” mdf under the cut and used the t+ (Thickness+) function in CC to cut .01” below the bottom. Since I am a beginner I went conservative on the tabs. Now my problem is finding more time to build on my initial learning with CC and to make some more projects.
Congrats on getting your Altmill up and running! ![]() That first spindle break-in is always a good feeling.
That first spindle break-in is always a good feeling.
The low hum from the steppers when the controller is powered on but not moving is totally normal. They’re energized (holding torque) any time the controller is on, which prevents the gantry from drifting if nudged. Some people describe it as a faint buzz, whine, or hum depending on motor and driver frequency—it’s expected.
Your workshop setup sounds well thought out too. Framing in that wall to protect the extended X-axis motor and running conduit for the circuits was a smart move. Getting the MDF baseboard pre-cut saves a lot of headache, and once you screw it down and drop the T-track in, you’ll be ready for test cuts pretty quickly.
Looking forward to hearing how it performs once you get your first real job on it—sounds like you’re off to a smooth start.