tried out v7 and seems to work fine on side where the clip opens. but i couldnt install in reverse.
I liked the stacked version too. would be nice to have a zip tie hole
@MrExo3D If you start your own thread, I’d be happy to take a look. Or just message me if you prefer.
1 Like
From what I have noticed, getting tube holders too far removed from the centerline of the drag chain you experience exponential tube movement and binding. In the case of the tube holders being on top of the clips, the radius would be much narrower thus causing the lines to really bunch up. I’d be curious to now how Tube_Holder_JosefChuk_v2.stl worked for you? That was the initial design I had in my head but the guy I got the original design from that chucky_ott started working from spoke about the bunching and I abandoned trying to get that to work. I may print a half dozen of these blocks to see what happens just for fun. The design I ultimately settled on , Tube_Holder_v11 still causes me a little bunching but its fairly negligible.
working on a different take.
1 Like
@MrExo3D Having it in two parts is a great idea. I thought about doing that in case the drag chain is placed with the hinges on the inside. You would not have been able to lift the clip up with the tube holder on unless you can slide the part that drops down away from the drag chain. I didn’t pursue it because the OP had his hinges on the outside.
Also note that mounting the tube holder on both sides will work for the x-axis but not the Y-axis. The plates on the x-axis gantry would be in the way.
But by having the holder like you designed on the x-axis, you could alternate the side of each holder and use only the bottom slot for the tube. So at least for the x-axis, both your tubes would be at the drag chain’s center line and not bunch up.
@Headshop Dan, you payin’ attention to this latest development? Actually, would your existing clips work on both sides of the x-axis drag chain? If you alternate each clip, you would only use the bottom tube holder on each one.
1 Like
Btw, my previous comments is for the Altmill. I’m not sure if the Longmill would allow a tube on both side of the drag chain. If it does, then Exo’s clip is what I would pursue.
I have been following along. Im not using any clips on the X axis drag chain as it only holds the Z axis wires, the spindle wire, one very small 2 wire bundle for the auto dust boot. I was able to get the two water lines inside the chain. It was tight but not unmanageable. The problem with the Y axis drag chain was the addition of the X axis wire bundle and 2 other sets of wires one 2 wire bundle and one 3 wire bundle for the LED lights. With those extra wires, there really wasn’t any extra room in the Y Axis drag chain for the water lines. In answer to your question, yes on the X axis drag chain you can orient the clips on either side of the drag chain with out issue. Though having them on the front side of the drag chain may pose a bit of an issue when it comes time to turn the corner and connect to the clips mounted on the inside of the Y axis drag chain
1 Like
Here is my version for 8mm hose on Altmill
https://makerworld.com/en/models/1785924-altmill-cnc-drag-chain-water-hose-brackets
1 Like
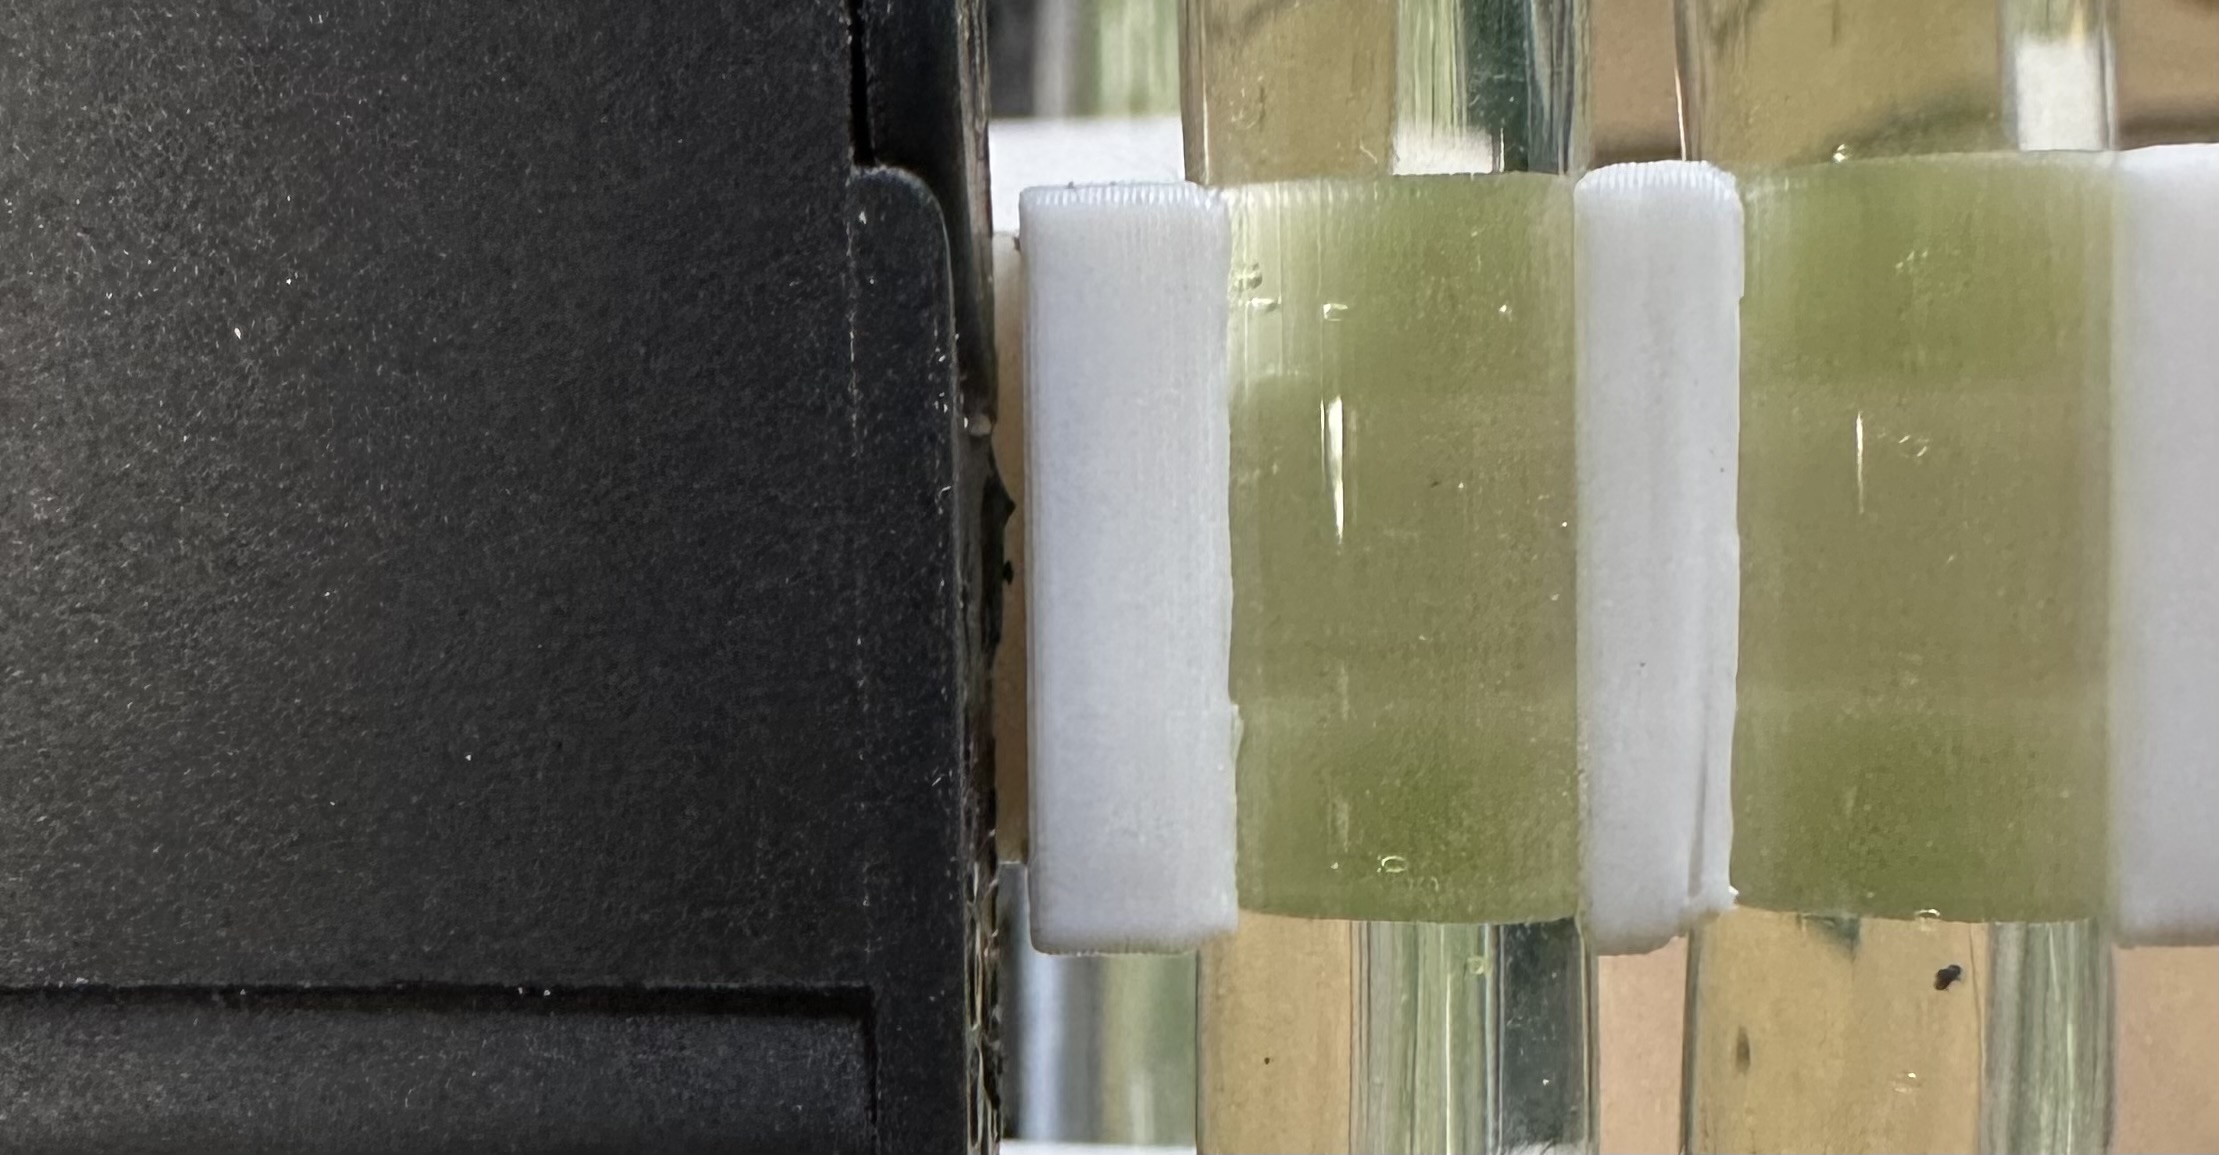
Ok the results are in for the Longmill version(s). Longmill v2 (T-top style) did not work as you predicted; the tubes bunched up and eventually popped out. But the are useful for keeping together free floating tube pairs. Longmill v2 (tubes in parallel with the chain) is working - see attached photo. Only issue is getting to the clip to pop open the chain link but I rarely need to do that. I’m printing a few more now to see if adding more or less helps or hurts. Big thanks @Chucky_ott and also @Headshop for their work and input. Peace out.

2 Likes
@Djosefchuk yeah, I was concerned about them popping out and was going to do a closed tube holder. But that would require feeding the tube from the end instead of just snapping it in. That, and a slightly bigger hole to allow movement without friction. Still don’t know if it would even work though.
@Djosefchuk As for access to the clip, a two piece holder would solve that issue. See post from @MrExo3D above.
The Longmill would NOT allow a tube on both side of the drag chain. Not only would be interference at/near the spindle/Z-axis but also because you wouldn’t be able to slide the tube holder pass the chain’s cap top hinge. (Hope that makes sense.) A different chain attachment method like a tie-wrap would be needed and that would defeat the purpose. The Longmill v1 holder is working well enough - see other reply with photo. Cheers. [Update: Just played the video and now see what you mean. Looks promising. But I like the simple one piece design and I can force the cap open if need be. It doesn’t happen all that often. Cheers again.
1 Like
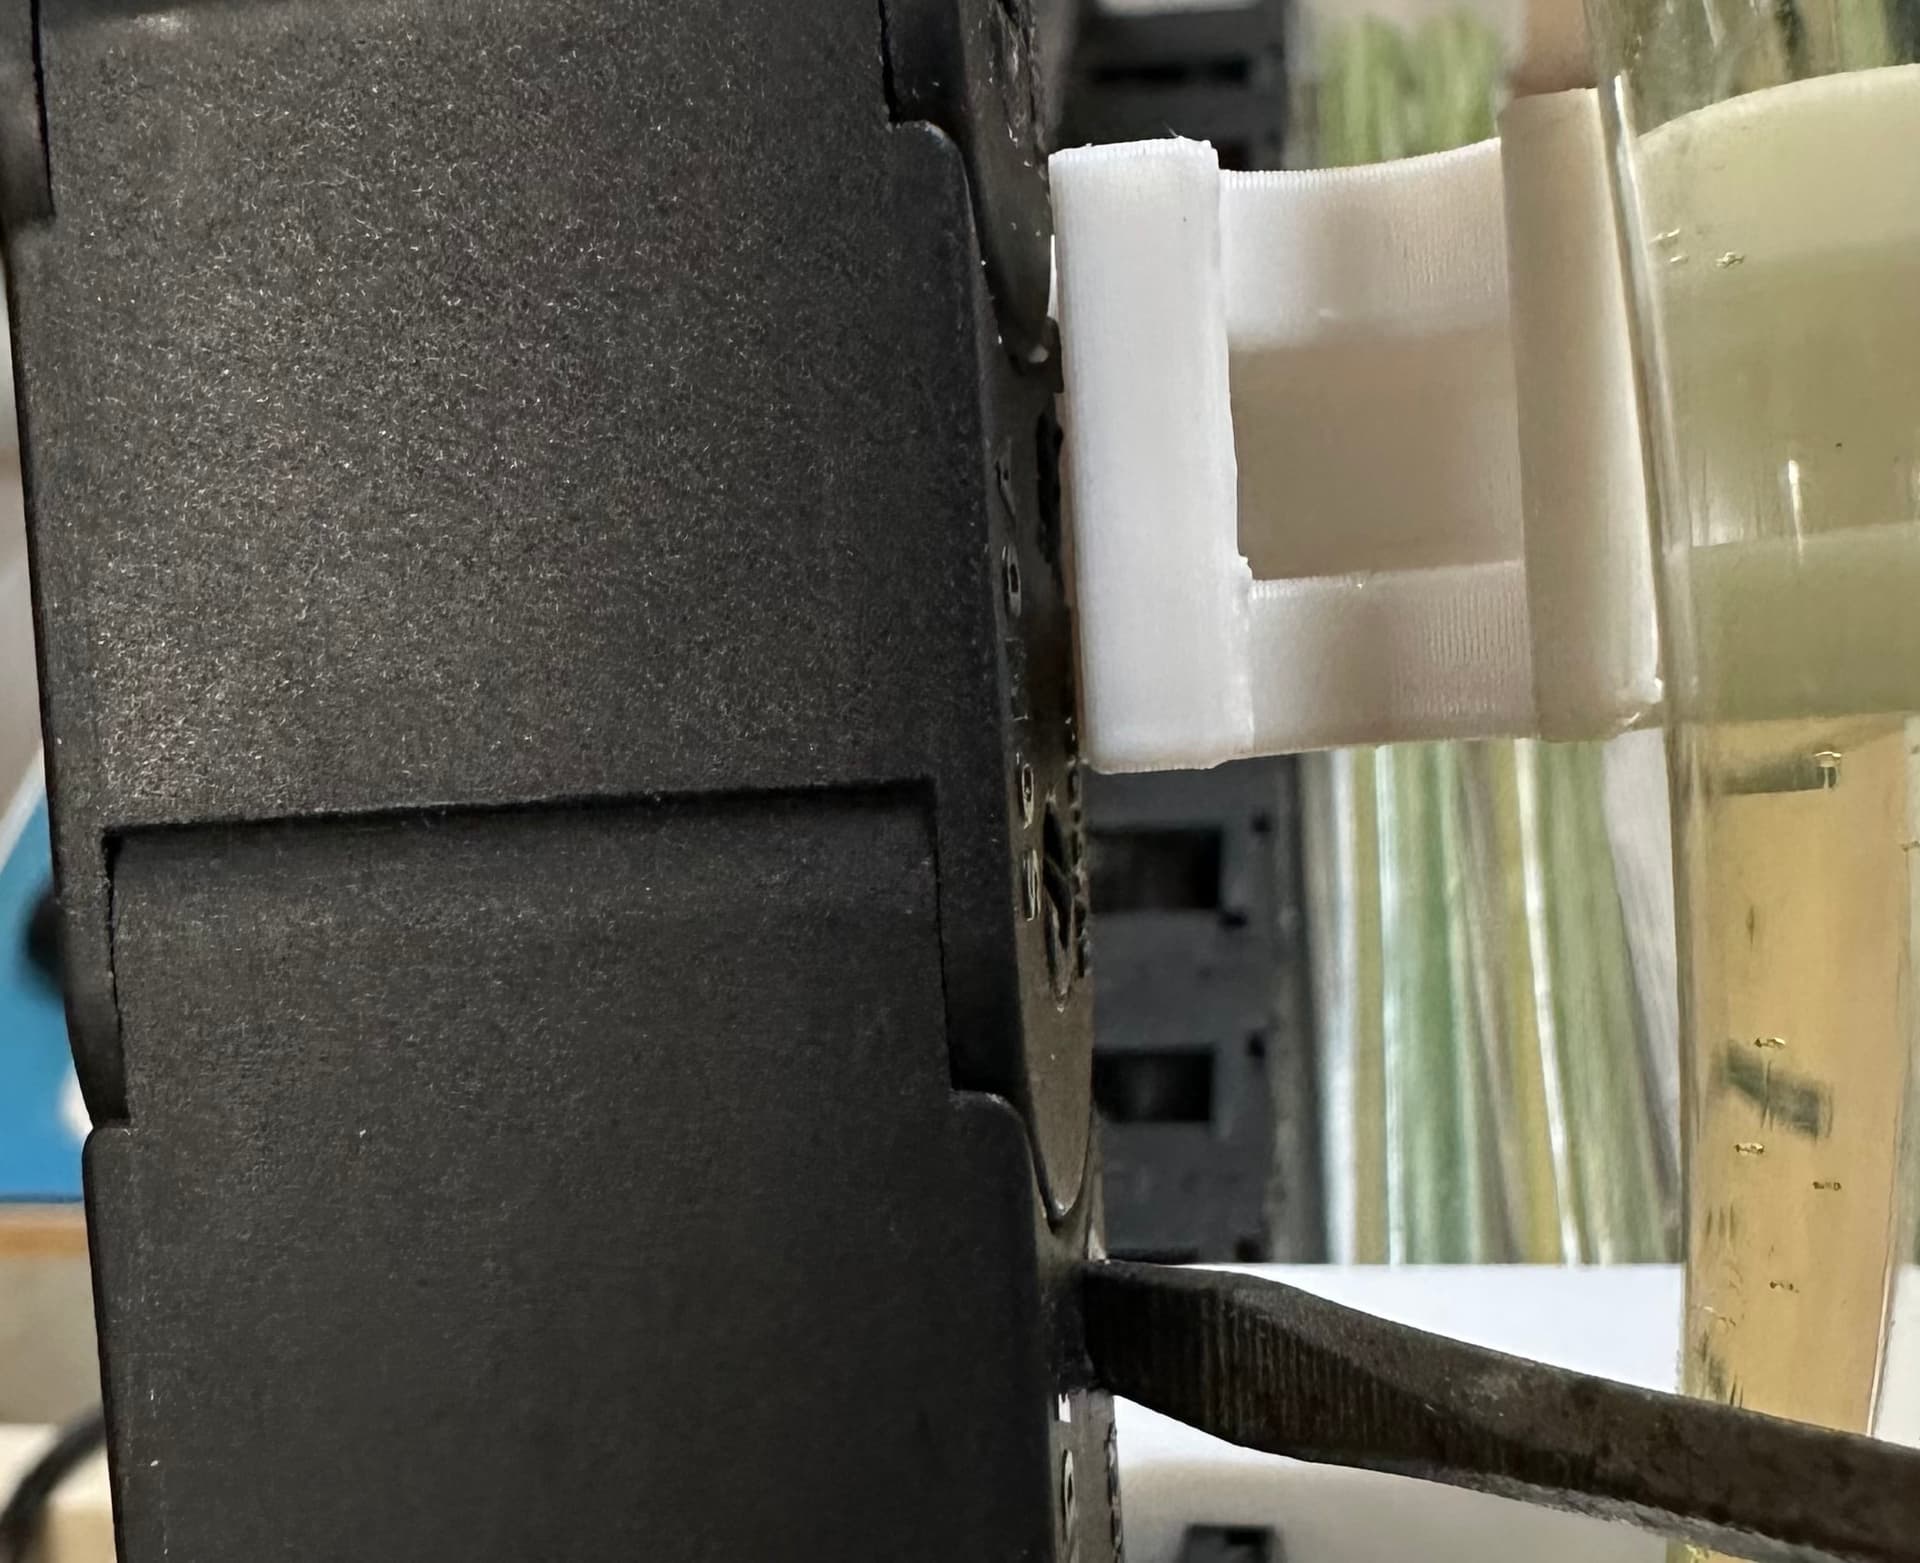
@Djosefchuk And for lifting the drag chain clip, are you inserting a long and narrow flat screwdriver and just twisting it open? It needs to be opened by twisting, not prying.
@Chucky_ott Because I left very little space beyond the thickness of the chain wall, it’s an angle issue - getting the screwdriver edge under the lip. That’s why in my original sketch I had the opening opening doing all the way through the holder edge - rather than a window. No worries. It works as is.
@Djosefchuk Ah, I didn’t notice your sketch. I’ll edit the model whenever I get the chance. At least you’ll have it available if you ever need to print new ones.
@Chucky_ott Here’s a couple of photos as it stands that illustrates the angle issue. A rev may help others as I’m all hose bracketed in already. It may weaken the holding power of the hose on the inside but it should be ok. Are you willing to also provide the STEP in case someone else wants to carry the torch later?
.
my version is also causing issues with binding due to bend radius and not being centered with the drag. going to update..
@Djosefchuk I’m not quite sure why you need to put your screwdriver at an angle. If your screwdriver is small enough, you should be able to reach the slot through the existing hole and then just turn your screwdriver to pop the latch open.
@Chucky_ott Because I didn’t think to put the screw driver through all three holes - duhh me! Confirmed: reaching the tab slot through the all three holes and then turning the screwdriver to pop the latch open works. Cheers.
1 Like