We made ornaments to paint as a fundraiser for charity. Our Comm Tech teacher designed our mascot with some Christmas flair, a quick caption on the back and we were off! I’ve found Easel to be incredibly easy to use for design and operation of our new Longmill 30x30. Issues included alignment when flipping the workpiece and using the tabs function so when the pieces get cut out they don’t go flying. Also figuring out how to run the second half of a job the next day. Ended up just making a copy of the file and deleting what had already been carved. Also sped up the Mill like crazy and it remained super-accurate. Now I just need to level our table… G codes can be found here, new user so I couldn’t upload them here.

Wow there’s some amazing projects on here. This was my first-ever so go easy!
1 Like
No worries Joe @Joe_Lawrence , we’re all here to learn from each other 
I’m curious to know, for any self proclaimed newbies out there, what has been the most difficult part of learning the machine so far?
1 Like
PROJECT DESCRIPTION
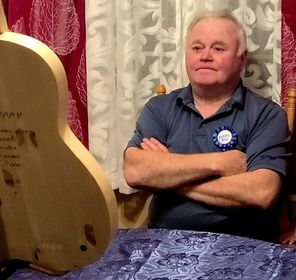
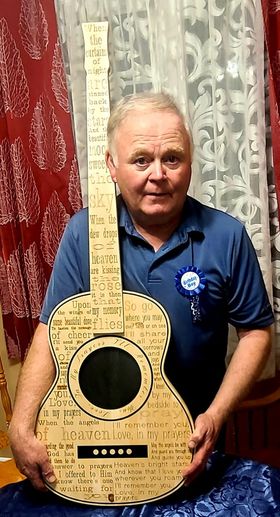
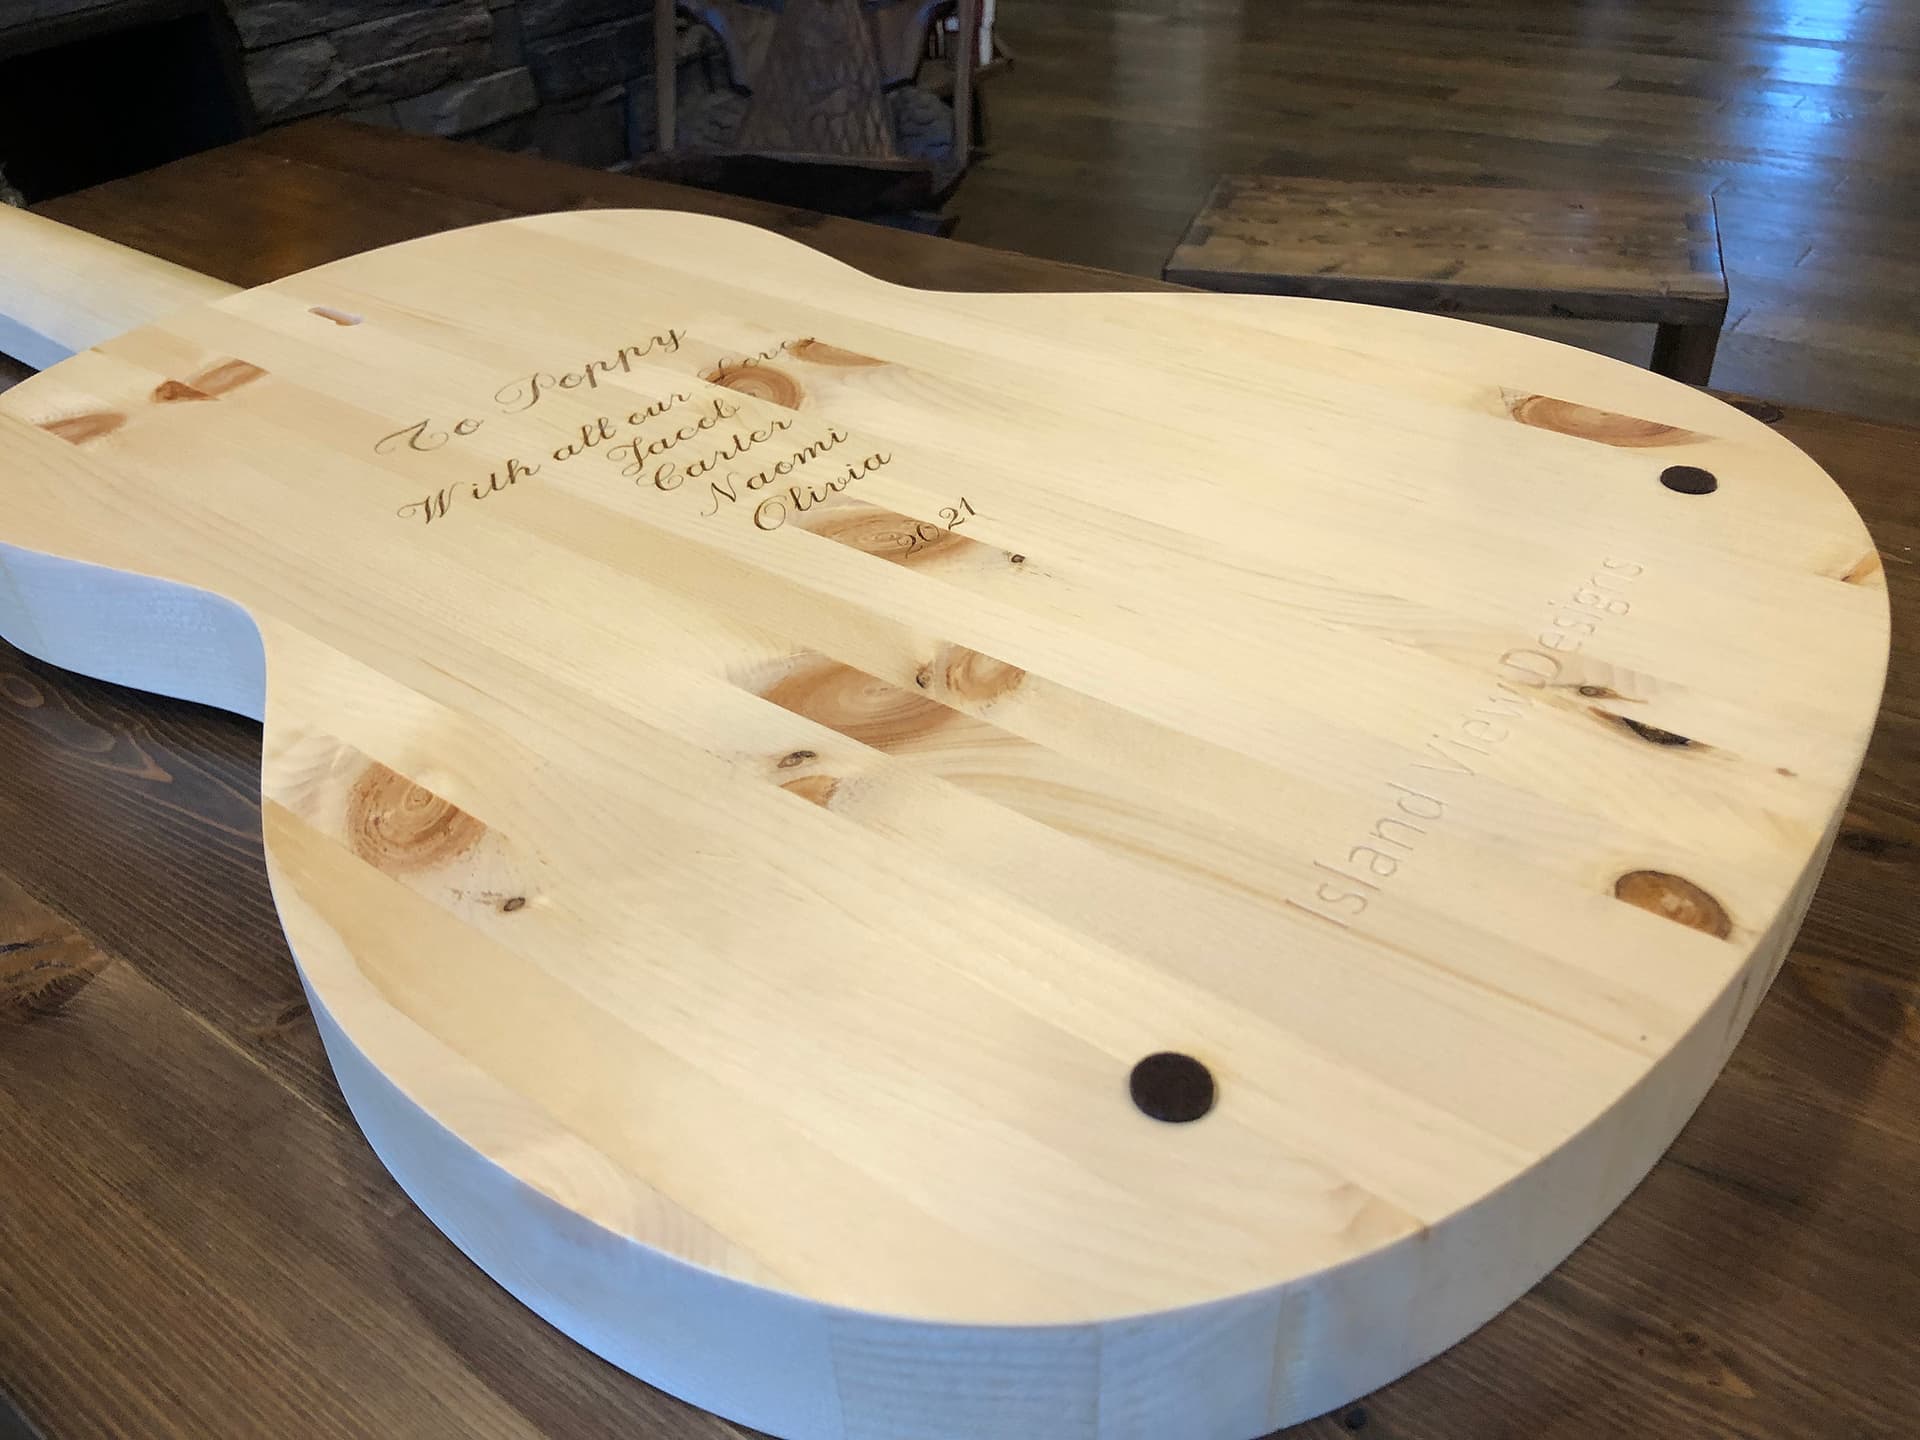
This is a LongMill 30"x30" project designed to look like an acoustic guitar with laser engraved lyrics to the song title “I’ll Remember You, Love in My Prayers”. The look on the gentleman’s face in the pictures is what this project story is all about and how the LongMill has opened a doorway to fulfill the imaginations and dreams of whomever we create for.
The gentleman in the pictures is a widower, who’s wife passed away from an illness sometime in the past couple years. Every evening when he put her to bed, he would whisper the song to her which was their favorite growing up. The singing would sooth her to sleep, eternally entrenching the memory of their last months together in his mind. For them it was a memory that spanned the beginning of their life together and until they did so depart.
When recently approached by this gentleman’s son regarding of doing a design he had seen on Etsy, he was told that we have a Sienci LongMill CNC machine and we can do much better than that. With no idea of what it was for, we were armed with a desire to create a template that we could reuse for future projects and we underpriced this one knowing that this would be worth the effort.
When it came time to pickup the guitar, the gentleman’s son was astounded at what we had done for him. With a tear in his eye, he said, you have no idea what this will mean to my father. Although this was meant to be a Christmas gift, the family decided to give it to him early for his birthday instead. The look on his father’s face in the pictures says it all.
LESSONS LEARNED
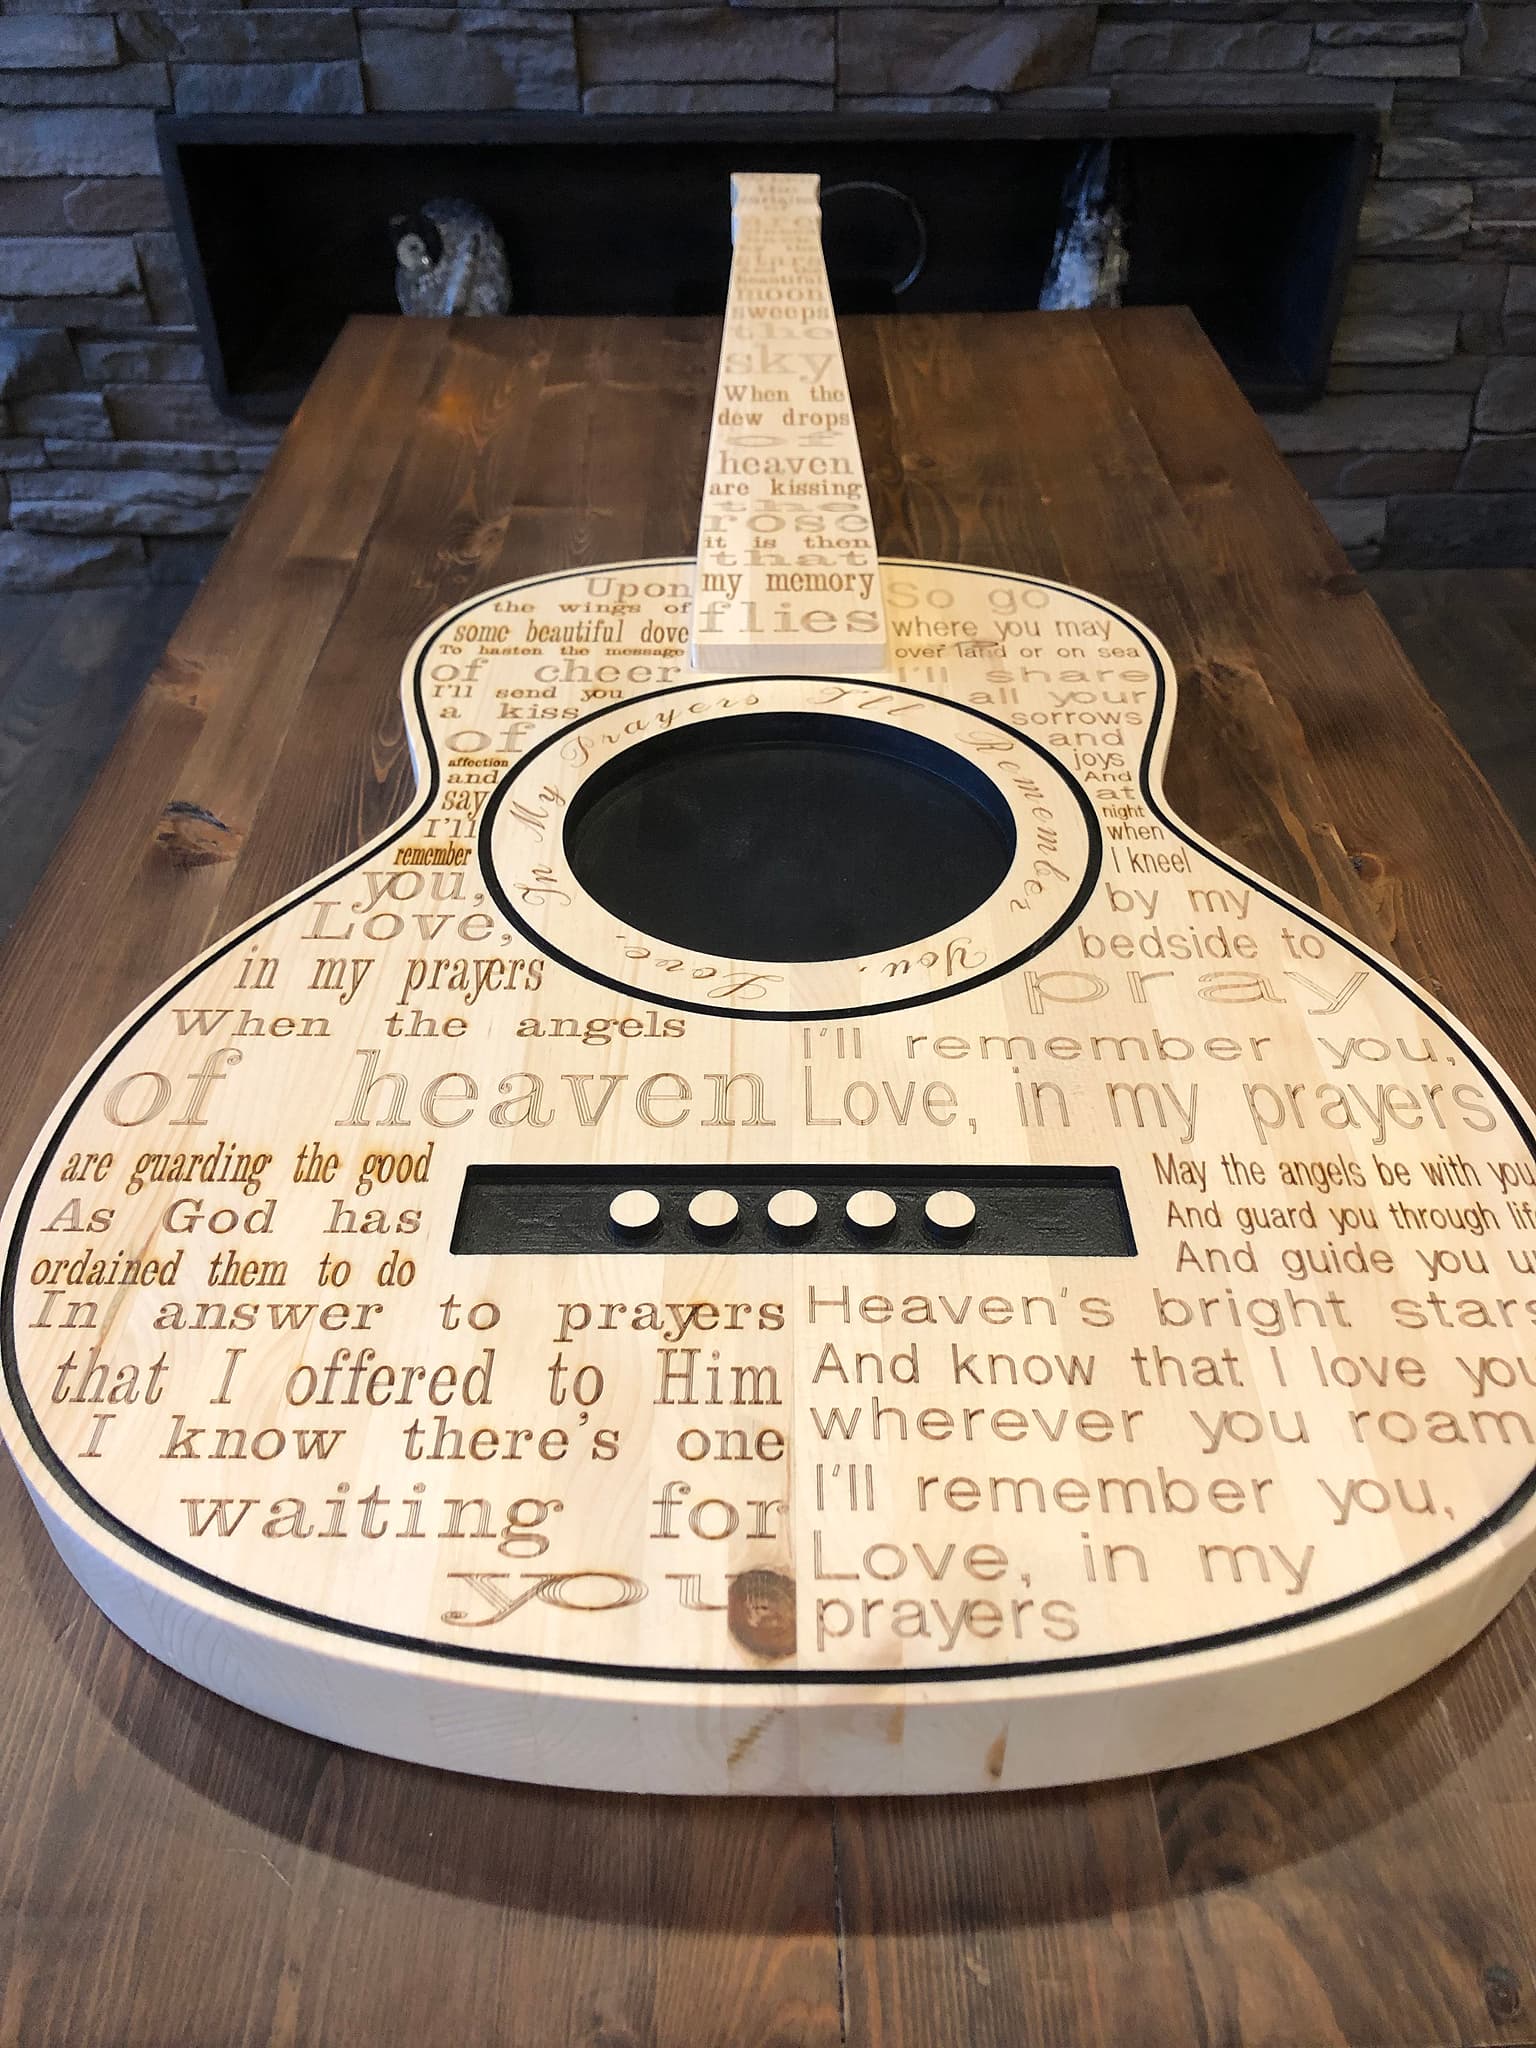
- This one was done in pine and although hardwoods were discussed with the customer, it was cost prohobitive
- Pine is prone to tear out and rough cuts, thus the reason why the laser was chosen. Pine does not burn as dark as hardwoods.
- Body cuts were done first, slots painted, body sanded to remove overpaint and then lasered. Paint masking or wood pre-varathaning was not required knowing the cuts for the painted areas were not complex or prone to tear-outs. Sanding with 180 to remove the overpaint and then to 320 grit for a smooth finish.
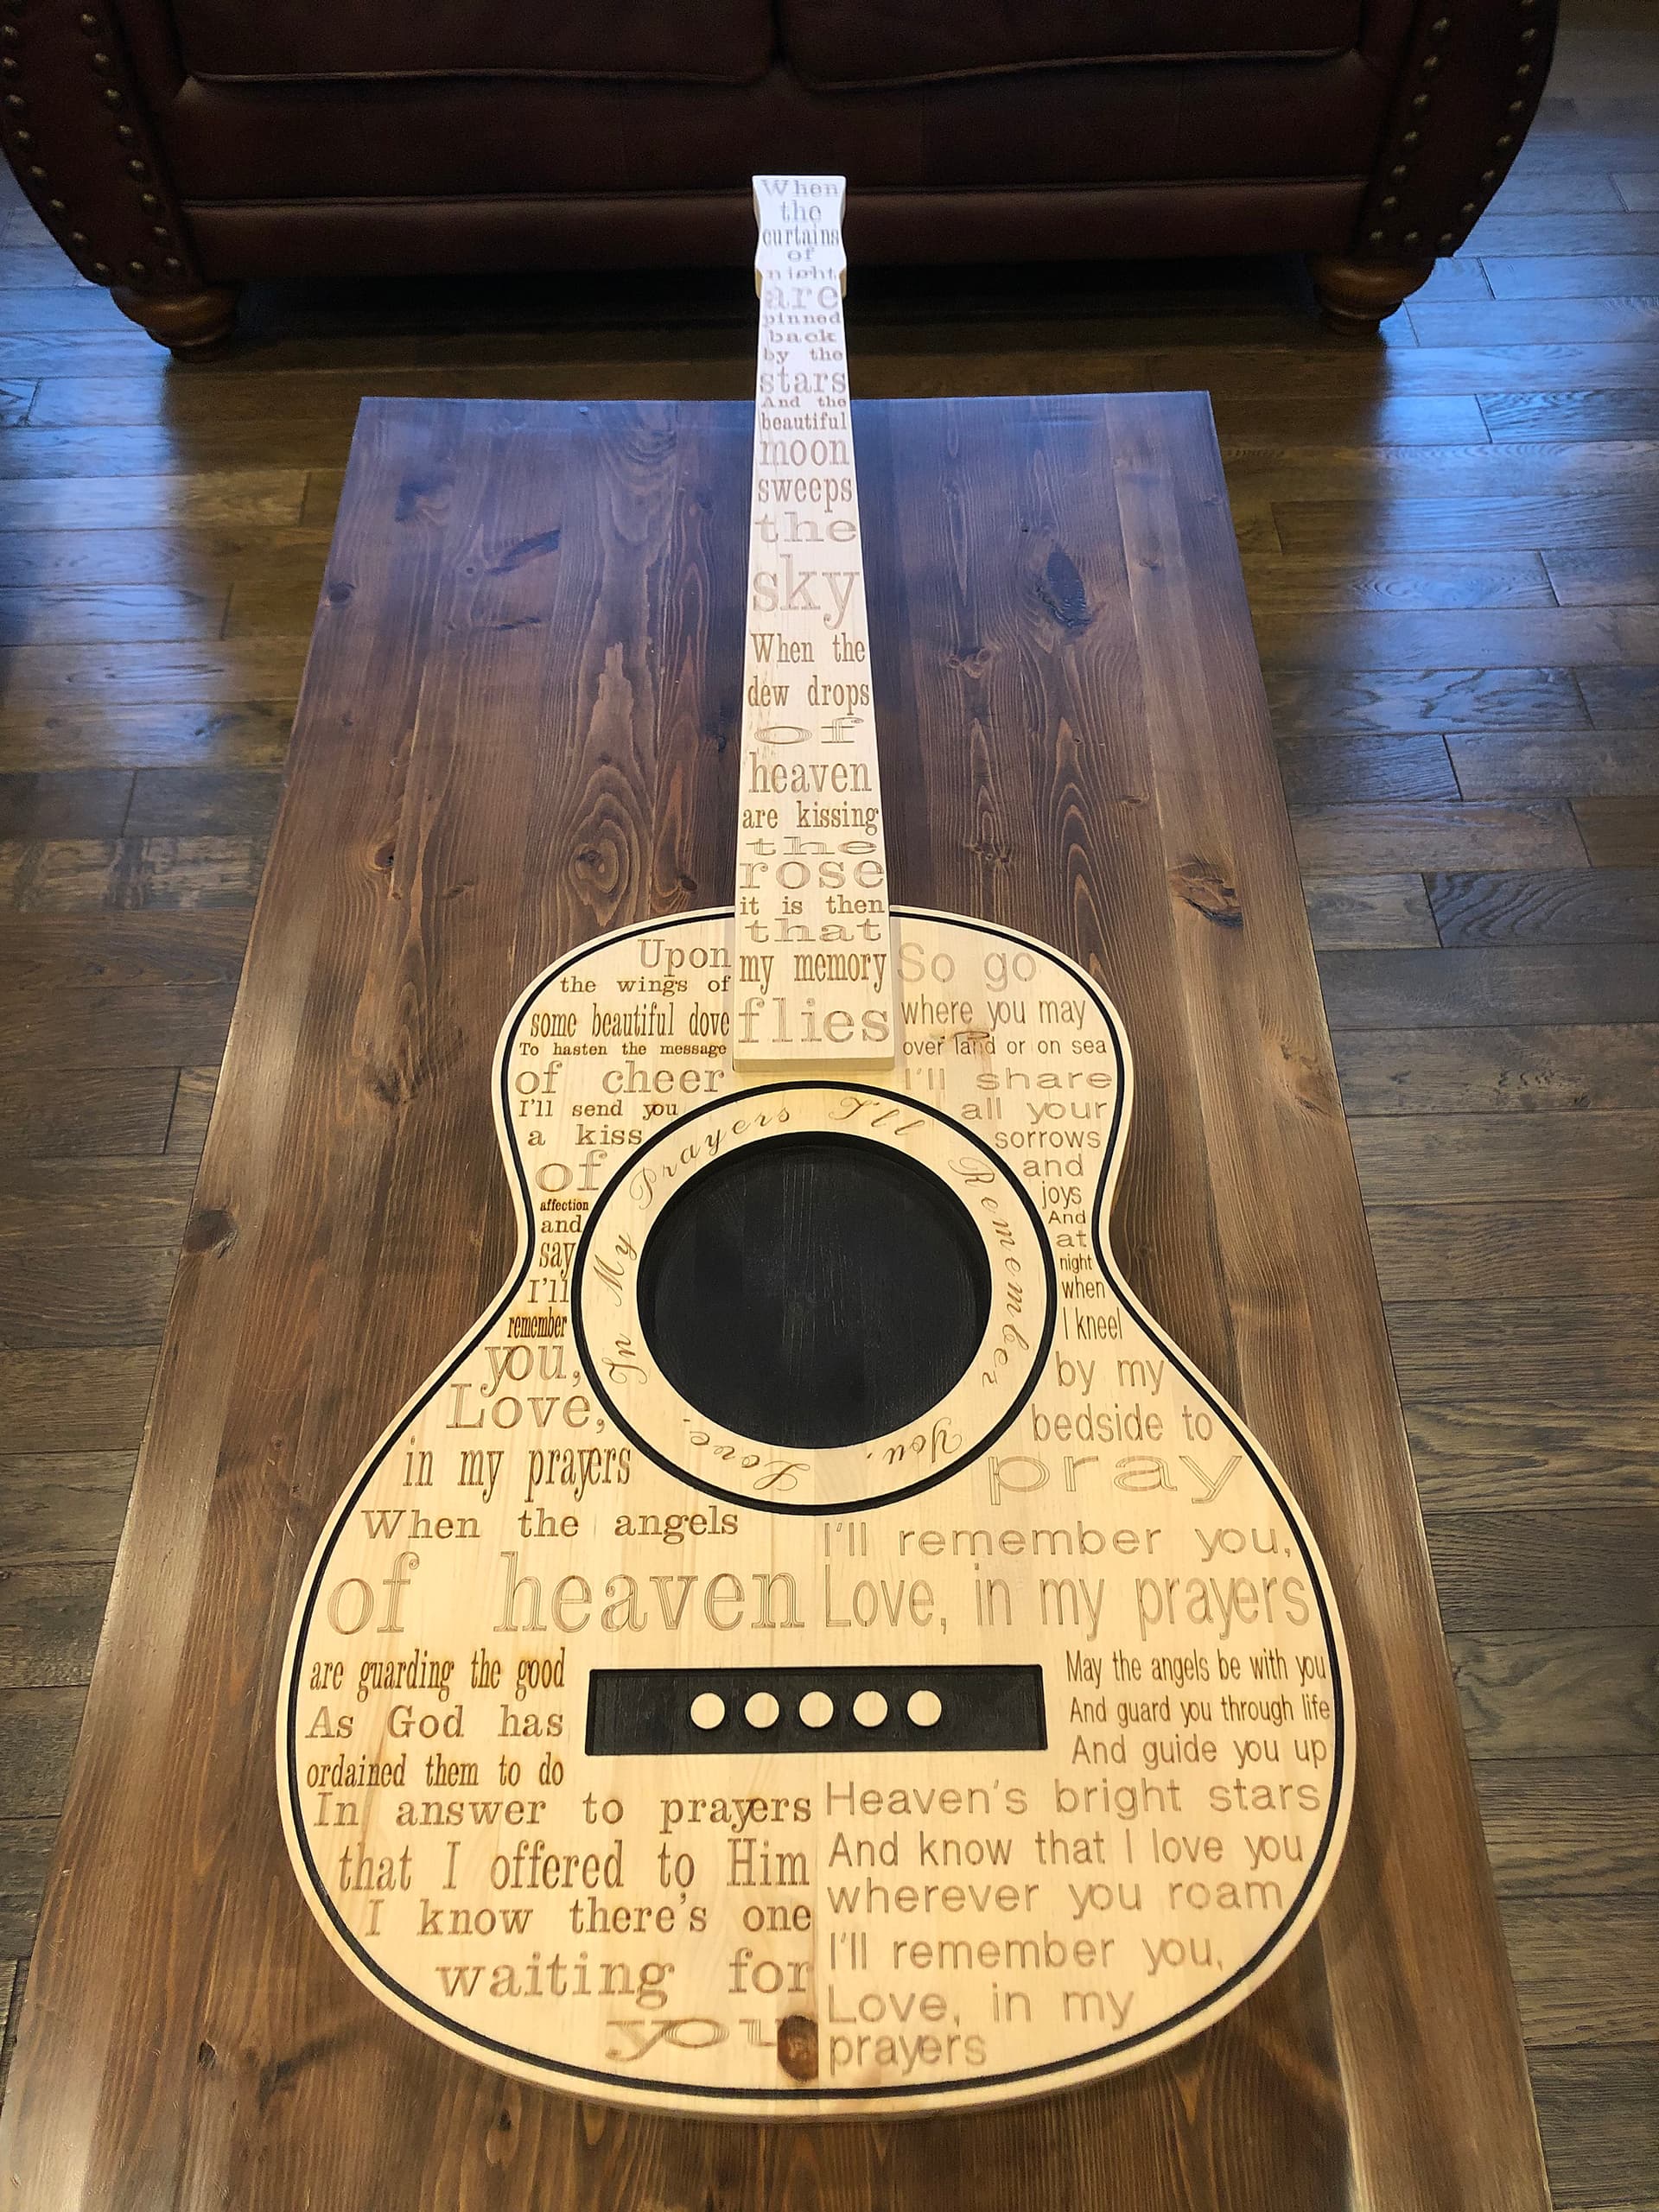
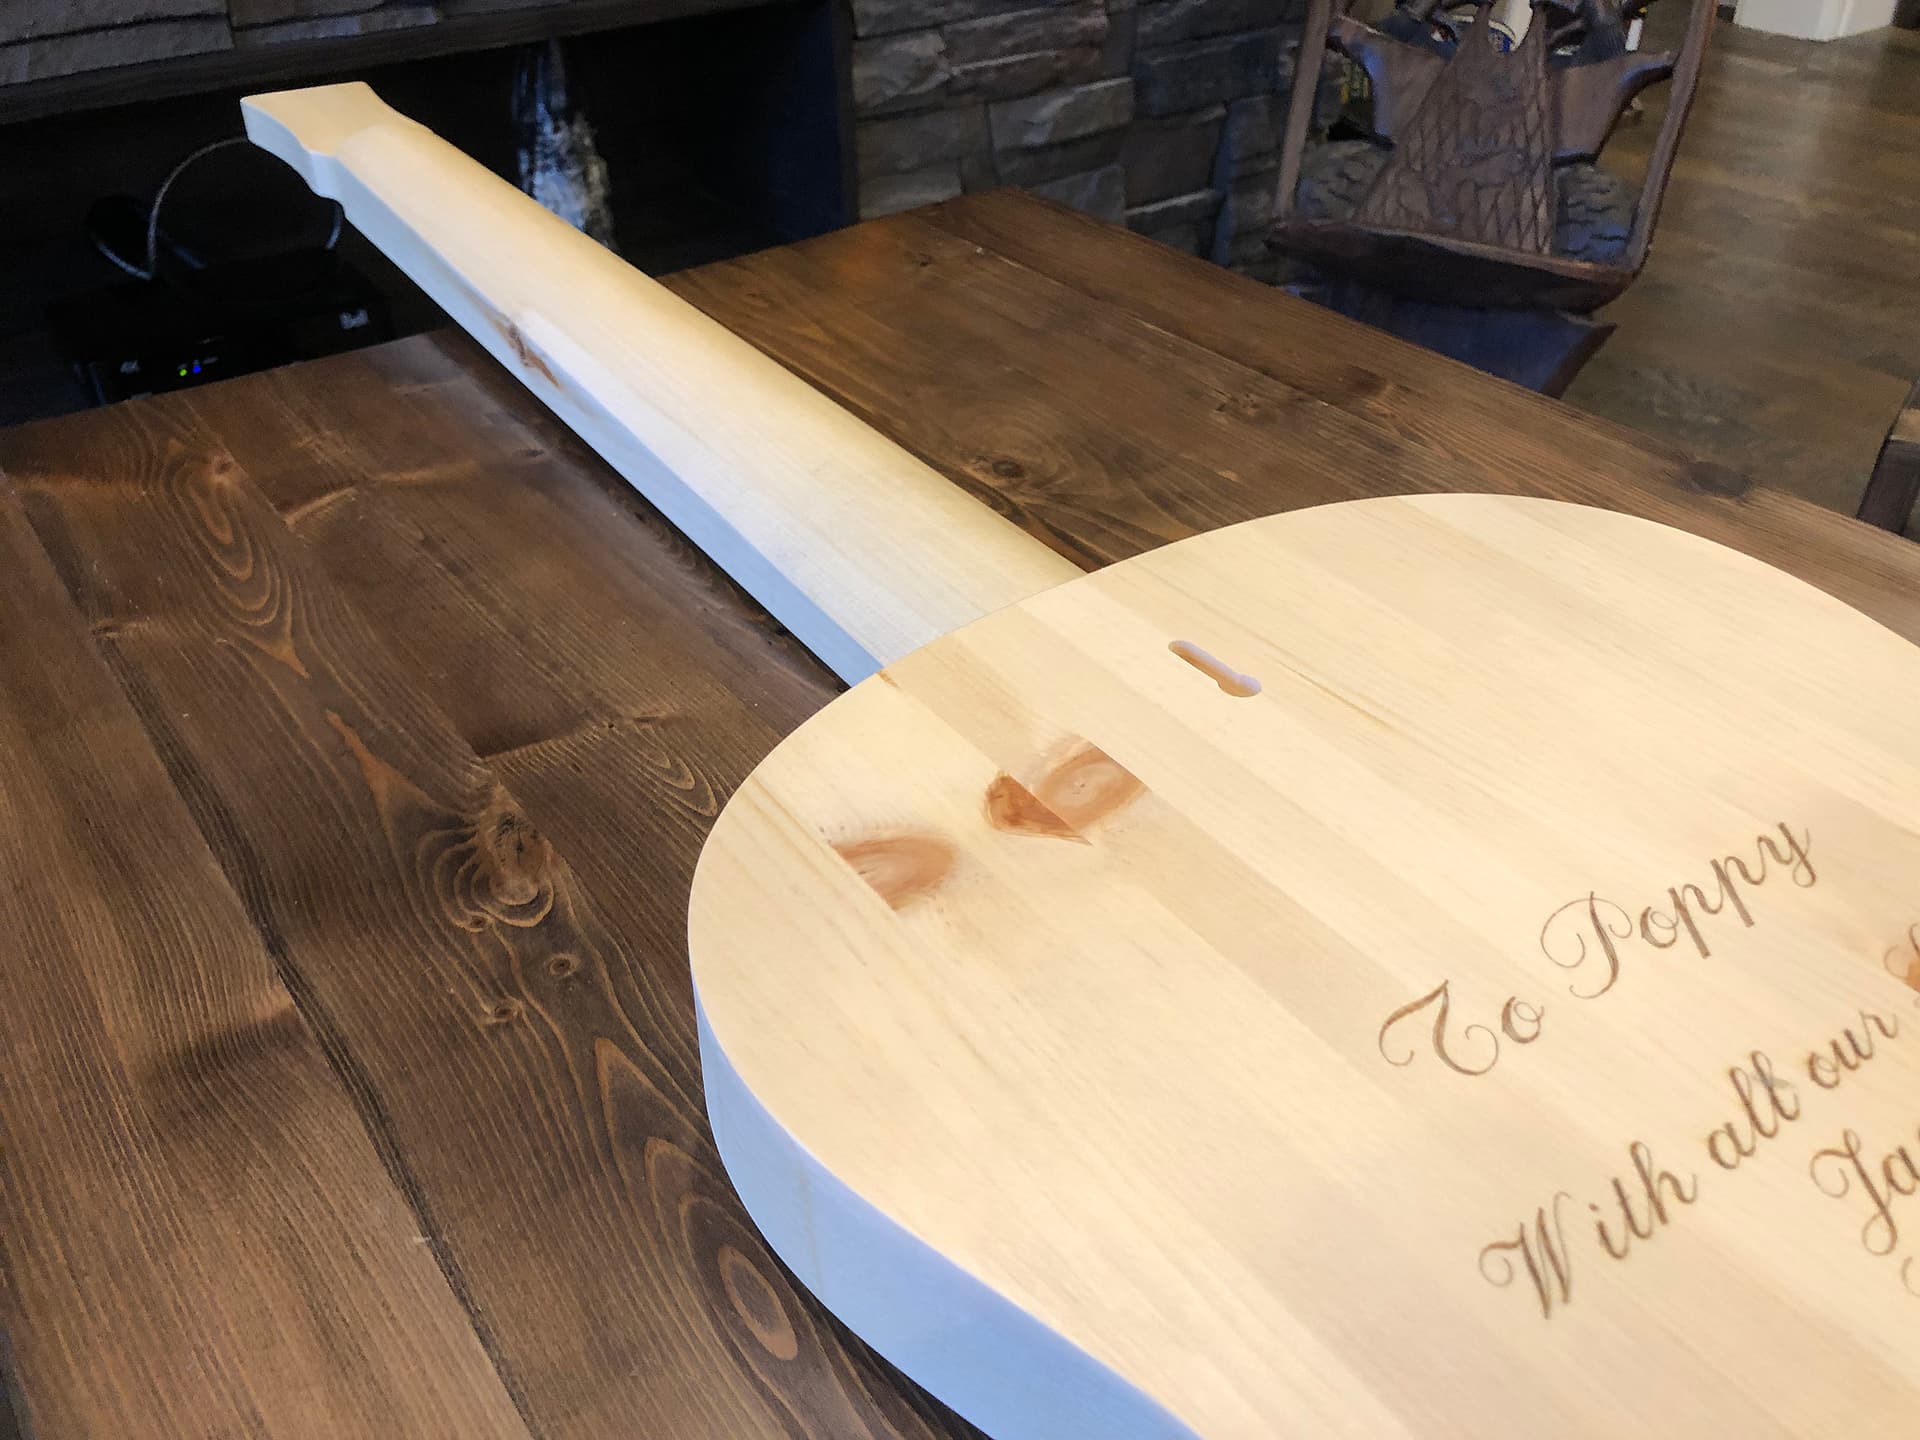
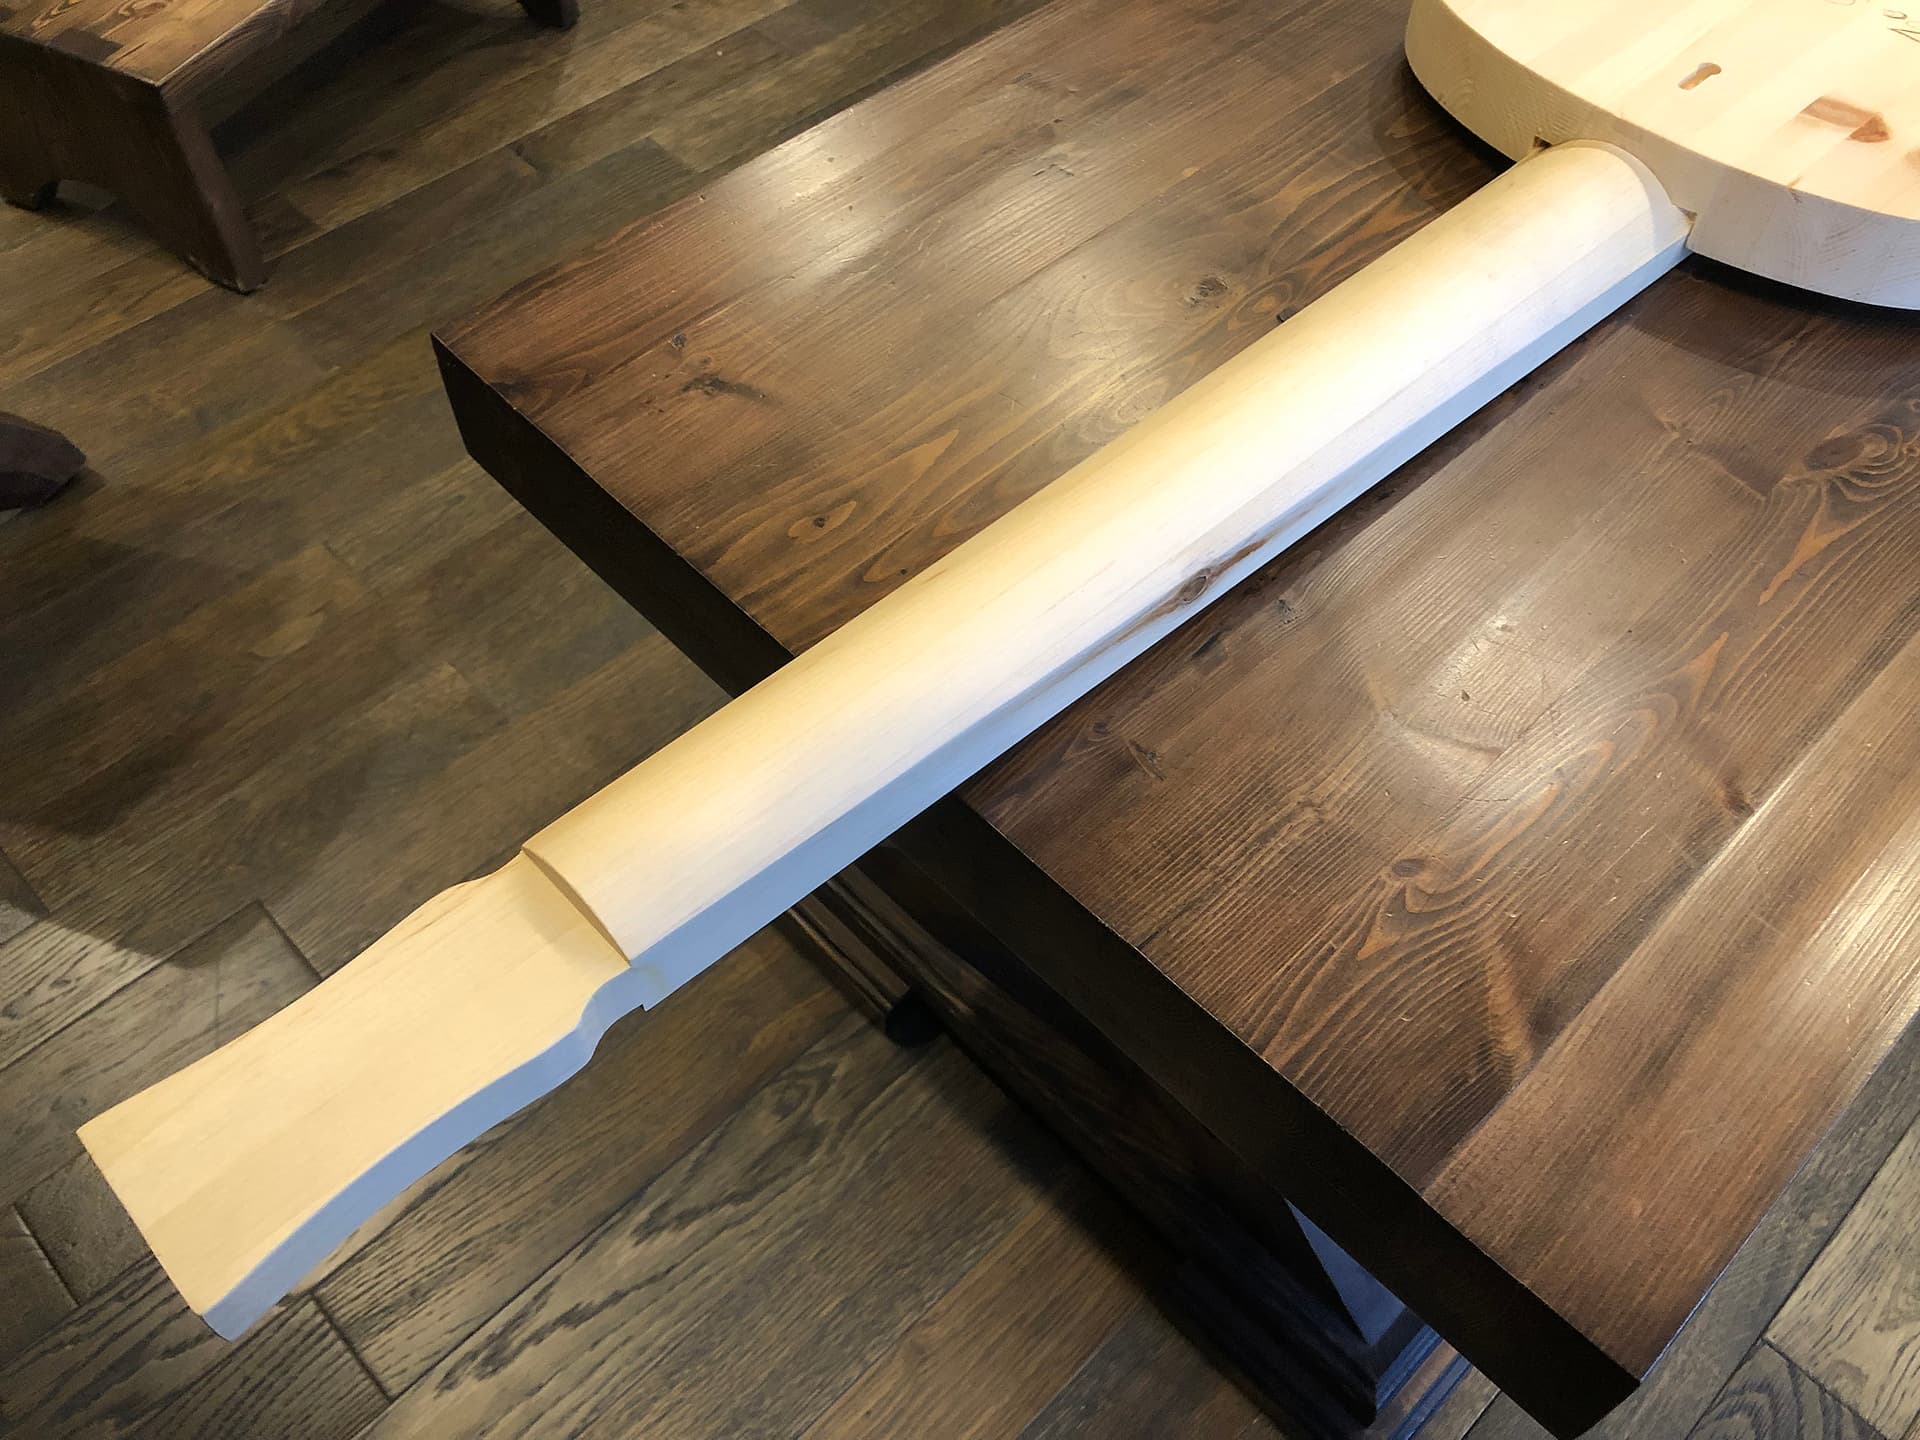
- Guitar neck, rounded profile was created in Vectric VCarve Pro. The Aspire version is needed to taper the profile from one end to the other.
PROJECT TECHNICAL DETAILS
General
- Two part project, neck and guitar body
- Body measures 22” wide by 26” high
- Neck measures 4” wide by 28” high
- Both cut from 1.5” thick edge jointed pine
- Software, Vectric VCarve Pro
- Laser, Banggood 5.5watt
- All project design elements and tool paths created by myself
Neck Tool Paths
- Rounded neck profile on back, 1/4” ball endmill (profile tool path in VCarve)
- Flat pockets, 1/4” flat end mill (down cut)
- Cutout, 1/4” flat end mill (down cut, 1.5” cutters)
Body Tool Paths
- Keyhole slot, 1/8” down cut end mill
- Keyhole slot, 3/8” keyhole bit from Lee Valley
- Company name, 60 degree v-bit from Lee Valley
- Neck slot, 1/4” end mill
- Middle hole, 1/4” end mill
- Body outline, 1/8” end mill


4 Likes
This project is truly special Derek, thank you for sharing their story with us.
1 Like
Name: Custom Made Picture Frame for Christmas Grandma
Usecase: make a unique gift for Grandma
Material: Hobby Lobby Basswood Plank, Acrylic Sheet
Size: 5X7 Picture Frame
Cut Time: 1.5 hrs
Finish Time 1-2 Days with sanding and finishing with stain and seal coat
Lessons Learned: Precision is tricky since its a front and back cut so i had to make a center mark both on mateirla and spoil board to line center up when flipped. If you look closely you can see the inner cutout isnt fully centered… The Honey comb inner design was a happy accedent from carbide create of using their advance vcarve option. Took about 5 trys to get the right dept and lettering of the correct.

1 Like
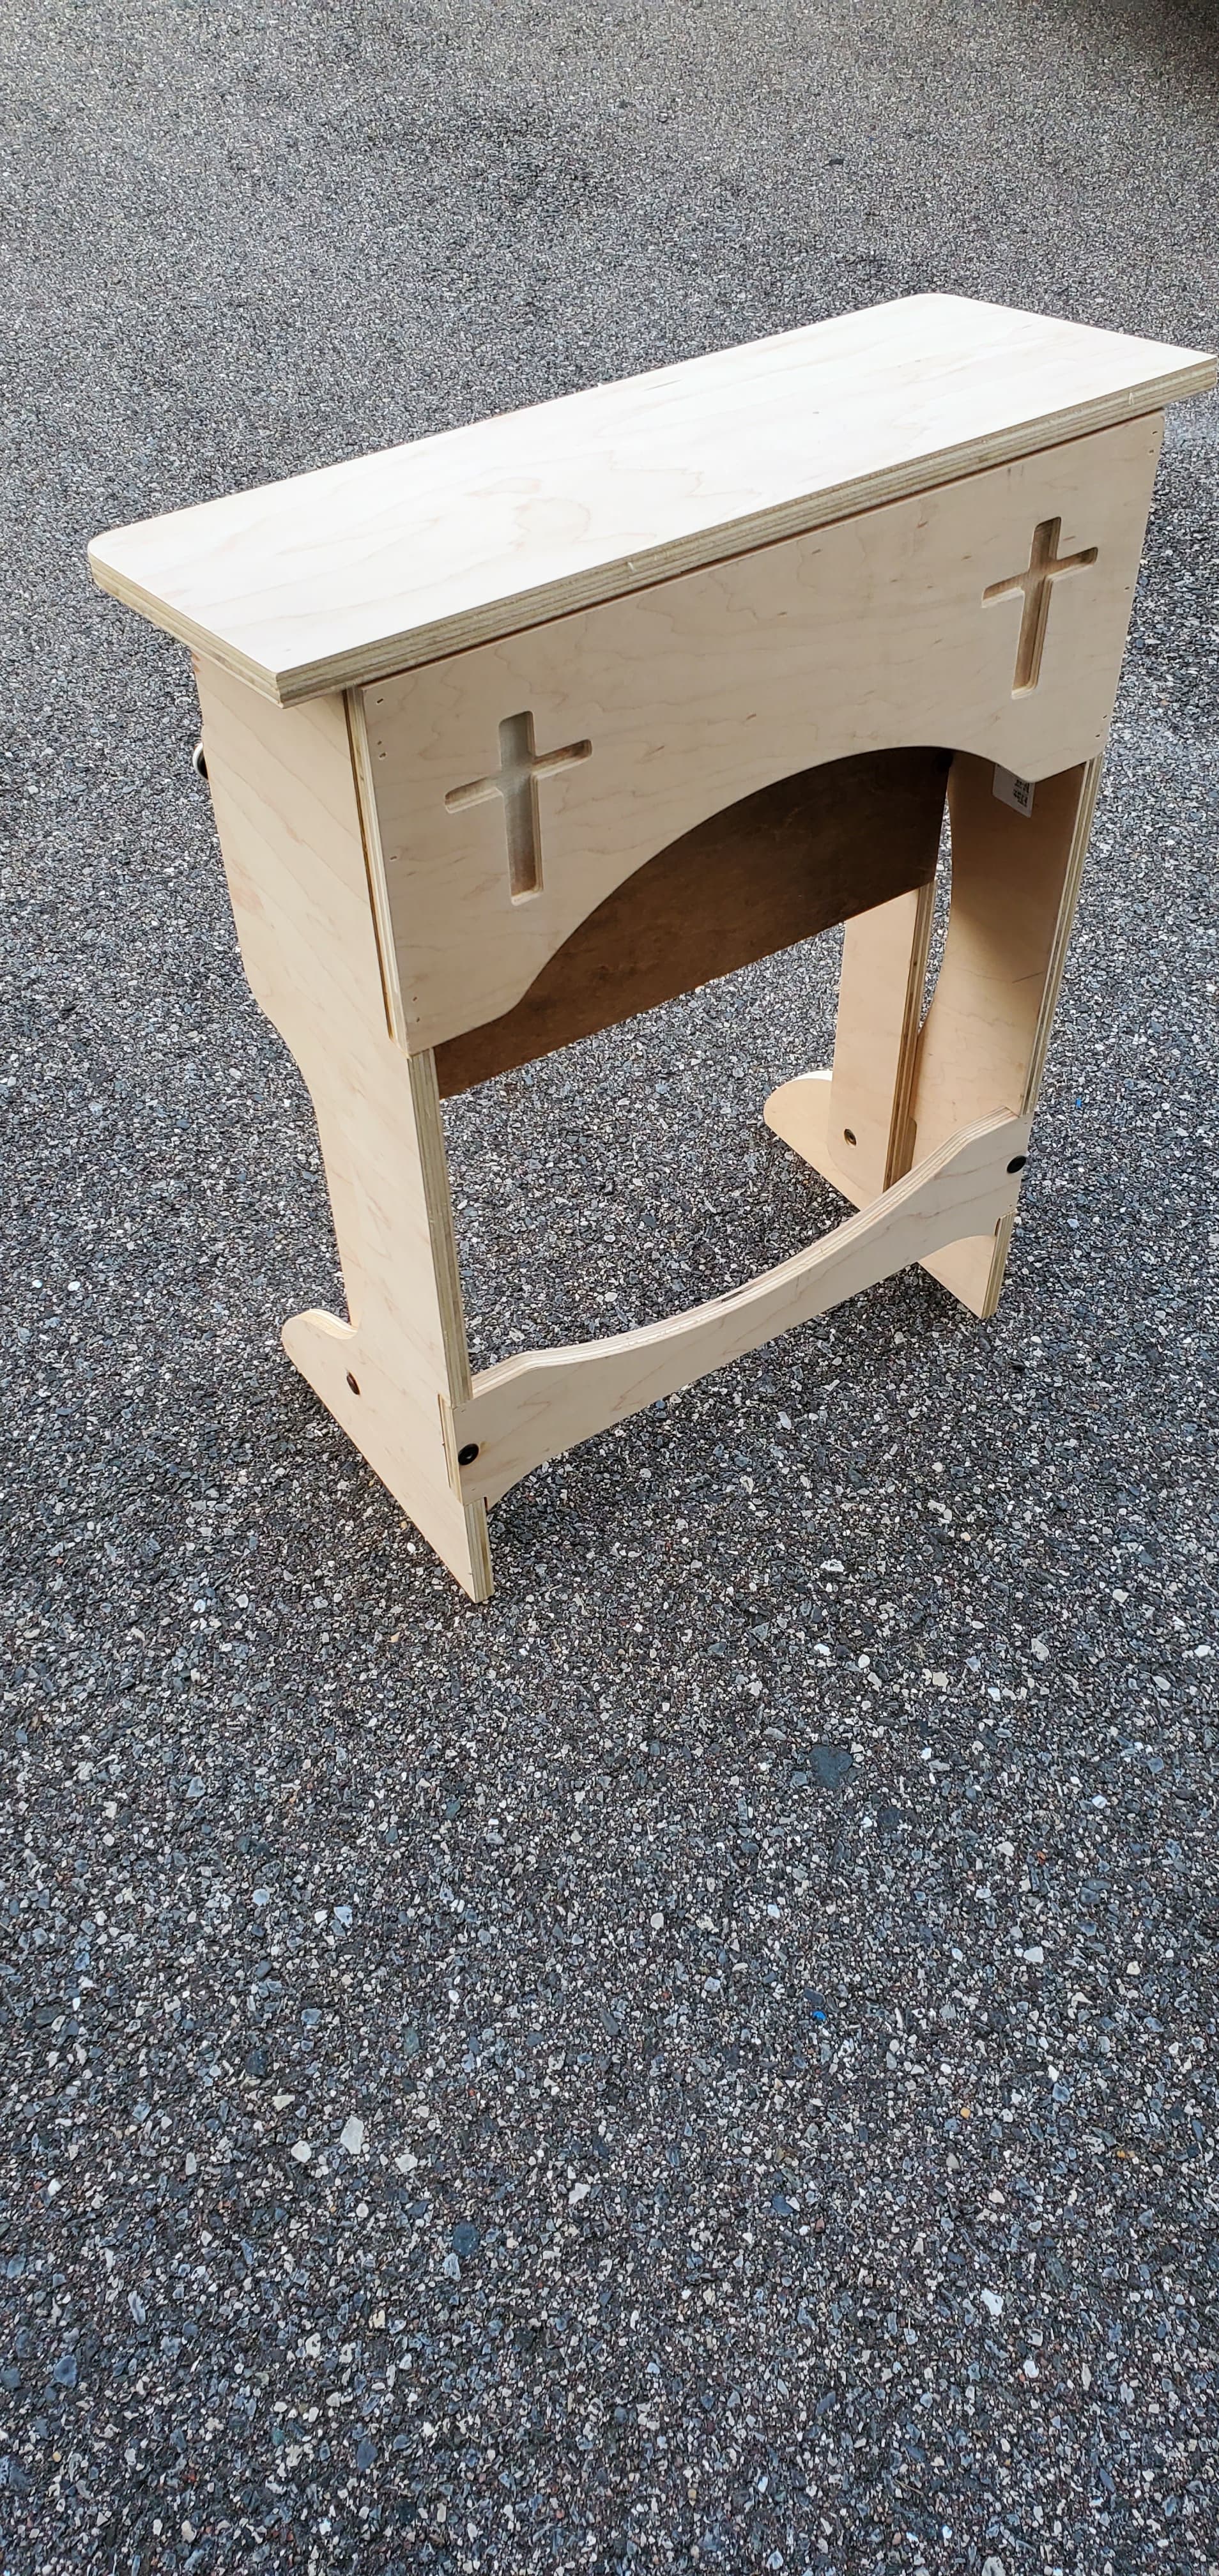
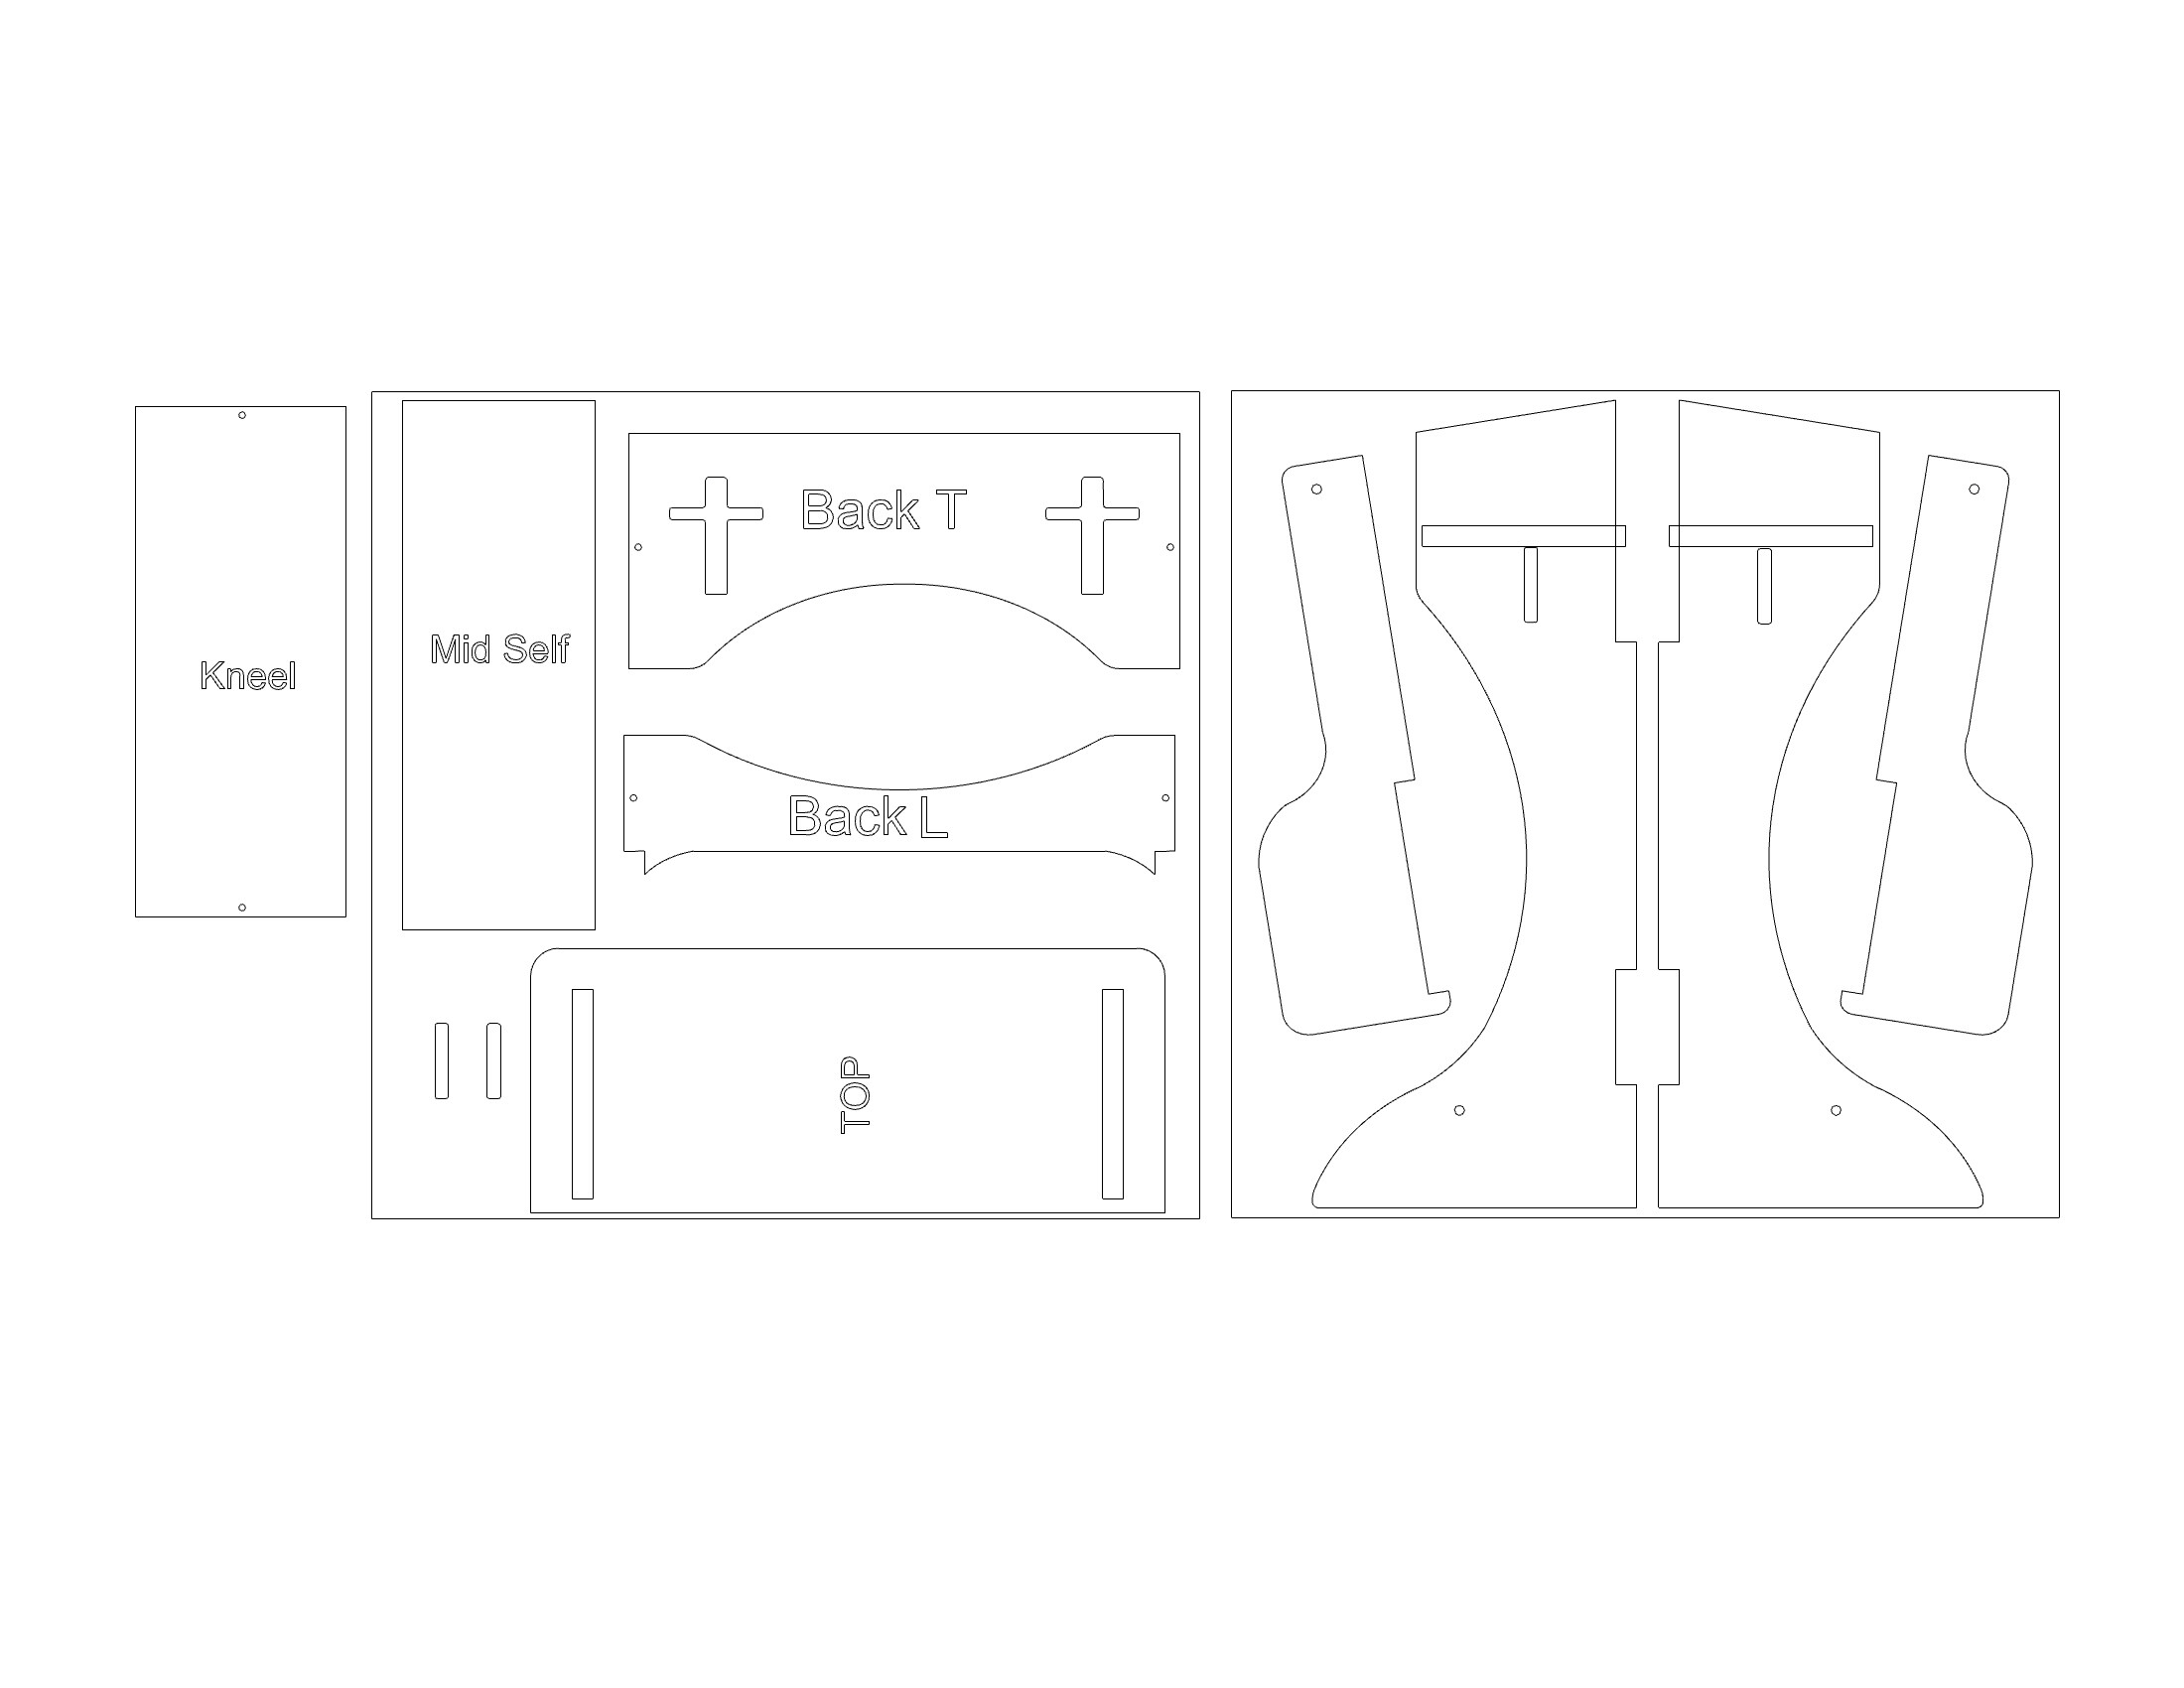
Name: Custom Made Prayer Kneeler
Usecase: Make a unique that can be flat pack and assembled for Christina Charity Event
Material: Birch Plywood, Stain, Mini Magnets
Size: Multiple
Cut Time: 1.5 hrs
Finish Time 1-2 Days with sanding and finishing with stain and seal coat
Lessons Learned: Original design was handmade using electric hand tools total time took about 3-5 days. New design is repeatable and only take less than 2 hours to cut and you can get 2 on a 4’x8’ sheet of ply. No Screws are required part fit together with glue. Each piece is replaceable and design folds up vertical to save space and stays closed with magnets. Its tricket to get Plywood dimensions perfect especially for inserts and inconsistancy in center sheets especially if material is from big box store. Long mill helped to get from 3-5 days of manufacturing time to make 1 to less than a day to make 2.
2 Likes
That honeycomb pattern is very unique @jad66. Did you keep the live edge on the material?
Glad to see that the LongMill is helping you reduce manufacturing time
Yes i kept the live edge on the material what i did was seal it so it didnt crackle and fall off.
2 Likes
it still saying im a new user btw and i can only do one reply to post
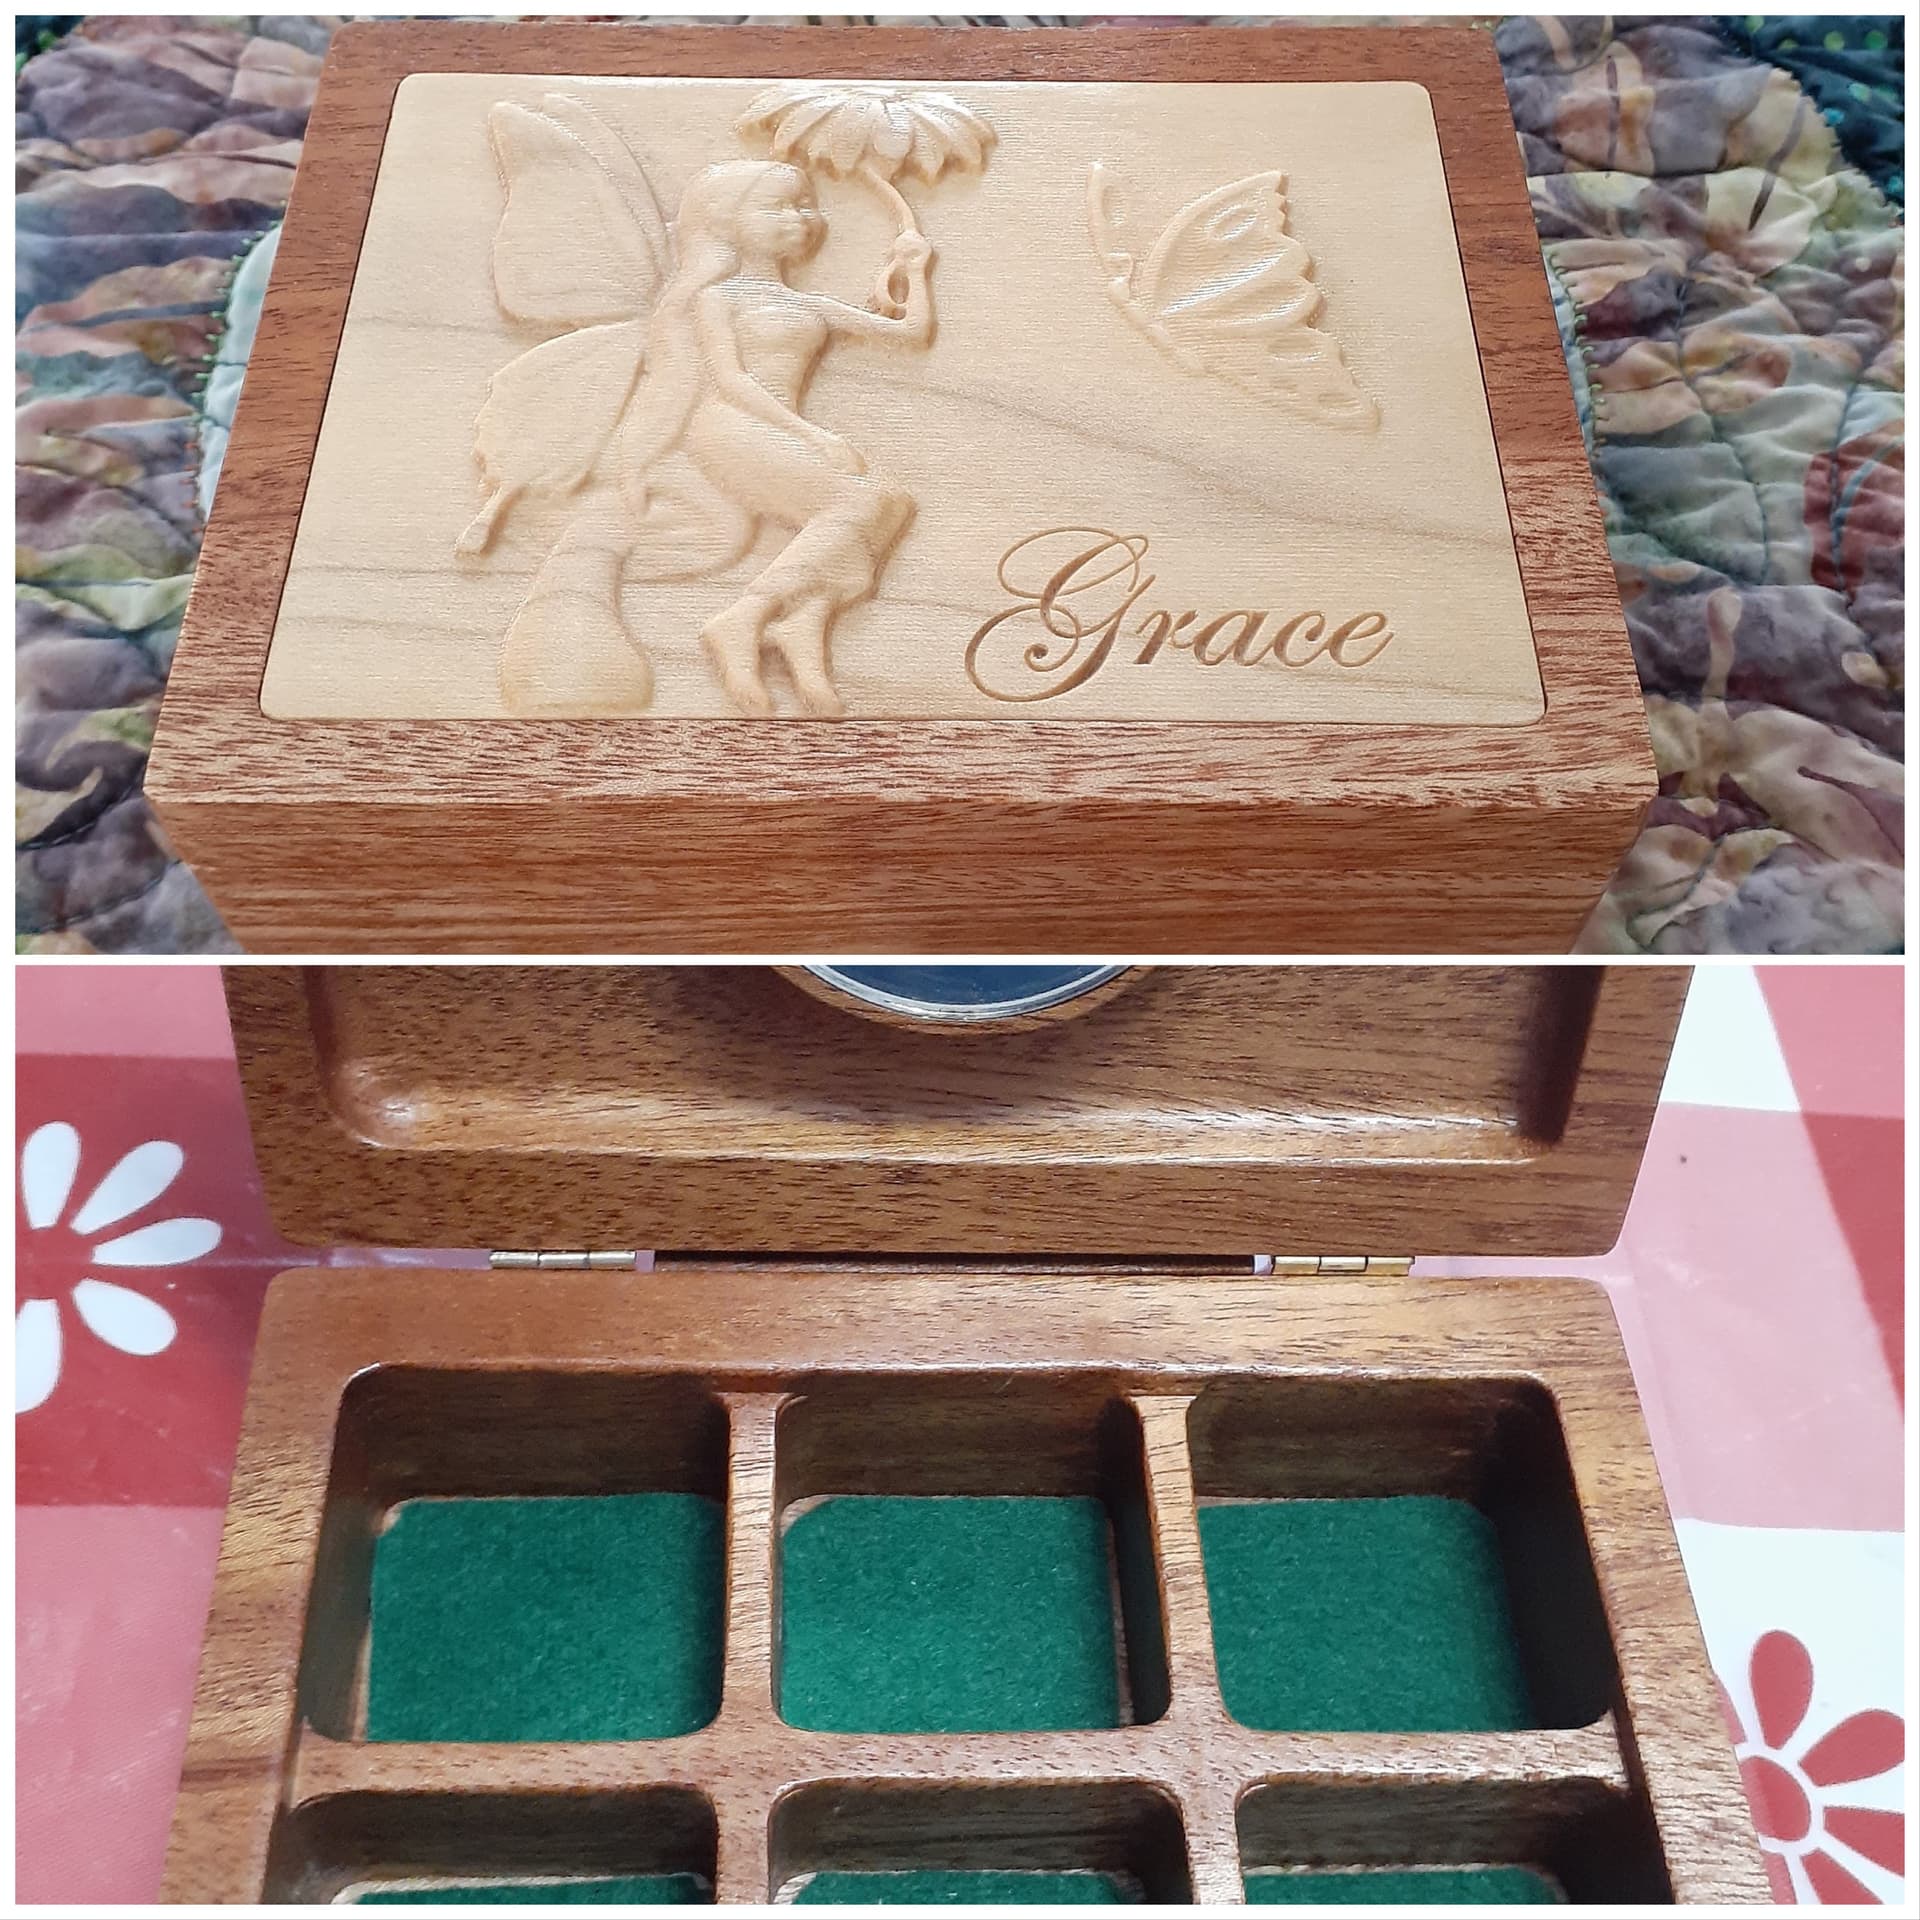
Special request earring box. Lid & box from single solid piece of Mahogany with insert done in 1/4” Poplar. 140x110x45mm. 1/4” up/down end mill & 1/8” end mill for the box. 4.9’ tapered ball nose & 1/8” end mill for the inset. 1/4” end mill for the lid. 2” round mirror inside of lid & self adhesive felt for bottom (which needs tweaking…miserable stuff to work with) .
2 Likes
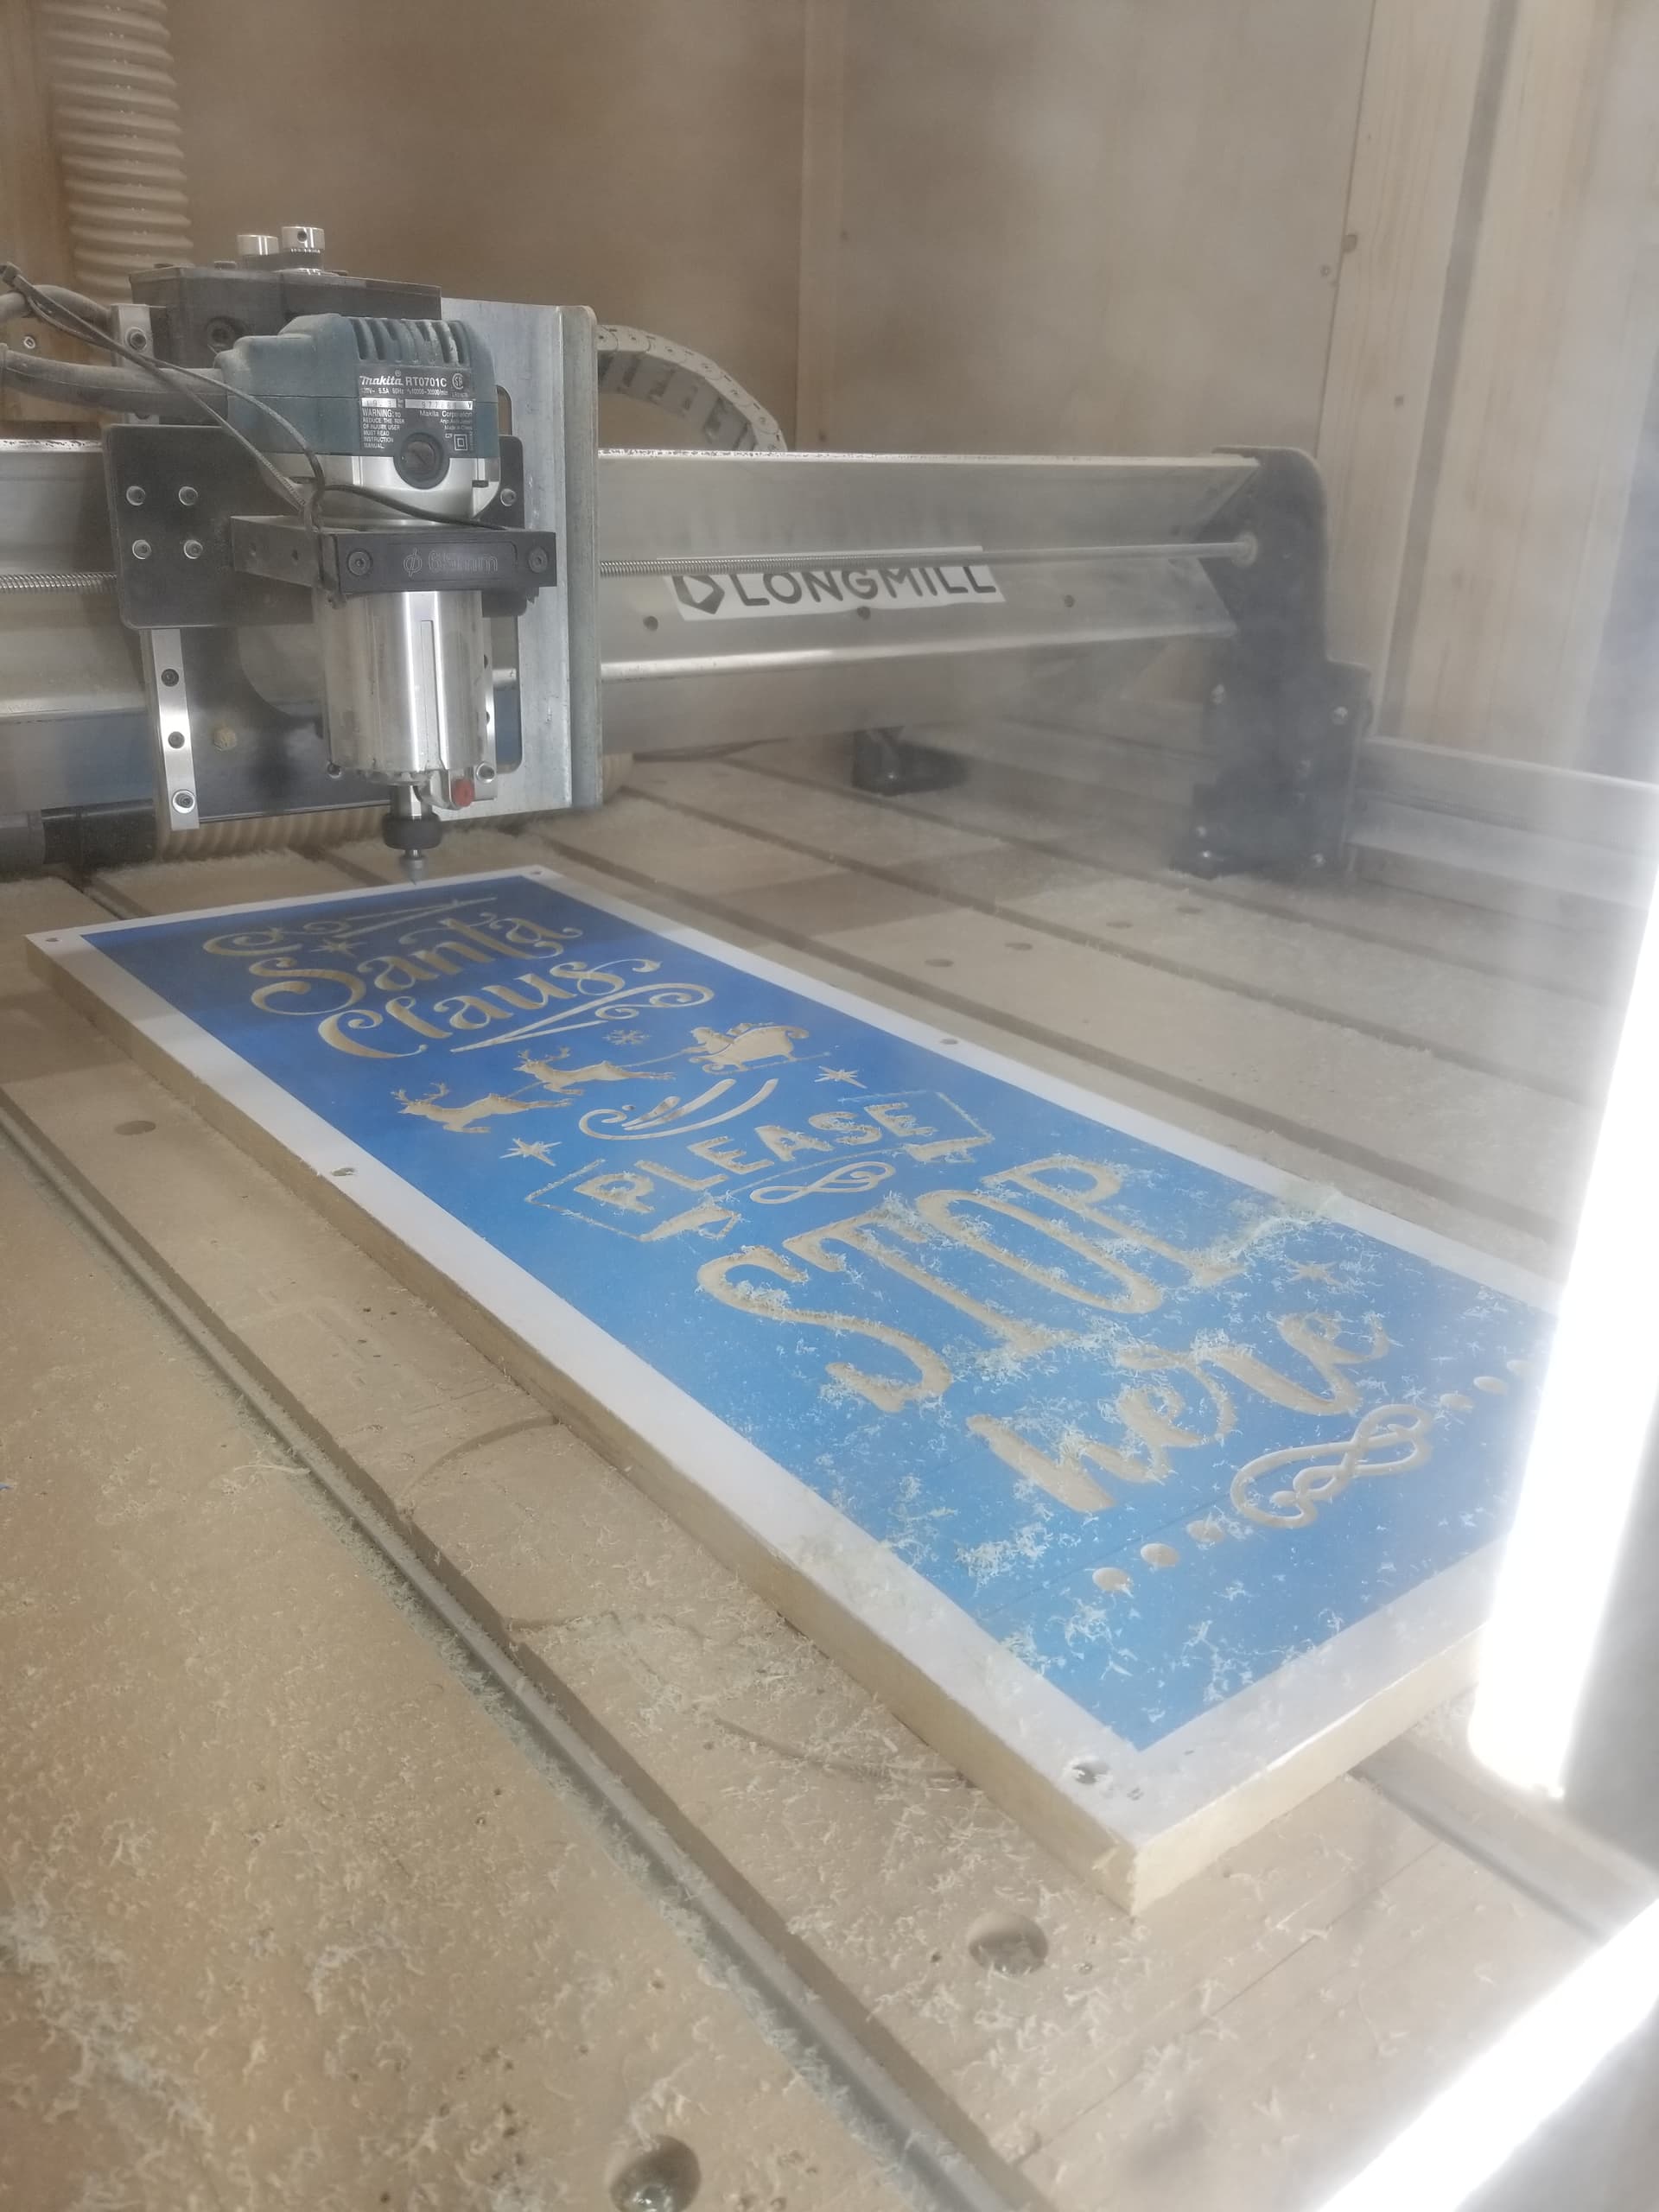
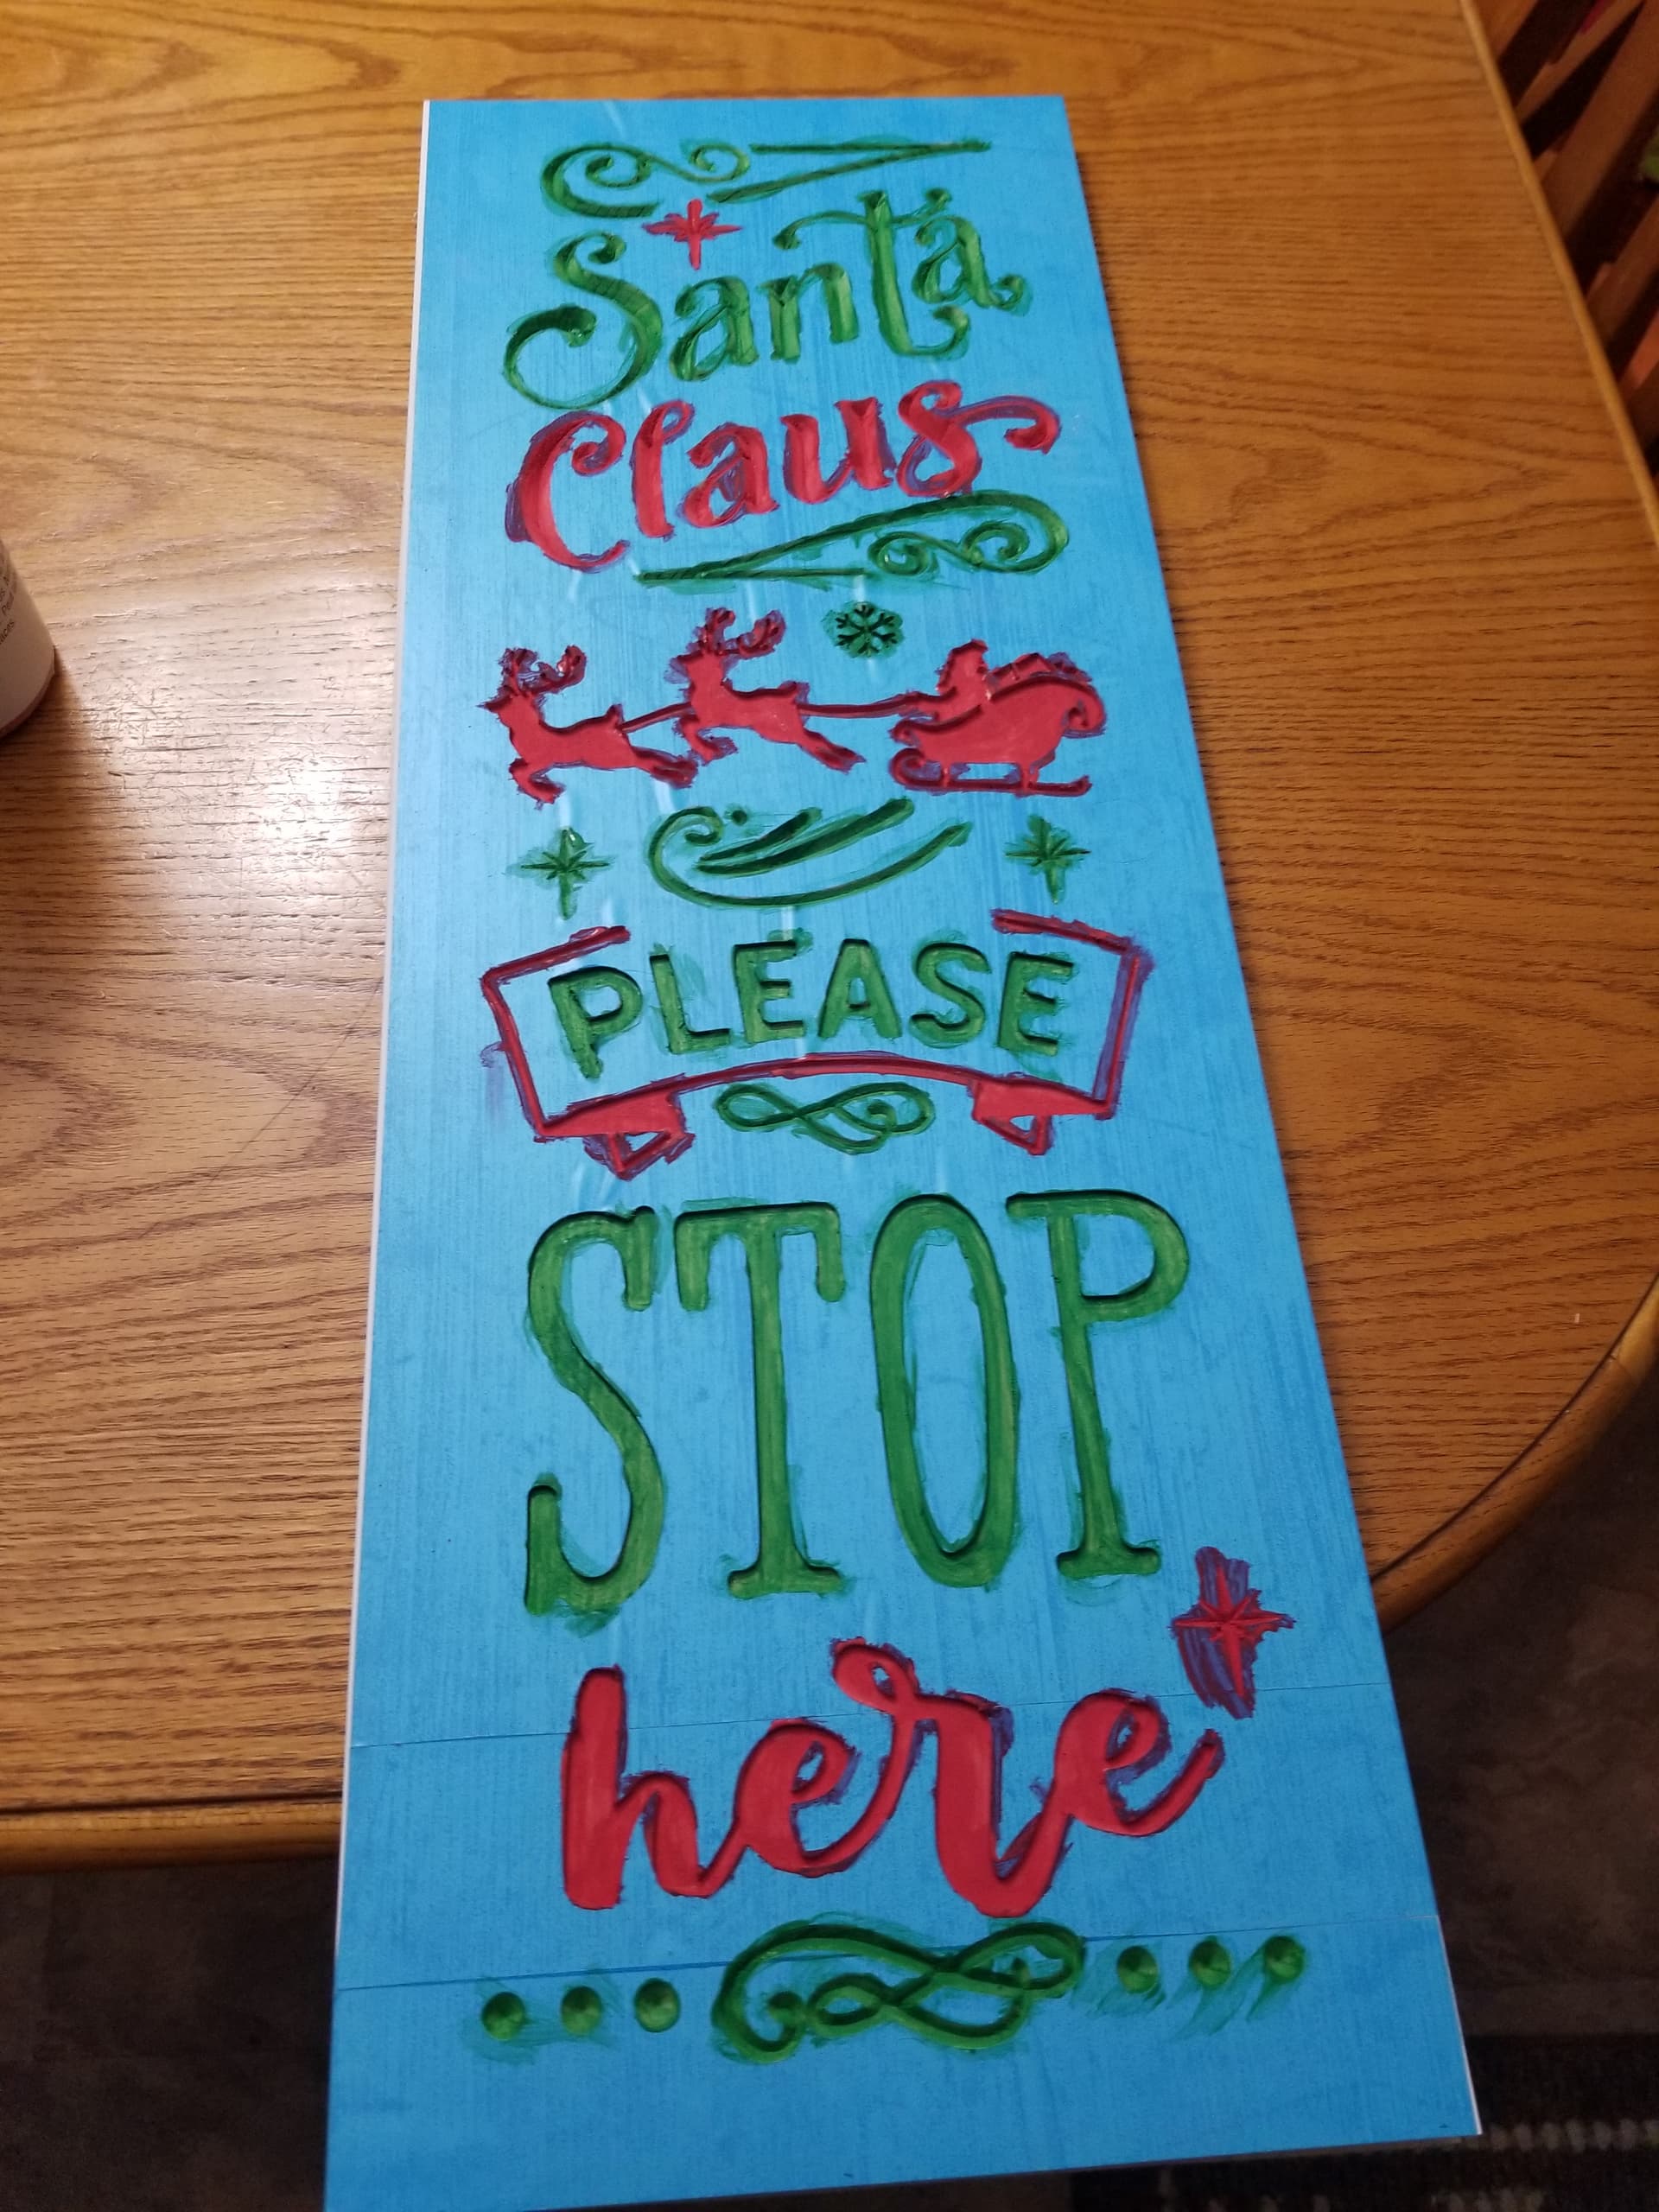
Santa Please Stop Here Sign
Design process – Fusion 360
- Modelled a 12” x 30” x ¾” board.
- Imported free svg file from Free Design Resources | Download Free Graphics, SVGs, Icons + More! (designbundles.net)
- Sized the svg file 1.5 inches smaller than the board.
- Removed border from svg file.
- Cut svg shapes into the board, 1/32” deep.
Creating Tool Paths – Fusion 360
- Setup board 12” x 30” x ¾” in manufacturing workspace.
- Cut Santa and sleigh using 2D pocket command with 1/16” down cut end mill. Spindle speed 20,000 RPM, feed rate 60 inches/minute. Multiple cuts 0.04” deep.
- Cut the words; PLEASE, STOP and here using 2D pocket command with 1/16” down cut end mill. Spindle speed 20,000 RPM, feed rate 60 inches/minute. Multiple cuts 0.04” deep.
- Cut the shapes using engrave command, with 90-degree V groove router bit. Spindle speed 20,000 RPM, feed rate 60 inches/minute.
- Cut the words; Santa Claus using engrave command, with 90-degree V groove router bit. Spindle speed 20,000 RPM, feed rate 60 inches/minute.
- Cut the outline using 2D contour command with ¼” compression end mill. Tabs added. Spindle speed 20,000 RPM, feed rate 60 inches/minute. Multiple cuts 0.12” deep.
- Created tool paths using the Fusion 360 post process feature.
Manufacturing – Longmill 30 x 30, with Makita Router – UGS software
- Clamped 12” x 30” board into Longmill using screws. Screw heads counterbored down at least ¼” each.
- Surfaced board using ½” surfacing bit. Jogged router.
- Sanded surface slightly.
- Painted surface white.
- Waited approximately 24 hours for paint to dry.
- Applied Oramask 813.
- Cut all tool paths as outlined in tool path section above.
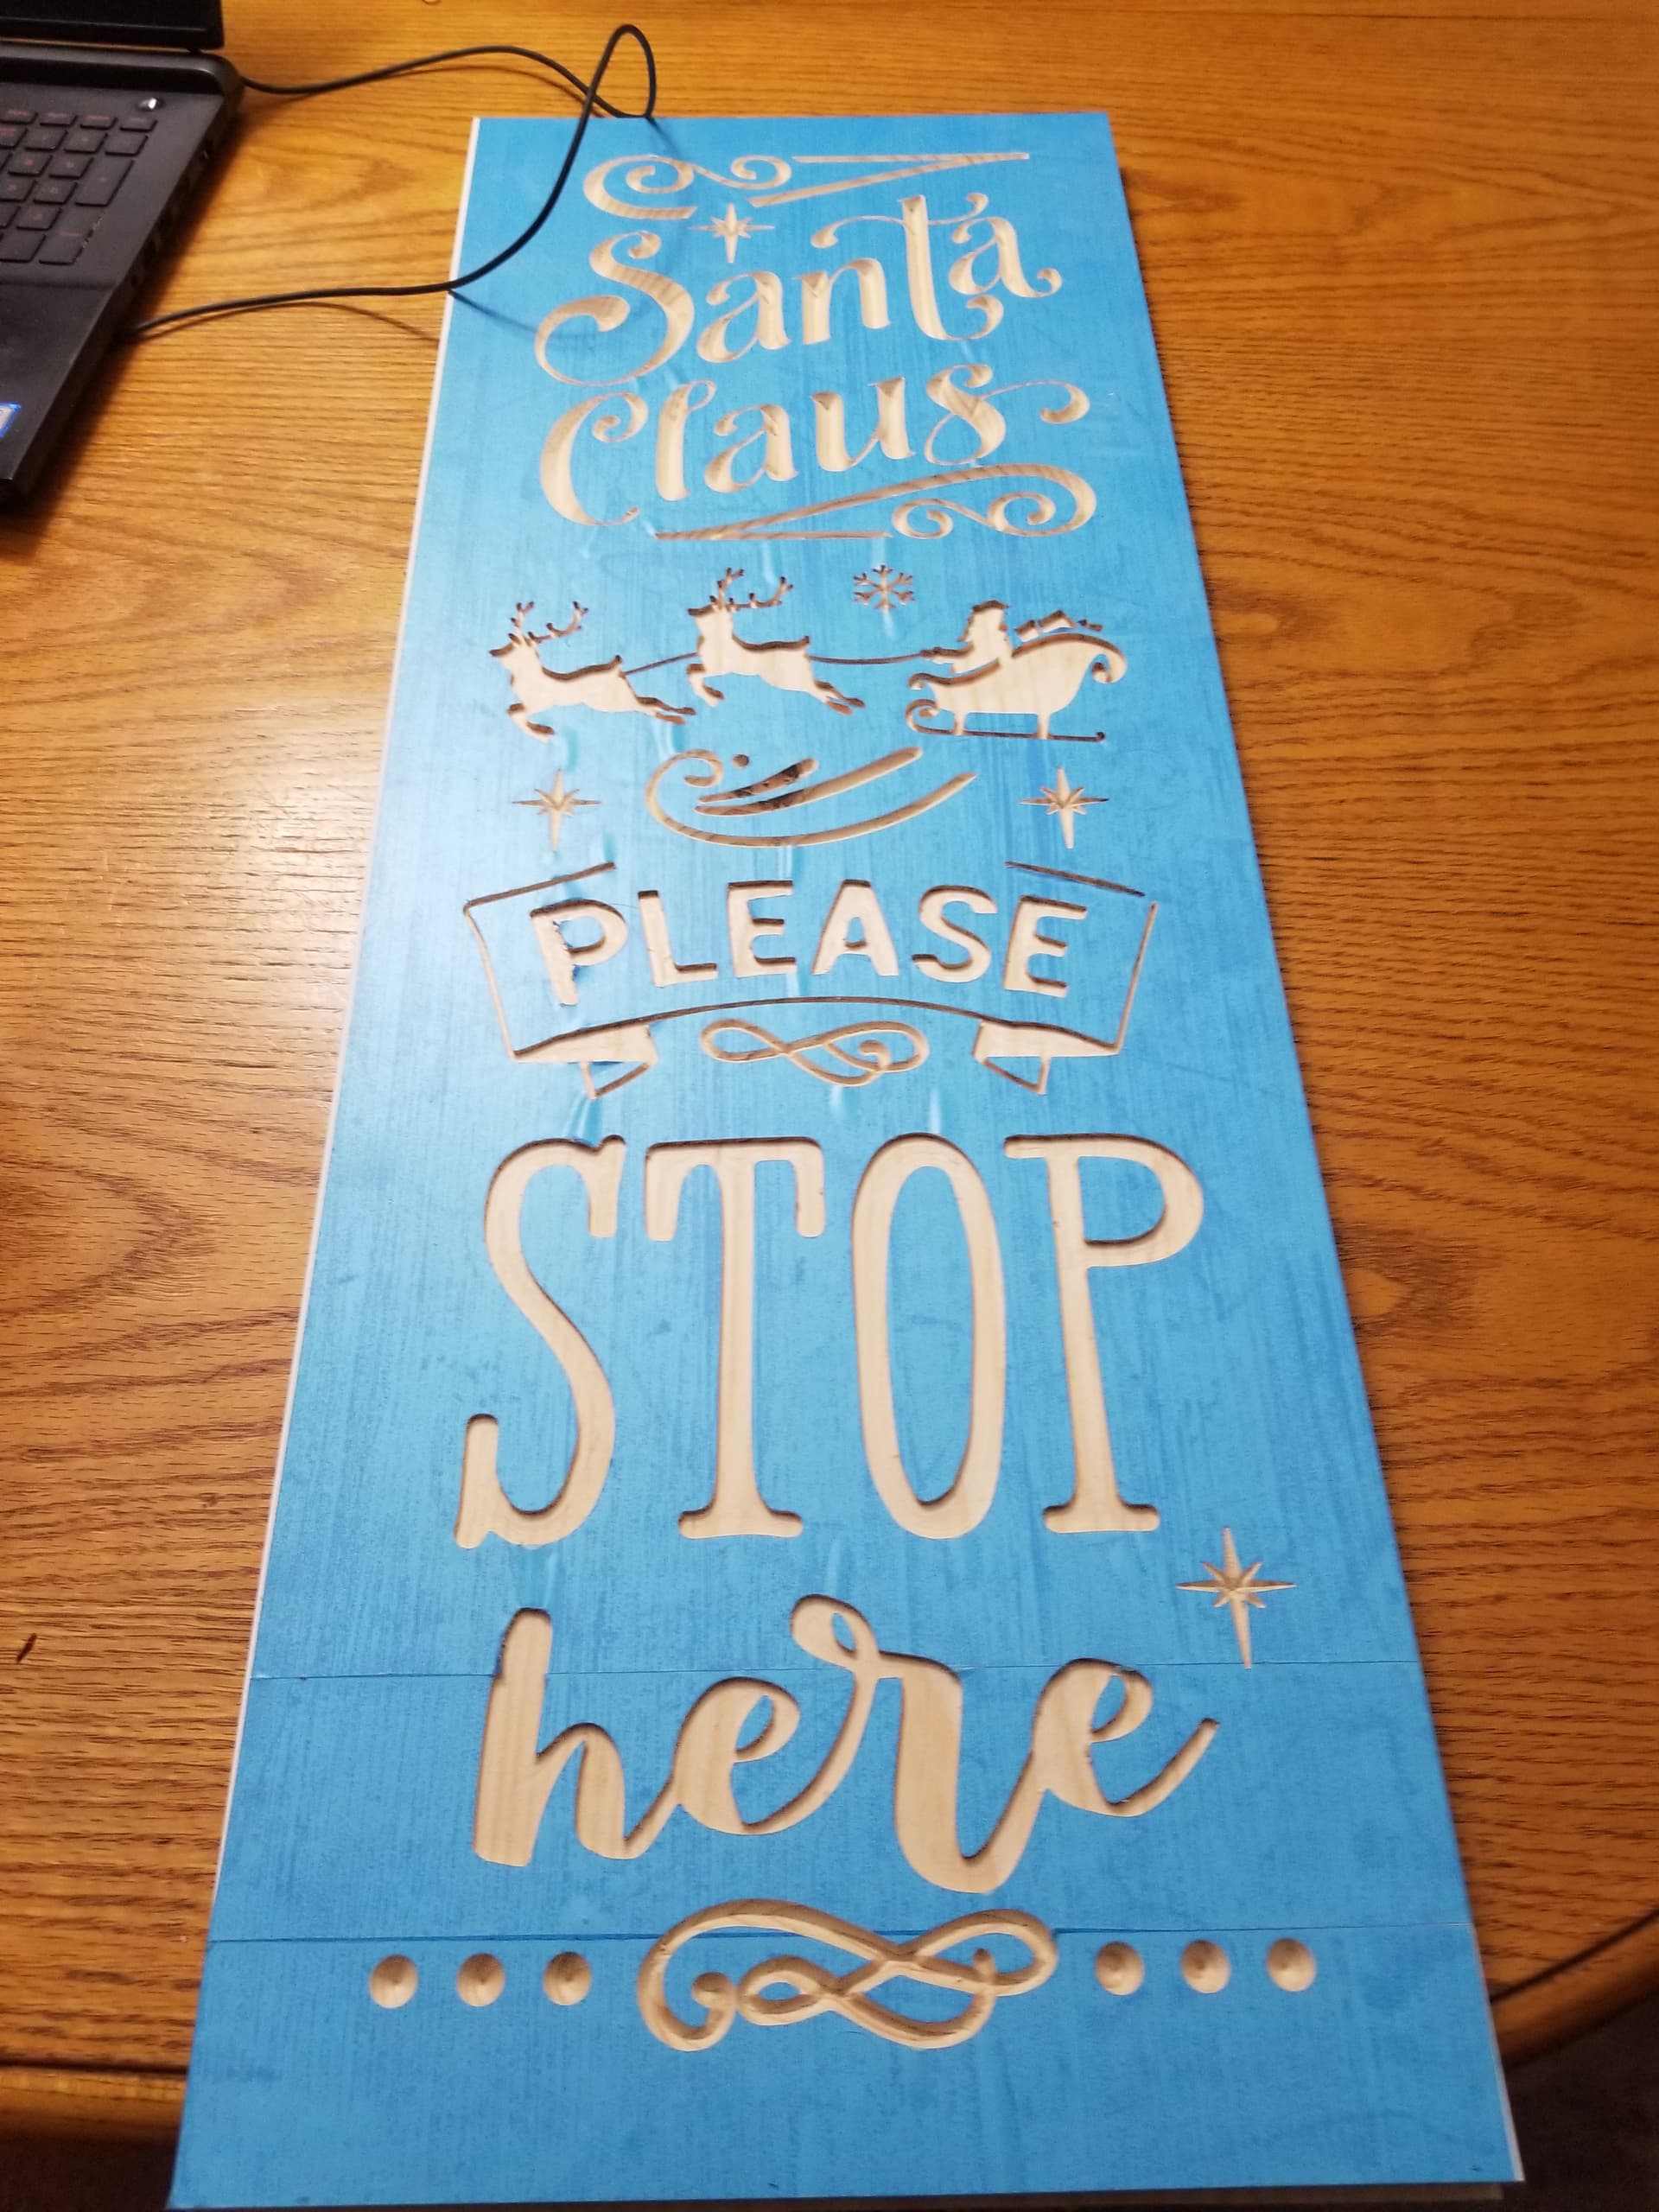
- Removed board from Longmill.
- Painted letter and shape areas with green and red paint.
- Removed Oramask.
- Touched up a few areas with paints.
- Created frame separately using table saw and router.
- Added frame to sign.
- Finished with polyurethane.
- Added lights.
Problems
- Didn’t wait long enough for white paint to dry before applying Oramask. Result was very sticky surface that attracted all kinds of dirt.
- Didn’t wait long enough for red paint to dry before applying polyurethane. Result was that the red paint smeared. Had to repaint white areas around red features.

3 Likes
Very nice. Look up flocking in Google. It is easy to work with, and fairly cheap. I use it on bandsaw boxes.
1 Like
@Rusty_golfer Russ: Lee Valley has a flocking kit that is not expensive and does a seamless job.
1 Like
Thanks for that. Planning to stop by there today, will check it out.
Russ
1 Like
Thanks for the info. Hadn’t thought of using that.
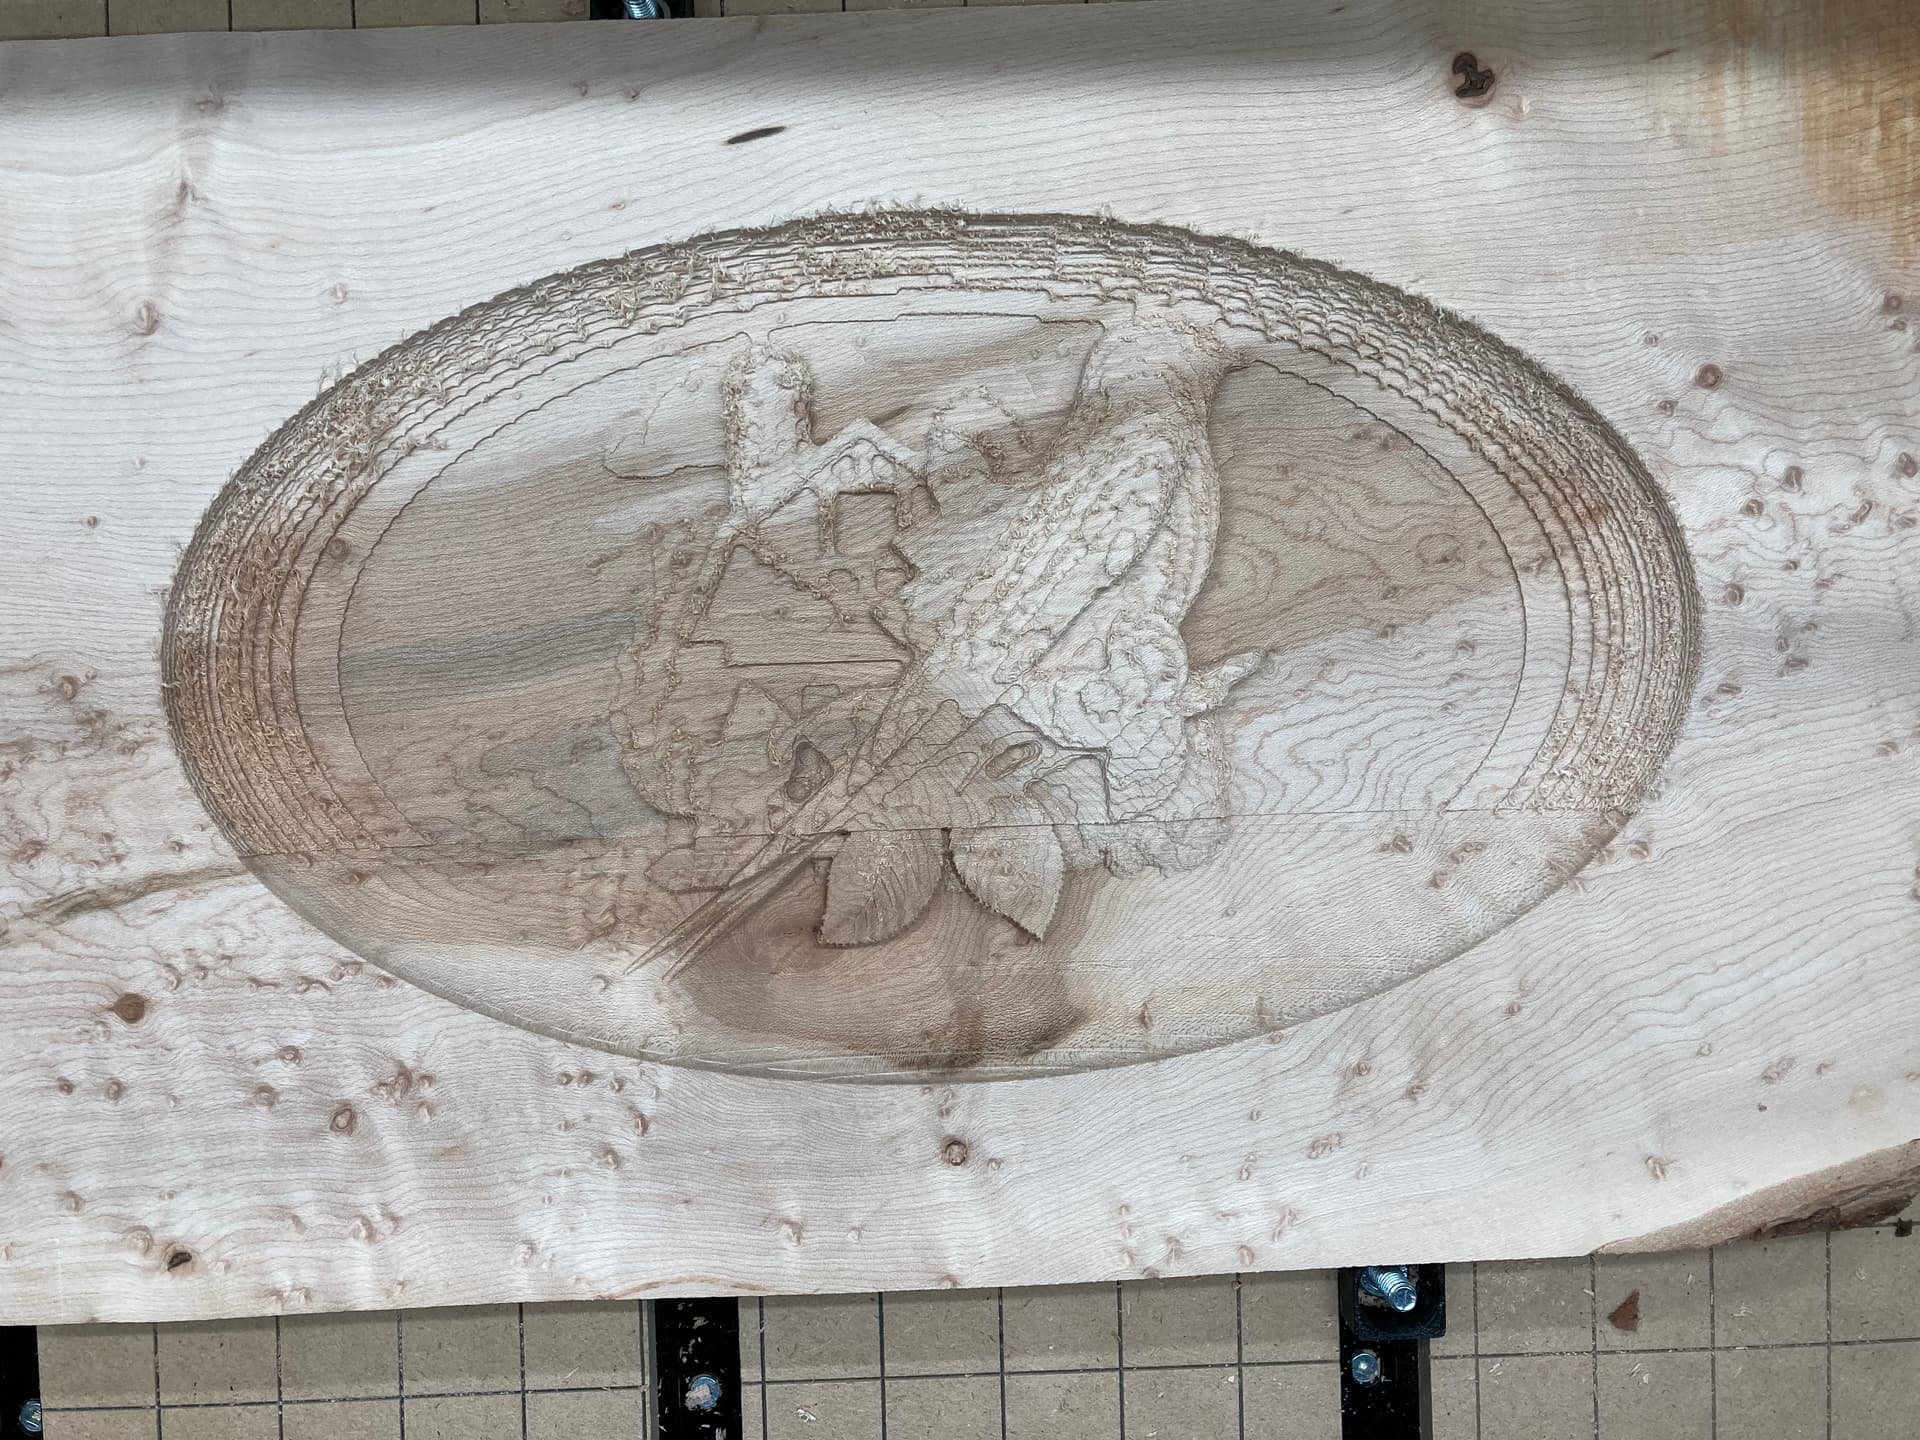
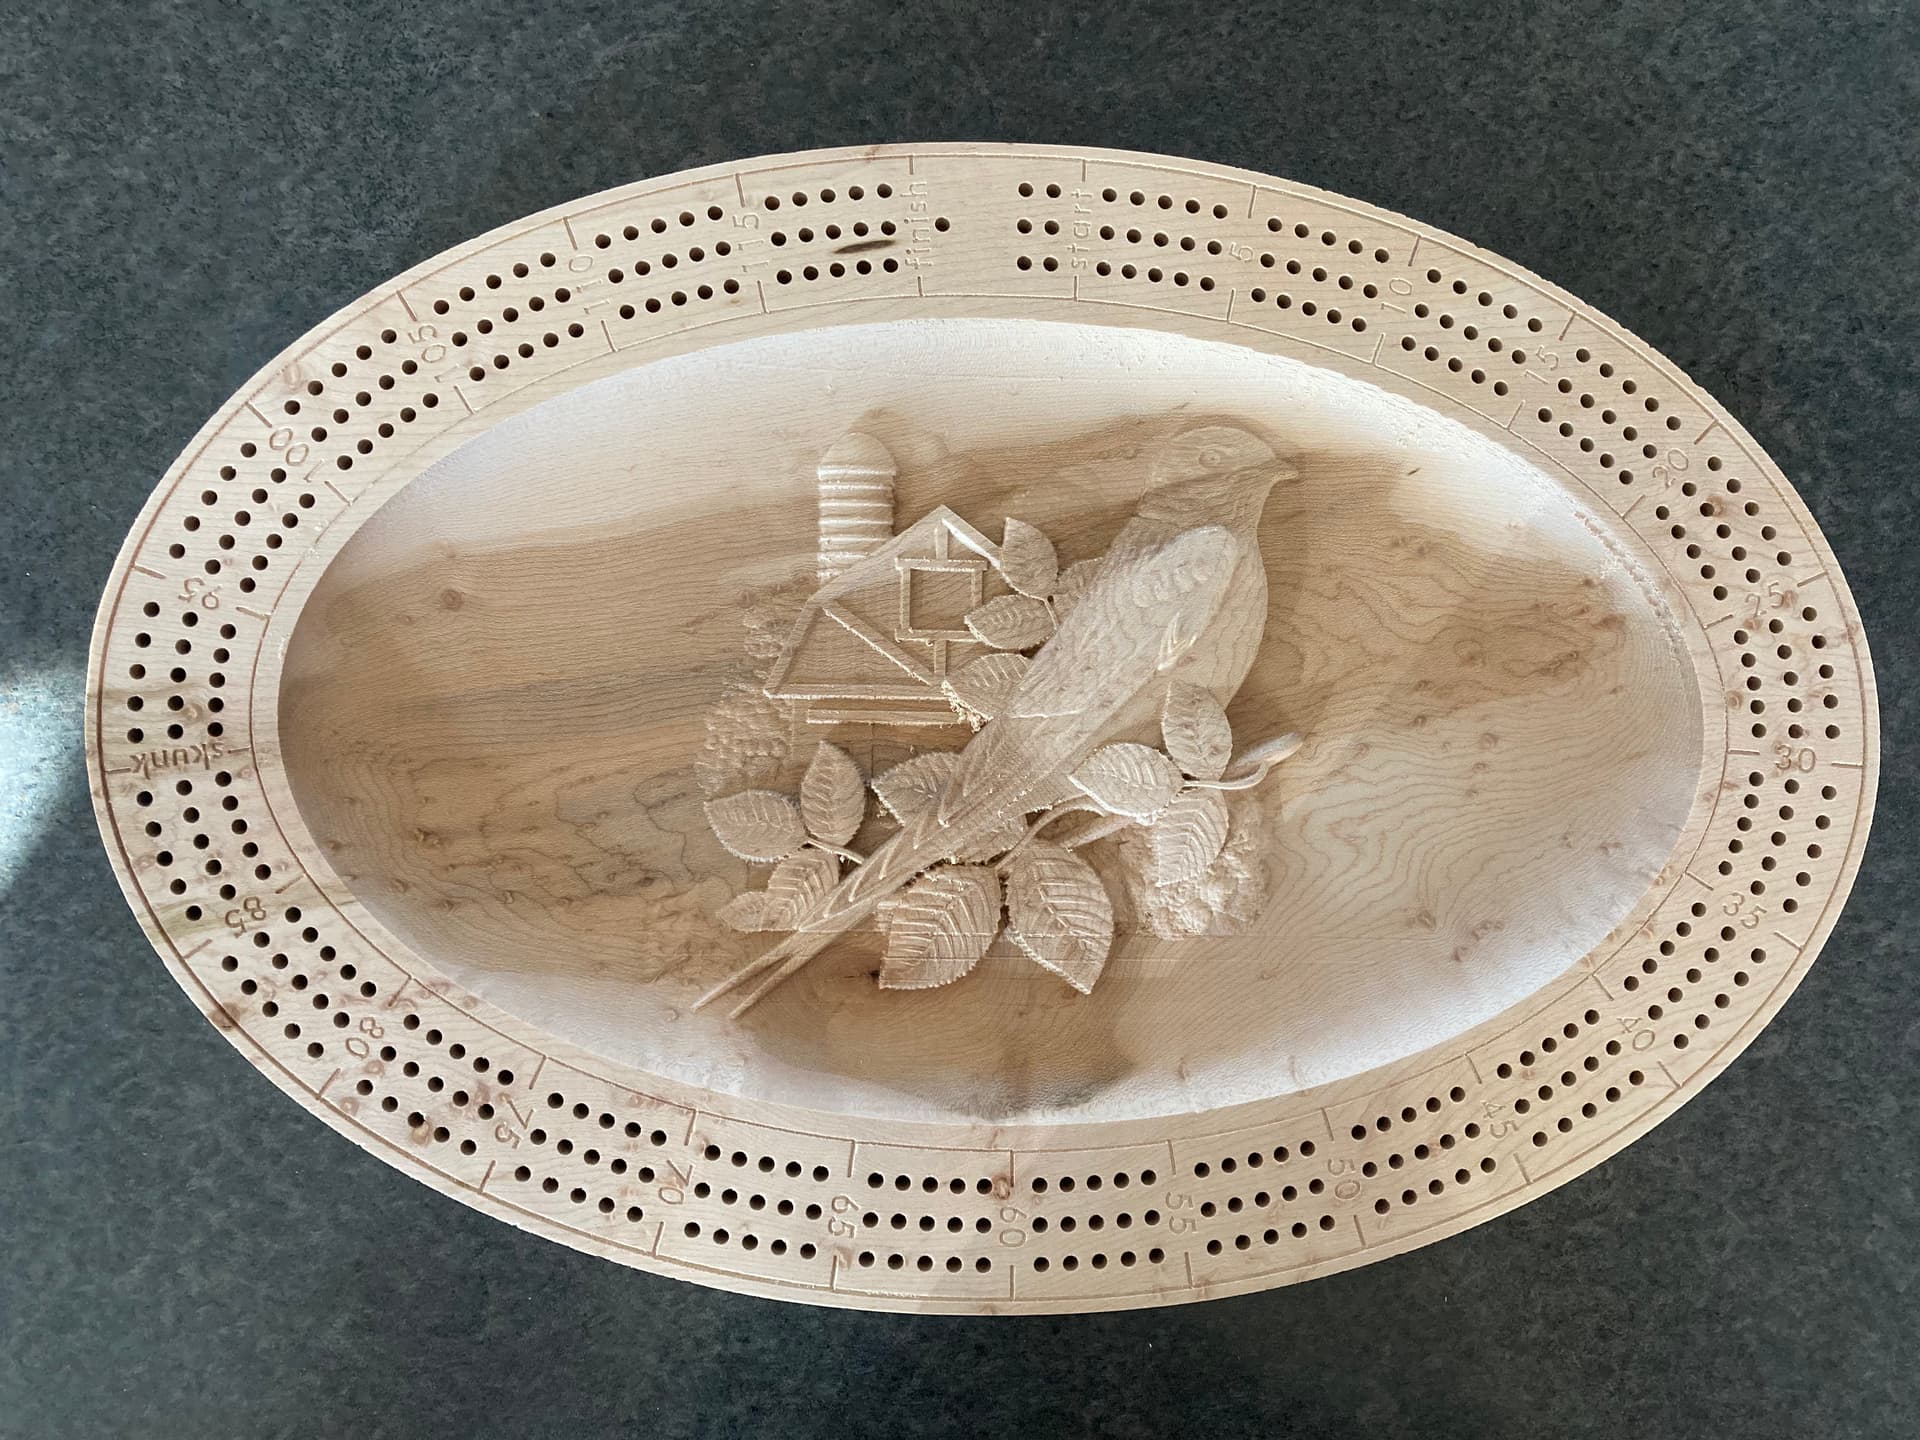
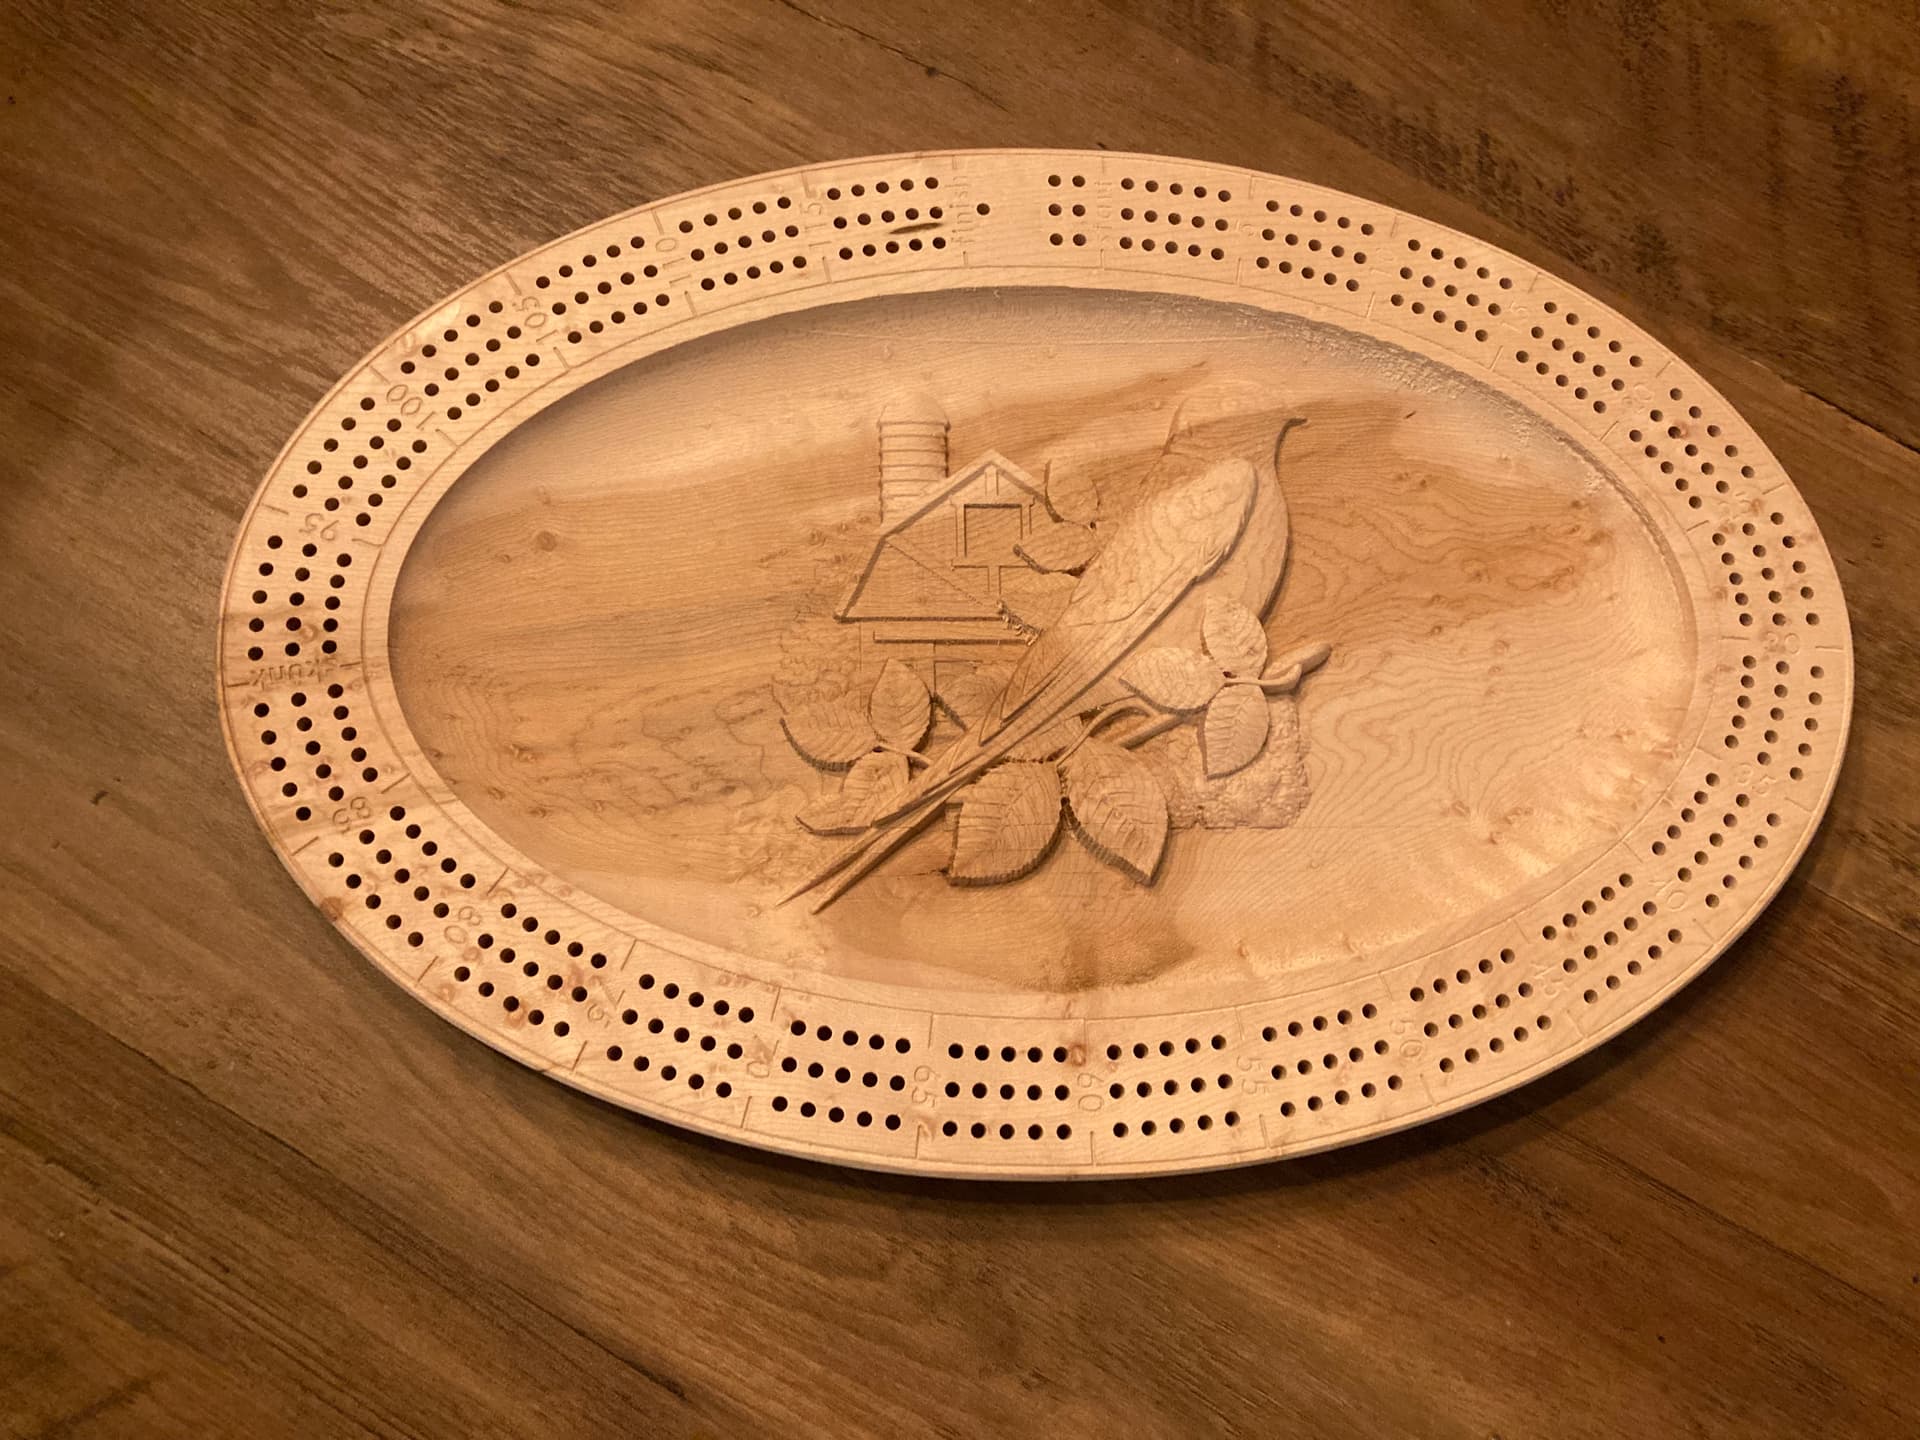
Name: 3D Carve Cribbage Board
Use case: Christmas gift for my mother
Material: Birdseye Maple
Design software: Carveco Maker
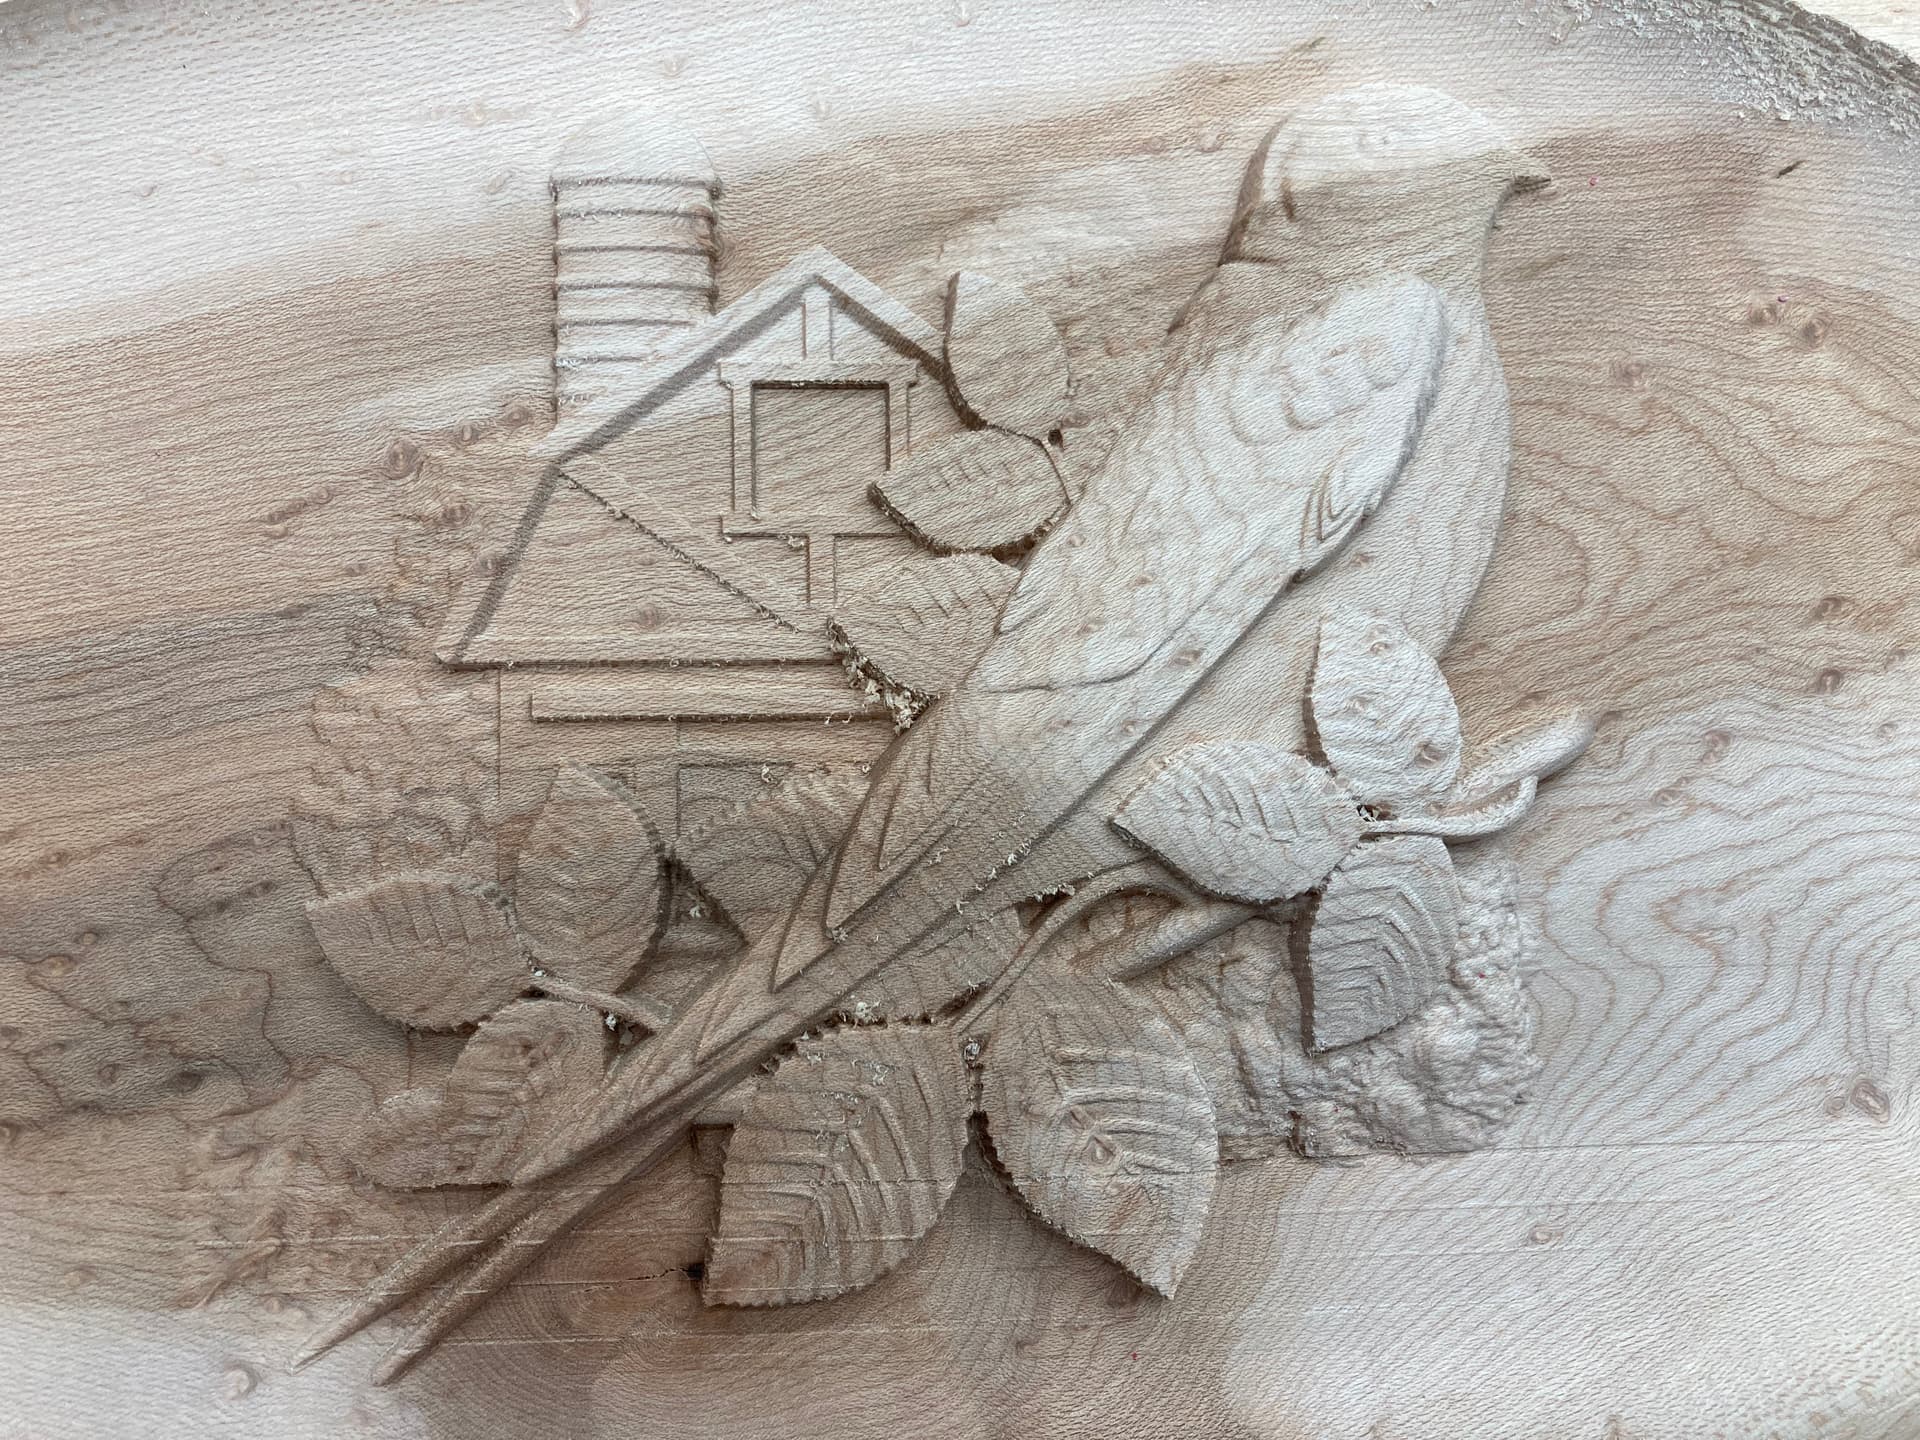
Relief Design: A Swallow Visits the Farm ( A Swallow Visits the Farm 3D Relief Model - CNC Clipart)
Size: 380mm x 250mm x 21.5mm (I come from 3D printing background so everything is metric)
Cut Times:
- 3D rough cut: 8 hrs
- 3D finishing cut: 22 hrs
- Peg holes and lettering: ~30 mins
Bits:
- 3D rough cut: 1/8" upcut end mill
- 3D finishing cut: 1/8" D0.5 Tapered end mill
- Peg holes: 1/8" upcut end mill
- Lettering/lines: 60 dev V-bits
- Contour: 1/4" downcut end mill
Lessons Learned: Waiting for replacement bits in the mail (twice) is slow progress, have spares on hand. I was a bit (pun intended) too aggressive with my tapered end mill and it snapped at the tip. I did not have a spare so ordered another set from Sienci Labs. 5 days later received and started the finishing pass again. I lost my zero since Windows decided it was time to install updates… Good timing Microsoft. Reset mu zero and ended very close to the original. Started the finishing pass again and was moving along nicely. Paused the cut to get some sleep. Started the next morning but after 30 minutes of cutting lost the USB connection to the Longmill. Not sure what happened there. In my frustration I move the Y azis instead of the Z axis and snapped my bit again (learned patience). Down to my last bit again so I immediately ordered 2 more sets from Sienci Labs just in case. Waited until Saturday morning to try again. Reset my zero, started the finishing pass and made it to the end after 21.75 hours. A few rough edges because of the re-zeroing but salvageable. Cut the peg holes, lettering and lines in about 30 minutes. Now on to finishing. I will be away for work during the next few days so not able to complete until next weekend. Planning to finish with Tung Oil. I may try to add a trap door with magnets on the bottom to hold the pegs and line that with felt. Really happy with the outcome.

4 Likes
Chess set i made 1st dabble into 2 sided machining i messed up a little when sanding my tabs off i sanded the pawns bases on a bit of an angle nothing major just a little hicup. 1st real project done in Aspire and I really got the hang of it! Used Roasted Ash for the dark pieces and spalted maple for the light. Finished in mineral oil. Didnt even have to sand anything minus the board which was made seperate from the longmill.
Used this video as a Baseline guide
2 Sided Machining Tutorial
Chess Piece STL
Aspire File for all the pieces
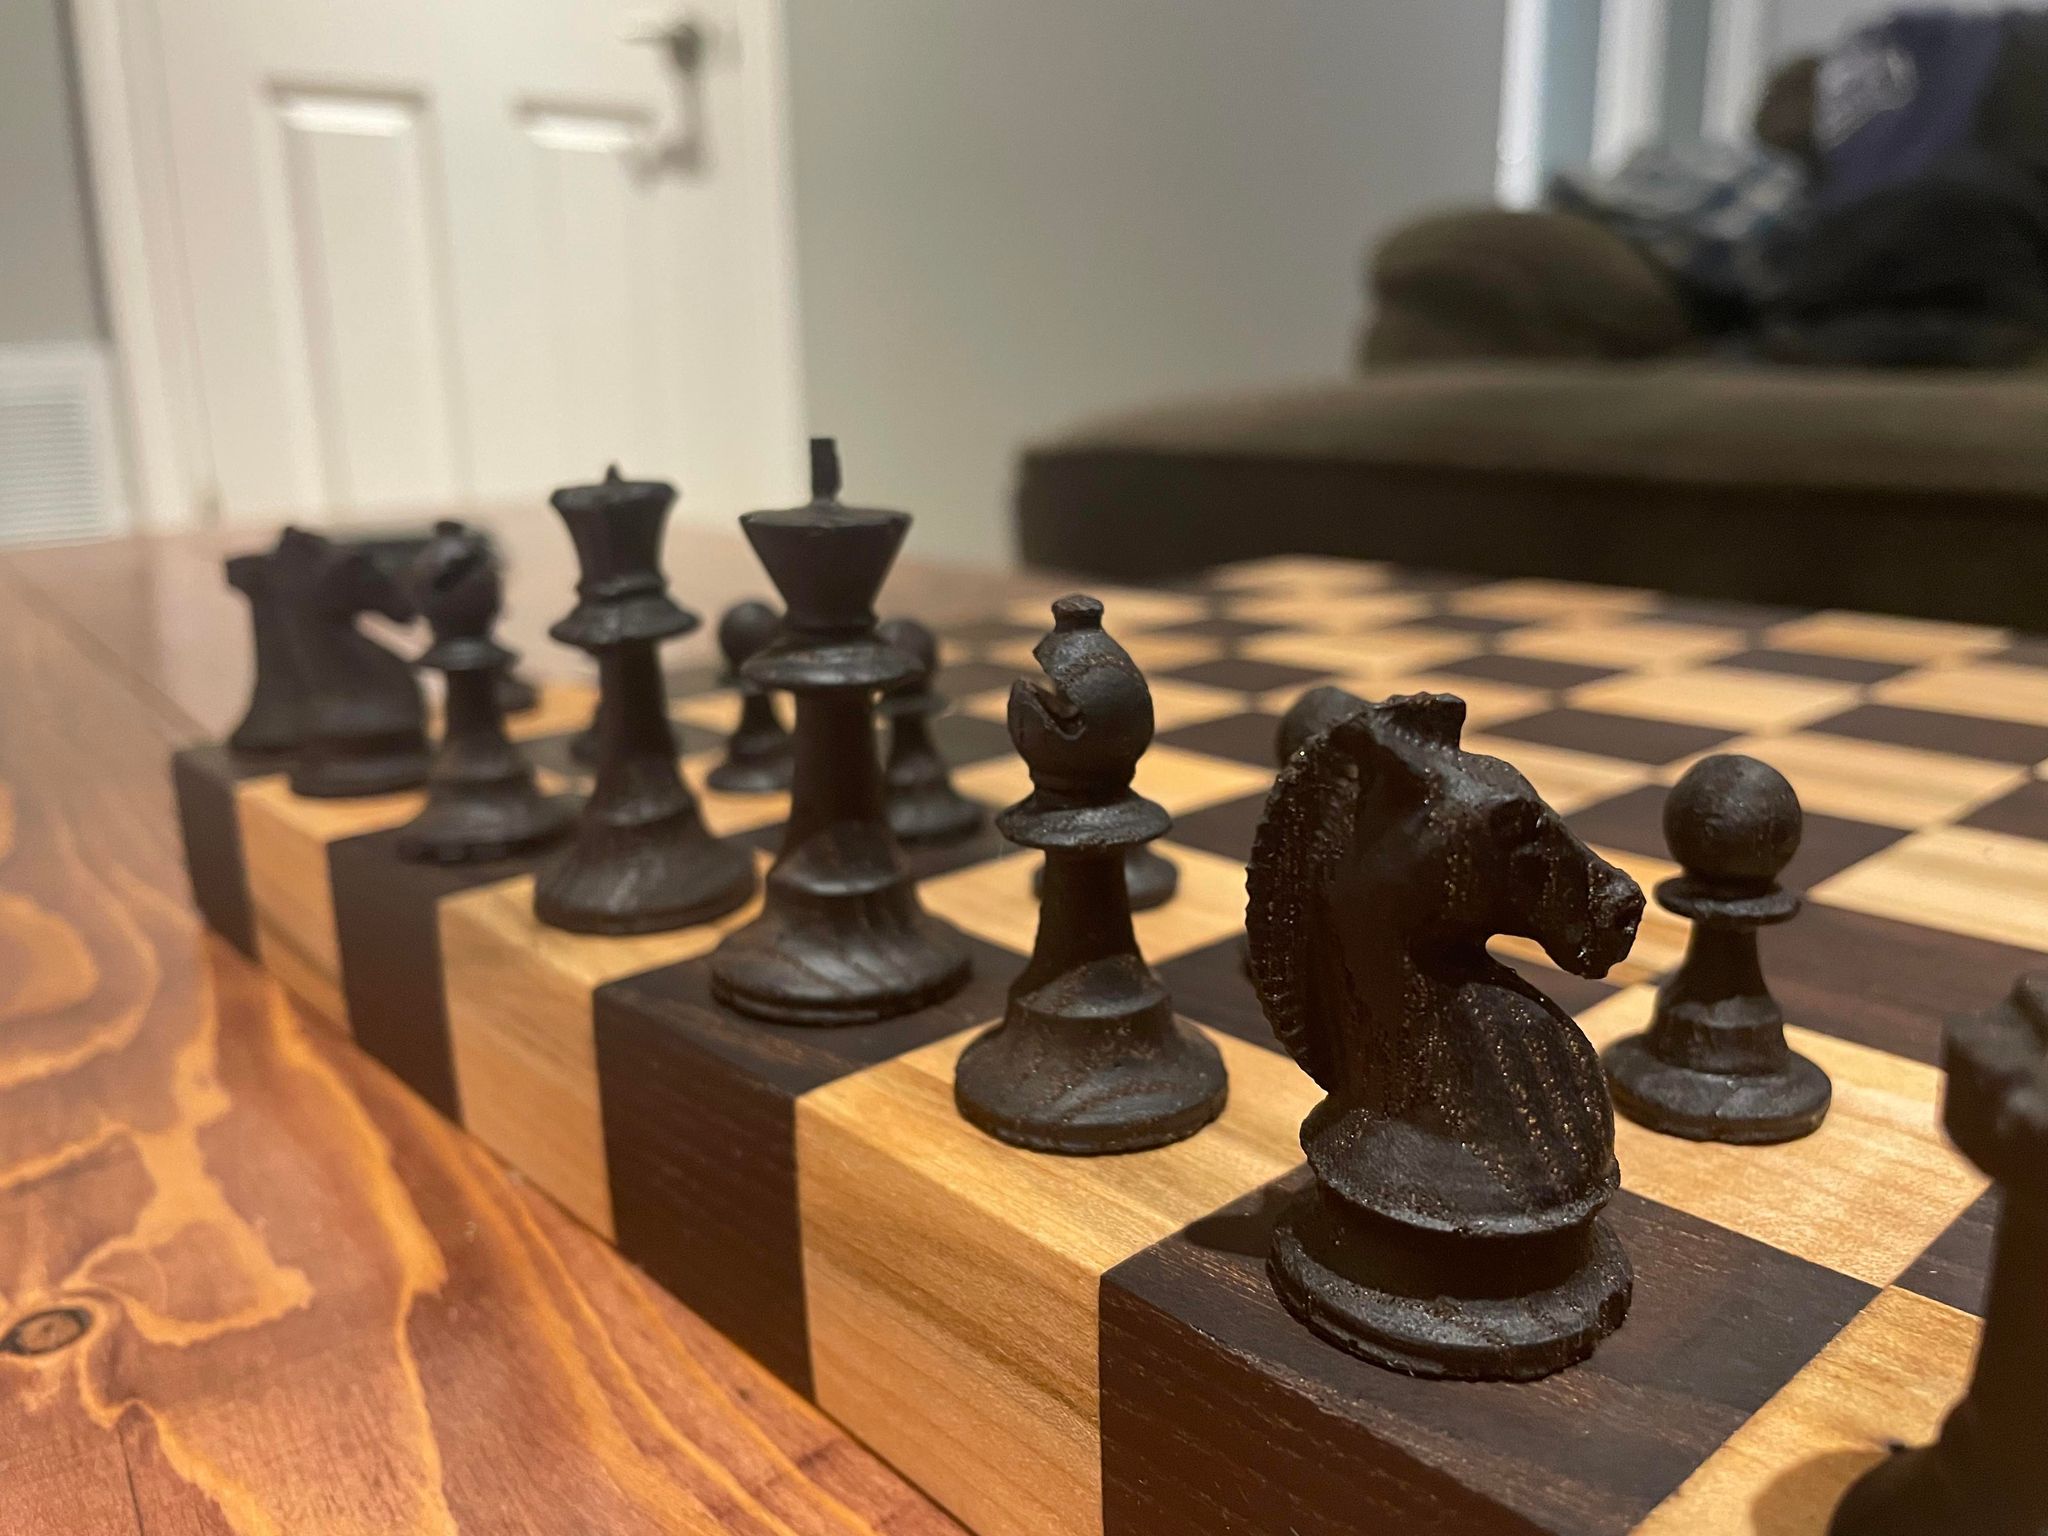
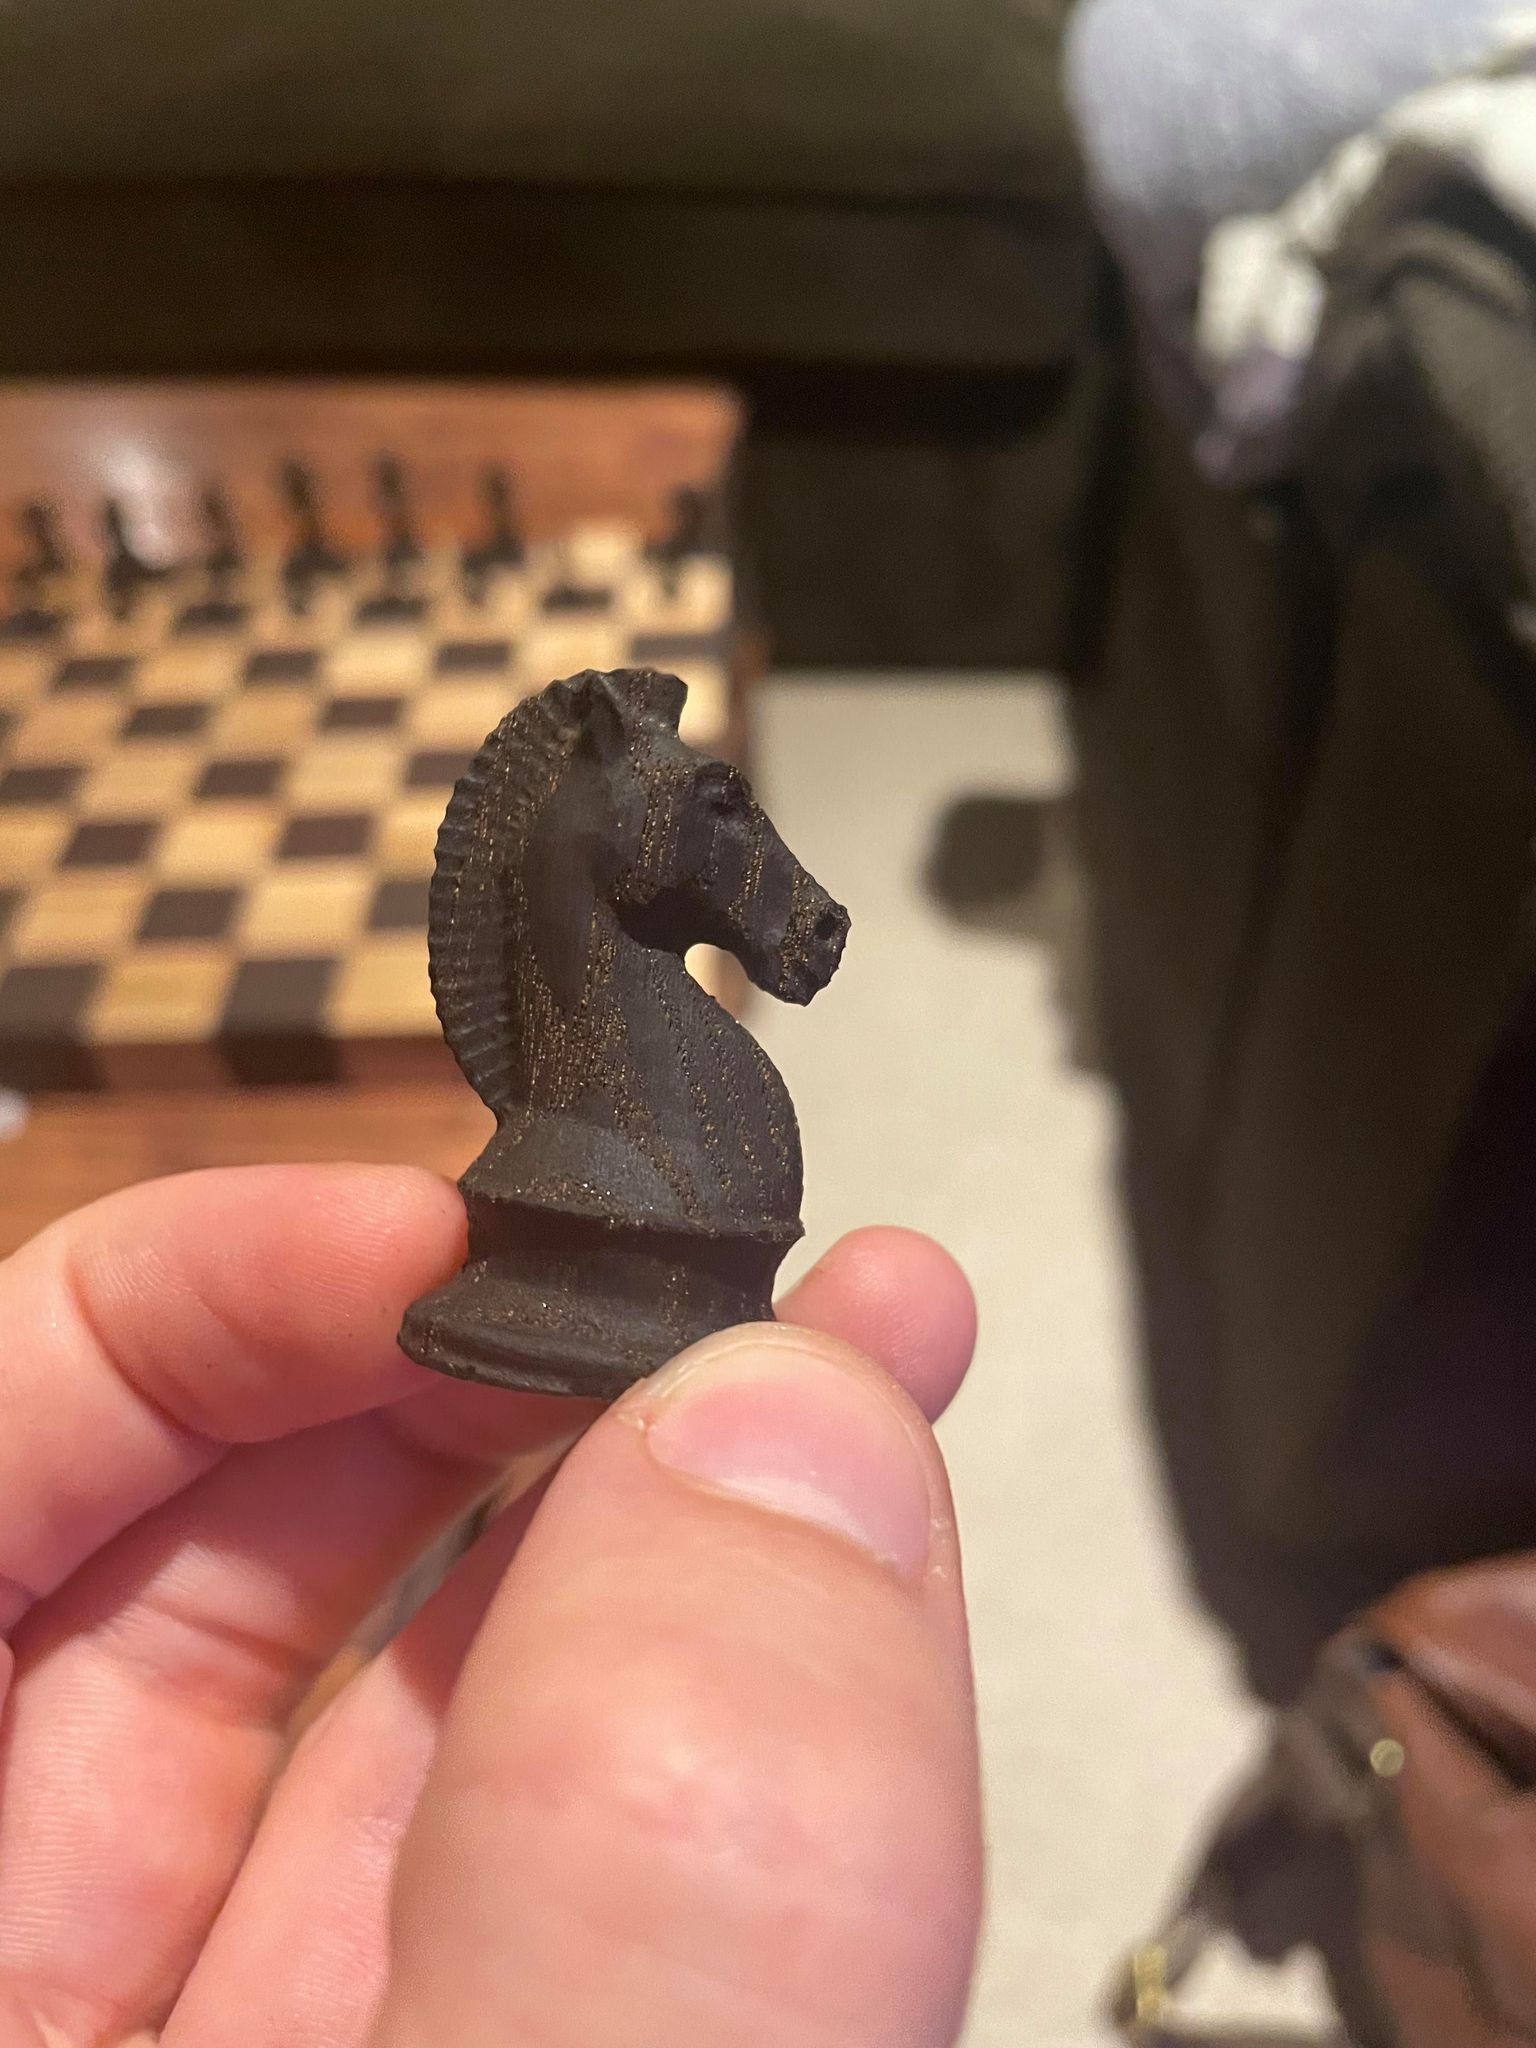
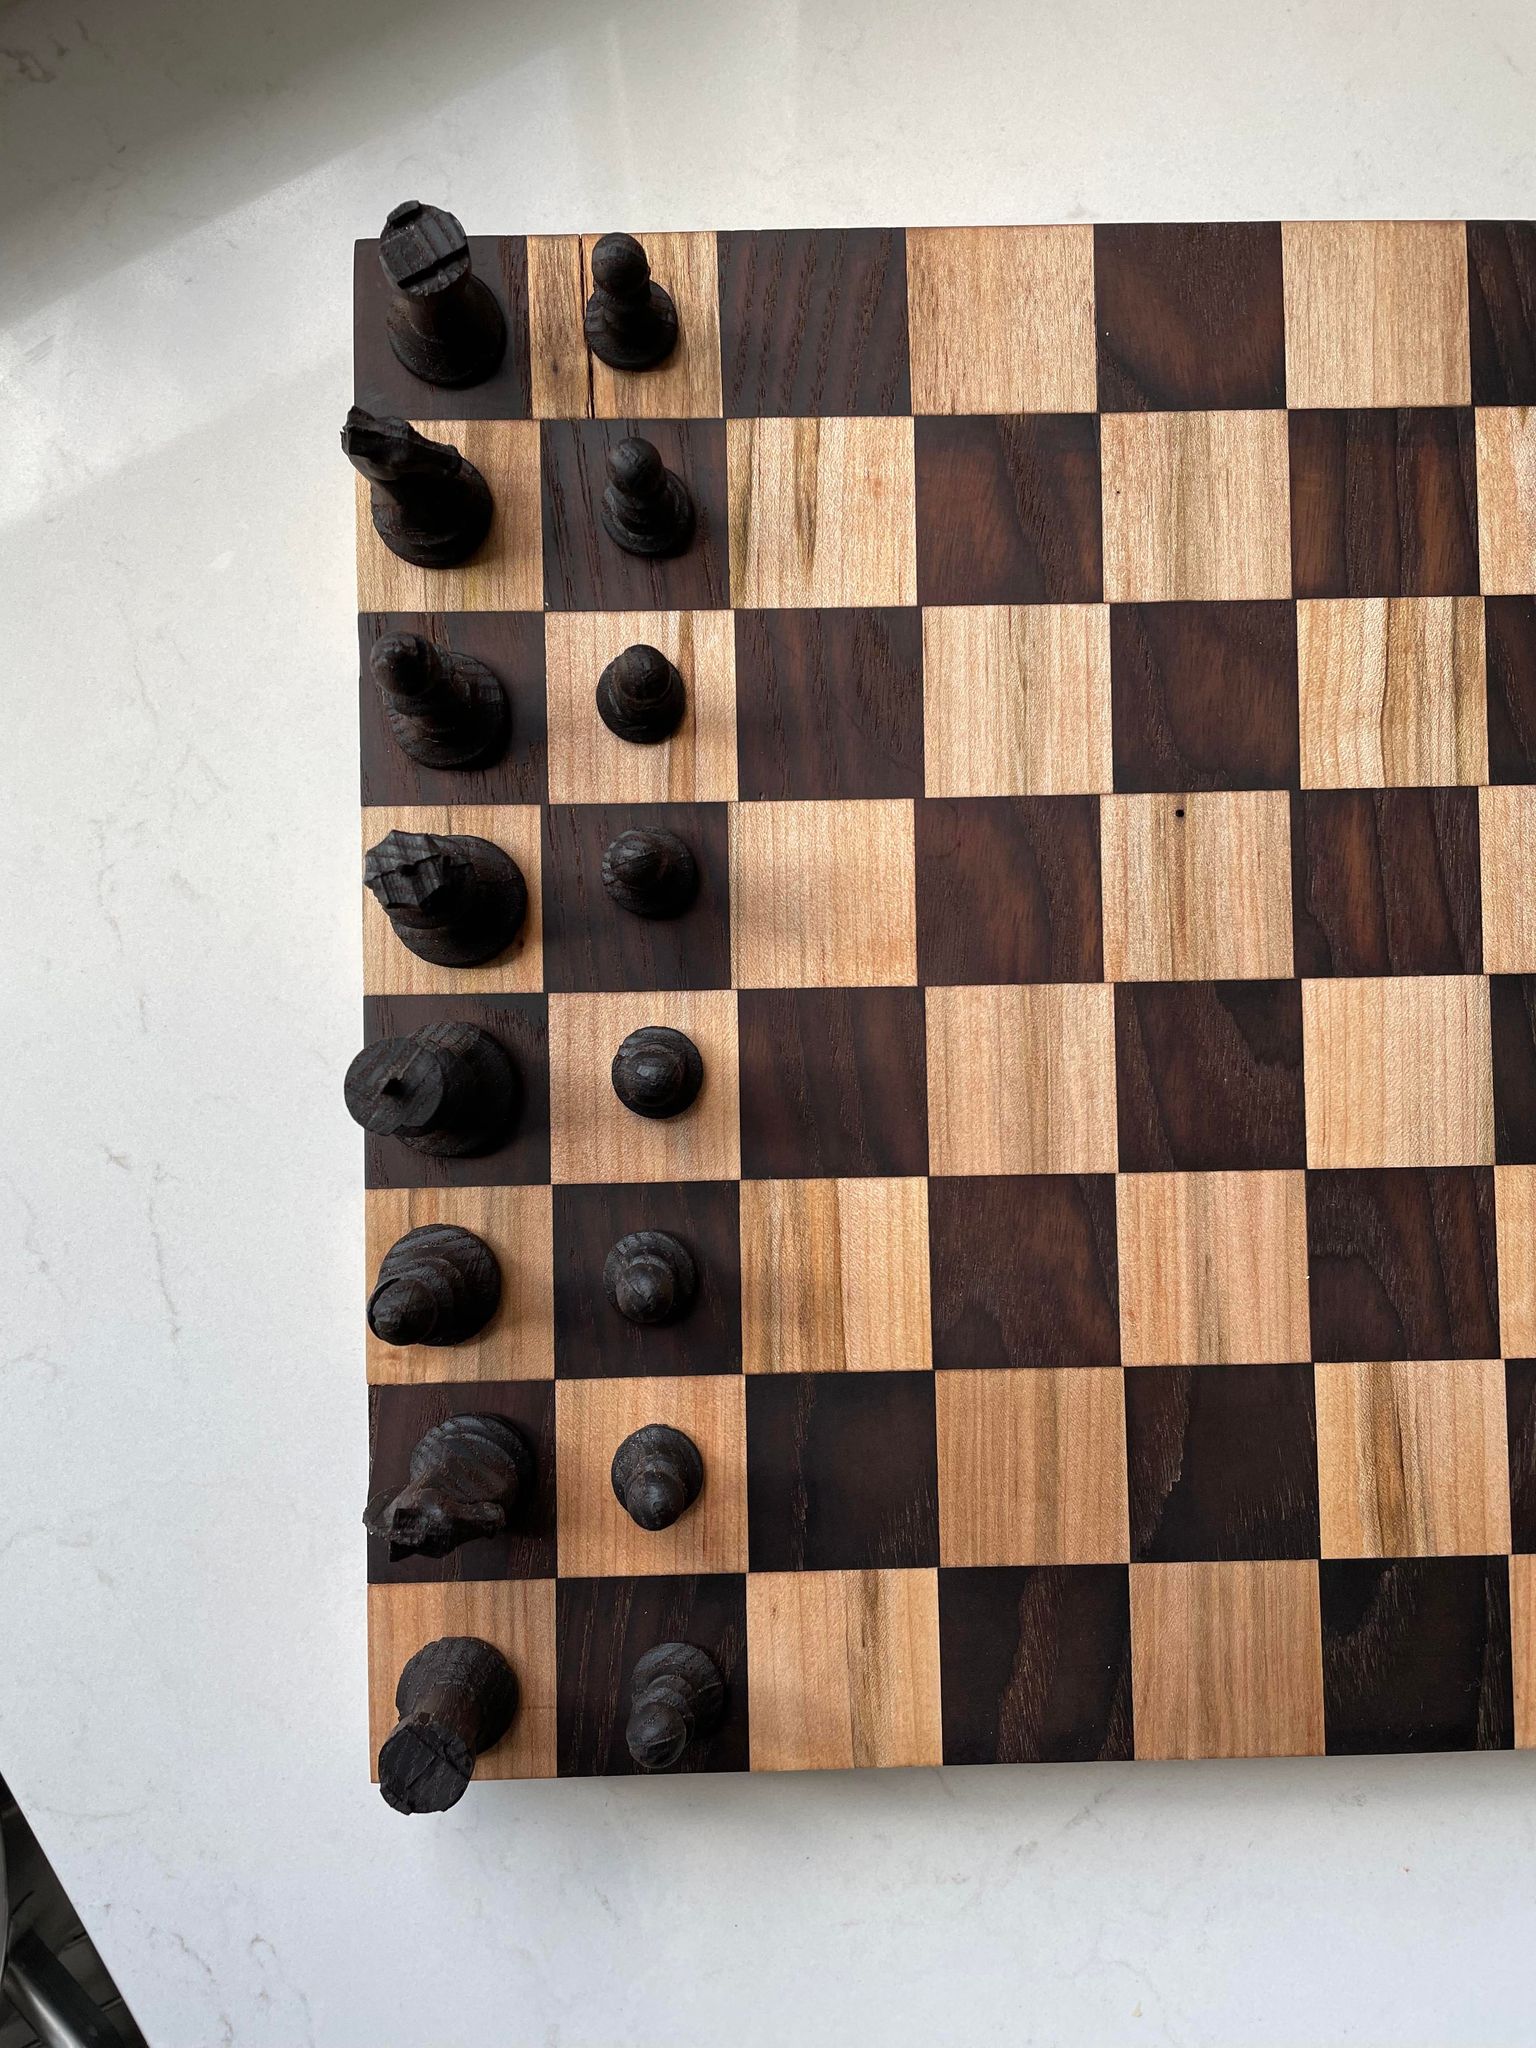

Roughing pass was done on a 1/8th inch endmill while finishing was done with with a 1/16th ball nose end mill 2500mmpm feed and speed on the finish pass
This was roasted ash and the light pieces are on spalted maple (not pictured I already wrapped this up! rookie move  )
)
Really been working on 3d carving this year got into it with this video became really obesessed very happy with the detial that came out of this
5 Likes
Dear Abby…
Wait… wrong forum… 
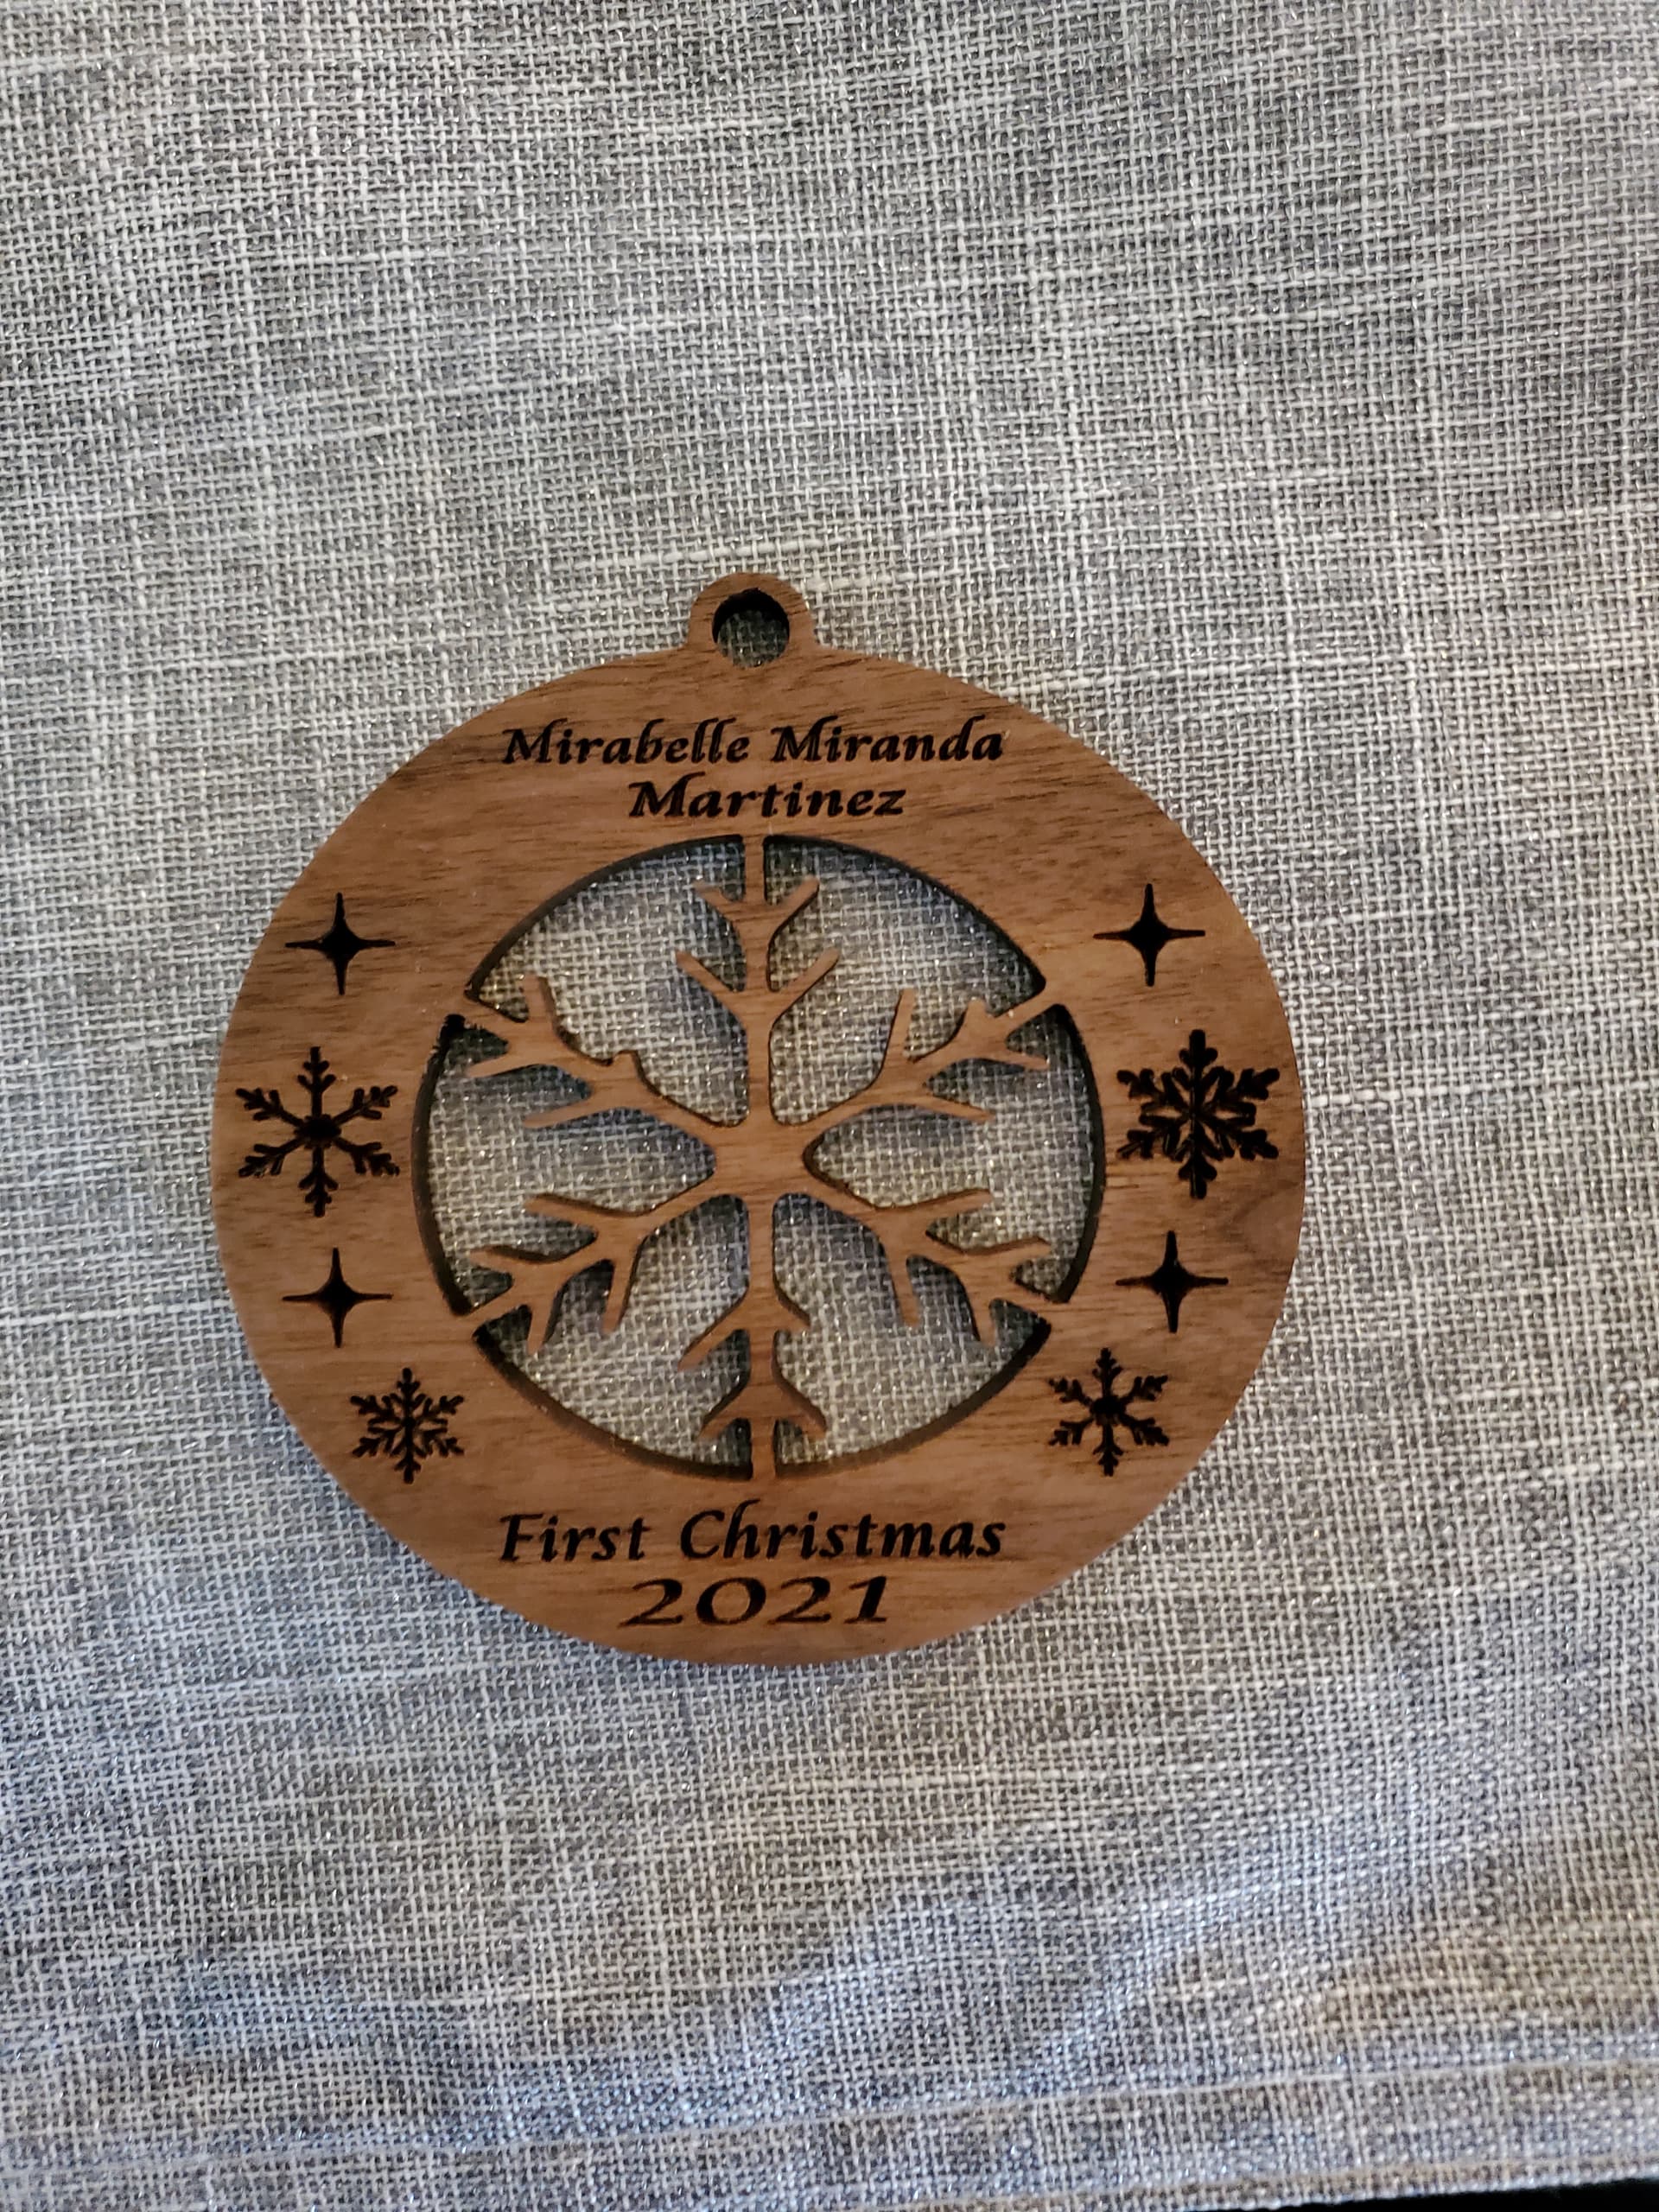
Merry Christmas all. I’m relatively new to the CNC game but loving it so far. In the few short months I’ve had my longmill I’ve only broken 2 bits. Not sure what the average is but I’m pretty happy with myself on that number. Lol What I’ve learned do far is that CNC is NOT plug and play as I know some people I’ve spoken with assume. I’ve learned to not rush things and ask questions of those who are more experienced. This community and others I’ve met since getting into this have been incredibly helpful and open to teaching. I’ve managed to turn out a few projects but my most recent is a baby’s first Christmas ornament for a close family friend. By no means is it anything compared to some I’ve seen on here but I was pretty proud of myself that it turned out the way it did… on my third try  . Still a few things that aren’t perfect but that just adds character right? I used a 4" x 4" x .25" walnut board. This was my first attempt at something more detailed and fine. The finish is a simple oil and wax. The idea was to keep a natural look and not too shiny. I dont comment much in here yet but I do read the posts and all of the knowledge shared and information given has been a great help so thank you to all that have posted. Oh and the image… Screen shot off of Google and messed around with it until I got it to work. Still learning how to design my own stuff. You’ll notice I had some parts of the snowflake break. Any suggestions on how to prevent that would be awesome! Thank you all and Merry Christmas!
2 Likes
I’m a “newbie”. Had my longmill 3 months but time is limited and I squeeze in longmill time when I can. The machine itself hasn’t been the biggest challenge. I’ve made a point of watching the video and learning the parts of the machine and what they do. I’m constantly checking nuts and bolts and wheels to make sure everything is where it should be and not to tight or loose. The hardest part for me has been the bit selection and corresponding feed rates, plunge rates and depth per pass. What’s to fast? What’s to slow? How deep should I cut? A few settings can take a carve time from 7 hours down to 2. Finding that magic mix of quality of cut vs time is my biggest challenge