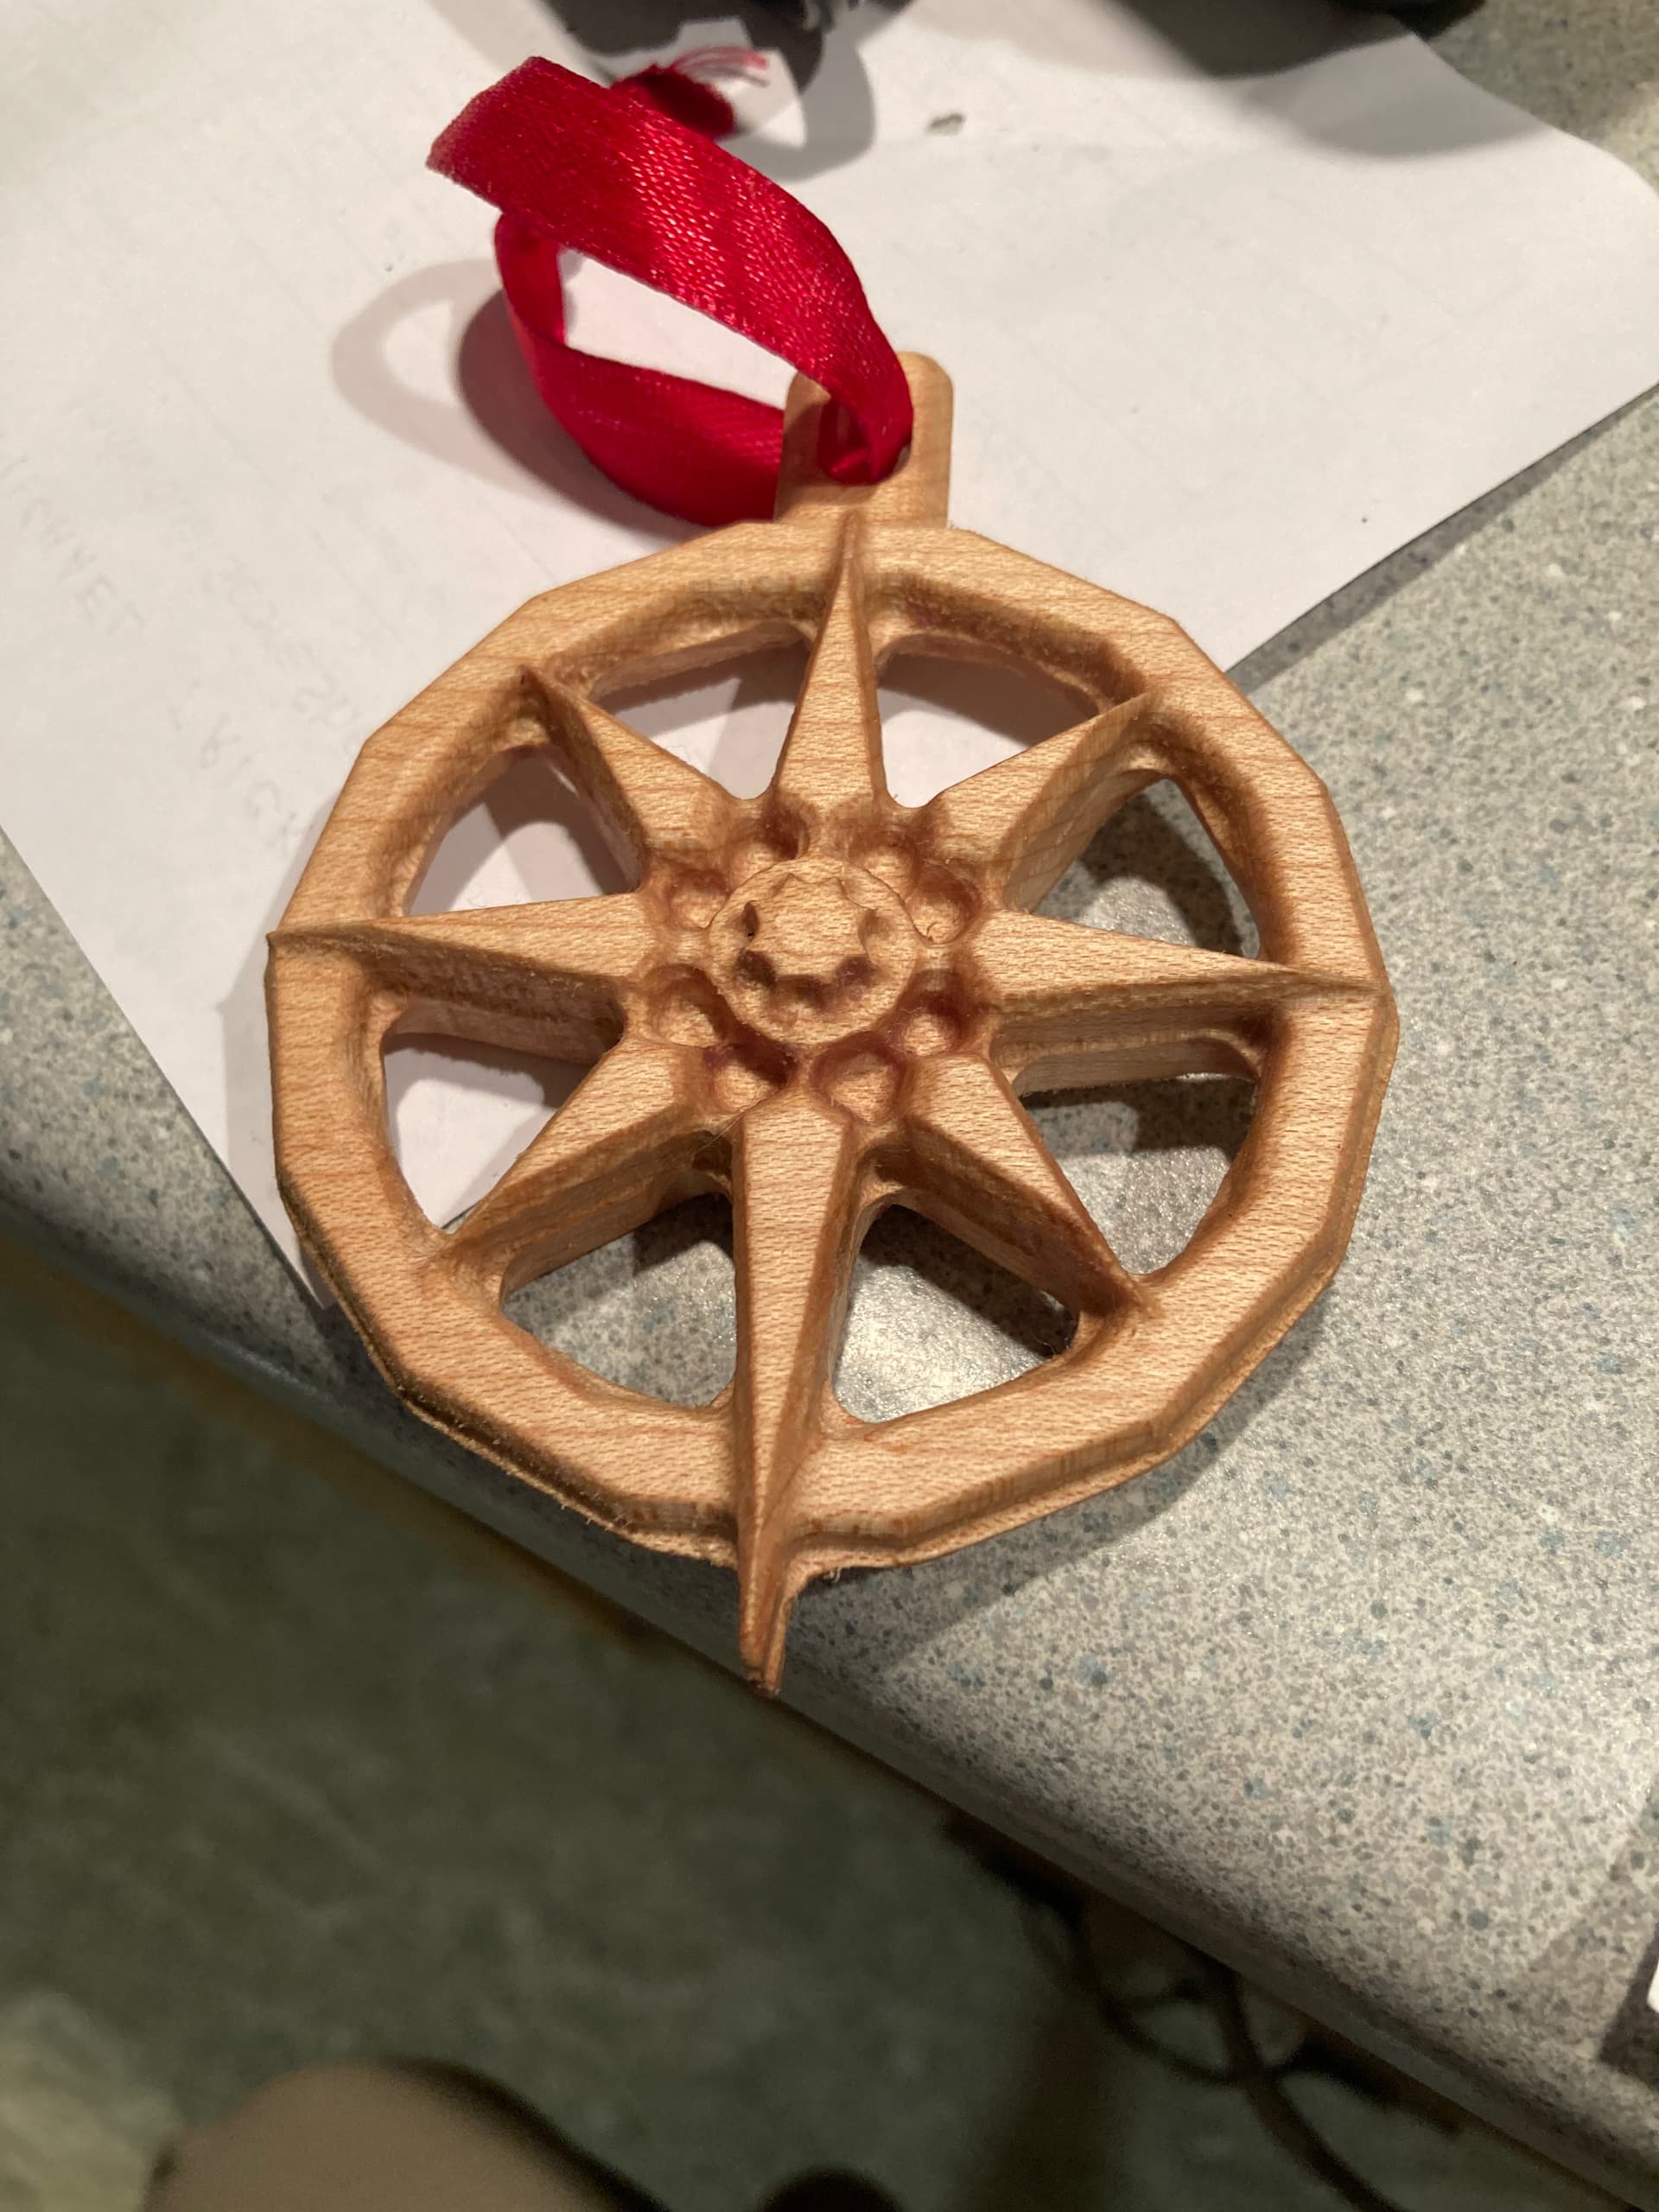
This is a double sided carved Christmas ornament. It uses a custom STL file that I have also 3d printed when messing around with my new Ender 3.
I learned a lot, importance of using indexing to ensure carves are not off centre, also that incorporating a full depth hole that is smaller than the roughing bit as a part of the model is a really bad idea as I broke 2 1/8 ball noses when they dove into the hanger pocket which hadn’t been touched by the roughing bit because it was too small.
Still trying to learn an optimal way to incorporate tabs so that the model doesn’t detach from the carve when doing the second side, will be experimenting with tabs incorporated directly into the model and then using a boundary vector. This was carved with a 1/4” end mill for roughing and clearing the star ray pockets, 1/8” ball nose for finishing and 1/4” end mill.
The finish is a home made beeswax based finish. I also learned how amazing of a wood finish beeswax based products are and how simple they are to make (1 part beeswax: 4 parts food grade oil). As a bee keeper I occasionally have some so I’ll probably be finishing a lot of my products with this type of finish.
Small things are… small. The line you have going around the finished item, around the middle of the two halves, is an indication that things are misplaced. Looking at the magnified view of the arm of the star that is pointing south, you can see the top half is misplaced in relation to the bottom half. The magnified view of the centre segment shows the star has a bit missing from the southern most point and the hole directly beneath it is a bit larger than the other surrounding the star. It also appears to be a different shape. The rib that is just above the west pointing arm looks quite thick and denotes that Z depth setting is not even.
Do not be discouraged because all in all, this a great first shot at a technique that takes no prisoners where it is not 100% accurate. Accuracy can be improved by simple measures. However, you can assist yourself a lot with this technique if you have your wood stock an exact size. That way, when you index it and you turn the piece over, it will be in exactly the right place to make a perfect match of both sides. Exact measurements of stock make it much easier to plan your cuts. The final Z height cut must be exactly midway in depth for both sides if you want to avoid the additional ribs, that are not a part of the pattern, from being left behind.
Bridges (tabs) are easy if you create them in exactly the same place on top and bottom and let them extend naturally (by being located opposite the other face) into each other. A tab depth of 1mm will be a two mm tab that will attach to both top and bottom faces if they are in the same place. This will prevent you losing the work or a cutter because the workpiece came loose.
10/10 for beeswax… this is my favourite finish. It is non toxic and can be used on food grade items and kids toys. It also does not raise the wood grain like some finishes do. I use my beeswax as a soft cream to be applied very sparingly and it is mixed with a little walnut oil which can add a very small amount of darkening. The smell it gives off after application is great and all of the people I have given stuff to have liked it.
I hope this helps. I am currently milling a two sided carve in hardwood and will film it and the indexing techniques you can use. I will probably post this within a few weeks.