I read a few posts where some people liked to use the “center point” as the Datum Position for projects.
This makes it more challenging to set the starting position as you can’t use the touch plate to set the xy, or at least I haven’t found a way. It’s not hugely difficult as you can eyeball a center point and for most projects that’s good enough.
So what are the pros and cons of using the center vs using one of the corners? Seems like there must be some benefits since it’s a bit more hassle to zero it.
I’m thinking that as a “newbie,” there must be something I’m missing that I want to understand.
When I am making a design without the exact dimensions of the stock, the design dimensions become an “at least this big” requirement. Especially when I’m going to do a profile cut around the final project. Then I use the center as I can get close enough by eye (or closer by marking center from corner to corner on a piece of tape). The only potential issue comes with zero the Z on tool changes. - especially on 3D carves when the center no longer has a full height. But in that case I just move my spindle over to an edge to zero.
When I have the stock in hand (existing cutting board for example) I will use a corner when I am designing the project.
I was quite quick in realising centre xy0 would work better with the things I do. I like to do things one way as much as possible. Since I have projects that use irregular stock, anything other than centre zero will not give me a one way fits all solution. Another pro to using centre is that you don’t need to know the exact stock dimensions, just that the design will fit within it.
Designing with a centre zeroe gives (to me) a more logical grid to work with. Mirroring elements feels more intuitive and positioning things gives an easy reference for eyeballing if something is positioned right. When a project includes a cutout, any offset due to eyeballing will be eliminated.
To be able to determine the centre of a realy impossible irregular stock, I use a calibrated camera to take a picture inside lightburn that adds a grid. Importing this picture inside my cad software gives me a good referense to design within the stocks dimensions.
Tip: When using centre zero, after zeroing xy, move a known distance x or y outside the stock/design dimensions, and carve a dimple with a vcarve bit on the spoil board or outside the cutout dimension to be able to refind your centre zero. Don’t rely on brain to store that distance! I write it next to the dimple and cross it when no longer valid if on spoilboard.
When, not if, you lose your zero, just install the same vcarvebit and fit it back into the dimple you made, move up the z axis enought to not hit the stock - sounds silly but trust me, it is easy to forget (before the mistake. After the mistake, it will hunt you for ever.)- and move the known distance back to where the centre was. Zero the xy (this is essential, trust me on this one too.) And you are good to go again.
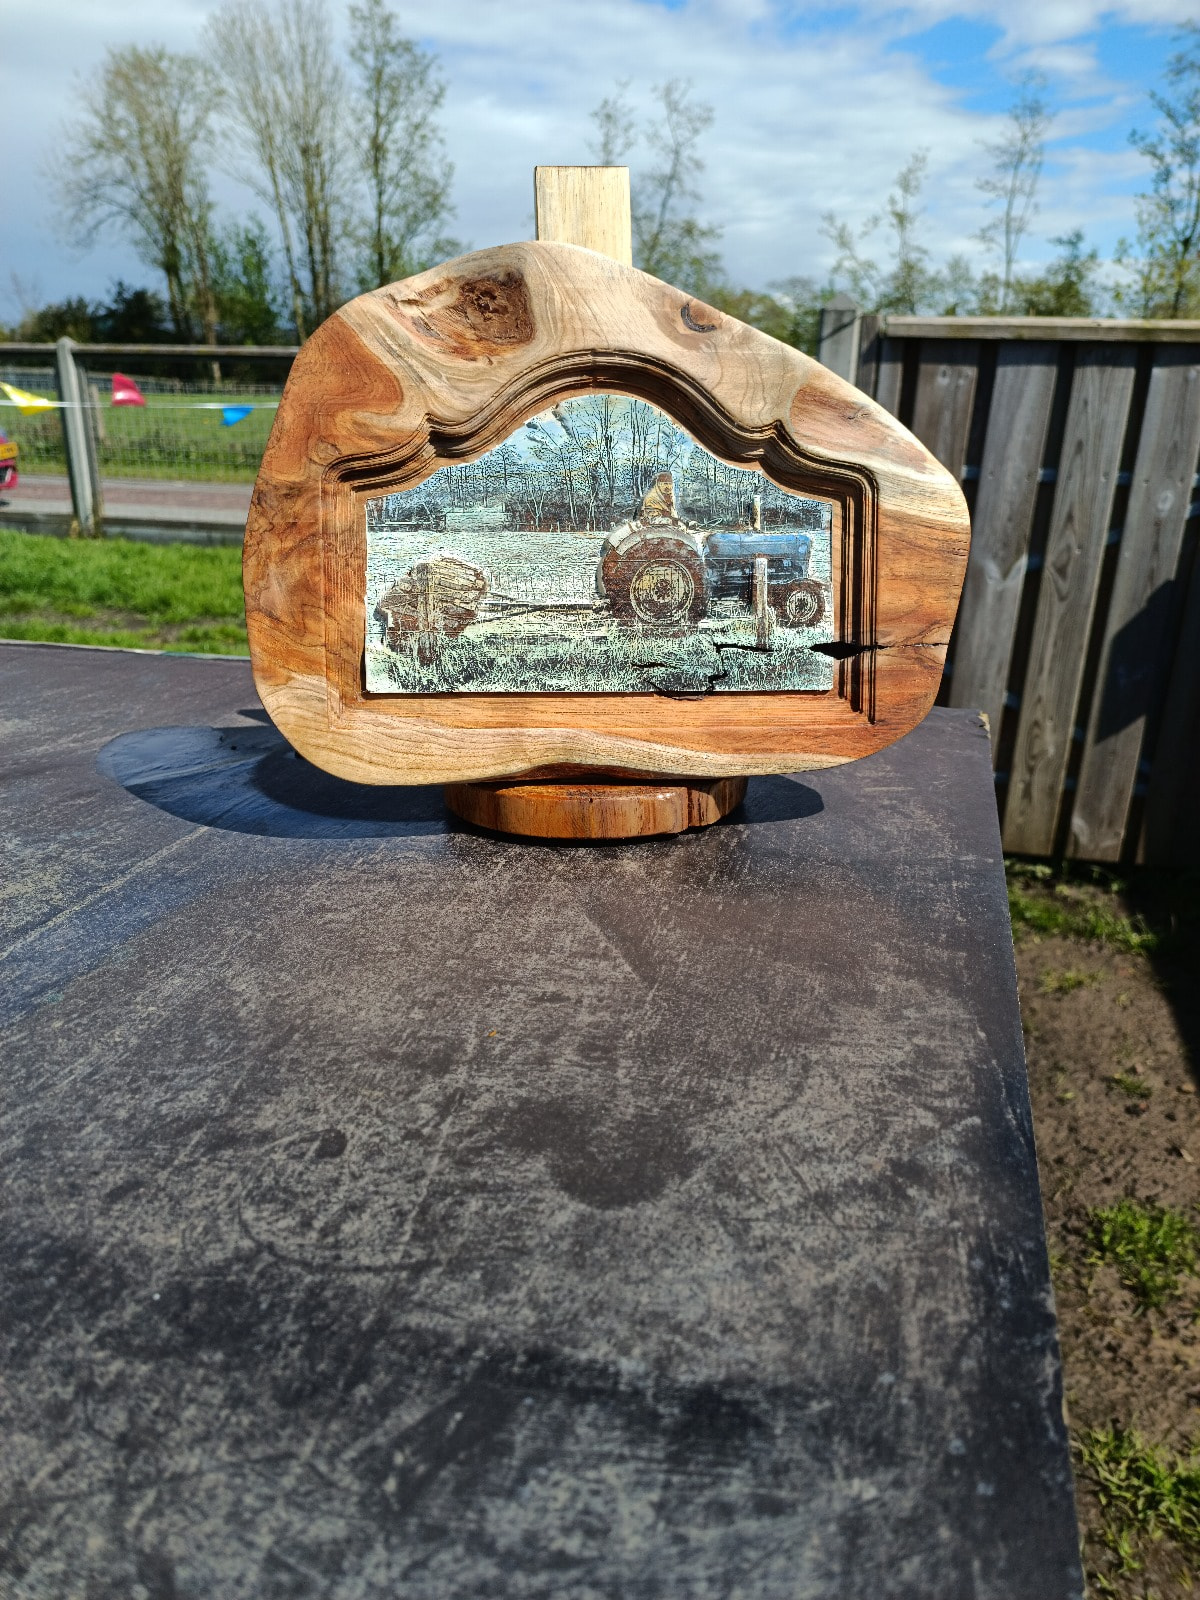
No way I could’ve made this one any other way than with a centre xy0.
(Without the camera I would’ve not be able to fit the design within the irregularities of the plaque either. But centre xy0 is key with this sorth of projects.)
Wow, that’s an awesome project. Thanks for the detailed explanation of how you set the center and how to keep track of it for future reference.
What you’re doing sounds similar to things I might do in the future. I mostly do “rustic” type things. Using pieces of barn wood or other things that are odd shapes suites my style.