I’m trying to startDoing deep inlays with a. 015 rad x 10° taper ball nose end mill. I get the computer to recognize the bit as a v bitbut when using V12 to do a vcarve inlay toolpath the plug always ends up way too loose. does anybody know if I have to do it the old way all the time to use the 3D bit. I haven’t got that far into it yet. I think I might have to resize the plug biger and keep doin it the old way?
@Tommycuts There have been lengthy discussions on the Vectric forum about using tbn bits and the new vcarve inlay toolpath. Vectric has weighed in on some of them to explain why they have not accommodated tbn with this toolpath. There are those who say that they have worked out the math to make them work. You may want to search on the Vectric forum and read those discusions.
Can you give me links to some of them tutorials?
@Tommycuts They aren’t tutorials. They are discussions on using tbn bits, why they don’t work well with the vcarve inlay toolpath, and possible workarounds. On the Vectric forum search on vcarve inlay toolpath tapered ball nose.
Thank you, merry Christmas all.
1 Like
Well, there isn’t a search bar. I had to register now wait
@Tommycuts
If you offset your Z-zero up 4mm (actually 3.99mm) when cutting the plug, you’ll get a tight inlay. You’ll cut air for 4mm though.
The image below simulates a simple example of the difference between your tbn and a true 10deg v-bit.
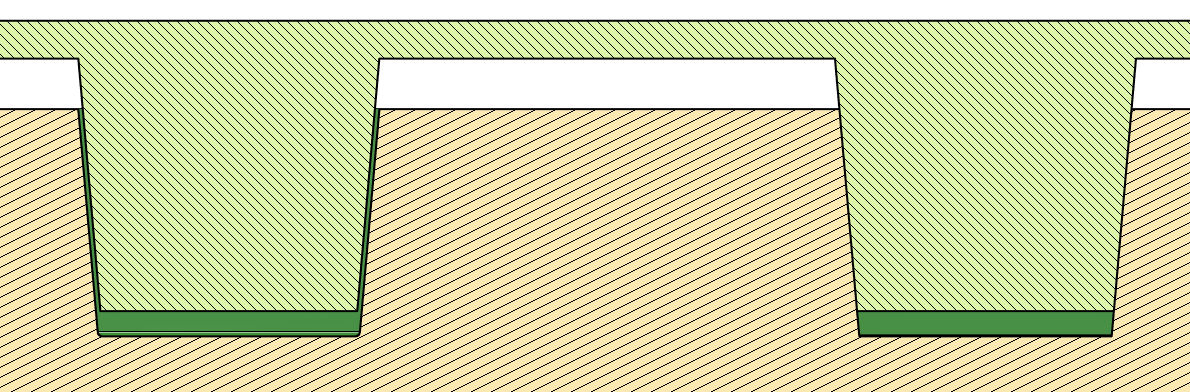
There’s a 2mm “glue gap” in this simulation. The v-bit inlay fits tight at that depth. If the gap is closed (bottomed out), there is still a gap with the tbn.

If you adjust the Z up 3.99mm, your inlay will fit correctly with your desired gaps. You’ll have to increase the size of your “Surface/saw gap” to account for that 4mm, as well.

The math on these gets a little deep into trig and geometry, but you can get pretty good estimates using the diameter of the ball. Much easier to draw it in CAD.
2 Likes