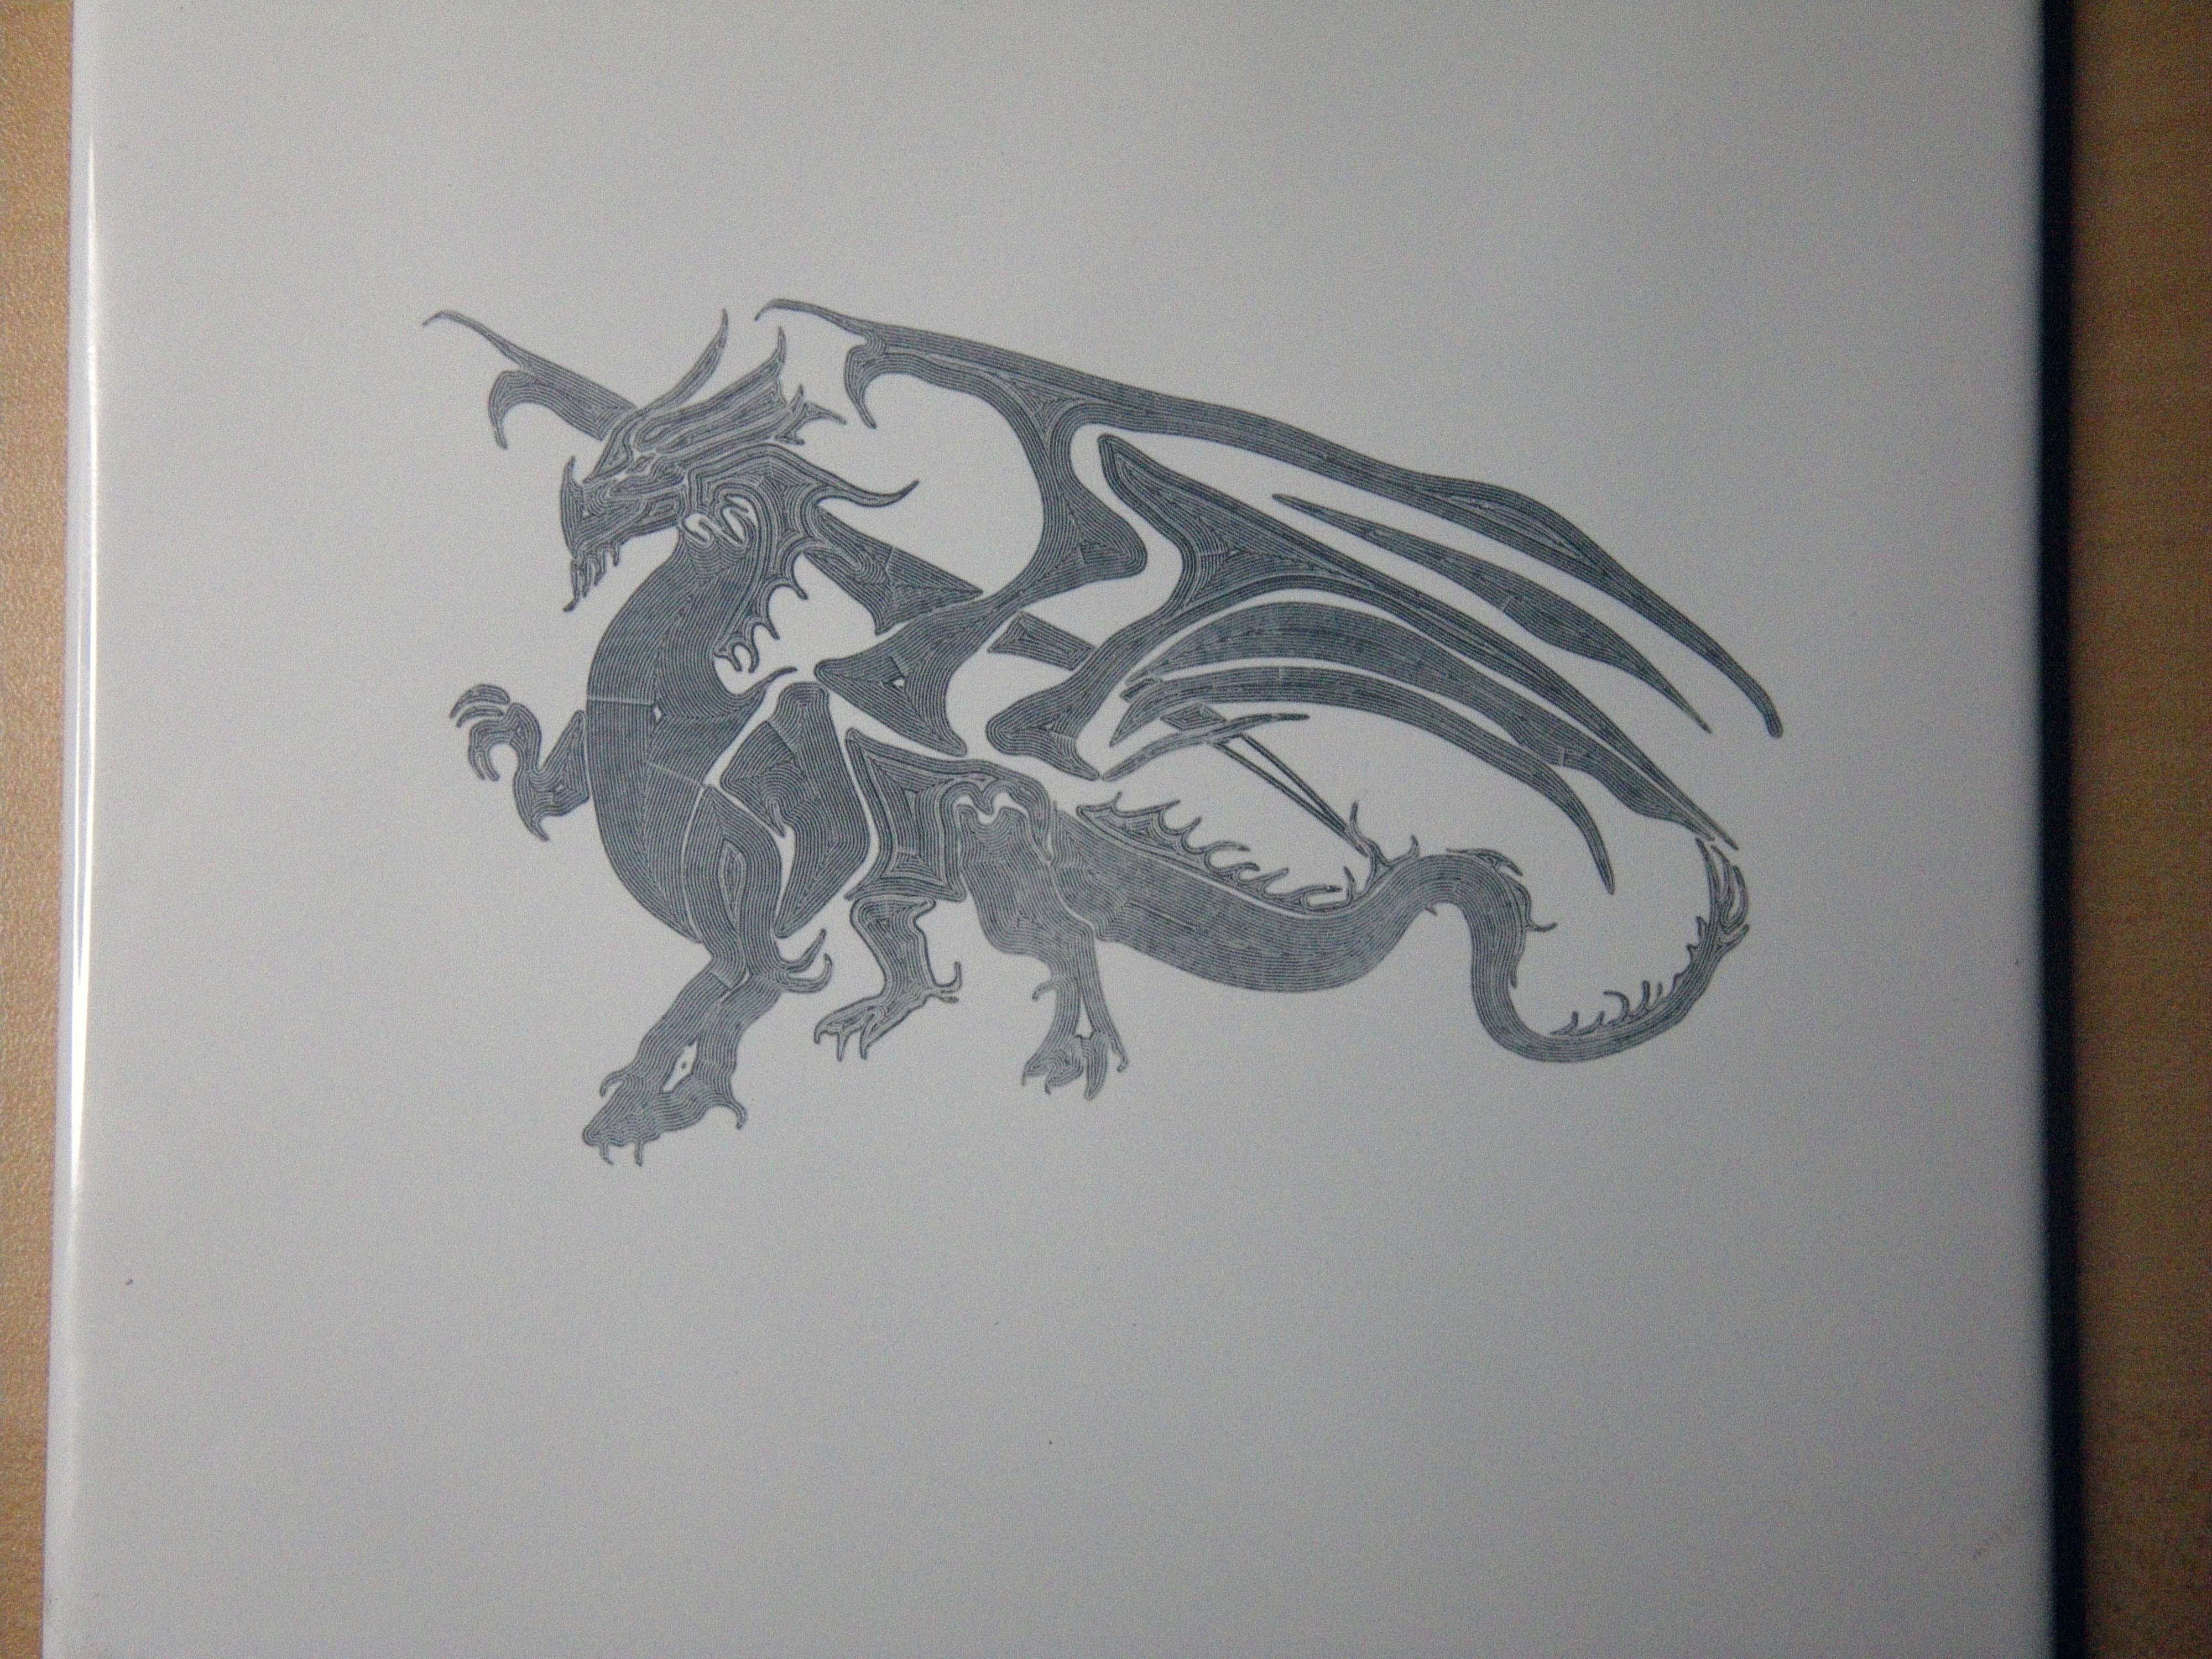
I finally have a functioning laser and thought that I would try the process of burning an image onto a ceramic tile.
I’m reasonably pleased with the results.
I finally have a functioning laser and thought that I would try the process of burning an image onto a ceramic tile.
I’m reasonably pleased with the results.
Nice work Grant. I know you are pleased. Did they end up sending you a new one I take it? Now you can enjoy.
@Heyward43 Yeah, after too much nonsense (I’m trying to be polite here.) and more false information than I could take, they sent a replacement. I will never deal with Banggood again. The low price simply is not worth the trouble when things go wrong.
Enough whining.
I’m really just starting to play with it. The tile idea sounded interesting, so I figured that I would do one. I really need to work on a smoke extractor before I do much more burning on wood, though. 
That is great news about your laser. The dragon looks fantastic. I’d been reading along with the challenges you were experiencing with the laser. Glad to hear you were finally able to get the results you wanted.
I’m curious what does the surface of the tile feel like once the image is engraved?
@Chris The dragon feels like the tile was sanded with 320 grit paper. That’s the best way to describe it. It is not very rough at all.
I used the “paint the tile” first method. I had some semi-gloss white rattle can paint. I sprayed a very light coat, let it dry, then did the burn. They I removed all the paint with lacquer thinners. I half figured that the dragon would be gone with the paint, but I was glad to be wrong.
This tile is a back splash left over. The surface is sort of scalloped very lightly. I think that better results could be obtained if it were flat. This worked OK, but even the shallow scallop means that the focal length for the laser is variable.
Wow, that’s gorgeous. My last few bathrooms were tiled around the shower and for my current remodel I had decided to go with a tub surround - you’re making me question the decision!
A pattern of custom-etched tiles is suddenly accessible, I’ll have to show this to the boss and see what she thinks!
@SteveFossey My wife is now dreaming of a moose  -motif back splash.
Nice!!! I’m going to have to try a tile burn, now!
Very cool! I will have to give this a try.
Very good job. I am fairly new to this blog and would like to know which laser head did you hook up to your longmill
Michel
This is the one I got, am quite happy with it so far!
https://www.amazon.ca/gp/product/B07V423ZZT/ref=ppx_yo_dt_b_asin_title_o04_s00?ie=UTF8&psc=1
Dave
Thanks for the info. I supposed you made a bracket and mounted it in front of your Longmill and are you using a software like Lightburn to drive this or something else.
Michel
@michou Michel: I just bought one of the generic 5w lasers. You will find threads on here with links. I am very reluctant to link to the one that I bought. I bought it from Banggood and it was defective from day one. It was a long and frustrating fight to get them to send a replacement.
The one that Dave links to on Amazon is an incredible deal if the output is really 15w. Often, the chinese laser specs are exaggerated. Also, they frequently quote consumption, not output. I would think, though, Amazon would be a better place to buy from than Banggood.
As for mounting it, I mounted mine using the threaded holes on the side of the router mount In a previous post, I attached a dxf of the bracket.
Really? Did it come with a power supply? If not, what did you use?
@justinbouchardw Yes, it came with a power supply.
Yes, I did up a bracket from modifying one that @gwiki made available to me here in the forum at Adding a Laser - My Journey (Tutorial) - #28 by djgrant181, cut it out of 1/4" (6mm) acrylic. I can post my file here later if you end up going this way. I originally attached it to the right side of my Longmill, have now moved it to the left side for the newest version of the dust shoe, can probably shift it back to the right  I got Lightburn and have to say that I’m quite happy with it after the slight learning curve.
@justinbouchardw - mine didn’t come with a power supply, but I had a 12v power supply (self-contained AC adaptor style) for LED lights laying around, used it (anticipating frying it due to current draw but was pleasantly surprised that it works well ). I like that it is all in a single unit, no separate driver board taking up space beside the Longmill. There is a DC output on the Longmill control board, but I couldn’t figure out if it was 12v or 24v, as well as how much current it was rated for. It’s still an option in my mind
@djgrant181 Dave: The output port on the Mill controller is 12v, but rated for very low draw. Andy mentioned using it for a fan. I use it for an led bulb that shows me the mill controller is on.
Sheesh @gwilki another good idea…
@stevendq Tks, Steve. I’m just full of good ideas. (There are those in my circle of friends that would attest that I am full of something else, too.)
I started out with the first generation of LongMill controller. It had plastic sides so I could see the lights and know that it was on. Now, I have V2 with metal sides. I wanted something smacking me in the face indicating that I had left the controller on. A car taillight LED at the front of my bench, wired to that 12V port does that.