I tend to be someone who shares when things turn out, and when things don’t. It helps me learn from my mistakes.
I set off to carve a Harley Logo with wings yesterday. Now I am not a Harley guy, but wanted to make it and post it online as a “for sale” piece.
The design was to be carved on walnut (love carving on walnut) that is locally sourced and reasonably priced. This was to be the largest piece I have carved to date.
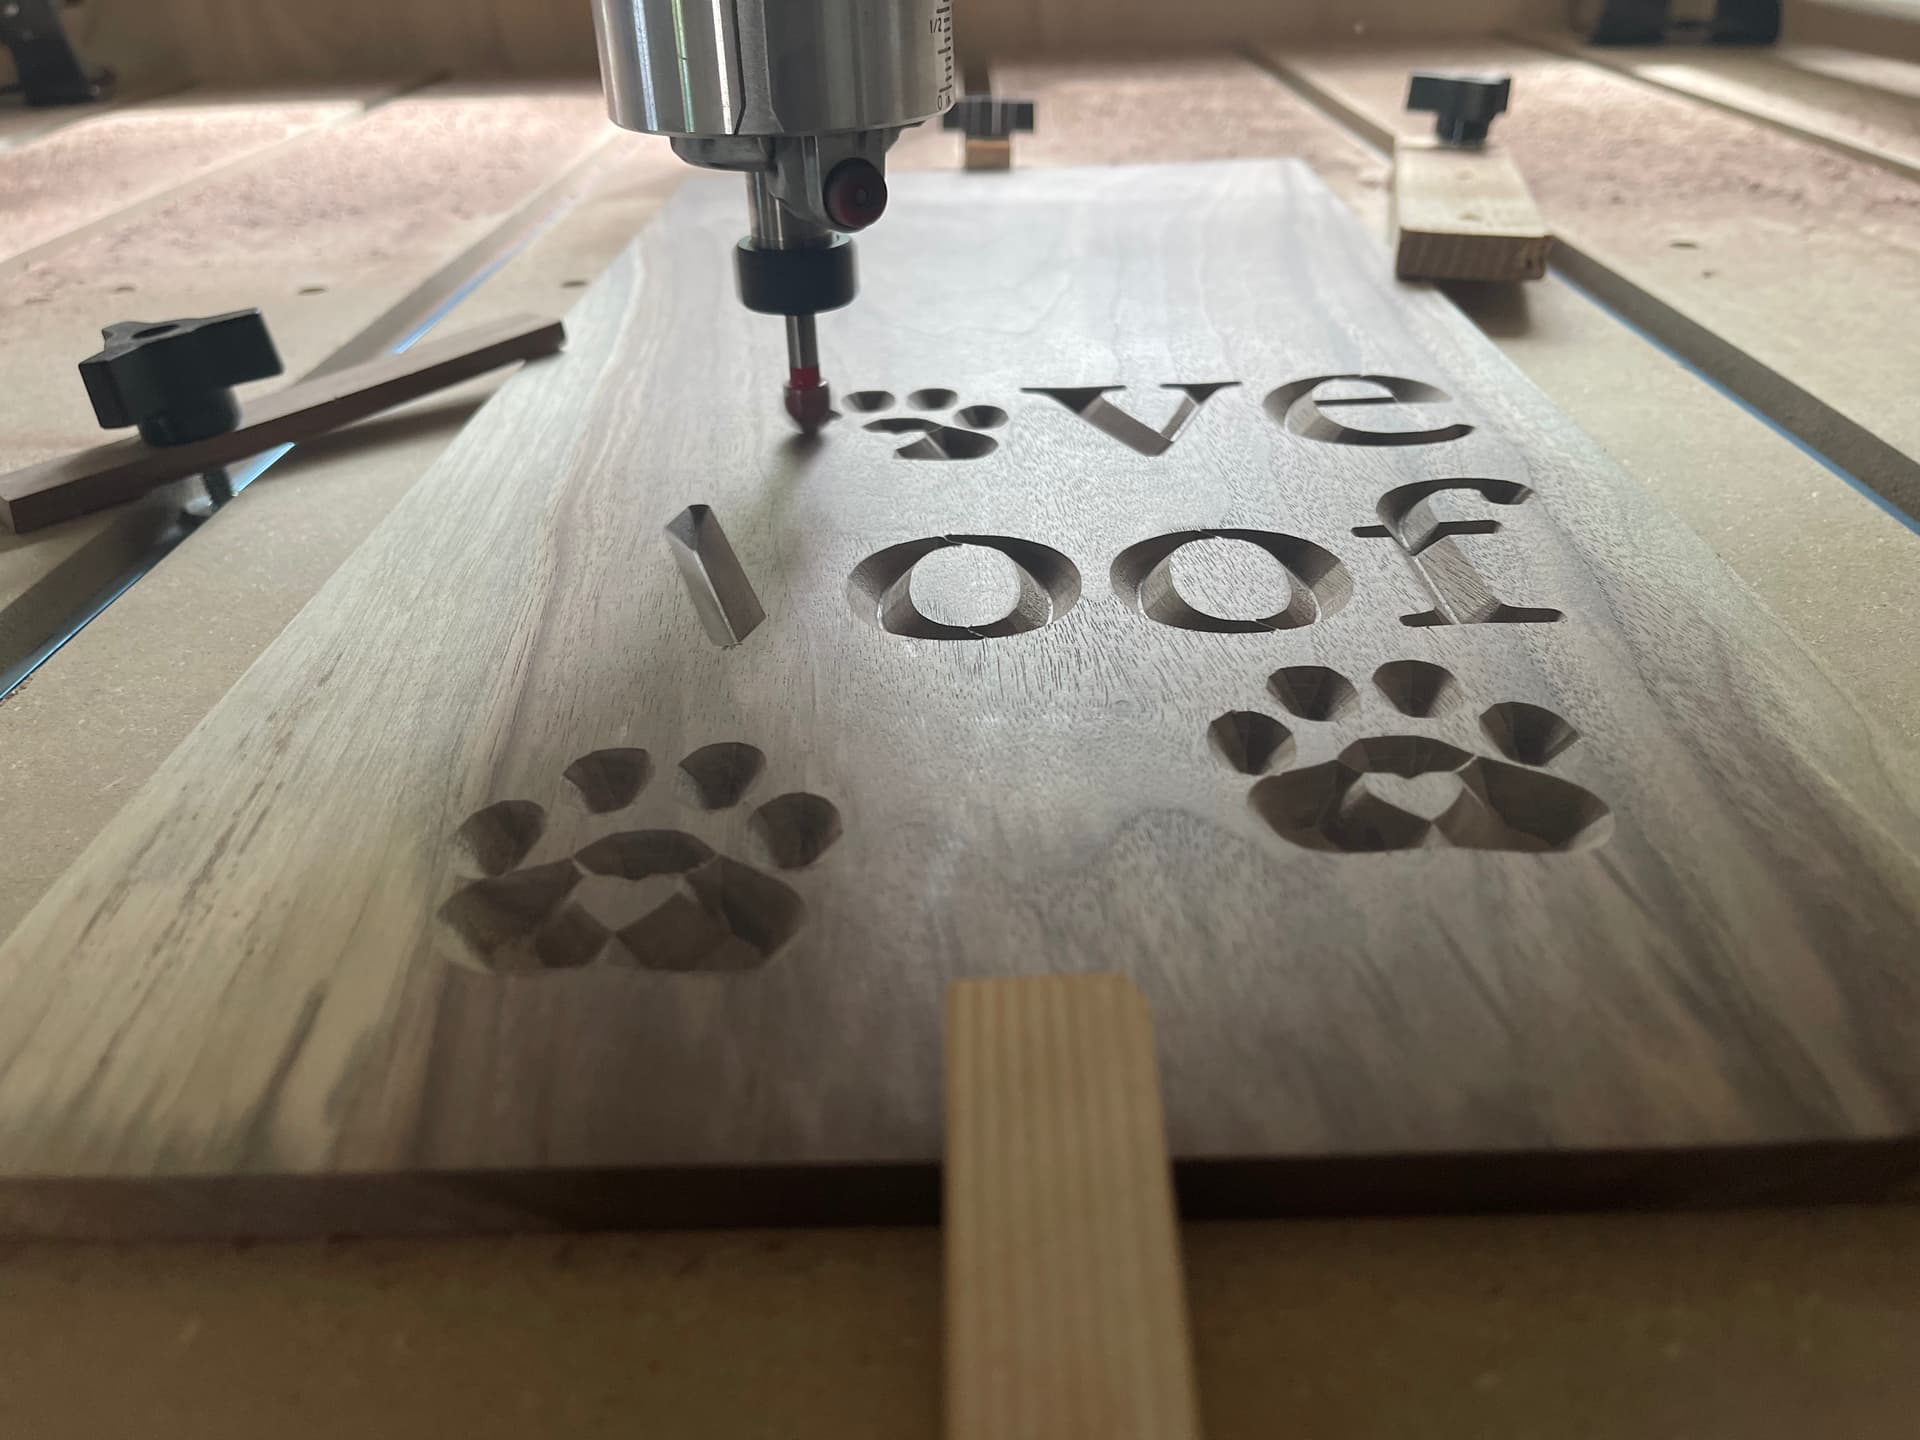
Played with the image until I was happy it filled the 9”x20” space well, carved with a 60 degree v bit. I successfully sanded the rough cut walnut and had a coat of spray on poly. I was set to go. I secured the walnut (so I thought) to the spoiler board and started the 90 minute cut. The problem was it really wasn’t as secure as I anticipated. The piece ended up loose and the cut quality was terrible. Once it was done, I seen what a failure looked like, I quickly ran it through the surface planer to be rid of the carve.
Lessons learned:
Slow down and take time to ensure everything is really ready to carve.
Ensure the wood is secure to the spoiler board. The larger the piece, the more hold downs that are needed.
In the future, I’m going to not finish the surface ahead of time. Sand? Absolutely. Spray poly? Not till I have a satisfactory carve.
Understand it wasn’t the machine, nor the software that caused the problem, it was 100% on me.
Don’t start something and not pay close attention to the progress of the carve. Might have been able to salvage the carve had I noticed it.
Remember what my dad always said, “there are two ways to do things, the right way and again”
Sorry for the rambling, but as I said, it helps me learn from my mistakes.
I hope this helps someone else with remembering to double check everything before hitting the start button.
@Jake Excellent post, Jake. We can all learn from it.
Not to be a downer, but be very cautious when offering Harley Davidson signs, coasters, etc, for sale. Harley is known to have their lawyers contact sellers who are violating their copyright. They are right up there with Disney for doing that. It can get very, very pricey.
@gwilki Thanks Grant, I heard that from a friend of mine this morning as well. Maybe I won’t redo it after all. Epic failure for a reason? Possibly. Dad always said “everything happens for a reason, just not always apparent at first”. He was a wise old woodworker!
My dad was wonderful and very wise. He died a long time ago, yet his wisdom lives on. I was too busy drinking and chasing women to learn his woodworking skills, but have done reasonably well learning and making epic mistakes on my own. He would have loved my wood shop, not shared with vehicles or other non related stuff. Although he would have made fun of my CNC I’m sure. He was old school, minimal power tools and never even owned a table saw. I think mostly cause he never had the room for one. Appreciate the response, thank you!
Thanks for sharing your CNCing “trials and tribulations” with us.
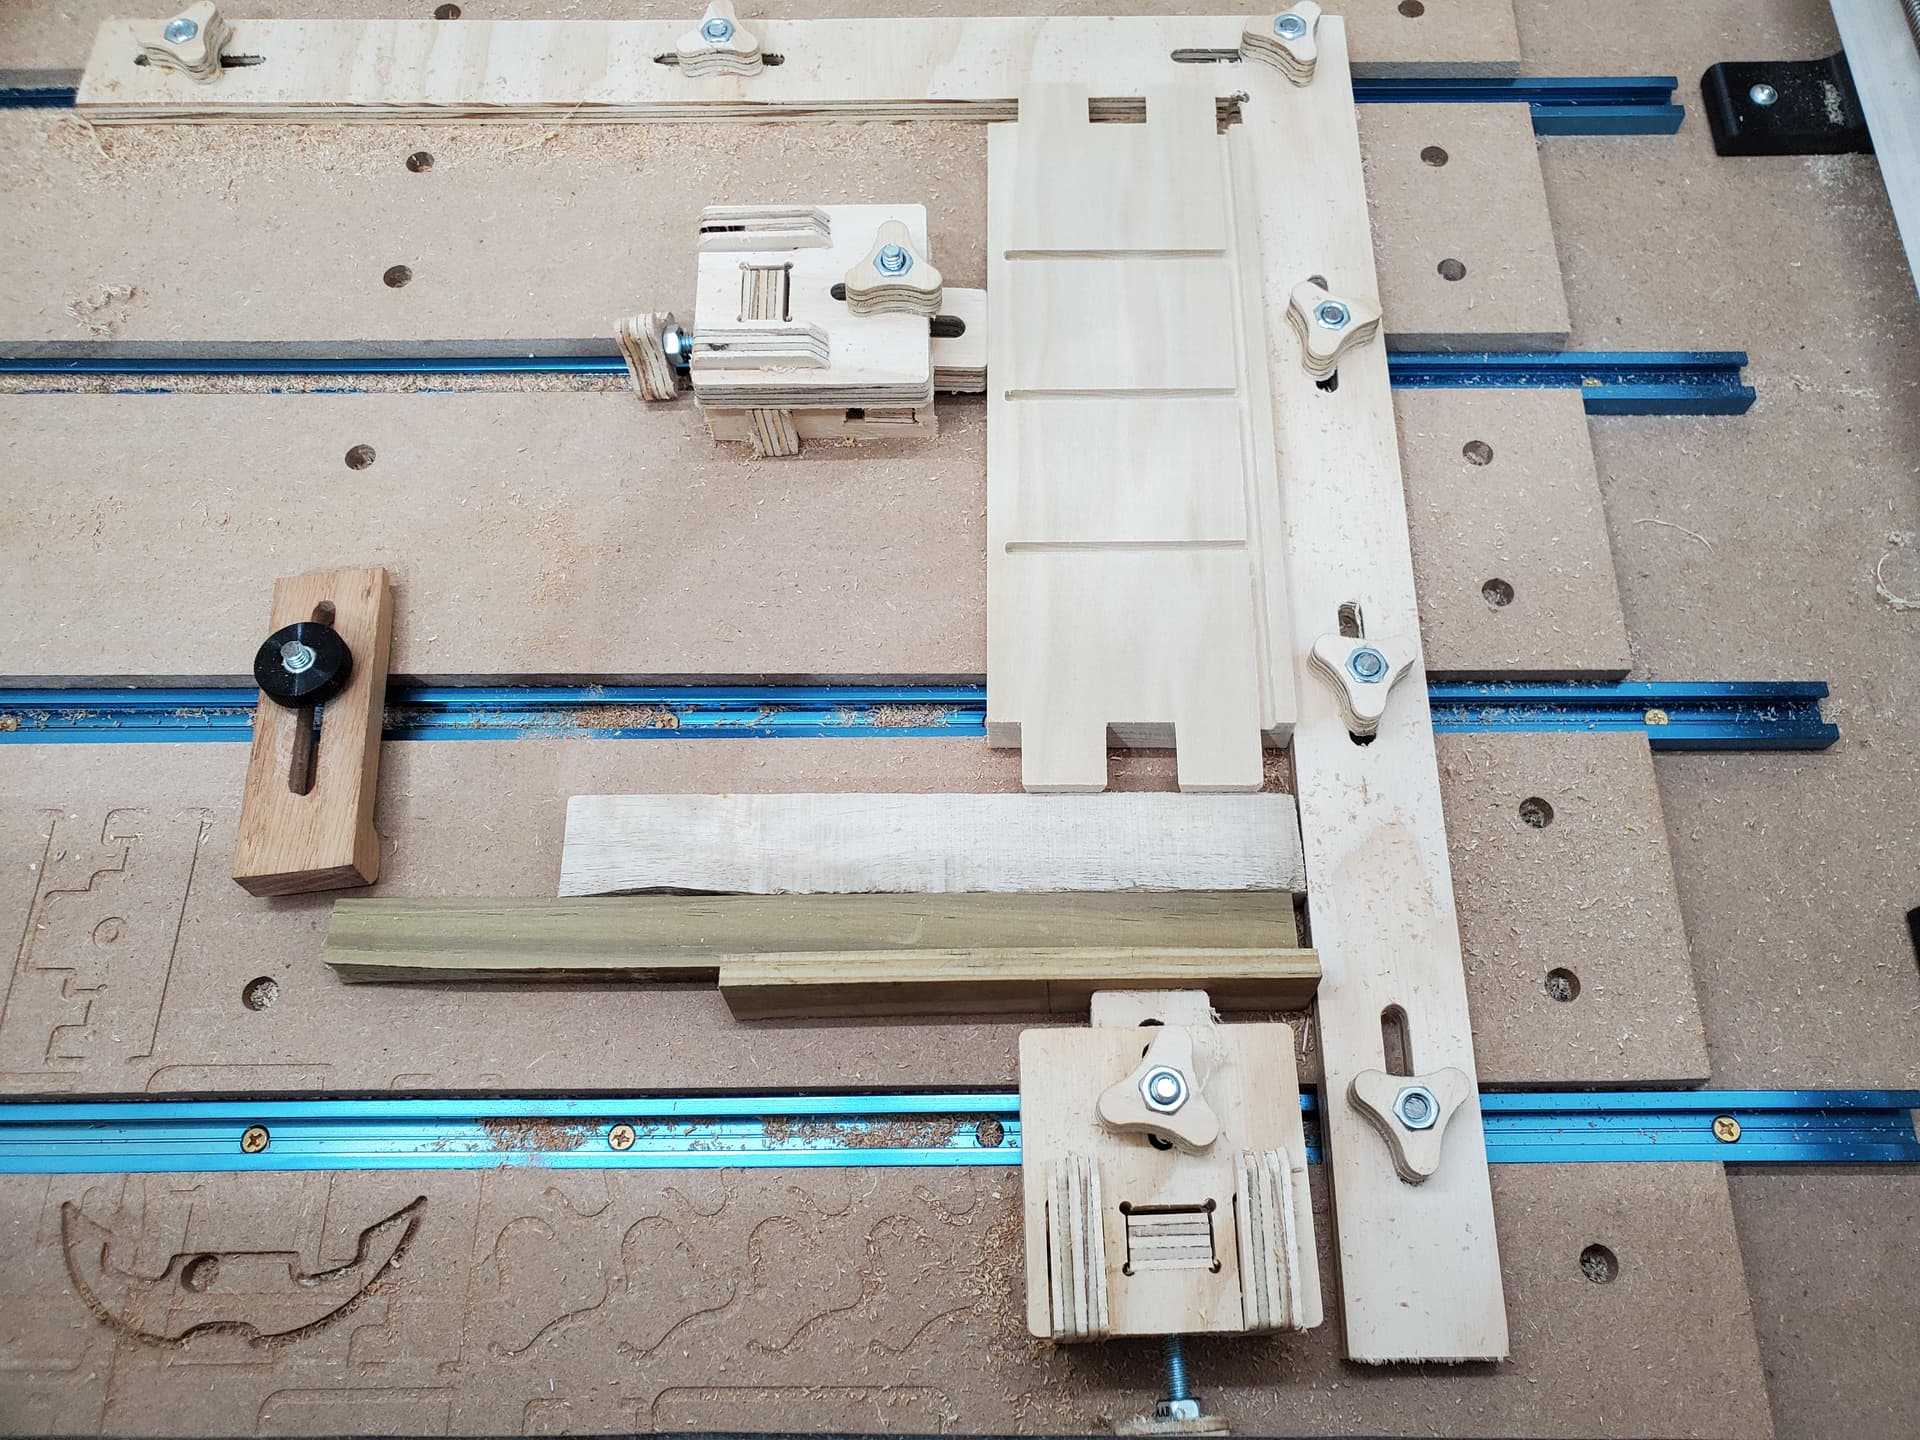
Would you mind sharing with us the method of hold-downs you used, please? The reason I’m asking is that I don’t ever clamp any work onto the spoilboard; instead I place blocks of the same height against each of the sides of the piece and clamp those blocks down firmly. This way the piece is immobilized and the clamps seldom get in the way.
@ApexWoodworks Hey Marty! I have been using strips of walnut and t track nuts. I haven’t used your method cause I thought I needed to secure the work piece to the table. I envisioned the router lifting the piece and causing issues if I did it the way you described. Heck, I definitely am no CNC expert by any stretch. Just some retired guy having fun (and sometimes frustration) with a new tool.
Here is a picture of another recent failure lol, but accurately reflects my current method. If you have a better idea, please let me know. I appreciate you! Thanks.
Jake
Jake, I too am no expert. I’ve found that most of the workpiece movement is transverse, not up/down. Therefore, only blocking the sides, too & bottom from moving has worked well for me. I think surface clamping pressure is only mandatory if the workpiece is warped.
@ApexWoodworks Thanks Marty! I agree with the whole side to side clamping and too down for warped pieces! Give yourself some credit sir, your knowledge is decent. Me, on the other hand, I’m still barely crawling. I did do a nice piece for my brides 50th birthday. A wall plaque that I was having so much fun with, I carved the back side too. Purple Heart wood, slowed down the speed and had an amazing carve. I’ll post it in a couple of days. I just commissioned to do 6 pieces for our local Sheriff’s Office. Reworking the design a bit and getting approval for each piece. I do badges and do them well, so I was quite ready to accept the project.
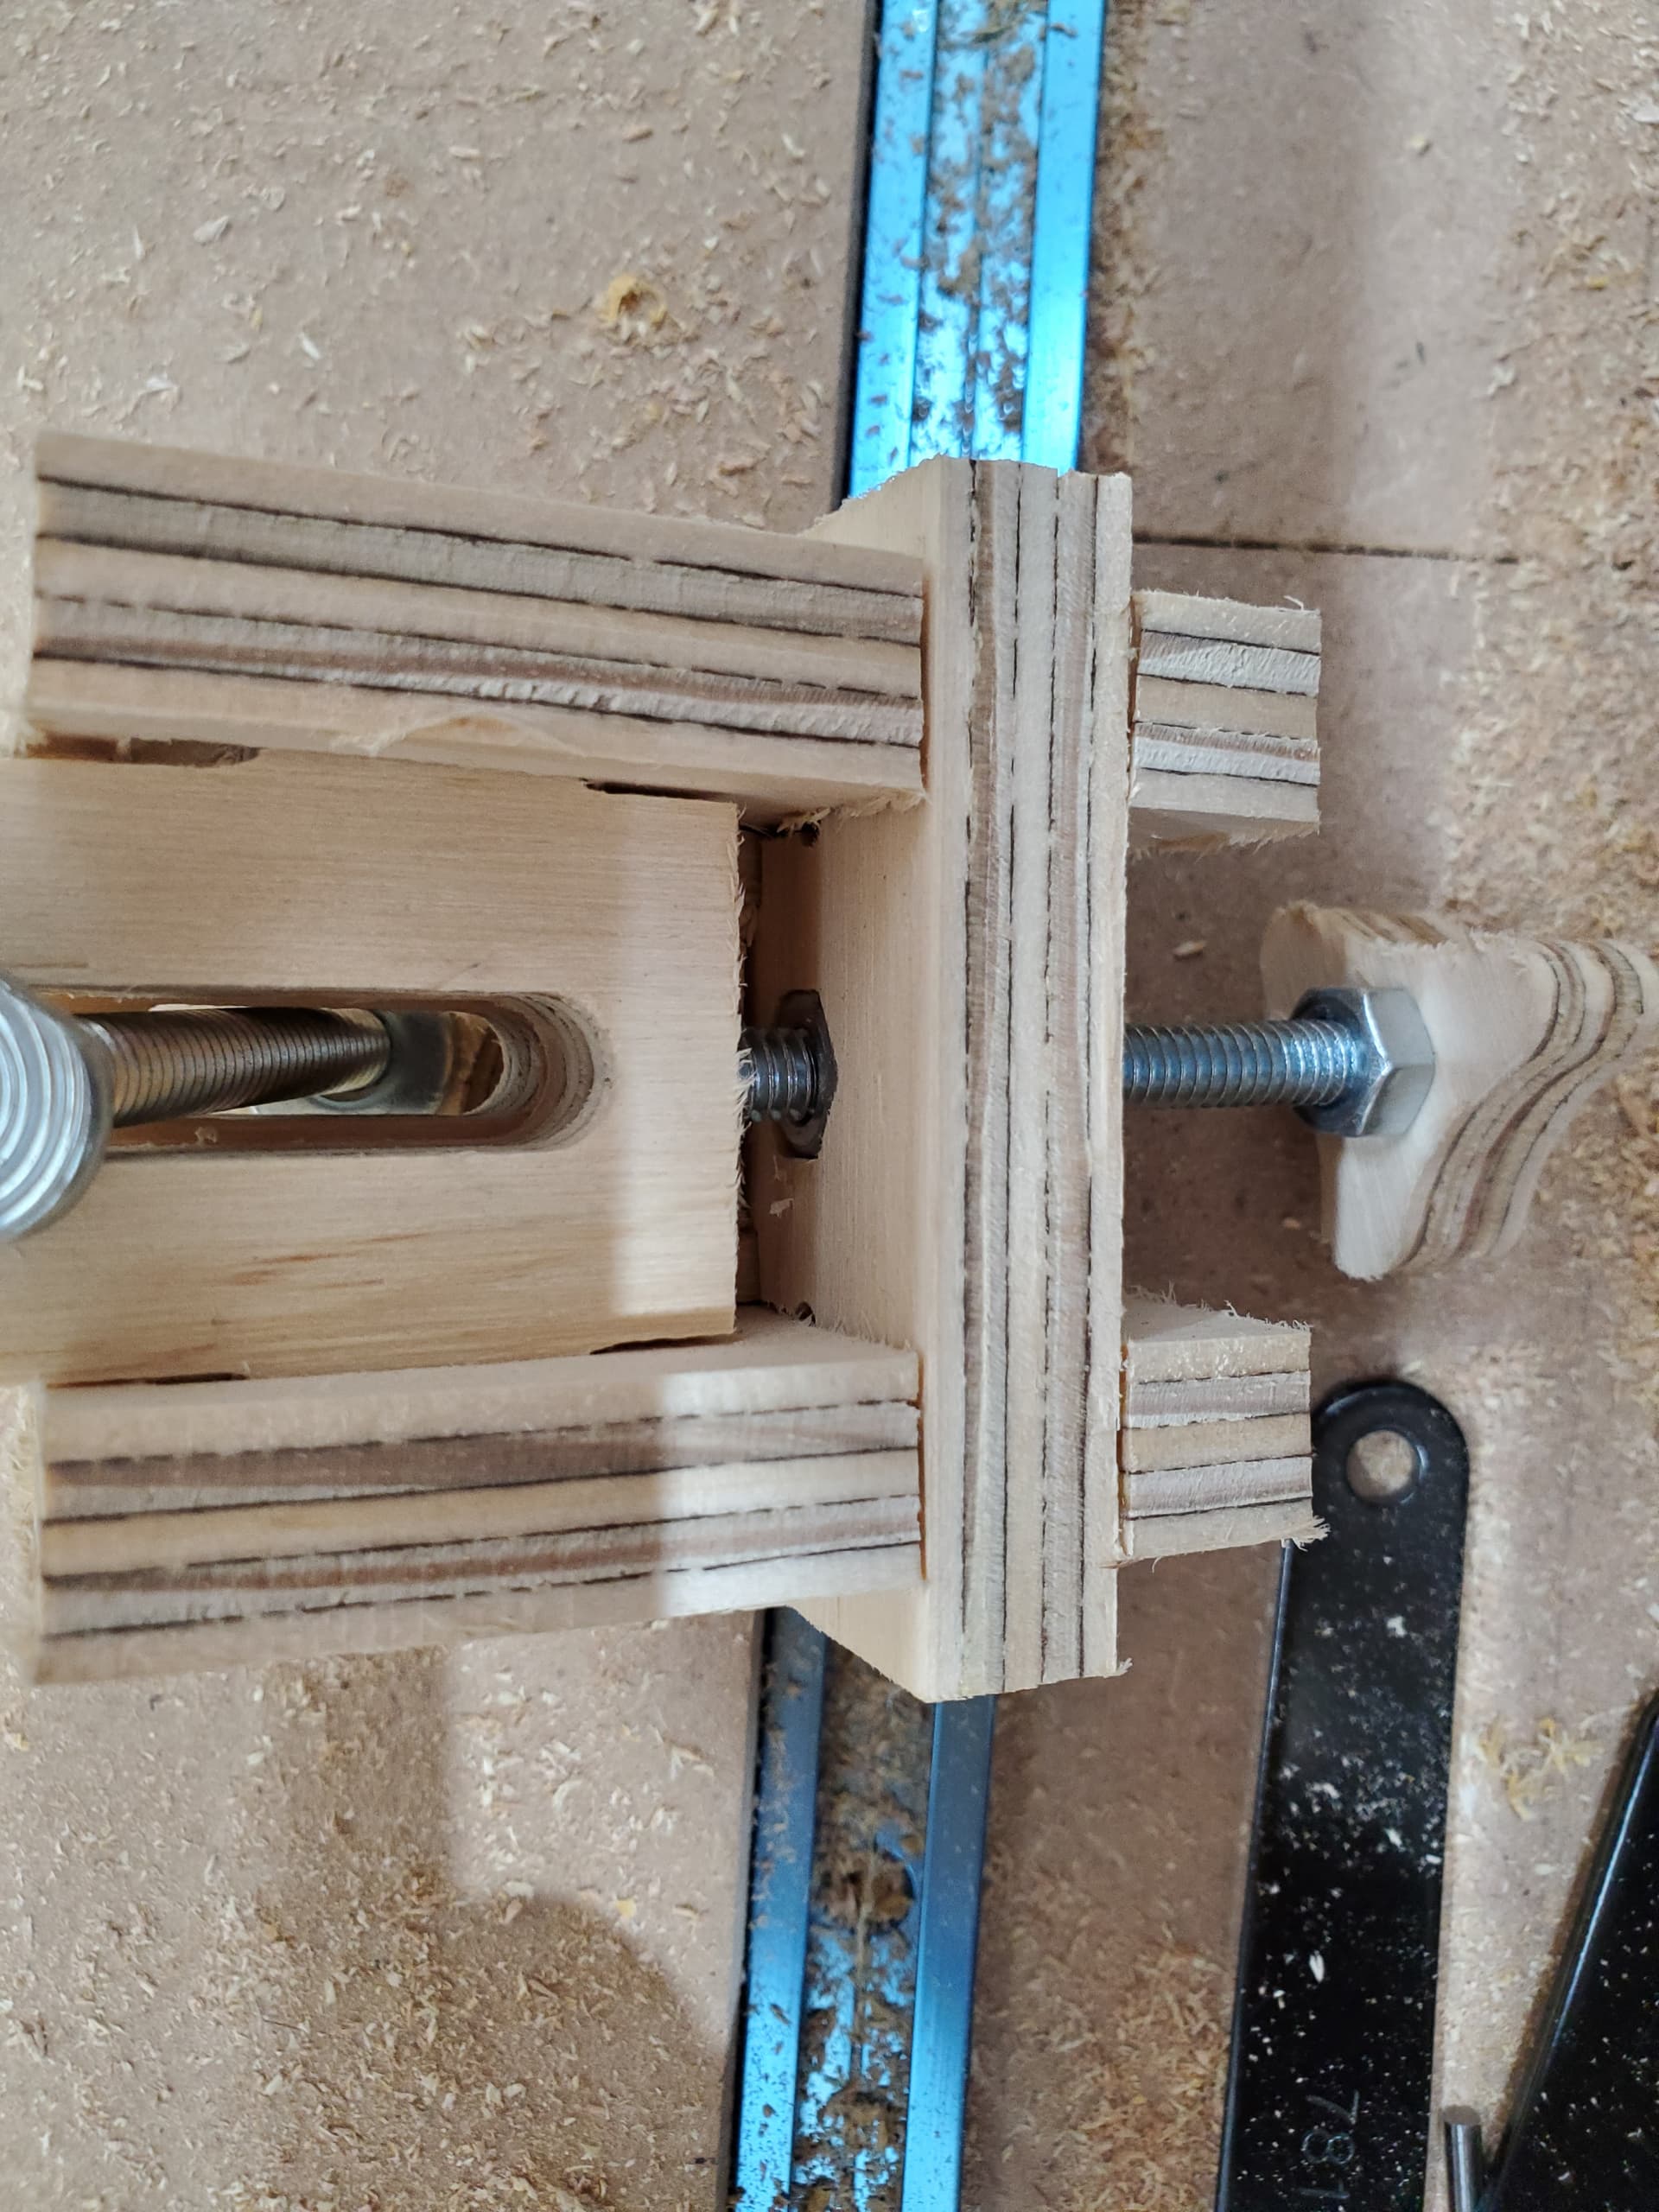
I’ve just recently had the opportunity to use the toe clamps that I made using the blog post from Sienci which can be found here.
I made a couple of the toe clamps and a square for my machine. I mounted the square so it is against the back and right of the work piece so that the front left corner is available for the touch probe. The square is clamped to the t-tracks and a toe/push clamp on the left side and one on the front. Seems to work well so far. The toe clamps don’t have a lot of throw so you may need to use a spacer block between the clamp and the work piece.
I can’t find where I posted it but if you are as cheap as me you can skip the threaded inserts and use a pocketed nut on the back side of where the insert goes. The appropriate sized hexagons for 1/4 20 nuts can be found in one of the files on the knobs used to hold down the square and the regular style clamps.
EDIT: A picture is worth a thousand words so here is a couple. The first shows how the toe clamps and square work together and the second shows the pocketed nut instead of threaded insert. Oh and on the toe clamps the knob that goes to the track needs to be tight but the other one that pushes doesn’t need to be cranked on very hard at all to secure the work piece.
The “heel” on the back helps to keep the clamp more level and the notch on the front lets you restrain lateral and vertical motion. Kudos on using wooden clamps, it sure does help when you hit one!