Hey @all! Halloween’s around the corner and we’d love to see how you are celebrating. Share your Halloween themed projects here on the forum, and they will be voted upon by community members! Winners will be selected based on number of votes, but a few winners may also be hand picked by our Moderator and Admin team.
Enter by submitting your project to this thread, with the following requirements:
Describe the process of completing your project, including any finishing, planning and even mistakes! We want to learn from each other’s experiences.
Include pictures of your work, anything from in-progress to finished product photos.
Provide the 2D/3D design file (such as .svg, .dxf, .stl), or if the design is not yours, provide a link for where you purchased or received your file.
Contest Rules
The project must be done mostly or entirely on a LongMill or Mill One.
Submissions must be posted in this forum thread. Entries outside of this thread will not be counted.
Multiple entries allowed, up to 3 per person. Only 1 prize can be won per person.
When voting opens, contest participants cannot vote for their own submission.
Submissions will end on Friday November 5th, 2021, 12pm EST. Voting will open Friday November 5th 2021, and will end Friday November 12th, 12pm EST.
Prizes
Top 10 winners can choose 1 of:
Inductive Sensor Kit
Spare Parts Kit
12pc V-wheels
4pc anti-backlash blocks
3pc couplers
4 pc ACME nuts
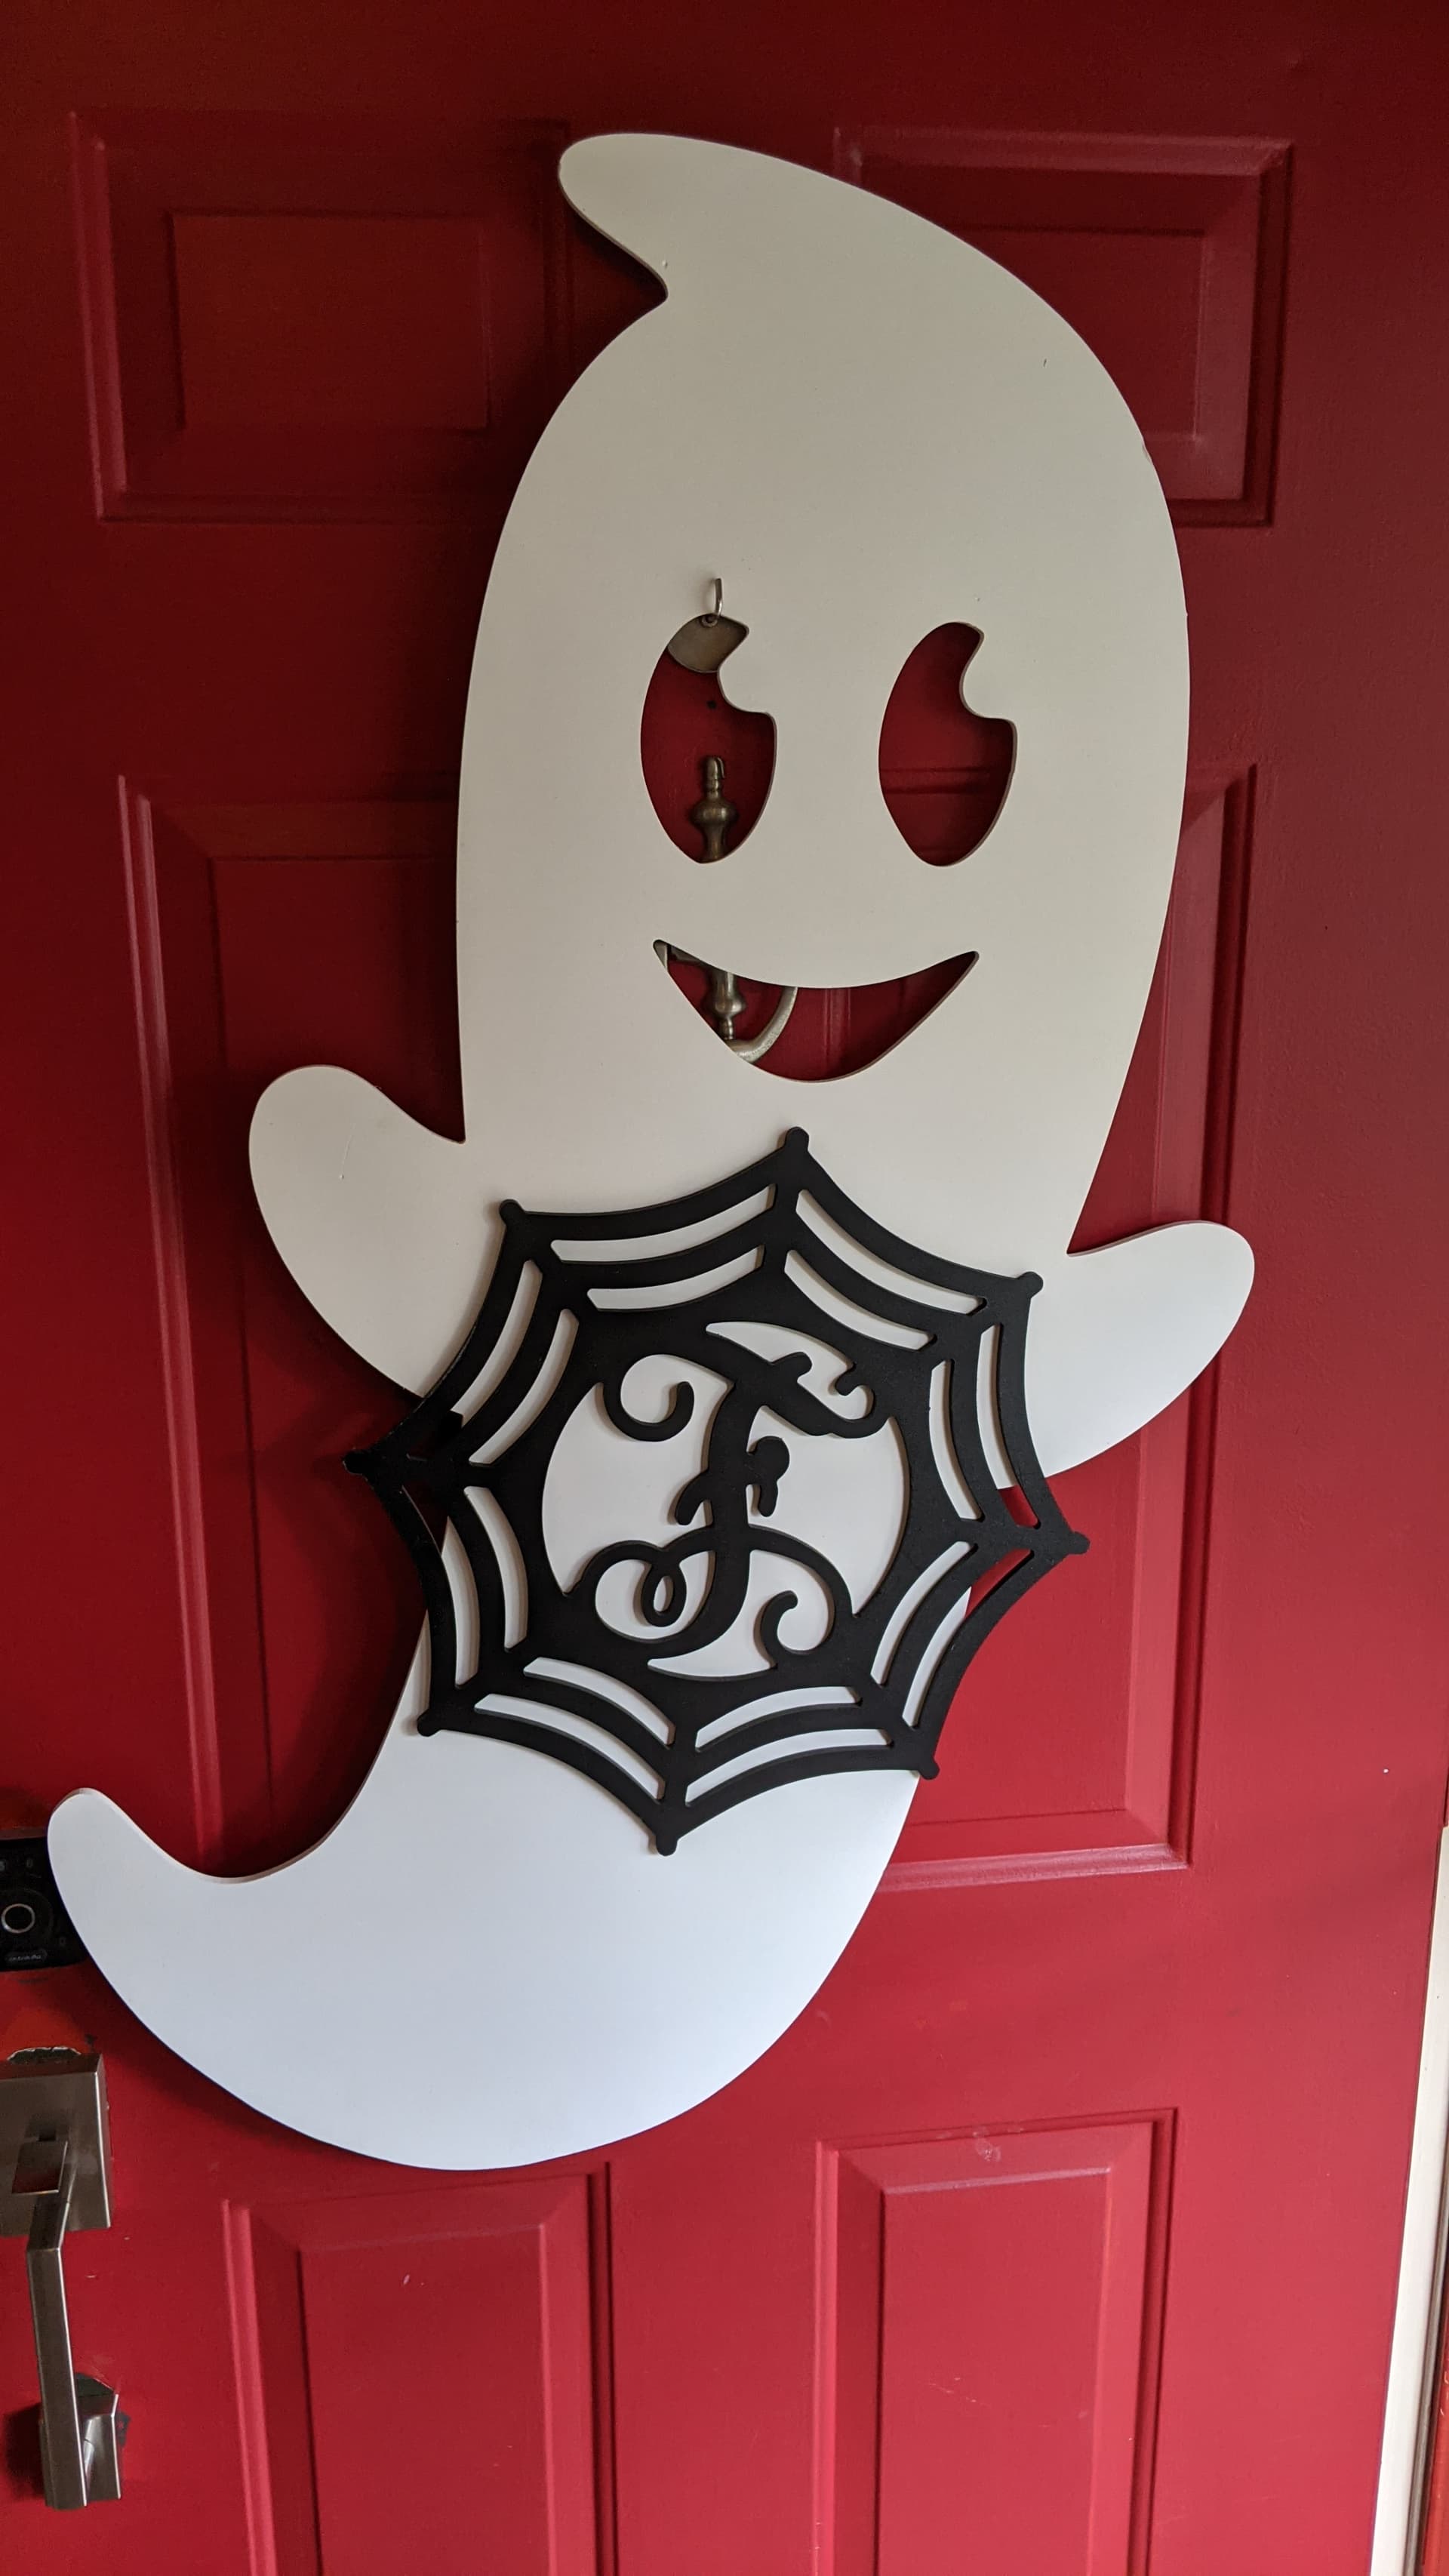
I’m not entering (no LongMill), but I thought I’d share an old project that comes out this time of year…a PVC ghost and spiderWeb for the front door. I did this one about 4 years ago. It’s about 2’x4’ (1200mm x 600mm) with a 16.5" (425mm) diameter web.
I had to tile the ghost on my machine due to its length. This was all done in a combo of Inkscape and Fusion 360.
Very neat work Neil I’m looking forward to seeing some other submissions come through in the next week. I’m sure there are already many cuts being churned out for Halloween so why not get some free stuff along the way
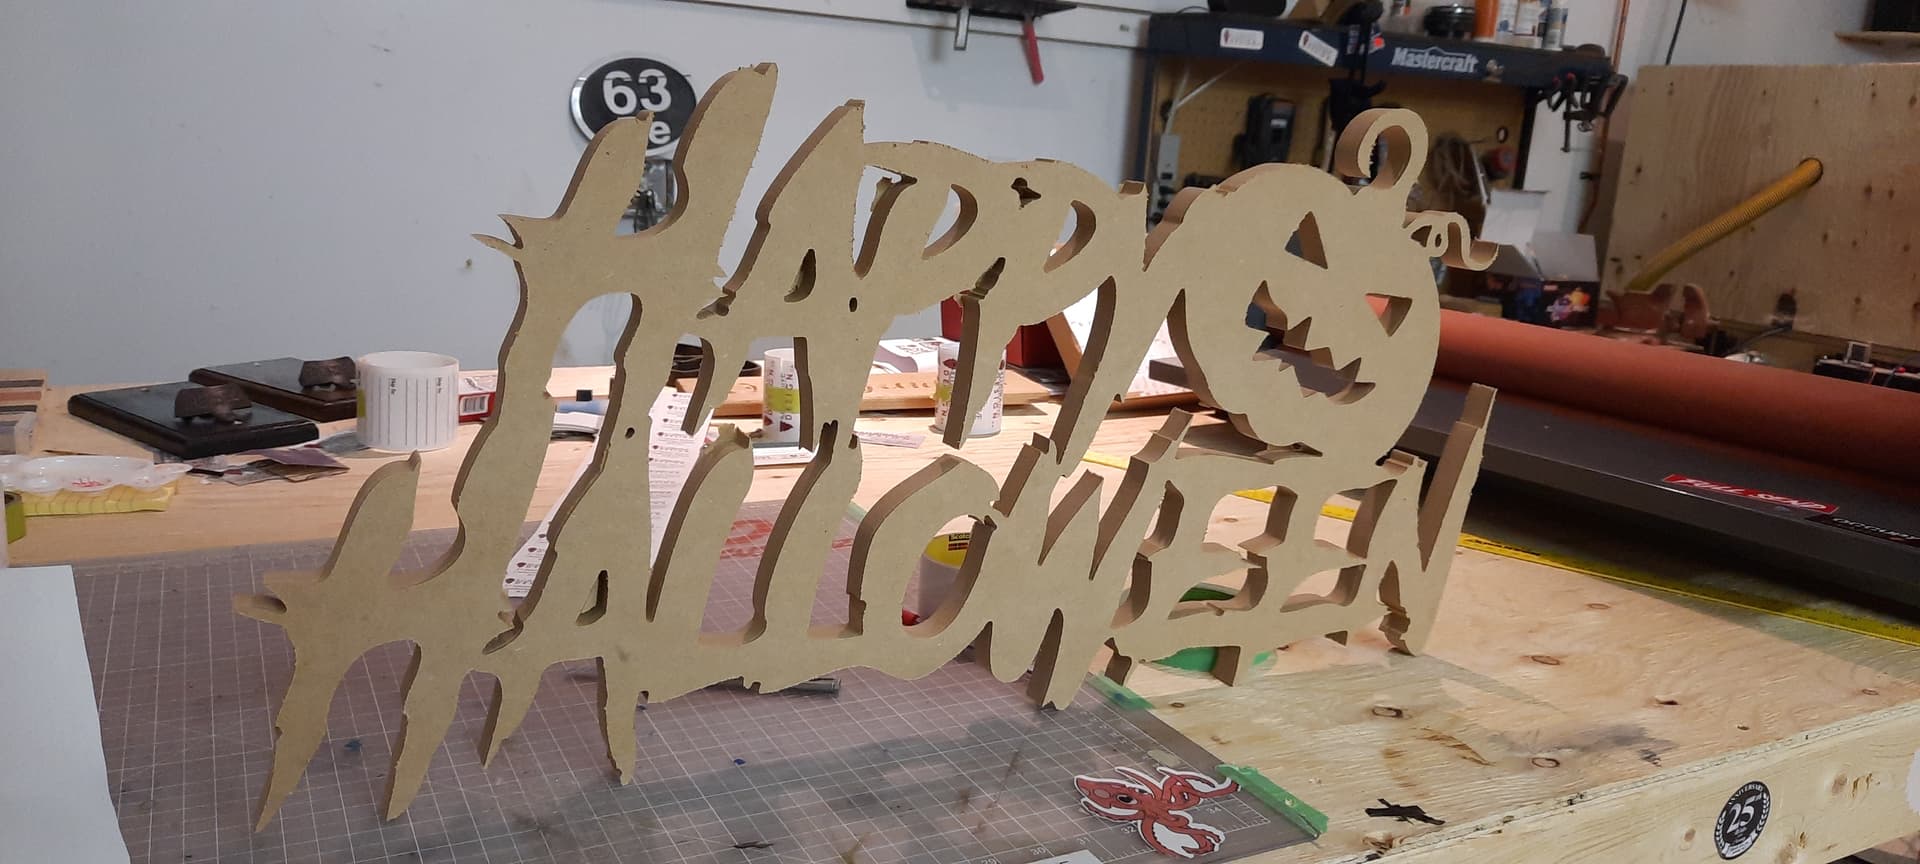
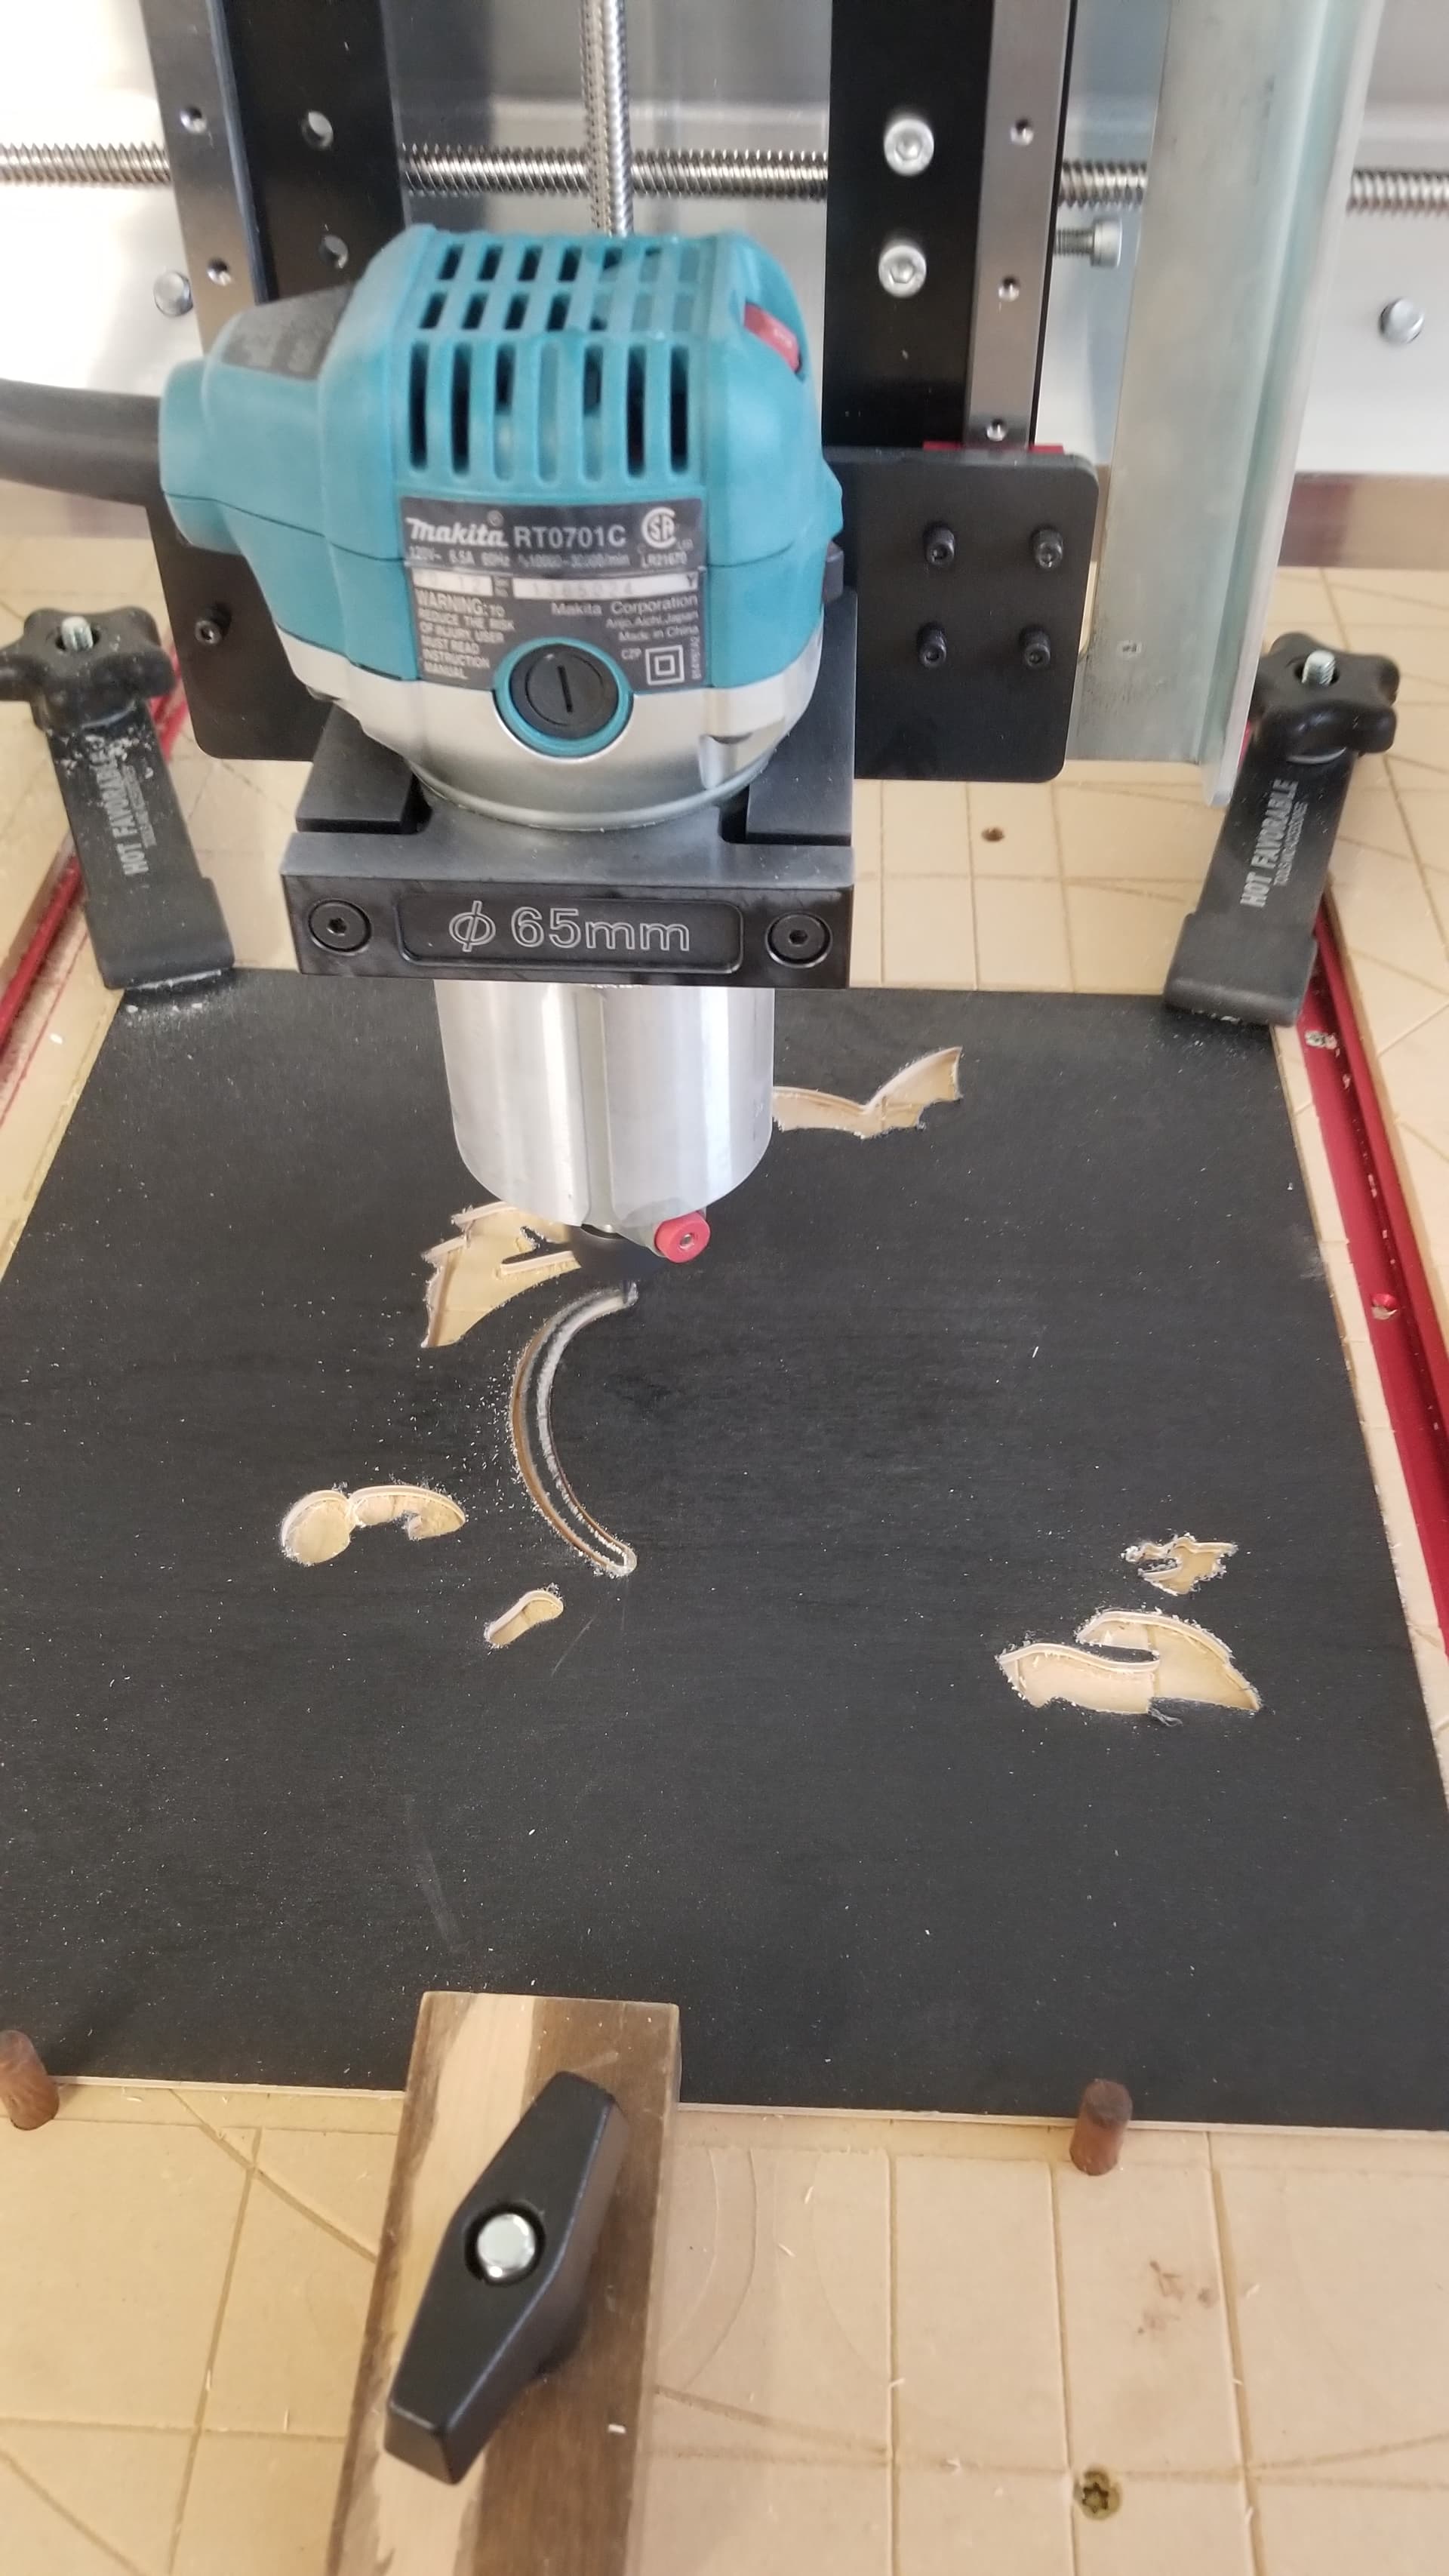
Halloween contest entry
Zombie stl file purchased from 3D wave
Rough pass 1/4 end mill 120 ipm
Finish pass 1/32 endmill 100 ipm
Made with the long mill and vcarve software
Pine finished with tung oil
@Designsquid Welcome to the group, Chris. You will find it an excellent source of experience and knowledge. You’ve made a great first post! Please be sure to post again when it’s painted and ready to spook.
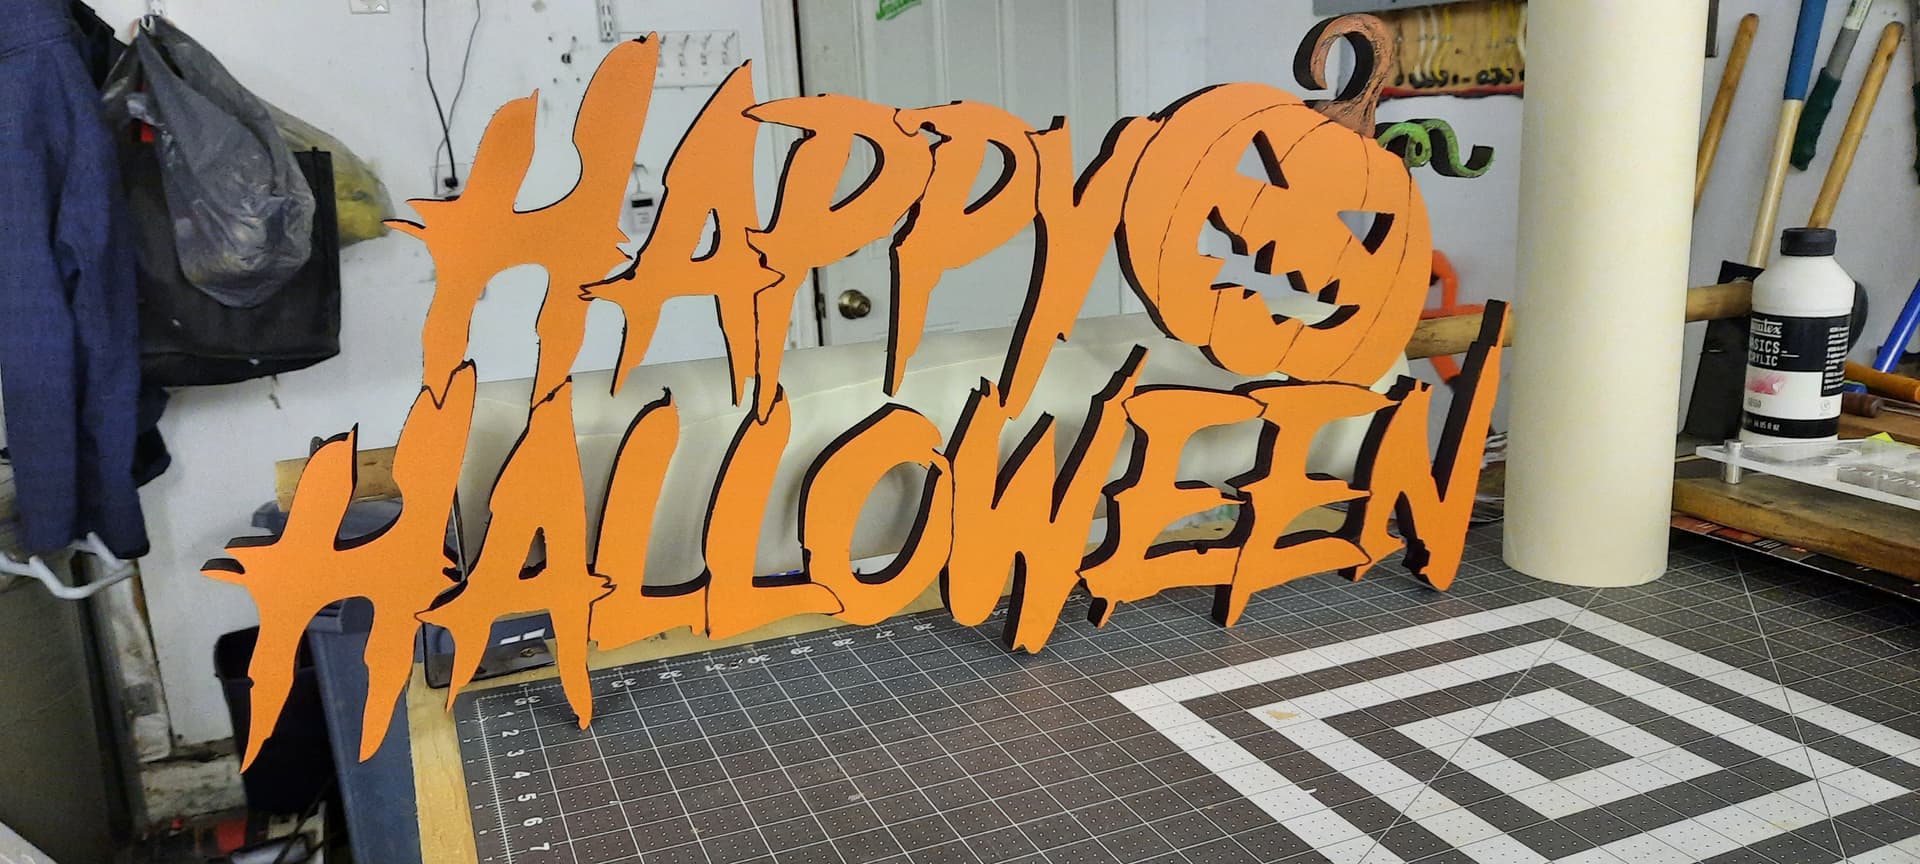
First entry. I found this image on the web (can’t remember where), and using VCarve desktop, I traced the bitmap and vectorized it. The biggest challenge was resizing the vines so they would fit the bit, I actually had to buy some 1/8 DC bits to do this project. Since I’m new at the CNC, I went through a few ideas on how to make it, including doing a pocket cut to get rid of material, which would have left small pieces flying, and a few other ways to cut and hold the small pieces with tabs. In the end, I decided to test cut and see if the small pieces would fly out or wobble in place on their own. I think because I used 1/8 ply and a small bit, it worked, so I cut out all the small pieces first with a profile, then an inside profile on the larger part and letters. It was fun and challenging because I had to learn and practice manipulating nods in many ways, which was new to me. I did get a lot of hints and support from the FB group, it’s a great community. I used Rustoleum spray for the orange and black 12x12 inch boards, and I glued everything using CA glue.
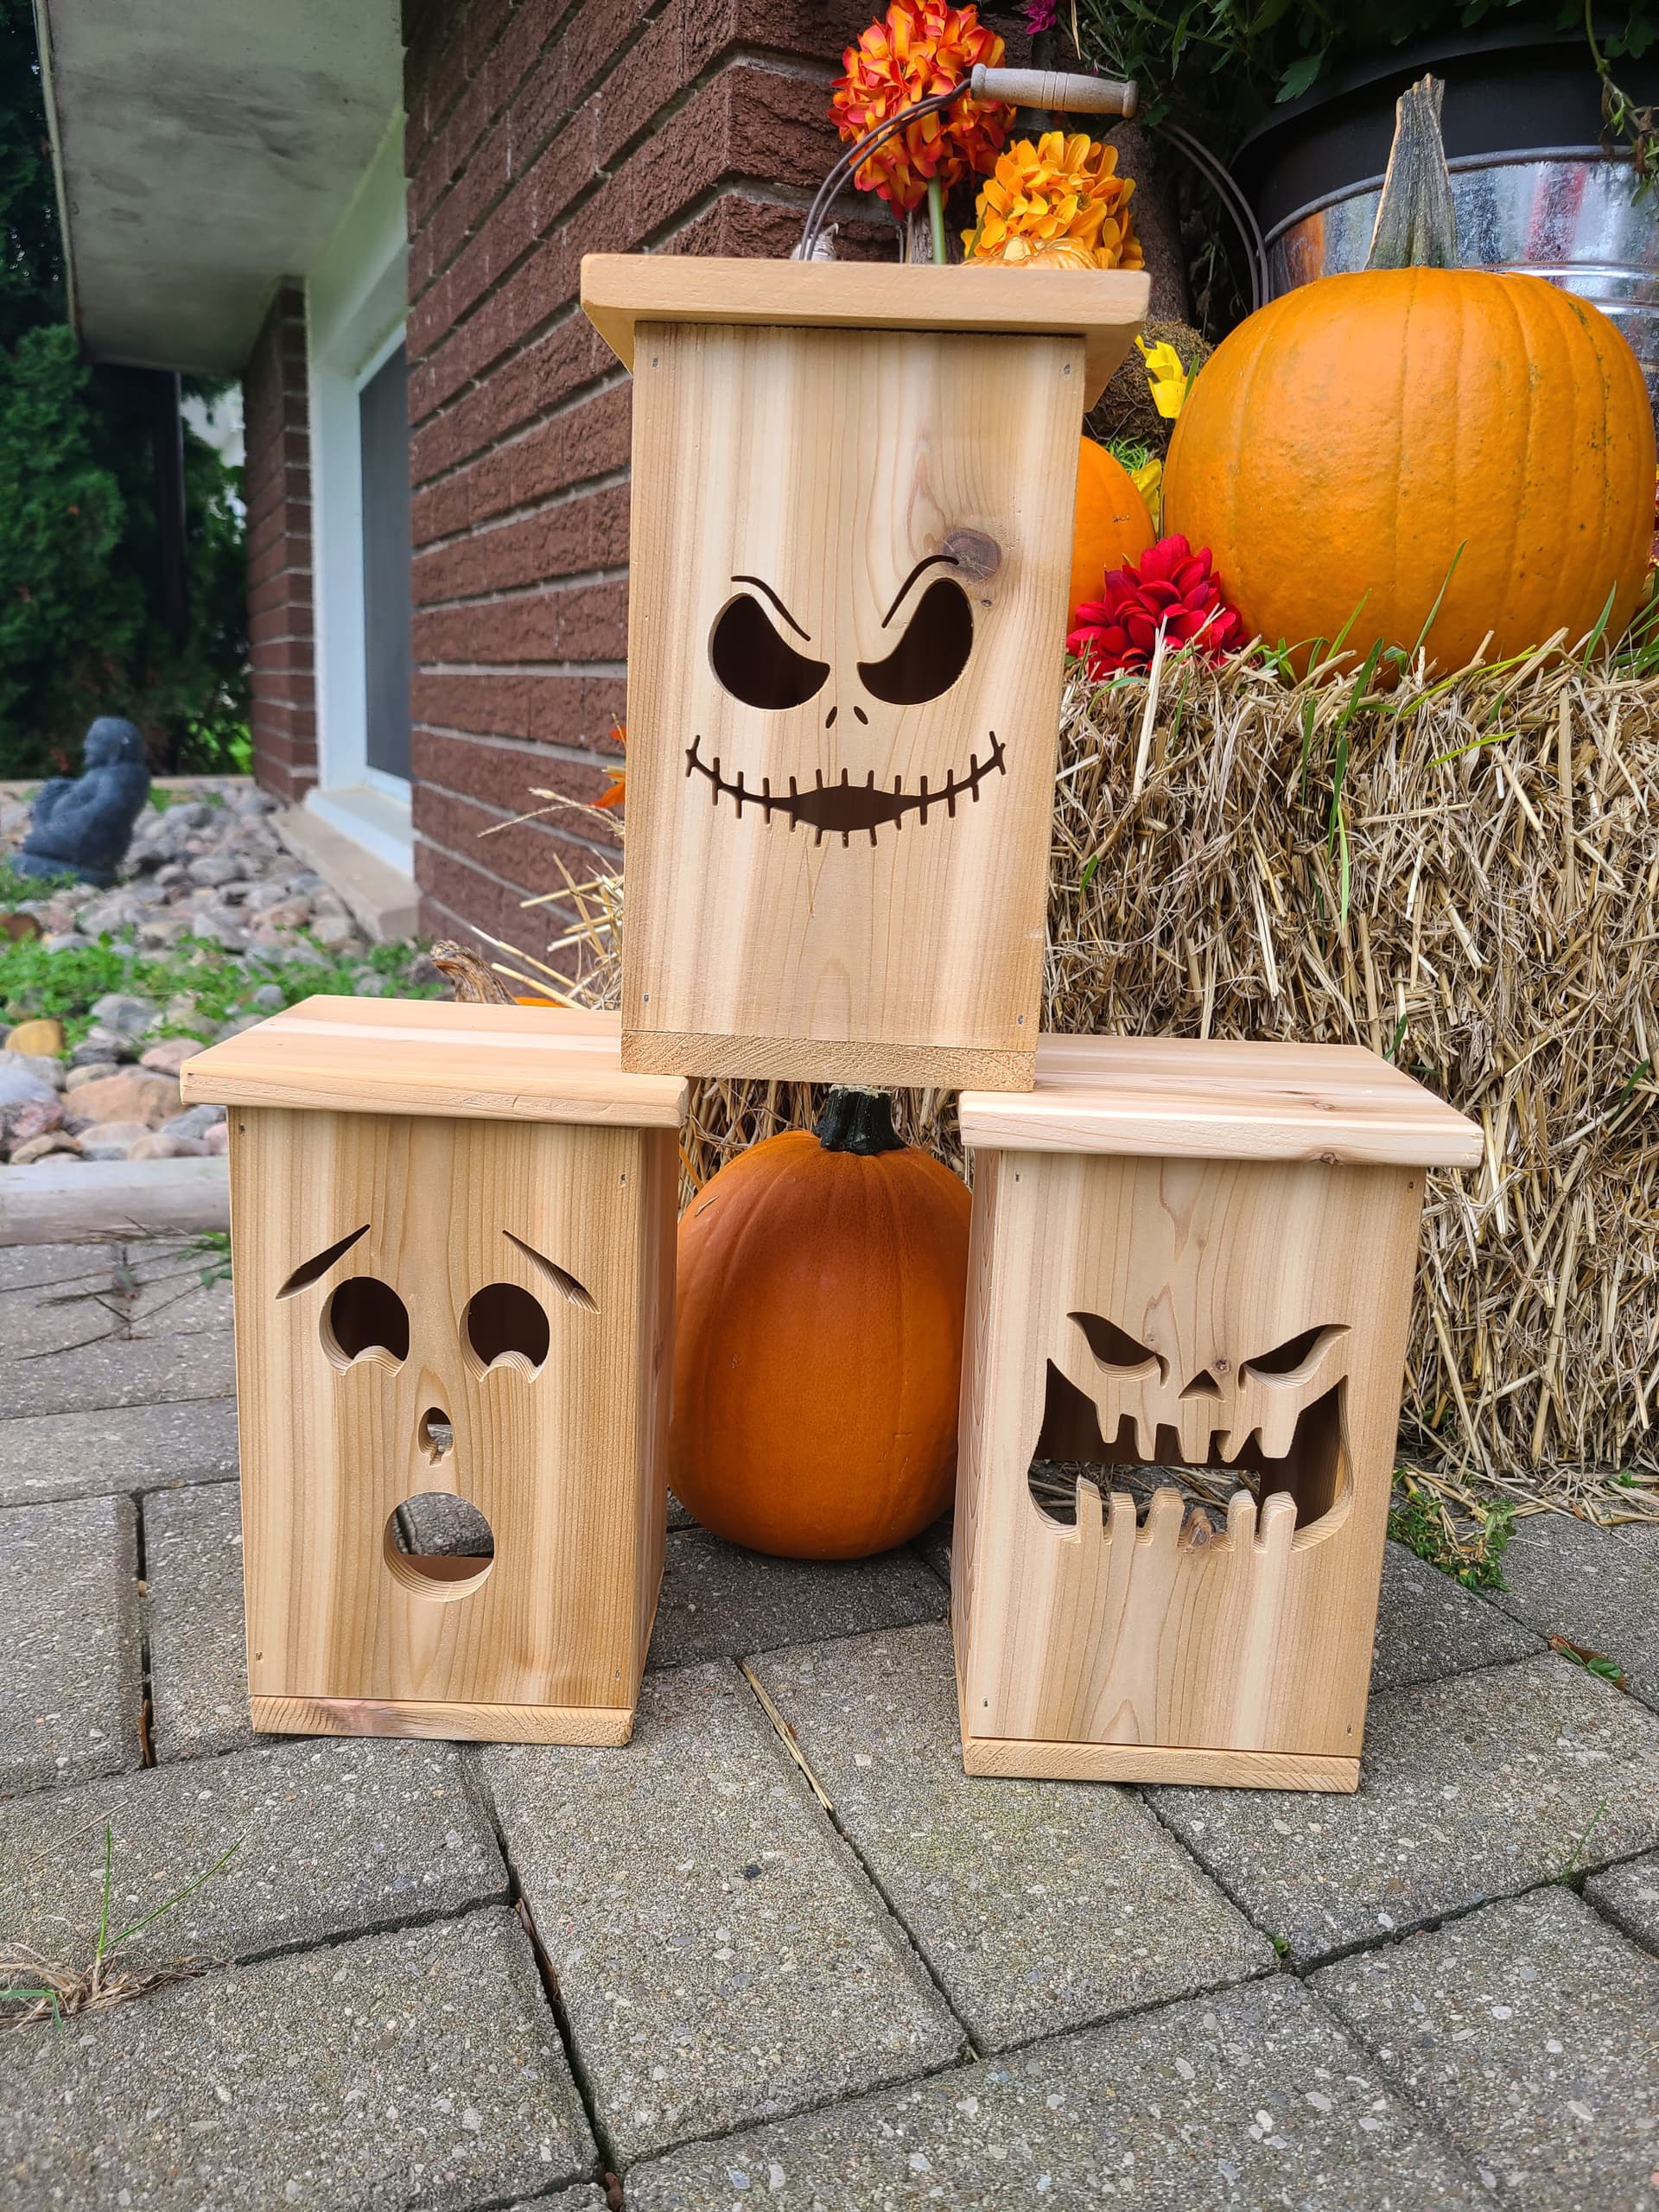
Some Halloween wooden lanterns I made for our house.
Made from cedar fence boards that I planed down to 1/2".
Used a 1/16" bit for the first time and didn’t break it!
Update (once I re-read instructions):
Design process was finding Clipart and then tracing it out in Vectric.
Planed Cedar deck board to 1/2". Cut to size and sanded, glued and pin nailed together.
2 look better finished as I altered my finishing process with more sanding.
*Added Vectric file
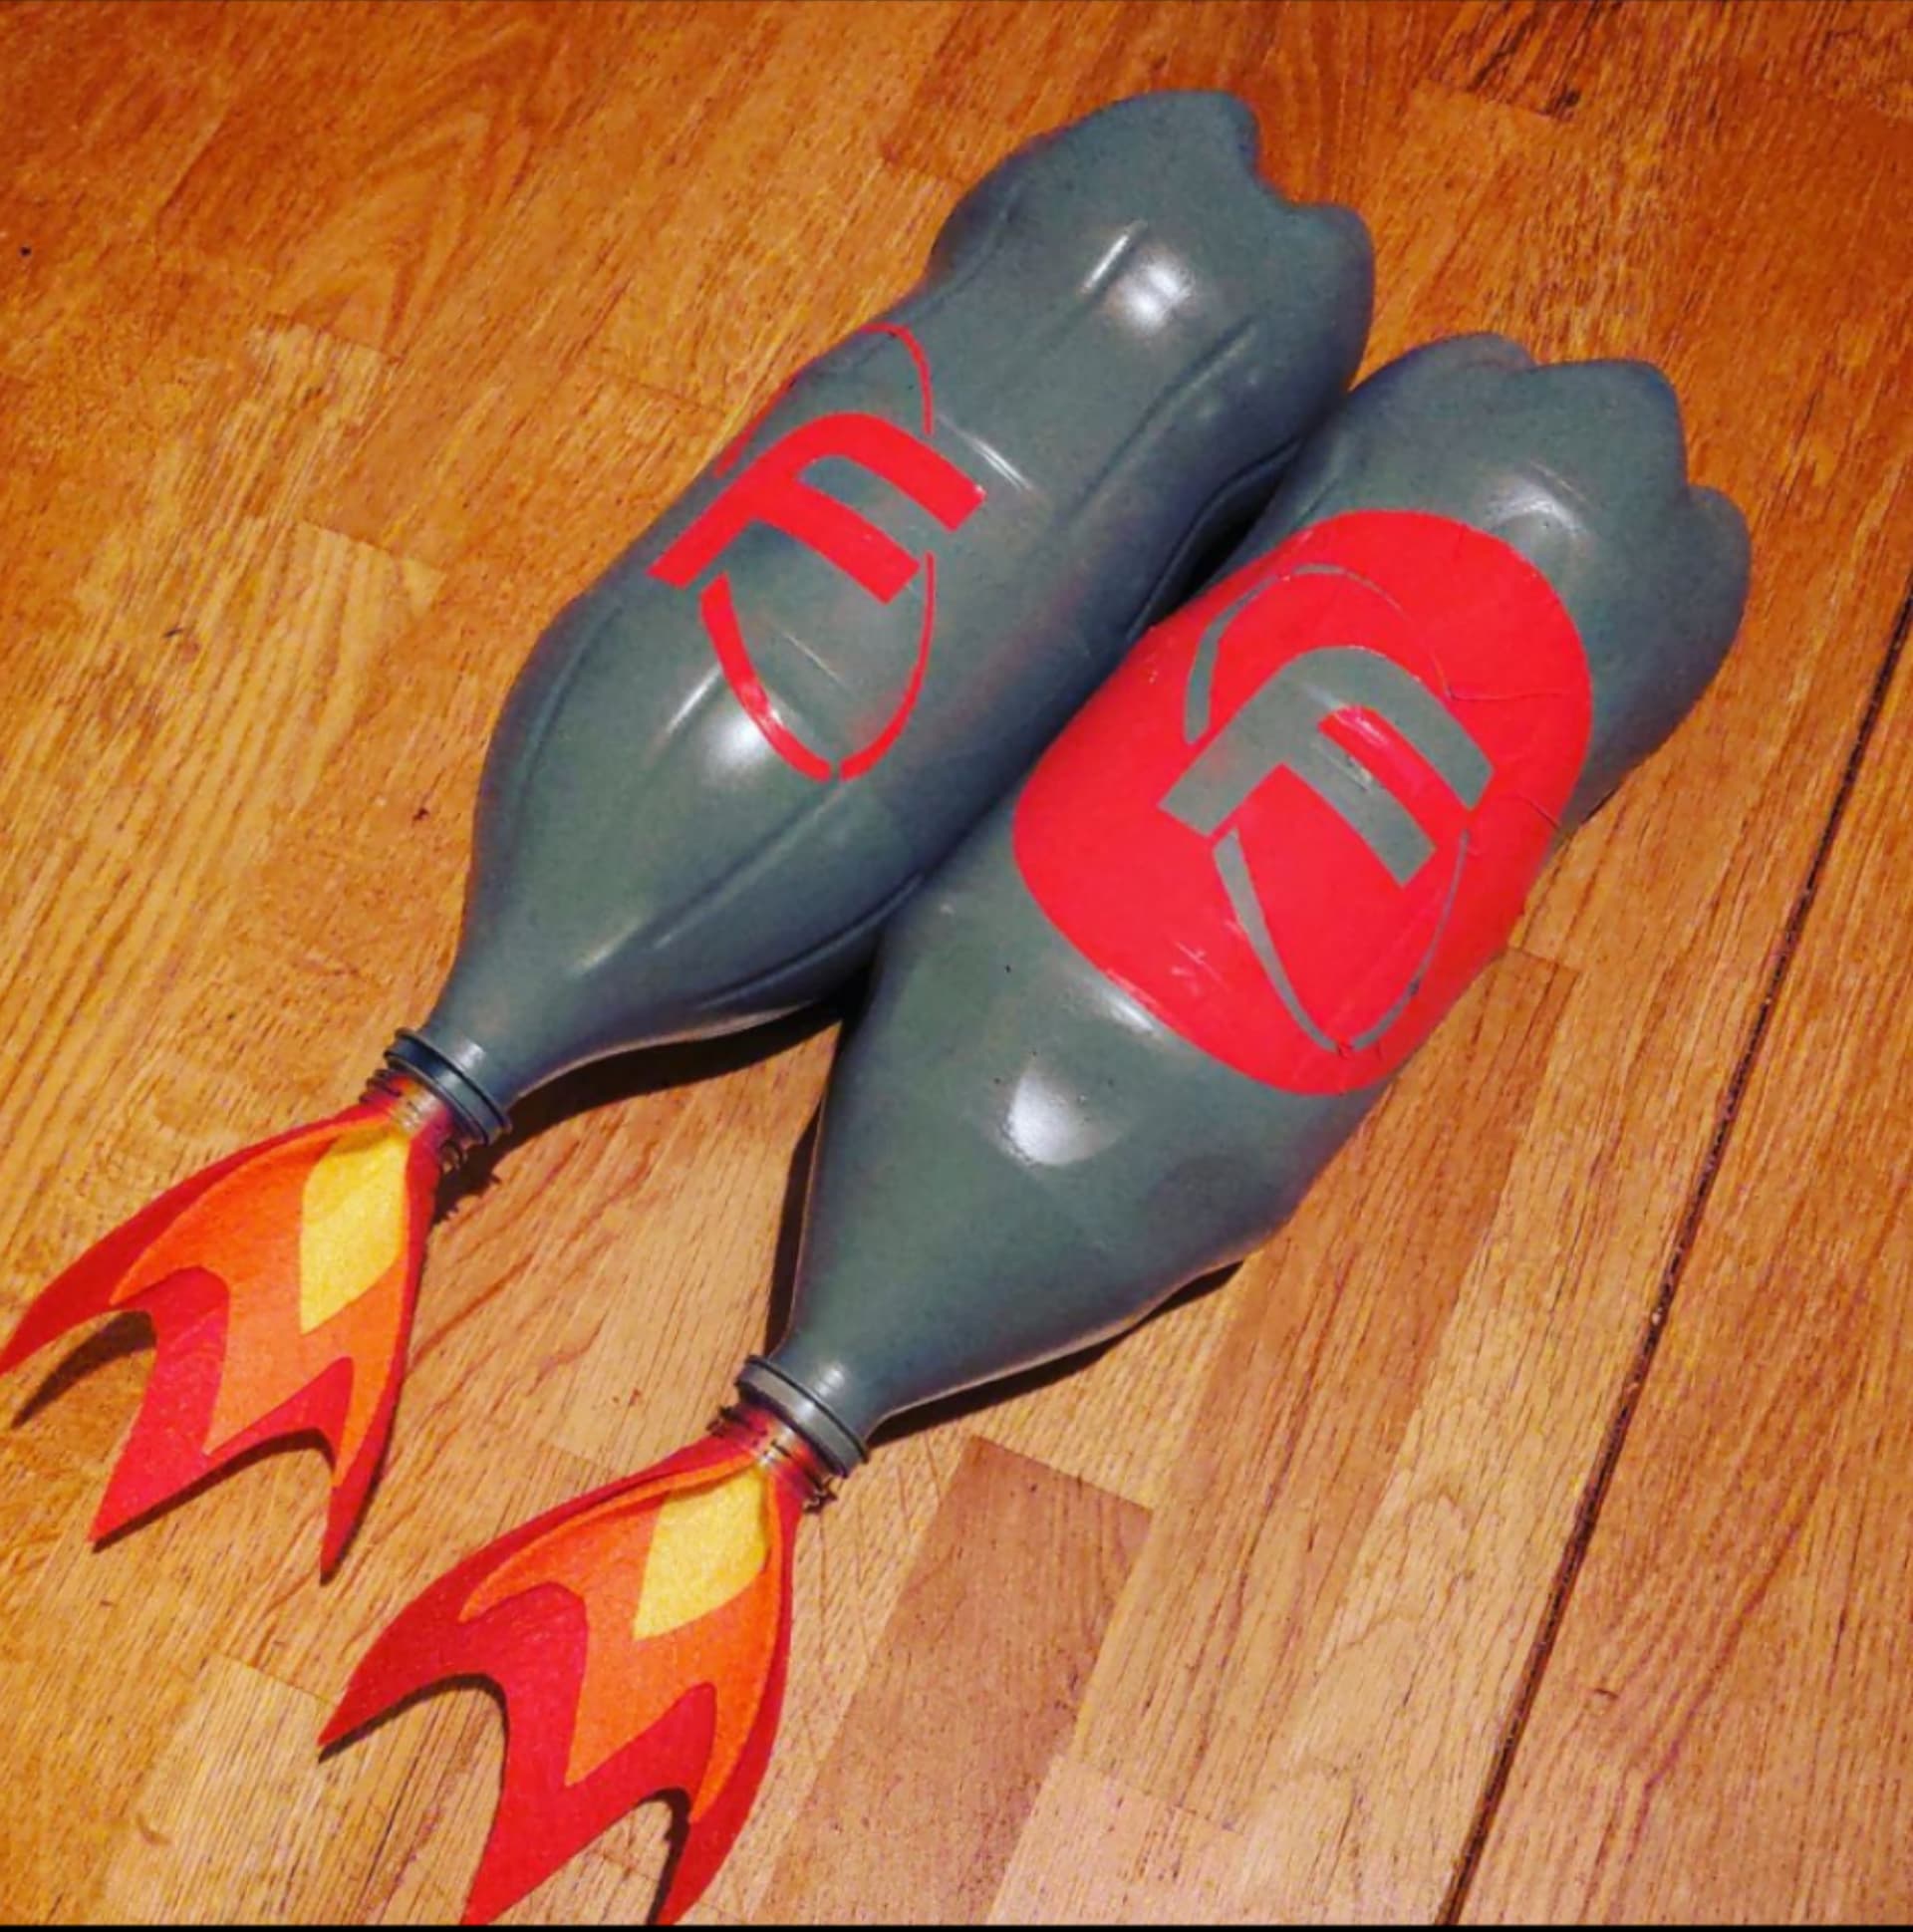
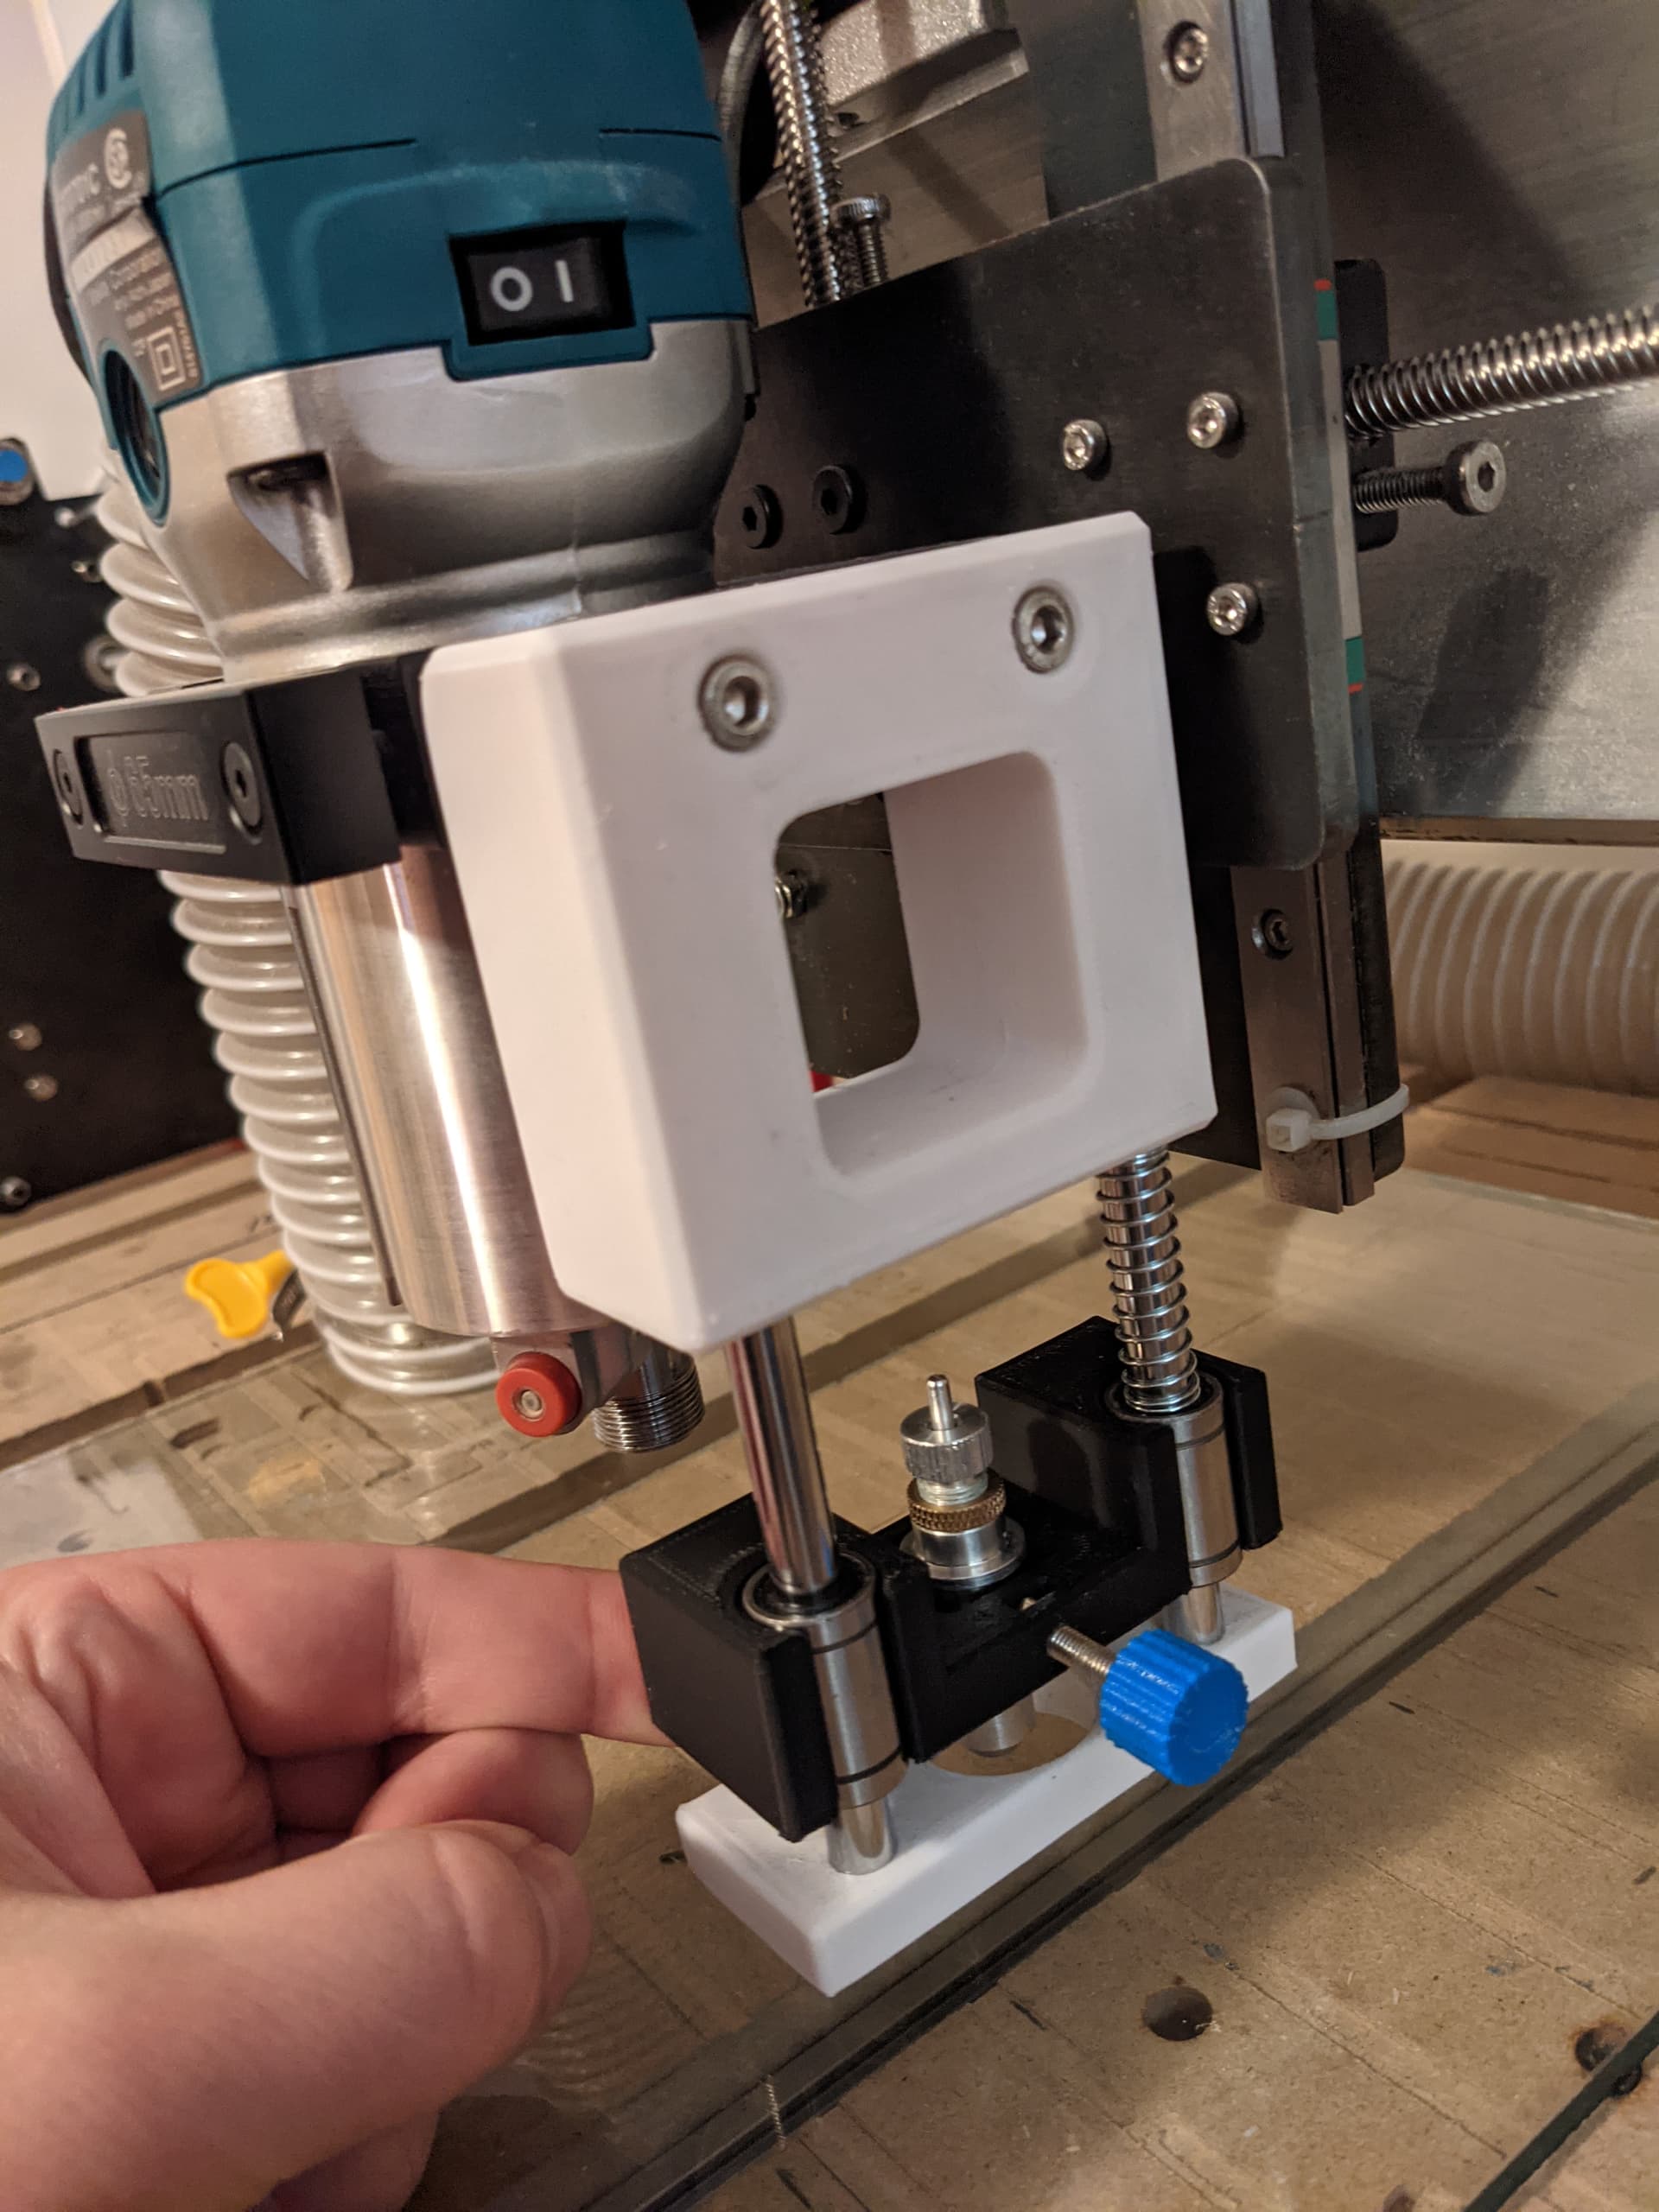
My 5 year old son is dressing up as an astronaut for Halloween. I made a jetpack out of two 2L pop bottles and as a finishing touch I designed a vinyl decal with his first initial in a space-y font. I cut this out using a drag knife attached to a custom mount I made for my longmill (it uses 3d printed parts, springs, and LM8UU bearings). My mount will also accept a pen or marker, so it is a good way to draw pictures. It’s great to be able to use the longmill for a wide variety of things other than just cutting with endmills!
@frankchannel While I bow t your imagination with the jet packs, I’m really fascinated by the mount. Do you have plans, or did you make it up as you went along? It sure looks very professional.
Great work everyone! Just another few days before the contest closes. If you have your design file please add it to your post
@aringer Good to hear you learned some new techniques along the way with this carve. For large pieces I use screws to hold down flying pieces, so I can see how the small vines can pose a challenge!
@Dlab006 Derrell this is great Halloween decoration - out of curiosity did you put LEDs or candles in the lanterns?
@frankchannel Corey definitely a creative way to make a jetpack! And I’m sure many people would love to know how you made that custom mount.
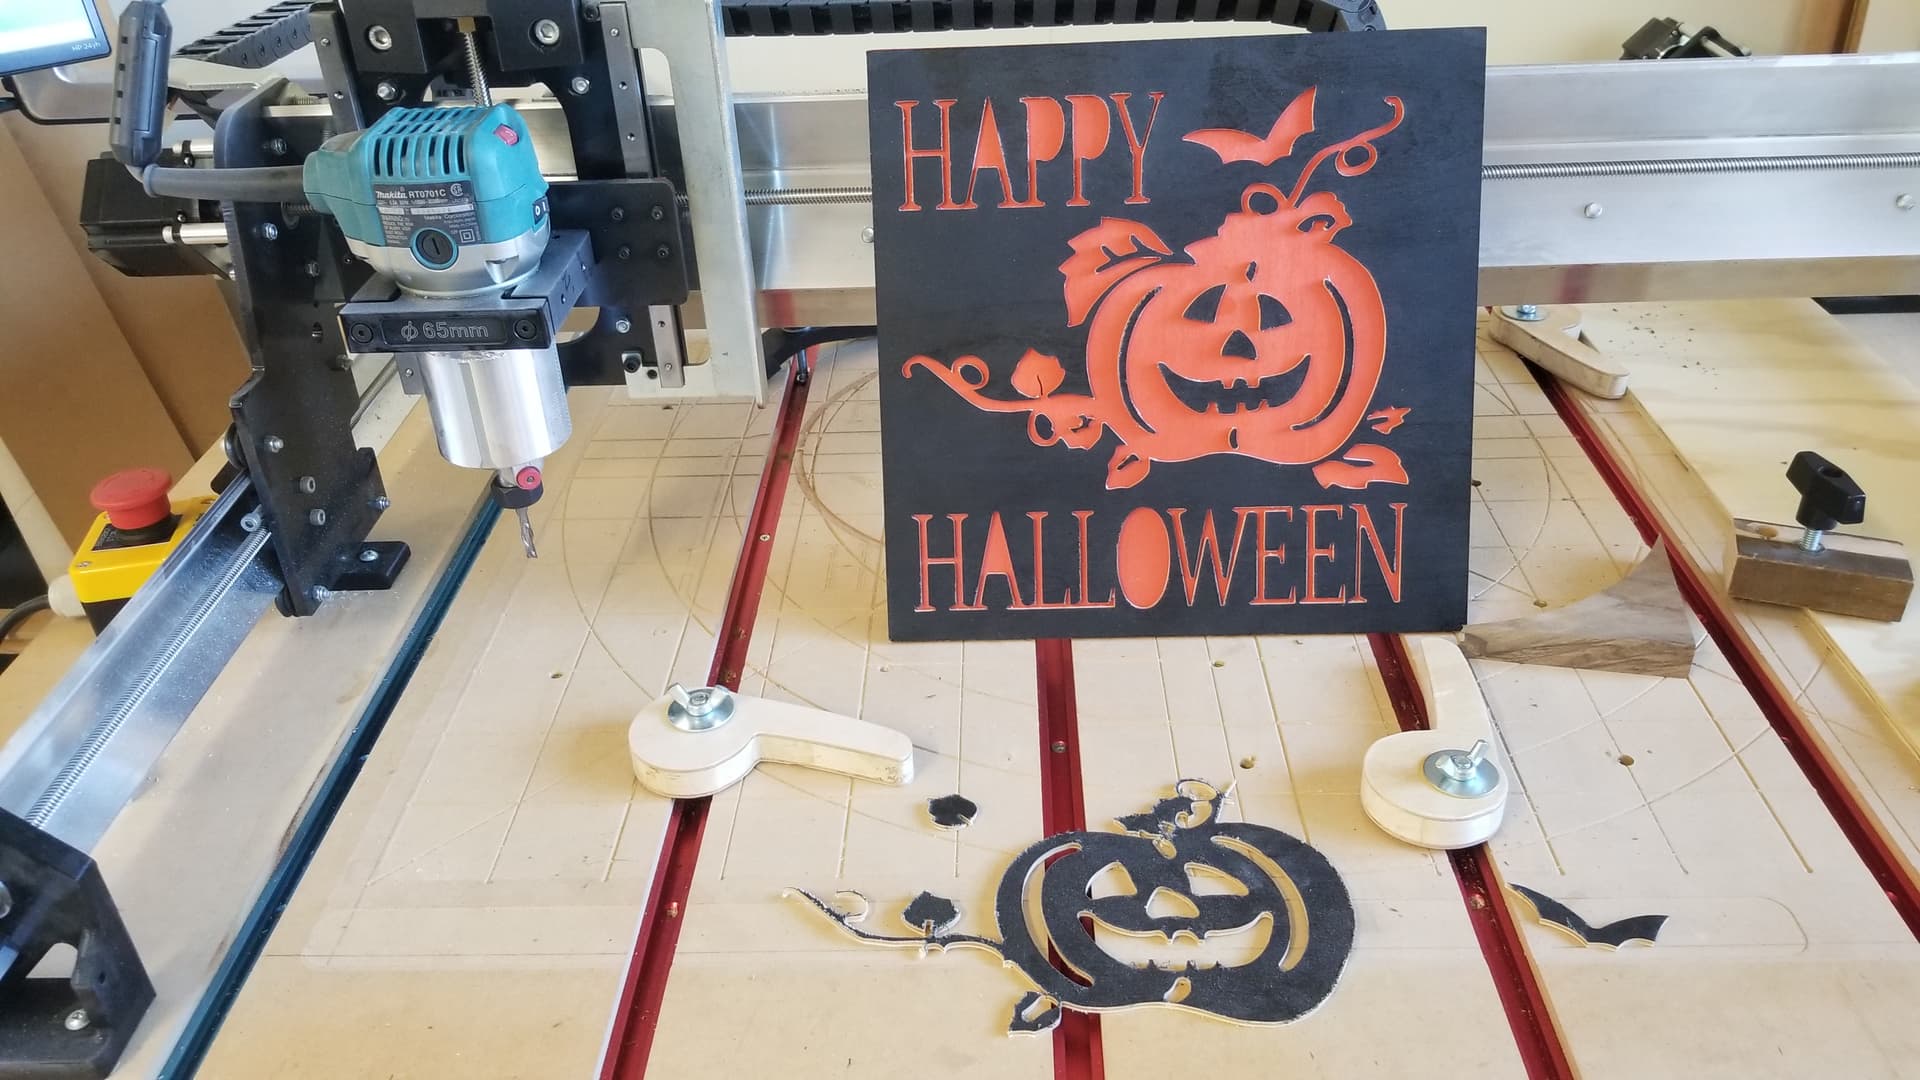
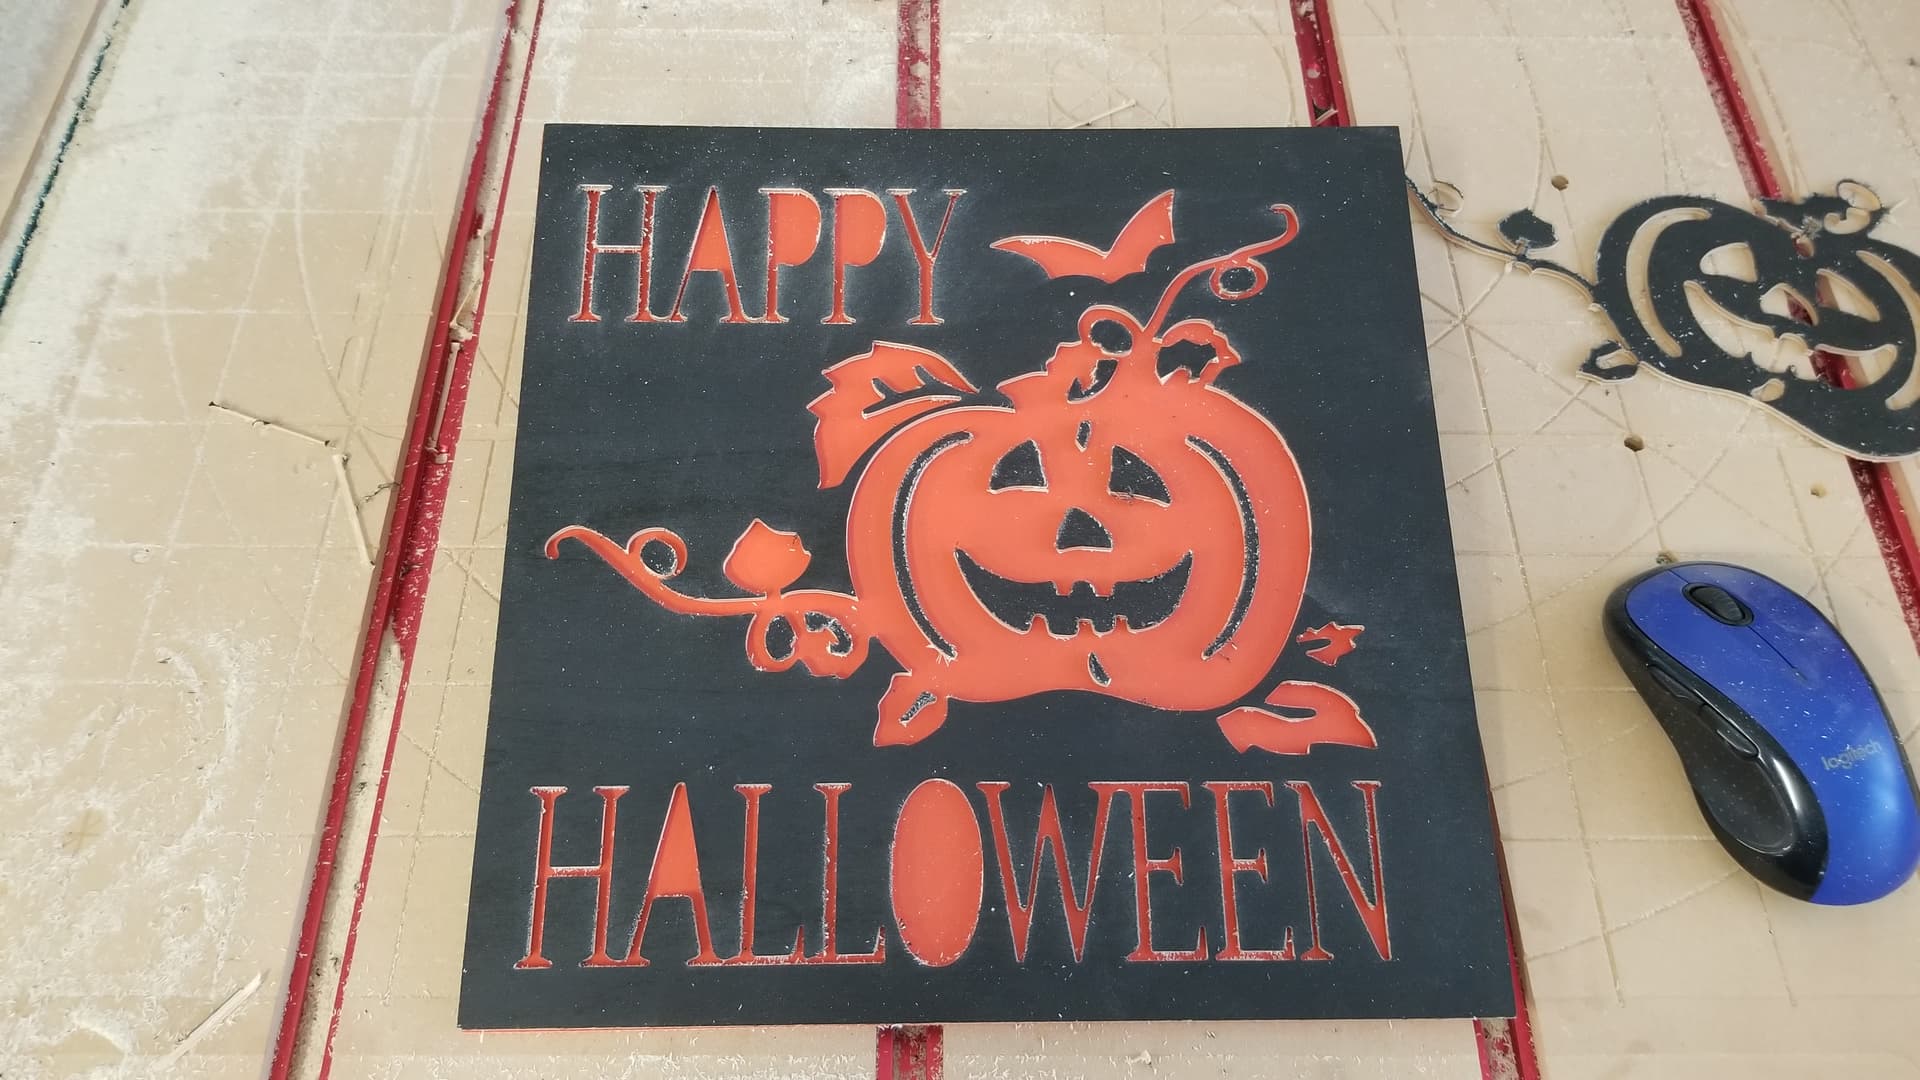
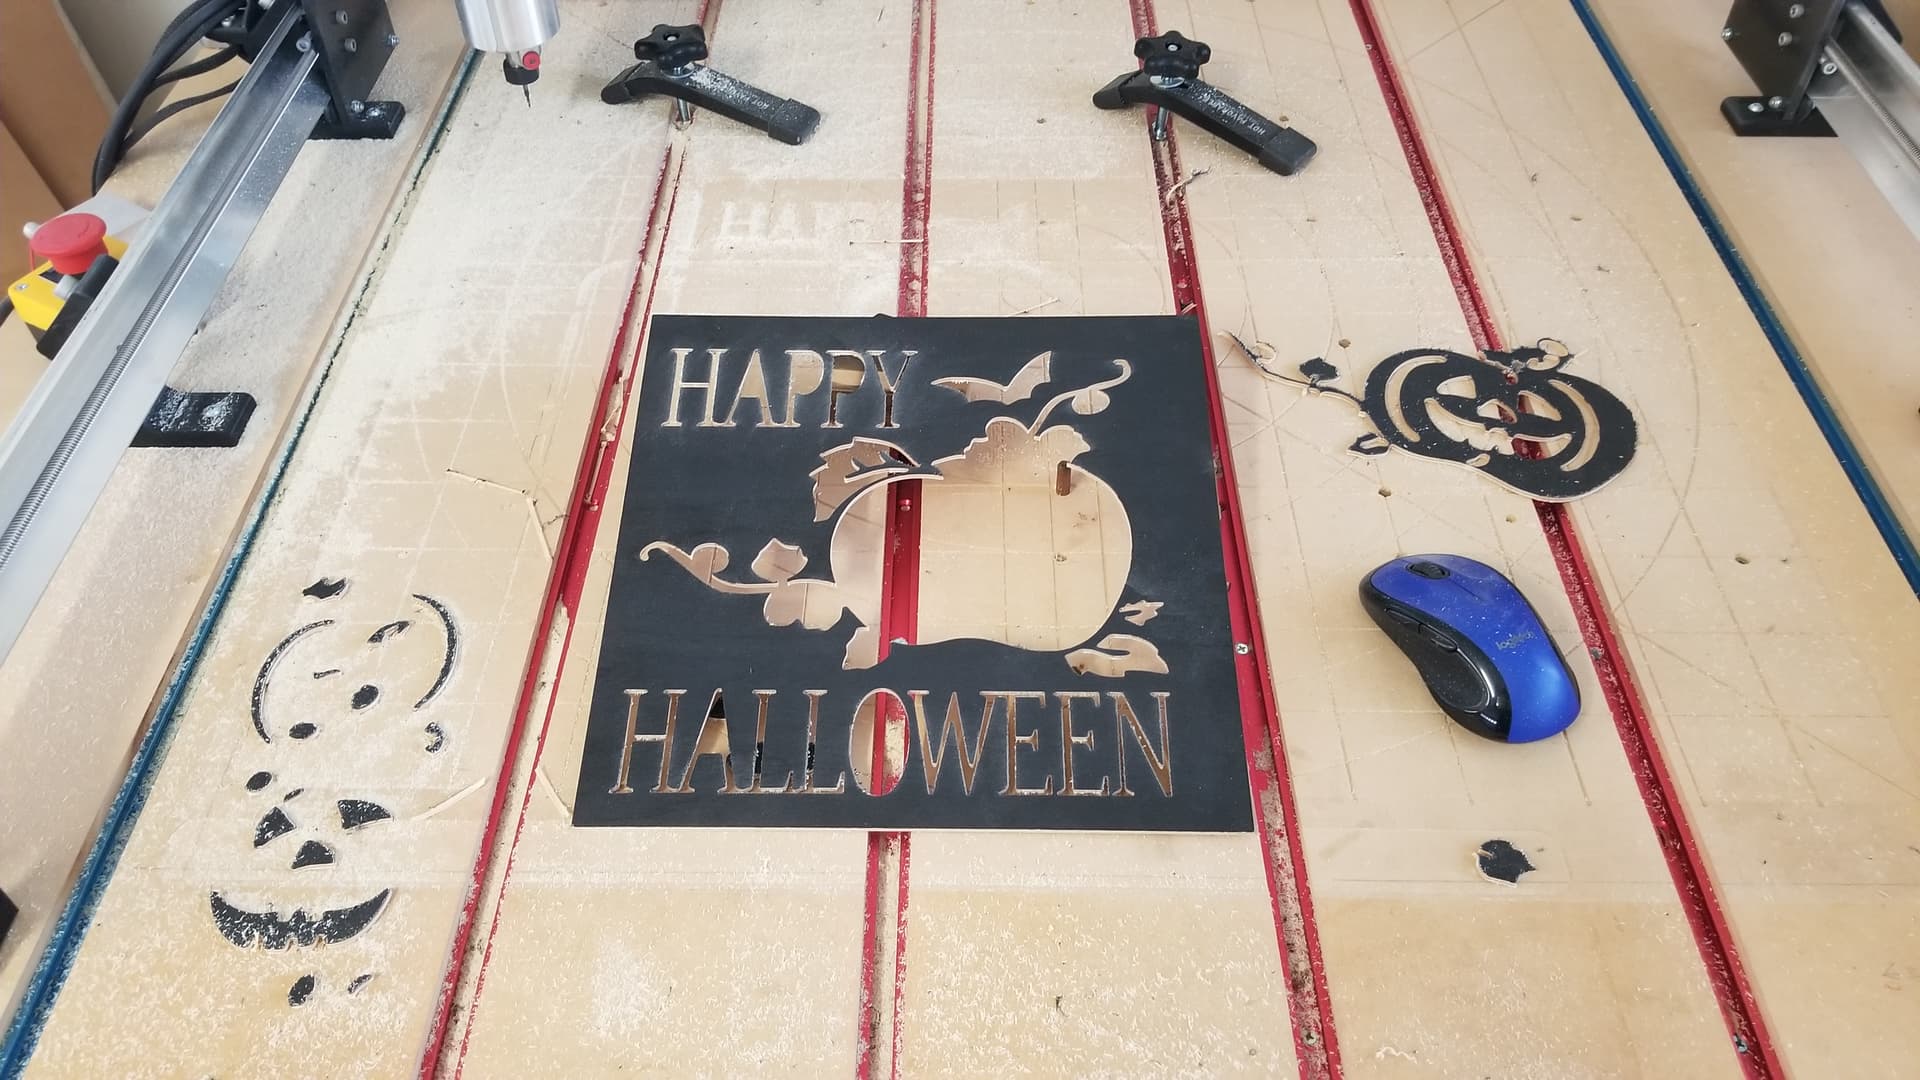
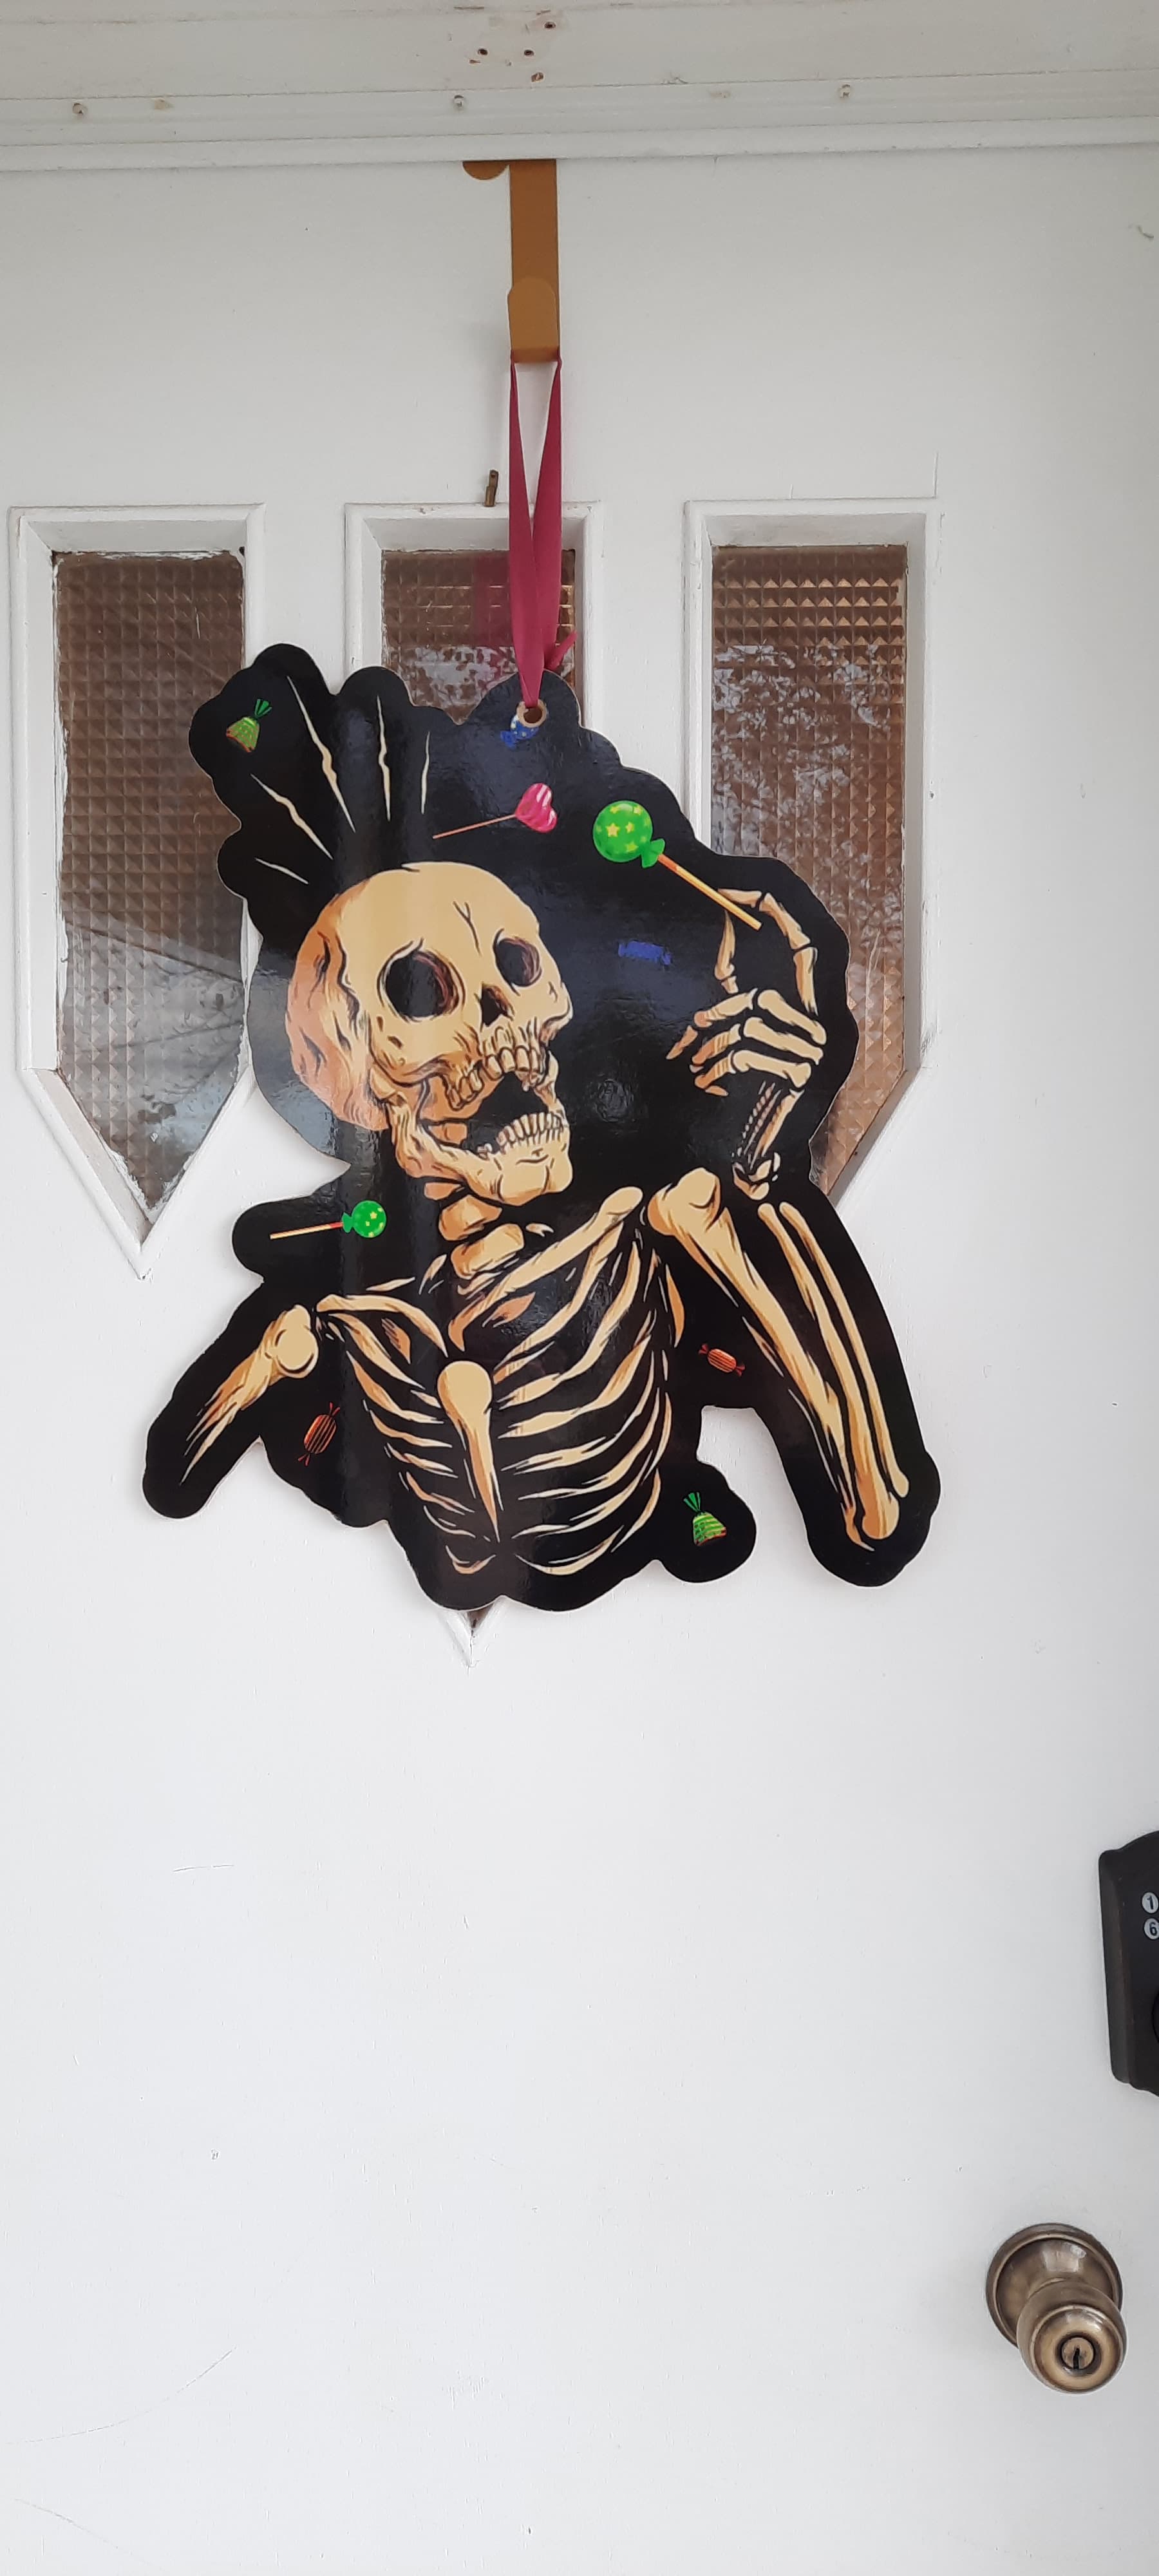
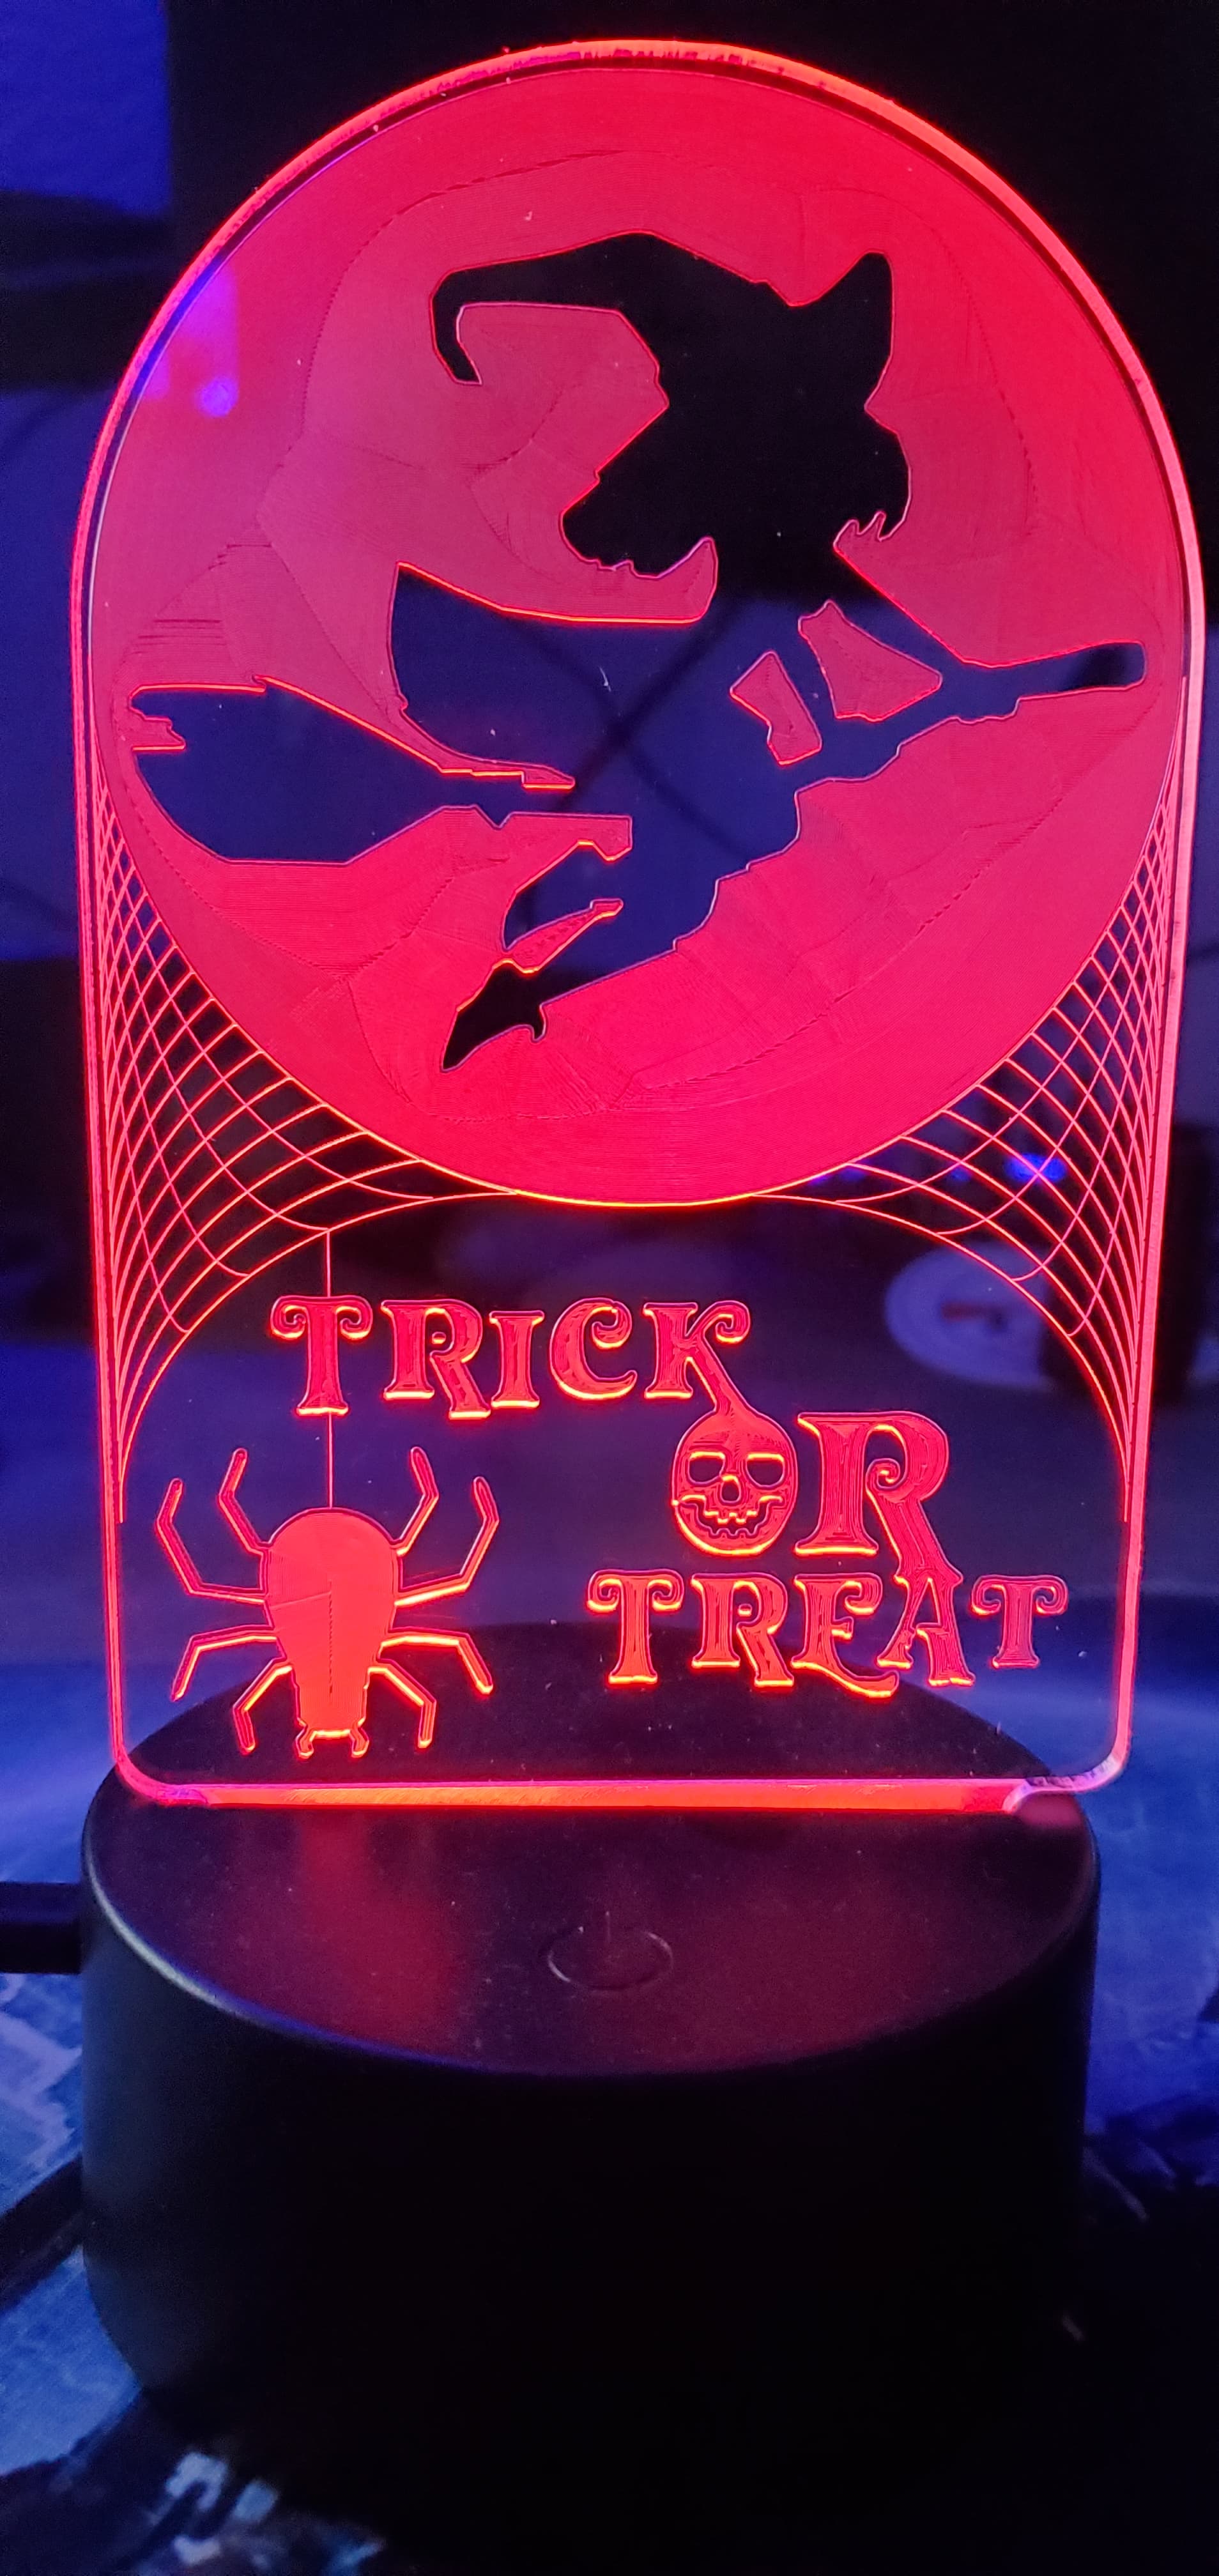
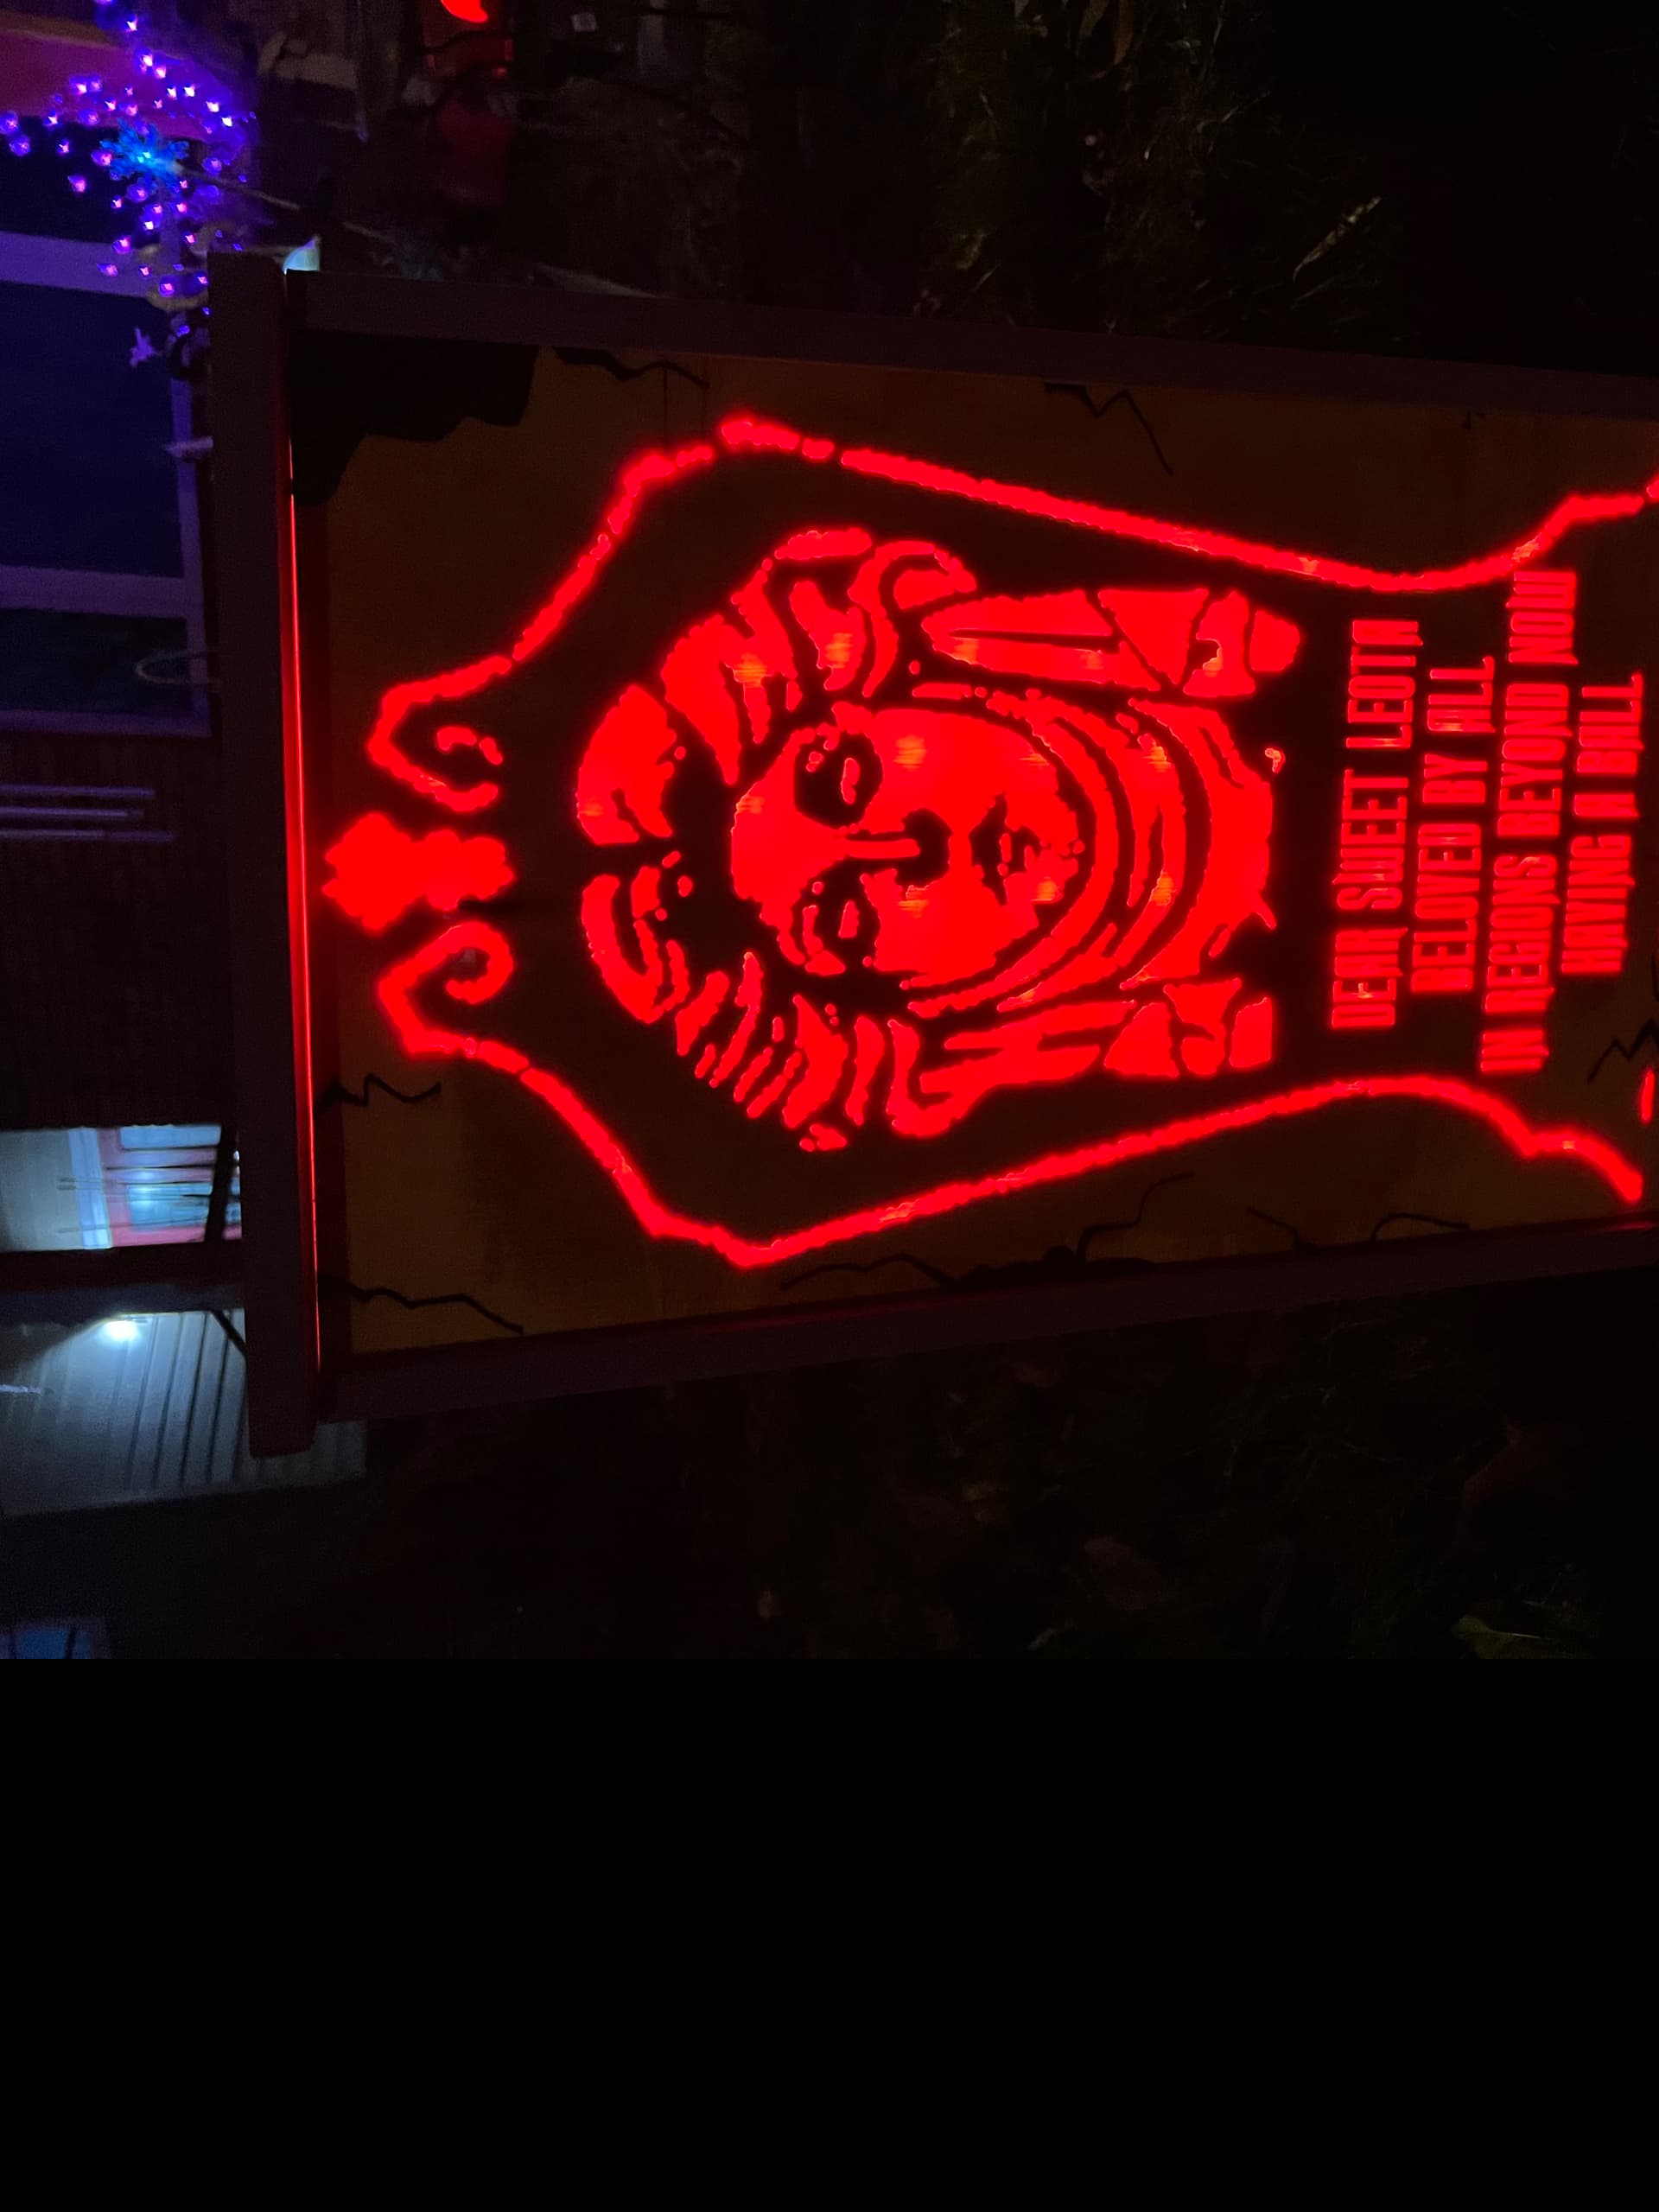
So this is my Trick or Treat Acrylic LED Light. Designed in Illustrator and cut on my LongMill. Used a 90 Degree Drag Bit for the Spider Web, and a .98mm 2 Flute for the infill/pocket areas (testing out ways to do these faster). Then a 2 flute straight bit to cut it out.
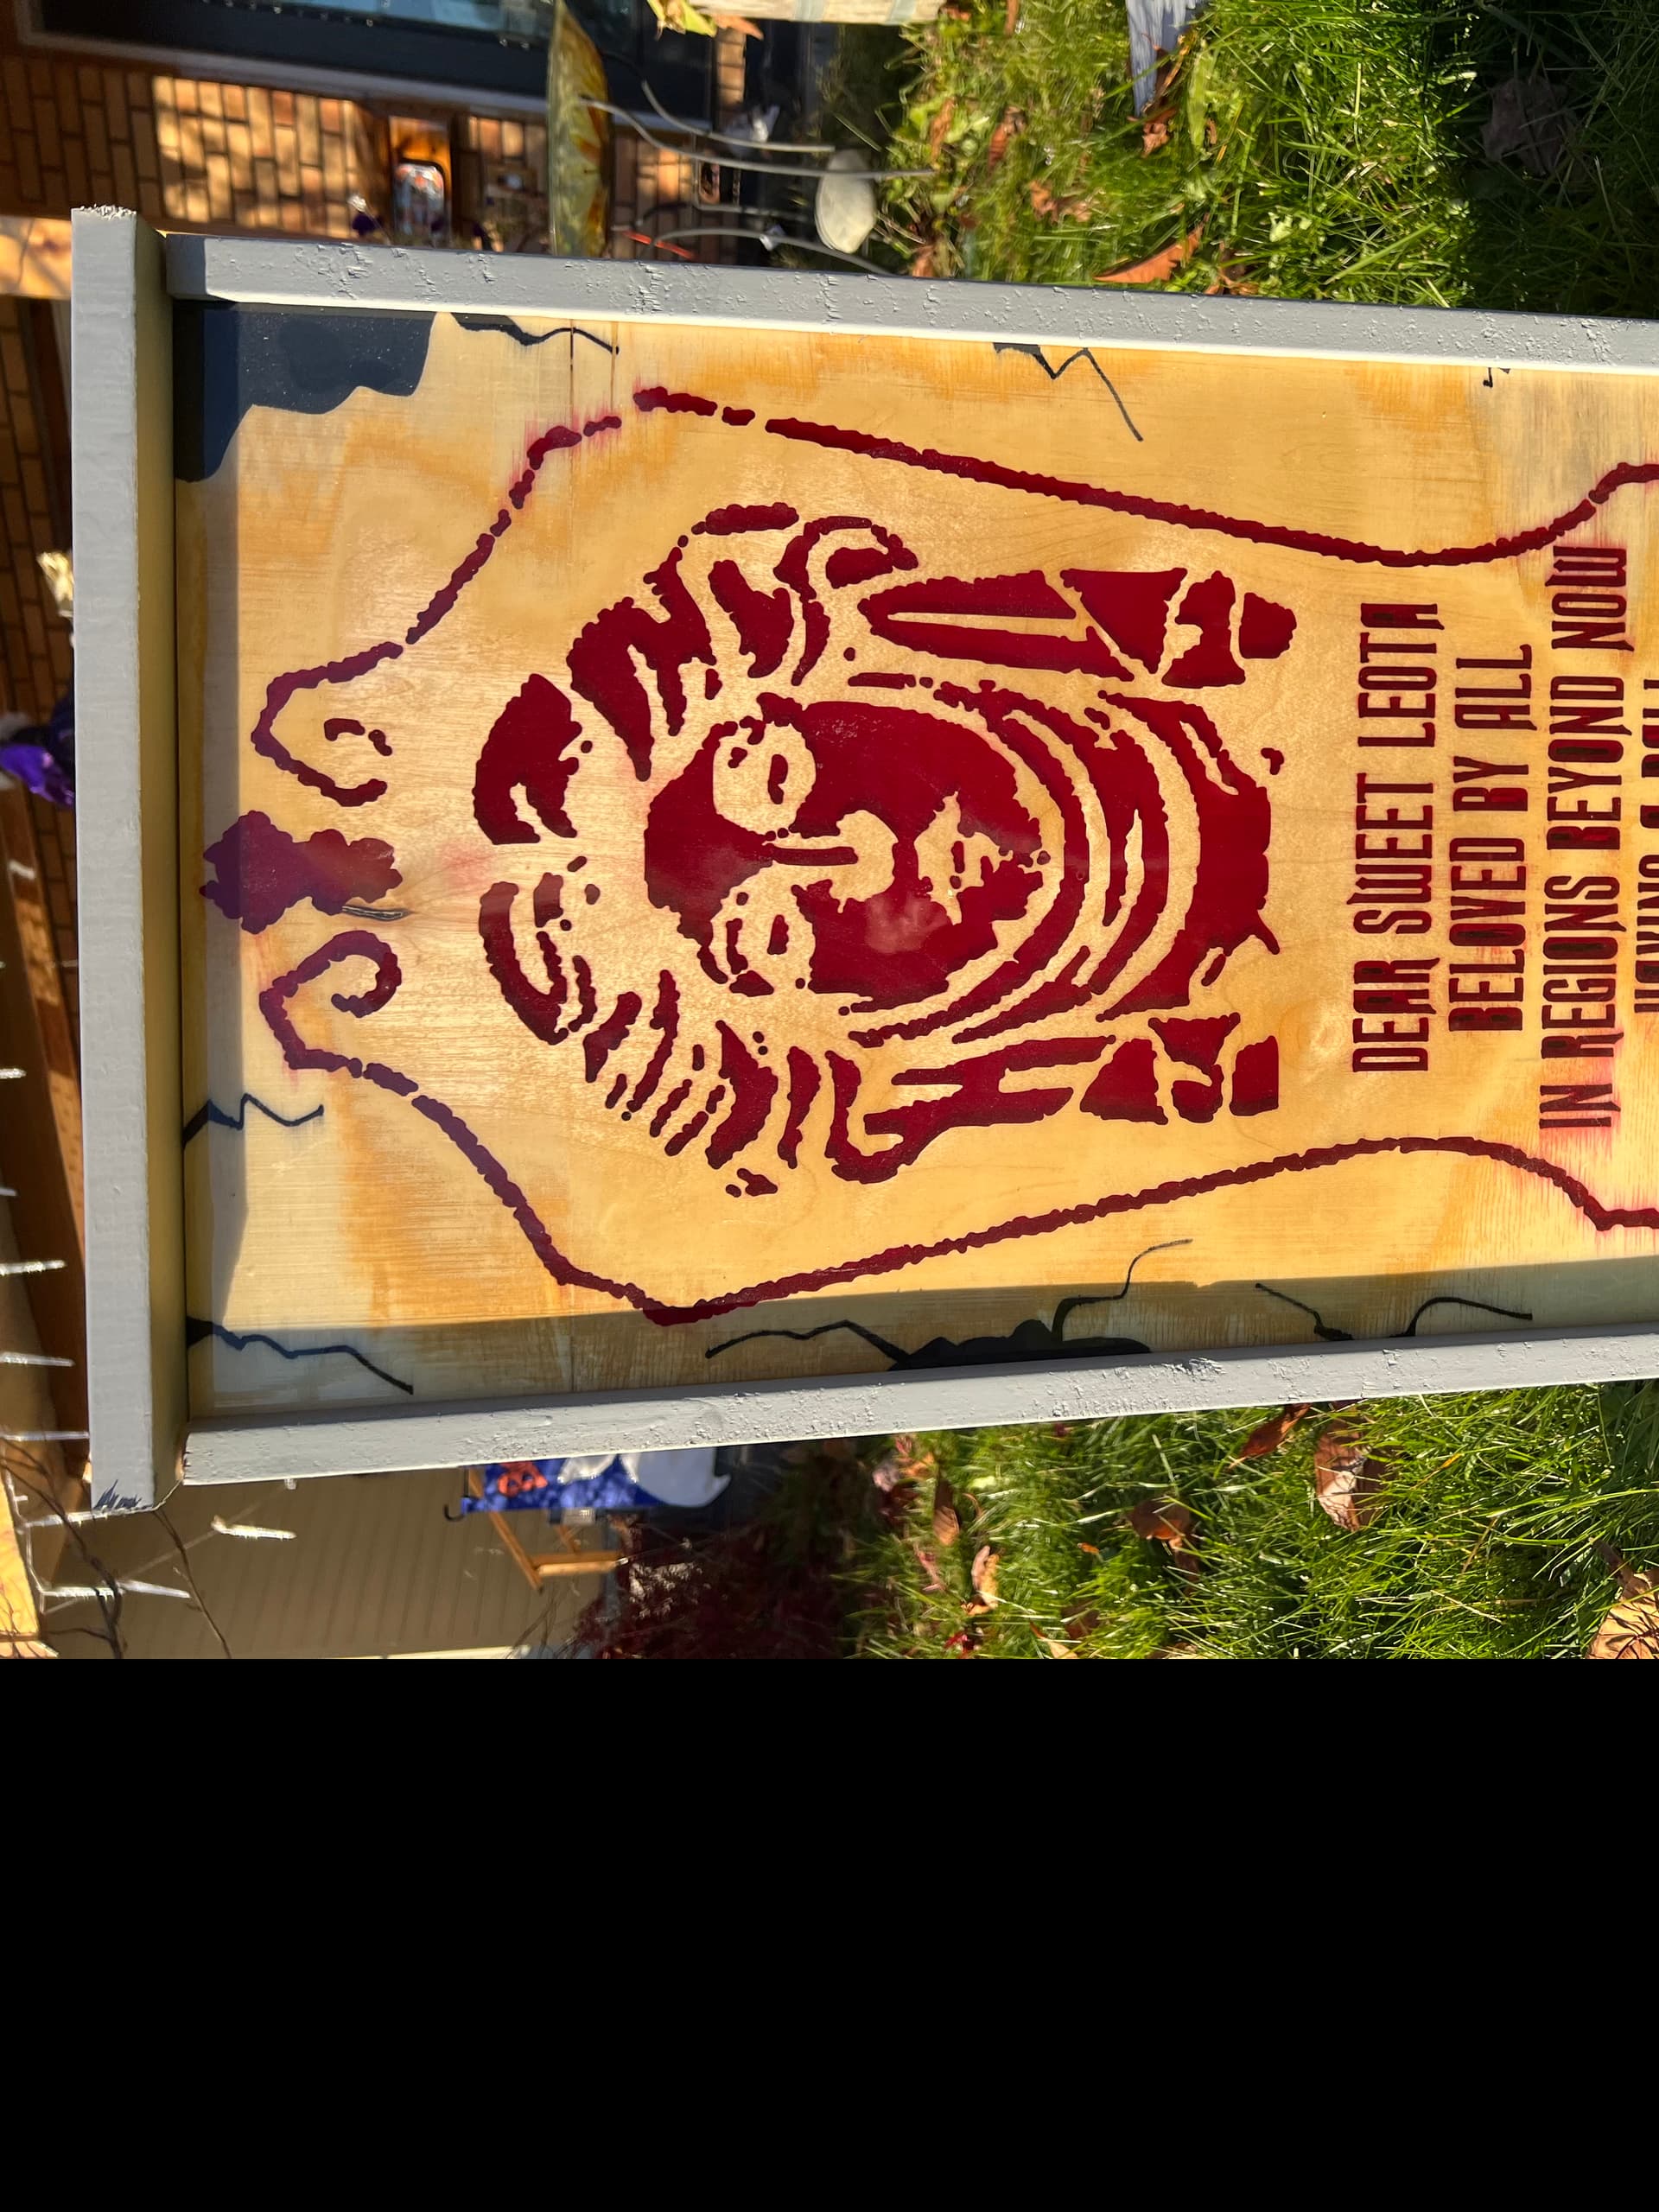
1/2” plywood, carved 3/8” using the Longmill with 1/4” and then 1/8” downcut 2 flute, filled with coloured epoxy, put the piece through my belt sander to remove top overfill and then sanded off the rear 1/8” then backlit the piece with LED’s
The resulting files were used in Fusion 360 to generate the toolpaths. Carved in pine with a 1/8 ball mill.
The pieces were sanded and painted by my kids. : )
Overall, satisfied with the result. This was only for a Halloween costume.
In order to make these better, I need to adapt the original 3D file better and tweak the tool passes. Also, the next one will be made from hardwood for a better feel and better engraving detail.
 Share your Halloween themed projects here on the forum, and they will be voted upon by community members! Winners will be selected based on number of votes, but a few winners may also be hand picked by our Moderator and Admin team.
 Submissions will end on Friday November 5th, 2021, 12pm EST.
 Voting will open Friday November 5th 2021, and will end Friday November 12th, 12pm EST.
 I’m looking forward to seeing some other submissions come through in the next week. I’m sure there are already many cuts being churned out for Halloween so why not get some free stuff along the way