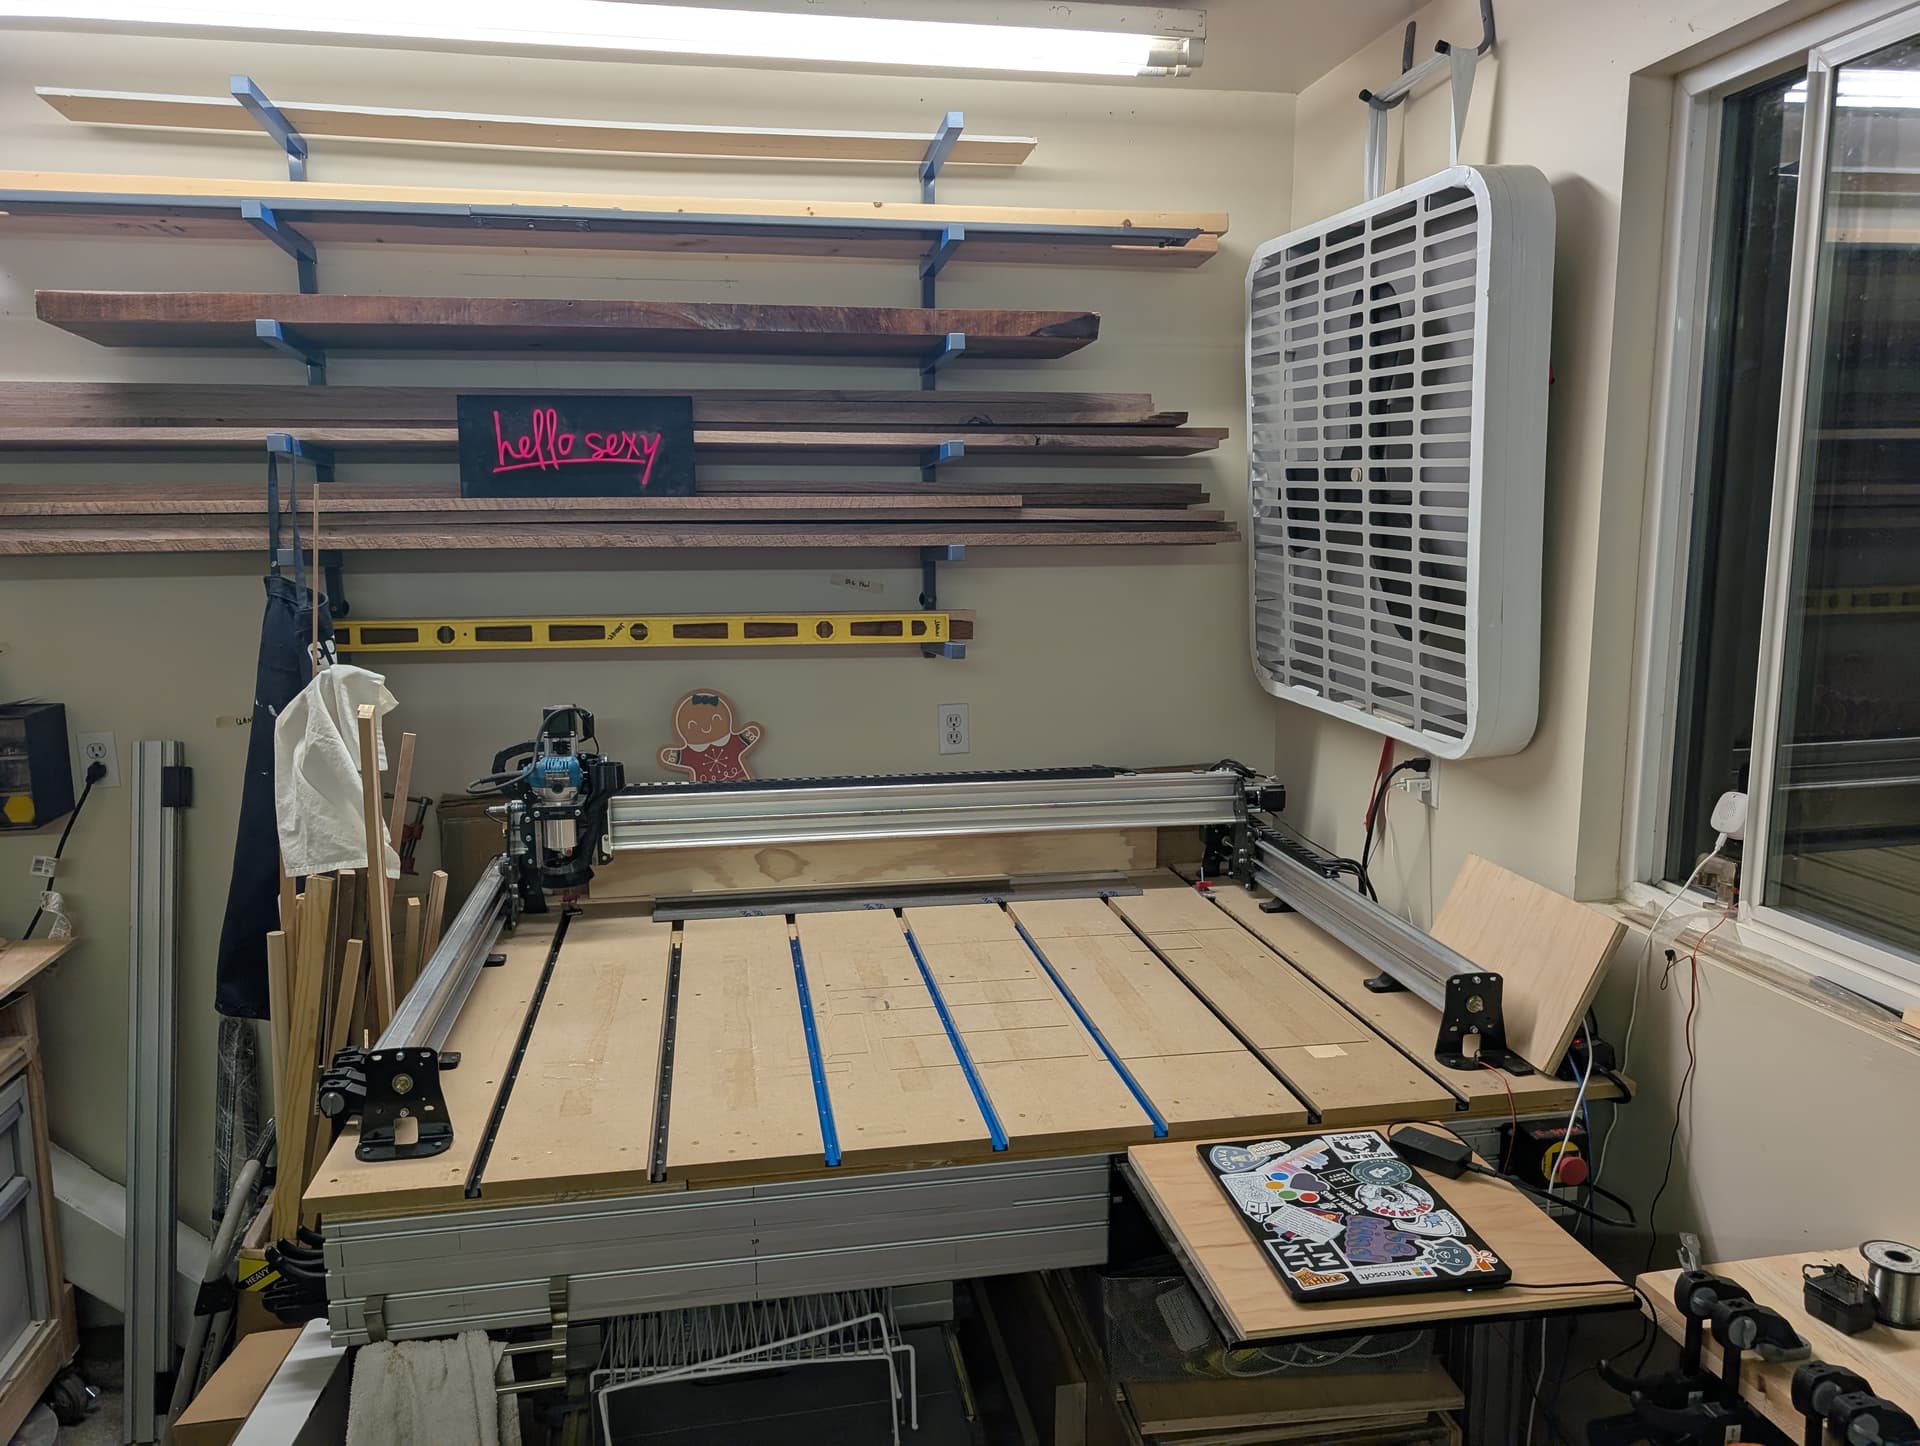
Okay so Ive had this machine since 2022- and long story short _ I set up my Longmill MK2 and ran a sample cut soap dish (which worked!) for various reasons haven’t been able to use it until now. Trying to start back up and set it up. after getting through various troubleshooting problems (machine out of square in x-y, hitting too many limit switches, re-learning the new auto zero touchplate I am still having trouble with basics.
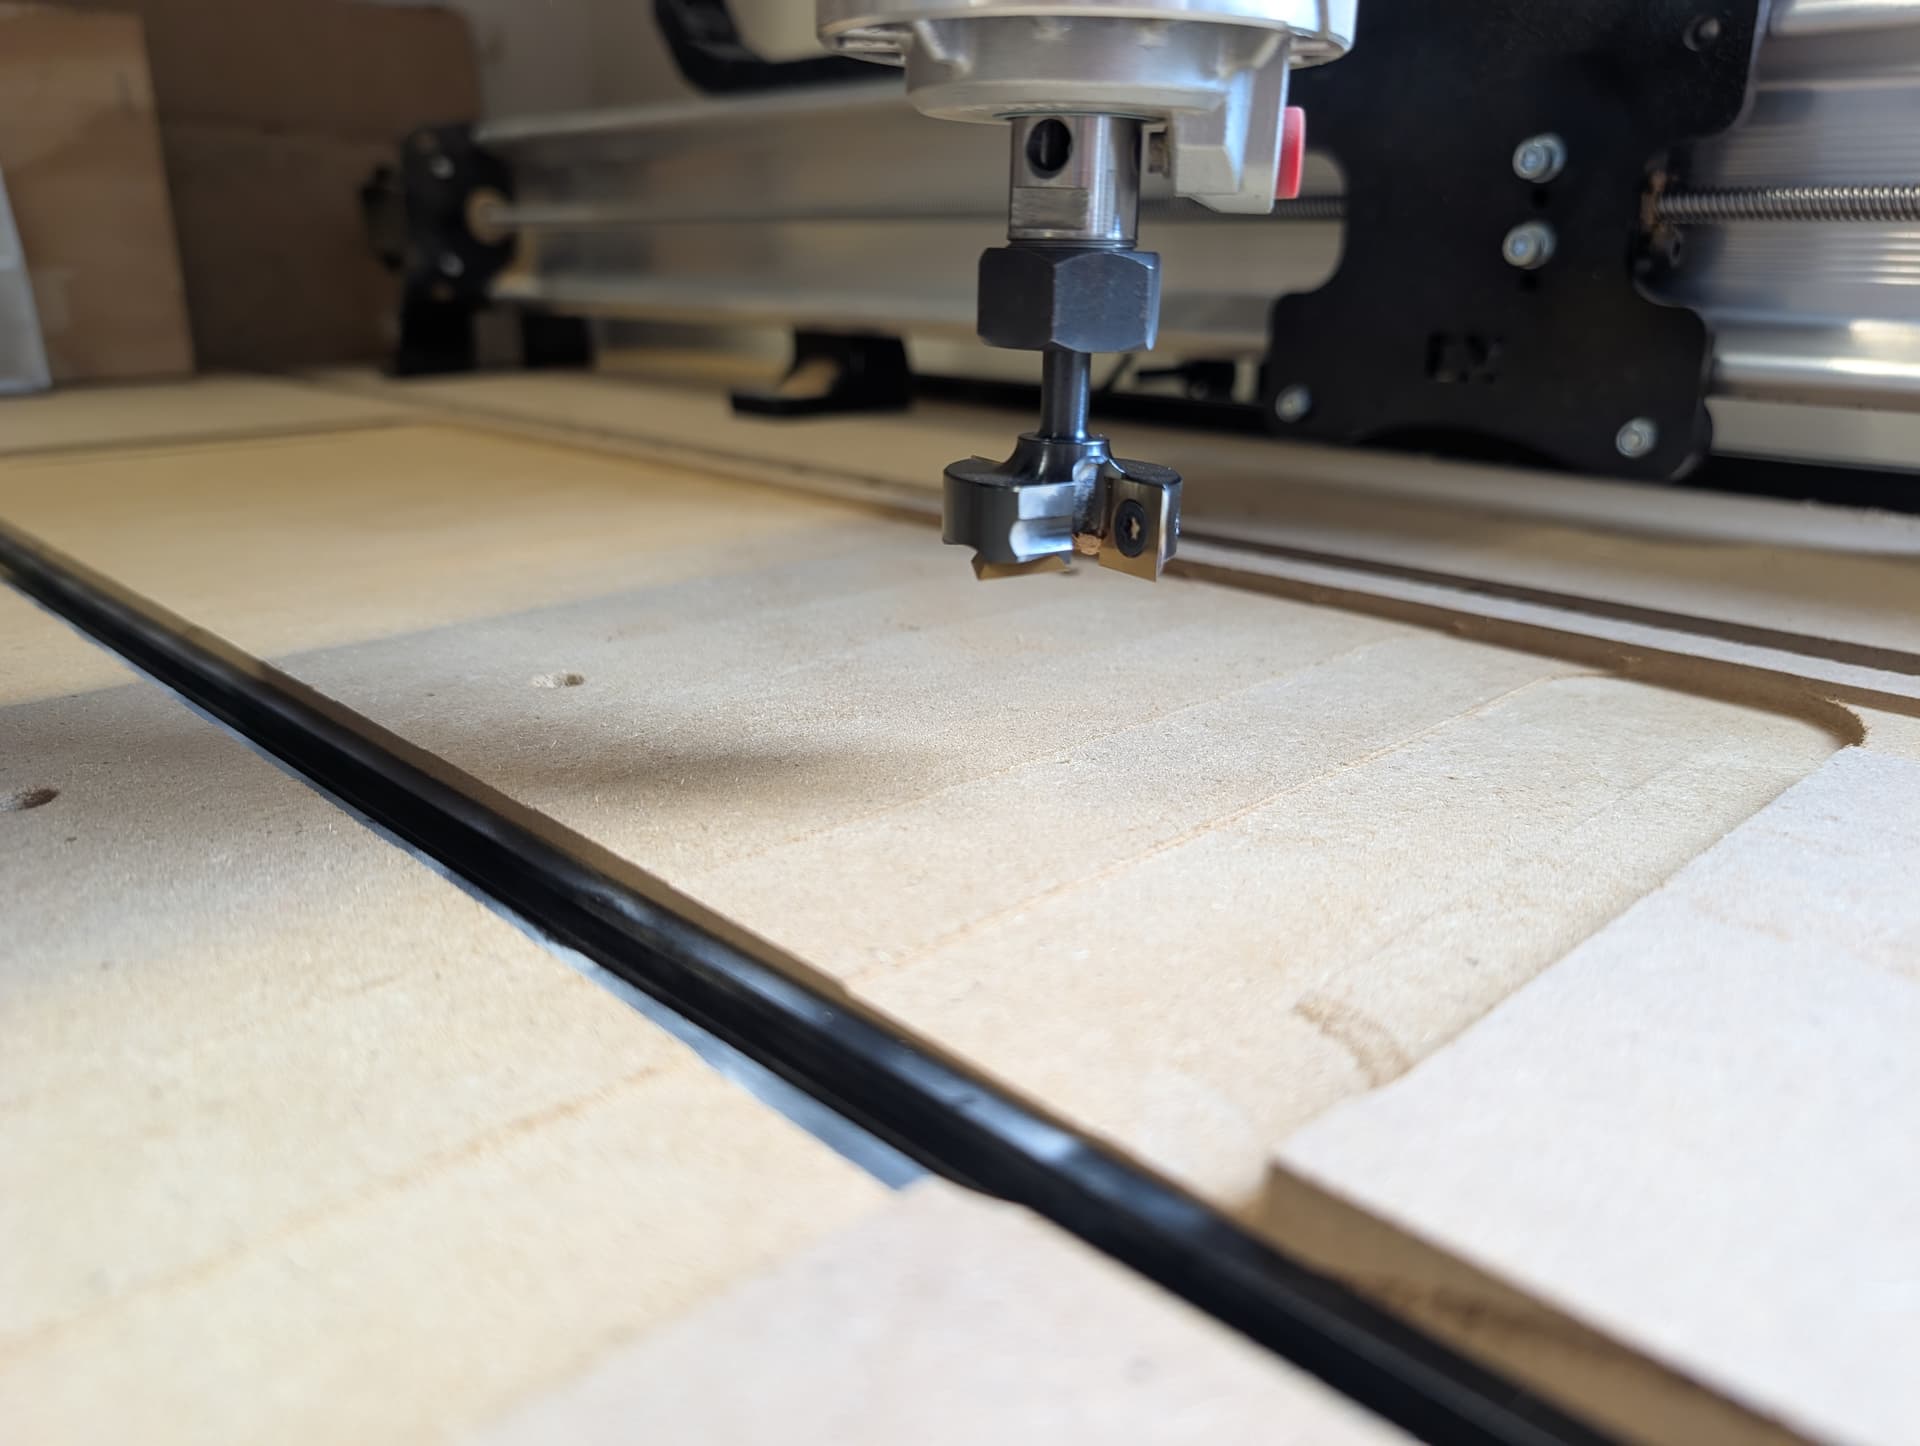
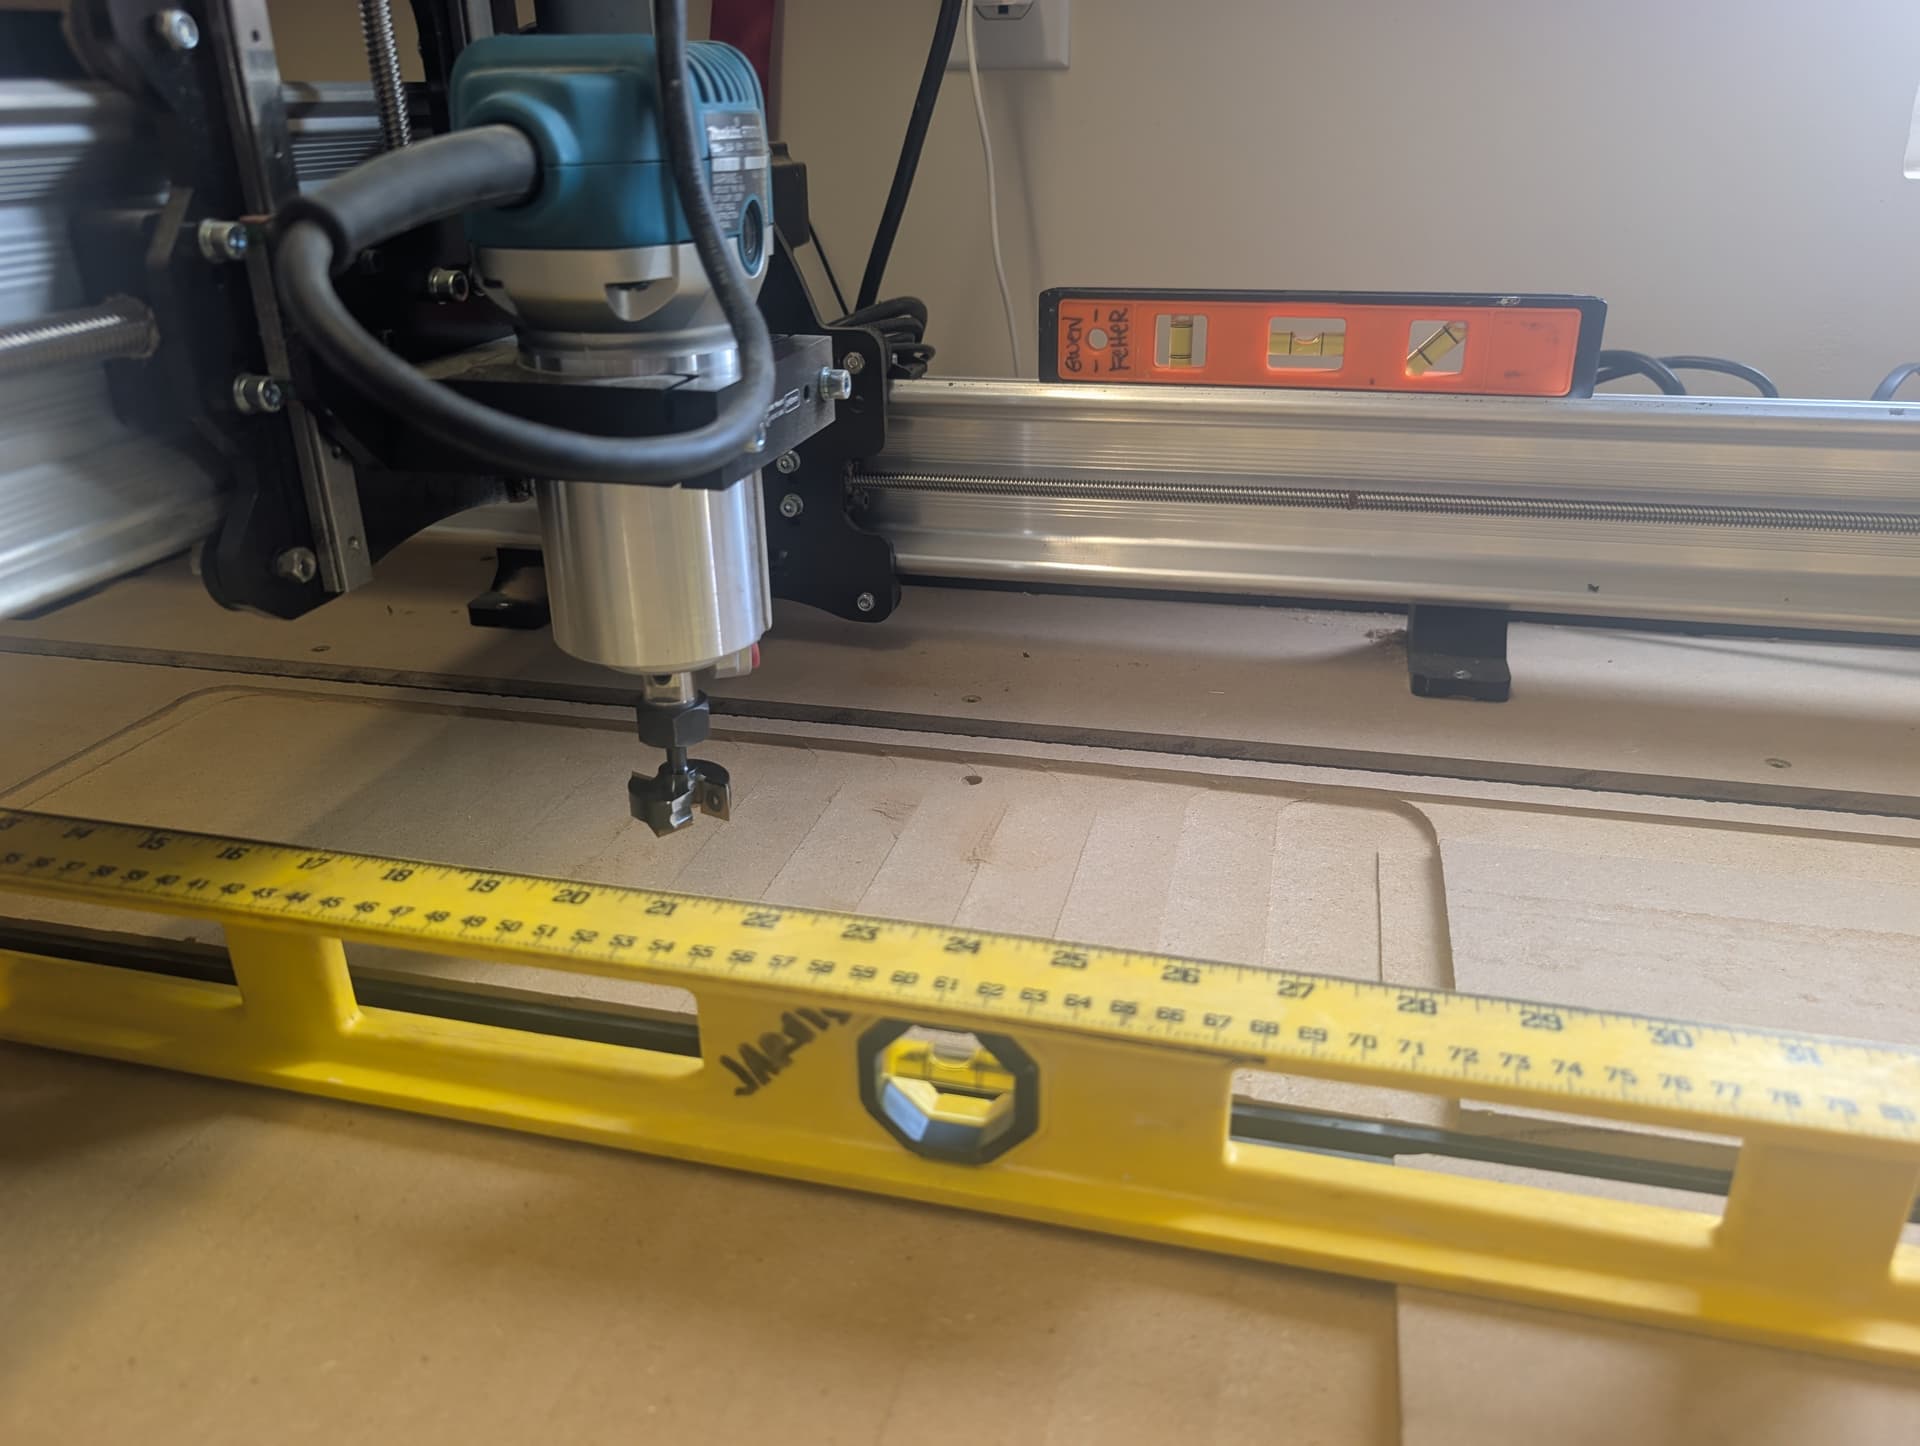
For whatever reason the router (tightened in the router mount) maybe seems to be sliding down because each pass it is going deeper and deeper. the top left corner (my 0,0) i set for a spoilboard cleanup at 1mm depth, max 1mm and the lower right corner is already at 5mm deep. My bit is about to hit the C channels so I had to stop mid program. its also going to chew up my bit like this.
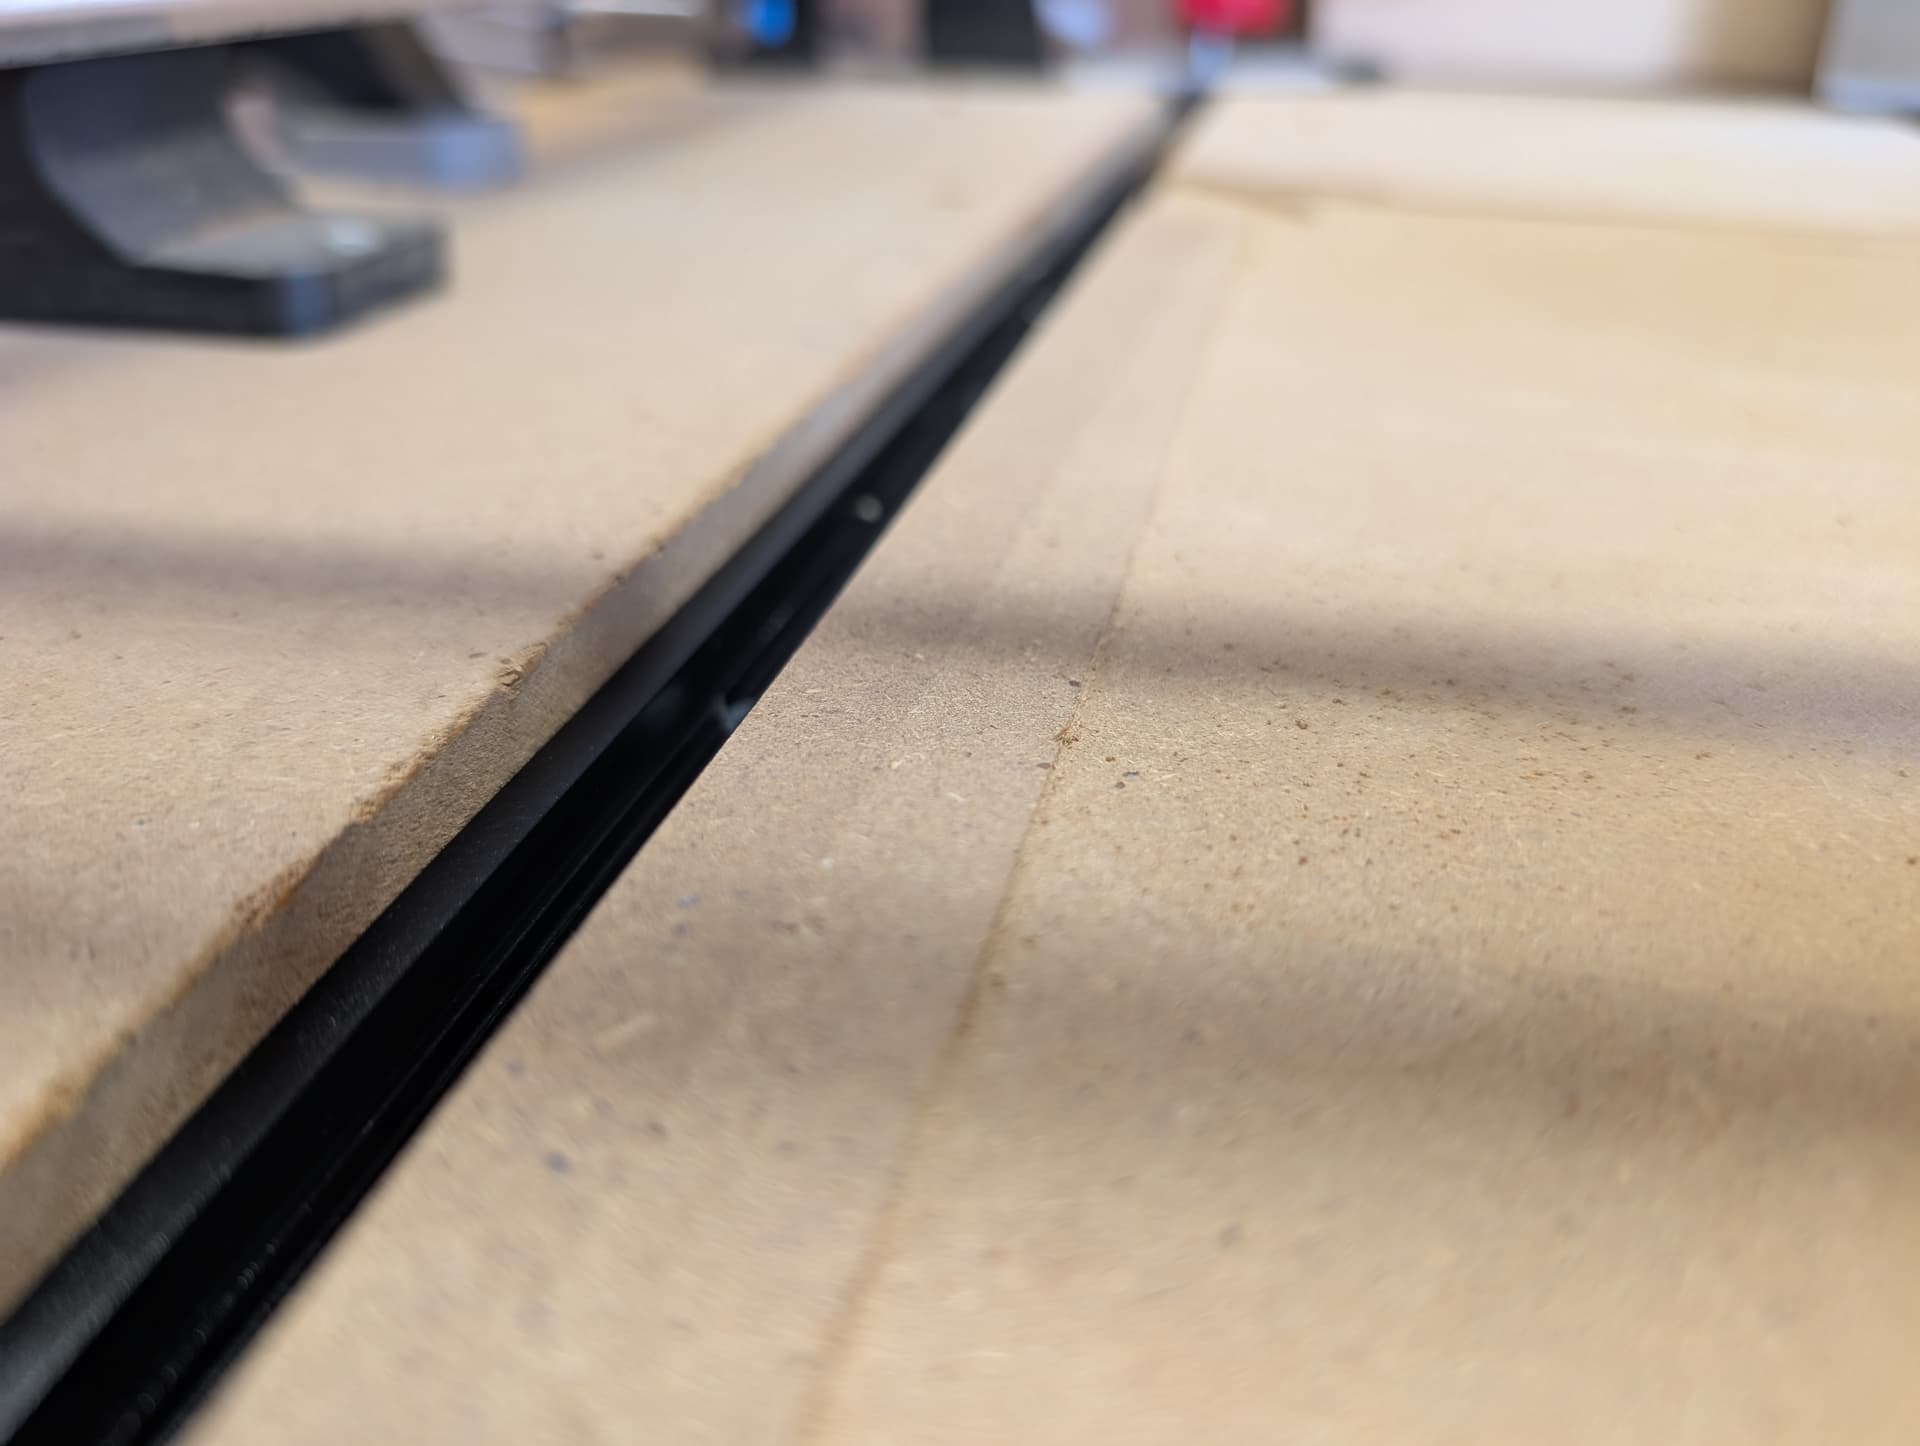
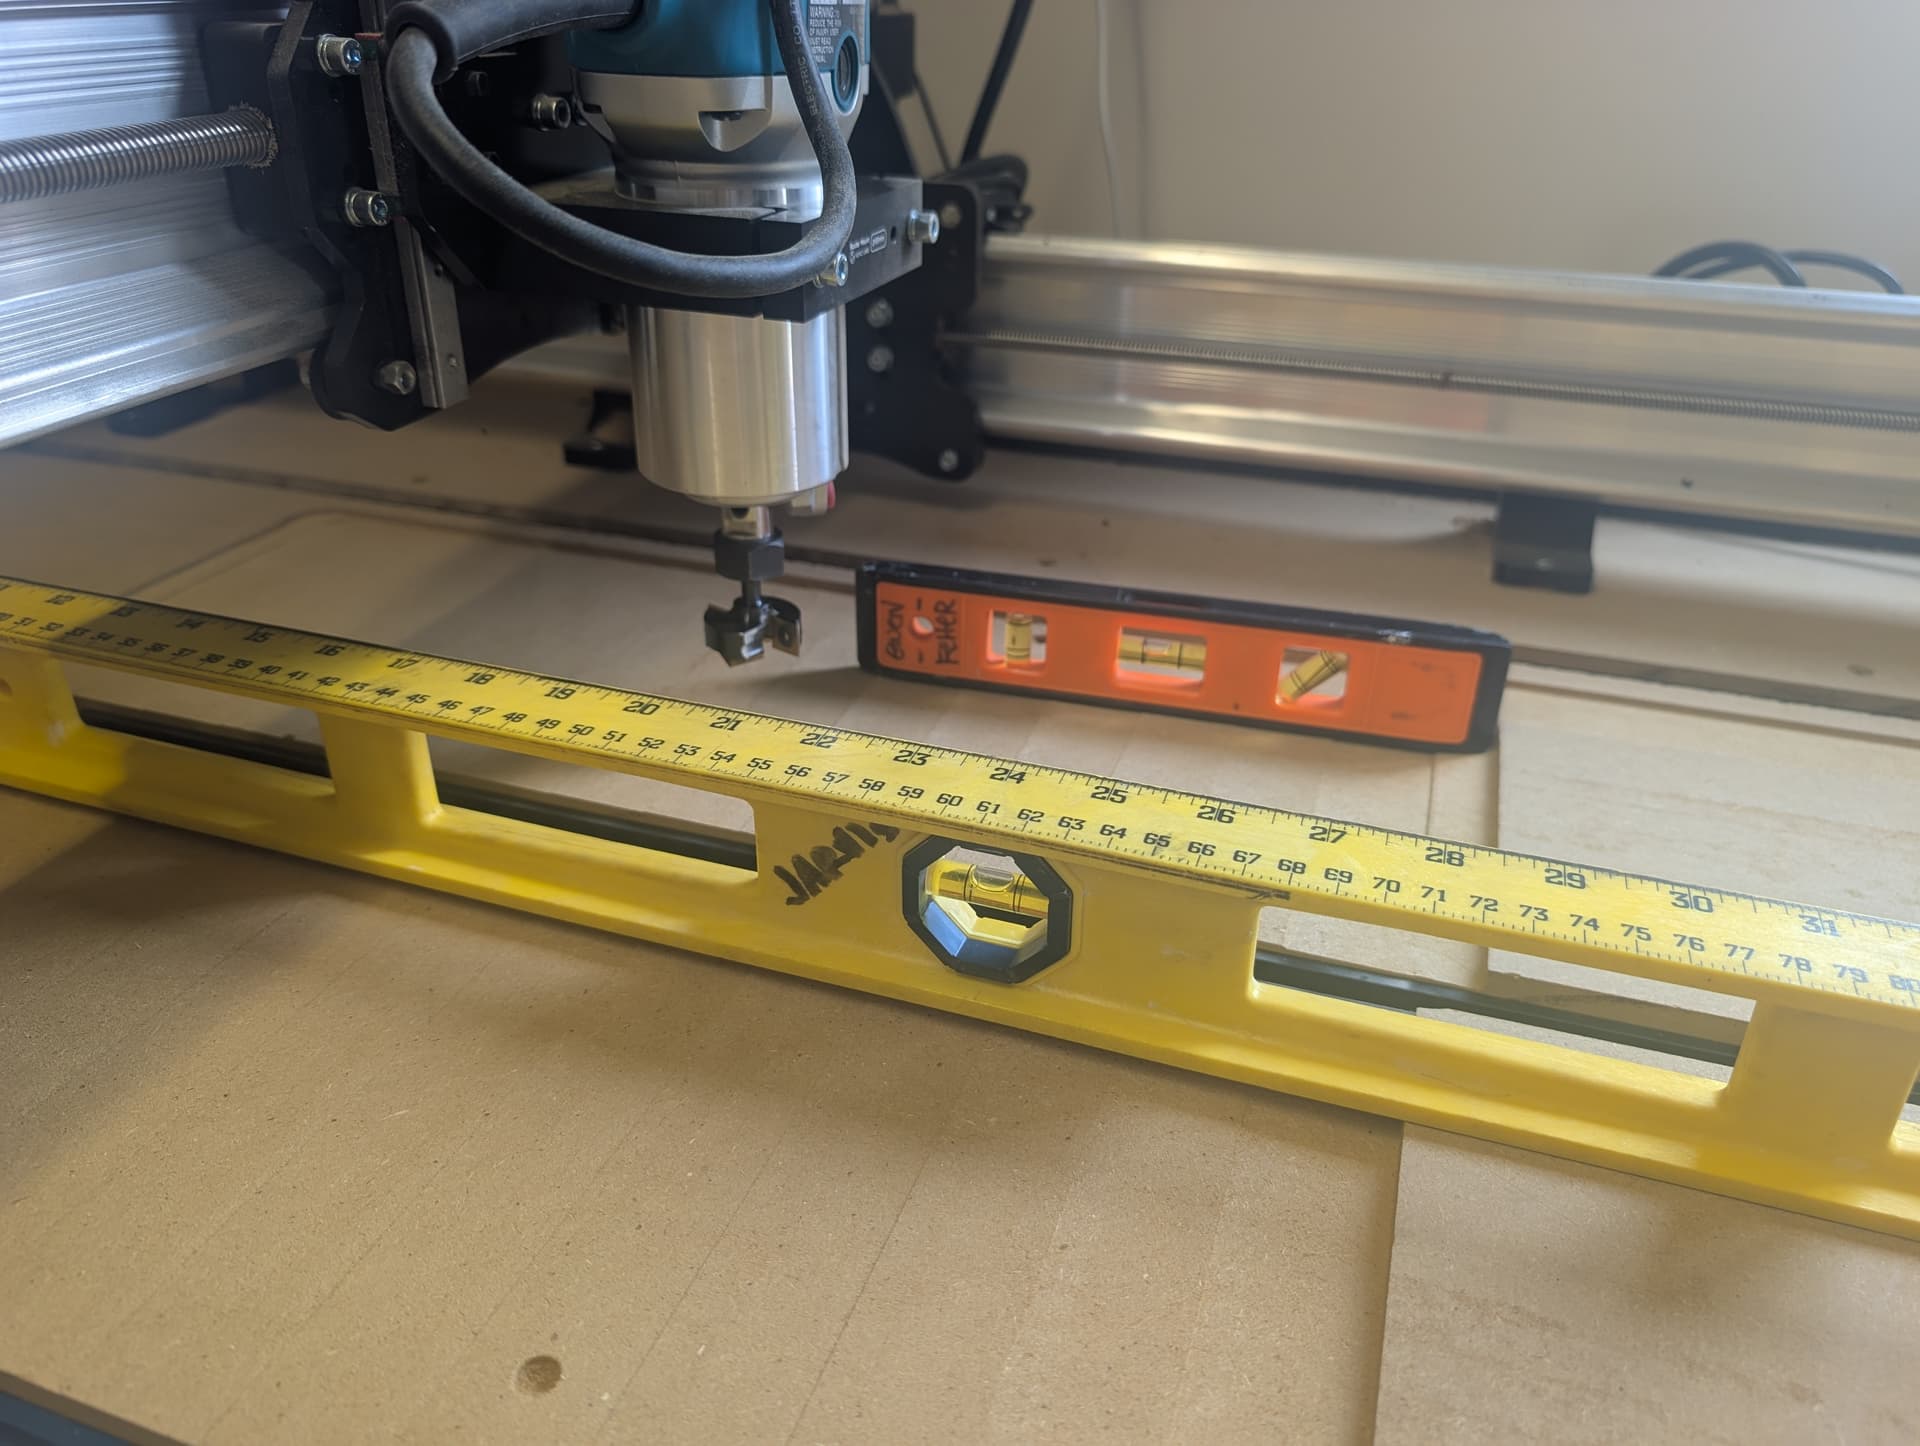
1st photo is the setup before spoilboard surfacing attempt - 2nd photo is front right , 3rd photo is near 0,0 top left)
What is going on? The router is mounted to the same surface on left and right so its not that. help - what do i do? I am out of ideas on what it could be.
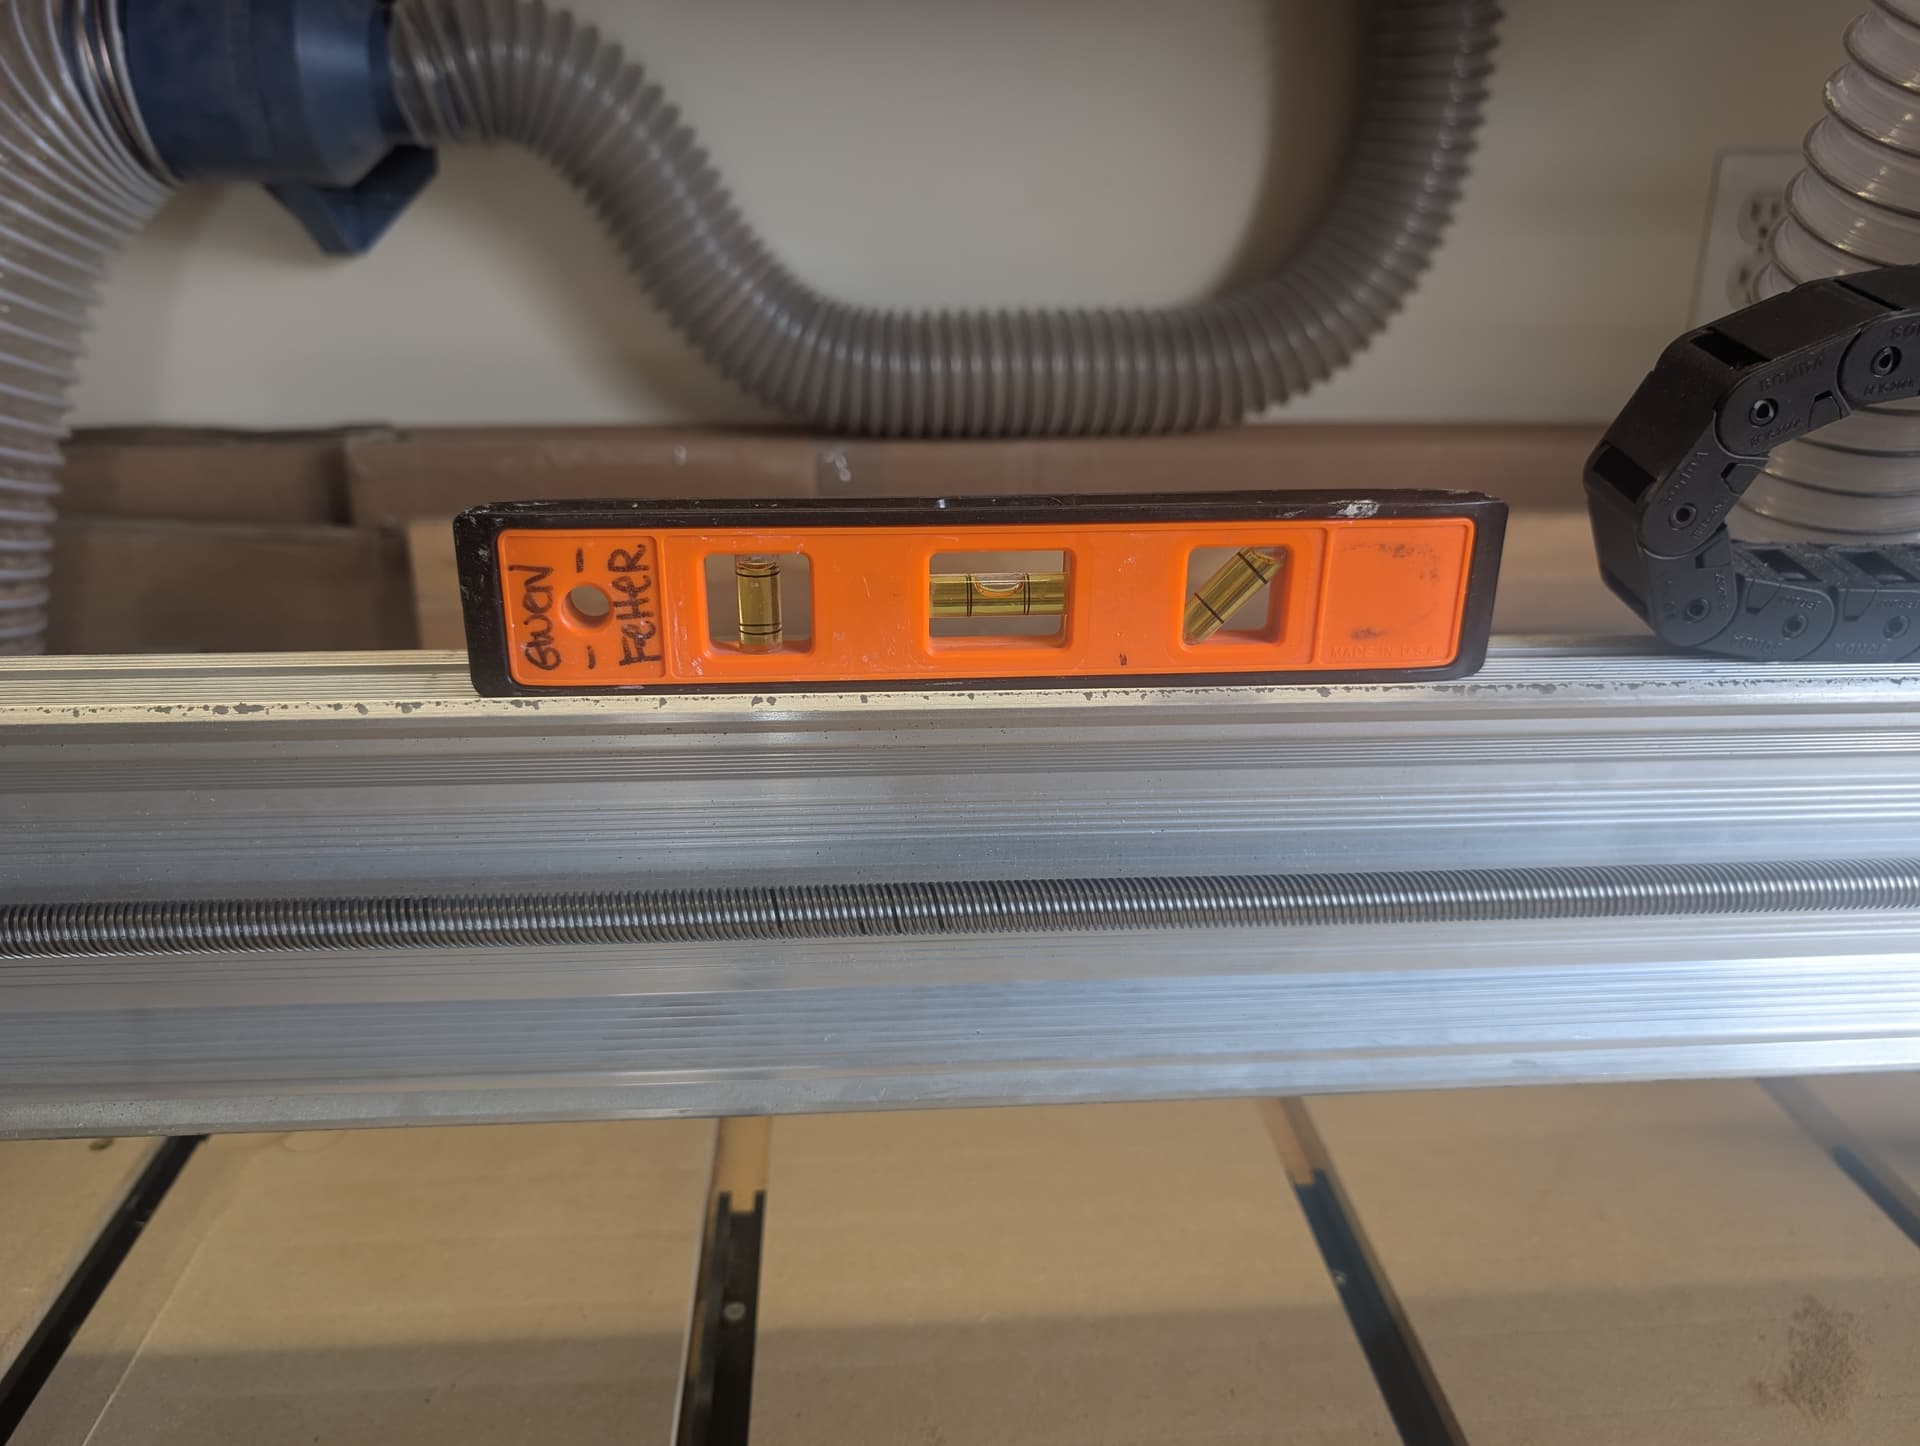
you can also see with my two levels that the spoilboard previously was level and the new cut is unlevel (I also checked my gantry rail and y rails which are also level )
@GwenMakesThings It’s unlikely, though not impossible, that the router is moving. It’s more likely that the bit is slipping in the collet. Check that all is clean in the collet, the router spindle and the mill. Check also that the collar between the Z motor and the Z lead screw are tight.
When you’ve done all that, I suggest that you clamp a piece of scrap anything down onto the spoilboard and surface it. That way, your spoilboard is not the guinea pig.
The bit is slipping - see a recent thread on that exact issue. The upshot is that the Makita collet isn’t designed to be heavily loaded and ‘easy does it’ is the operative sentence.
I don’t know the details of your surfacing bit, stepover and cutting speed but a 1 mm cut is a very substantial cut. My standard surfacing cut with an Altmill and a spindle is 0.5 mm in solid wood. MDF might work ok at 1 mm with an Altmill but I think you are being way too aggressive.
I sort of felt 1mm was an easy cut. my previous experience i would rip through 1/8 mdf without issue…but that wasn’t makita…it was a professional manufacturing CNC….so you have a fair point.
BUT - even if I am going too aggressive with mm that still wouldn’t explain why its sort of racking in ‘Z’ too deep in one corner only…and only deep in one corner. right?
virtually unused (as a router anyhow) it was a storage table for bathroom renovations. lol
I am not sure how i woudl test that now since 1/2 the spoilboard has been surfaced down. I just checked and tried to align and the diagnol says its 2mm roughly higher when i touch down from what that corner was. but I dont understand how thats possible when the boards are within 1mm heigh of each other.
still doesnt explain going from 1mm to 6mm depth. I understand a little difference but where does the extra 4mm come from?
@GwenMakesThings It’s impossible to say what happend to that spoilboard after 3 years of being used as a storage table. MDF swells and shrinks with humidity and temperature.
You’re right, though. Since you have already cut the spoilboard down to close to the t-tracks, there is not much that you can do with this spoilboard. Replace it and start again is what I would do.
i understand it swells. the thickness of it on the left and the right is within 1mm… and honestly its only close to touching the channel on one side. its still about 6mm away from the channel on the left and less that 1mm from hitting on the right. I can replace it but the path is slanted. the MDF spoilboard is level. the rails are level.
I understand all of what you are saying but isnt the one corner being substantially different the main issue? I will get new mdf and try again but the mdf on each side is the same thickness so I don’t think it’s going to solve the problem since only one corner is deep. Is there a way to check if my machine in racked in z?
I would do what @gwilki mentioned about zeroing to the top. I’d zero in the back left just touching the spoilboard. That’s the high corner if I’m reading this correctly. Then jog up 1 mm so you can jog around with the router off. Then move towards the front right, the lowest corner.
One of two things should happen, either the bit stays 1mm above the surface or it gets farther and farther away. If it stays a constant distance away then the machine/table has a problem. If it gets farther away and is where it’s supposed to be, Z wise at the front right then I think either the bit slipped or something is wrong in the Z drive train.
If you haven’t done something similar to that I think it would help to narrow down the possibilities of what’s wrong.
The front corner is only 2mm difference after checking with his method. but the cut is 6mm deep in that corner and 0.5mm cut in the 0,0 spot
This is a screenshot of the program and the surfacing path. should i be concerned it says 4mm in Z?? cuz thats the issue ( I think) but I am not sure where its coming from
I don’t think that’s a problem because it says min -1mm and max 3mm for a total travel range of 4mm.
As far as the Z drive train I would make sure the connection from the motor to the lead screw is not slipping. I have a Mk1 so I’m not sure of the best way to check that. If you can grab the motor shaft with needle nose pliers you can try to turn the lead screw with your other hand to make sure it doesn’t slip. Don’t put pliers on the lead screw, you don’t want that scratched up. A better way may be to set setting $1, step idle delay to 255. That will keep the motor energized when not moving so you can check if you can turn the lead screw by hand. I’m not sure how hard you’d have to twist to overpower the motor but I’m guessing really hard. Set it back to the default when done.
Another thing to check is how hard the lead screw turns by hand when the machine is off. You should be able to turn it by hand, it’ll be harder to make the router go up than down but if it’s really hard then your anti-backlash blocks might be too tight. That could lead to the axis binding a little and missing steps. Since moving up is harder than down it would most likely miss steps when going up. This leads to grbl thinking the router is higher than it actually is and your cut gets progressively deeper as the missed steps add up.
Also you should check the linear bearings. These could cause the same problems as the anti-backlash blocks. To do that I would remove the router and the bolts that hold the anti-backlash block onto the Z plate. You can then move the Z axis up and down. This should be really smooth because your disconnected from the lead screw and motor. If it feels ‘bumpy’ or ‘sticky’ they need to be lubed. After sitting they probably need lube anyway. I use some light oil, like 3 in 1 on those bearings. I took my mill all apart recently and mine were a bit stiff in places. After oiling and moving it up and down for 5 min or so they were much improved.
After writing this all out I think I’d check them in the reverse order I mentioned them. Might be easier to check the coupling with the router off and you might think the backlash is too tight when in fact it was the bearings!
Everything is lubed and not “bumpy” or sticky. In fact i did that first thing before I started everything up. The lead screws all turn by hand no problem. I will check the last thing you said and maybe just make sure all the wires are plugged in?
I’m not sure what else to check so I think after you finish checking whats left it might be time to do some testing. At this point, from what I gather, you’ve only done one carve since getting back into it. Maybe, fingers crossed, the problem is not repeatable.
I wouldn’t want to ruin a bunch of material so I’m thinking if you put a board or strip of MDF from the back left to the front right you could test on that. That would cover the low and high spots from your spoilboard attempt. Depending on the material you might need to shim under it because of the shape your spoilboard is in. I’d also mark or measure how far the bit is sticking out so you can tell if the bit slipped.