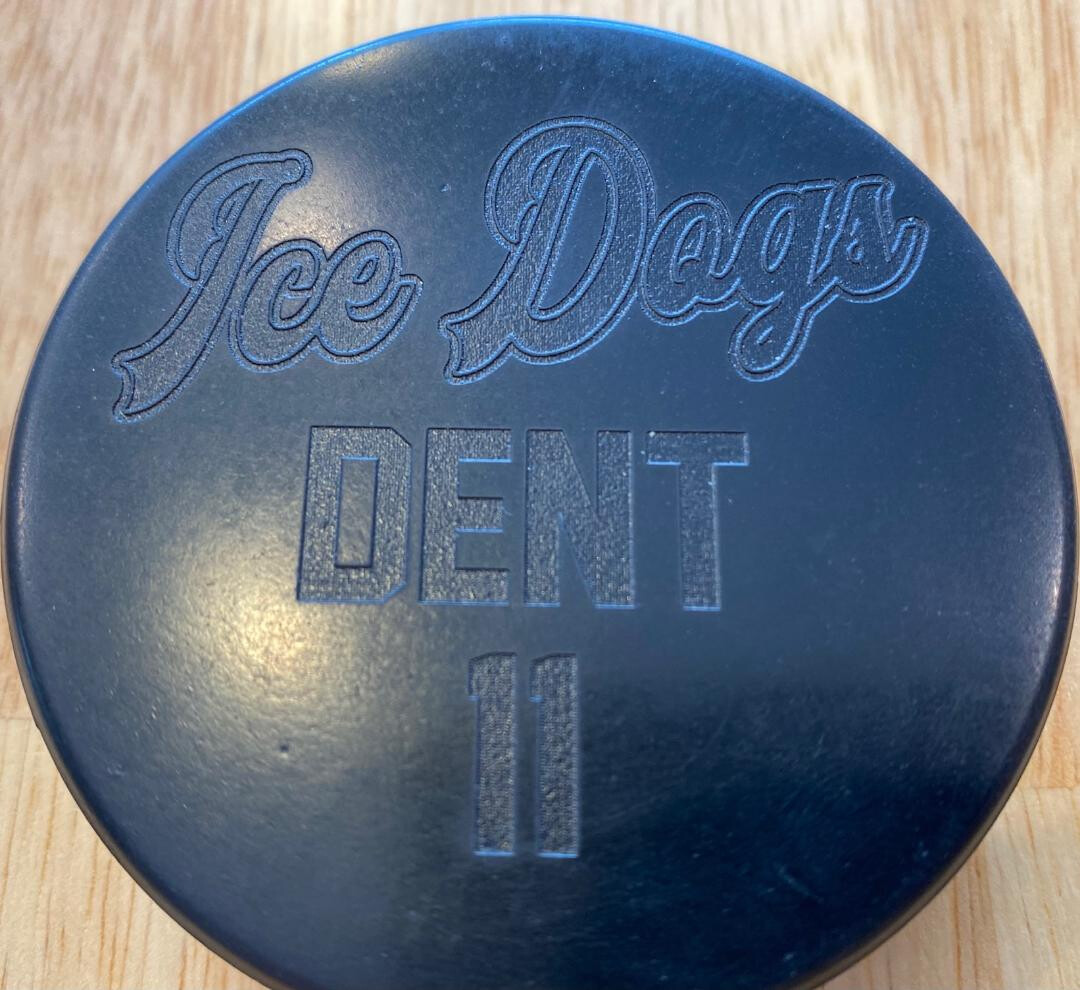
My son plays hockey and baseball. For hockey I engraved pucks for the team and they turned out great. I want to engrave baseballs for the team but have not found software that can wrap and engrave the logos on a sphere.
One setup I found actually mounted the laser head on a pivot and then rotated the ball for the other axis. Looks like it would work great but a lot of work to setup/design.
I’d like to try to use the longmill to do the engrave. There is enough Z travel for a baseball. F360 can wrap a decal on the sphere but I’ve not figured out how to turn that into g-code.
I think you would need a fourth axis to rotate the ball, if for no other reason than the laser would be out of focus as the depth varies. Not the answer to your question about Fusion but I think you need to move the object around the laser rather than adapt the image to the object in this case.
@JayDent Jay: Before I throw out any weird and wonderful ideas, can you tell us what you want to engrave on the baseballs? Text, graphics, one line, multi-line, etc?
I wanted to use the z axis movement to manage this. The radius of the baseball is well under the movement of the z axis. I guess think of having the mill carve the sphere on the final pass. That type of motion is what I thought would work, but I need to warp the 2d image to the sphere and then have something take that image and generate the g-code for it.
@JayDent I think that it’s possible, but it depends on what software you have available.
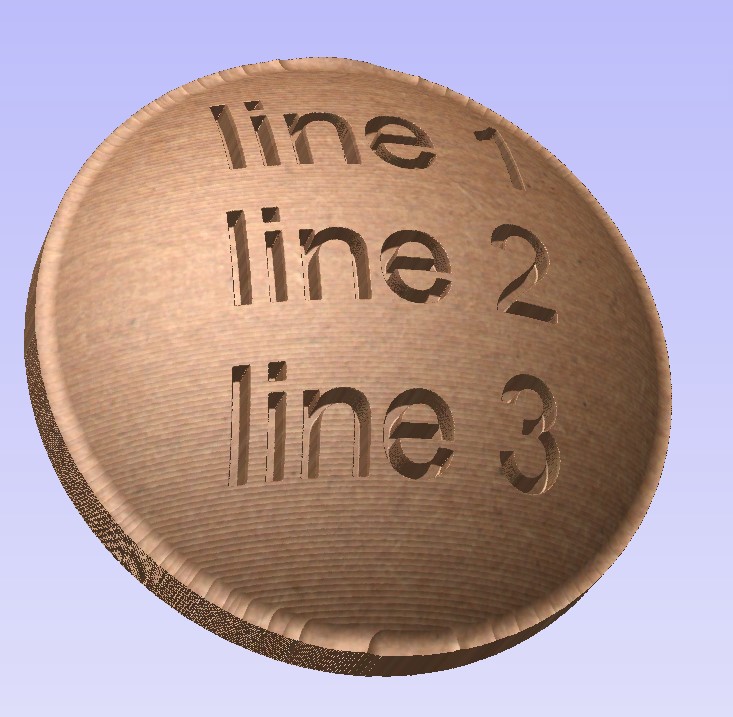
I just did a simulation using VCarvePro. I created a dome, arbitrarily sizing it to 3" in diameter. I didn’t spend any time figuring out the angle of the dome to make it match a baseball. That is possible, though. I carved out the dome just to get the shape. Obviously, you would not do that. You have the shape already = the baseball.
I created 3 lines of text on the dome. Then, I pocketed it out to a depth of 1/32" using a ball nose mill. In VCP, you have an option to project the toolpath onto the 3D model. I chose that. The carve looks good.
Now, if you have VCP, you can fake a tool using the diameter of your laser dot, and “carve” using that. If you have the laser module for VCP (I don’t.), that is all done for you.
If you don’t have VCP, this was all just a boring explanation. I suspect something could be done in Lightburn, but I have never used the Z axis option in LB so I can’t help at all on how to make it work. It could be fun to try, though. I see that you posted this question on the LB forum in May, but no one has replied, so I could be all wrong there.
Clearly, all of this is hypothetical. The optimal method would be a 4th rotating axis, as @ryanprice Ryan mentioned.
I decided to follow the trusty rule, if you don’t know how to solve something, buy a new tool/toy, that always helps.
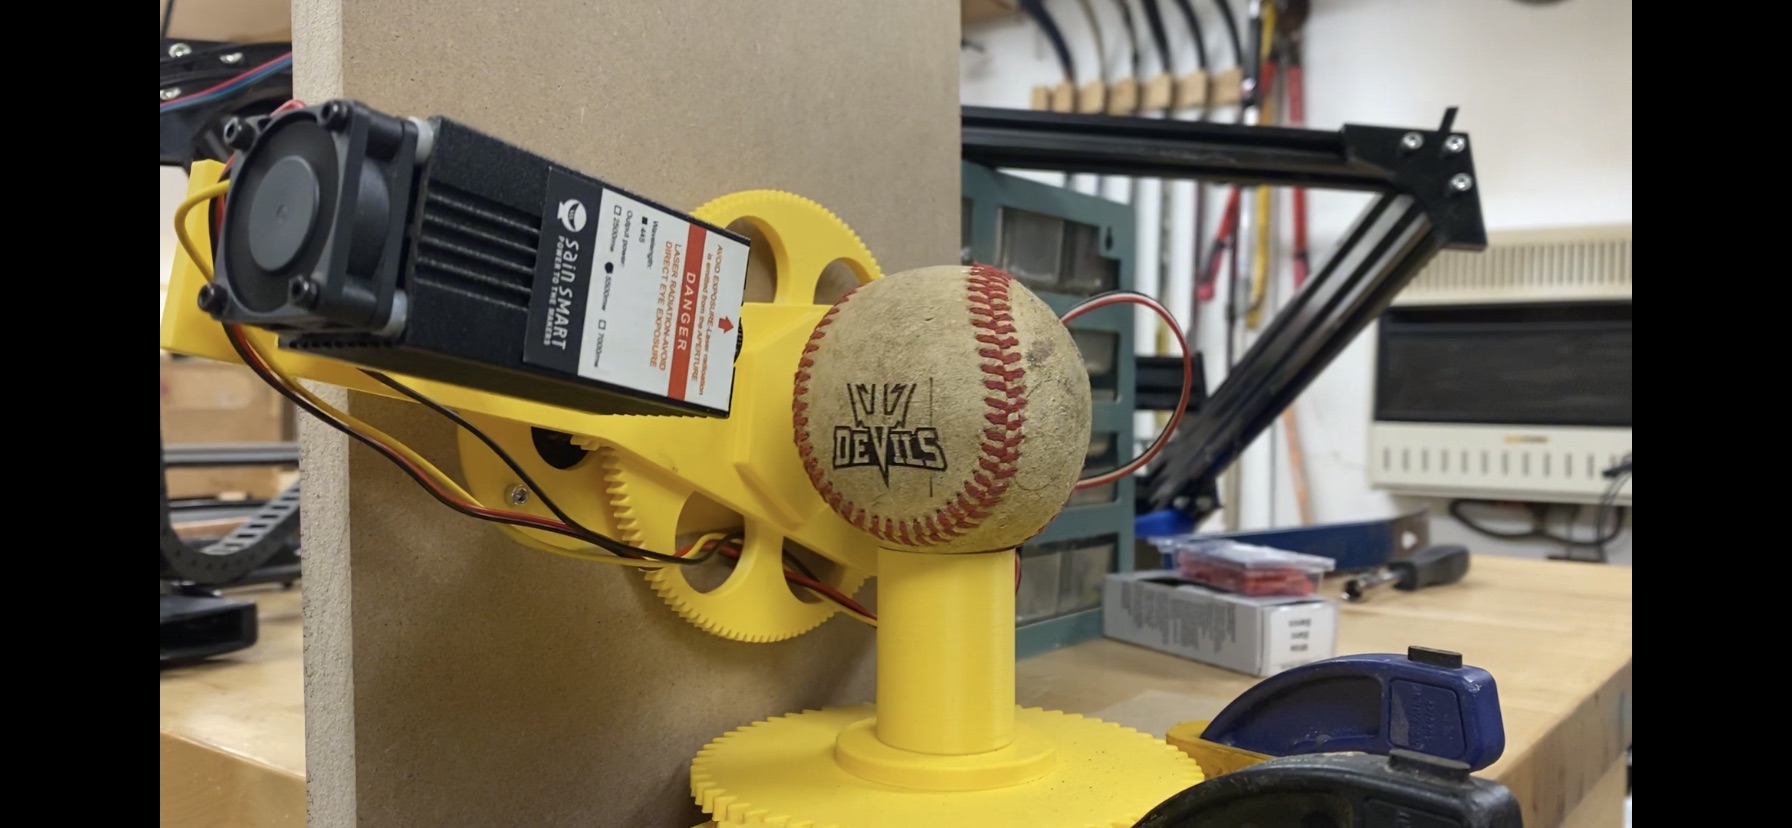
Picked up a 3D printer and it can print gears. I used the longmill to machine a pocket for the plate that holds the gears, designed a gear setup to move the laser head around the sphere. This is the proof of concept before I make the full enclosure with adjustable height. In the end, it is a 2 motor setup.
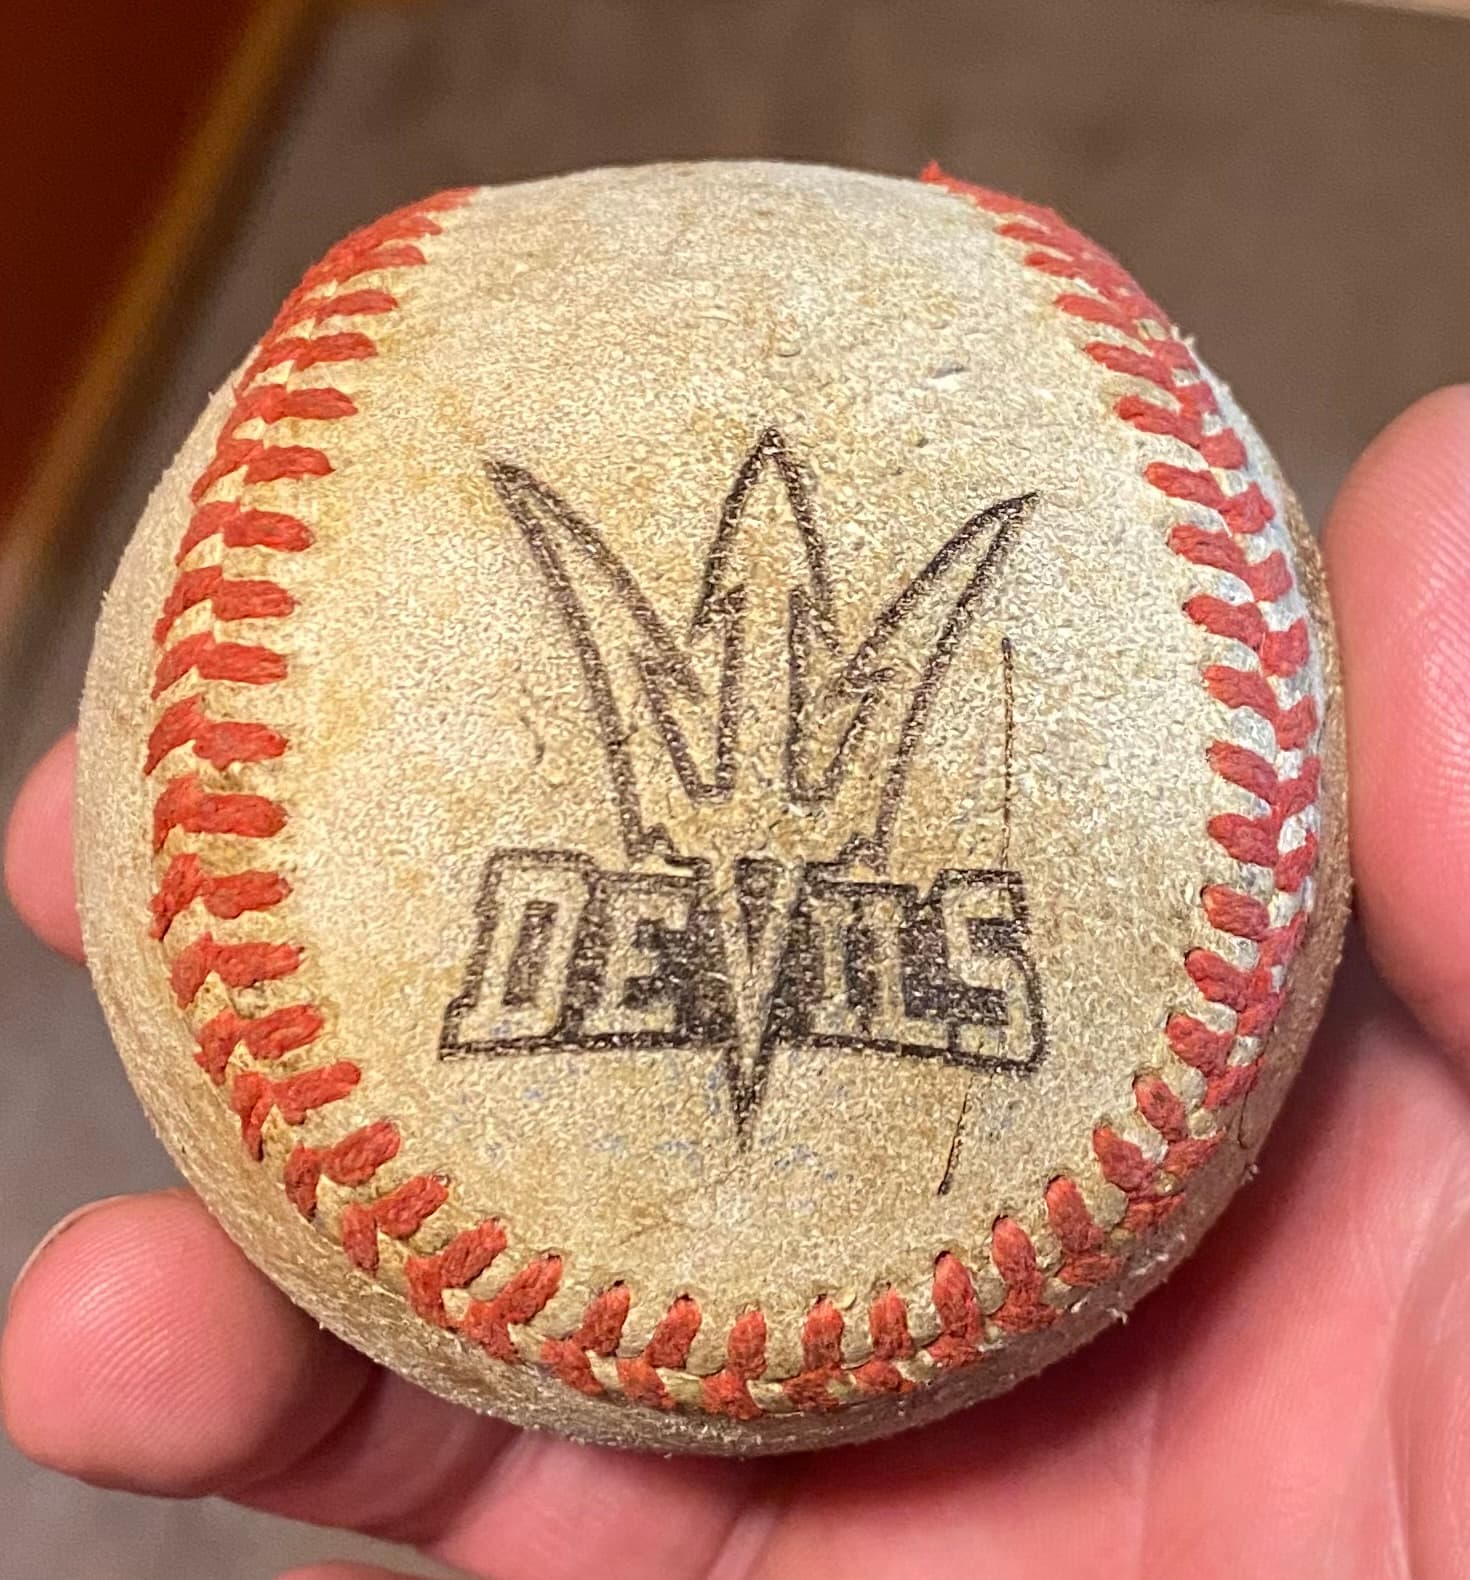
The devils logo would probably burn ok based on your laser and lens. I wanted the ability to wrap around the ball also, which this can do. This also (I think) will minimize the distortion of projecting onto the sphere, at least the squares and circles I tested with turned out looking like squares and circles and not ellipses like you get with a flat plane.
It’s over engineered, but that is part of the fun of this hobby, right?
Can you tell me how you did that two axis set-up? I am trying to figure out a similar problem- larger sphere, more surface area to be etched- but the nuts and bolts look the same.
Welcome to the group. I’ll try to answer, but if you have more questions let me know.
I drew up a model in Fusion 360 for the yellow parts and then printed them on a 3D printer. My first machine (before upgrading to the Longmill) was a Sainsmart laser, I stole the motor and control board from that (you can see the black extrusion frame in the back, I had not completely disassembled the unit at that time).
I just did a pinion gear to drive the motion (you can see one of the gears just under the laser. Overall it worked, but the weight of the laser was right at the edge of the motor capability. As it was, I had the change the GRBL setting to hold current always, otherwise the laser would drop. I wanted to improve the design with some type of adjustable height (different diameter spheres) but got bored with it and put it aside.