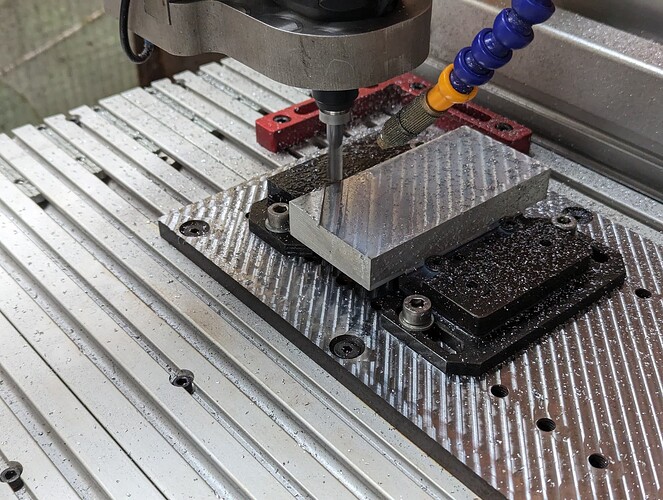
How about this, when currently
Using the probe from top of spoiler board, when done zero is at top of spoiler board…
Now if you know the thickness of your material deduct that number from the height of your probe and enter that number in gsender settings probe height.
Once you zero off the spoiler board the first time you’ll now have your zero at the top of your material…
All other tools probed going forward will end up with zero at top of material for the rest of the job…
problem is you’ll need to to remember to change material height on the next job if different.
Maybe it makes sense to have a material height entry when probing Z if it makes sense…, and maybe not.
Just thoughts
Nice setup. ![]()
![]()
So what you do now is, if understand it right
Using your collars, is zero the first tool, from there you just enter a tool offset from current Z position every time there’s a tool change…
I also do think what I last described would also work
It would eliminate the collars and the offsets.
And when probing you could do it right off of your table.
The tool tip would always end up on top of your material.
Vic
quick question, am i allowed to fork the program on github?
It’s open source, you’re able to do whatever you want with the code within the limitations of the license.
WE (at the day job) using Aspire, always set Z zero to the spoil board. Even if we scratch through and leave trails, we do, the spoil board Z remains for as much as weeks. All tools are Zeroed to that height, with the tool length as the recorded variable, but WinCNC does that through macros, and I need to do that with Gsender… or you do and teach me how.
Welcome to the group Rob!
That sounds like a nice setup at work, but who wants to be there ![]()
You’ve got me thinking now… ![]() I think I just I had an idea!
I think I just I had an idea! ![]()
I will assume you didn’t got my point for this.
Here’s a short explanation.
I want to eliminate the probing after every tool change, and only probe at the beginning with a 3d probe.
And the more I’m thinking about this and how I would make it, the simpler it gets, it only has to be something like an add-on in g-sender that manipulates the z axis current numbers without actually moving it. It doesn’t have to do with grbl or anything.
I just wished I could code ![]()
I can’t code either, but that’s what I do for a living so: at the day job, when I refresh my spoil board, I set Z zero to the top of the new board (vacuum on), using any one of ten (don’t be jealous of my privilege) tools, then let the macro set all tools to that zero using the “tool setter”. (they call it the calibrate switch, but you get the point). Once that has been done, we don’t have to re-check tools until any parameter changes. I’m sure we can help Sienci set this up. I’m looking forward to it.
What CAM program are you using?
I’m using fusion 360, I’ve used it for the last 3 years. Learned it pretty quick in terms of basic sketch since I’ve used Freecad about 8 years ago
Using Fusion…You could potentially add a “Manual NC” to handle the offsets on tool changes. I posted about this for a different reason on another forum here.
To do this with a gSender macro and more like a tool table, I think you could use a “nested” ternary statement (I don’t know if that’s what they’re called).
%global.tool = Number(tool) || 0

%toolOffset = global.tool == 1 ? -1: global.tool == 2 ? -2: global.tool == 3 ? -3: global.tool == 4 ? -4: global.tool == 5 ? -5: global.tool == 6 ? -6: 0

G43.1 Z[toolOffset]
This macro applies a dynamic tool length offset based on the current active tool. Please make sure you understand what you are doing if you try this. I used negative offsets in the example to differentiate from the tool numbers. There is a lot that could go wrong here, so test.
And, please, don’t use those unbalanced collars on a cnc.
looks promising, but, i don’t even know where to start ![]()
No worries, i am removing the “stops” now. I also noticed that when i insert the tool in the collet it pulls in when tighten, so, that might not have been a good idea after all.
I will try to implement a tool setter/tool leghnt sensor.
Yup, that’s how collets work.
![]()
Look at the macro I posted above. The positive numbers are the tool number and the negative numbers are the corresponding offsets. It’s essentially a tool table
Another logical way to envision the main function in Neil’s macro (not syntactically correct).
set %global.tool = Number(tool) or 0

if global.tool == 1  then %toolOffset = -1:
else if global.tool == 2 then %toolOffset = -2:
else if global.tool == 3 then %toolOffset = -3:
else if global.tool == 4 then %toolOffset = -4:
else if global.tool == 5 then %toolOffset = -5:
else if global.tool == 6 then %toolOffset = -6:

else %toolOffset = 0
@RobLM It took me awhile to implement the idea you gave me but it’s done now and you can read about it here.
Well, I endet up finally building a z probe and a tool touch sensor with 3d printing and switches. I implemented both to work on a USB c cable that came with a 3d touch probe, so I can use one cable for all 3.
I’ll post about them later, need images first. This topic can be closed I guess.
