Long Mill setup and use

Hi Jason,

When comming to the Netherlands, make sure it’s at least halfway into spring. Autumn, winter and the first half of spring are mostly gray and wet.

If you get a 220V makita, chances are that you are getting a 6mm and an 8mm collet with it. I got the 1/8 inch collet from sienci and found me a 1/4 inch one with an online tool webshop. They are available, but it was quite a search to find. You might want to look into that before getting the machine so it’s not something you get stuck on.

Getting bits is another issue you might want to look into. I have found a local webshop, selling bits that wont break my bank, but since they are local, their bits are focussed on the metric market. I can’t seem to obtain any downcut bits and the ones they have are mostly 1/8.

Importing bits isn’t an option i like. Tarrifs ballooning the prices, hold me back shopping outside the eu. So I’m sticking to having a weird mix of inchy and metricky bits.

My table is something like 2.4 meters long and 1220 wide, to fit my 48x30 and some. The machine is fitted on a mdf slab, disconnected from the table. It’s fitted with so many inserts, I kept needing to buy extra boxes of them.

The table is mounted on casters and able to slide off the wall to be able to work pieces longer than 48". If realy needed it can rotate the whole table into the shop to be able to work on stock upto 6m in length. I’ve not needed that option yet. My longest project was 2.5 meter, but could manage (barely)by just sliding the table off the wall.

Having the option to move the table around has proven to be most handy. Installing that circuit breaker box and outlets in the back with a static setup, would have been like combining construction work while climbing up and down a mountain.

Anyway, here’s a pic of my setup and though it aint much to look at, it has served me well and, though I try to avoid it, is perfectly climbable.

What is your to go to clamping method. Hkw are you planning to control your machine? Are you going to have a dedicated computer at your setup?

awesome setup… and I have some questions too. Sorry for going so off the OT (original topic).

I’ll mount my torsion box base atop a mobile 1800x600mm bench, one of two I made a couple years back. When the Longmill isn’t needed, I will then store the base with cnc vertically to save some space.

I’ll first use the Longmill for mould and jig making. When composite parts have been made and de-moulded, I can finish them with various cuts in the jigs and also use jigs for assembly tasks.

I haven’t determined my work holding methods as yet, but I plan a means to have a work area x & y ‘zero’ location so that I can easily and quickly place my mould stock or jigs do a quick zero and get a job running. I’ll be using limit switches and touch probe which should help make this easy too. I think for moulding stock, I’ll screw down or bolt. These are longer running jobs with tool changes.

For finishing tasks such as cuts, I’ll make larger product holding jigs with tape hold downs and later incorporate vacuum holding into the jig. I’m expecting to do lots of tests and trials even without bits or the router running to check I have good tool paths. I’m sure I’ll make mistakes but hope to minimise breakages, especially when I could ruin an expensive part I’ve made or need to wait a long time (for shipping) to replace something.

I’m interested in Lean so I have goals of having efficient build and assembly processes. My initial items are niche and, for hobby, maybe a bit costly (items over $1K euro). My volume plans are low. Later for fun, I might do some research and sample product tests with local shops and see if there’s some interest in higher volume items where my skills and knowledge learned could come in handy.

I plan to use a laptop on USB to the SLB. Initially the same laptop as I’m designing on. If that’s an issue, I’ll use another older laptop or maybe an older PC for running gSender.

Oh, and I’ve ordered the Sienci collets (1/8 and 1/4) and some extra backlash parts. I might have to order in bits as the local ones are really expensive and appear to be mostly professional grade for cabinet makers or cnc milling. I’d rather not, but I think I’ll be forced to import. Ideally I’d work in metric only but will have collet options.

ok, so I have some questions. Are those your own x/y dust shields? And, is that a webcam for watching long jobs? I’m interested in these and what your learnings are. I hadn’t considered a webcam for the longer jobs, but I can see that being quite useful.

I’m keen later on some way to sending a txt or email notification when gSender has finished a job or is is ready for a tool change. I haven’t gotten that far to know how I’d go about that, but fun to think about it.

Kia ora (cheers)

You’re full of excelent plans, aren’t you.

The storing of my longmill is still an option in my setup, though when jogging the mill way back frees up a lot of workable space so I have never felt that the machine was taking up valuable room. For now having the machine seperate from the table keeps options like vertical milling open without me having to break too much down. just slide the machine over the edge of the table, mill out a piece of the machine bed at the front, install a vertical clamping system on the table and I’m good to go. The need for vertical milling (prolly dovetails or the likes.) has not yet come into my shop, so it’s still only an option.

Having jigs is my way to go. I never flattened my machine bed, so instead I use smaller jigs and flatten those to the machine. This way I can mitigate having to flatten or even replace enormous waste boards. Surfacing a jig is pretty much a quick fix to that.

I initially had the cad pc in my office running the machine via a 10m shielded usb cable. It worked, but I encountered a lot of program freezes and could not pinpoint the cause, so I got me a dedicated pc at the machine. It, to my frustration, didn’t solve the problem. It turned out to be the small usb cable that came with the machine that caused the freezing problem. The machine pc was going to stay so I had a good usb cable doing nothing running from the office to the machine.

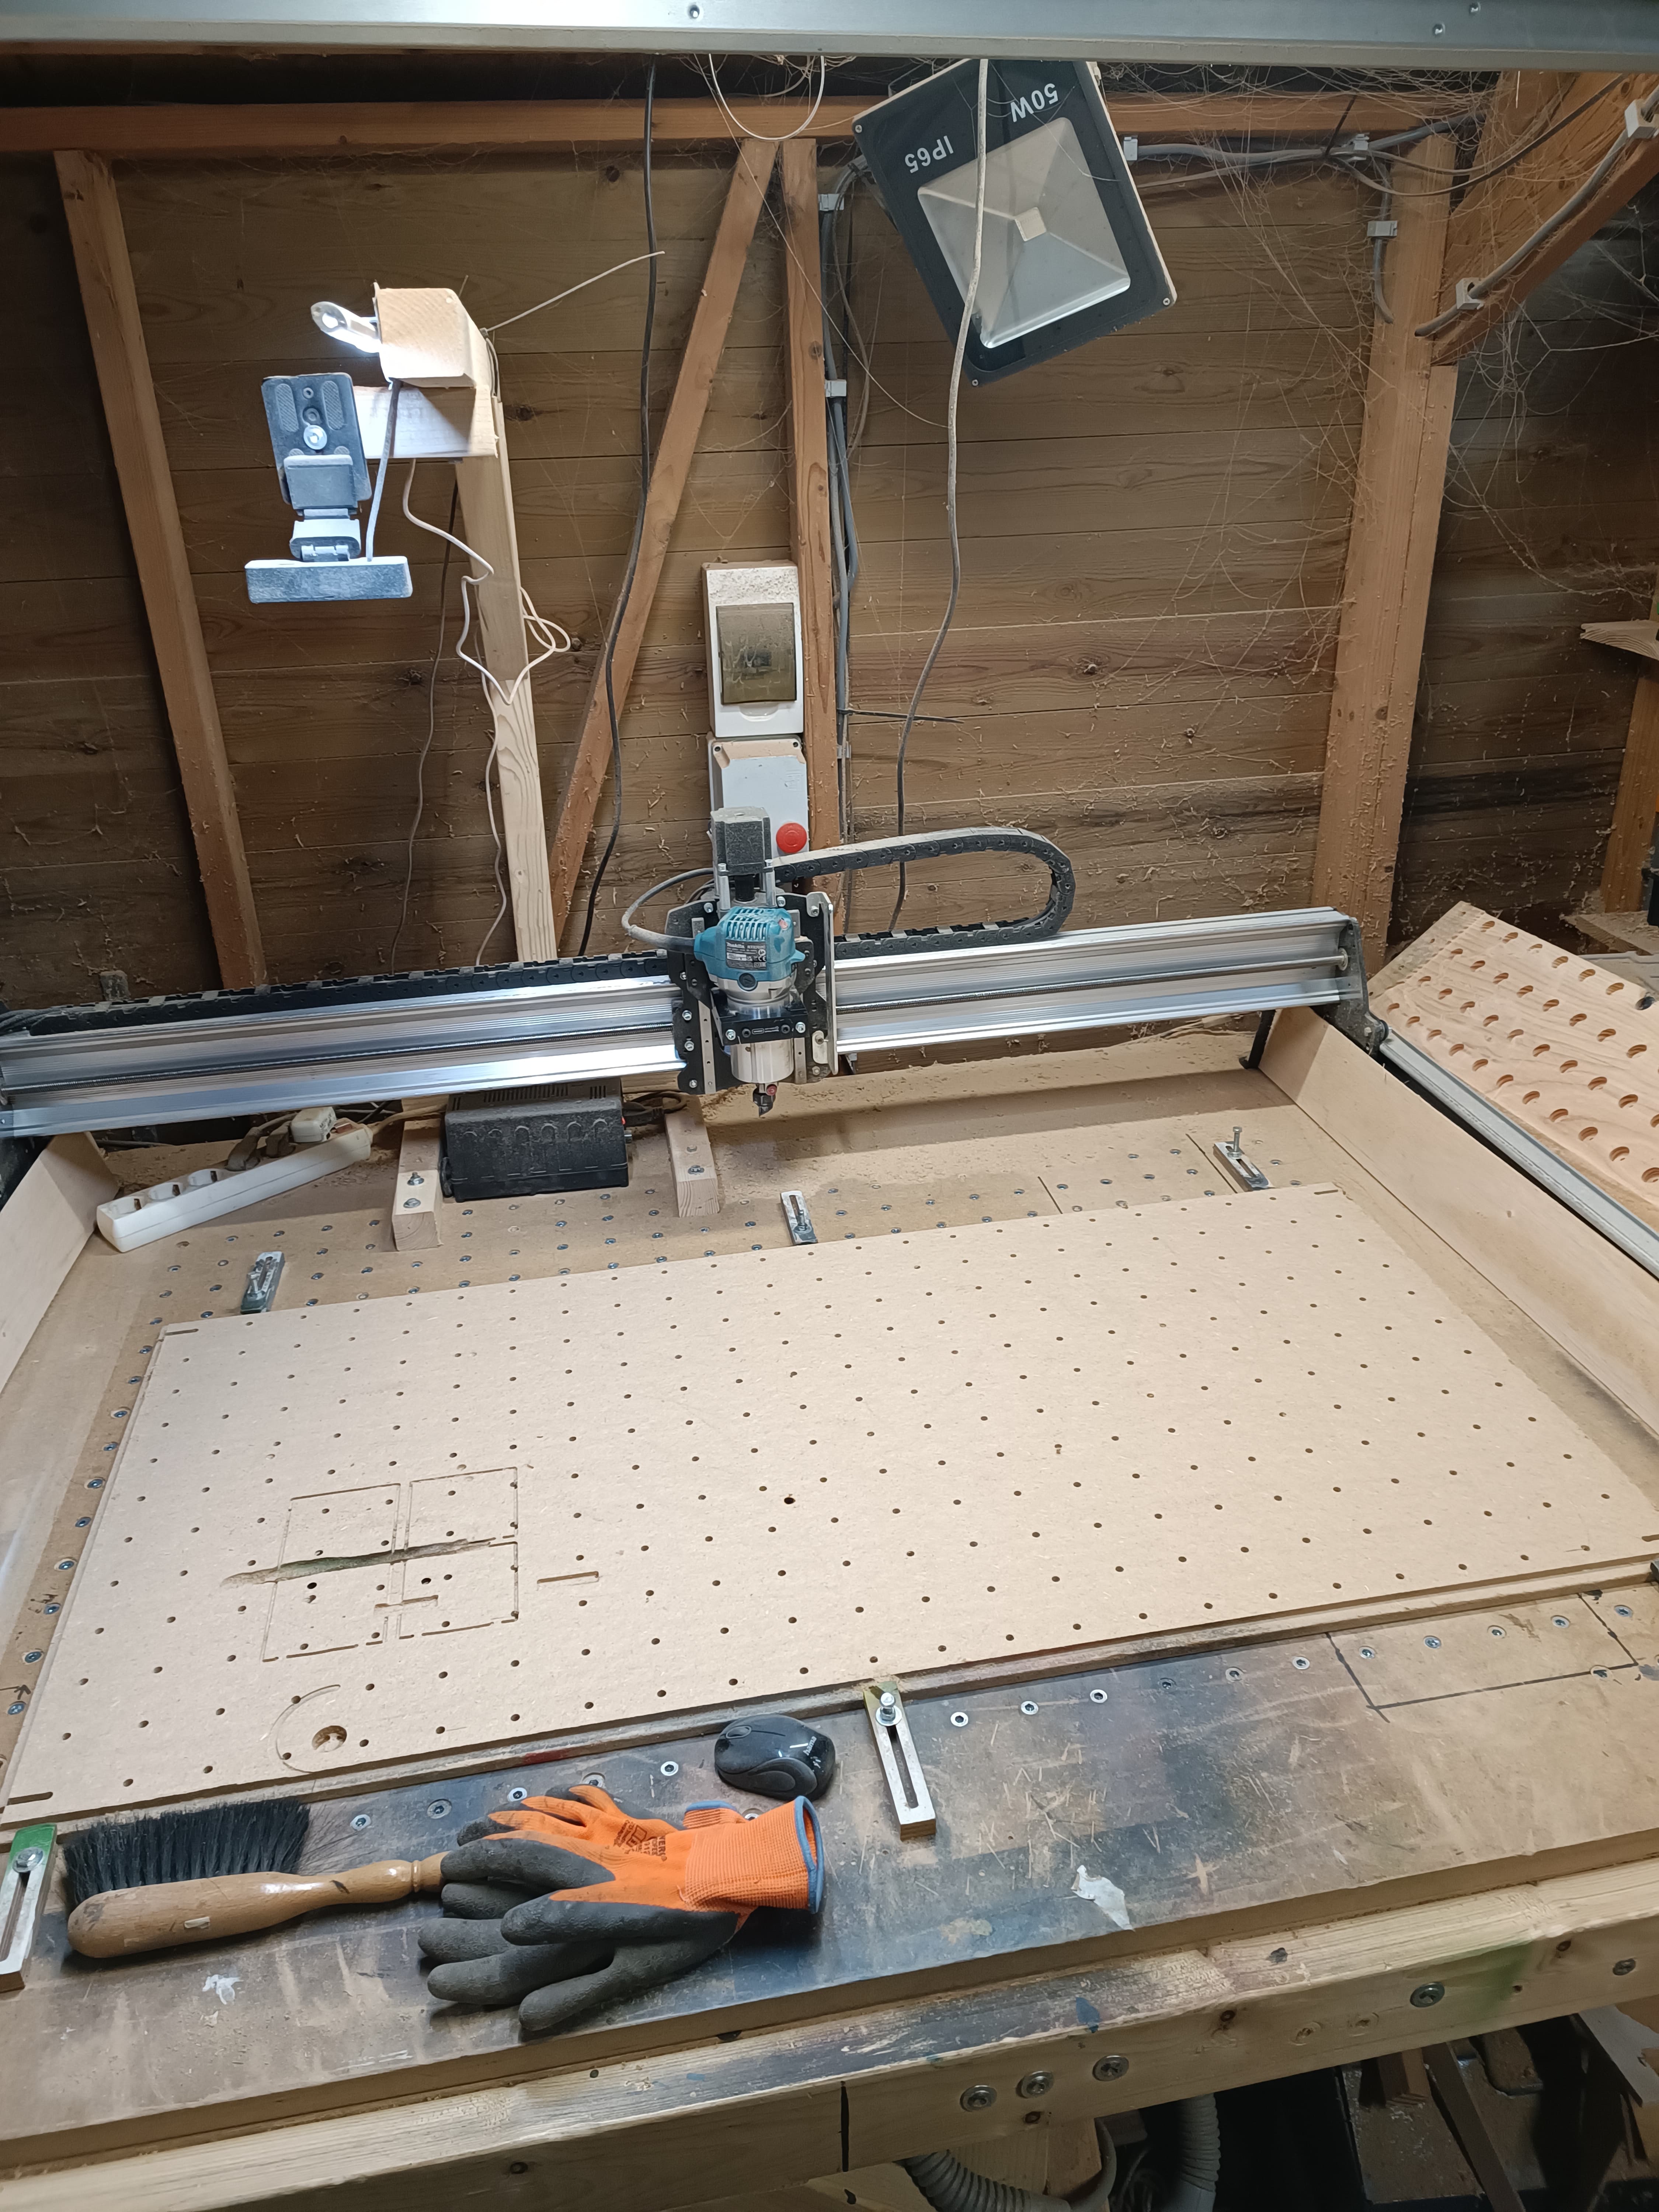
Since Lightburn (lasersoftware) has an option to install a camera, I installed one above the machine, just to see what could be done with it. It turns out that having a calibratable cam gives you the option to import a screenshot of an object on your table with accurate measurements. Importing that into my cad software made designing onto irregular jobs a breeze. The cam is a cheap one, only hd capable but by Jove, did it made a difference.
One day I’ll get me a real 8k fisheye one and have it encompass the complete machinebed. For now it does a hell of a job, as is.

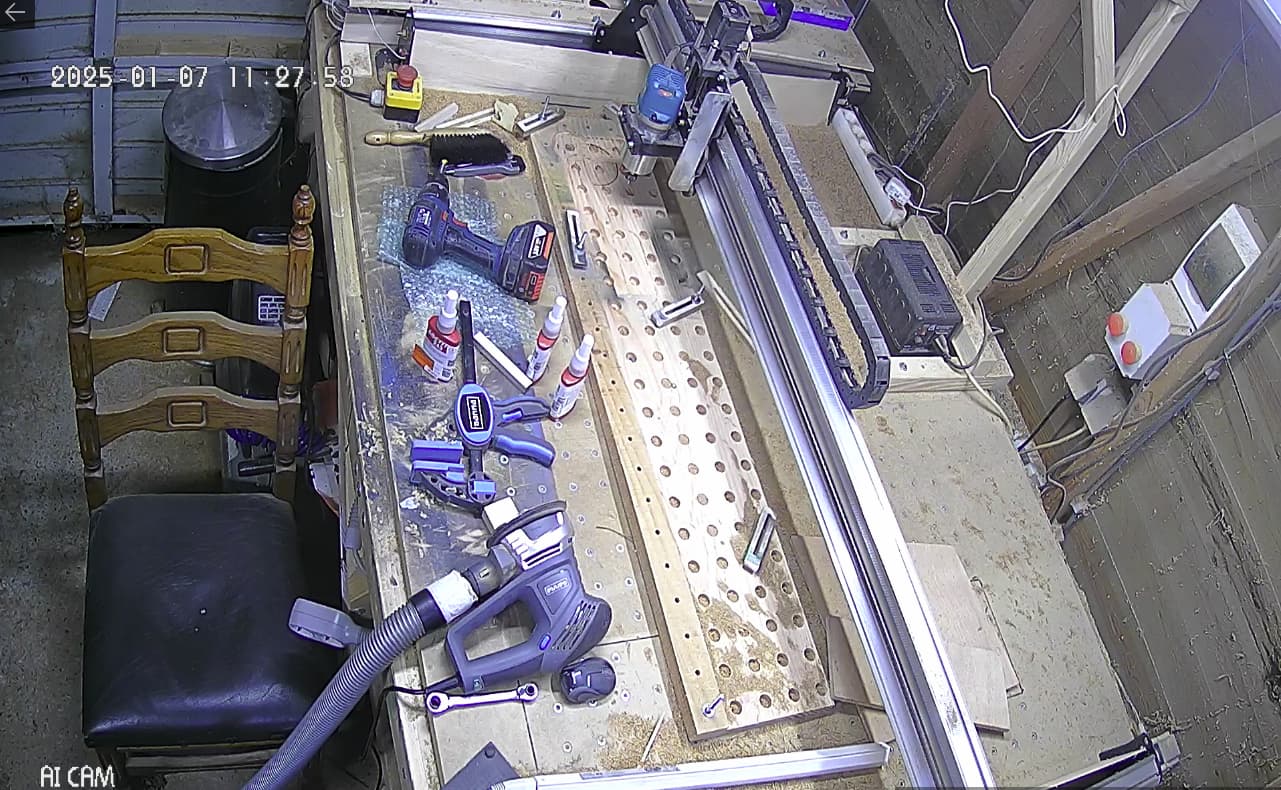
For keeping tabs on my machine, I simply added an ipcam overlooking the mill to my security system and have it on screen when jobs are boring me and I am cadding on the side. It gives a better oversight than the webcam that gets obscured by the router and x-axis.

Small tip on something I wished I had when my machine went collet deep into a project and started to unclamp it like a pro: If you are to monitor the machine from anywhere but in reach of the e-stop button, make sure you can cut the power to machine and router from that spot. It can be the difference between a close call and broken bits, ruined projects or worse.

The dust shields are strips of 3mm thick ply wedged between the y-axis feet. They are simple but works magic when chips start to pile up. The router blows all against the nearest y-axis and I rather keep that away from the lower v-wheels. It however wrecked my cleaning cycle. I have become less worried on pile-ups and just whipe off my jig and do one more job because… meh, there’s still a couple of cm of shield visible… Lets goooo.

If I had an SLB, I would, having had all them freezes due to bad usb connection, use the ETH connection between my machine and the local pc. For now my machine is stable, but if I could, I would ban the usb connection all together. It caused gray hair all over my body, even on places I had no hair before.

Having the machine to mail would be fun. You can however run g-sender via the remote mode on pretty much any device with a browser. This includes phones, tablets and your cad machine, given that is is on the same local network your machine is on. If I run different toolpaths using the same bit, I tend to load and run them from the comfort of my office. My machine is in a room with no heating, so it was a matter of time, I would.

Having g-sender in sight all the time, might be enough for you to see how far your machine is in and see if it’s done. It’s better than an email.

G-sender has an option to execute code on events. I don’t know if it can do something as advanced as sending mail, but it can defenitly switch a unused port on the controller that you can utilize as a flag input to another device controlling your mail-sending-thingy.

Bits is a problem, though I know my provider retails low cost chinese ones and I must say… they work.

Can’t wait to see what you come up with. Exciting times.

@Spamming_Eddie @cdnkiwi I’ve moved your latest discussion to a new topic, which I believe is more in keeping with the subject matter. :grinning:

2 Likes

I’ll report my setup and early learnings. I’m aware of watching for signal interference and your remote access idea for gSender is good.

Although the Longmill will be my first CNC, I’ve already been making moulds and prototypes. I’ve done this with an analog 3 axis router jig which takes a z/y-axis pattern as an input. y and z axis move on drawer sliders and x is a rotation around a center point. This actually looks like a kind of CNC setup, just without stepper motors. Manual feed rate and zeroing, poor precision and accuracy and a lot of hard work, haha. Over 100hrs of router run time with this setup and various dust collection approaches. This was hard work, but proved the concepts. Even my work task checklist is like ones I’ve seen described for CNC.

Will let you know how it goes.

Old analog router jig, never to be used again!

1 Like

Torsion box built, ready to assemble the Longmill mk2.5. Woot!

1 Like

Can’t wait for a new stepdown transformer to arrive! Basic build complete.

Next steps are

  • determine base height (going to raise the height of my spoil board)
  • position/align Y axis and the Y & X v-wheels
  • check tramming
  • flatten a working surface
  • some tests

Main/only mistake so far was to not pay attention to how to open the clips on the drag chain. Mistakenly broke a few clips opening them up.

Credit to Sienci, this is as easy to build as a City Lego kit. Great instructions, easy to see difference to mk 2.5 vs 2 in the instructions/video and easy to add limit switches during the normal build.

Managed to easily source a Makita 220v router. Guy at the shop was a cnc’r and I got tradie pricing, sweet!!

1 Like

Jooo Jason,

Whoooop there it is!

Oh man, look at that gem, all packed up and ready to go. Picking up dust before the storm. Ready to ride 5000 miles of tole free road, the wide terrain, the woodlands of the south. Craving dirt, throwing bricks, spewing dust in the wind. Shining like a star with diamonds, shouting at the universe: I will not fight the mill, I am the mill.

Am the mill.

Am the mill.

1 Like

An update to the thread as I continue my Longmill (LM) mk 2.5 30x30 journey.

It’s been a while since last post, but there’s reason which I’ll share.

The Setup - table and spoliboard, laptop, 110v in ‘220v land’

After a quick and easy LM build I was ready to get stuck in. I purchased a 300W stepdown transformer online from a regional supply company with good website using. This works great with just the LM power supply and Super long board (SLB) on it.

Matika ANZ (slang for Australia/New Zealand) delivered a corded RT0702C router quickly. Only battery Makita routers in the local shops so the easy order and pick up in my small city was appreciated. Got this all installed without issue and setup some extension cords to my mobile workbench.

As I plan to manufactur some items, a mobile workbench is good for flexibility of my garage space for different space needs depending on the build steps and the mini workstations I have.

Getting to know gSender and my LM was up next. I got connected, got x y and z movements going and generally got a feel for how gSender and the LM worked. Little things like learning the menus and configurations and the jog control speeds were all useful and fun to do. The Sienci vids are great for this, but nothing beats a coffee and laptop in hand to give the CNC a go.

At this point I was also thinking about a spoliboard and surfacing, but decided to go straight to a scaled down version of the first item I wanted to CNC. To do this, it wasn’t necessary that my CNC surface was flat;l. I like an agile approach and getting something made and testing the end-to-end CAD, CAM, CNC process was more important for me.

Oh and before I forget, some tools that I found really useful up to now. My high quality allen keys, just a bit nicer than the supplied, masking tape, sissors and fine vivid marker. I like to measure and try things and some tape and marker has been great. Plus, with being so darn far away from easy access to reasonable quality router bits, I don’t want many mess ups. Tape and markers just work great for trying things out.

My first CNC ‘cuts’ were actually just done in the air with a taped out 3d stock and a lowest Z depth marked out. Doing this, I couldn’t help but laugh and think it’s easy and cheap to be the best guitarist when you’re playing air guitar. But again, I’m taking an agile approach and without realising it I was also learning heaps to help me with CAM.

Time now to hit upload on this while a sit watching a larger 730mm x 730mm spoliboard job run. Will know later, and with time, if my spoliboard attachment approach works. I’ve probably not been conventional in my approach and maybe I’ve been too agile. Time and quality will tell.

Coming up next will be… The Software - CAD, CAM and gSender

chur/cheers

@cdnkiwi It sounds like you are moving right along, Jason.