I have a new project that requires a 3" depth of cut. I see I can purchase a 4" bit but I am curious if anyone has cut profiles this deep? Thanks in advance.
Hi Bill,
What material are you cutting? I haven’t cut anything nearly that deep - I would be concerned about deflection in the bit, and the Z range you can actually achieve (with a bit that long, you would need to use a lot of the Z travel).
If you could post a screenshot of the model you want to cut, there may be some unusual work holding and / or toolpath options as well.
With a bit that long, I would be pretty worried about deflection of the bit - but that again depends on the material.
1 Like
I actually just did this over the weekend. Got a 4” bit and had no issues with tooling down to on 2.7”. Was cutting into 3.5” pine so the my dust shoe didnt fit. Not a big deal. I also removed my wasteboard to give me some extra room. And raised the router on the y gantry. I imagine 3” is doable but probably dont want to do it long term. … I am also a fresh rookie so take that into consideration ![]()
1 Like
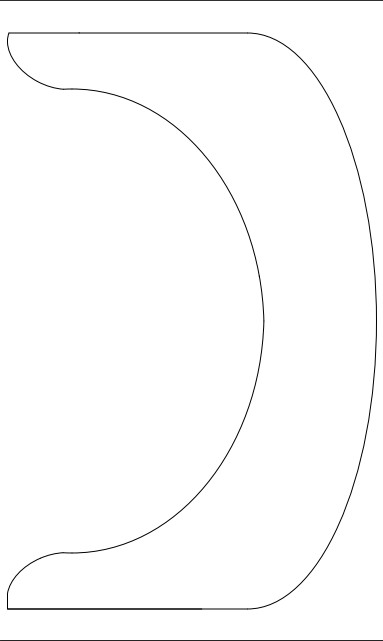
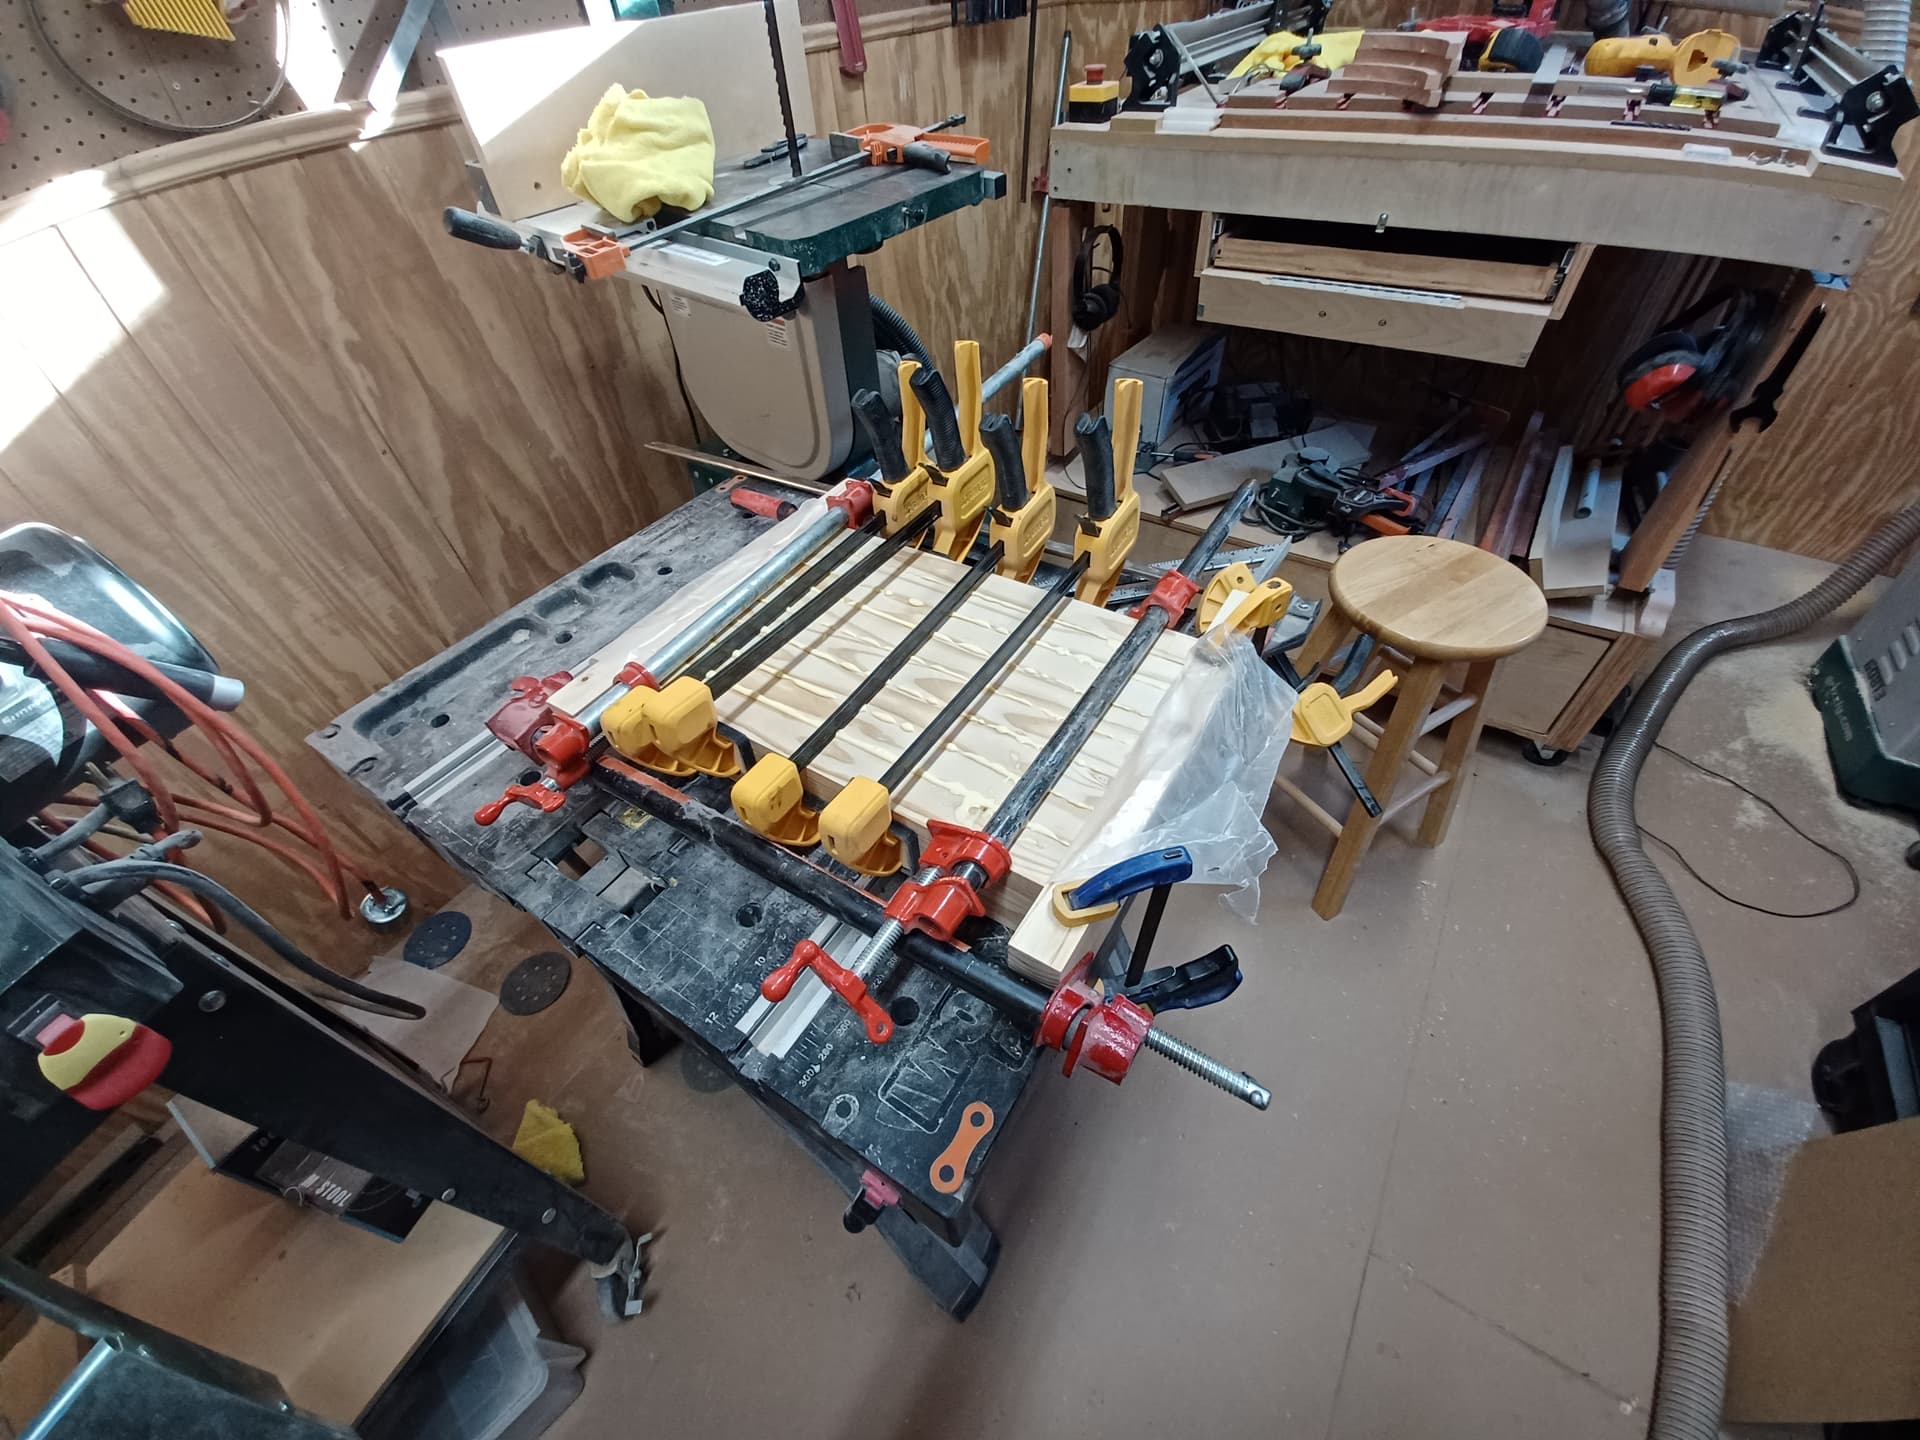
@elbarsal @Clt49er I figured I would have to feed very slow because of deflection. What I have is 8 pine 2X’s ripped at 3" in a glue up that is 17" tall X 11.5" wide. The glue up is in the clamps. I thought about the band saw but I’m not too good with that and it would require lots of addition sanding as compared to the cnc.
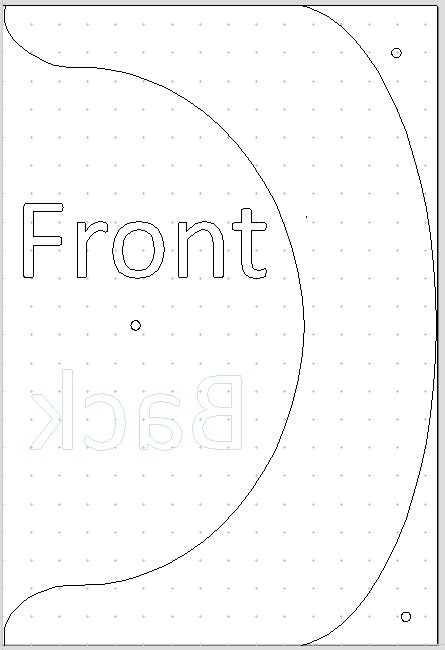
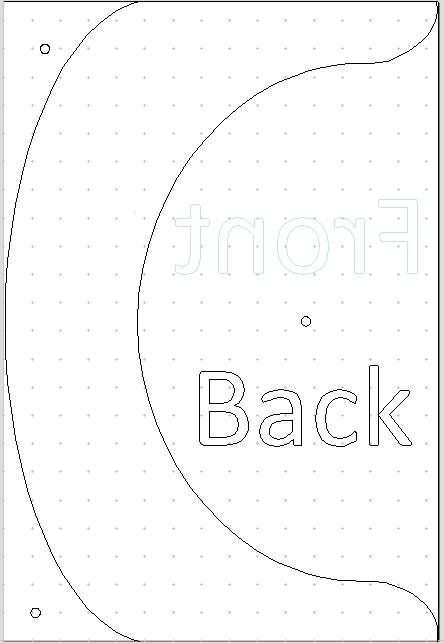
Here is a pic
Hey Bill,
I think you’ll be fine in pine (sorry for the accidental rhyme). One thing to note - rather than going slowly, what you want to do instead is take shallower passes / less depth of cut. Slowing down can result in burning, which will also dull your cutter.
The other thing I would say is ensure you do roughing passes to clear the bulk material wherever you can, and then use full depth finishing passes (you will probably need at least two) to shave off the final 1/16 to 1/32 inch or so, depending on how close you run your roughing. I know the way to do this in Fusion 360, but I’m not sure how it’s done in other packages.
If you are comfortable with changing bits during a job, you could even use a shorter (and thus stiffer) bit to hog out as much rough material as you can, then switch to the longer bit when you need the extra reach.
Good luck, and post pictures of your results!
1 Like
@elbarsal like the rhyme, funny. I have changed tools and roughing passes, I use Vcarve pro. Bit change for sure, thinking one of my normal 3" bits, 2 1/2 in the chuck, cut the depth to 2", the go to a longer 4" bit and cut the rest. I really need to check how much clearance above the piece I can achieve between z axis travel and router position to make the longer bit work.
My band band saw is set up for re-sawing. I currently us a 3 tpi 3/4" blade. Maybe buying a finer tooth, thiner blade may be the best approach. It’s heavy chunk of wood and it’s a lot of near the max for the machine.
I have read the z axis travel is 4.9" total so still possible.
Another method that would work in your case is to cut as far as you can with the 1/4" endmill you have now then rough cut the shape on the bandsaw leaving 1/8" material and use a flush trim router bit in a handheld router to trim the rest of the material left by the rough cut on the bandsaw. The portion cut on the cnc will act as a template.
3 Likes
@Bill You should also check your safe Z height in VCarve, Bill. If it is too much, you may find that, after setting your bit on the surface, the router rises up, runs up against the max height of Z, loses Z0 and ruins your project. Been there, done that. ![]()
FWIW, another easy option in VCarve is to do this as a double-sided project. That way, you can use a regular bit and have no worries about Z travel.
2 Likes
@brewpickles Know thats a great idea since I won’t have end grain issues, just side grain should trimm like butter and greatly reduce sanding for finishing. I have a new 1/2" combo trim bit.
@gwilki I need to learn about that, first is fear of finding xy 0. I will indeed investigate. I’m getting ready to unclamp and start removing squeeze out, actually got a electric hand planner from santa for that purpose. I hate squeeze out…
Thanks for the advice.
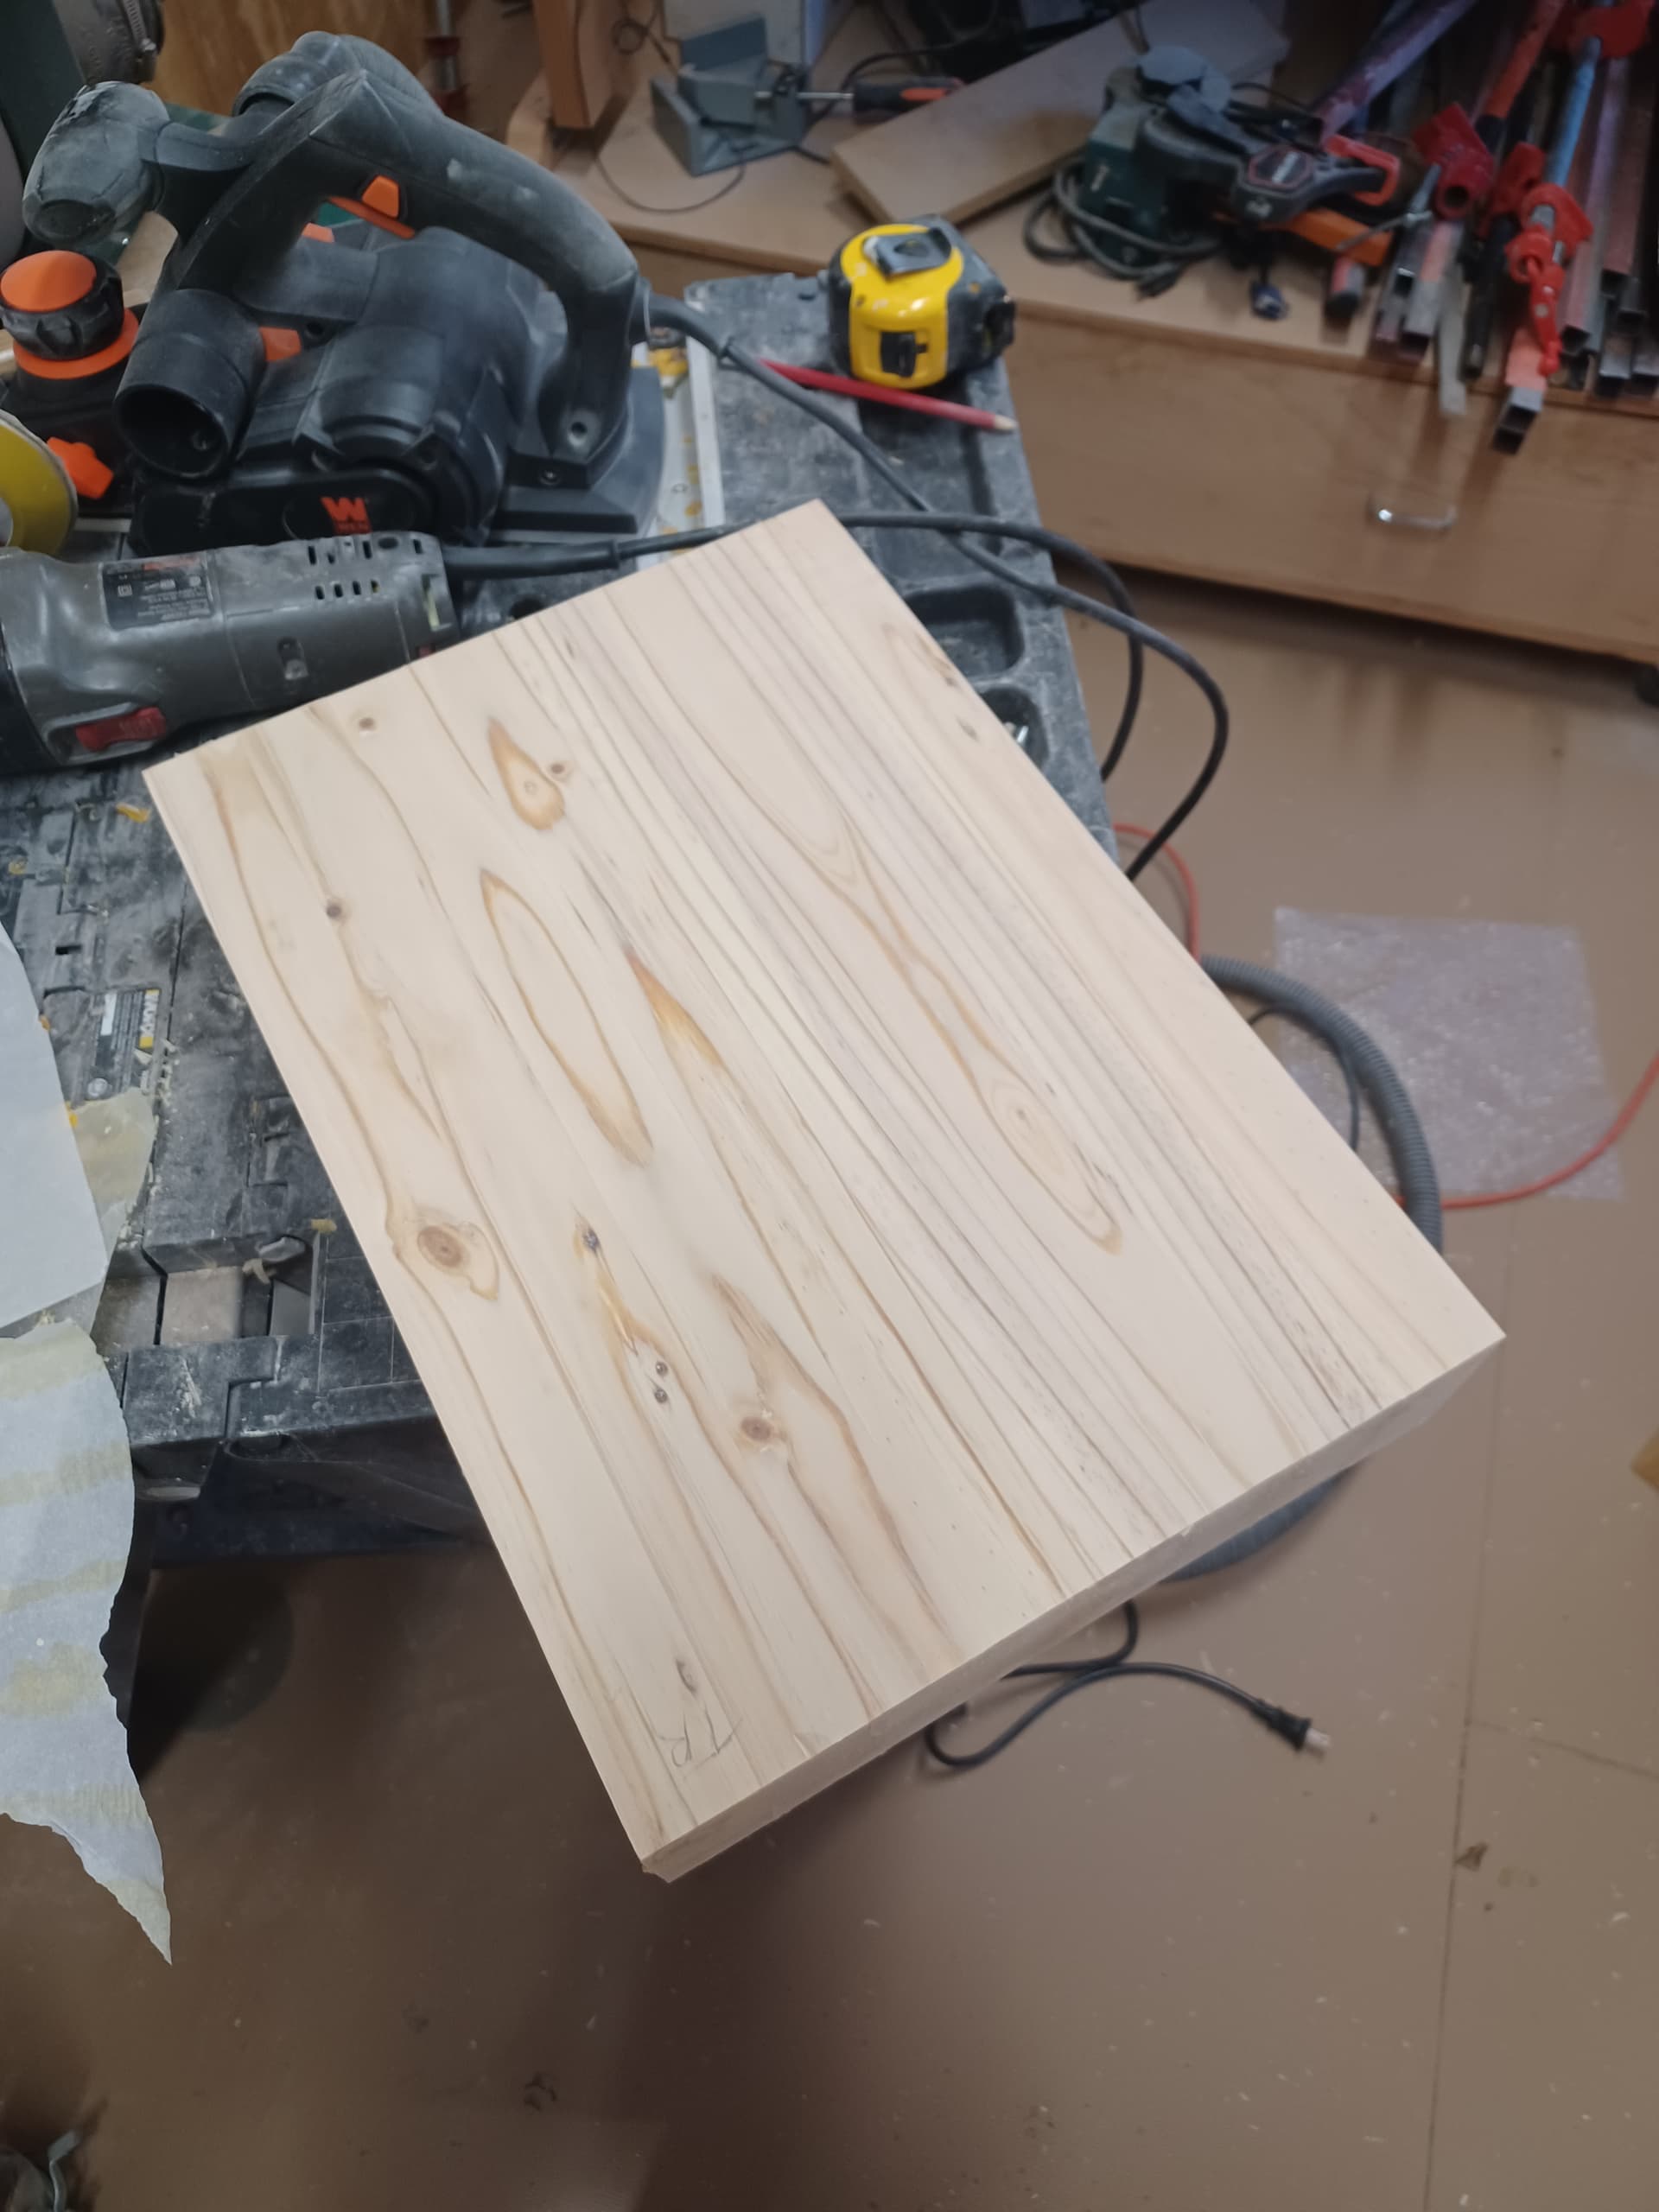
@gwilki @Clt49er @elbarsal @brewpickles the glue up in un clamped and planed to 3" thick. With @gwilki suggestions will attempt a double sided carve, seems to be the best option with what i have on hand. I am going to use the corner centering versus using dowel location to center the piece.
I will update when i get something cut.
@Bill I would suggest that, no matter how to decide to set your XY0, you still use asymmetrical dowel holes in the work piece and in your spoil board to ensure that the two sides line up exactly.
1 Like
I was thinking the same, there are as one can see waste areas that could easly accept dowels, the issue is the drilling through 3" + 1/2" into the waste board. I know I could manually do it but vetric has the feature of copying and reversing so both sides have the same dowel reference.
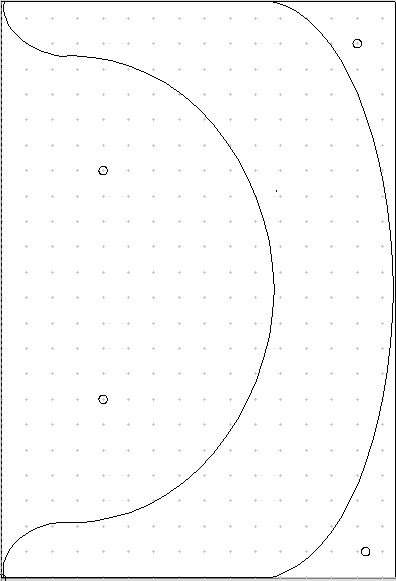
For both sides if I use 4 dowels that means 8 holes in the spoil board
@Bill I should have explained better. Here is video that explains it very well

I’ve following this:

Will take a look at the other, thank you Grant
I understand asymmetrical dowel holes, easy on 3/4" wood, how to do it on 3" thickness don’t know, I don’t have a bit to go through the 3" stock and another 1/2" into the spoil board.
@Bill You don’t need to drill the holes all the way through. You only drill them deep enough to take the dowels. That’s what Mark shows. Example: you drill 3/4" into the project material. You drill the mirror image holes 1/2" into the spoil board. You put 1" dowels onto the spoil board and place the project material onto them. The two sides MUST match. You do not ever reset XY0.
1 Like
@gwilki Grant I have gone through Mark Lindsay video twice, will probably go one more time while in vcarve. I have also suscribed to his channel very good teacher, slower pace like I really need!
Thanks, will let you know how it turns out.
@Bill I learned a great deal from watching Mark’s beginner series. He does a sunday live cast at 3pm eastern time. He takes live questions and shares his screen so that you can see what he is doing.
I sent you a DM to follow up if you like.
1 Like
Here is my project as set up on v carve with g codes if anyone is interested in taking a look.
End Table Leg #2.crv (910 KB)