This maybe something already asked and I did search for setup for Laser in Lightburn on this forum.
I am getting to the point of assembling my MK2 30 x 48. I purchased Lightburn key through Sienci Labs and just installed the program onto my desktop. So this is where my question(s) will begin.
Lightburn requires a device setup and since my Desktop is in the house and the CNC will be in a 10ft by 10ft Room in my shop. I wanted to know do I have to use Lightburn to drive the cnc with laser or will Gsender do that for me?
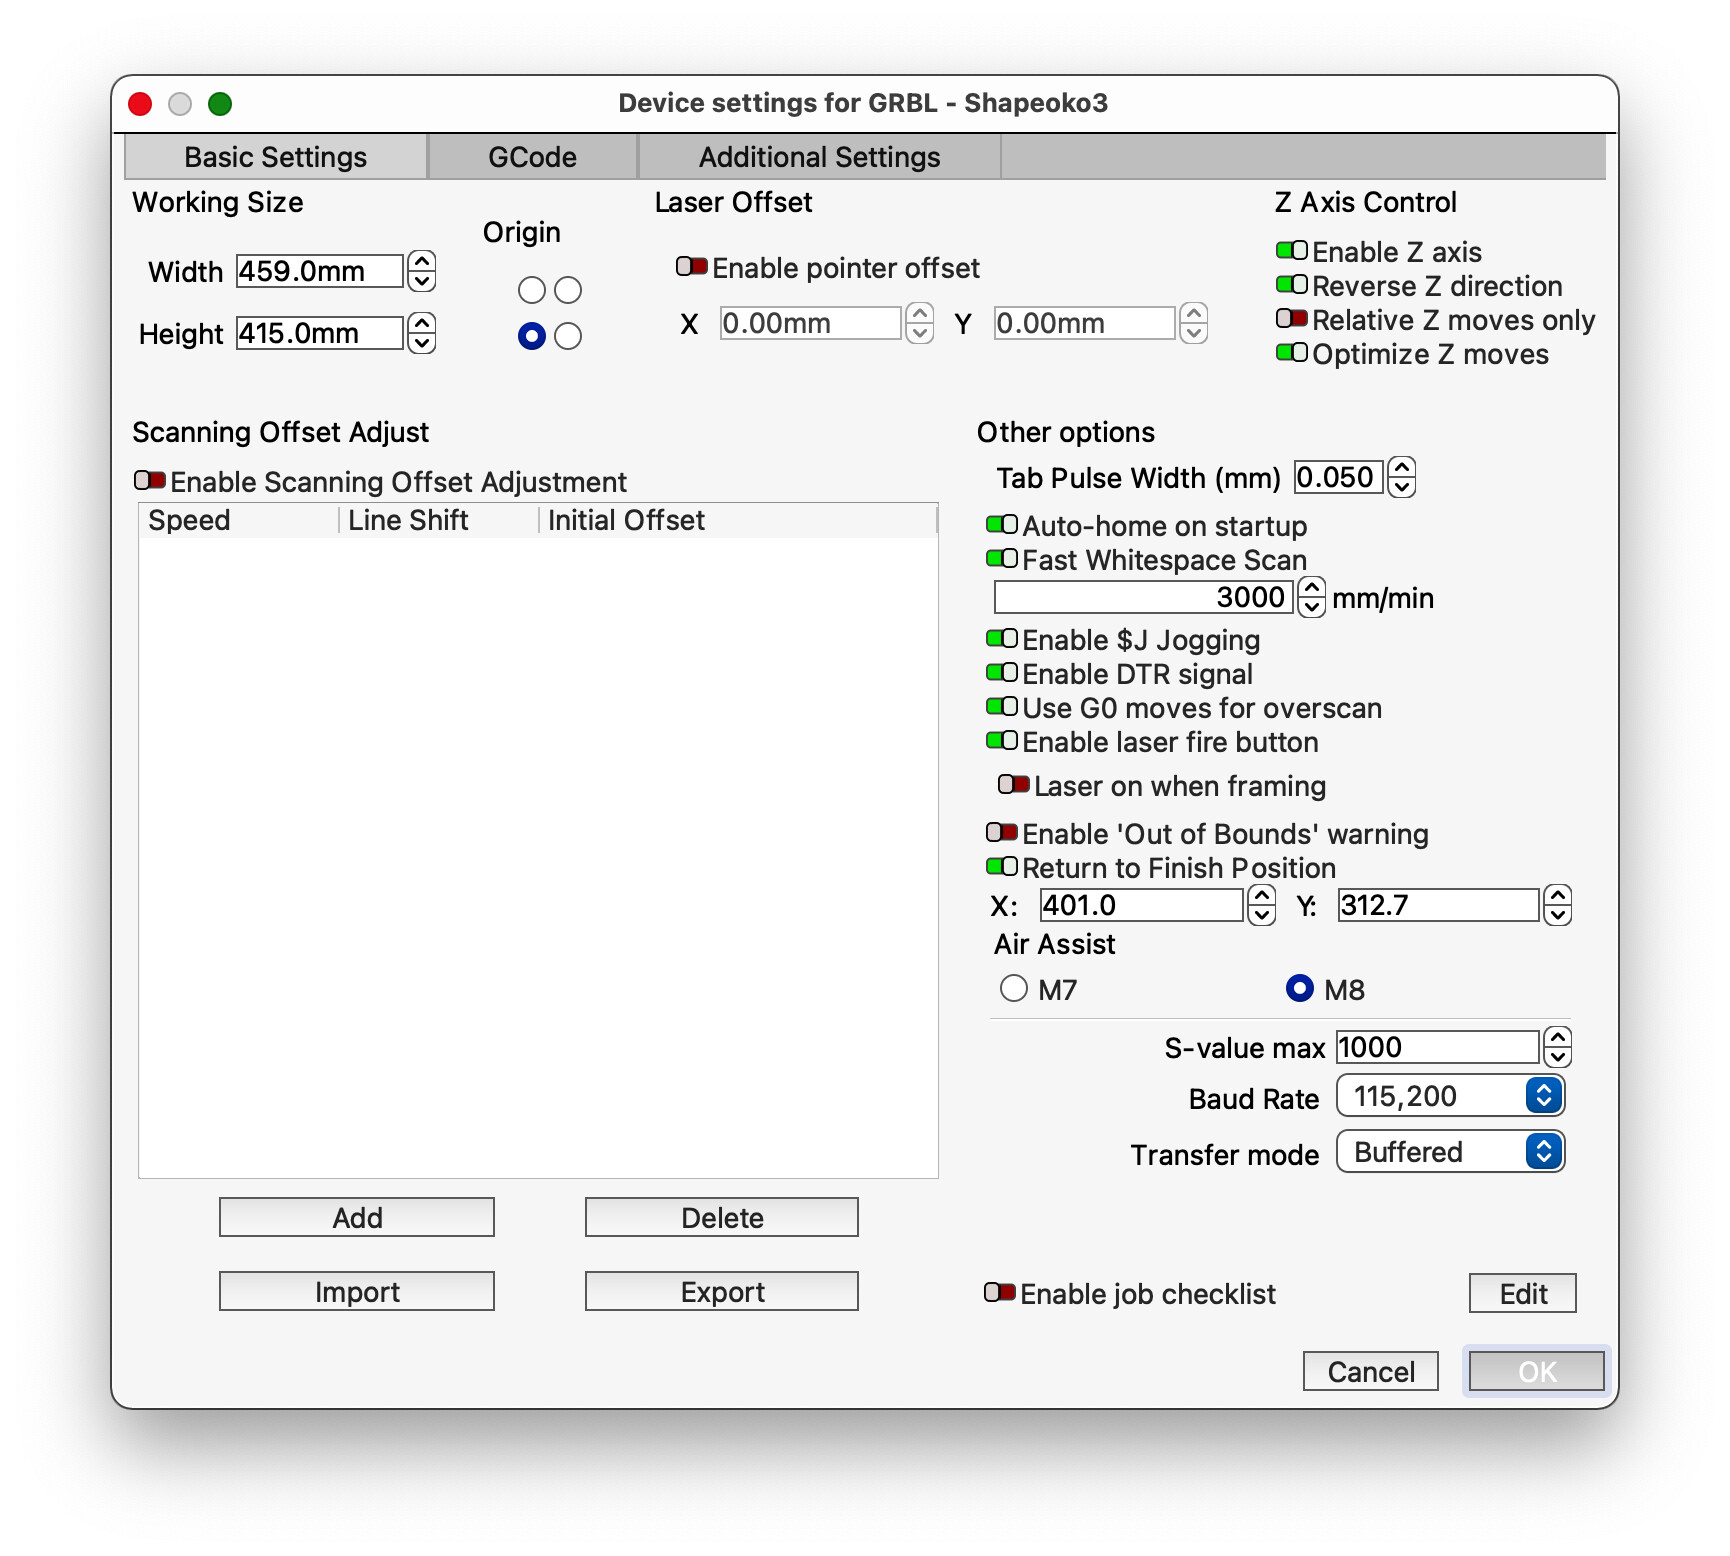
Since I have installed the software on my desktop on start up of Lightburn it wants to know the device settings? I.E. CNC size Type of programing code (GBRL) Is there a break down of Longmill MK2 30 by 48 setting for Lightburn any where so that I can add them manually? Since it is not practical to plug the desktop into the CNC. There is over 200 ft between the house and the shop.
I do have a laptop it is an older model, but if all else fails I can install Lightburn onto it. My plan was to only have Gsender on the laptop am I in error with this thought process?
Just a technical side note Since I am helping out another Disabled Veteran with sharing the CNC and Laser with him. The multi license software purchased such as Vetric Pro and Lightburn and Adobe CS6 these software are also installed onto His desktop. We each have a dedicated thumb drive for the transferring of gcode or gbrl from both Vetric and or Lightburn.
Thanks to any and all for taking the time to read my novella and respond. Jack.
While you may find that the gSender and the Vectric software will run a laser toolpath, you may also find that LightBurn is a choice that will be good in the long term. It is relatively easy to set up, learn and use.
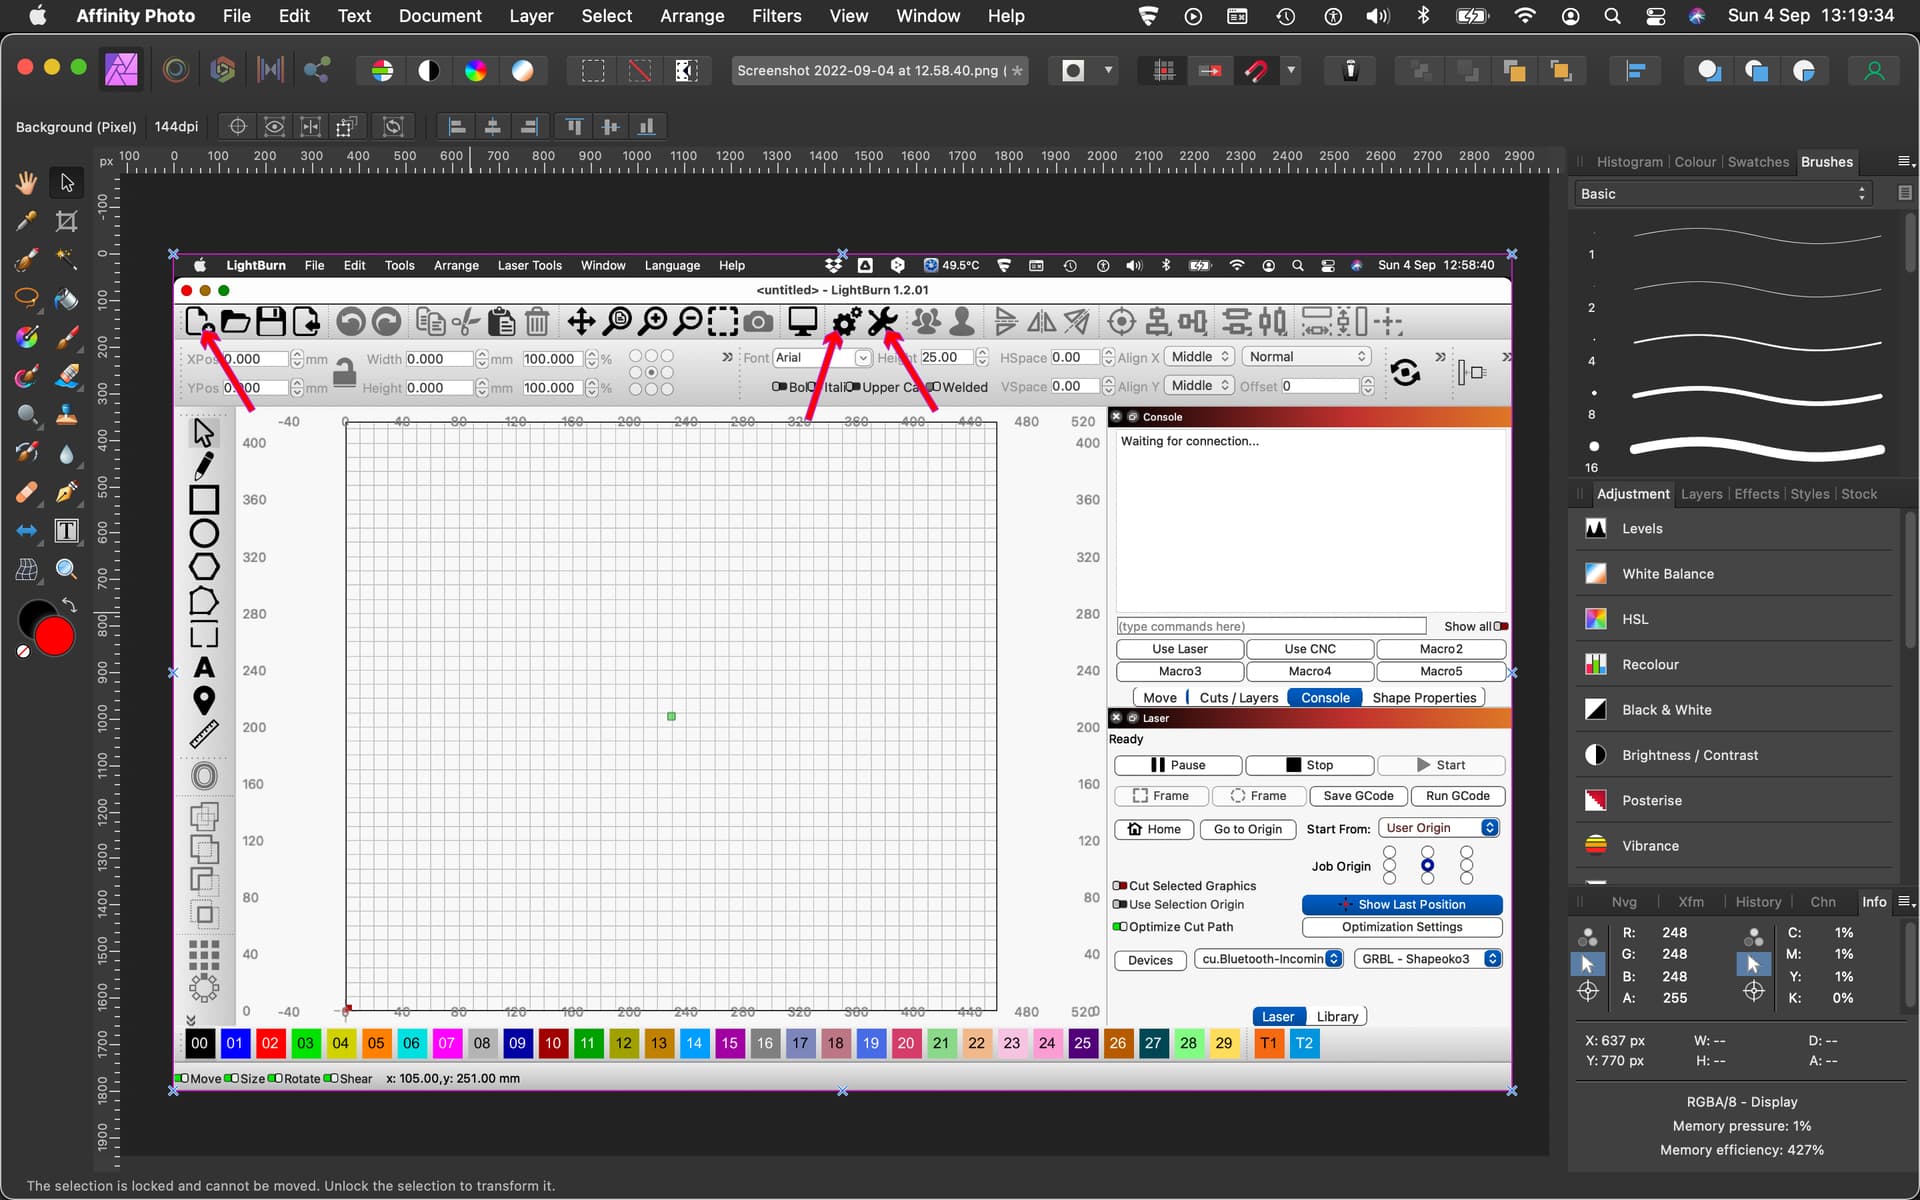
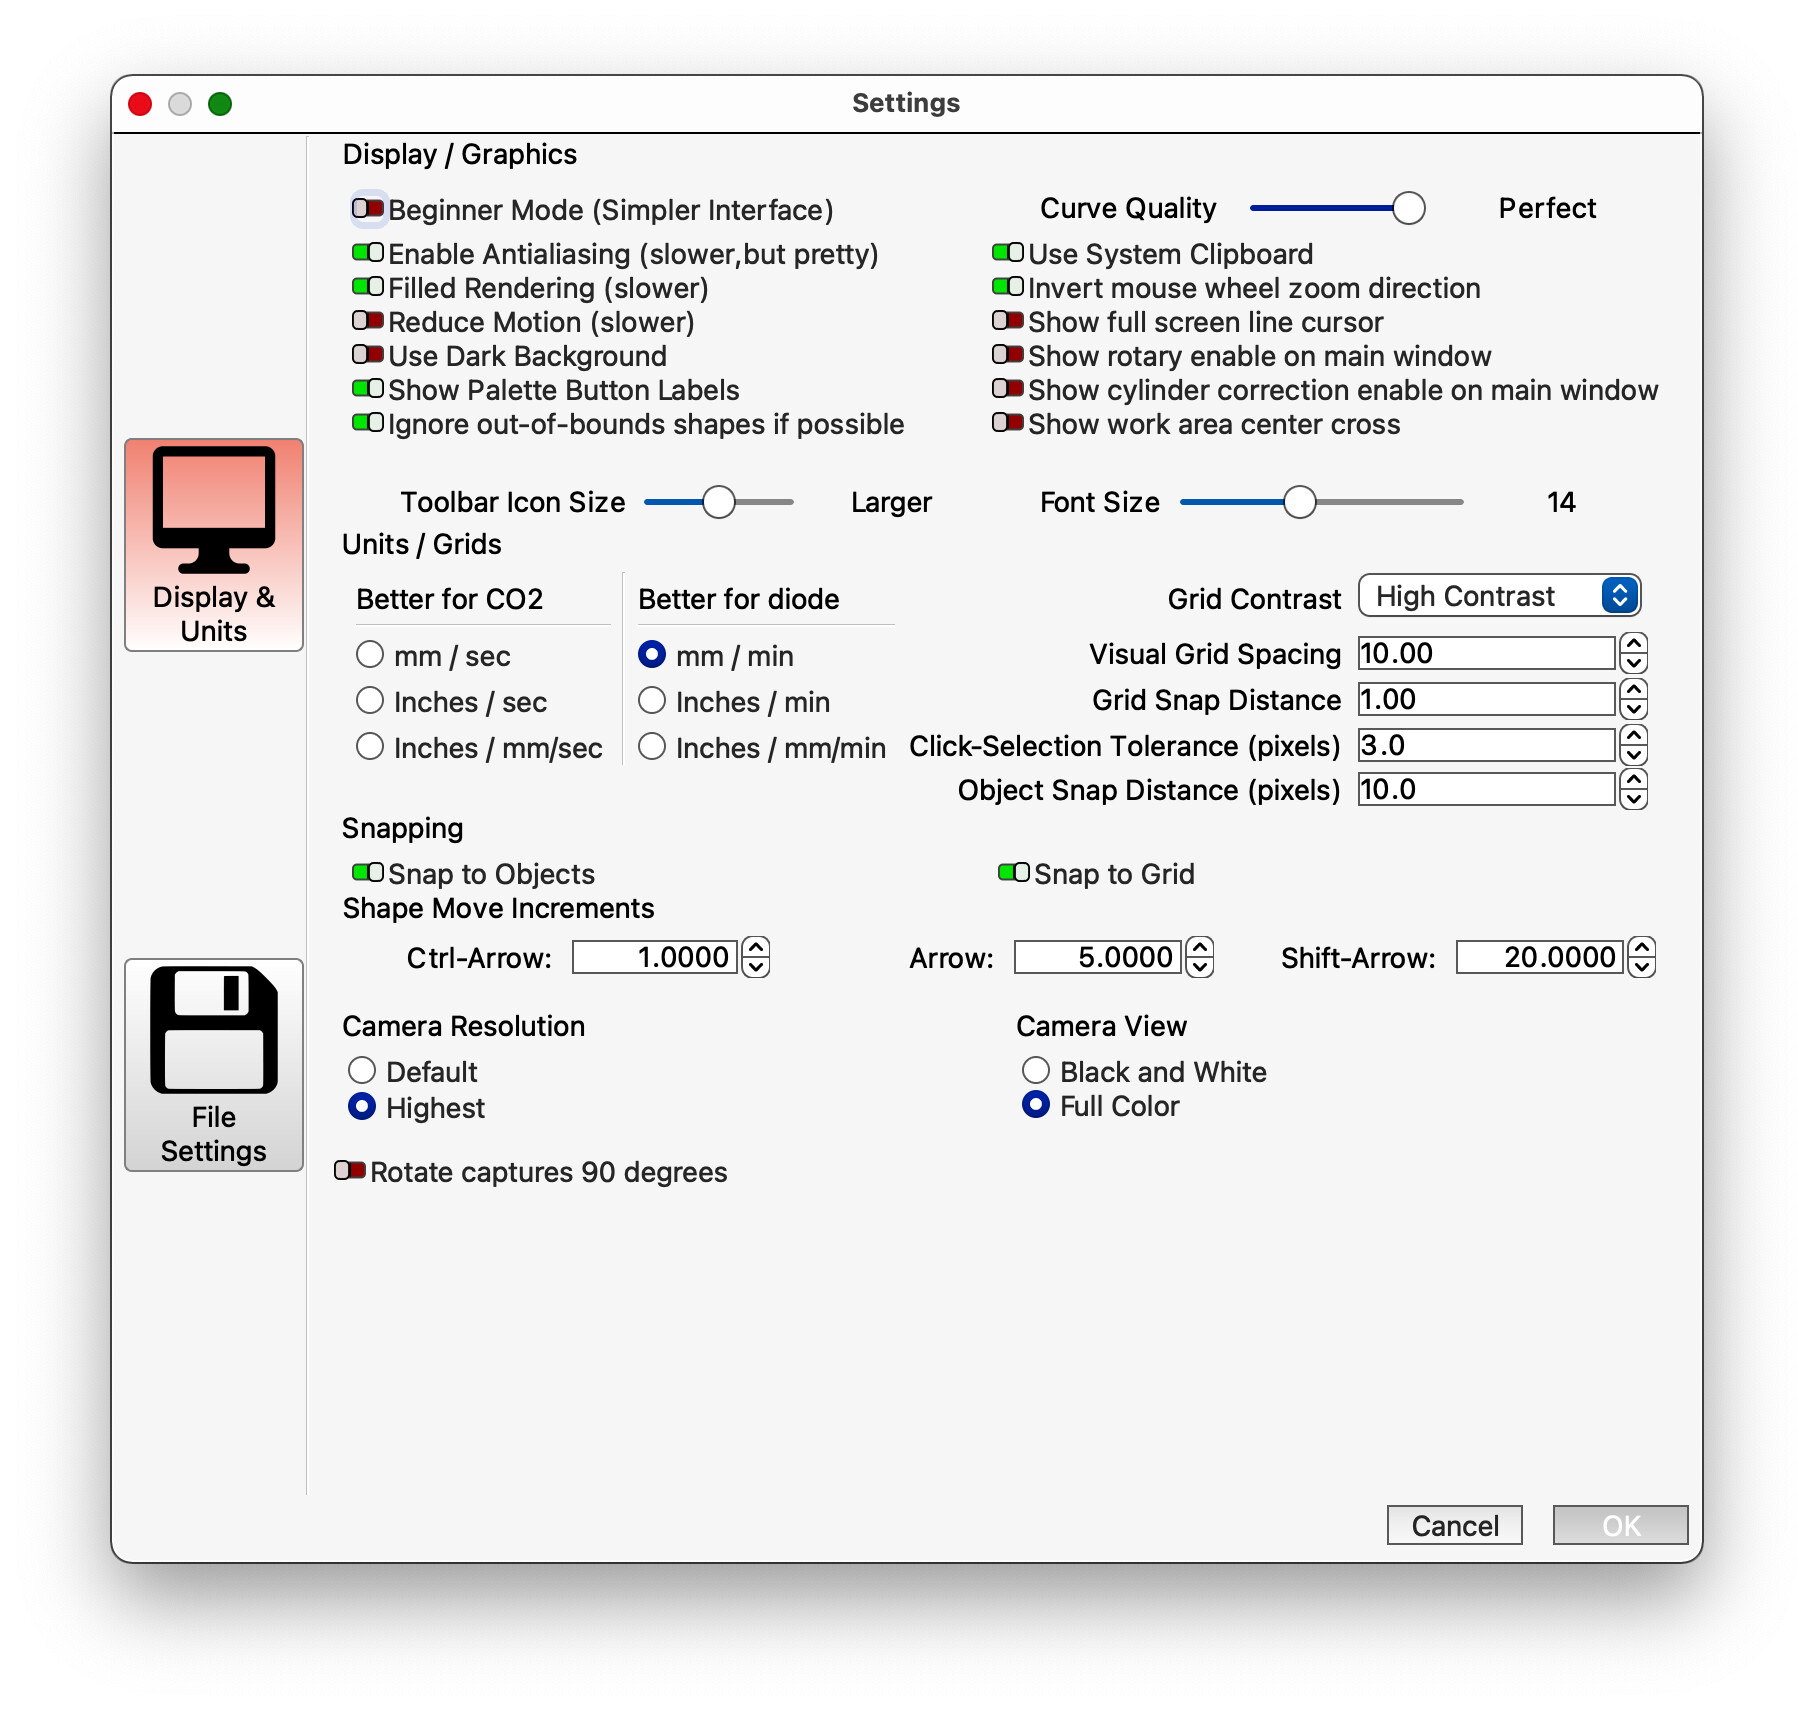
The initial settings refer to the CNC machine work envelope… the size (in cartesian coordinates) that is available to address after you have fitted the laser head to the machine. There are a couple of places to make settings.
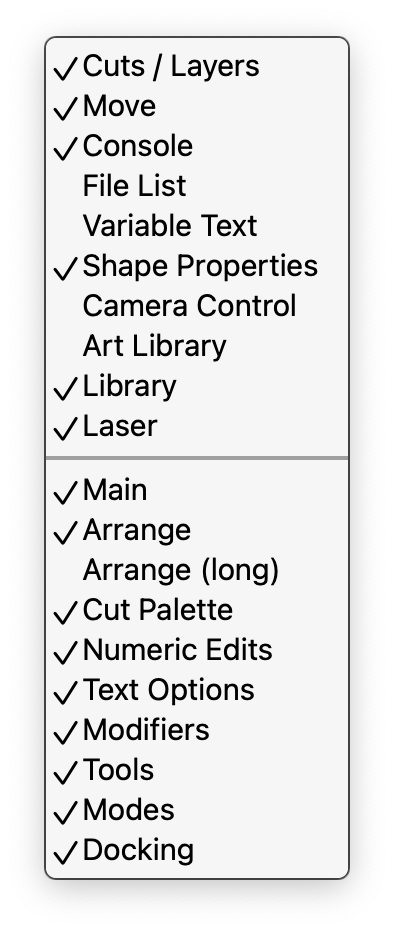
setting adjustments: The red arrows denote the places to change settings. The left hand arrow on the document and plus icon requires a right click to reveal the settings you can make for tabs. The selections become tabs on the working section of the screen on the right hand side.
Other places to make settings are the tabs on the working area. The move tab shows this image and you can see origin and where you start your cut. It also shows bluetooth but I always use a USB connection and connect the computer directly to the CNC machine. I don’t know how Lightburn will work across an ethernet connection.
I found it necessary to use a small macro to run the Laser in the correct directions for X & Y, after using the CNC machine. I reverse the macro to re-use the CNC machine.