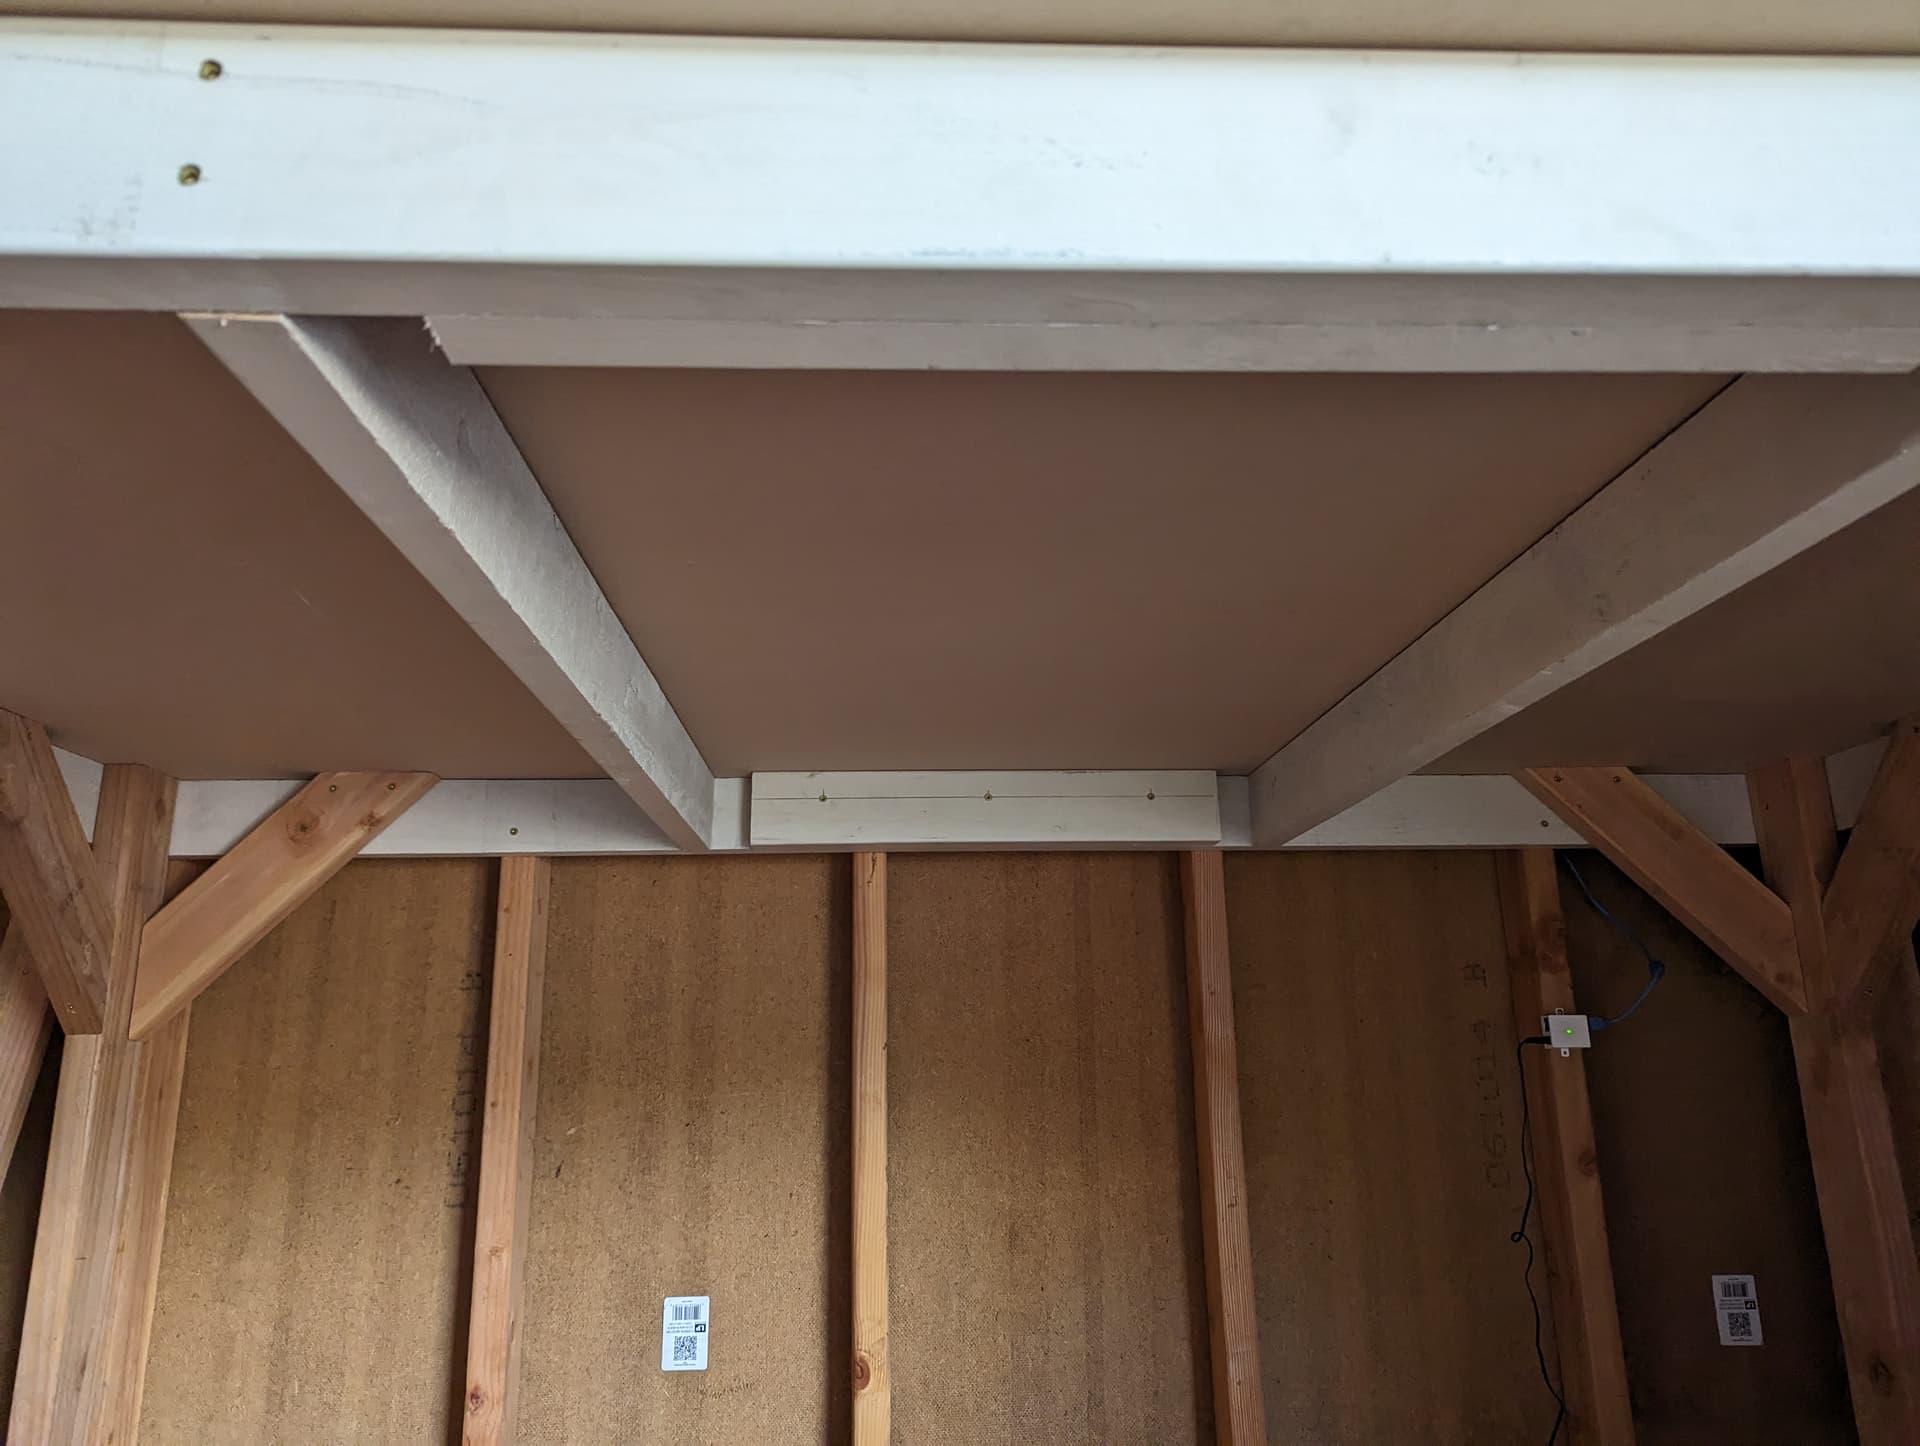
Built my table now waiting for my machine to arrive.


Nice work so far!
It looks like you screwed the table to the wall. When I first got my LongMill my table was setup the same way, screwed to the wall in a basement that’s only partially finished. I don’t know what’s on the other side of the wall but in my case it was the stairs that go up to the first floor. When I ran my machine it was very loud throughout the whole house because the wall and staircase were like an echo chamber or something, magnifying the noise.
I unscrewed it from the wall and it was much quieter. At least you put legs on the back so you can do the same if it’s loud.
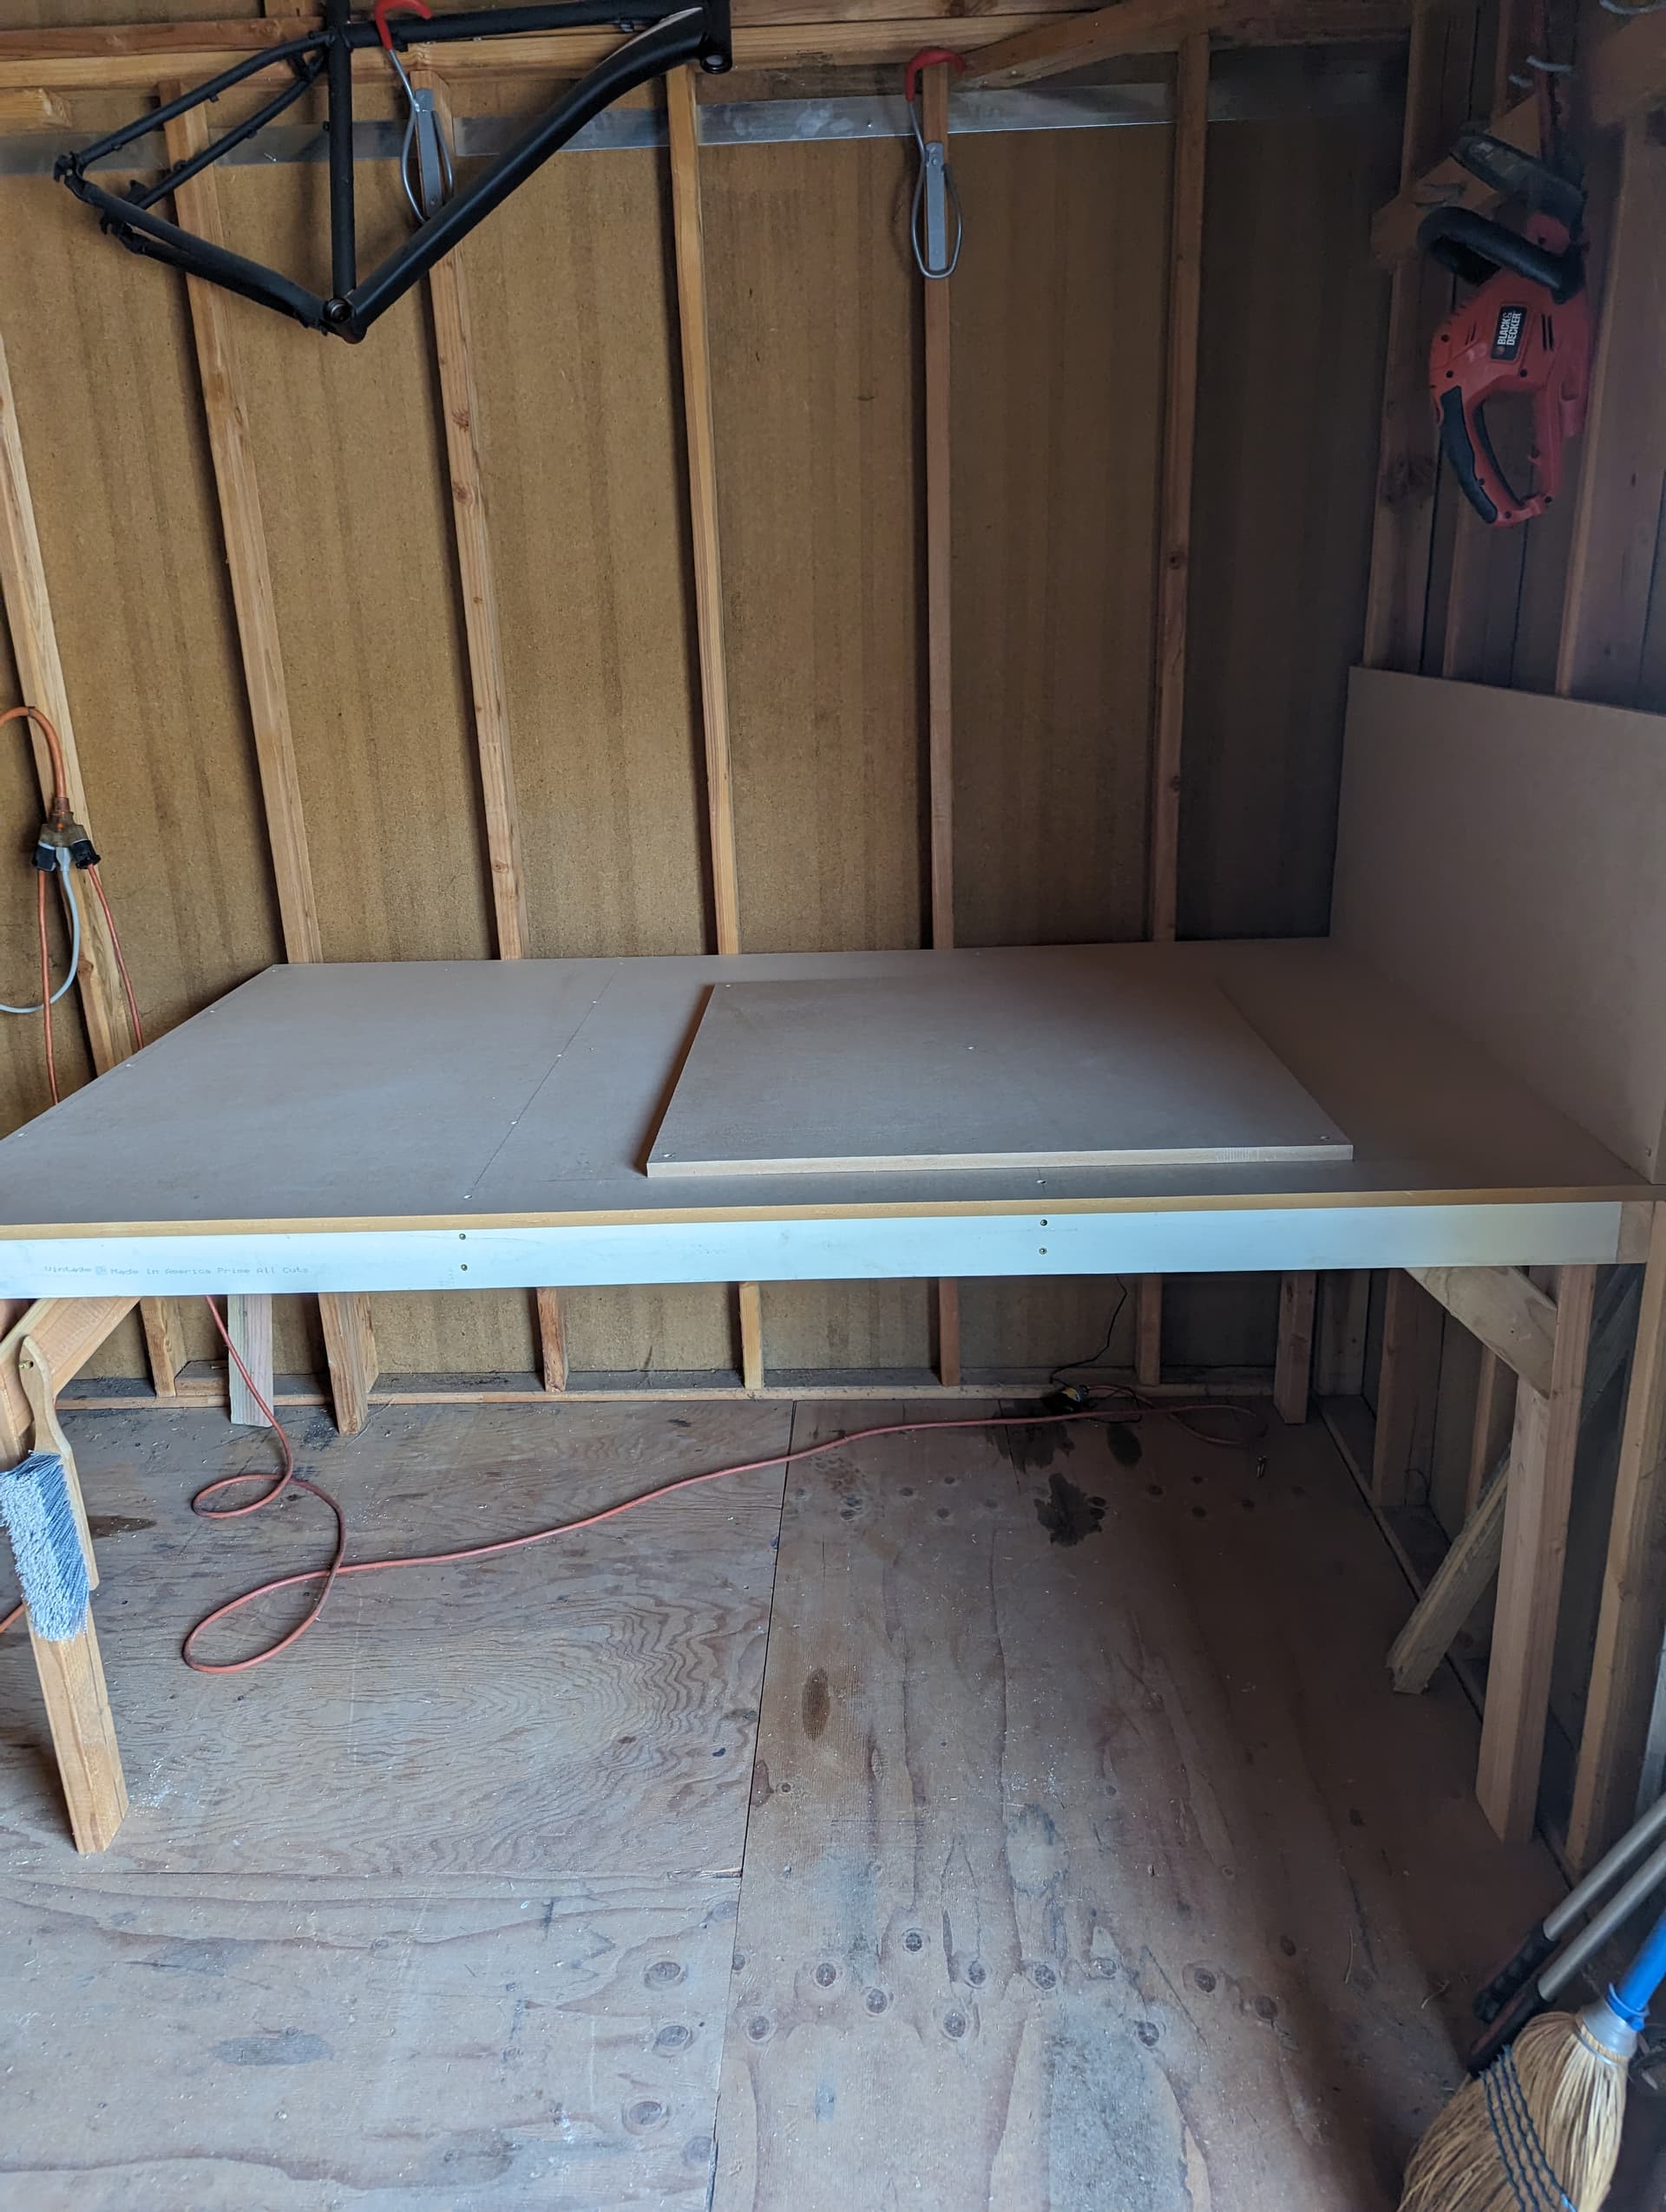
It’s not screwed to the wall, free floating in a 12x20 shed. I will need to put some windows otherwise it will be loud inside but we will see. Table is layed out per Sienci dimensions everything is square within .050 I do large CNC machine installation for a living so this is fun for me. Just playing the waiting game now. Had a Genmitsu 4030 but wore it out in a few weeks. Can’t wait to get running the Longmill.
1 Like
Okay, my bad, I thought from the underside photo that it was screwed to the wall and wanted to give you a heads up just in case.
The loudest part of my setup is the vacuum so you should be okay. I think you’ll find the LongMill a nicer machine. My step dad has a Genmitsu 4030 and there is no way I’d trade. ![]()
During assembly it was screwed to the wall since I was a 1 man band during the process. Needed that mysterious 3rd hand👍. I’m excited to get started!
1 Like
I had the same thoughts the well. Although not screwed to the wall you have a large flat surface that would act like a drum head and act up with harmonics some what , regardless if screwed to the wall or not - some sound proofing on the underside may be suggested.
1 Like
I’ll wait and see how much the shed vibrates. Floor is 1.250 thick 2x8 floor joist every 12 in and sitting on 12 concrete pads not bricks. Doubt I will have any extra noise minus the reverb inside the wooden box ![]()
I’m new to CNC but have been a hobbyist carpenter for several years . I understand the importance of having machinery square and level, I’m just not sure the best way to go about it, particularly for mounting my 48x30. My garage floor has it’s uneven spots here and there and while I can build a table out of 2x4’s just as easily as anyone else, I always seem to be off a degree in this direction and another degree in the opposite direction, which leads to anger, anger leads to fear, fear leads to the dark side. What are the best ways to ensure that I’m built square and level OR how to adjust if there is a slight tilt to the table once I have her set up? I’m only asking on this thread because your setup looks great, rip-roaring, and ready to go before the machine has even arrived. I’m jealous, wish I had the knowledge and ability to build something out like what you have without needing the Fisher-Price Instruction manual. Any advice or feedback is appreciated, again, great looking setup.
-Tanner
Remember flat is more important than level, level is nice but flat is necessary. If your floor is uneven then cut your legs to match, they do not all have to be the same length. Nice thing about making the table with the legs on the inside of the frame is you can adjust up/down to get things flat. I used facia/trim 2x4’s for the frame they are dimensionally sq. and wont warp, finger jointed but still strong enough for a 100lb machine to sit on. I used left over pieces for the stiffeners in the center on the long side, they cost about 4x as much as a regular 2x4 but worth it, buy once cry once. Build the frame flat, square is important but not as much as flat. The machine needs to be square, but it could be turned at a 45° on the table which doesn’t matter. Go to your local lumber store not Home Depot, they should have the pre primed facia boards. Any other questions let me know!
“Nice thing about making the table with the legs on the inside of the frame is you can adjust up/down to get things flat.”
My inexperience is about to come glowing through on this next question. I looked over your photos and followed every part of your explanation into the build, but how are you adjusting the legs? Is it before, during, after the build? Clearly they are screwed into the frame, but what do you do to adjust up and down when making it level? Could I screw threaded levels into the bottom in case I have to move my table around in my garage?
I’m sure you have an easier, simpler answer than anything I just threw out there.
Thanks again,
Tanner
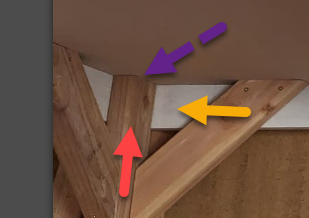
Lift up on the white part to get things flat/level before screwing thru the frame into the leg. you may end up with a gap (purple) between the table leg and the MDF but that is fine. - Lift up (yellow)- use a quick clamp on leg (red) during positioning so you can adjust, then screw. Then add your braces for leg support I pre drill all holes before screwing, reduces splitting on the 2x4’s. Or yes you could put adjustable feet on your legs, a 3/8 t-nut and bolt work great, or 1/2 in if your using a 4x4 for the legs.

2 Likes
Thank you very much. I believe I might be building out a beginners replica of your table.
What is your H x W x D (roughly) for this table?
78L x 49W x 36 tall MDF comes 49 in wide if you have room go full 49x96 which I should have done. ![]() more room for computer and control boxes
more room for computer and control boxes
I do have the space, that is exactly what I needed to know. Thank you.
Might as well ask since I’m replicating the build, what does your wastboard setup look like and how do you clamp down your pieces? Do you use the 2 fences of MDF to square up a “true” zero you can always bounce back to in that bottom left corner?
Do you have detailed plans for this table. want to build it before I purchase the MK2 48x30.
Want to build this weekend and order it on monday.