My recent installation of gSender was a good decision. My standard sized Shapeoko had work reasonably well for about 20 months. It had an annoying personality trait where randomly, and without any warning, the Z axis would plunge down rapidly to its fullest extent. It has happened 4 times to me and I had an open ticket at Carbide, but the issue has gone unresolved.
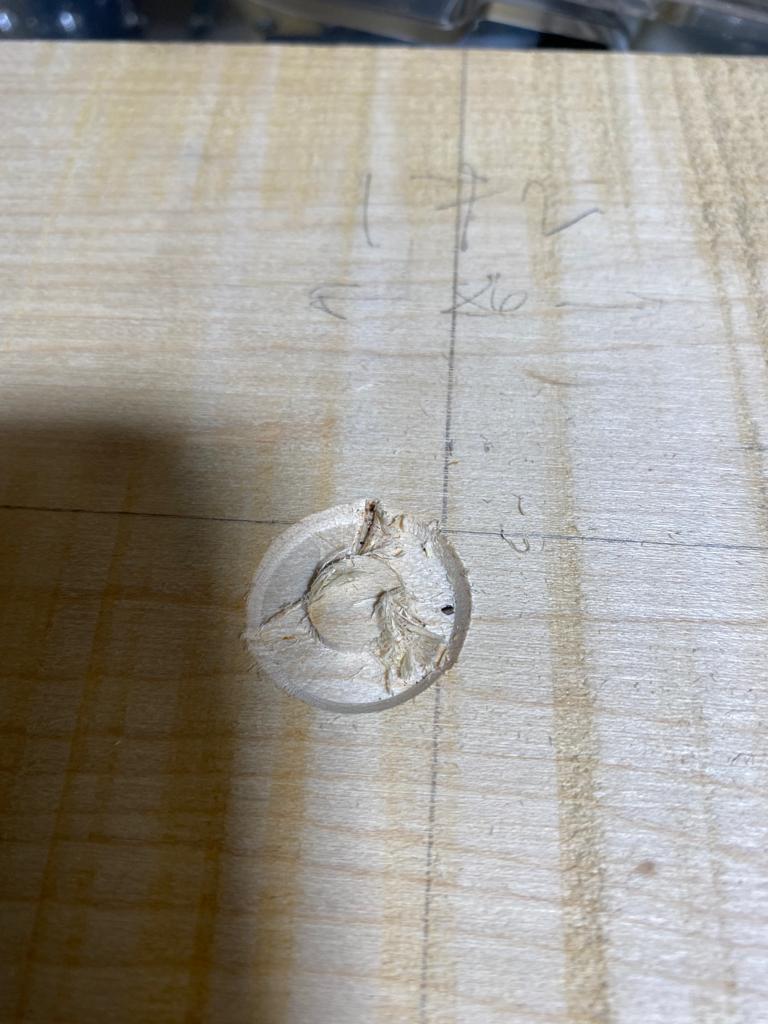
It was just prior to installing gSender, that it happened again. A violent and rapid descent of the Z axis, and the 24mm surfacing cutter, for I had intended to surface some American maple. The image demonstrates a deep gouge out of the workpiece. The surfacing cut was set to my standard 0.2mm and the cut that resulted was just over 2mm deep.
Needless to say the cutter blade stopped immediately and a couple of seconds that it took for me to get to the power and the router lost all power. It was very difficult to remove the embedded cutter and I was lucky that more damage was not done. The workpiece was replaceable, the router has not worked since the incident and I lost all confidence in Carbide Motion. There is no reasonable explanation for software to make unplanned movements where the potential for pieces of sharp tooling are revolving at up to 30,000 RPM.
Anyway, as luck would have it, I was installing gSender. I ordered a new router and another surfacing bit. This was the three flute Amana 45525 (28.58mm in diameter) cutter. I can highly recommend this Amana item. It was very sharp and made short work of the surfacing of my maple workpiece.
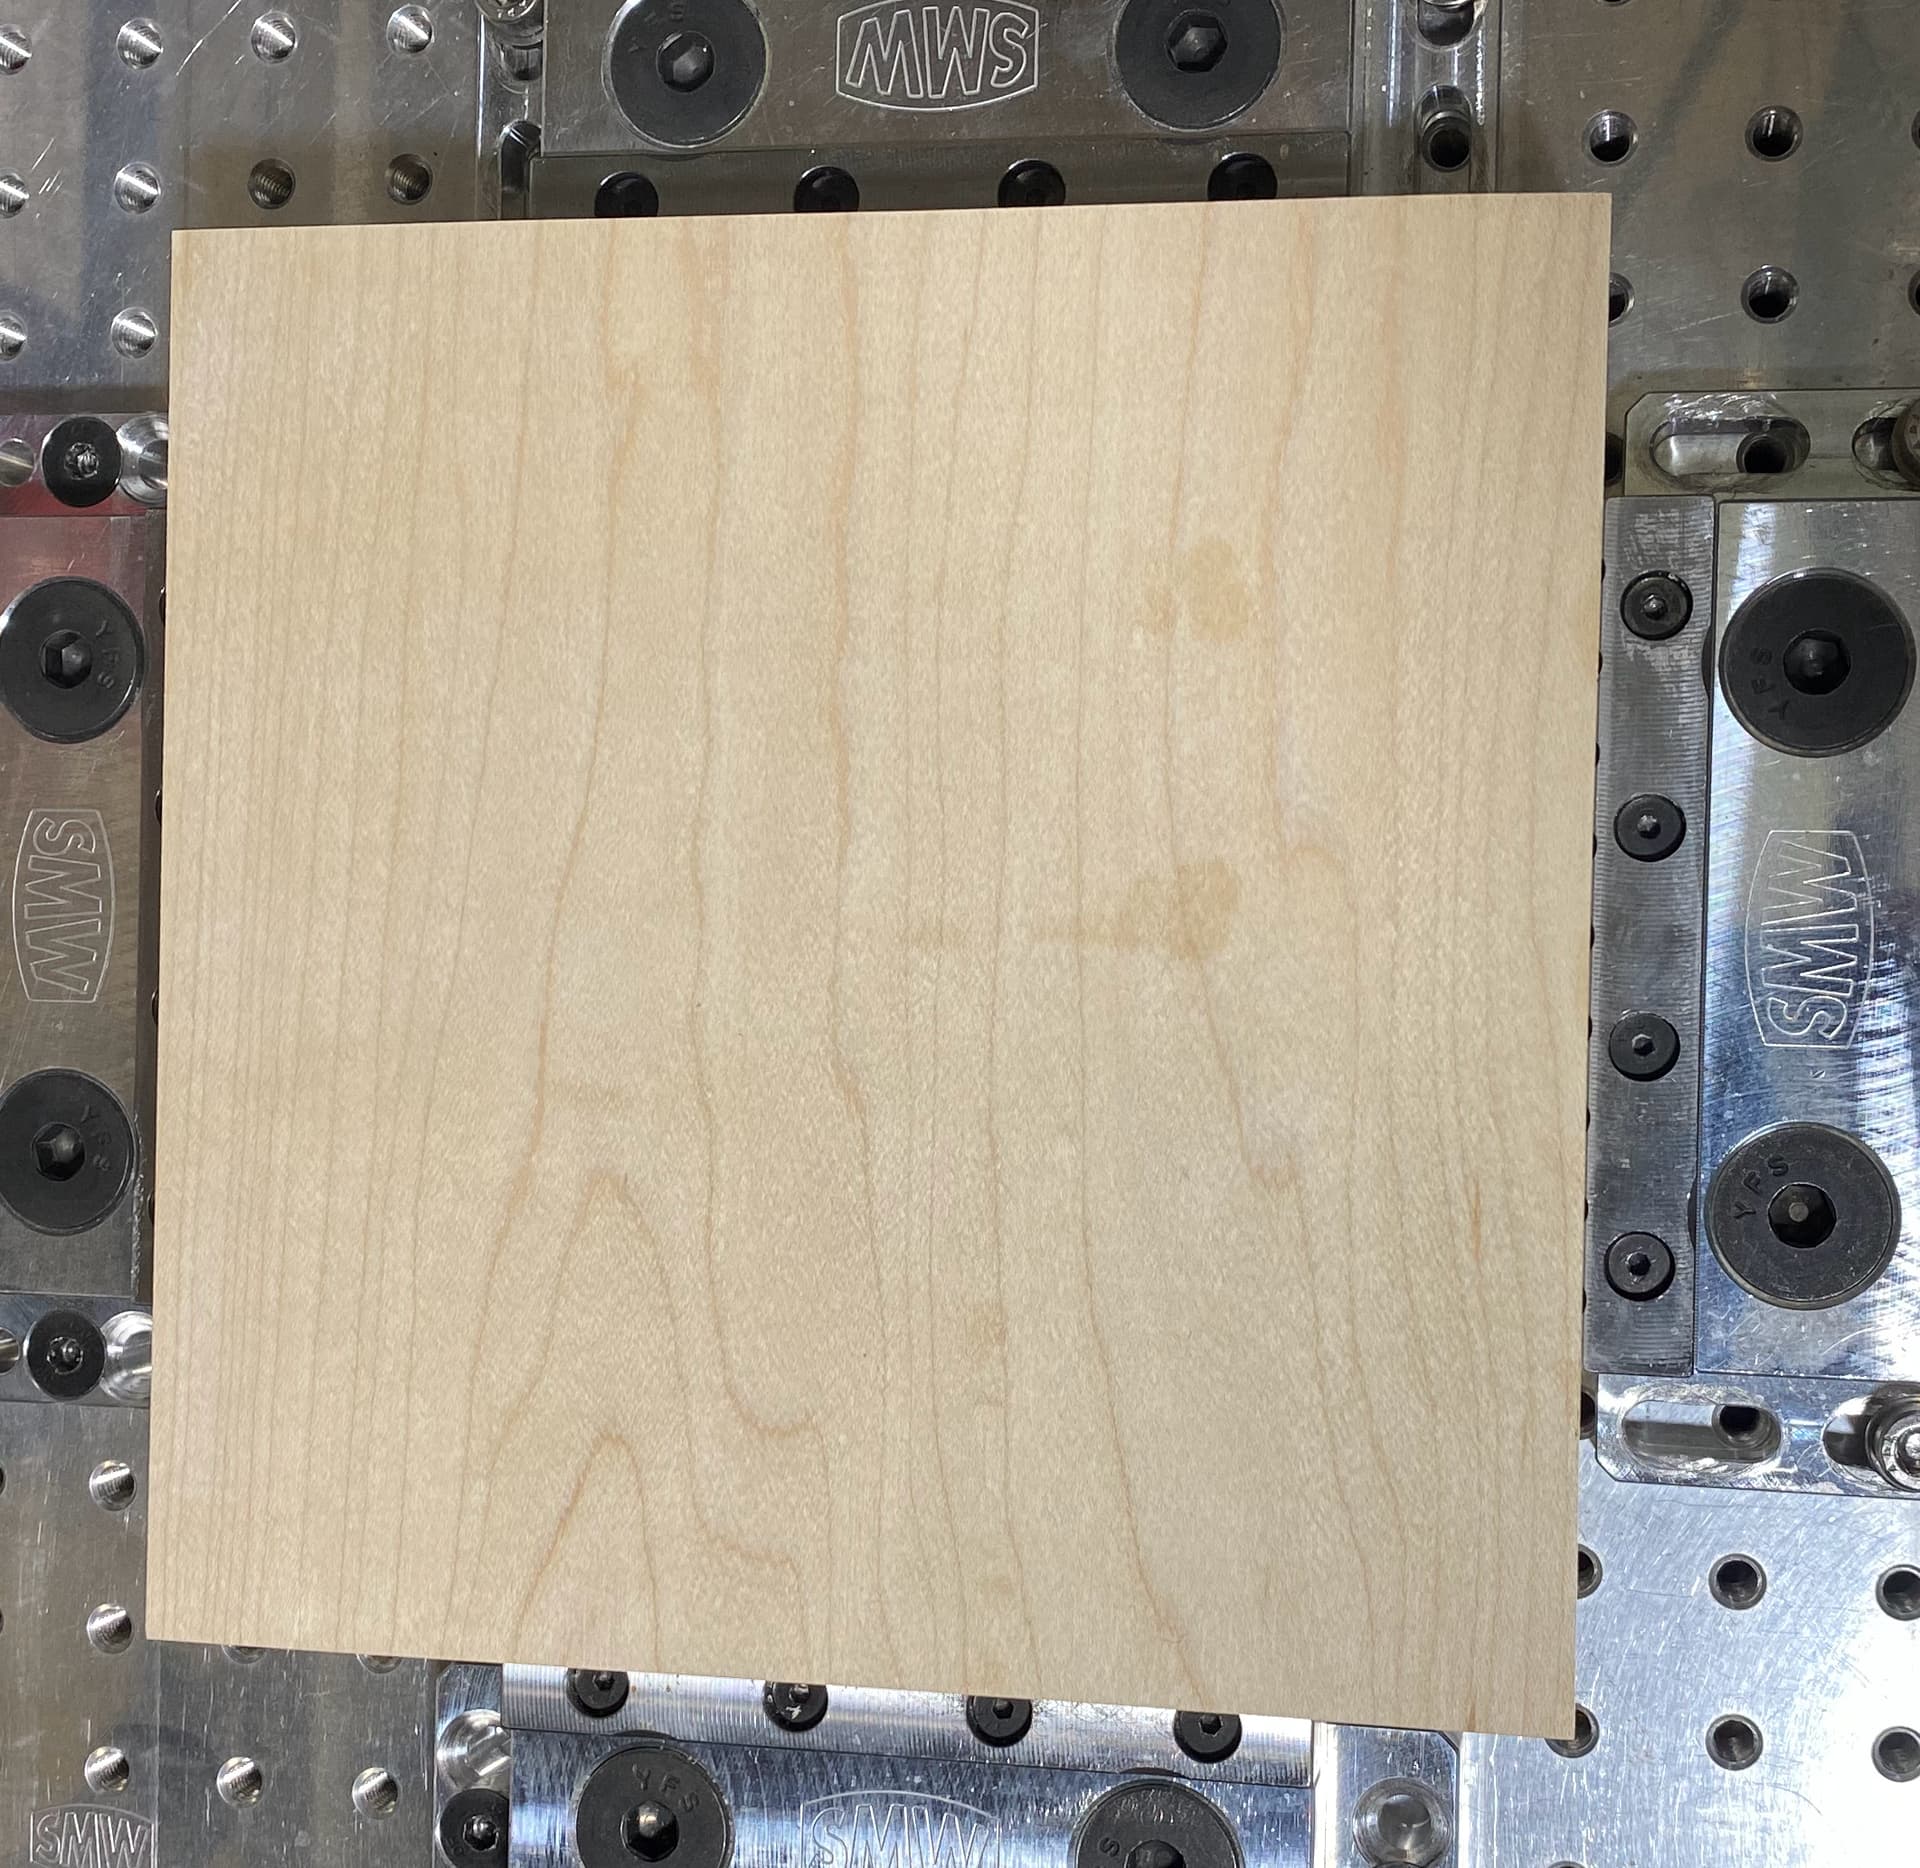
The first image shows how clean and smooth the surfacing of new wooden workpieces was.
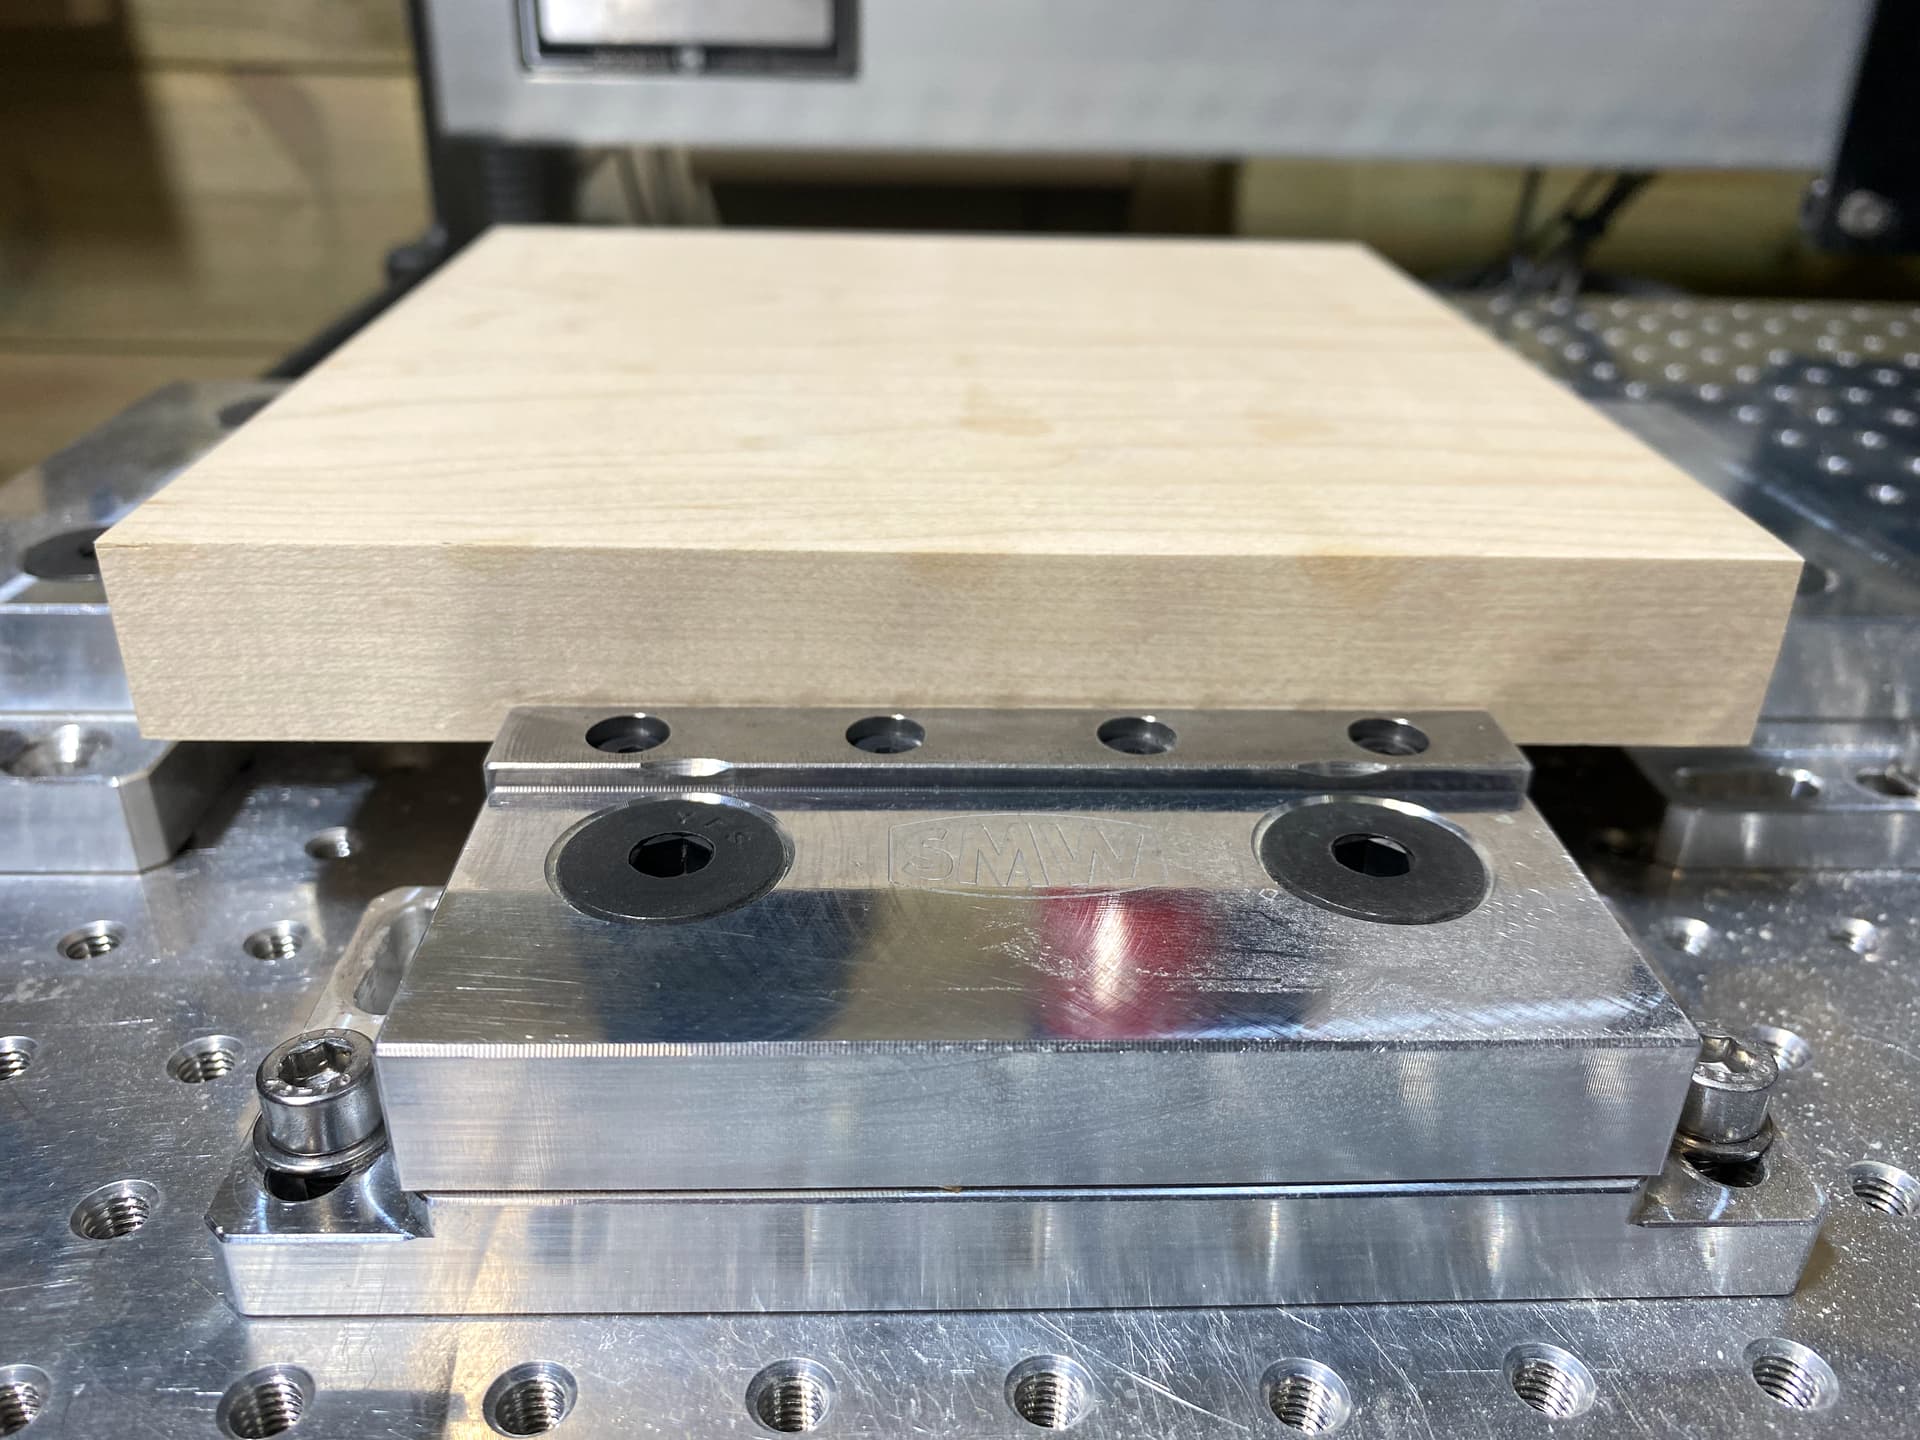
The second image shows the surfaced workpiece and you can see how the 2 modular vice pairs hold the work on a 1mm ledge that is 5mm deep.
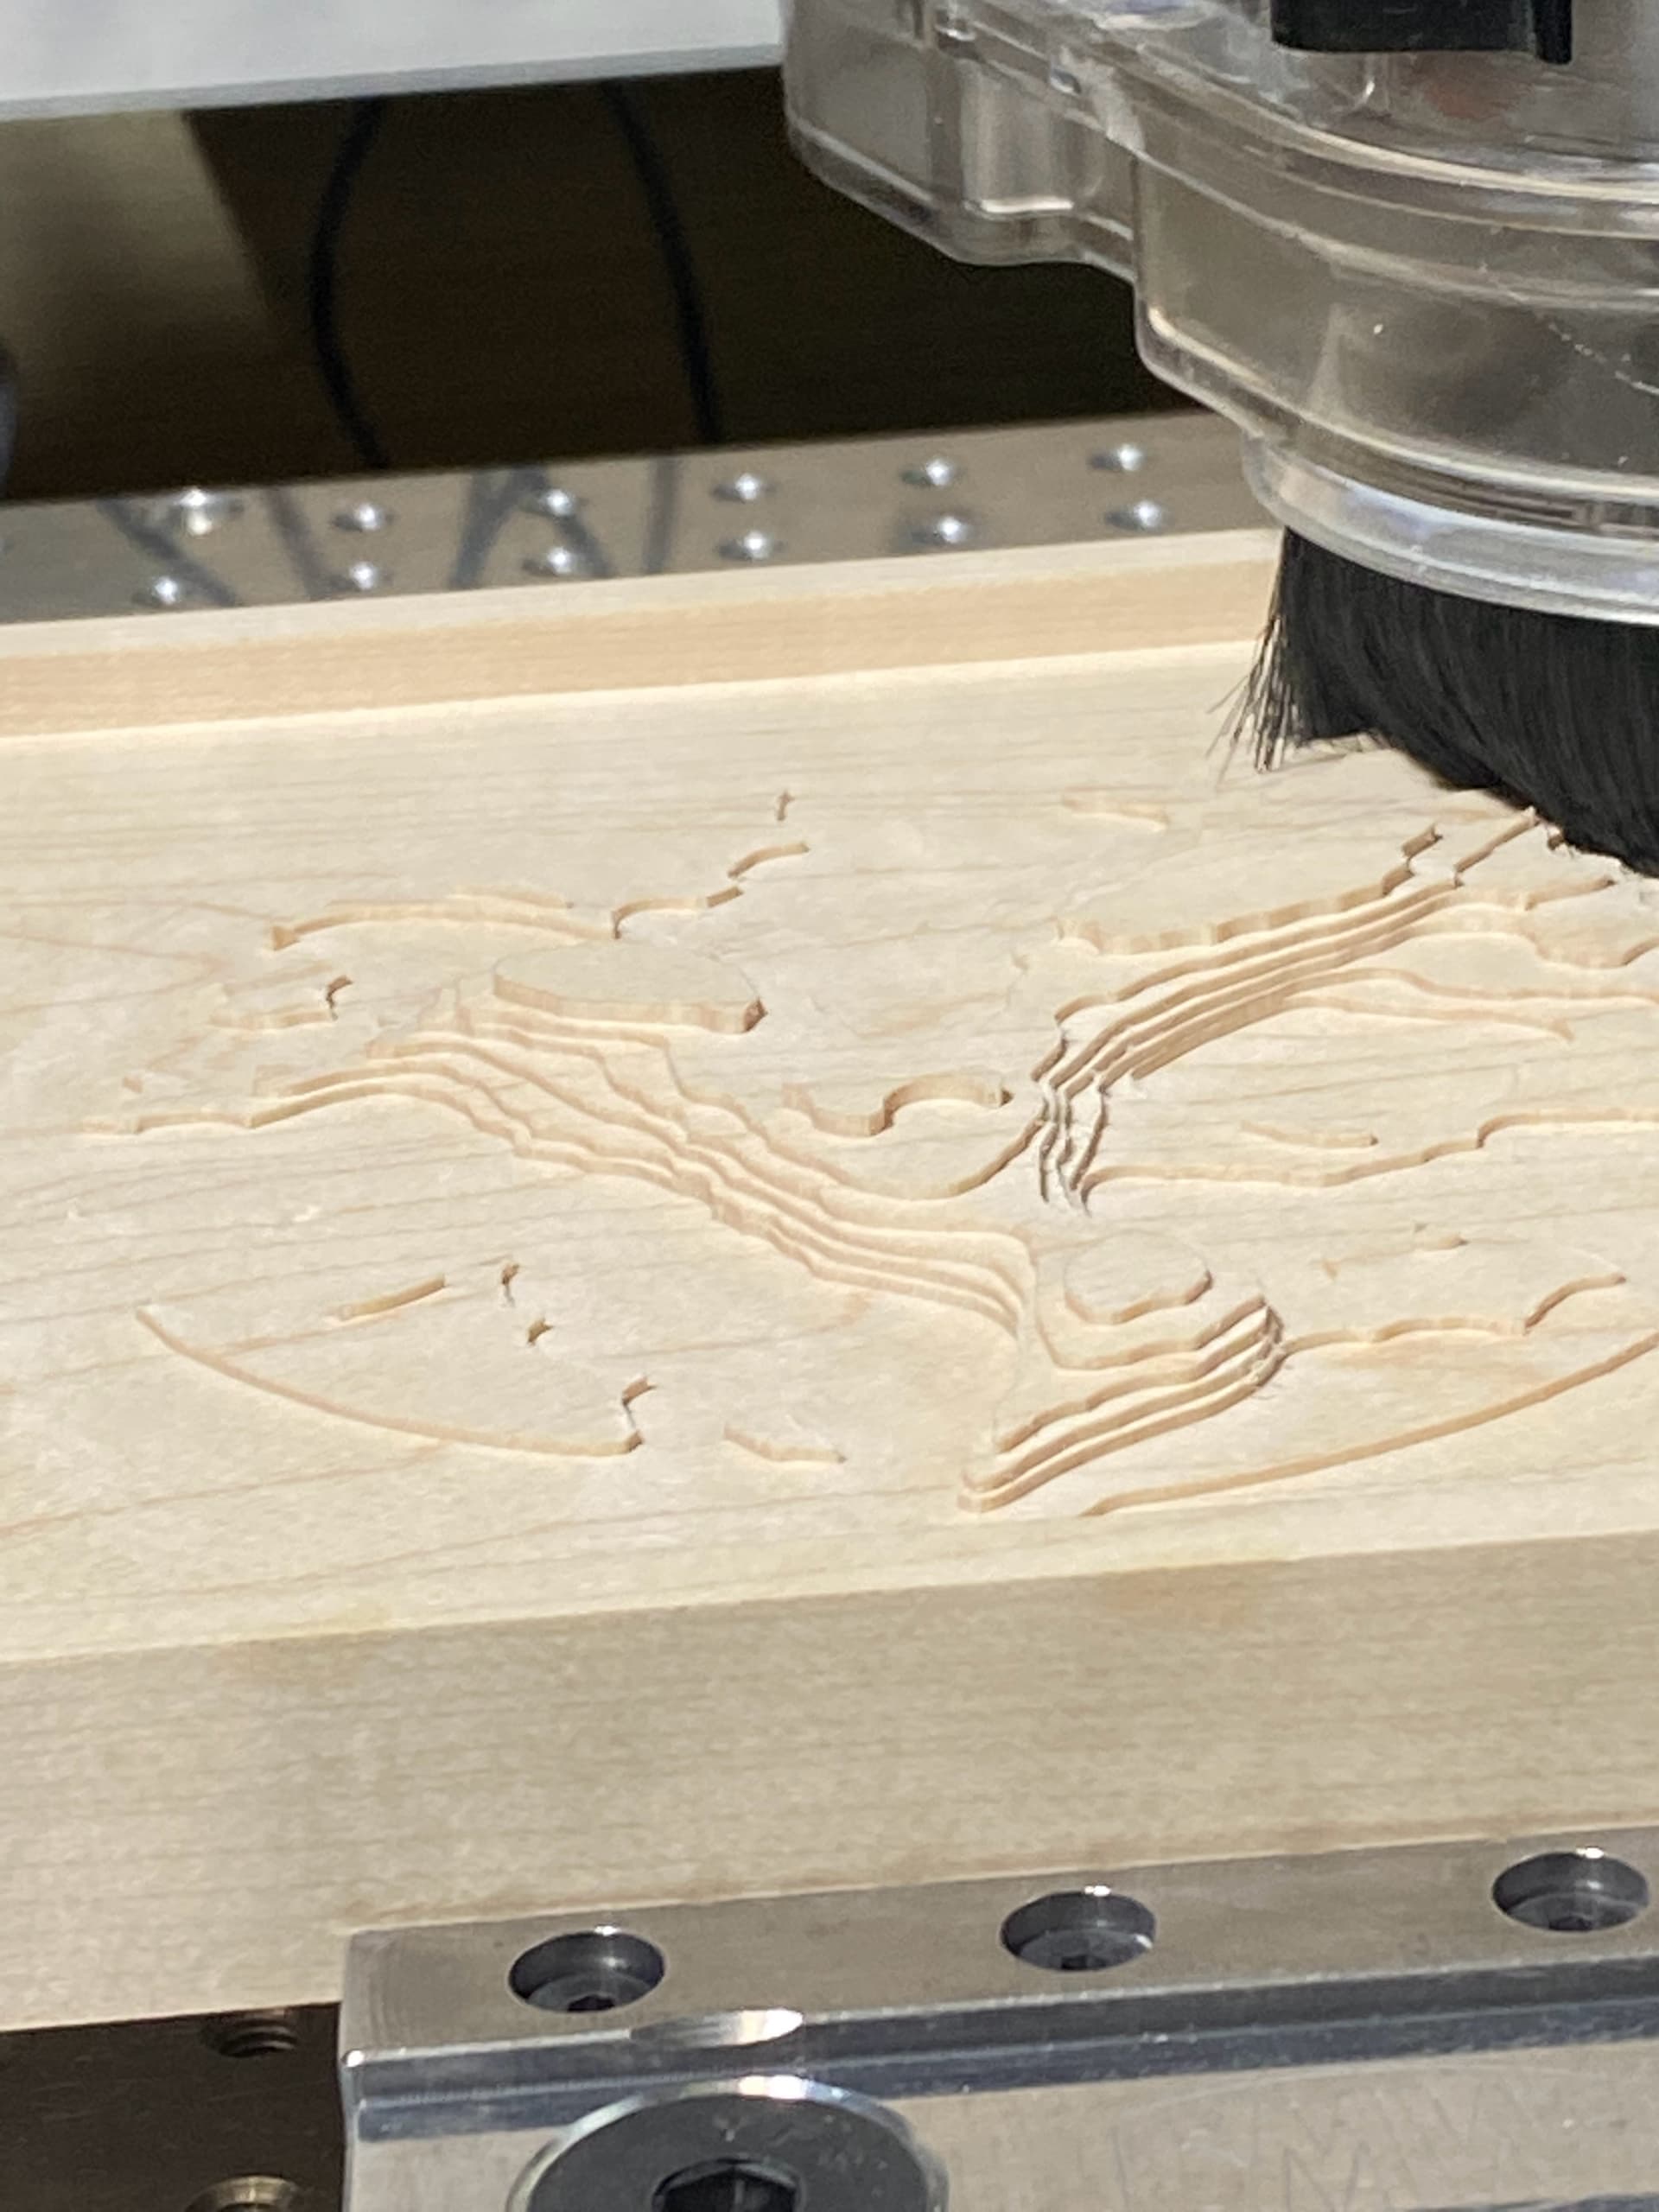
The next image is a roughing pass created to use a 1/4" twin flute straight sided cutter. The stepover was set to 30% and the stepdown was set to 1mm. To avoid scorch marks and burning the wood, I set 10,000 RPM and a feed rate of 1500mm per minute (59 ipm) and the plunge rate was a conservative 250mm per minute. The very clearly defined edges every 1mm in depth, indicate that the roughing pass was not placing the machine under any stress.
I created the toolpaths in Carveco Maker (subscription fee of $18 per month) and the software can combine toolpaths if you pick the correct post-processor for your machine. I had installed the BitSetter macro created by @NeilFerreri. The bitSetter is a tool length measurement device and it stores the measured values so that one can change the tool for a different tool. Both tools will machine the programmed material written. It is important to have a means of accurately bringing a new tool to the project. Multi-tool projects do not hold any fear after you have installed this tool. It is a truly awesome device.
The clip below shows how it works… please excuse the terrible video clip quality.
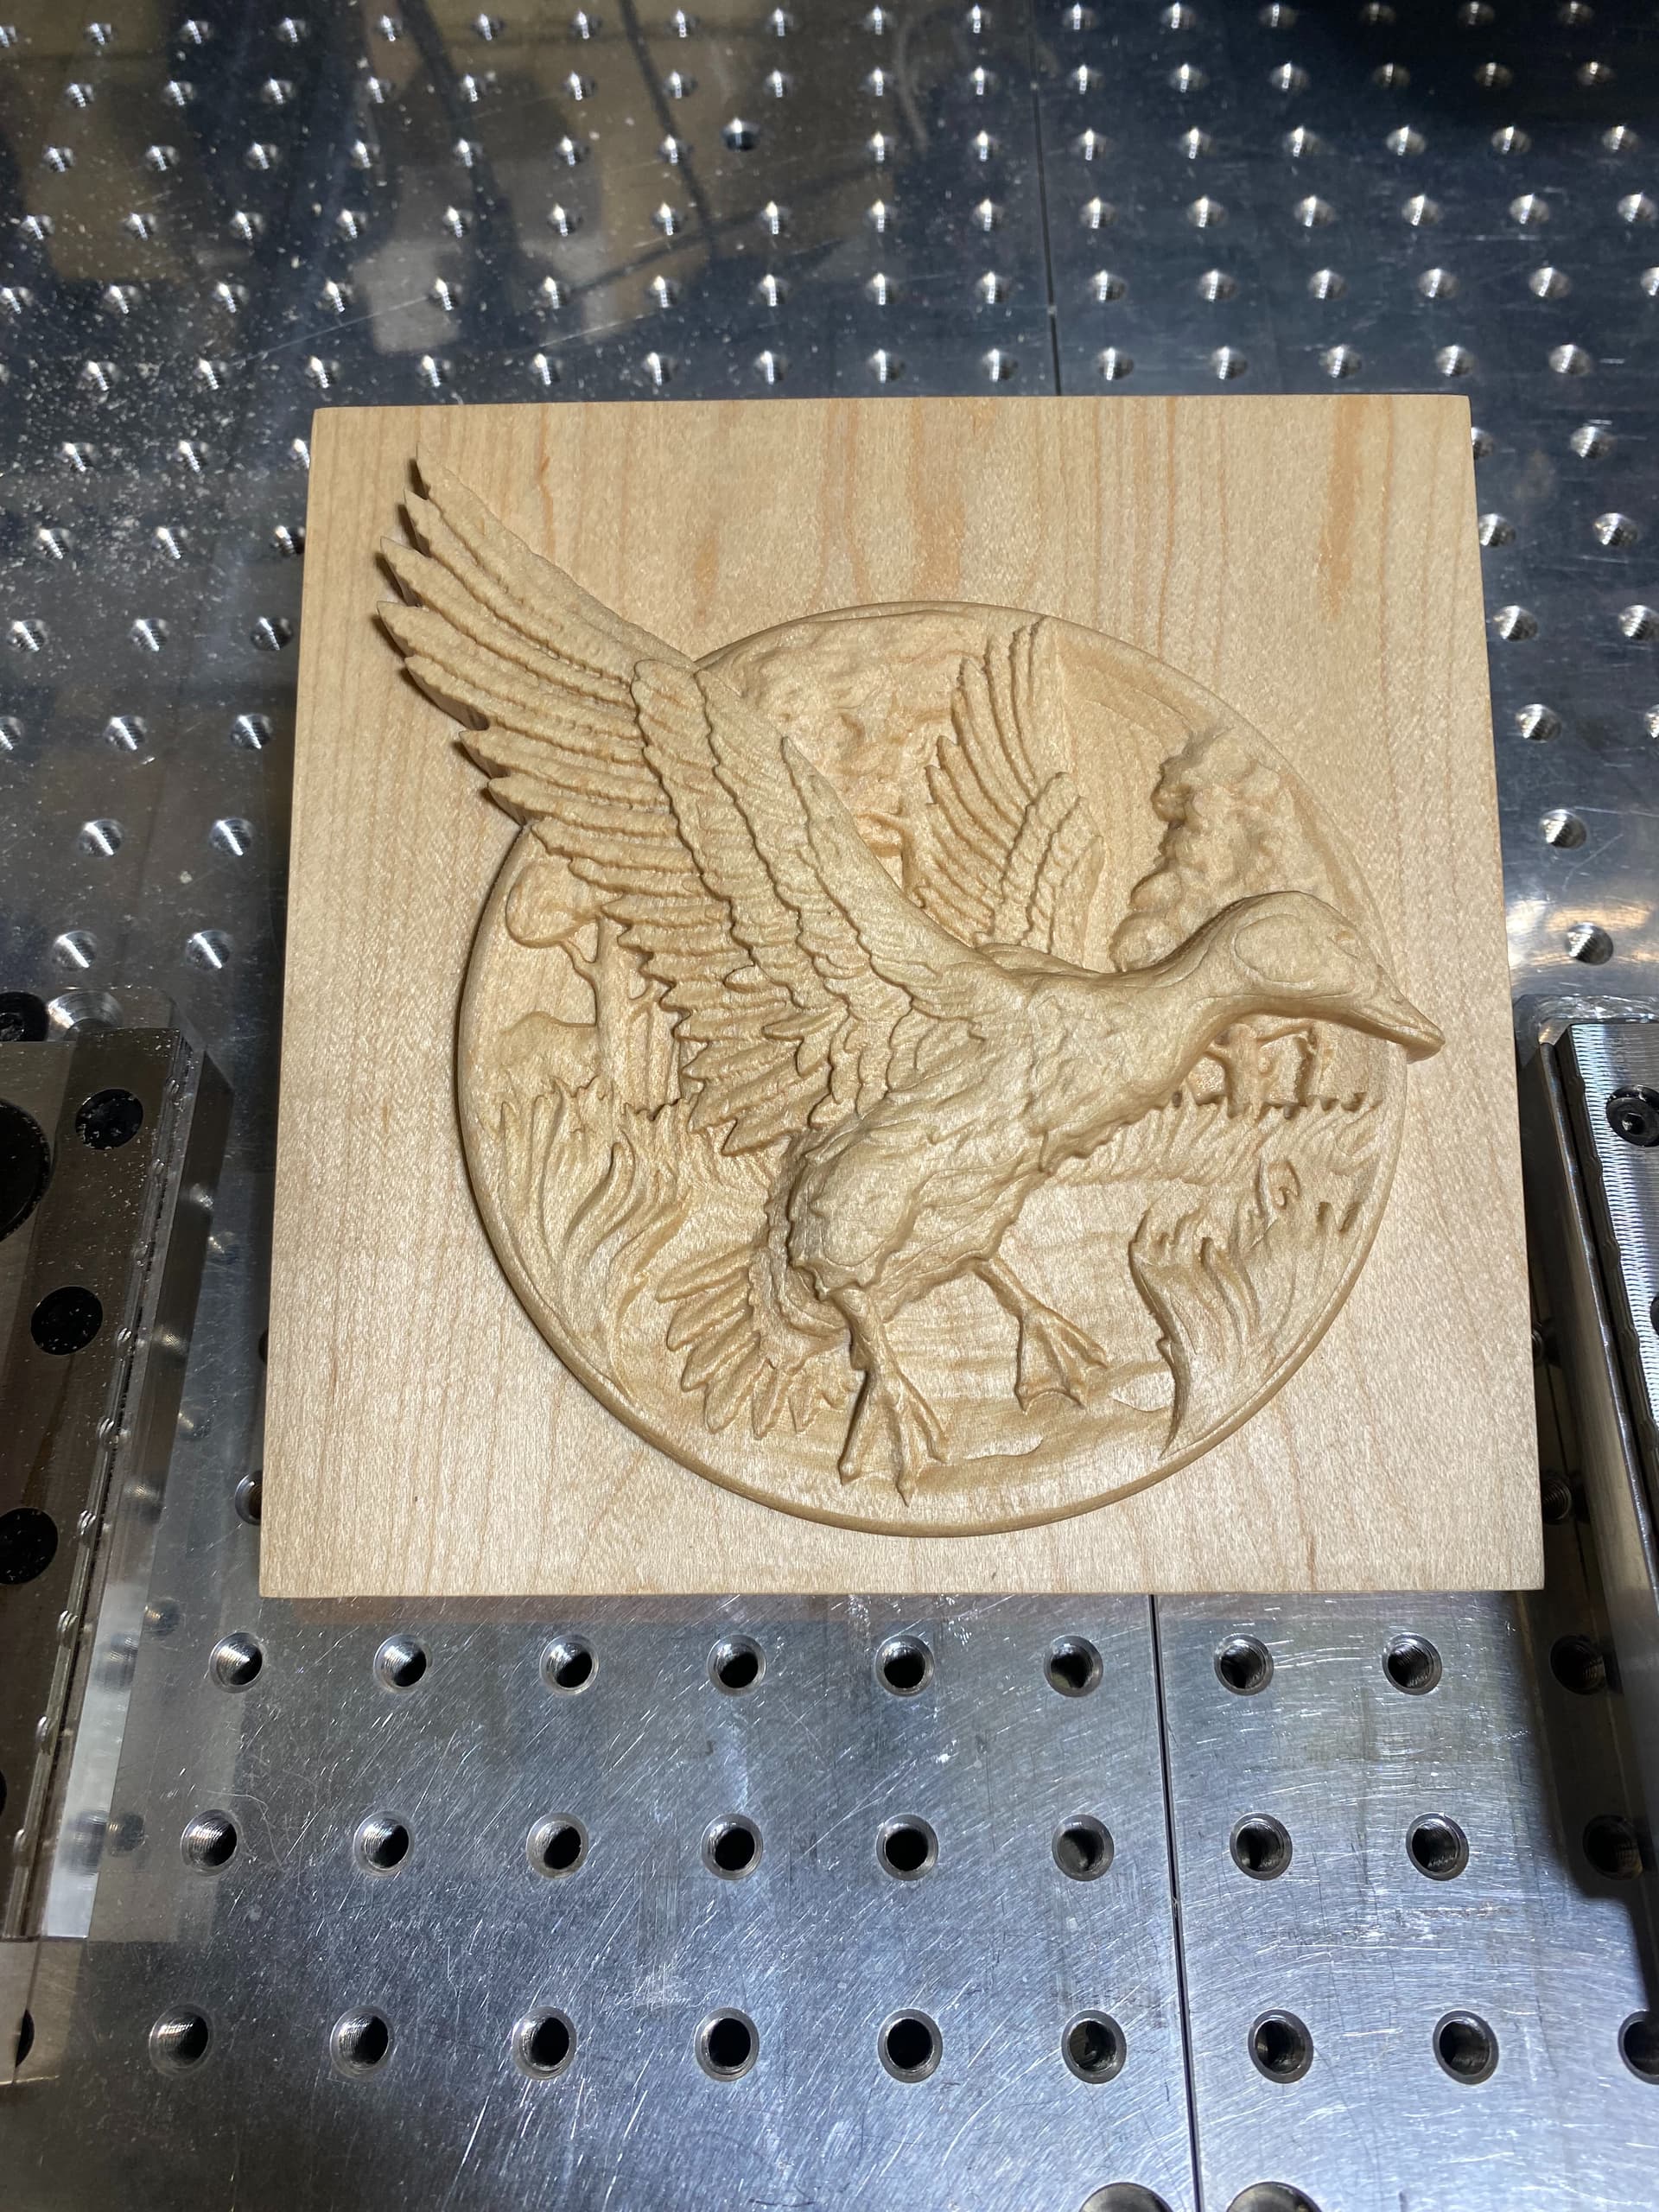
The cutter used for the finishing cut was an angled ball cutter that was .25 radius, ball ended cutter. After the final cut article was was finished with wax
The image shows the workpiece before its slight cleaning up… it is as it was when it came off the CNC machine.

This image shows how well the coating of beeswax and walnut oil take to this light slightly figured wood.
EDIT: images, video clip and text