Thank you for the finished image @Heyward43. The result is clean and must be judged a success by any definition of the word. Opposing grain direction underlines the different materials. It was worth persevering with your tests. Very nice work!
1 Like
@ApexWoodworks - I figured someone would notice the tool marks. I, unfortunately, broke both of my 1/8" end mills last week and had to use a 1/8" ball nose. I wasn’t too worried about it since that surface doesn’t normally come into play on an inlay. Thanks for pointing that out though, Marty.
@gwilki @ApexWoodworks - Marty, I respect and understand what you are talking about. Furniture design and manufacturing I’m sure has it’s own set of rules for aesthetic appearance and I also understand that. However, to me and a lot of others, CNC design and manufacturing is a different form of art. It lends itself to trying different techniques and procedures to minimize production and appearance problems. To me it’s not here’s a pattern and everyone has to do it this way. It’s more of a lets watch a bunch of videos and see what appeals to me and lets me do it my way. It may not be perfect but it works. I’ve watched a lot of youtube videos and thought “wow, there’s an easier way to do that” and sometimes there is, sometimes there isn’t. I took Grant’s comments for information, just that and nothing else. We all have our own way of doing things for mostly good reasons. Again, not knocking your comments as there are some things that do need to follow accepted techniques and procedures. Thanks for the “Information”.
I’d like to apologize to everyone here for my rather brusque comments. I would most especially like to apologize to Heyward, as it was because of me that his thread veered off on an unnecessary tangent.
I also humbly request Grant (@gwilki ) to delete my offending posts.
Sorry, everyone.
Marty from Kingston, ON, Canada
2 Likes
@ApexWoodworks Done. Thank you, Marty. No harm done as far as I am concerned. Take care. Have fun. ![]()
edit: For future reference, you can delete any post that you posted yourself.
2nd edit: Please feel free, if you like, to start a new topic about grain direction and how it pertains both to the overall strength of the piece and to its place in project design.
1 Like
@ApexWoodworks - No harm done, Marty. Like I said, considering your background, grain is one of the main considerations in design work. Thinking about the weight and strength requirements of furniture I’m sure it is very important. As you will learn in your CNC life grain is more important in appearance or aesthetics. Yes there are some areas where grain needs to be considered to provide strength as in, uh, furniture (lol). In the future of your new CNC life just keep in mind there’s more than one way to turn a grain (?). Enjoy and have fun.
1 Like
Had my LongMill for 9 months. Still have not tried an inlay yet. Nice
1 Like
@jmaree - No cause to wait. I’ve had mine for a little over 2 years and just got around to trying it. It can be frustrating but have patience. You can do it. Try the video at the top of this thread. It’s what I used and it works pretty well as you can see.
1 Like
@Heyward43 looks great. I usually rotate the grain 90 also.
Have you tried the “Tapered Inlay Gadget” https://forum.vectric.com/viewtopic.php?f=51&t=38767&start=15
Worked great with the correct air gap dimension…
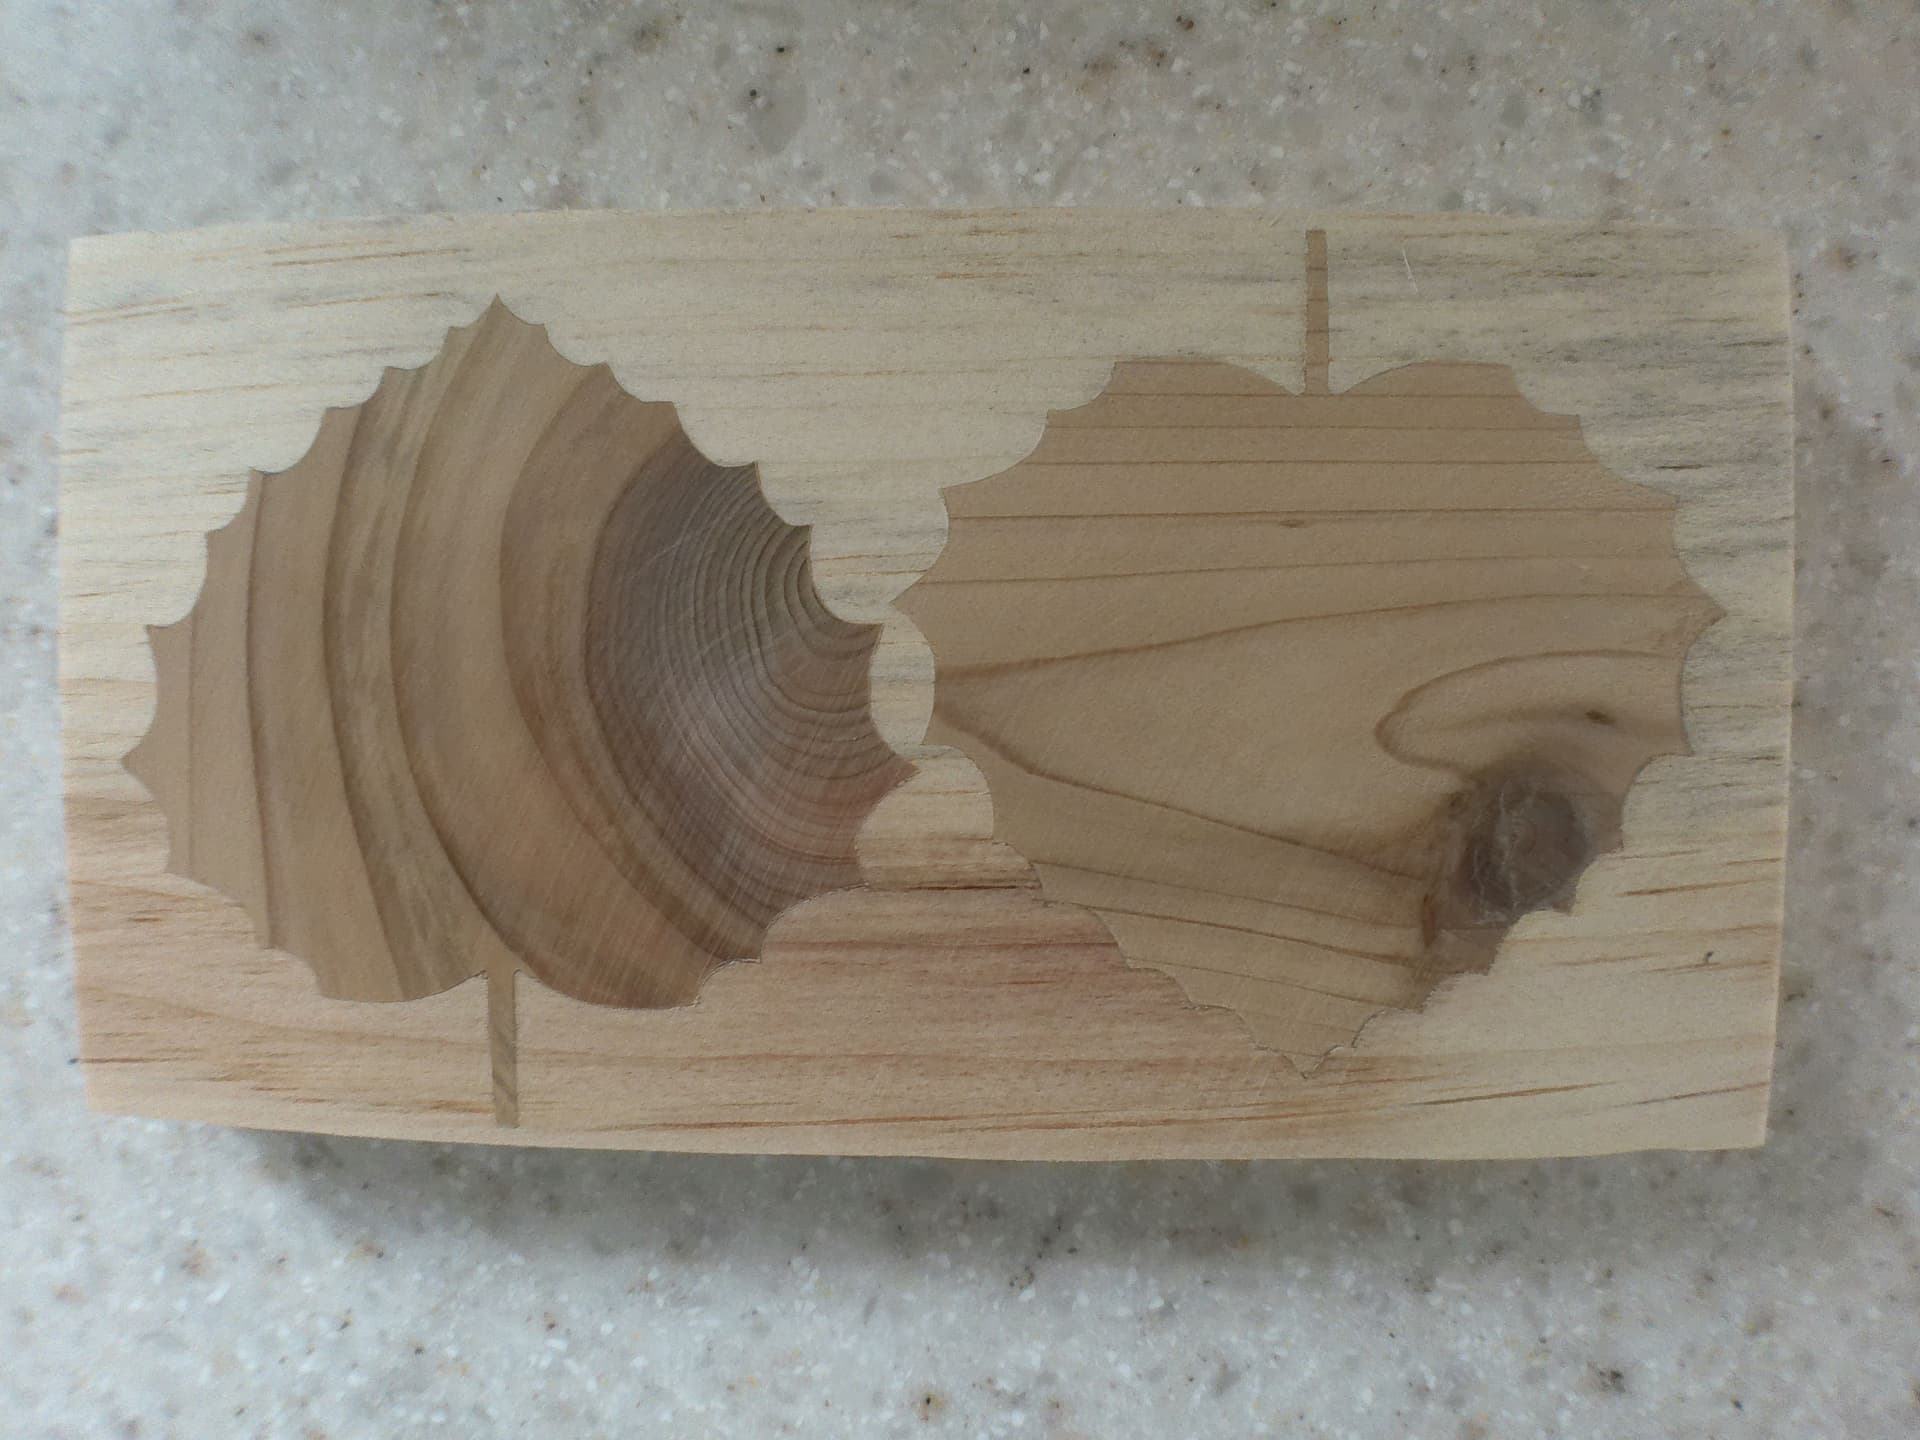
The one on the right in the pic was a first attempt but I used 0.005 for the air gap instead of 0.05 so there is a glue line visible. Oops. Second attempt on the left worked just fine. The inlay is only 1/8" deep and not 0.2 like most of the videos show. I used western red cedar (fence picket) for the male plug to do a soft wood test and the stem didn’t chip or disappear completely. Female board is blue stained pine. I’ll post the crv and crv3d files to the freebies page when I get a chance.
3 Likes
@RickW - Thanks for the praise. I’ll check the method you sent. I’m always looking for the easy one, lol. Mine only goes .15" which, of course, is a little more than 1/8". My pattern I used had some really thin areas and they chipped out as expected. No big deal since I knew it would probably happen. Yours on the left looks really tight. That’s good.
@Heyward43 so far, this gadget is the easy one for me. I set a flat depth of 0.125 for the female, set the “A” value in the gadget to 0.125 and the “B” value to 0.05 for the male plug. I didn’t surface the female board first so it isn’t perfect but the test worked. I do have a few other inlays I’m going to test the gadget on to check for chip out.
2 Likes
Thanks for this gadget. This will come in handy when moving into inlay work.
Happy dance.
1 Like