I’m new to wood working, since my background is software with a few years as a decorative blacksmith (my wife is actually the wood worker in the family). I plan on making some signs from MDF that will have an overall color and a different color in the carved text. From my YouTubing, it looks like the approach I should be taking is roughly this:
2 coats of sealer, probably spray shellac, and sanded.
2 coats of spray paint for the overall color, sanded
Mask with Oracal 531.
Cut the text/images.
Spray at least 1 coat of sealer into the carved portions so color doesn’t bleed
Spray 2 coats of contrasting color into cut areas. If multiple colors, seal off areas with painters tape between colors.
Remove mask
2 coats of final sealer, sanded.
Does this seem like a reasonable approach? What are your opinions about the sealer and type of paint? I want a fairly high gloss.
A few years ago, I made some name plates (small signs) using a different CNC machine (now defunct and is being replaced with the Longmill). I started with 1/4" poplar (easy to get at the local big-box store), milled out the shape of the name plate, and milled the edges down so they would slide into the holder we had at work to get a blank. I then sealed the blank using a fairly generic sanding sealer, let it dry, then spray painted black on top of that. Once that had cured, I did a very shallow cut to mill out the signage (name, nickname and a fancy border) to expose the very light colored poplar. Finally, I sprayed a clear polyurethane coat of several layers. The nameplates came out very nice and were quite in demand until my work got rid of nameplates altogether.
Oh, yes, I did the milling of the lettering and fancy border using CNC drill bits. Using a flat bottomed bit did a little bit of tearing of the black paint, but the drill bits (3/32") worked like a charm. It’s not really what they are designed for, but the cut was shallow enough and was only using the cutting part of the bit.
@falviani Frank: Your approach sounds reasonable. You may want to look to one of the B.I.N products as your sealer. Stay way from the water-based ones as raw edges on MDF hate water. The shellac-based ones will give you a good surface for your paint. Another approach on the outside rough edges is to thin PVA glue and brush it on. Then, paint.
I’ve read good things about Oracal 531 for masking, but have not used it myself. I’ve masked using MacTac with good results. You can look into the project board here to see the Guy Fawkes mask that I did that way.
Don’t forget to post pics of your work - successes and disappointments. Speaking only for myself, I can use all the education that I can get.
So this morning I realized I had overlooked the fact that the Oracal 531 isn’t self adhesive. Further research suggested I really needed a stencil vinyl like Oramask 813. That doesn’t appear to require a transfer tape. Since I only have a few dollars in the Oracal, I’m going to go ahead and order a small roll of the Oramask and use that. I expect to spend a few dollars here and there on ‘failed experiments’ (my brushless dust boot design didn’t perform nearly as well as I thought it would, for example).
After my first failed experiment (text was fine, profile border was terrible), I made a small test design to see how bits worked with Oramask 813 masking film. The cuts were with a 60 degreee VBit (1/4" shank), 2mm downcut endmill, 2mm upcut endmill, and a 2mm radius tapered ball nose mill. Long story short - the VBit is fine for letters, the 2mm downcut is fine for pocketing, 2 mm upcut is terrible (rips the film so the cut area can’t be painted cleanly) and the 2mm TBN is kind of so-so - might work for lettering, but the VBit is still better. While I was focused on the cleanness of the cut film at the edges, I did a modest size pocket to compare pocketing performance. The text was NOT vcut, but cut to a flat 1mm depth. Doing VCut text would probably look significantly better.
In my first experiment the text was pretty good. However, I’m certainly open to alternatives! Have you got something I can try that you think will work better?
@falviani I use Con-Tact adhesive shelf and drawer liner. I get it at Home Depot. I use a J roller to make sure it is really stuck down, and it gives me a very clean edge. Make sure your bits are sharp and keep your feeds and speeds up.
I was getting rips like that with my vbit. I switched it out to a new one from lee valley and it cuts really clean. I think I dulled my first one from figuring out my feeds and speeds. (Cutting too slow and too high rpm) not sure the condition but could be it
@falviani@Aazero Aaron raised a good point, Frank. Many times when using masks, our base material is MDF. I know that is the case for me. MDF seems soft to cut, but the adhesives in it play hell with bits. Obviously, any use dulls bits, and since we need them to be very sharp to get clean cuts in our masking material, sharpening/honing them often really helps. There are many videos available on bit sharpening. I’m a Stumpy Nubs fan, so I’ll post this link to his:
FWIW: I use this technique on V bits and the improvement is noticeable.
Also important to keep bits clean. Any gunk building up on or near the cutting edge will degrade the cut quality as well as cause friction, which makes the bit heat up and leads to dulling.
You can get specialty bit/saw blade cleaners, but I’ve found the heavy duty Spray Nine is really effective.
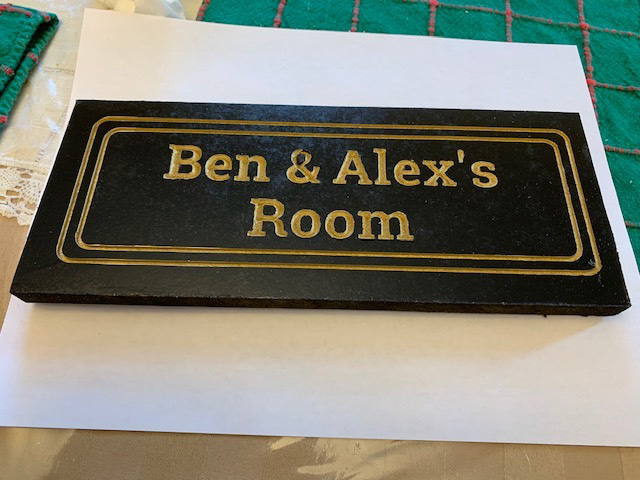
I made another one today but using contact paper in place of the Oramask as an experiment. I am not pleased with the results While I thoroughly rolled it for maximum contact with the MDF, it still ‘frizzed’ in many places around the text. The sign will have to live with no paint in the cut outs. I definitely plan to stick with the Oramask for future signs.
@falviani I’m sorry to hear that, Frank. I’ve used up about 4 rolls of the Home Depot contac paper and only had one bad cut. That one was on gloss lacquer that had not been scuffed before applying the paper. The adhesion on that one was not good.
I had good results with home depot contact paper as well, only problem, it leaves a sticky residue on the wood, any idea how to remove that without affecting the paint,? I dont want to use thinner or anything that will remove the paint.
Depending on the wood you are using, you may want to put a seal coat of unwaxed shellac or lacquer sealer on the wood, lightly sand when dry, then stick on the paper.
When you remove the paper, alcohol will remove the residue. Test it against your paint first. I’ve not had the alcohol affect any of the paints that I have used, but YMMV.


 While I thoroughly rolled it for maximum contact with the MDF, it still ‘frizzed’ in many places around the text. The sign will have to live with no paint in the cut outs. I definitely plan to stick with the Oramask for future signs.