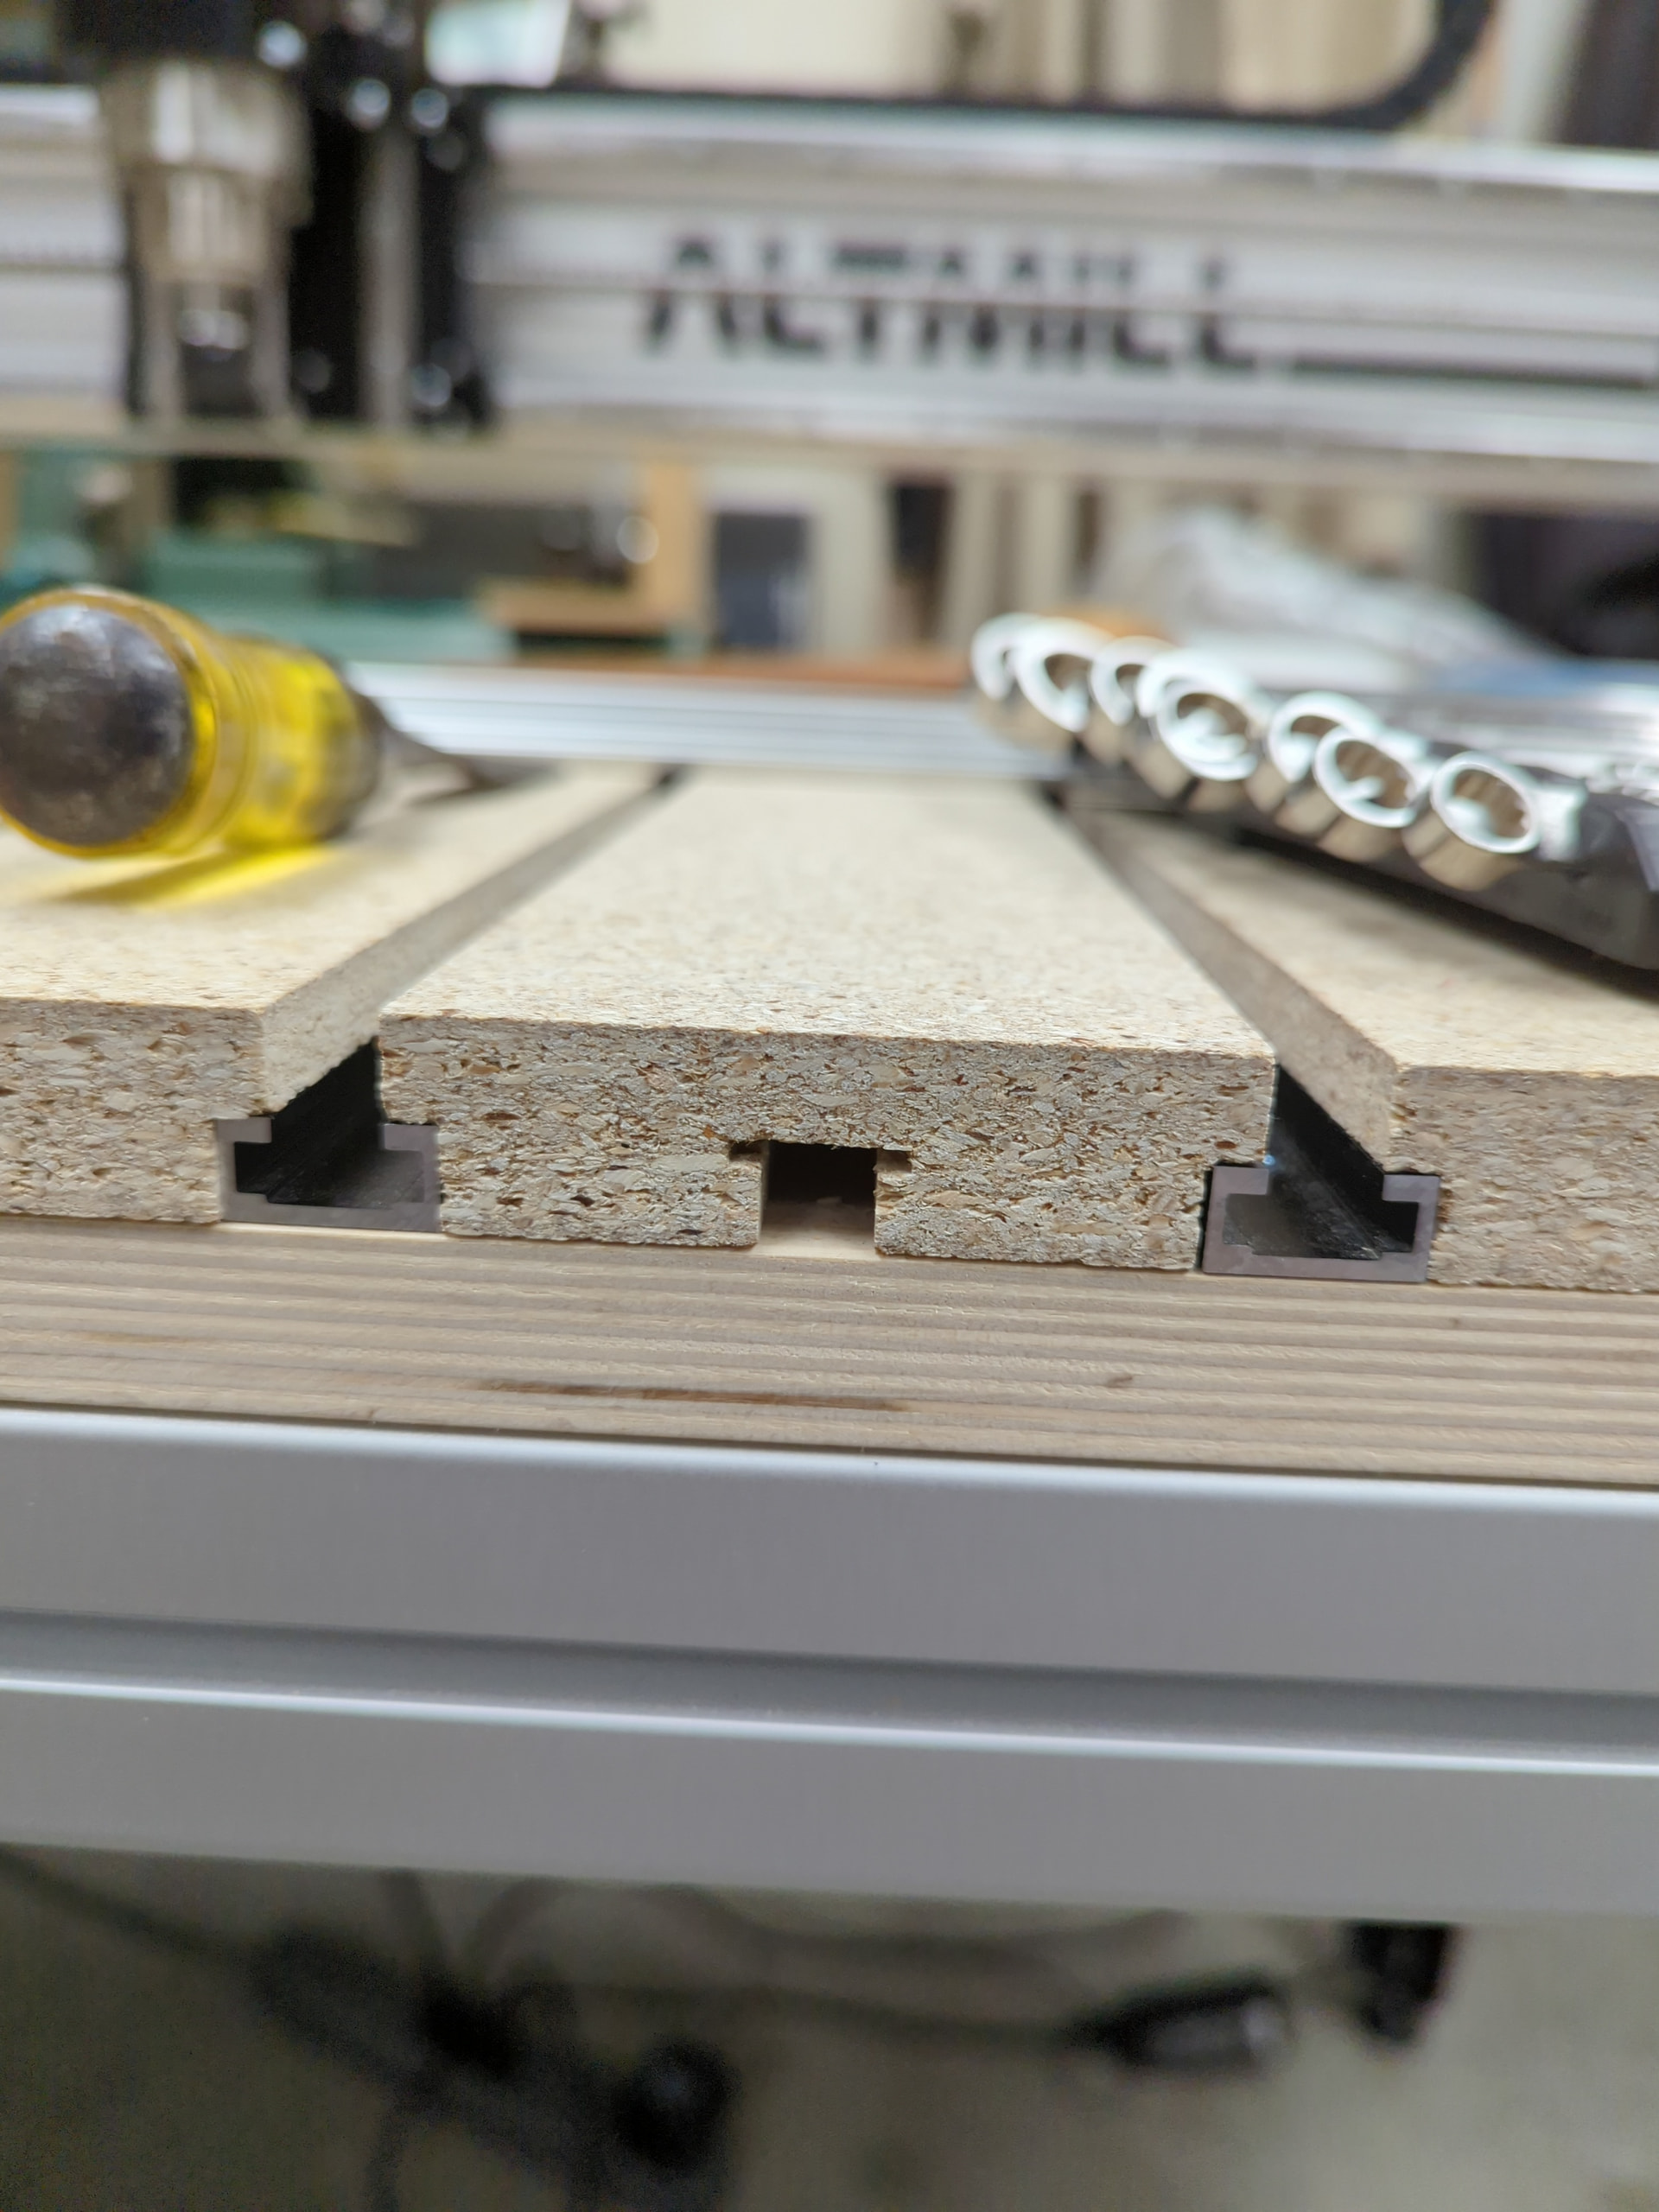
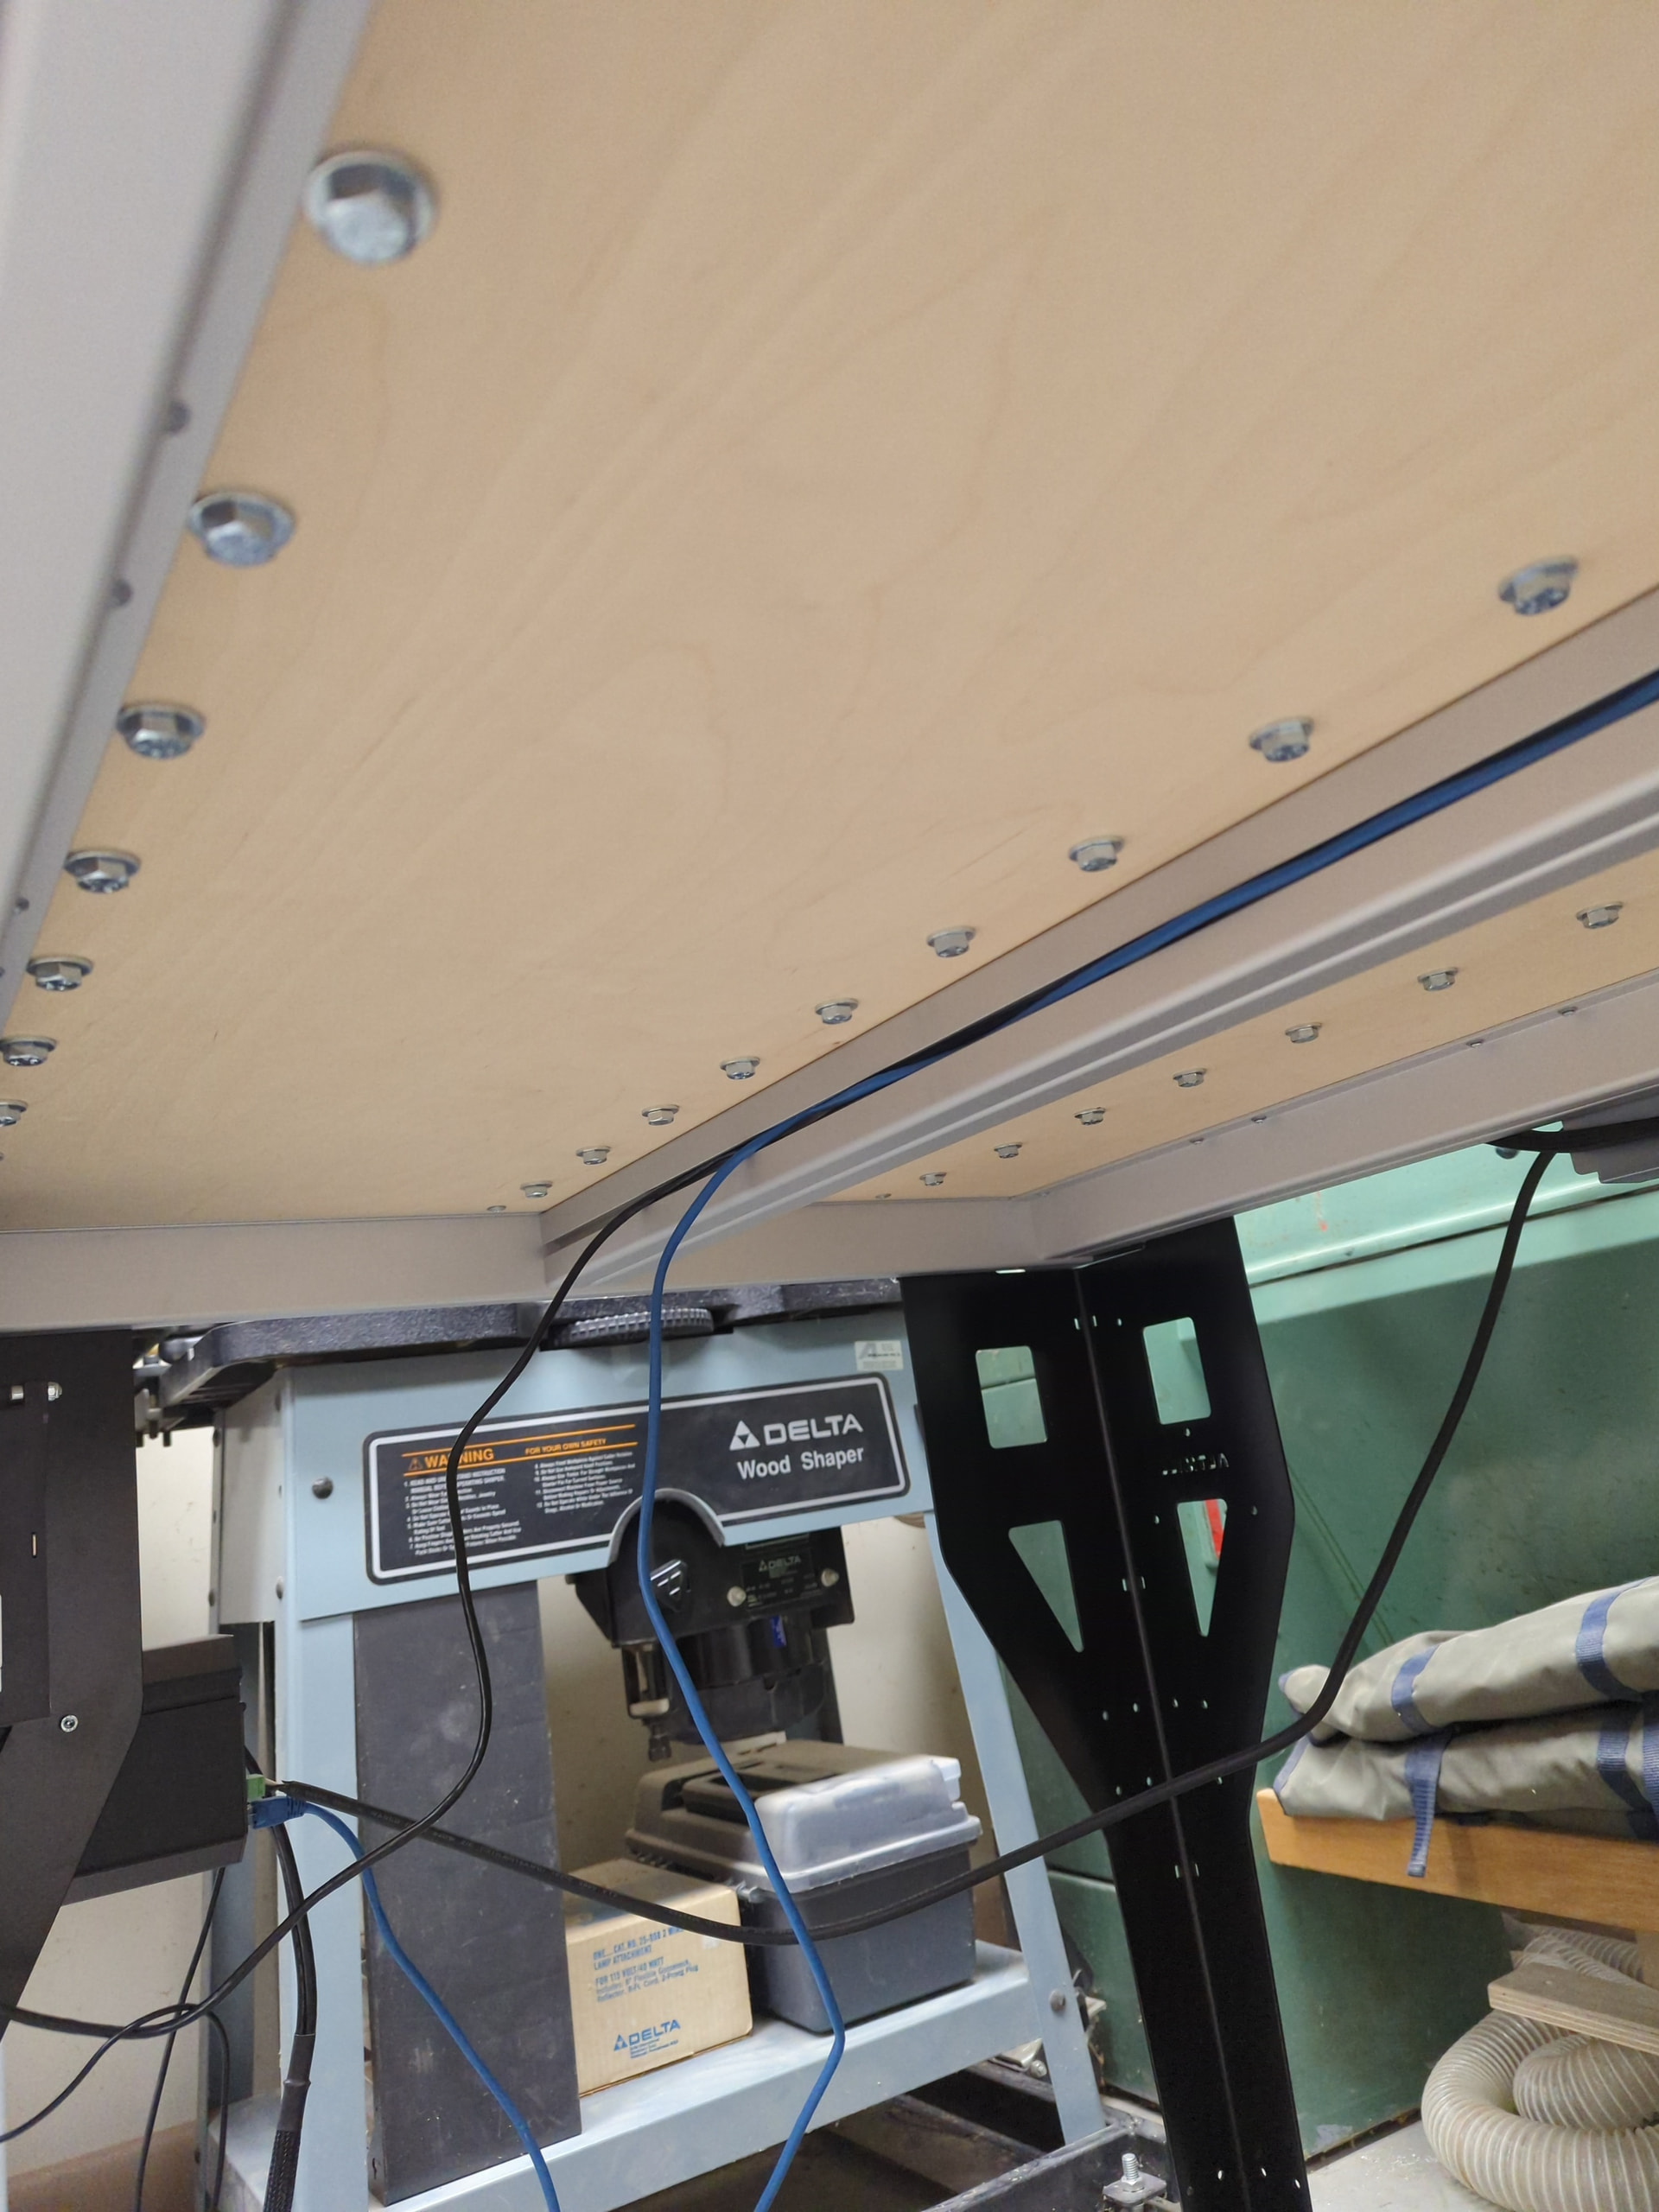
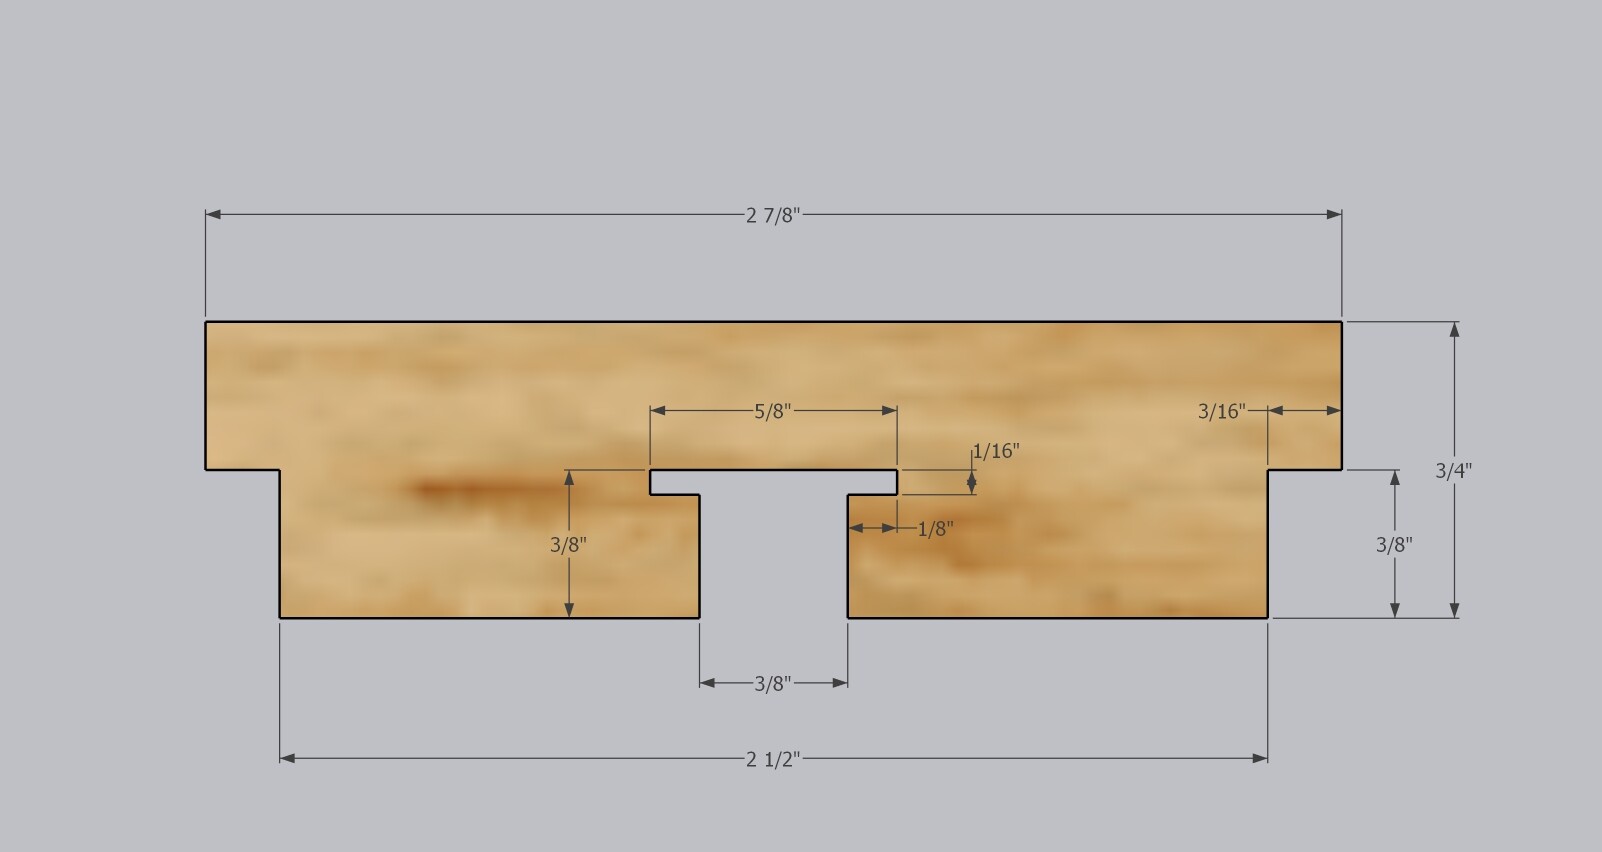
I am going to be ordering an Altmill 4x4 here soon. So have been getting some things lined up in advance.
Wanted to see if anyone can confirm my thoughts for the spoilboard mounting. Thinking put down the full 3/4 mdf for the base. Then create a file to space out the slats and t tracks, and rather then screwing those to the base board, use threaded 1/4-20 inserts.
If I drill the base mdf down the .5" or so, to insert those, that would keep me from drilling into the aluminum cross supports underneath. Then lay out the slats and t track, probably go ahead and screw down the t track and tape down the slats. Then drill / counter sink the bolts to mount the slats using the mill.
Is there any flaws in the logic anyone can think of I’m missing? Also considering spacing the inserts out so to miss the cross braces and just drill thru the base mdf for the inserts as well, so bolt length wouldn’t have to be so precise.
Just thinking inserts is better rather then screwing down the slats. Since first time I have to replace, it will start loosing threads in the base mdf.
Consider t-nuts instead of treaded inserts. You will have to mill small a pocket in the backside of the slats but you end up with a much stronger attachment point and eliminate the possibility of drilling the cross braces.
@Onezero l have an aversion to MDF so avoid it if I can. My spoilboard slats are MDF but the base is Baltic Birch plywood. I used inserts for the slats and t-tracks. The holes for the inserts were milled with the Altmill. Although not necessary, the inserts are between the aluminum cross rails.
For MDF, I’d consider t-nuts like @jpnharris suggests.
Actually baltic birch isn’t a bad idea for the base. I used the t nuts on a prior cnc, and really don’t care for them. Didn’t think about the inserts pulling out of mdf. So I may just swap to birch then.
I plan to lay out the holes to avoid the cross braces, so that shouldn’t be a worry.
Just want to try to do as much as I can by operations, so can repeat later as needed to replace boards.
I too have a strong ave aves aver.. what Chuck said against mdf. And I too have an mdf base board. I however did use inserts. Many many inserts.. imagine at the dark side of your eyes many inserts.. multiply that amount with 7 and you have my insert littered base board. Every 5 cm one, over the complete machine bed. I used the machine to sink them with a fornster bit, but never used a program because the slab was not going to be flattened. I used the centre of the forstner sink to hand drill every insert. They are not drilled all the way through.
The inserts have been there for a good 4 years and while most still function, some have been pulled out and disabled by me putting too much force on them. They can be stressed quite a bit but will give way eventually. I use them to clamp projects, waste strips and project jiggs.
If I would ever change my base board, it will be meranti ply (the slab that is currently beneath my machine functioning as table top.) Factually the mdf was a poc test and it passed except for it being mdf.
Mdf should be banned. BANNED, -shakes fist at a cloud-
I used MDF only because that is what Sienci recommended and didn’t know enough. Also didn’t particularly like that if you follow the instructions by Sienci for using MDF you do not actually cover the entire table. The working area is completely covered but the back edge doesn’t reach to the back cross beam so there is some hanging over the 2nd to last crossbeam when you follow their instructions (you’d need two sheets of MDF to fully cover it).
If I had to do it over again I’d use the 3/4" plywood at least for the base. Then you’d have much less worry about anything like t tracks pulling out of that. I’m really not sure if it even needs to be the baltic birch plywood.
Also worth noting is that there is “outdoor” rated MDF available in some places that is even stated to be “bug proof”. Not sure if many people have looked at the safety data sheet on that but it is toxic to marine/water environments. Really don’t think that stuff is safe to be cutting all the time like I see some people do for outdoor signs.
I don’t think you need to worry much about inserts peeling out. I managed to pull some out because I was trying to force 12mm strips of badly bent Azobe hardwood back into milleable flatness.
Azobe if a hardwood with nasty fibres that can deform a flat strip really badly when drying. Mind you, sometimes forcing it flat works, but sometimes something else will give, pulling the insert from the mdf. I don’t think plywood would have fared better against so much Dutch bluntness. And hey, still got another million inserts left. No harm done.
If you add inserts to MDF, they should be inserted from below so that the shoulder of the insert keeps it from being pulled through the board (unless you’re cranking on it incredibly hard.) This is the way I made my slats and the inserts are very strong that way.
I find it curious that you all seem to be so obsessed with the strength of the inserts or T bolts in MDF. I have a 3/4" MDF baseboard . The baseboard is screwed down into the mills’ aluminum stringers which are tapped. I use inserts installed from the top in the baseboard and the spoilboard attaches to the baseboard with 1/4" nylon screws into these inserts. Each screw is basically hand tight and I would be surprised if there was more than 10 to 20 lbs of clamping force provided by each screw. The spoilboard isn’t going anywhere short of a nuke going off close to it.
I don’t know which fastener in this sandwich would be the point of failure. The nylon screws, the inserts in the baseboard or the bolts holding the baseboard to the frame but I can’t imagine any scenario that, in normal operation, would lead to a failure anywhere.
I don’t use T tracks but I believe the screw holes are fairly small which would make the inserts (M3 seems to be the smallest) small as well which just might warrant installing those inserts from the bottom.
As a side comment, I would not crank down hard on anything that I was attaching to the mill table for fear of distorting the surface that I was so careful to mill perfectly flat before placing my project on it.
‘Snug’ is generally a good thing here.
T-tracks are less likely to pull out if you cut a small rabbet in the edges of the material (slat?) that is between the T-tracks so that they actually cover and hold down the T-Tracks. I’ve been using <these> from Lee Valley for a long time now and I’ve never had one pull out.
I do however also have some threaded inserts evenly spaced on the Slats to give me more options. If you have a clearance hole below your insert then you don’t have to fuss around with the length of the hold-down’s screw as much.
For the T-tracks, I have been using <these> nuts because the length of the flange is fairly long(ish) so it gives me more flexibility with regards to the length of the bolts. The only issue I had with these initially is that the flange was just slightly too wide to fit in the Lee Valley t-tracks I mention above. That that was easily solved by filing down the sides of the flange just a little bit. 15 min of filing and all of the nuts in the package fit fine now.
After reading through the comments thought it might be helpful to share with you what I ended up with for a support and waste board solution. I wanted to be able to remove the waste boards quickly and be able to insert vises and other methods for hold downs as well. There are 4 bolts with washers from the bottom up and into a 5/16" T nut. The spacing between the T tracks is around 3". This allows for a greater number of clamping options. Note that the waste board is milled so that it is over the sides of the T slots to give greater support, and close the gaps. To create the slot in the waste board slats I used a Dremel slot cutter after using a end mill to create the edge and the center clearance slot.
I guess I misunderstood what you were using the inserts for in your original message. I use t-nuts on a four-inch pattern for work holding devices. I never considered them to hold the spoil board to the table base. I used the holes in the cross beams to screw into the table base board as described in the assembly instructions and joined the spoil board to the base board with two columns of four (8 total) countersunk screws per spoil board slat.
I find that countersunk holes from the top down limit the amount of top surface that you can mill down to create a flat spoil board over time. The T nuts from below create almost 3/8" if material that can be machined. Also note that all of the forces are parallel to the Z axis thus allowing for a flatter surface when all of the hold downs have been torqued down. This allows for the force of the slats to pull down the T-track sides to aid in maintaining the flatness when applying the clamps and fixtures to the top of the spoil board.
I countersink the holes holding the spoil board holes deep enough so that the top of the screws are at the same level as the top of the t-track. Can’t surface below that anyway. A drill press makes short work of that. Your method works! I hope you enjoy your alt-mill.