So I had a really tough carve on my AltMill 2x4 this weekend that totally went south probably due to bad feeds/speeds management on my part.
So here’s my question to the Community: What is your approach for carving super hard woods like hard maple and walnut when it comes to feeds/speeds and depth per pass?
I think I got greedy and set my depth per pass too high. I was using a 1/4 inch (6.35 mm) “Hog” bit from IDC Woodcraft for the rough carve, and was taking 2 mm per pass at about 2600 mmpm.
My stepover was only 50%, but like any carve there are moments where my CAM software had it doing its initial plunge with the full bit engaged and then making really long runs.
The wood was absolutely screaming and the chatter was ruinous in the end.
So in general when carving really hard wood, is it better to make shallow depth passes of like a millimeter or less, and if so can I still move the machine pretty briskly?
In other words, is it conventional wisdom that you opt for low depth/high speed for really dense materials?
Or should I just slow the hell down?
The carve was already over 2 hours with my settings (because I’m basically eating down through a 40 mm blank to end up with a neck that’s 20 mm at its thickest but has an angled headstock).
I think it would help to know the details of the cuts you were attempting.
What CAD/CAM software are you using?
What species of wood?
What were you feeds, speeds and depth of cuts?
Climb or conventional?
Type of toolpath - profile, pocket, etc.?
But first, a couple of observations - I have a ¼” Hog. I also have a ¼” Beast. AltMill 4 x 4. Cutting the same exact toolpath the hog screams and the beast cuts like butter. As far as I can tell, the only difference is the length of the cutting edge (hog being longer). I routinely cut maple, walnut, cherry and sometimes purpleheart (much less forgiving than the others). With the beast, I set it to 125 to 200 inches per minute (3175 - 5080 mmpm) at 11,000 to 14,000 rpm, ¼” depth of cut is the norm. You mentioned the hog screaming - screaming or screeching is usually caused by having the rpm too high for the feedrate.
And yes, shallower cuts at the correct feed and speed are better than deeper cuts and slowing the feed down. It all comes down to chipload.
Hard maple with a couple of strips of purple heart (10 mm thick). The blank was 915 mm x 115 mm x 40 mm
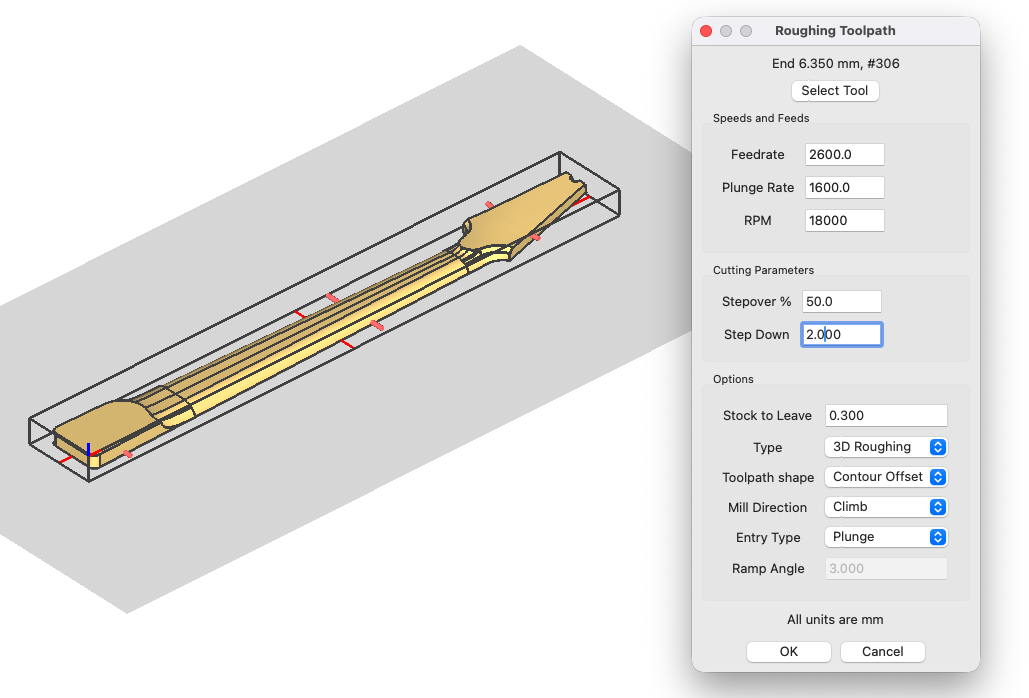
Feed at 2600 mmpm, plunge at 1600, and (probably where I went wrong), 2 mm depth.
Climb
The 3D Roughing toolpath in MeshCAM, with an estimated time to complete at about 2.5 hrs.
Thanks for the tip on the Hog vs. the Beast. I just broke my second Hog on the carve I mentioned (again, probably my fault). I’ll definitely check out the 1/4-inch Beast. I have the long 3/8-inch Slayer (Deep Slayer), which works great, but not always the best diameter for the workpiece I’m trying to carve.
From what you’re saying, it sounds like I was probably also running the spindle too high on my AltMill 2x4. I was running it at 18000. But I was only running at 2 mm depth per pass.
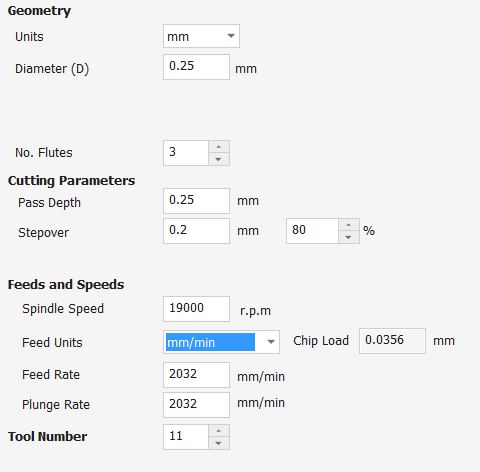
IDC’s tool database for Vcarve lists the following speeds and feeds for the “Hog.” This is listed under “softwoods” so that would indicate that this is maybe their max for this bit. For harder woods you would need to dial it back some.
Also, IDC has a downloadable PDF, which doesn’t specifically list the “Hog” but does list a 1/4” upcut. That gives you a few more clues as to how they recommend using the bit. You can get that here:
Would be interested how your neck turns out. I’m a musician as well and some day hope to make a guitar. But to this point I’m doing simpler things to learn more.
I have plenty of respect for IDC, but this chipload seems WAY off to me. 19,000 rpm at 80 ipm feedrate on a 3 flute bit is a chipload of .0014, roughly 1/6 to ⅛ of the recommended chipload for most ¼” tools in hardwood.
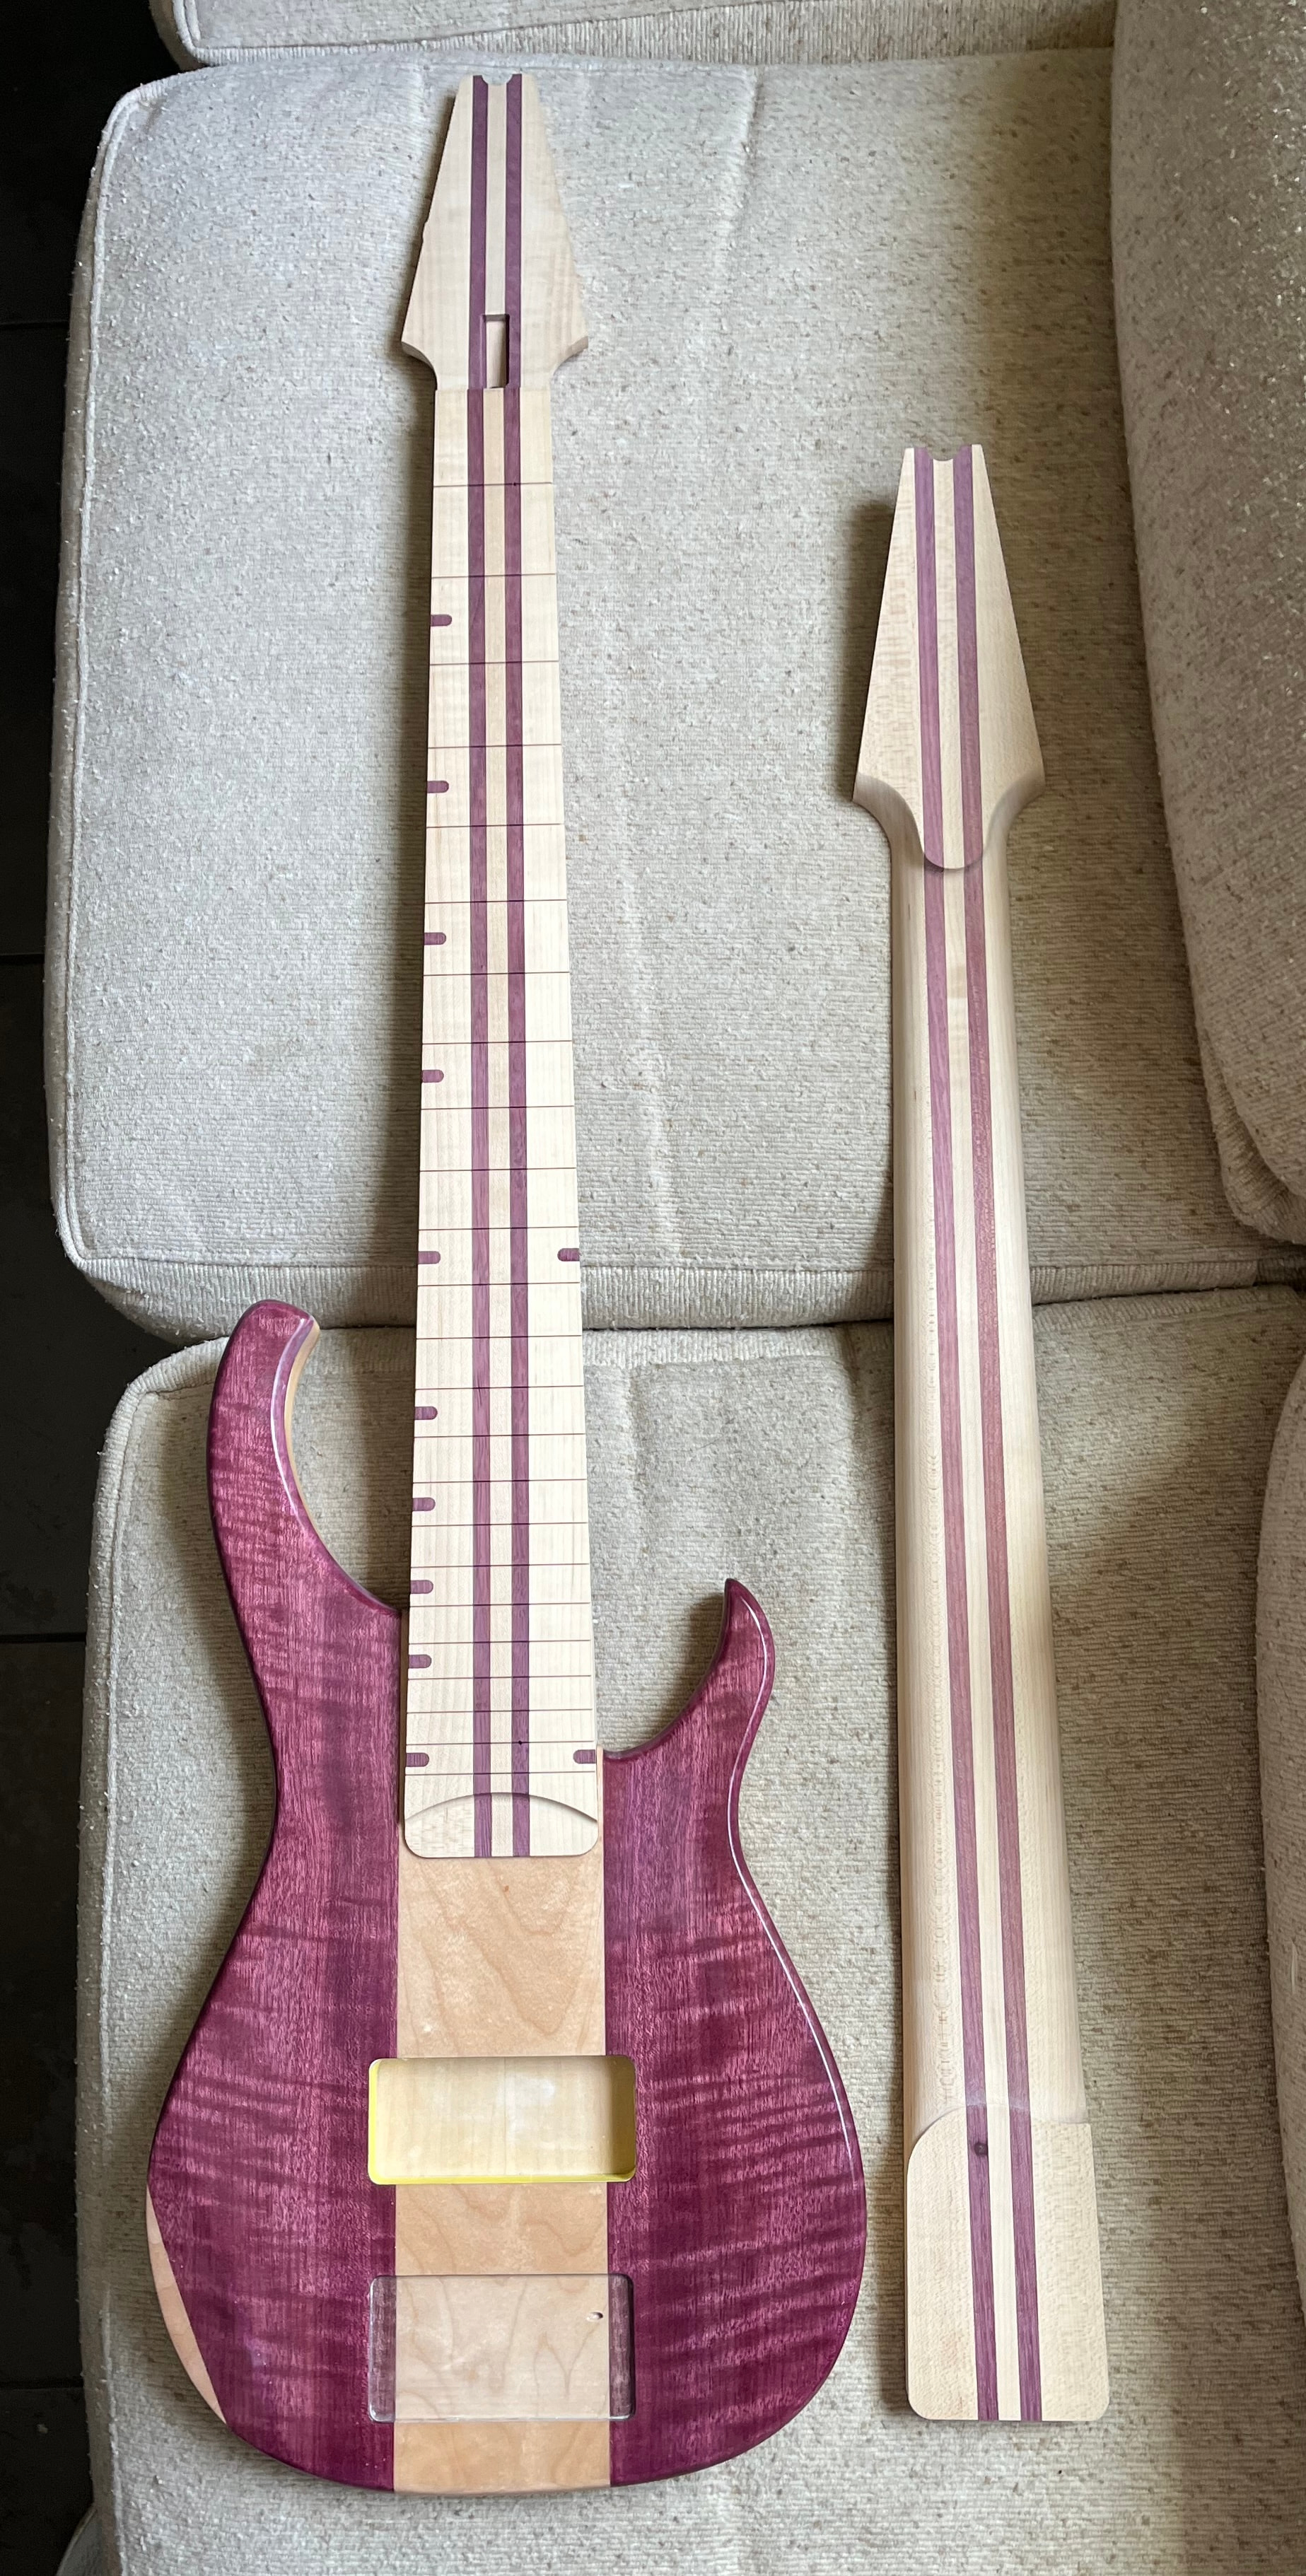
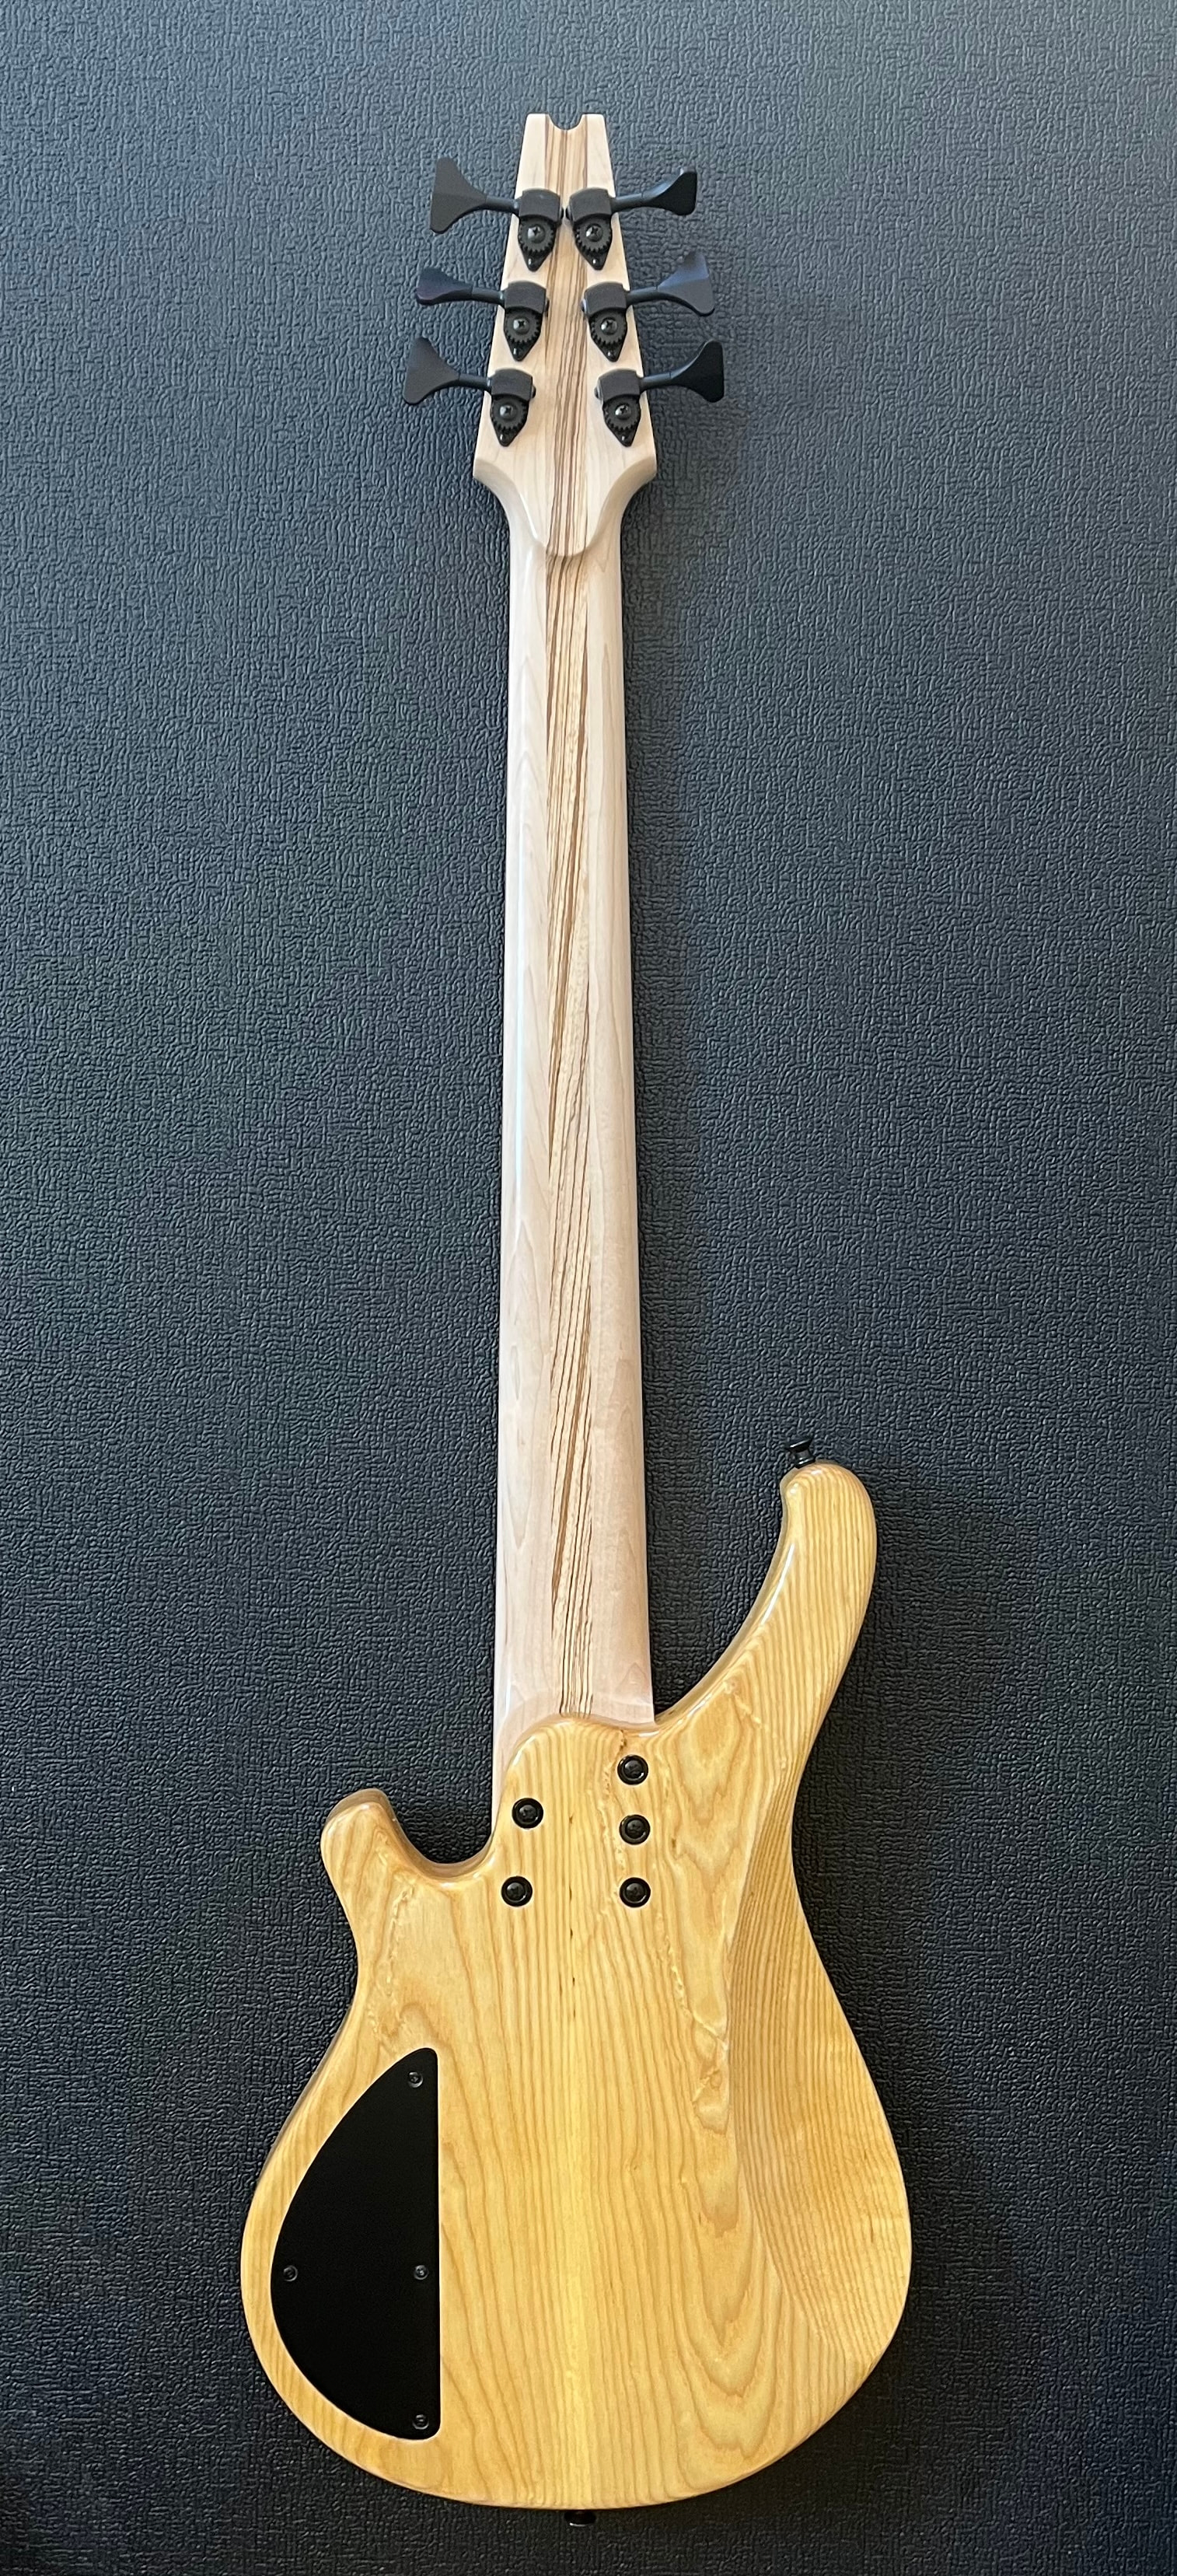
Here’s a shot of the bass so far. Not really happy with how it’s turning out, to be honest. In particular, I’m a little disappointed in how brownish the purple heart on the body has turned due to the finish. I tried a product called Crystalac first, which made it really brown, then stripped all that off and tried a 2k poly.
The neck on the right is the one I’m discussing in this thread. I was able to salvage it and sand out all of the chatter marks, but in doing so I had to remove too much wood for the neck to fit snugly in the neck pocket. The neck sitting in the bass now was the first one I did, but I’m not happy with the how the glue seam between the neck shaft and fretboard turned out.
@mick_s and @The_Unknown_Bassist I’m not really sure. I just downloaded the database from IDC and loaded it into Vcarve. I haven’t changed any of the settings they provided in the download. I just brought it up and captured it with snipping tool.
So I don’t know if those numbers are right or not, it’s just the numbers they provided.
@The_Unknown_Bassist At least in pictures the purple heart looks really nice. I know you’re still trying to get it right and for an instrument it has to be right. Looks like you’ve learned a lot and are on the right track. Good luck and I would be interested in how it plays once you get it sorted out. Good luck man.
IDC had a YT session this evening and I posed this question to them. I wasn’t altogether happy with the response - I asked specifically about chip loads and they answered as if I had asked about feedrates. Their response was that they had to publish conservative feedrates they had no way of knowing how rigid the user’s machine might be. That makes sense of course, but to get close to the optimum chipload you have to also adjust the rpm setting or you’ll burn up the tool if your machine can’t cut fast.
Thanks for that. Even though they didn’t answer the question directly, at least it’s a bit more info. Until I saw the video Sienci did comparing the stiffness of the different versions of the Longmill and then also comparing that to the Altmill, I didn’t realize how much stiffer the Altmill is.
I’m guessing that compared to most home/hobby type CNC machines, the Altmill is a lot more rigid than most. So all these published numbers on bits are going to be quite conservative for the Altmill.
Who has an idea what that means? Do you increase chiploads by some percentage from the published numbers for an Altmill? I know it wouldn’t be an exact number, but a ballpark. I have so little experience I would just be making a wild guess.
I obviously could not reply to them in real time, but if I could have, I’d ask them why not take into account the other variables that make up chipload, e.g. rotation speed? The IDC tool db has the feeds and speeds for the Beast, a ¼" 3 flute roughing bit at 100 ipm and 22,000 rpm. That results in a chipload of .0015. A conservative (meaning recommended for less rigid machines) chipload is .005 - 3 times their published chipload. A rigid machine would be closer to .01, so IDC’s published chipload is really low. I would argue that such a low chipload might make it easier on the drive motors of less rigid machines, but would be murder on the tool and the spindle bearings due to overheating. You overheat the tool and it dulls faster resulting in making it harder to push through the material and eventually breaking the bit. Self defeating, IMO.
To get the chipload higher, simply reduce the rpm. Dropping from 22,000 to 13,000 results in a chipload of .0026. Dropping it to 10,000 gives you .0033. Still not ideal, but better than overheating the bit.
A typical spindle reaches max torque around 9000 rpm and starts falling off around 18,000, so recommending 22,000 rpm makes little sense to me unless the machine is fitted with a router motor which gets higher torque via higher rpm. Even then you should get better results by slowing the rpm.
As much as I appreciate what Garrett and IDC do and have done for the hobbyist CNC market, which is considerable, IMO more can be done to educate their customers about the relationship of feeds to speeds and why it matters. My background is in industrial CNC - much heavier and faster machines, but since retiring in 2015 I’ve taught CNC for woodworking at the local community college. Being able to recognize and adjust for incorrect feeds and speeds is a huge part of most beginner’s learning curve.
Published chiploads are just a starting point, it’s important that users know how and what to adjust on the fly.
I just grabbed a similar .csv file from IDC for Carbide Create, which I use every once and a while just to produce .svg files. It might just be a conversion issue or something? The IDC stuff only has values in inches for my file, not mm. So maybe not all of the values get converted when your app loads in the specs for a tool? Just a guess. Either way, I appreciate the input because it seems to confirm that I need to just slow the hell down! When I upgraded from my LongMill to the AltMill, I just assumed that a faster, more rigid machine meant my carve times would drop, across the board. But as you can see, I mostly carve hardwoods, in 3D, and there are probably just certain limits that can’t be crossed, no matter how robust the tool.
Really appreciate you asking those questions, @mick_s ! I need to take some of your classes because I haven’t paid proper heed to chip load. I mostly just try to ape the settings I see other people use, to be honest. And from what you’re saying, I’m also probably a bit too trusting when it comes to using the recommended rpms. (Or rather, I’m just taking them on faith as a static factor, rather than thinking about them in the context of the nature of the carve and the materials.) I’m getting ready to attempt another carve like the one I’ve been describing in this thread, and the first things I’m going to do are reduce the rpm along with the feed rate.
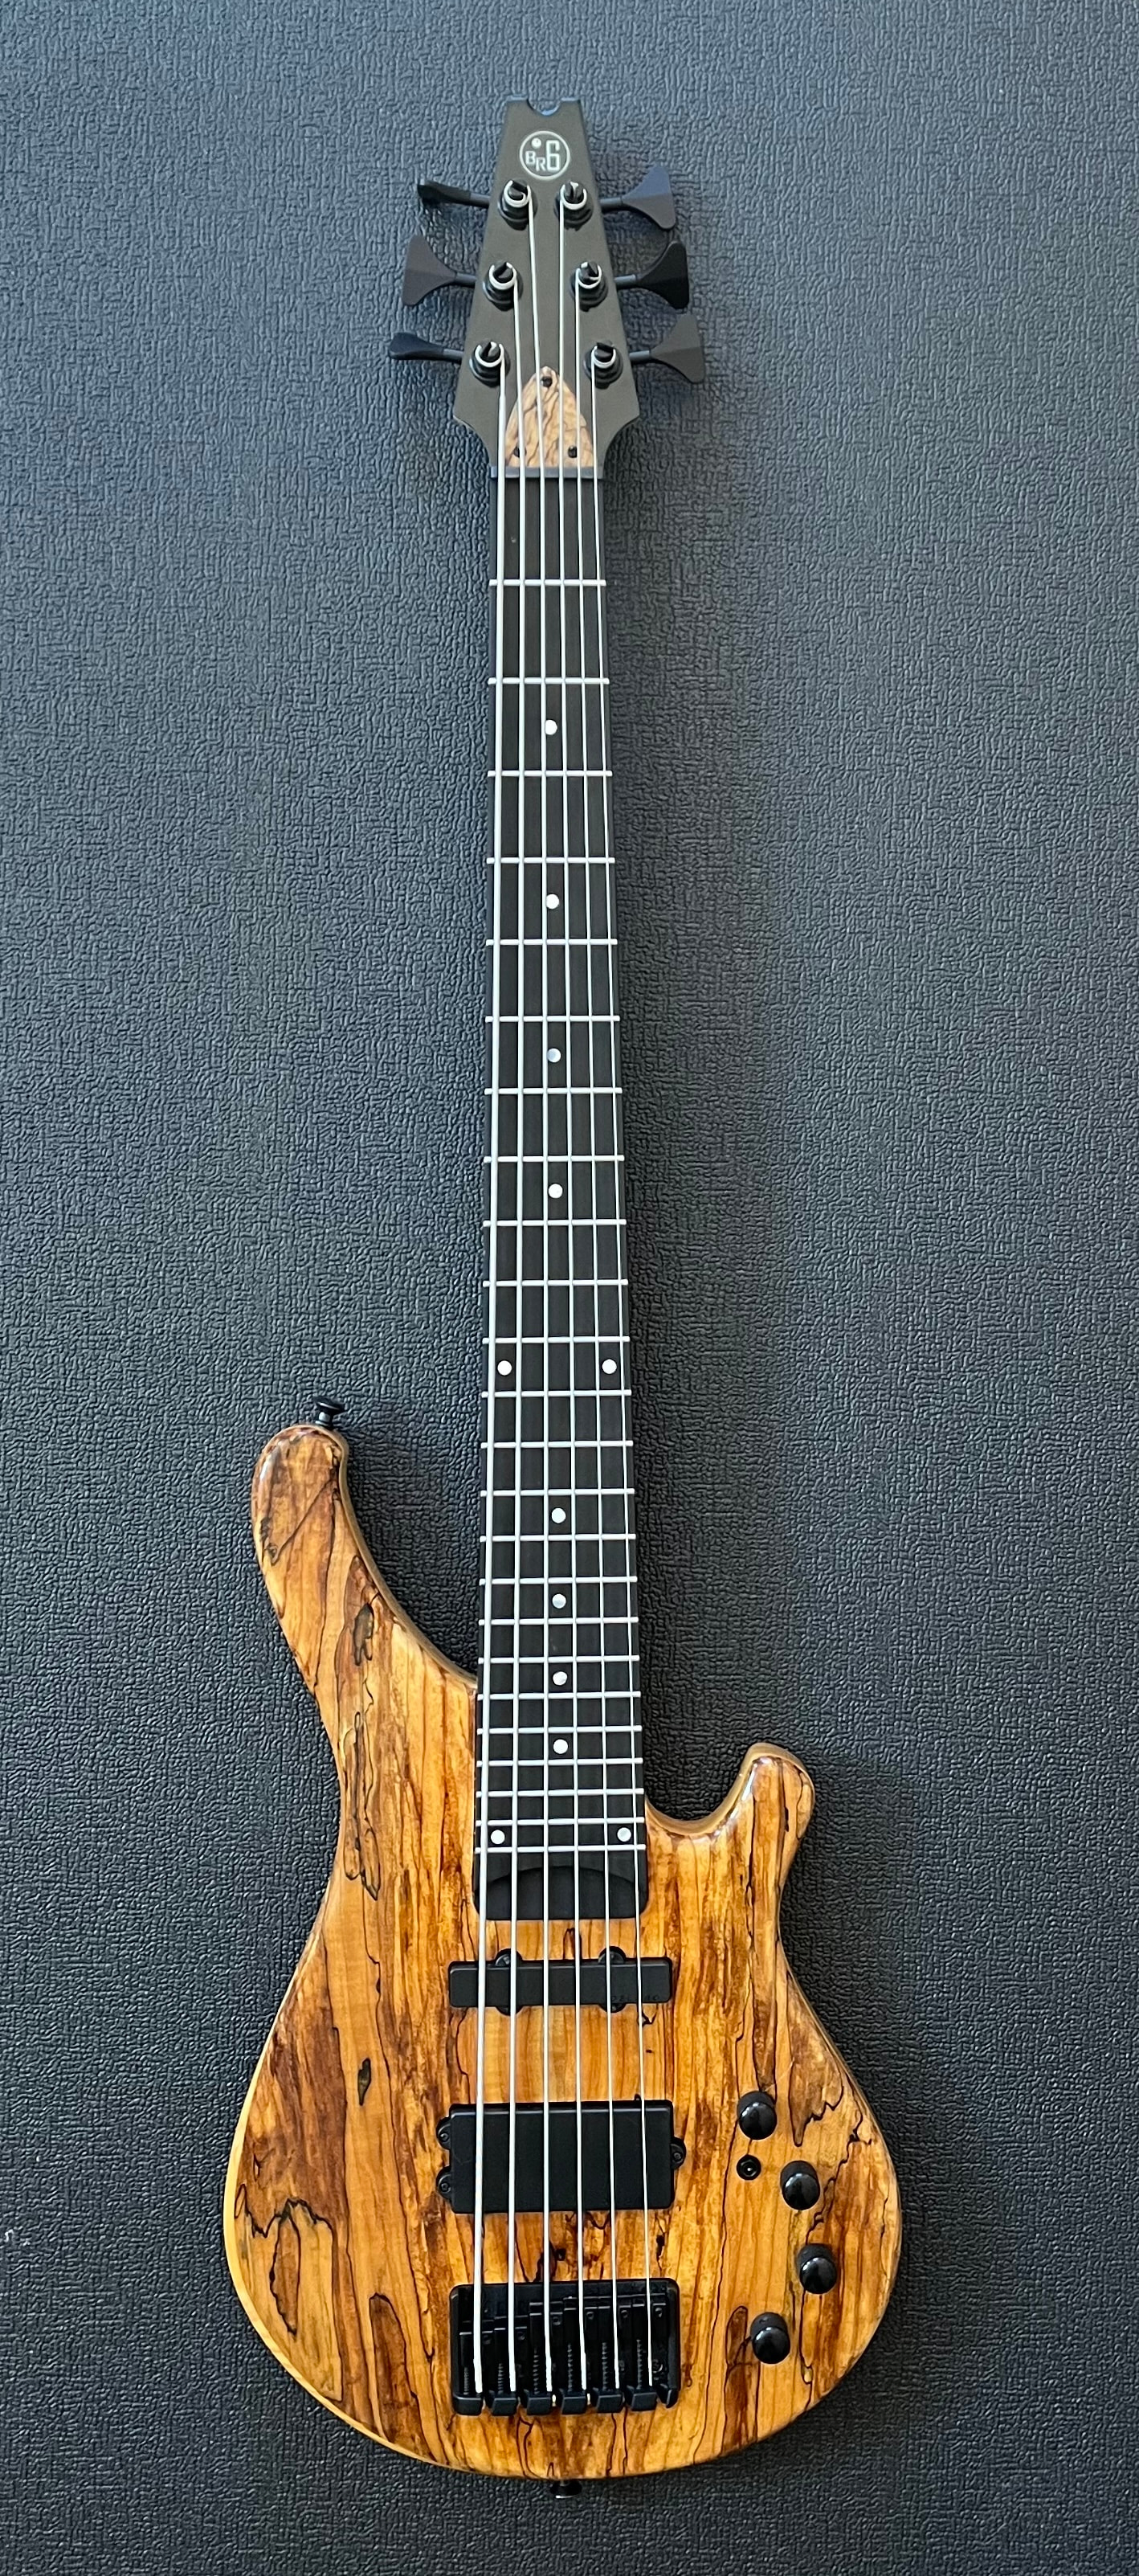
Here’s the first full instrument I’ve built so far. It’s a 6-string bass that I built for my nephew, who’s an excellent bassist. Frankly, it plays great. Maybe the best bass I’ve ever played. And the reason for that is not because I happened to build it; it’s because I was able to design it so that it’s optimized for the way I play, personally. Even something as simple as pickup placement makes a huge difference, but a lot of manufacturers have to design their instruments to accommodate a wide range of styles. The great thing – the best thing – about building your own is that you get to design it specifically for your own playing style, and how you use your hands and fingers, the kind of tone your style produces, etc.
In a nutshell, if you hear the tool squealing, either reduce the rpm or increase the feed rate. If you hear or see chatter, reduce the feed rate or increase the rpm.
Like I said above, the posted feeds and speeds are just a starting point. When I was training new users in industry, I gave them a new compression bit and asked them to increase the feed rate until they broke the bit or stalled the spindle, then note the feed rate and back off 10-20 % to get the proper chipload.
Most new users want to cut slow at high rpm. The opposite is a better approach.
One of the great things about being a maker is the customization of the projects we build. Whether it’s personalization or simply adapting a design to an aesthetic, not having to rely on someone else’s idea of compromise makes the learning curve worth it.
Thank you @mick_s for all the great info and tips. And wow @The_Unknown_Bassist I hope to achieve at least some of what you’ve done over time!! Great looking bass!
Thanks again, @mick_s ! I downloaded a chip load calculator (spreadsheet), which is really helping me see the relationship. It’s exactly as you describe. Adjusting the RPM really does seem to be the key factor in terms of getting the settings into the right range. For example, if I stipulate a feed of 2500 mmpm using a 3-flute 3.175 mm bit like the “Badger,” I should be running the spindle at 11000 RPM to get the recommended chip load for hardwood. If I go with the recommended 19000 RPM, the chip load is nearly cut in half.